#PAN-Aadhaar Linking News
Text
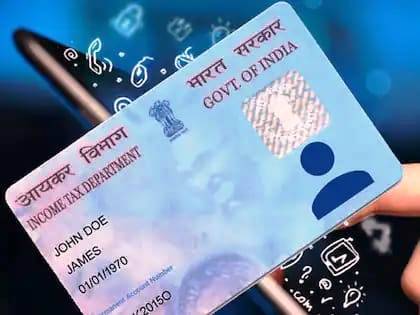
Voter ID link to Aadhar | Government of India | Aadhar Card | aadhaar card pan card link status check | breaking news | Voter ID | Aadhar Link
Government increased voter ID and deadline for linking Aadhaar, now these important works can be dealt with till this date
The central government has taken an important decision and extended the deadline to link the voter ID card to the base number
The central government has taken an important decision and extended the deadline to link the voter ID card to the base number। Now common people can…

View On WordPress
#aadhaar card pan card link status check#Aadhar Card#Aadhar Link#breaking news#Government of India#Voter ID#Voter ID link to Aadhar
0 notes
Text
A guide to enhance your business growth
Running a business is akin to navigating a complex maze, and every entrepreneur dreams of not just surviving but thriving. In the Indian business landscape, the government has laid out a golden path for micro, small, and medium enterprises (MSMEs) through a simple yet powerful tool – MSME registration. In this guide, let's explore how this seemingly mundane registration process can be your ticket to unparalleled business growth.
Understanding the MSME Advantage
The Heartbeat of the Economy:
Micro, Small, and Medium Enterprises collectively form the heartbeat of the Indian economy. From local grocery stores to innovative startups, these businesses contribute not only to economic development but also to job creation, fostering a robust and inclusive growth environment.
Unlocking Financial Avenues:
One of the immediate perks of MSME registration is the access to financial assistance and credit facilities. Financial institutions offer tailored loans at favorable terms, recognizing the importance of these enterprises in driving economic progress.
The MSME Registration Journey
A Simpler Path Than You Think:
Contrary to popular belief, the MSME registration process is not a bureaucratic labyrinth. It's a straightforward journey that involves providing essential details about your business, such as PAN, Aadhaar, and other relevant information. Whether you choose the online portal or opt for the traditional route at District Industries Centres, the process is designed to be accessible.
Documents: Your Passport to Opportunities:
The importance of documentation in the registration process cannot be overstated. Your Aadhaar card, PAN card, business address proof, and details of your plant and machinery are the keys that unlock the door to a myriad of government schemes and subsidies.
The MSME Advantage Unveiled
Market Access and Procurement Preferences:
Once you've acquired your MSME registration, you find yourself in a prime position in government procurement. MSMEs are often given preference in government tenders, providing a golden opportunity to secure contracts and expand your market reach.
Technology Upgradation and Subsidies:
In the rapidly evolving business landscape, technology is the differentiator. MSME registration brings with it the chance to upgrade your technology with subsidies for adopting new and advanced processes. This not only boosts efficiency but also enhances your competitiveness.
Navigating the Schemes and Subsidies Landscape
Credit Linked Capital Subsidy Scheme (CLCSS):
At the forefront of government schemes is CLCSS, a game-changer for technology upgradation. It provides capital subsidies to MSMEs, facilitating access to credit for purchasing new machinery and equipment.
Pradhan Mantri Employment Generation Programme (PMEGP):
For those looking to embark on the entrepreneurial journey, PMEGP is the beacon. This credit-linked subsidy program promotes self-employment, creating not just businesses but livelihoods.
Credit Guarantee Fund Scheme for Micro and Small Enterprises (CGMSE):
The fear of collateral is a common hurdle for many small businesses. CGMSE eliminates this barrier by offering collateral-free credit facilities, making it easier for MSMEs to access the capital needed for growth.
Tailoring Your Approach
District Industries Centres (DIC) and National Small Industries Corporation (NSIC):
Think of DIC and NSIC as your business allies. DIC, as a local agency, offers guidance and support, while NSIC provides a range of services from marketing assistance to credit facilitation. Engaging with these institutions can significantly enhance your MSME journey.
Tech and Quality Upgradation Support:
The government's emphasis on quality is evident through schemes like Lean Manufacturing Competitiveness Scheme (LMCS) and Quality Management Standards & Quality Technology Tools (QMS/QTT). These initiatives not only boost competitiveness but also position your business as a paragon of quality in the market.
Export Promotion and Market Development:
Venturing into global markets can seem daunting, but the Market Development Assistance Scheme for MSMEs is a trustworthy companion. It provides financial support for participating in international trade fairs, opening doors to new business horizons.
Overcoming Challenges for Seamless Growth
Lack of Awareness:
One of the challenges MSMEs often face is the lack of awareness about available schemes. Entrepreneurs can overcome this by actively seeking information through government portals, industry associations, and local MSME support cells.
Complex Application Processes:
Cumbersome application procedures can be discouraging, but persistence pays off. Simplifying the application process and seeking assistance from dedicated facilitation services or MSME support agencies can make the journey smoother.
Continuous Evaluation and Adaptation
Performance and Credit Rating Scheme:
Enhancing your creditworthiness is an ongoing process. The Performance and Credit Rating Scheme allows MSMEs to undergo assessments, showcasing financial stability to potential investors and lenders.
Embracing Continuous Improvement:
The business landscape is dynamic, and your approach should be too. Regularly assess the impact of government schemes on your operations, adapt to changes, and stay informed about updates to maximize benefits continually.
Conclusion: Your Journey to Unprecedented Growth
In conclusion, MSME registration in India is not just a formality; it's your gateway to a realm of opportunities. By understanding the classifications, embracing government schemes, and overcoming challenges, you position your business for sustainable growth. The government's commitment to fostering MSMEs is a testament to the integral role these enterprises play in shaping the nation's economic future. So, don't just register – embark on a journey of growth, innovation, and success. The path is laid; it's time to walk it.
Learn more at : https://msme-registration.in/
#udyog aadhar free registration#msme free registration#msme registration free#print udyam certificate#free udyog aadhar registration#udyog aadhar update#msme registration online#msme loan#online business#msme
2 notes
·
View notes
Text
A Step-by-Step Process of Getting a Home Loan
Securing a home loan can be a significant step toward owning your dream home. The process, however, can be complex and requires careful planning and understanding. Here’s a step-by-step guide to help you navigate the process of getting a home loan:
1. Assess Your Financial Situation
Check Your Credit Score: Your credit score is one of the key factors lenders consider. A higher score can help you secure better interest rates.
Evaluate Your Income and Expenses: Determine how much of your income can go towards EMI payments without straining your budget.
Save for a Down Payment: Most lenders require a down payment, typically 10-20% of the property value. The larger the down payment, the lower the loan amount.
2. Research Home Loan Options
Compare Lenders: Different banks and financial institutions offer varying interest rates and terms. Use online tools to compare lenders.
Fixed vs. Floating Interest Rates: Decide whether a fixed interest rate, which remains the same throughout the loan tenure, or a floating rate, which fluctuates with the market, is better for you.
Loan Tenure: Consider the length of the loan. A longer tenure means smaller EMIs but more interest paid over time.
3. Check Your Loan Eligibility
Use an Eligibility Calculator: Input your financial details into a loan eligibility calculator to estimate how much you can borrow.
Understand Lender Criteria: Lenders consider your income, employment stability, age, and existing financial commitments when determining eligibility.
4. Gather Necessary Documentation
Identity Proof: Passport, Aadhaar card, voter ID, or PAN card.
Address Proof: Utility bills, rental agreement, or passport.
Income Proof: Salary slips, bank statements, and income tax returns.
Property Documents: Sale deed, NOC from the builder, and other relevant property papers.
5. Apply for the Home Loan
Online or In-Person Application: You can apply online through the lender’s website or visit a branch to submit your application.
Fill Out the Application Form: Provide accurate details about your income, employment, property, and other required information.
Submit Documents: Upload or submit the necessary documents as requested by the lender.
6. Loan Processing and Verification
Processing Fee: Pay a non-refundable processing fee, which may be a fixed amount or a percentage of the loan amount.
Document Verification: The lender will verify your submitted documents and may ask for additional information if needed.
Credit Appraisal: The lender assesses your creditworthiness by reviewing your credit score, repayment history, and financial stability.
7. Property Valuation and Legal Check
Property Valuation: The lender appoints an independent valuer to assess the market value of the property.
Legal Check: The lender’s legal team examines the property documents to ensure there are no legal disputes or issues.
8. Sanctioning the Loan
Loan Approval: Once all checks are complete, the lender issues a sanction letter detailing the loan amount, interest rate, tenure, and other terms.
Review Terms: Carefully review the terms of the sanction letter, including any hidden charges or fees.
Accept the Offer: If satisfied with the terms, sign the acceptance copy and return it to the lender.
9. Disbursement of the Loan
Disbursement Request: Once you’ve signed the acceptance letter, you can request the disbursement of the loan.
Disbursement Mode: The lender typically disburses the loan directly to the seller or builder in case of a new property, or to you if it’s a balance transfer or self-construction.
Disbursement Conditions: The lender may release funds in installments, particularly for under-construction properties.
10. Repayment and EMI Management
Set Up Auto-Debit: Link your bank account to ensure timely EMI payments.
Prepayment Options: If possible, make prepayments to reduce the loan tenure or the total interest payable.
Monitor Your Loan: Regularly review your loan statement and keep track of interest rate changes, especially if you have a floating-rate loan.
Conclusion
Getting a home loan involves a series of steps, from assessing your financial situation and researching options to applying and managing repayment. By understanding each step and preparing accordingly, you can navigate the process smoothly and secure a loan that best suits your financial needs and home-buying goals.
#home loan finance#types of home loans#house loans#private home finance#home loans#home loan interest rate#home loan interest rates#current home loan interest rates#home loan interest#online home loan rates#private home loan companies#private home loan interest rate#private home finance company#quick home loan#best home loan interest rates#quick home loan approval#process of getting home loan
1 note
·
View note
Text
CA Intermediate Admit Card Sep 2024: Steps to Download

CA Inter Examinations September 2024 attempt is just around the corner, ICAI has already released the admit card for the September 2024 exams of CA Inter. This blog will walk you through a step-by-step guide to download your CA Inter Sep 24 Admit Card and give tips to help you navigate the process seamlessly.
Why is Admit Card Important?
This is where your CA Inter admit card will turn out to be a very important document for the following reasons:
Identity Verification: It shall work as proof of identity and eligibility to appear for the exams.
Examination Details: The admit card is a sort of document including vital details about the roll number, examination center, and examination dates.
Entry Pass: With the admit card, entry into the examination hall will be allowed.
How to Download the CA Inter Sep 24 Admit Card
Here are simple steps to download your CA Inter Sep 24 hall ticket:
STEP 1: Log on to the Official Website
Open your web browser and visit the official website of ICAI: icai.org
Step 2: Go to the Admit Card Section
The category will be "Examination" when the homepage opens. Under that, click the link to "Admit Card".
Step 3: Log In to Your Account
You will be taken to a new webpage where you have to log in by using your Registration Number of ICAI and password.
Step 4: Exam Selection
At the time of login, you can choose the CA Inter Examination from the list of examinations. Select "CA Inter September 2024" from that list.
Step 5: Download and Print
Your admit card is shown on the screen when you select the detailed exam; thoroughly verify all the information and download the admit card.
It is better to take out a hard copy of the admit card in multiple numbers for the sake of safety.
Things to Remember
Search for Errors: Check all the information on your admit card. If you find any error, inform ICAI at the earliest.
Carry ID Proof: Carry a valid photo ID proof—Aadhaar card, PAN card, passport, etc.—with your admit card to the examination center
Admit Card Copies: Make multiple copies of your admit card in case one gets misplaced.
Instructions Read: Carefully read all the instructions regarding the examination day that are mentioned on the admit card.
Read More Blogs
CA Spom Set A & Set B
CA Foundation Cut-Off
CA Bhanwar Borana Classes
CA Final Toppers List
Conclusion
Though the procedure to download your CA Inter Sep 24 admit card is easy, you have to follow each step very carefully. So, prepare all the documents well in advance so that you don't get stressed at the last minute. Take up your CA Inter exams confidently; do the right kind of preparation and follow the guidelines. Good luck!
Keep visiting our blog for more updates and tips on the CA examination and keep updating yourself with the information.
0 notes
Text
Re-Registering UAM to Udyam Registration: A Comprehensive Guide
In a dynamic business environment, staying updated with regulatory frameworks is crucial for small and medium enterprises (SMEs). The transition from the Udyog Aadhaar Memorandum (UAM) to the Udyam Registration system marks a significant shift in the Indian government's approach to supporting SMEs. This guide will walk you through the re-registration process, highlighting its importance, benefits, and the steps involved.
Understanding the UAM and Udyam Registration
The Udyog Aadhaar Memorandum (UAM) was introduced as a simple registration system for micro, small, and medium enterprises (MSMEs) to avail of government benefits. However, to streamline and enhance the registration process, the Indian government replaced UAM with the Udyam Registration system on July 1, 2020. Udyam Registration aims to offer a more robust framework, ensuring better support and integration with various government schemes.
Why Re-Register from UAM to Udyam Registration?
Regulatory Compliance: Udyam Registration is mandatory for availing of benefits under the MSME Act, 2006. The UAM system is no longer valid for accessing government schemes and support as of June 30, 2020.
Enhanced Features: Udyam Registration offers several advantages over UAM, including a more comprehensive online registration process, improved validation mechanisms, and better integration with other government databases.
Access to Benefits: Udyam Registration provides access to a wide range of benefits, including financial support, subsidies, and concessions available under various government schemes designed for MSMEs.
Benefits of Udyam Registration
Ease of Registration: The Udyam Registration process is entirely online and does not require any physical documentation or fees. This simplicity reduces administrative burden and accelerates the registration process.
Automatic Updates: The Udyam system is linked with the GST and income tax databases, enabling automatic updates and reducing the need for manual intervention.
Access to Government Schemes: Registered businesses can avail themselves of various schemes and subsidies designed to support MSMEs, including financial aid, tax benefits, and infrastructural support.
Credibility and Recognition: Udyam Registration enhances the credibility of the business, making it easier to build trust with clients, investors, and financial institutions.
Steps to Re-Register from UAM to Udyam Registration
Gather Required Information:
Aadhaar Number: The registration process requires the Aadhaar number of the proprietor, partner, or director of the enterprise.
PAN Number: For enterprises with a legal entity, the PAN of the business is required.
Business Details: Information about the business's name, address, and type (proprietorship, partnership, company) must be provided.
Visit the Udyam Registration Portal:
Go to the official Udyam Registration.
Start Registration:
Click on the "For New Entrepreneurs who are not registered yet as MSME" option.
Enter Aadhaar Details:
Input the Aadhaar number and name of the entrepreneur as per the Aadhaar card. For businesses with a legal entity, the PAN number will be used for verification.
Fill in Business Information:
Provide details about the business, including its name, address, type of enterprise, and the number of employees. The system will prompt you to provide information about your business's investment and turnover.
Verify Details:
The system will validate the information entered against government databases. Ensure all details are accurate to avoid discrepancies.
Submit and Generate Udyam Registration Number:
After verification, submit the application. Upon successful submission, you will receive an Udyam Registration Number (URN) along with a registration certificate.
Download and Print the Certificate:
Download the update Udyam Registration Certificate from the portal. Print it for your records and use it as required for availing of government schemes and benefits.
Common Challenges and Solutions
Incorrect Aadhaar or PAN Details:
Ensure the Aadhaar number and PAN details match the records exactly. Any discrepancies can lead to validation errors.
Data Mismatch:
Double-check the business information provided to ensure it aligns with the records maintained with government departments like GST and Income Tax.
Technical Issues:
If you face technical difficulties, contact the Udyam Registration helpline or support team for assistance. They can help resolve issues related to the registration process.
Conclusion
Udyam Re-registration from UAM to Udyam Registration is an essential step for businesses to continue accessing the benefits and support provided by the Indian government. The Udyam Registration system offers a more streamlined, user-friendly, and effective way for SMEs to establish their credentials and avail of various schemes. By following the outlined steps and ensuring accurate information, businesses can successfully transition to the Udyam system and unlock new opportunities for growth and development.
0 notes
Text
How to Transfer PF from One Employer to Another #SLNConsultancy #SLNPFConsultancy #SLNESIConsultancy #SLNPFESIConsultancy #PFConsultancyHyderabad #PFConsultancyNearMe
Transferring your Provident Fund (PF) when you switch jobs is essential to ensure the continuity of your retirement savings. The process is straightforward, thanks to the Universal Account Number (UAN) system introduced by the Employees’ Provident Fund
Organisation (EPFO). Here’s a step-by-step guide on how to transfer your PF from one employer to another.
Step 1: Activate and Update Your UAN Your UAN, which is unique and remains the same throughout your career, plays a crucial role in the PF transfer process. Follow these steps to activate and update your UAN: Visit the UAN Member Portal: UAN Member Portal. Click on ‘Activate UAN’: Enter your UAN, Member ID, Aadhaar, PAN, and other required details. Update Your KYC Details: Ensure your KYC (Know Your Customer) details, such as Aadhaar, PAN, and bank account information, are correct and verified.
Step 2: Check Eligibility for PF Transfer Before initiating the transfer, make sure you meet the eligibility criteria: You must have an active UAN. Your previous and current employers should have digitally registered authorized signatories. Your UAN must be linked with your Aadhaar and other KYC details.
Step 3: Log in to the UAN Portal Go to the UAN Member Portal: UAN Member Portal. Log in Using Your UAN and Password.
Step 4: Initiate the PF Transfer Request Go to the ‘Online Services’ Tab: Select ‘One Member – One EPF Account (Transfer Request)’. Verify Personal Information: Ensure that your personal details, including the PF account numbers of both previous and current employers, are correct. Choose the Employer to Attest the Claim: You can choose either your previous or current employer to attest the transfer request. Enter Your UAN or Previous Member ID: Fill in the required details and click on ‘Get Details’. Verify the PF Account Details: Check the details of both your previous and current PF accounts. Click on ‘Get OTP’: An OTP will be sent to your registered mobile number. Enter the OTP and submit the request.

Step 5: Submit Form 13 After submitting the online transfer request, you need to download Form 13. This form must be signed by you and submitted to your chosen employer (either previous or current) for attestation. The employer will then forward it to the EPFO.
Step 6: Track Your Transfer Status You can track the status of your PF transfer request online through the UAN Member Portal. Here’s how: Log in to the UAN Member Portal. Go to ‘Online Services’: Select ‘Track Claim Status’.
Step 7: Confirmation of Transfer Once the transfer is complete, you will receive a confirmation message on your registered mobile number. The transferred amount will reflect in your new PF account under your current employer.
Additional Tips Ensure Your KYC Details Are Up-to-date: Any discrepancies can delay the transfer process. Keep a Record of All Communications: Save emails, messages, and copies of forms submitted. Consult Your HR Department: If you face any issues or have questions, your HR department can provide assistance.
Conclusion Transferring your PF from one employer to another is a crucial step in maintaining the continuity of your retirement savings. By following these steps and ensuring that your UAN and KYC details are up-to-date, you can make the process smooth and hassle-free. Regularly tracking your transfer status and keeping your records organized will help avoid any complications.
0 notes
Text
Legal and Regulatory Aspects of Udyam Registration: What Businesses Need to Know
The Micro, Small, and Medium Enterprises (MSME) sector is a vital component of India’s economy, contributing significantly to employment, exports, and GDP. Recognizing the importance of this sector, the Indian government introduced the Udyam registration system, a more streamlined and efficient process for MSMEs to formalize their operations. This article delves into the legal and regulatory aspects of Udyam registration, highlighting what businesses need to know to navigate the system effectively.
Background: Transition to Udyam Registration
Udyam registration, launched on July 1, 2020, replaced the Udyog Aadhaar Memorandum (UAM) system. This new system aims to simplify the registration process for MSMEs, making it more transparent and accessible. The Udyam portal integrates with other government databases, such as the Aadhaar and GST networks, to verify information and streamline the process. The shift from UAM to Udyam was driven by the need to provide a more robust and efficient framework for MSME registration and to better align with contemporary business environments.
Legal Framework Governing Udyam Registration
The Udyam registration process is governed by the MSME Development Act, 2006, which has been amended to incorporate the new registration system. The Act outlines the criteria for classifying enterprises as micro, small, or medium based on investment in plant and machinery or equipment and annual turnover. This dual criterion ensures a more inclusive classification system, reflecting the true size and capabilities of businesses.
Definition of MSMEs:
Micro Enterprises: Investment in plant and machinery or equipment not exceeding ₹1 crore and turnover not exceeding ₹5 crore.
Small Enterprises: Investment in plant and machinery or equipment not exceeding ₹10 crore and turnover not exceeding ₹50 crore.
Medium Enterprises: Investment in plant and machinery or equipment not exceeding ₹50 crore and turnover not exceeding ₹250 crore.
These definitions are crucial as they determine the eligibility of enterprises for various government schemes and incentives.
Regulatory Requirements for Udyam Registration
Mandatory Aadhaar Number:
The Udyam registration process requires the Aadhaar number of the proprietor, partner, or director of the enterprise. This requirement helps in the authentication and verification of the business entity and its owners.
GST and PAN Integration:
While GST registration is not mandatory for all MSMEs, businesses registered under GST must link their GSTIN with their Udyam registration. Additionally, the Permanent Account Number (PAN) of the business entity is crucial for the registration process, especially for medium enterprises.
Self-Declaration:
The registration process involves a self-declaration by the business regarding its classification, which includes providing details about investment and turnover. This self-declaration simplifies the process and reduces the compliance burden on MSMEs.
No Renewal Requirement:
Once registered, there is no need for renewal of Udyam registration. This is a significant change from the previous system, where renewal was periodically required, adding to the compliance burden.
Exemption from Certain Licenses:
Udyam-registered enterprises may be exempt from certain licenses and approvals required under state laws, depending on the sector and location. This exemption aims to facilitate ease of doing business and reduce bureaucratic hurdles.
Compliance and Penalties
Non-compliance with Udyam registration requirements can result in penalties. For instance, providing false information during registration can lead to the cancellation of the registration and other legal consequences under the MSME Development Act. Additionally, businesses that do not update their information as required or fail to comply with other regulatory norms may lose their eligibility for benefits and incentives.
Benefits of Udyam Registration
Access to Government Schemes:
Registered MSMEs can avail themselves of various government schemes, including credit facilities, subsidies, and grants. These schemes are designed to support the growth and development of the sector.
Easier Access to Finance:
Udyam registration enhances the credibility of businesses, making it easier for them to secure loans and other financial products from banks and financial institutions.
Market Opportunities:
Registered MSMEs can participate in government tenders and procurements. Many government departments and public sector undertakings have mandates to source a certain percentage of their requirements from MSMEs.
Subsidies and Tax Rebates:
MSMEs may be eligible for various subsidies and tax rebates, including those related to technological upgrades, energy conservation, and quality improvement.
Conclusion
The Udyam registration system represents a significant step towards simplifying and streamlining the registration process for MSMEs in India. By understanding the legal and regulatory aspects, businesses can ensure compliance and take full advantage of the benefits available to them. The system not only facilitates easier access to government schemes and financial products but also helps in creating a more transparent and accountable MSME ecosystem. As the Indian economy continues to recover and grow post-pandemic, the role of a well-regulated MSME sector, supported by systems like Udyam registration, will be crucial in driving sustainable development and inclusive growth.
#msme registration online#udyam registration#msme registration#udyog aadhaar print#udyam registration certificate
0 notes
Text
Unlock Your Business Potential with udyog aadhar: A Quick Registration Guide

In the ever-evolving landscape of small and medium enterprises (SMEs) in India, udyog aadhar registration stands out as a pivotal step towards business formalization and growth. The udyog aadhar system, introduced by the Government of India, simplifies the registration process for businesses, making it easier for entrepreneurs to access a range of benefits and support. In this blog, we’ll walk you through what udyog aadhar registration is, why it’s important, and how you can register your business in a few simple steps.
What is udyog aadhar?
udyog aadhar is an initiative by the Ministry of Micro, Small, and Medium Enterprises (MSME) designed to streamline the process of registering small and medium businesses in India. It provides a unique identification number to enterprises, which helps in accessing various government schemes and benefits aimed at promoting and supporting SMEs.
The udyog aadhar number is a single-window solution that replaces multiple registrations and provides businesses with an easy way to get recognized officially. This initiative aligns with the government’s vision to enhance the ease of doing business in India and foster a supportive environment for SMEs.
Why is udyog aadhar Registration Important?
Simplified Registration Process: The udyog aadhar registration process is designed to be quick and hassle-free. By consolidating multiple registrations into a single online form, it reduces the administrative burden on entrepreneurs and accelerates the formalization of businesses.
Access to Government Benefits: Businesses registered under udyog aadhar become eligible for a variety of government schemes, subsidies, and incentives. This includes financial assistance, tax benefits, and other support measures designed to boost SME growth and sustainability.
Enhanced Credibility: Having a udyog aadhar number provides official recognition to your business. This can enhance your credibility with financial institutions, investors, and potential clients, making it easier to establish and grow your business relationships.
Financial Support and Subsidies: Registered businesses can access various financial schemes such as low-interest loans and grants. This financial support is crucial for capital investment, business expansion, and managing operational costs.
Regulatory Ease: udyog aadhar registration simplifies compliance with regulatory requirements. It helps businesses meet legal obligations more efficiently, allowing them to focus on their core operations.
How to Register for udyog aadhar: A Step-by-Step Guide
Step 1
Business Name and Address: Complete name and address of your business.
Bank Account Details: Bank account number and IFSC code.
Investment Details: Information about investment in plant and machinery or equipment.
PAN Number (Optional): Though not mandatory, having a PAN number can be beneficial.
Step 2: Access the udyog aadhar Portal
Visit the Official Website: Go to https://udyog-adhaar.in/
Step 3: Initiate Registration
Select the Registration Option: Click on “For New Entrepreneurs who are not Registered yet as MSME” to begin the process.
Step 4: Enter Aadhaar Details
Input Aadhaar Number: Enter the Aadhaar number of the business owner or authorized signatory.
Authenticate with OTP: An OTP (One-Time Password) will be sent to the mobile number linked with Aadhaar. Enter this OTP to verify your identity.
Step 5: Complete the Registration Form
Fill out the registration form with the following details:
Personal Information: Name of the business owner, Aadhaar number, and PAN number (if available).
Business Details: Business name, type of enterprise (micro, small, medium), business address, bank account details, investment details, and number of employees.
Step 6: Review and Submit
Verify Information: Double-check all the details entered in the form to ensure accuracy.
Submit the Form: Click on the “Submit” button to complete the registration process.
Step 7: Obtain Acknowledgment
Receive Acknowledgment Number: An acknowledgment number will be generated after submission.
Download and Save: Download and print the acknowledgment receipt, which includes your udyog aadhar number and serves as proof of registration.
Step 8: Verification and Certificate
Verification: Your submitted details will be verified by the authorities.
Download Certificate: Once verified, you will receive an udyog aadhar number and certificate, which you can download from the portal.
Step 9: Post-Registration
Update Information: If there are any changes in your business details, update them through the udyog aadhar portal.
Utilize Benefits: Use your udyog aadhar number to apply for government schemes, financial assistance, and other benefits.
Note:- Apply For Udyam Re-Registration Through Udyam Portal
Conclusion
udyog aadhar registration is a crucial step for small and medium enterprises aiming to formalize their operations and tap into government support mechanisms. With its simplified process, access to financial benefits, and enhanced business credibility, udyog aadhar provides a robust foundation for entrepreneurial success. By following the straightforward steps outlined above, you can efficiently register your business and begin leveraging the numerous advantages that udyog aadhar offers. Embrace this opportunity to streamline your business operations, access valuable resources, and drive growth in a supportive regulatory environment.
0 notes
Text
Link Aadhaar and PAN by SMS: Pan Card Aadhar Link by SMS New Process: Aadhaar will be linked to PAN card with just one SMS
Link Aadhaar and PAN via SMS :- A very good information has come about linking Aadhaar with PAN card. As you all know, it is mandatory to link Aadhaar with PAN card. Online facility has been provided to link Aadhaar with PAN card. But there are many people who have not been able to link Aadhaar with PAN card through online mode. So, this facility has been started for all of them. Through this,…

View On WordPress
0 notes
Text
How to apply Pan Card Online
A Permanent Account Number (PAN) card is a critical financial document issued by the Income Tax Department of India. This ten-digit alphanumeric identifier is essential for anyone engaged in financial transactions in India, ranging from individuals to businesses. Here, we delve into how to apply pan card online.
What is a PAN Card?
A PAN card is an identification document assigned to Indian taxpayers. The unique number on the card is linked to all financial transactions made by the individual or entity, allowing the government to monitor and prevent tax evasion. It is issued under the supervision of the Central Board of Direct Taxes (CBDT) and remains valid for a lifetime.
Importance of a PAN Card
The significance of a PAN card extends beyond mere identification. Here are some key reasons why having a PAN card is crucial:
Tax Filing: A PAN card is mandatory for filing income tax returns. It ensures that every taxpayer is uniquely identified, and their tax payments are accurately recorded.
Financial Transactions: PAN is required for various high-value transactions such as buying or selling property, purchasing vehicles, and investing in mutual funds or stocks. It helps in tracking these transactions and preventing illegal financial activities.
Bank Accounts: Opening a new bank account, whether savings or current, requires a PAN card. It also applies to applying for credit or debit cards.
Loan Applications: Financial institutions demand PAN details when processing loan applications, including personal, home, or business loans.
Foreign Transactions: For NRIs and foreign nationals involved in business or property dealings in India, a PAN card is essential for regulatory compliance.
Amazing Features of a PAN Card
The PAN card comes with several noteworthy features that make it a versatile and indispensable document:
Unique Identifier: Each PAN is unique to an individual or entity, ensuring no two PANs are the same. This uniqueness helps in the precise tracking of financial activities.
Lifetime Validity: Once issued, a PAN card does not expire. It remains valid for the holder’s lifetime, irrespective of changes in personal details such as address.
Digital Integration: The PAN database is integrated with other government services, enhancing transparency and simplifying processes such as linking with Aadhaar for improved verification.
Preventing Tax Evasion: By linking all major financial transactions to a single identifier, the PAN system helps prevent tax evasion and money laundering, ensuring more robust financial regulation.
Versatility: It is accepted as a valid proof of identity across the country for various purposes, including KYC (Know Your Customer) requirements.
Applications of a PAN Card
If you want to apply pan card online so you can contact us +1 (416) 996–1341 or [email protected] for apply your pan card online.
The applications of a PAN card are vast, encompassing a wide range of financial and legal activities:
Taxation: Filing income tax returns, claiming tax refunds, and receiving taxable salary or professional fees require quoting your PAN.
Banking: Essential for opening bank accounts, applying for loans, and making deposits exceeding a certain threshold.
Investments: Required for investing in securities, mutual funds, and debentures. It is also needed for transactions involving the transfer of securities.
Property Transactions: Necessary for buying or selling immovable property valued above a specified amount.
Business: Companies need a PAN for registering their business, paying taxes, and participating in government tenders.
Telecommunications: Required for purchasing a new mobile phone connection.
Insurance: Mandatory for purchasing policies above a certain value and for claims.
Conclusion
How to apply for PAN card online from Canada is a straightforward process if you follow the steps outlined above. By ensuring that all information is accurately provided and all required documents are submitted, you can efficiently obtain your PAN card and manage your financial affairs in India seamlessly.
Contact us
Phone:- +1 (416) 996–1341
Email Us:- [email protected]
0 notes
Text
link aadhar with pan | pan aadhaar link | pan aadhar link | pan card aadhar card link | Adhar card | tax savings
Apart from the PAN-Aadhaar link, what else to do till March 31? Know otherwise you may have to repent!
Explain that apart from linking PAN-Aadhaar, you will have to complete many important tasks like nomination in mutual funds, tax savings investment, investment in PM Vaya Vandana Yojana and investment in SBI’s Amrit Kalash scheme before March 31.
The government has set a deadline of March 31 to…
View On WordPress
#Adhar card#business news#business news in hindi#investments#link aadhar with pan#pan aadhaar link#pan aadhar link#pan card#pan card aadhar card link#personal finance#ppf#tax savings
0 notes
Text
What is Udyog Aadhaar?
Udyog Aadhaar is essentially an Online Business Identification Document provided by the Government of India that aims at providing a unique identification number for all kinds of SME businesses operating in the country.
Also Read: Udyog Aadhar Registration Print
The Udyog Aadhar Registration is a completely online process and thus, saves both time and energy as you do not have to physically go to some office or authority in order to get this done. It is a great boost for small scale industries across India and below we detail the entire process of registration for the same.
Initially, when these registrations were being made mandatory over the past year or so, there was a lot of confusion among owners regarding this new business registration scheme but now with more being made known about Udyog Aadhar Registration, more and more owners are coming forward to get the registration done for their businesses.
The Udyog Aadhar Registration is a completely online process that is totally free of cost. You will not have to pay any money in order to complete this registration process.
Udyog Aadhaar Registration Process :
The Udyog Aadhaar website contains all the details related to each stage of the business Udyog Aadhaar Registration process as well as the documents required at each stage so you do not need to worry about anything while registering your small scale business for Udyog Aadhar Card . Some of the Udyog Aadhar Registration documents required are: Proof of Identity : A copy of your PAN Card, Ration Card or Passport (if it has the same name as mentioned in Udyog Aadhaar Form
Proof of Address : Udyog Aadhar requires you to provide a proof of address so that they can verify your residence. The most common document used in this Udyog Aadhaar Registration process is Bank Account Statement. You may use Electricity Bill, Telephone Bill and Property Tax Receipts for Udyog Aadhar but your Udyog Aadhar Registration will get rejected if you do not provide valid proofs such as Bank Account Statement with the business premises’ address mentioned therein .
Benefits of Udyog Aadhaar
Udyog Aadhaar Registration is a great help for small scale industries in India as this Udyog Aadhaar Card allows the business to be linked with various government schemes and thus helps them get financial assistance from the government. Udyog Aadhar Registration also ensures that these MSME businesses are provided with bank loans at much lower interest rates than what conventional banking provides. Udyog Aadhar Registration also acts as an identity proof for anyone who owns or runs such business.
Udyog Aadhaar Disadvantages
Udyog Aadhar Registration does have certain disadvantages too including wear and tear of both machines and personnel manning the same due to increase in number of registrations that will eventually happen after more people know about Udyog Aadhar Registration Scheme .
Furthermore, Udyog Aadhar Registration does not help you file taxes, take loans or get a PAN card for your business. Udyog Aadhar is just an identification number that helps the government’s verification process much easier and smoother than what it was before Udyog Aadhaar Registration came into effect .
So if you are looking to start or run a small scale business in India then Udyog Aadhar Registration will definitely benefit you in more ways than one and below we detail some of the Udyog Aadhaar Disadvantages too .
Your Udyog Aadhar Card will contain the following:
Your Photograph in color
Address (as per your Udyog Aadhaar Form)
Name as per PAN card
Date of birth
Gender
Mobile Number
E-mail ID
Expiry date (This information is placed on physical Udyog Aadhar Card and not on UDI)
Udyog Aadhaar Number
Udyog Aadhar Card Serial Number
Udyog Aadhaar Registration date
Also, Udyog Aadhar Registration is permanent and thus you cannot correct or change any information on your Udyog Aadhar Card later . If you do not have a Udyog Aadhaar number then the physical Udyog Aadhar will be issued to an agent or business representative representing you. A UDI generated during Udyog Aadhaar registration process will contain all of the above mentioned details except for biometric data which obviously will not be available in case of UDI. The below flowchart describes the entire Udyog Aadhar Registration Step by Step Process:
Step 1: Application Form Submission (online)
Step 2: Udyog Aadhar Card or UDI (UDI stands for Udyog Aadhaar Number) Generation
Step 3: Udyog Aadhar Card Delivery to the Applicant
Step 4: Udyog Aadhar Updates with UIDAI Online for updation and linkages Further, Udyog Aadhar Registration is handled by Unique Identification Authority of India . Further details regarding UAD will be updated on this article whenever required hence always make sure to check Udyog Aadhaar Registration updates before starting the UAD process.
We would love to hear your feedback on Udyog Aadhar Registration, if you have any then please leave a comment or send us an email Back To Top
Application Form Submission (online) Udyog Aadhar Registration is completely online – all you have to do is fill in the Udyog Aadhar form and submit it online along with relevant documents. The entire Udyog Aadhar Registration Process can be completed within 3-5 working days for new applicants while update of information will take one full day . Also, UDAI has launched special camps at various cities to make it more convenient for people who don’t live near their home-town to Udyog Aadhaar Registration .

#print udyam certificate#udyam registration#udyog aadhar registration#udyog aadhar#udyog aadhar certificate download
0 notes
Text
How to Check CIBIL Score Online: A Step-by-Step Guide
Your CIBIL score, a three-digit number ranging from 300 to 900, plays a crucial role in your financial journey. It represents your creditworthiness, based on your history of credit repayment. The higher your score, the more favorably lenders view your profile, often resulting in better interest rates on loans and credit card approvals. Given its importance, checking your CIBIL score regularly is a wise financial habit. Here's a comprehensive guide on how to check CIBIL Score Online:
Step 1: Visit the Official CIBIL Website
Start by visiting the official website of TransUnion CIBIL, the organization that compiles credit scores in India. Their website is user-friendly and secure, providing various services related to credit information.
Step 2: Create an Account
For First-Time Users: You'll need to create an account. Click on the link or tab that says “Get Your CIBIL Score” or a similar call-to-action.
Account Creation Process: Provide necessary details such as your name, email address, ID proof (PAN, Aadhaar, etc.), and other relevant information as prompted by the website. Ensure the information is accurate to avoid discrepancies with your credit report.
Step 3: Choose Your Subscription
CIBIL offers various subscription plans, including a one-time report or yearly subscriptions for those who wish to monitor their credit score regularly. Select the plan that best suits your needs. Note that CIBIL might offer a free once-a-year option or other promotions, so look out for those.
Step 4: Verify Your Identity
To access your CIBIL score, you'll be required to authenticate your identity. This is a security step to ensure that sensitive financial information is handed over to the right person.
Authentication Process: You may be asked to answer questions related to your credit history, such as details of past loans or credit cards. This is to verify that the person requesting the score is indeed you.
Step 5: Access Your CIBIL Score and Report
Once verified, you'll gain access to your CIBIL score and report. This report not only includes your score but detailed information on your credit history, including credit accounts, repayment history, and any inquiries made by lenders.
Step 6: Review Your Report Carefully
Understand Your Score: Familiarize yourself with where you stand on the credit scale. A score above 750 is generally considered good.
Check for Inaccuracies: Review all the listed accounts and payment histories for any discrepancies. Errors can negatively impact your score, so it’s important to report them immediately.
Step 7: Dispute Errors if Any
If you find any inaccuracies, you can file a dispute directly through the CIBIL website. Provide supporting documents and a clear explanation of the discrepancy. CIBIL will verify the information with the respective lender and update your record accordingly.
Importance of Regular Checks
Regularly checking your CIBIL score allows you to:
Monitor Your Financial Health: Understand how your financial behavior affects your credit score.
Identify and Rectify Errors: Ensure your credit history is accurately represented.
Plan Financially: Knowing your score is beneficial when planning to apply for loans or credit cards.
How To Improve CIBIL Score
Want to know how to improve CIBIL score immediately? Focus on paying bills on time, reducing credit card balances, maintaining a diverse credit mix, limiting credit applications, settling outstanding dues, and monitoring your score regularly. These actions can positively impact your creditworthiness and help boost your CIBIL score over time. Consistent financial discipline and responsible credit management are key to improving and maintaining a healthy credit profile.
Conclusion
Checking your CIBIL score online is a straightforward process that can be done from the comfort of your home. By staying informed about your credit health, you can take proactive steps to improve or maintain a good credit score, securing your financial future. Remember, a good credit score is a key to unlocking many financial opportunities.
0 notes
Text
Detailed Instructions on How to Register Your Business Under the Udyam Scheme
Micro, Small, and Medium Enterprises (MSMEs) form the backbone of India's economy, providing significant employment opportunities and contributing to the country's GDP. To support and streamline the registration process for these enterprises, the Government of India introduced the Udyam Registration. This new system replaces the earlier MSME registration process and aims to make it easier for businesses to register and access various benefits. In this blog, we will provide detailed instructions on how to register your business under the Udyam scheme.
What is Udyam Registration?
Udyam Registration is a simplified and fully digital process for registering MSMEs in India. It is designed to provide businesses with an official certificate and a unique identification number, known as the Udyam Registration Number (URN). This registration is essential for availing various benefits offered by the government, such as subsidies, tax exemptions, and easier access to loans.
Eligibility Criteria for Udyam Registration
Before you begin the registration process, it's important to determine whether your business qualifies as an MSME. The classification is based on investment in plant and machinery or equipment and annual turnover:
Micro Enterprises:
Investment: Up to ₹1 crore
Turnover: Up to ₹5 crore
Small Enterprises:
Investment: Up to ₹10 crore
Turnover: Up to ₹50 crore
Medium Enterprises:
Investment: Up to ₹50 crore
Turnover: Up to ₹250 crore
Step-by-Step Guide to Udyam Registration
Step 1: Visit the Udyam Registration Portal
The first step is to visit the Udyam Registration portal. This portal is user-friendly and provides all the necessary information and forms for the registration process.
Step 2: Aadhaar Verification
Aadhaar verification is a crucial part of the registration process. Depending on the type of ownership, the Aadhaar number of the proprietor, partner, or director must be provided. Here’s how to proceed:
For Proprietorship: The Aadhaar number of the proprietor.
For Partnership Firm: The Aadhaar number of the managing partner.
For Hindu Undivided Family (HUF): The Aadhaar number of the Karta.
For Company, LLP, Cooperative Society, or Trust: The Aadhaar number of the authorized signatory.
Ensure that the mobile number linked to the Aadhaar is active, as you will receive an OTP (One-Time Password) for verification.
Step 3: PAN Verification
After Aadhaar verification, you will need to verify your PAN (Permanent Account Number). This step is mandatory for all enterprises, as the Udyam portal is integrated with the Income Tax Department's database for seamless verification.
Step 4: Fill in the Basic Details
Once Aadhaar and PAN are verified, you need to fill in the basic details about your business, including:
Name of the entrepreneur
Name of the enterprise
Type of organization (Proprietorship, Partnership, LLP, Private Limited Company, etc.)
PAN number and GSTIN (if applicable)
Business address (including district and state)
Email address and mobile number
Step 5: Classification of the Enterprise
Next, you will classify your enterprise based on the investment and turnover criteria. This classification will determine whether your business falls under micro, small, or medium enterprise.
Step 6: Enter Bank Details
Provide the bank details of the enterprise, including the bank account number and the IFSC code of the branch. This information is crucial for availing financial benefits and subsidies.
Step 7: Additional Details
Enter additional details such as:
Major activity (manufacturing or service)
National Industrial Classification (NIC) code
Number of employees
Social category (General, SC, ST, OBC)
The NIC code is a statistical standard used to classify business activities. You can find the appropriate NIC code for your business from the list provided on the Udyam portal.
Step 8: Self-Declaration
Complete the self-declaration section, confirming that all the information provided is true and correct. This section is important as it serves as a legal affirmation of the details you have entered.
Step 9: Submit the Application
After filling in all the required details and completing the self-declaration, submit the application. Upon successful submission, you will receive an acknowledgment with a unique Udyam Registration Number (URN).
Step 10: Receive Udyam Registration Certificate
Once the application is verified, you will receive an Udyam Registration Certificate. This certificate is an official document that serves as proof of your registration and includes the URN. It can be downloaded from the Udyam Registration portal.
Benefits of Udyam Registration
Registering under the Udyam scheme offers several benefits to MSMEs, including:
Access to Government Schemes: Registered MSMEs can avail various government schemes such as the Credit Guarantee Fund Scheme, Interest Subsidy Schemes, and more.
Easier Access to Finance: Banks and financial institutions provide loans at lower interest rates and with fewer collateral requirements to registered MSMEs.
Tax Benefits: Registered MSMEs can enjoy various tax exemptions and rebates provided by the government.
Protection Against Delayed Payments: The MSMED Act provides protection against delayed payments, ensuring timely payments from buyers.
Preference in Government Tenders: Registered MSMEs get preferential treatment in government procurement and tenders.
Subsidies and Incentives: Various subsidies and incentives are available for technology upgrades, quality certification, and marketing.
Export Promotion: Registered MSMEs can benefit from export incentives and subsidies, as well as assistance in international marketing.
Capacity Building and Skill Development: The government offers various programs for capacity building and skill development to enhance the productivity and efficiency of MSMEs.
Conclusion
Print Udyam Registration is a critical step for MSMEs in India to gain official recognition and access a wide range of benefits and support systems offered by the government. The registration process is straightforward and entirely online, making it accessible to all eligible businesses. By obtaining Udyam Registration, small businesses can enhance their credibility, financial stability, and overall growth potential, contributing significantly to the country's economic development.
For entrepreneurs and small business owners, understanding and leveraging the Udyam Registration process can be a game-changer, providing the necessary boost to thrive in a competitive market. Whether you are starting a new business or running an existing one, registering under the Udyam scheme is a step towards sustainable growth and success.
0 notes
Text
How to Withdraw Your Provident Fund: A Step-by-Step Guide
SLNConsultancy #SLNPFConsultancy #SLNESIConsultancy #SLNPFESIConsultancy #PFConsultancyHyderabad #PFConsultancyNearMe
Withdrawing your Provident Fund (PF) can be a significant financial milestone, often associated with retirement or job change. To ensure a smooth and hassle-free withdrawal process, it’s crucial to understand the steps involved. Here’s a comprehensive guide to help you through the process.
Step 1: Eligibility Check
Before initiating the withdrawal process, ensure you meet the eligibility criteria:
Retirement: Generally, employees can withdraw their PF upon reaching the age of 58.
Unemployment: Partial withdrawal is allowed if you have been unemployed for more than two months.
Other Reasons: Specific conditions like medical emergencies, marriage, higher education, or buying/construction of a house.
Step 2: Gather Necessary Documents
Having all required documents ready will streamline your withdrawal process. These typically include:
UAN (Universal Account Number)
Aadhaar Card
PAN Card
Bank Account Details (with IFSC code)
Form 19: For final settlement
Form 10C: For pension withdrawal benefits (if applicable)
Form 31: For partial withdrawals
Step 3: Ensure KYC Details Are Updated
Your KYC (Know Your Customer) details must be updated and verified in the EPFO (Employees’ Provident Fund Organisation) portal. This includes:
Aadhaar
PAN
Bank Account Details
Step 4: Login to the UAN Portal
Visit the EPFO member portal: EPFO Member Portal.
Log in using your UAN, password, and captcha.
Step 5: Initiate the Withdrawal Process
Go to the ‘Online Services’ tab: Select ‘Claim (Form-31, 19 & 10C)’ from the dropdown menu.
Verify Member Details: Ensure your KYC details are correct and verified.
Enter the Last Four Digits of Your Bank Account: This is for verification purposes.
Click on ‘Proceed for Online Claim’.
Step 6: Choose the Type of Withdrawal
From the drop-down menu, select the type of withdrawal you wish to make:
Full EPF Settlement: For final settlement upon retirement.
EPF Part Withdrawal (loan/advance): For specific purposes like medical treatment, education, etc.
Pension Withdrawal: If applicable.
Step 7: Submit the Claim
Fill in the Required Details: Depending on the type of claim, you may need to provide additional information.
Upload Necessary Documents: If you are making a partial withdrawal for specific reasons, you might need to upload supporting documents.
Submit the Claim: After ensuring all details are correctly filled, submit the claim.
Step 8: Monitor Claim Status
After submission, you can track your claim status through the EPFO portal. It usually takes 15-20 working days for the claim to be processed.
Step 9: Receive the Funds
Once the claim is processed, the PF amount will be credited directly to your bank account linked to the UAN. Ensure that your bank details are correct to avoid any delays.
Additional Tips
Check for Tax Implications: PF withdrawals before 5 years of continuous service may be subject to taxes.
Use the UMANG App: The Unified Mobile Application for New-age Governance (UMANG) app also allows you to manage your EPF account and make withdrawals.
Contact EPFO for Assistance: If you face any issues, the EPFO has a grievance redressal mechanism that can be accessed online.
Withdrawing your Provident Fund can be a straightforward process if you follow these steps meticulously. Ensuring that all your details are updated and correctly entered will save you time and avoid any unnecessary delays.
0 notes
Text
Proof of Investment (POI) Submission: Made Easier for You and Your Employees
It’s that time of the year when you start thinking about the tasks of collecting, submitting, and verifying the employees’ proof of investments. The process can be a breeze. It can also be a nightmare! Everything depends on how well HR team members handle the process.
In this post, we have summarized the answers to 10 common questions about proof of investments (POI). Read on and watch the webinar for answers to 50+ questions! 👇
Most of the time, employees who join us from other companies don’t submit Form 12BB. What is the responsibility of our company in this case? If Form 12BB is unavailable, we will not be able to know whether the employee wants the new or old regime. In this case, as per the new law, the new regime becomes the default regime. So, the solution is to make sure that Form 12BB is a part of their joining-document deck.
Can the rent agreement replace the rent receipts? Does a rent agreement ensure that the rent is paid? Yes. The employees can submit either the rent agreement (on a stamp paper) or the rent receipts. However, they need to submit the same in the prescribed format. If the rent is INR 8,333 per month (or INR 1 lac per annum), the employee has to collect the landlord’s PAN card details.
What are the inclusions and exclusions in the tuition fee component? Tuition fee is the fee for children’s education from school to college. Only the monthly education fee is considered in a composite fee receipt with other components like computer fee, transport fee, etc. Fees for evening classes or private tuition are not covered. Only the receipts with the term ‘tuition fee’ are considered.
What are the deductions and rebates an employee can claim in the new tax regime? Leave encashment exemption and gratuity exemption are two deductions available under the new regime. But both are applicable only when the employee leaves the organization. There is also a VRS exemption if a VRS scheme is in place. Moreover, under Section 80CCD(2), there’s a deduction on the company’s contribution to NPS but this is limited to 10% of the basic salary.
What should we do if an employee has not linked the Aadhaar and PAN? Can we still generate Form 16? This question will certainly arise at the time of IT return filing. As an organization, you must validate the employee’s PAN status on the Income Tax website by entering the PAN and Aadhaar number. The site will also indicate that the PAN is either valid or valid but not linked. So, you need to inform the concerned employee to do the linking.
What is the maximum number of people who are covered in the section under disabled dependents? All the dependents are covered up to a maximum of INR 75,000. But there are some conditions to avail of this benefit. The spouse, children, parents, brothers, and sisters of the employee are considered as dependents.
Many times the landlord refuses to share the PAN card details when the annual rent is more than INR 1 lac. Please suggest what needs to be done. If the landlord does not provide the PAN card, there are two options for the employee: either forgo the HRA exemption or change the house.
Is there any option to change the tax regime in the middle of the financial year? As per the circular, an employee has opted for a specific regime with the employer, it is not possible to change later during the financial year. However, the employee can switch to a different regime at the time of filing IT returns.
Can an employee claim the exemption for both HRA and loan interest for a house in the same city? The employee cannot claim both even if one of them is occupied by family members. If the houses are in two different cities, the claim will be considered valid. The maximum limit for home loan interest is INR 2 lacs under Section 24. This is subject to certain conditions.
Is the gratuity paid to a resignee considered for exemption under Section 10(10) of the Income Tax Act? Yes. Gratuity is exempted under Section 10(10). This exemption is applicable to both old and new regimes.
Read the greytHR blog and watch the webinar recording.
Source Link
#HR#Payroll#HR Software#Payroll Software#HRMS#HRM#HRMS Software#HRMS Payroll#HR and Payroll#HR and Payroll Software#greytHR#POI
0 notes
Last Seen Blogs

always-anime-blog
Ecchi 4 Days

conversaciones-sobre-anatomia
Lunar De Clavícula

omg-ikr
Oh My God.. I Know, Right??

blackravebabes
Black Rave Babes

rociochan3posts-blog
Untitled