#Pop Art DIY Kits
Text

Coffee Painting On Round Coasters DIY Kit By Penkraft
• Cartridge Papers-3
• Coffee Powder
• Brush No. 000 And Brush No 03.
• Free Video Tutorial
#coffeepaintingDIYkit#Penkraft DIY Kits#Decoupage DIY Kits#Image Transfer DIY Kits#Knife Painting DIY Kits#Resin Art DIY Kits#Fluid Art DIY Kits#Alcohol Ink DIY Kits#Pop Art DIY Kits#One Stroke Painting DIY Kits
0 notes
Text
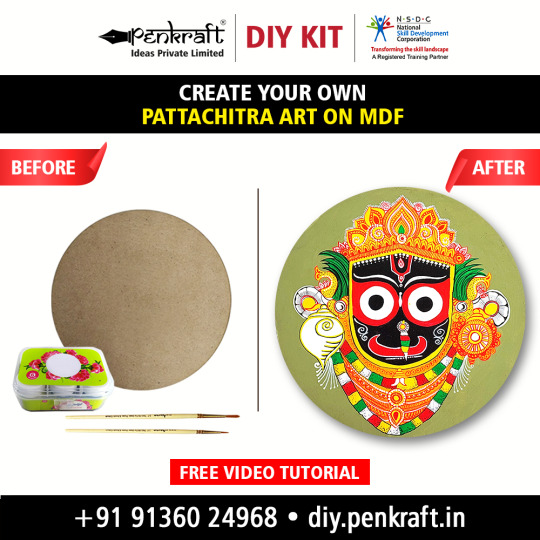
Penkraft's DIY Kits contain all material and tools that you need to undertake an art or craft activity - be it ethnic art forms, modern art forms or calligraphy.... And each DIY Kit comes with a Video Tutorial that teaches you how to use the material and create an amazing piece of art from ordinary objects!
#Penkraft DIY Kits#Pen Mandala DIY Kits#Resin Art DIY Kits#Fluid Art DIY Kits#Alcohol Ink DIY Kits#Dot Mandala DIY Kits#Gond Art DIY Kits#Warli Painting DIY Kits#Lippan Art DIY Kits#Decoupage DIY Kits#Image Transfer DIY Kits#Kalamkari DIY Kits#Kalighat DIY Kits#Knife Painting DIY Kits#Pop Art DIY Kits#One Stroke Painting DIY Kits#Brush Pen Calligraphy DIY Kits#Cut Nib Calligraphy DIY Kits#Devanagari Calligraphy DIY Kits#pattachitra art#art#artsy
0 notes
Text
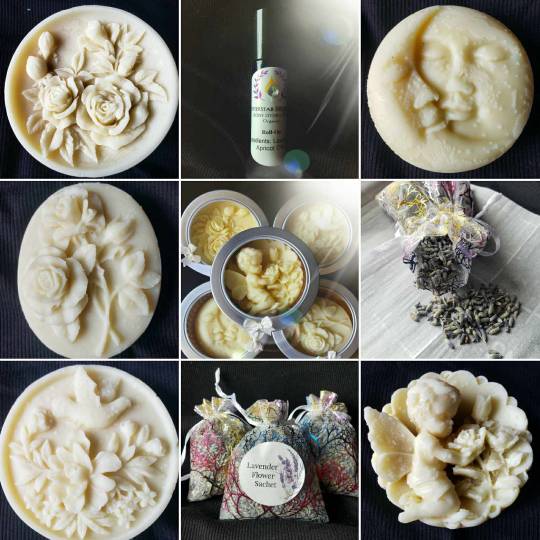
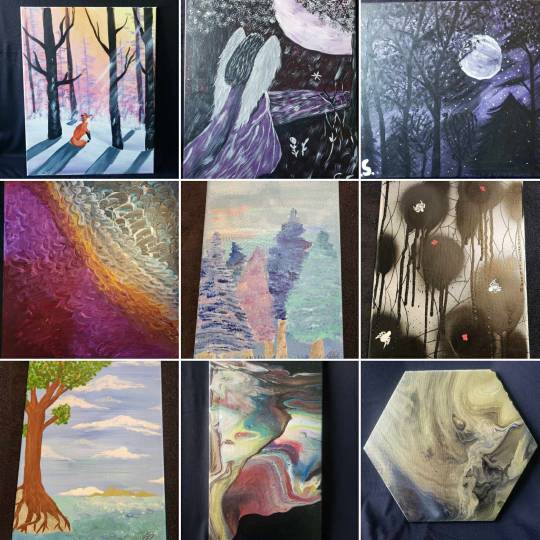
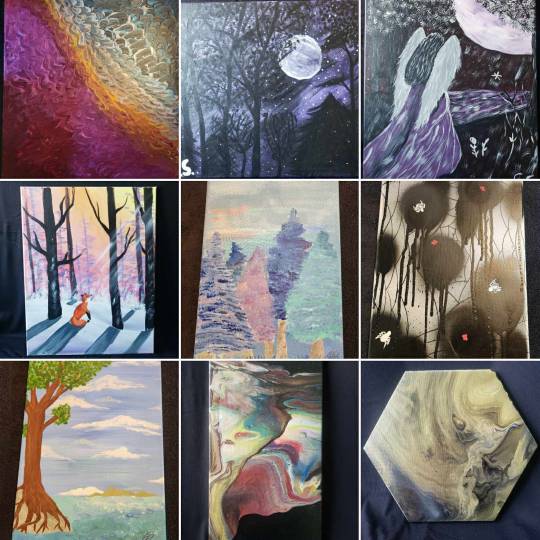
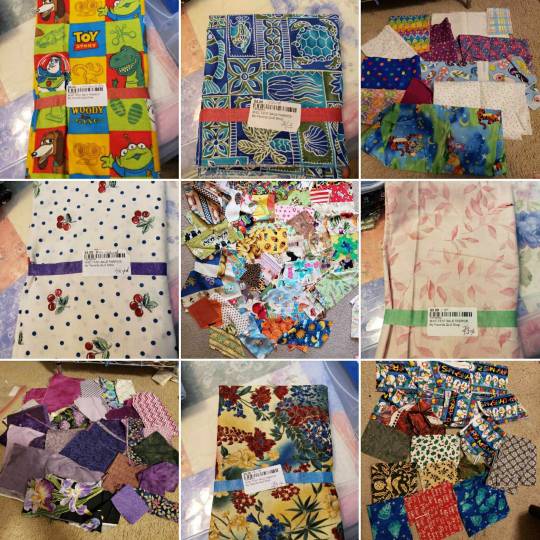
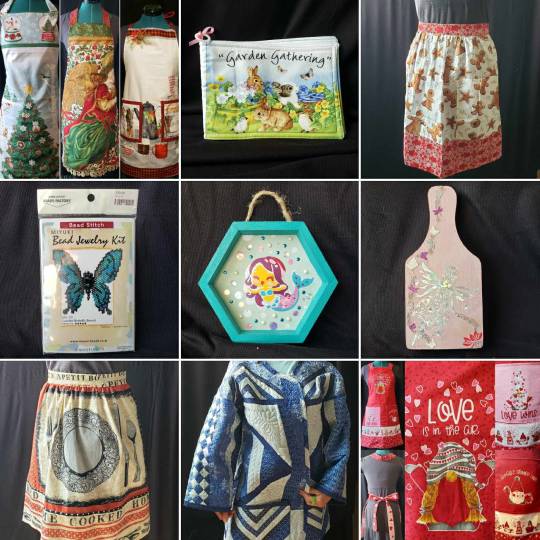
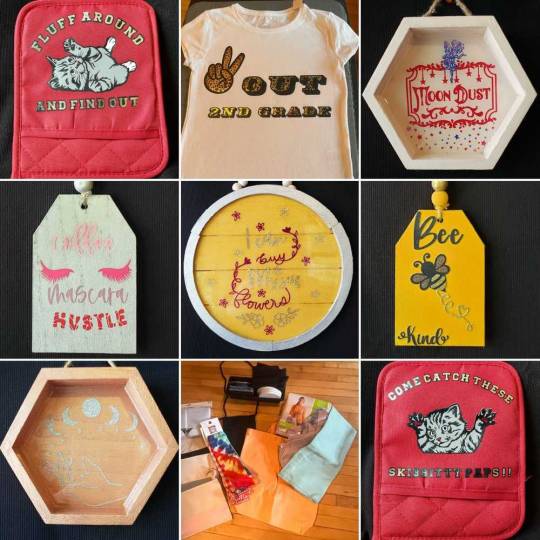
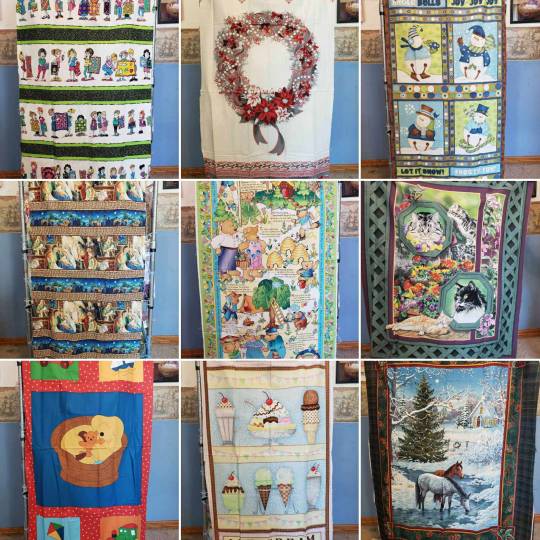
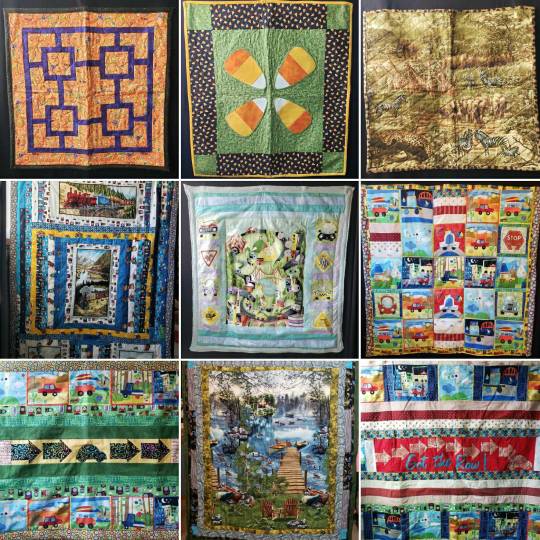
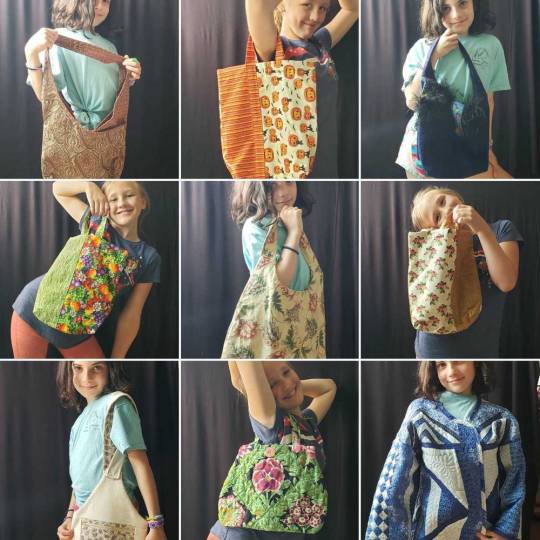
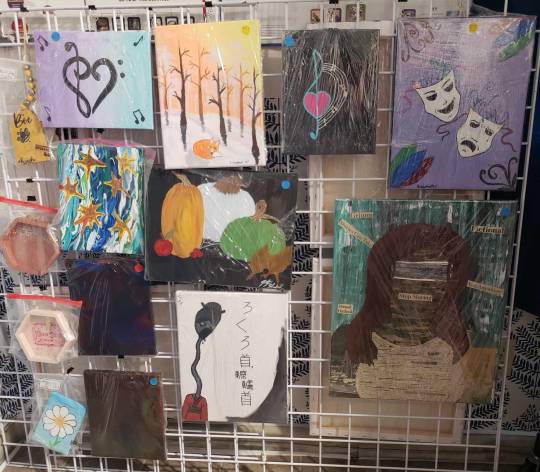
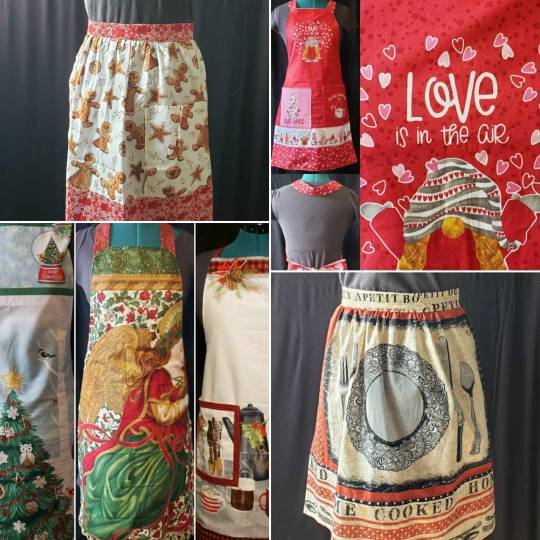
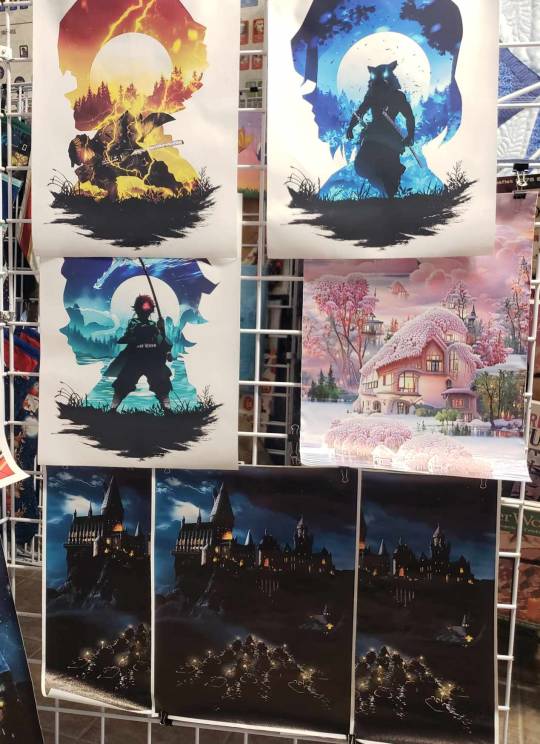
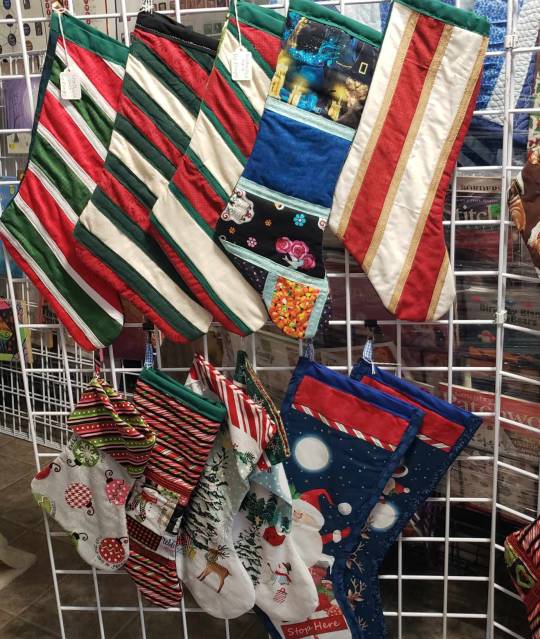
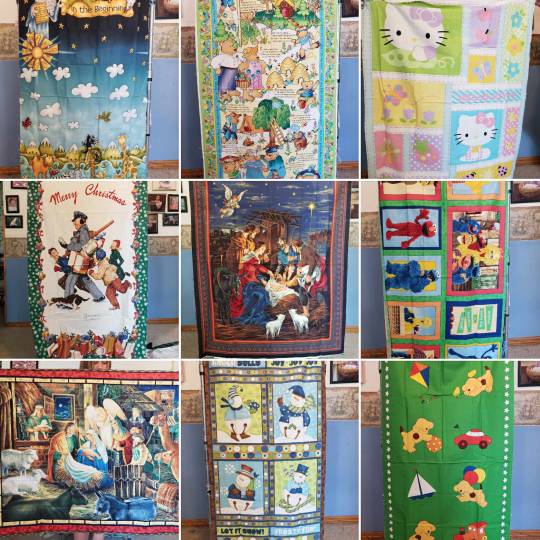
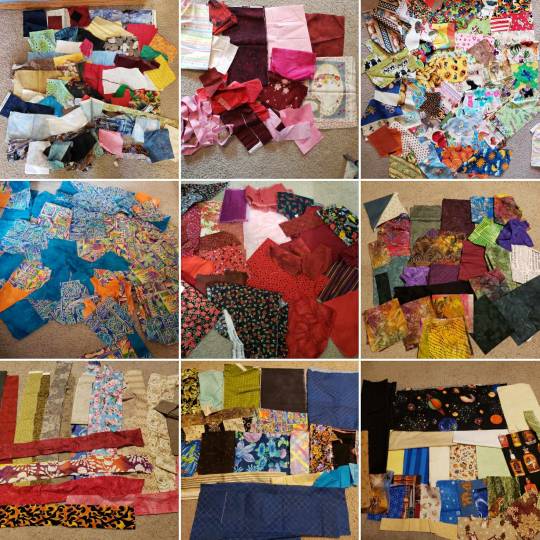
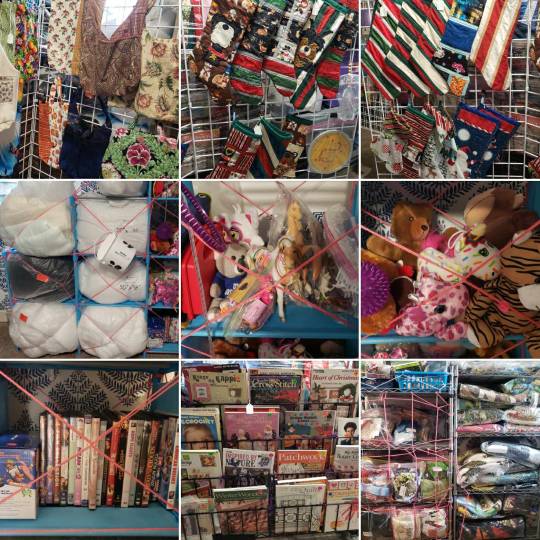
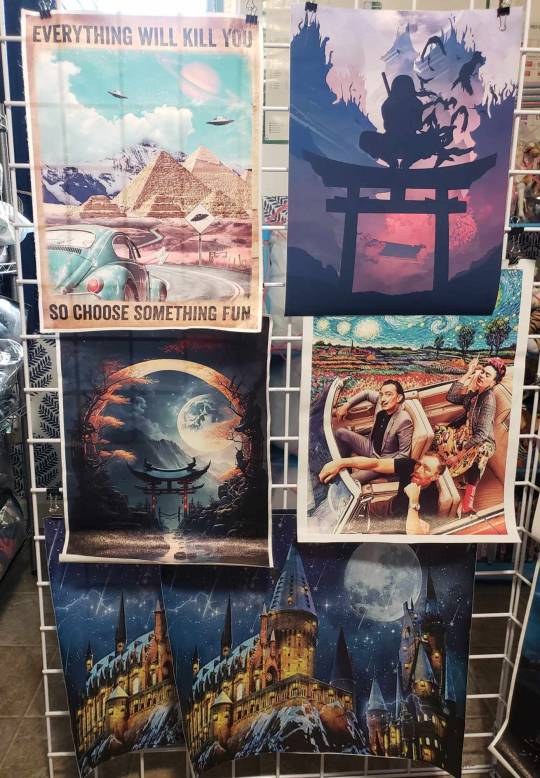
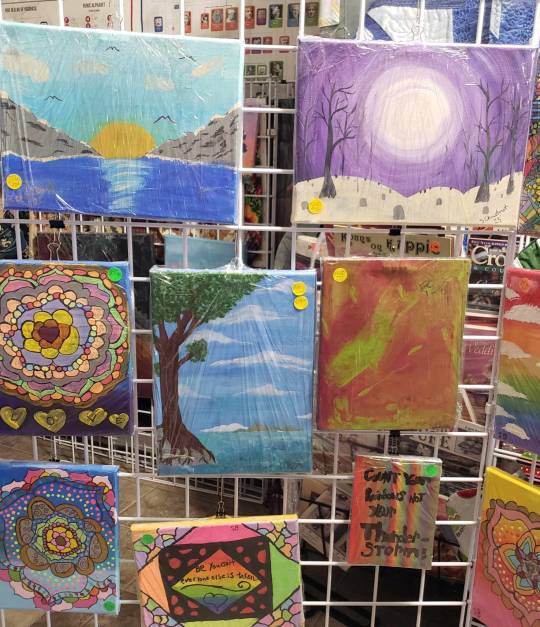
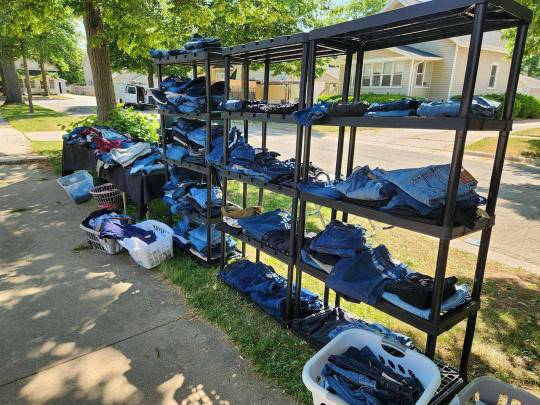
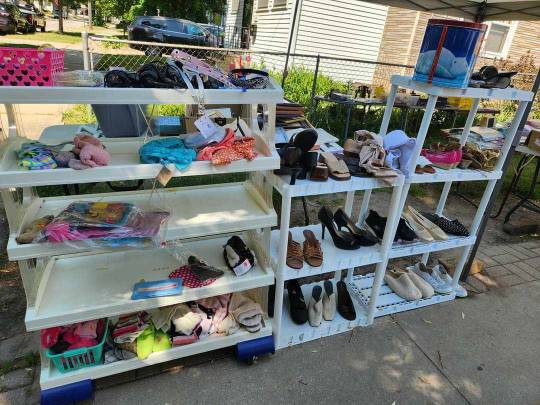

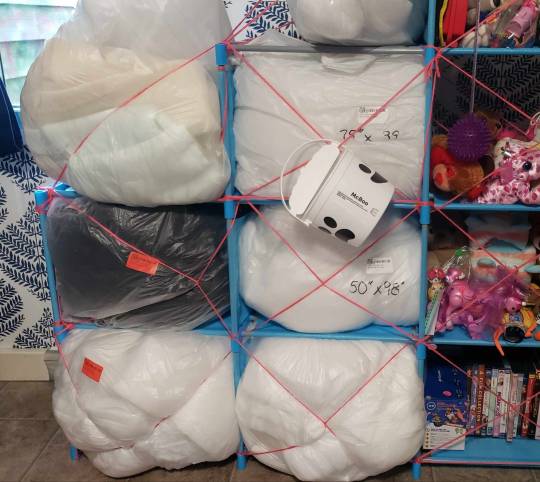
Huge Sale
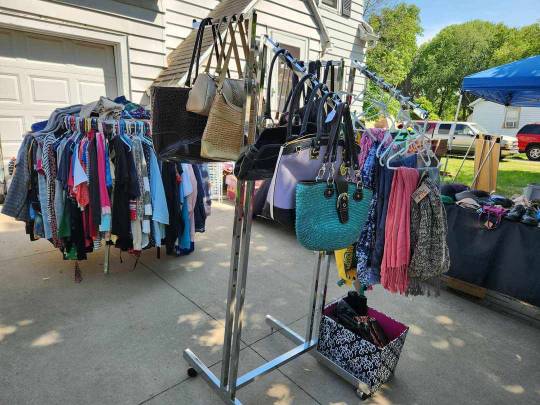
For Three Days, multiple local business and artists are coming together to offer this Rummage Sale and Craft Sale Event.
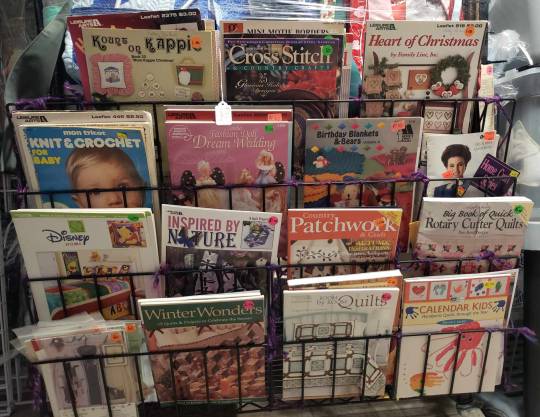
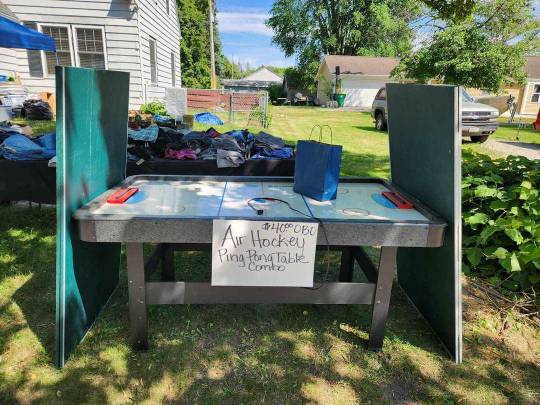
Rummage Sale items include gently used: Clothing for Men, Women, and Children. Shoes, Purses, Accessories, Toys, Stuffed Animals, Gym Equipment, Books, DVD's, Board Games, Barbies, Home Furnishings, Kitchen items and more.
The Rummage Sale Section is being hosted by two Groups.
Angels by Nature are using all proceeds from their rummage sale to fund their Adopt a Family Christmas Program.
Wonders By Women's rummage sale is being put on by members of WXW. The proceeds go directly to the children and women who contributed the items.
Food Items: Winterstar will be selling freeze dried candies, Wholesome foods will be selling all natural ingredient baked treats.
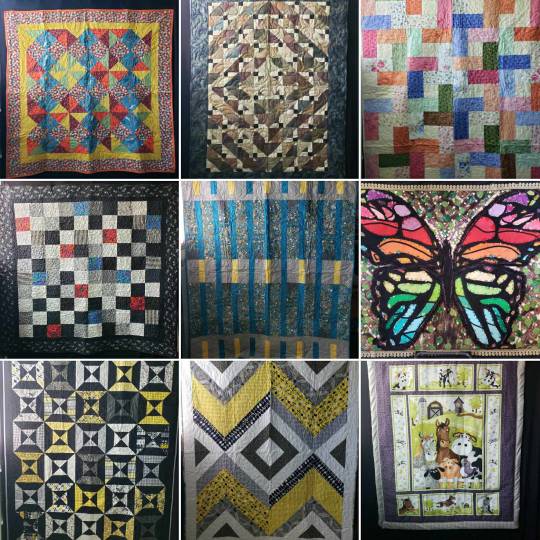
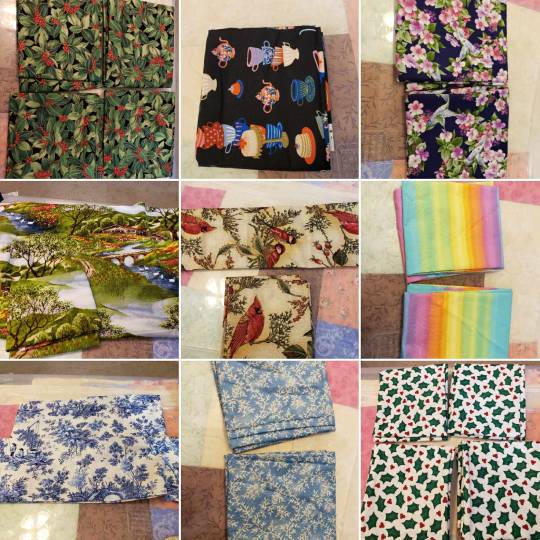
My Favorite Quilt Shop, from Green Bay, will be selling Heavily Discounted / Final Clearance Fabrics, Quilt Tops, Fabric Panels. Prices Start as low as $1.50
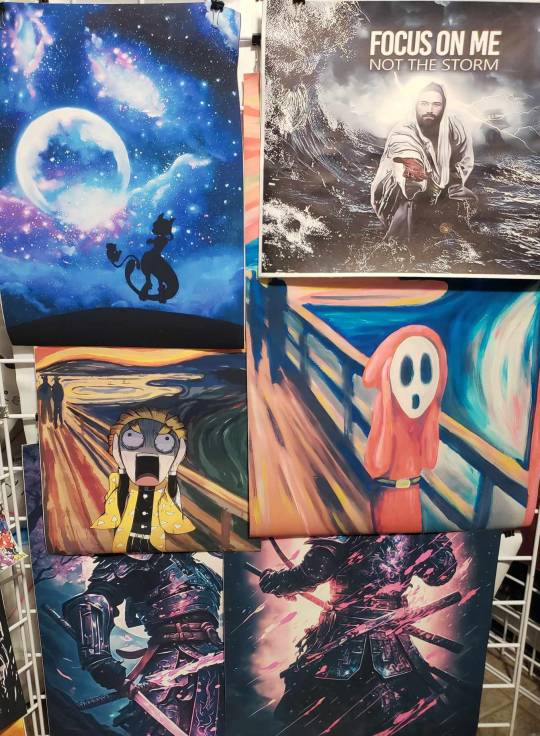
New Bay Art will be selling a multitude of different Resin Art items and decor.
Wonders By Women will be selling hand made Jewelry, Quilts, Stuffed Animals, Candles, Stockings, Quilts, Paintings, Aprons, Home decor', pop culture canvas posters, DIY Diamond Art Kits, Paint By Number Kits, Trading Cards, wind-chimes, sewing kits, and more!
If you are interested in learning more about local female photographers, who can help you out with your family portraits, chiropractic services, parenting groups / events, social events, or real-estate services, we will have information about WXW members who provide these services.
If you are looking for someone who can paint / decorate something for you, or make custom made blankets, candles, art work or other items, we will have information on WXW artists who can provide these services for you!
3 notes
·
View notes
Text
Do It Yourself!! - CGDCTT: Cute Girls Doing Cute Things Themselves
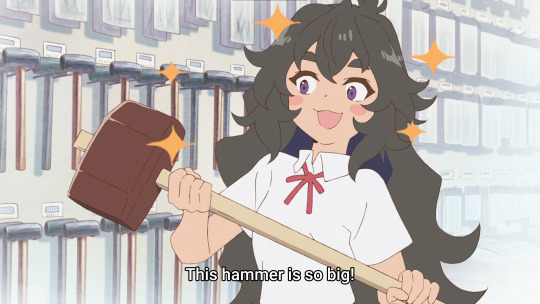
For anyone that isn't already watching this wonderful and warm slice of life series: what are you doing? Overloaded on crazy anime this season? Feeling like you've got a heavy and full schedule of series? Take a break, and watch Do It Yourself!! The perfect reset on the dense and packed fall season that follows a DIY club in their antics, and as I'll explain impassionedly with episode 6 as an example, gives a great perspective into DIY work and everything that makes it great.
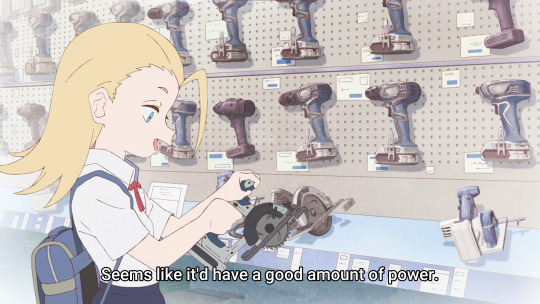
The first thing I really enjoyed was the girls getting all excited over the hardware store. Getting to peruse all the various options and available tools like a fun DIY version of a kid in a candy store. It's definitely something that I can say is relatable. Walking past aisles of new and shiny power tools on sale, thinking of the great deals and all the things you'd be able to get done with a proper hammer drill, how nice that solder kit looks for making changing out/upgrading your keyboard switches (yes, I don't use hot-swap switches currently, sue me) way easier. Anyways, I digress, it's cute, it's apt, and a great little segue to place them into DIY mode.

We swiftly move into Rei's room though, which aside from being cute and organized has loads of DIY projects, some of which even happened in the anime already!

Once again, going past the purpose of cuteness and fun, I really love how the DIY element is integrated into the daily lives of the characters. It was used to create a warm and fun environment for Jobko where she could be happy and comfy in her homestay with Purin, and here it really drives home the "nothing goes to waste" mentality that can accompany DIY in general. So many little pieces like a tablet stand, or a chair, or even a little decorative board, it's really fun to see just how many pieces of DIY stuff litters Rei's room and how much personality it gives it.
After the girls have their fun and get into a sidebar conversation about Shoujo manga though, we get into the real DIY of the episode with the girls making seashell beach necklaces, coffee drippers, and tablet stands!
I love the level of detail they go into with each of the crafts. Using the correct tools, having little tips and creative additions, they do such a wonderful job of making the project engaging to the viewer, but also providing insight and accuracy to it. The tips about layers for the resin art? Really solid, and the little trick with the hair dryer? Loved that they added it. To go a step further though, Rei talks about bubbles appearing in the resin during the process, but you can actually use it to your advantage! Of course, you want the lower layers to be without bubbles, so make sure you pop them as they appear or heat up the resin before it cures so that it can work the bubbles out of itself. Anyways, with the wave part of the beach scene in resin work like Rei's, you can use the bubbles from the white resin as extra details/foam in the waves and it can look really pretty.
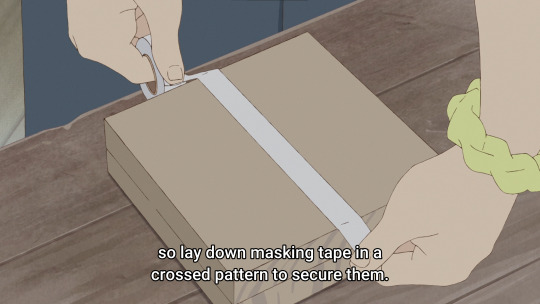
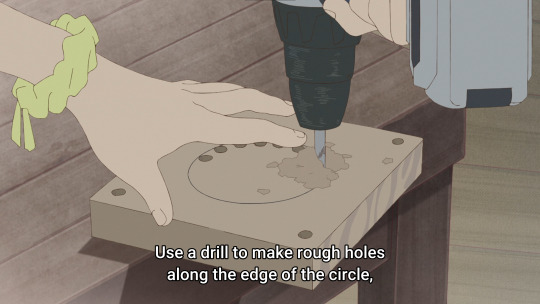
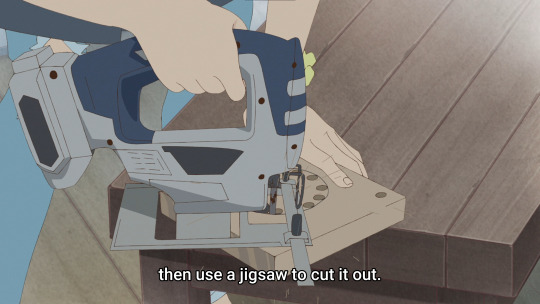
Moving on, we get to see Kokoro and Rei work away on some Coffee Drippers, and they do a solid job for the most part. They provide some solid tips for drilling symmetrical pieces of wood, and the tip about using tape to prevent burrs/rough entries on wood can be a good tip. My only gripe is that using tape to secure two pieces of wood for drilling through them is a bit flimsy compared to clamping, but at the same time I'm lazy and just use my one hand to keep stuff in place so I can't really talk😅.
They do a really solid job with the majority of the steps they walk you through, but have a few personal disagreements here and there. You don't really to drill holes all around the circle you're cutting out, just a single access hole will typically do for making a cut with a jigsaw.
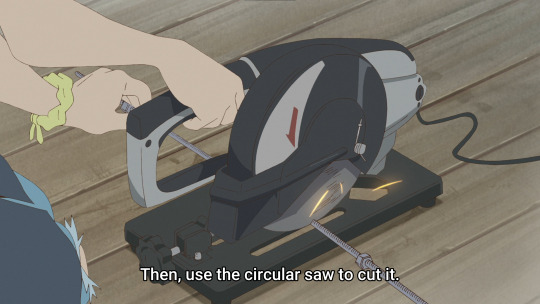
This piece is probably the biggest offender though, and twofold at that. The simple issue is the translation. In Japanese, they call the tool a "Setsudanki" , which directly translates to "Cutting Tool", but most handypeople out there know it as a Chop Saw, not a circular saw. Chop Saws are static saws that are brought up and down on the material in question to "chop" them, as the name implies. A simple error, but one that should be corrected because Circular Saws and Chop Saws are pretty different. Anyways, the more complicated issue is they don't mention any protection or precaution for cutting metal that will spark. It can get hot if you get any on your skin so it's best to be careful when cutting metal with power tools. Again, maybe the advice isn't the greatest coming from a person that'll run a concrete saw without earplugs and only wearing sunglasses, but I at least want to encourage safety in others.

The learning doesn't stop with Coffee Drippers though, as Jobko walks us through their approach to making a tablet stand. As a quick aside I really love Jobko's character and how well each episode makes use of her. The perfect bridge between technology and practicality, she always finds a way to integrate the two in an inoffensive and positive way, whether neither takes away from the involvement of the other. Also, I just love how detailed they get with the technical drawings she uses. Walking a perfect line of pretty and practical, they're really detailed and wonderfully standardized, basically exactly what you'd expect of a proper technical drawing.
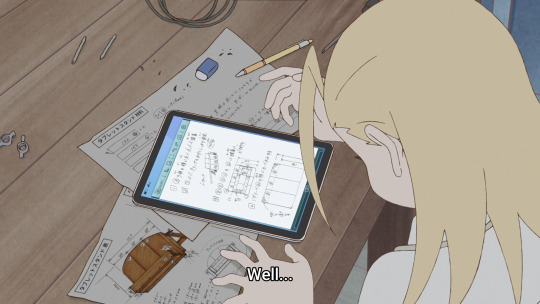
One little detail that they skip over though that's really useful is the gluing of some of the pieces. It's definitely not super structural given they don't clamp it or let it set, but it solves a really important problem when securing pieces together. She only uses a single screw on the piece in the image below, and that creates a problem on its own. It's a single point so the two pieces can rotate around it freely, which isn't exactly great for a product. Jobko solves this by gluing the pieces together as well as added security, good job Jobko👍!

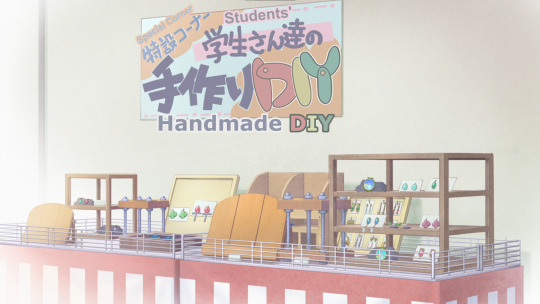
So, case study closed, not only are these cute girls doing cute things, they're doing it themselves, and doing it accurately! It's really great to see and only adds to the overall warmth and fun atmosphere that the show provides. They find a perfect way to inject the DIY and creativity in a way that fits the girls wonderfully, ending the episode with setting up a little space in Rei's family shop for the crafts they made, and it really sells the best parts of this story.
Do It Yourself!! really prides itself on the passion that it passes along for DIY, not just as an individual activity and a space away from the blistering and startling pace of growth in technology in daily life, but as a space to happily coexist in alongside your friends full of passion and creativity. Finding projects to do together, creating stuff by hand to gift to your friends, getting to spend that time together away from screens, just happiness that you can't find without an activity like DIY, and they do a wonderful job portraying that in all the episodes so far. It looks so fun and enjoyable, like something you want to pick up with your friends and try out. And I say do it.
16 notes
·
View notes
Note
Hey! For Trystan x Nora:
What foods will they not touch?
Do they wear jewelry?
Do they prefer luxury or practicality?
What are their guilty pleasures?
Thank you!
Thank you so much for sending me this, Elsa!! This was so so fun to answer <3 much love!
> send me some character asks
What foods will they not touch?
Nora is not too keen on anything that is boxed - all the "homemade DIY" kits, the frozen wontons. She had a traditional upbringing where her parents implored upon the satisfaction of a good, homecooked meal and sometimes, it's the process that teaches you dexterity and hand-eye coordination. Ever since then, she's sort of grown up to dislike anything that is boxed, pre-made or packaged and are those one-minute dinner things. She still splurges on instant pasta though. That you can never take away from her.
Trystan absolutely loathes New York bread - at least the ones in restaurants. From a culture that has perfected the art of breadmaking, he likes to think of himself as a purist-adjacent. In his eight years of being there, Trystan has probably consumed the bread a few number of times and has sincerely disliked all of that. He's one of those people who bakes them himself, distraught that there aren't a lot of variety nor decent ingredients. However, he is partial to the bagels. He tells everyone he hates them but loves them secretly.
Do they wear jewelry?
Nora doesn't wear a lot since they become a work hazard when she's on active duty. The most she wears is a locket that belonged to her Mom and a pair of earrings.
Trystan is the polar opposite. He enjoys collecting rings, because they make him look very Godfather-esque (even though he's never seen the Godfather) and wearing them too. He wears an earring as well - the slip-on ones that aren't much of a hassle. Cufflinks, not exactly jewelry, but something he appreciates. Bracelets. He's a kid in a candy store when he passes by all those pop-up jewelry shops. They needn't be all diamond-encrusted or anything. He appreciates virtually anything.
Do they prefer luxury or practicality?
Now, under normal circumstances, Nora would make an argument about how not everything is "black and white" but she could definitely use some luxury in her life. To her, luxury isn't anything fancy, rather the ability for her to sit at home and not have to constantly worry about a million different things. Have an opportunity to help her anxiety attacks without drowning them in caffeine and making it worse. It is time. She loves spending good time for herself or with her loved ones and that is luxury to her. She definitely works towards it, anyway. At the end of the day, the money and satisfaction she earns from clients, puts her to sleep.
It is still a work in progress for her, because she's not used to being so kind on herself. Usually a day-off comes with so many doubts and ends up turning into a mental breakdown day.
Trystan is practical under many circumstances. Though he might be the poster child for all the luxury in the world, he still likes to have a reasonable voice helping him out. Sometimes its him. Sometimes it's Nora telling him he doesn't need to wage a war on a local bakery for getting bread wrong. To him, practicality isn't pragmatism. It is about doing the right thing at the right time and having the right tools to deal with it. If one of them falters, he learns how to improvise on it and attempt to build a solution. Be it trying to escape a tall apartment building because they accidentally tailed after the wrong lead or trying to pick a dinner to make.
Trystan's constantly learning how to adapt. New York is definitely different from Drakkos, in the way how the cities and the cultures shape how people work. He's gotten very good at it too.
What are their guilty pleasures?
It's simple for Nora. A soda or ginger ale or a Bud Light, the Real Housewives playing on TV. Or listening to the sappiest, most romantic songs ever on the car radio. Sometimes she even puts in an audiobook, before Luke learned she'd listened to almost five hours of the Twilight books.
To Trystan, it's writing poetry. It's trash sometimes, but he loves it. He also enjoys reading recipe blogs because they come with pages and pages of backstory, which is delightful in its own way. Along with that, he secretly enjoys the tabloids. He hates them for what they've done to him and his family, but a nice story about how someone else is having a dumpster fire of a lifestory is somewhat cathartic and downright addicting.
___
Tysm for sending me the Ask!
4 notes
·
View notes
Text


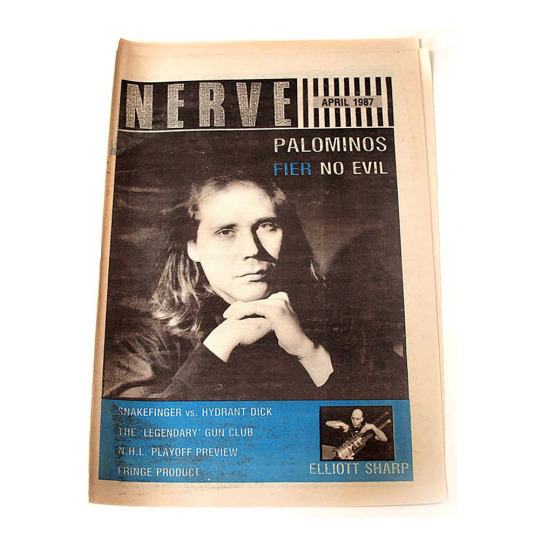


DRUMMERS: Anton Fier & Chris Cutler, 1987
I photographed two drummers in 1987 who were more than timekeepers. Anton Fier arrived in Toronto as a bandleader - the organizing force behind The Golden Palominos, an alt/indie/avant garde supergroup who he had transformed from a jazz outfit on their first album to an experimental pop band on their second, Visions of Excess. Guest vocalists on the record included John Lydon, Michael Stipe of R.E.M., Jack Bruce from Cream and Fier's discovery, singer and songwriter Syd Straw, alongside an all-star cast of musicians that included Richard Thompson, Jody Harris and Bill Laswell. His touring band included Matthew Sweet and P-Funk keyboardist Bernie Worrell. I had done a very prickly, unsuccessful interview with Fier over the phone a few months previous, but for some reason (I loved the record) decided to ask my editors at Nerve for a re-match, interviewing and photographing him at his hotel for what would be a cover story.
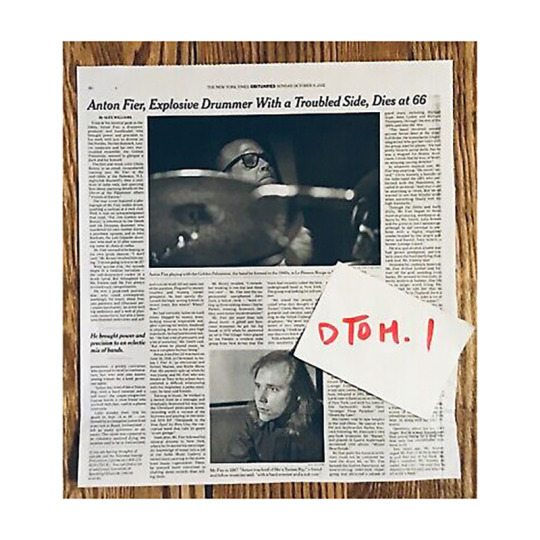
My second interview with drummer Anton Fier turned out much better than the first, and my photos were even better. I was still using my human lightstand and tripod method, holding my Mamiya C330 in one hand and my Vivitar flash in the other while trying to focus and compose, but the results were improving. Fier and the Golden Palominos would continue to release a string of fascinating records through the '80s and into the '90s - albums like Blast of Silence, A Dead Horse, Drunk With Passion, Dead Inside and Dreamspeed, most of which are extremely rare today. Fier's career had begun with immense promise, with stints in the Lounge Lizards and The Feelies before the Golden Palominos, and he would play on records by everyone from the Electric Eels, Joe Henry, Lloyd Cole and Matthew Sweet to Yoko Ono, Mick Jagger, Jeff Buckley and Herbie Hancock. But by the 2000s he was beset by money and health problems, and in September of 2022 he was dead of assisted suicide in Switzerland. One of my 1987 portraits of Fier ran with his New York Times obituary - something neither he nor I would have imagined back in that hotel room near Maple Leaf Gardens.
The other drummer of note I photographed in 1987 was Chris Cutler, born in 1947 in Washington DC to a British intelligence officer and his wife. His musical career began when he joined the Cambridge prog band Henry Cow, and after the band broke up in 1978 he founded Recommended Records, later adding a publishing arm, November Books. While performing with Art Bears, News from Babel and countless other avant-garde groups, he wrote File Under Popular, a collection of essays on music. This book, and his apparently endless musical energy, was what inspired me to photograph and - I presume - interview him when he came to town in 1987. He embodied the DIY spirit that I also saw in punk rock, and I was impressed when he showed up at Ildiko's, the grimy club above a pool hall where I'd seen countless hardcore shows, with his whole drum kit condensed into two cases that he hauled up the stairs. I photographed Cutler in the grafitti-filled dressing room at the club, holding my C330 in one hand and moving my flash around with the other, getting a few dramatic results. Chris Cutler continues to perform, record, write and even broadcast to this day, and Recommended is still putting out records.
#portrait#Anton Fier#portrait photography#black and white#film photography#musician#mamiya c330#early work#1987#Golden Palominos#drummers#Chris Cutler#some old pictures i took
2 notes
·
View notes
Text
Mike Savage on DIY Koi Pond Construction: Step-by-Step Guide for Beginners
Having a tranquil koi pond filled with vibrant fish adds a touch of magic to any garden. But for beginners, the idea of building one might seem daunting. Fear not! With careful planning and this handy guide, you can create your own koi haven, even with limited experience.
Before You Dig Your Koi Pond
Plan and permit: Sketch your desired pond size, shape, and depth. Consider local regulations and permits, as some areas require them for ponds exceeding a certain volume.
Choose a location: Opt for a sunny spot with at least 6 hours of sunlight for healthy plant growth. Avoid trees with aggressive roots and underground utilities.
Gather your tools: Shovel, wheelbarrow, liner, underlayment, pond skimmer, filter, pump, rocks, aquatic plants, etc. (specifics depend on your design).
Step-by-Step Koi Pond Construction
Excavation: Mark the pond outline and start digging. Remember to create shelves for plants at different depths. Aim for a minimum depth of 3 feet to accommodate koi overwintering.
Level and compact: Ensure the base is level and free of debris. Compact the soil firmly to prevent settling and liner damage.
Underlayment: Line the entire excavation with a protective underlayment fabric to prevent punctures from rocks or roots.
Liner installation: Spread the pond liner, ensuring it reaches all edges and shelves. Secure it with liner tape or rocks. Fill the pond partially with water to help smooth out wrinkles.
Edges and filtration: Create a natural-looking edge by burying excess liner and adding rocks. Install the skimmer, filter, and pump as per their instructions, ensuring proper circulation and filtration.
Water features: Add waterfalls, fountains, or bubblers for added aeration and visual appeal.
Planting: Choose aquatic plants suitable for your pond depth and sunlight levels. They provide fish hiding spots, improve water quality, and add oxygen.
Filling and testing: Slowly fill the pond with water and monitor water quality using a test kit. Adjust filtration or add water conditioners as needed.
Cycling: Let the pond filter cycle for several weeks before introducing fish. This allows beneficial bacteria to establish and maintain water quality. Koi Enthusiast Mike Savage From His New Cannan Backyard
Koi Pond Care
Research koi needs: Understand their water quality requirements, feeding and nutrition habits of the koi, and potential health issues.
Start small: Begin with a few young koi and gradually increase the number as your pond matures.
Maintain water quality: Regularly test and adjust water parameters like pH, ammonia, and nitrite. Perform partial water changes as needed. Also master the art of how to clean a koi pond.
Feed properly: Choose high-quality koi food and avoid overfeeding, which can harm water quality.
Enjoy your oasis! Sit back, relax, and watch your koi thrive in their new aquatic home.
Conclusion
This is a simplified guide. Adapt it to your specific pond design and consult professionals for complex setups.
Safety first! Wear gloves and proper footwear during construction. Be mindful of electrical hazards near water features.
Patience is key! Building and maintaining a healthy koi pond takes time and dedication.
With careful planning and this guide, you can create your own stunning DIY koi pond that becomes a cherished feature of your garden and a source of joy for years to come.
ABOUT MIKE SAVAGE OF NEW CANAAN, CT
Michael Savage from New Canaan is the Founder of 1-800 Accountant that helps businesses with their accounting services and needs through cutting-edge technology and customer support.
In his spare time, Savage enjoys collecting Michael Jordan sneakers, vintage Lego sets, and admiring muscle cars and unique pop art. He and his wife also spearhead the Savage-Rivera foundation to help impoverished families in Honduras.
0 notes
Text
Crafting Magic: A Liquid Shaker Card with Lovely LavenderL
LOVELY LAVENDER LIQUID SHAKER CARD
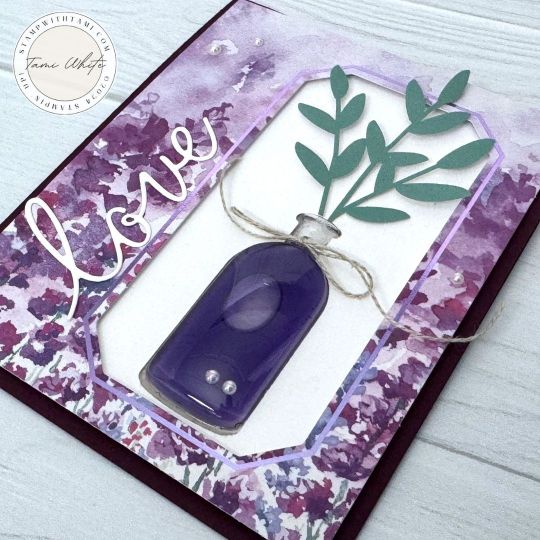
Hello fellow crafters! Today, I'm excited to share a glimpse into my latest card-making adventure – a mesmerizing liquid shaker card created using pieces from the Lovely Lavender Paper Pumpkin kit and the Vintage Bottle Punch and Domes. This DIY project is not only a creative delight but is also versatile, making it perfect for various occasions like Valentine's Day, anniversaries, birthdays, and more.
Liquid Magic: The star of this show is the Vintage Bottle Punch and Domes, elevating the visual appeal of our card. The window in the printed piece from the Lovely Lavender kit, adds a personalized touch, making each card a unique work of art.
Colorful Elegance: For the liquid inside our shaker card, I used Highland Heather ink pad refill mixed with water. This not only adds a pop of color but also creates a dynamic and visually captivating element to the card.
Versatile Occasions: One of the things I love about this liquid shaker card is its versatility. Whether you're celebrating a romantic Valentine's Day, a milestone anniversary, or a friend's birthday, this card is the perfect canvas to express your creativity.
Video Tutorial: Curious about how it all comes together? Check out the short video tutorial below for a visual guide on creating your own liquid shaker card. You'll quickly see that it's easier than you think!
Unboxing Joy: Dive into the contents of the January Lovely Lavender Paper Pumpkin kit with an unboxing video from Stampin' Up below.
More Inspiration: Throughout the week, I'll be sharing tutorials for alternate projects using the Lovely Lavender Paper Pumpkin kit. Stay tuned for fresh ideas and creative inspiration to keep the crafting momentum going.
The Art of Repurposing:One of the joys of crafting lies in the ability to repurpose materials creatively. If you've already enjoyed your Lovely Lavender Paper Pumpkin Kit, fear not! Refills are still available, allowing you to recreate this masterpiece and explore new, imaginative possibilities. Click for refills.
Don't Miss Out: If you're as excited about these crafting adventures as I am, make sure to subscribe before February 10th to secure your February kit. Join the Paper Pumpkin family and look forward to a monthly dose of crafting joy delivered right to your door. Click here to subscribe.
Crafting is not just a hobby; it's a journey of self-expression and joy. I hope this liquid shaker card brings as much delight to your creative endeavors as it did to mine. Keep the crafting magic alive, and happy creating!
CARD INSTRUCTIONSINSTRUCTIONS & CARD SUPPLIES
INSTRUCTIONS PDF ⬇
The instructions include measurements and step by step directions to create this card. There is also a clickable supply list.
DOWNLOAD PDF
SUPPLIES I USED TO CREATE THIS CARD ⬇
Click the thumbnail links to view and purchase in my Online Store.
VIDEO SHORT - HOW TO MAKE A LIQUID SHAKER CARD
I created this short video I created for another card to share how to create the Liquid Shaker technique with the Vintage Bottle punch and domes. You can get full details on this card here.
WHAT ARE PAPER PUMPKIN KITS?
Paper Pumpkin Subscription: Monthly Creative Surprises
For those craving a regular injection of creative inspiration, the Paper Pumpkin Subscription is a monthly adventure that arrives at your doorstep.
SUBSCRIBE
Key features include:
- Monthly Mail Delight: Subscribers receive a specially curated kit by mail every month. Each package includes designed projects, precut pieces, a stamp set, and ink. It’s like receiving a surprise creative adventure in your mailbox each month.
- Exclusive Subscriber Benefits: Subscribers to Paper Pumpkin enjoy special perks, including access to exclusive products and offers. It’s a fantastic way to stay connected with the crafting community and unlock additional creative opportunities.
- Endless Possibilities: Where will Paper Pumpkin take you this month? With a subscription, you’ll discover new techniques, themes, and crafting styles. It’s a journey of endless possibilities that keeps your creativity flowing.
- Acrylic Block: Your first Paper Pumpkin kit will arrive with a reusable acrylic block for your stamps.
- Refills: Depending on availability refills for each month’s kit are often available in my online store while they last.
- Control: You have full control over your Paper Pumpkin subscriptions and can take a break / pause, cancel and rejoin at anytime.
- Alternate Ideas: Go outside the box each month with me as I share alternate ideas for each Paper Pumpkin kit absolutely free on my blog. See my tutorial gallery here.
- PPX Bonus Videos: When you subscribe to Paper Pumpkin kits through me, you’ll receive 6 additional videos for alternate projects to the kit. These PPX videos are exclusive and not available anywhere else.
Paper Pumpkin kits have a deadline to subscribe each month by the 10th of the month in order to get that month’s kit. That month’s kit isn’t available after the deadline but depending on availability refills will be available in my online store.
LEARN MORE ABOUT PAPER PUMPKIN KITS
SUBSCRIBE
JANUARY PAPER PUMPKIN UNBOXING VIDEOLOVELY LAVENDER KIT
Make love-themed cards for special occasions, Valentine’s Day, anniversaries, and more with the Lovely Lavender kit. We just love how the tags punch out from the card front for even more crafting possibilities. Plus, this kit perfectly coordinates with the Perennial Lavender Suite Collection.
SUBSCRIBE TO PAPER PUMPKIN KITS
MONTHLY STAMP SET CASE INSERTS
LEARN MORE ABOUT PAPER PUMPKIN
STAMPIN' UP! CATALOGS
CURRENT SPECIALS
PHOTOS
These are projects created with the January 2024 Lovely Lavender Paper Pumpkin Kit. The kit made 3 of each of the projects.
These are my alternate projects for the Lovely Lavender Paper Pumpkin kit. Stay tuned for more tutorials.
This beautiful kit and refills make stunning projects both per the instructions and repurposed for alterante cards.
Liquid shaker card created using pieces from the Lovely Lavender Paper Pumpkin kit and the Vintage Bottle Punch and Domes.
The star of this show is the Vintage Bottle Punch and Domes, elevating the visual appeal of our card. The window, a printed piece from the Lovely Lavender kit, adds a personalized touch, making each card a unique work of art.
I added some of the die cut foliage from the kit.
The word "love" is die cut from the Love of Spring Die set.
I added Iridescent Pearls for some bling.
The inside of the card.
The Lovely Lavender Paper Pumpkin Kit coordinates with the Perennial Lavender Suite in the Mini Catalog.
One of the joys of crafting lies in the ability to repurpose materials creatively. If you've already enjoyed your Lovely Lavender Paper Pumpkin Kit, fear not! Refills are still available, allowing you to recreate this masterpiece and explore new, imaginative possibilities. CLICK HERE
Want to save these ideas for later? Pin them to your favorite Pinterest board.
Have you tried these designs? I love to see your creations! Be sure to share them on #shareyourcrafts post every Saturday on my Facebook Page
Read the full article
0 notes
Text
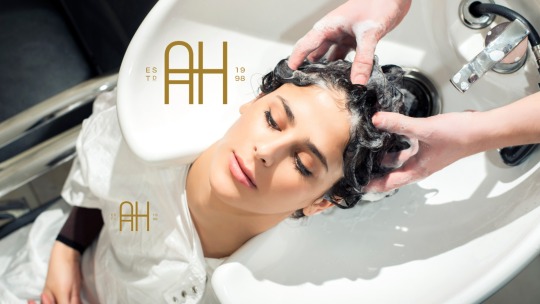
Hair Colorists NYC: Transforming Your Look with Style
Are you in search of a fresh, exciting look with a pop of color in your life? Look right here at the dynamic streets of New York City. In the city that never rests, you’ll discover an array of highly skilled hair colorists that NYC boasts. Whether you’re a resident or simply visiting, discovering the ideal hair salon in NYC can be a transformative experience. In this article, we’ll navigate you through the realm of hair colorists in the Big Apple, ensuring you’re fully equipped to make a striking fashion statement
Introduction to NYC Hair Colorists
New York City is a hub for fashion, art, and self-expression, and your hair is no exception. NYC hair colorists are artists in their own right, transforming your hair into a canvas for their creativity. Whether you’re into vibrant neon colors, subtle highlights, or classic shades, you’ll find a hair colorist who can turn your vision into reality.
2. Choosing the Right Hair Colorist
Selecting the right hair colorist can be a daunting task with so many options in NYC. Look for professionals with a stellar reputation, a portfolio that aligns with your style, and excellent client reviews. Don’t hesitate to schedule consultations to discuss your ideas and ensure you’re on the same page.
3. The Art of Hair Coloring
Hair coloring is a blend of science and art. Skilled NYC hair colorists understand the intricacies of color theory, ensuring your chosen shade complements your skin tone and personal style. They use top-notch products to achieve stunning, long-lasting results.
4. Trending Hair Colors in NYC
New York City is known for setting trends, and hair color is no exception. Keep an eye out for the latest color trends, from the ever-popular balayage to unconventional shades like pastel pink and bold blues. Your NYC hair colorist can help you stay ahead of the fashion curve.
5. Maintenance and Aftercare
Maintaining your hair color is essential for a fresh and vibrant look. NYC hair colorists provide valuable tips on aftercare, including the right shampoos, conditioners, and products to preserve your color’s brilliance.
6. Hair Colorist vs. DIY
While DIY hair coloring kits are readily available, nothing beats the expertise of a professional NYC hair colorist. They ensure even application, minimize damage, and deliver consistent, beautiful results.
7. Finding the Best Hair Salon in NYC
Your journey to the perfect hair color starts with choosing the right salon. Explore different options, keeping in mind factors like location, ambiance, and the expertise of the staff. Remember, a good salon experience can elevate your overall satisfaction.
8. The Cost of Beautiful Hair
Budget-conscious individuals might wonder about the cost of professional hair coloring in NYC. Prices can vary, but consider it an investment in your self-confidence and style. Discuss pricing with your chosen hair colorist to find a solution that fits your budget.
9. Celebrities and Their NYC Hair Colorists
Ever wondered how your favorite celebrities maintain their flawless hair colors? Many of them rely on NYC hair colorists who are skilled in creating iconic looks. From Jennifer Aniston’s golden blonde to Zendaya’s ever-changing hues, NYC hair colorists are behind these transformations.
10. The Power of Confidence: How Hair Color Impacts Self-esteem
Your hair color can have a profound impact on your self-esteem and how you perceive yourself. NYC hair colorists not only change your appearance but also boost your confidence. When you feel great about your hair, you radiate positivity.
Now that we’ve explored the fascinating world of NYC hair colorists, let’s address some common questions you might have:
Frequently Asked Questions (FAQs)
What is the difference between a hair colorist and a regular hairstylist?
A hair colorist specializes in coloring hair, focusing on techniques like highlights, lowlights, and full-color changes. Regular hairstylists provide a range of services, including haircuts and styling.
2. How long does a typical hair coloring session with an NYC hair colorist take?
The duration of a hair coloring session can vary depending on the complexity of the desired look. On average, it can take anywhere from 2 to 4 hours.
3. Is it necessary to book an appointment with an NYC hair colorist, or can I walk in?
While some salons may accept walk-ins, it’s recommended to book an appointment in advance to ensure you receive personalized attention and avoid long wait times.
4. What can I do to make my hair color last longer?
To maintain your hair color, use color-safe shampoos and conditioners, limit exposure to direct sunlight, and avoid excessive heat styling. Regular touch-up appointments with your NYC hair colorist are also essential.
5. Can I change my hair color dramatically in one session with an NYC hair colorist?
Yes, you can achieve a significant change in one session, but it depends on your hair’s current condition and your desired outcome. Some transformations may require multiple sessions for the best results.
NYC hair colorists are the artists who can transform your hair into a work of art, reflecting your personality and style. Whether you’re looking for a subtle change or a bold statement, these professionals have the expertise to make it happen. So don’t hesitate to explore the vibrant world of NYC hair colorists and embark on a journey of self-expression and confidence.
#nyc hair colorist#hair colorist in NYC#best hair colorists in nyc#hair colorists nyc#best blonde colorist nyc#Blonde specialist NYC#best balayage nyc
0 notes
Text
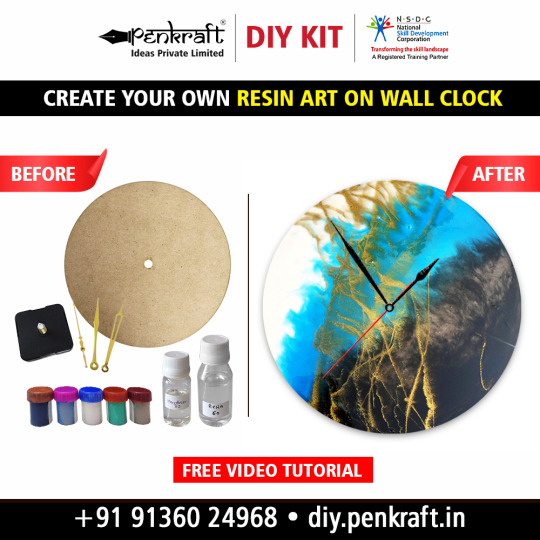
Resin Art On Round Clock DIY Kit By Penkraft
• 1 MDF Round Clock (9"dia)
• 1 Clock Movements and 1 Clock Machine
• Color Pigments(set of 5 color)
• Resin 60gm and Hardner 30gm (1 Bottle of each.)
• Free Video Tutorial
#Penkraft DIY Kits#Decoupage DIY Kits#Image Transfer DIY Kits#Knife Painting DIY Kits#Resin Art DIY Kits#Fluid Art DIY Kits#Alcohol Ink DIY Kits#Pop Art DIY Kits#One Stroke Painting DIY Kits
0 notes
Text

• 3 Square Coasters (4"X4")
• Acrylic Colors-Set of 6
• Brush No. 000 and 3 (One each)
• 2 Units of Air Dry Clay
• 1 Pkt of Mirrors (60Pcs)
• 1 Unit of Glue
• Free Video Tutorial
#Lippan Art DIY Kits#Decoupage DIY Kits#Image Transfer DIY Kits#Kalamkari DIY Kits#Kalighat DIY Kits#Knife Painting DIY Kits#Pop Art DIY Kits#Lippan art#Lippan art work
0 notes
Text
Car Enthusiasts' Vital Guide to DIY Mustang Maintenance Wizardry
Are you a car enthusiast with a burning passion for Mustangs? If the roar of a powerful engine and the sleek lines of a classic Mustang make your heart race, then you're in for a treat. In this guide, we're diving into the realm of DIY Mustang maintenance, revealing essential tips and tricks to keep your beloved ride purring like a contented lion. So, roll up your sleeves and let's embark on a journey of automotive wizardry!
1. The Foundation: Routine Maintenance Magic
Before we delve into the nitty-gritty, remember that consistent care is the cornerstone of keeping your shelby gt350 widebody in top shape. Regular oil changes, tire rotations, and fluid checks might sound mundane, but they are the secret ingredients to a long-lasting and high-performing ride. Treat your Mustang with love, and it will reciprocate.
2. Tools of the Trade: Building Your DIY Arsenal
Every wizard needs their wand, and every shelby gt350 body kit DIY car enthusiast needs their toolkit. Invest in high-quality tools like wrenches, socket sets, and jacks. These will be your companions as you venture into the world of Mustang maintenance. Don't forget safety gear like gloves and goggles—after all, even wizards need protection!
3. Taming the Mechanical Beasts: Under-the-Hood Mastery
Pop open that hood and dive into the heart of your Mustang. From changing the air filter to inspecting the spark plugs, this is where the real magic happens. Remember to consult your Mustang's manual for specifications and guidelines. With a little patience and a touch of skill, you'll have the engine running smoother than a perfectly brewed potion.
4. Bodywork Elegance: Polishing Your Mustang's Charm
Maintaining a Mustang's allure goes beyond what's under the hood. Regular cleaning, waxing, and detailing will preserve that head-turning exterior. Delve into the art of paint care, and your Mustang's color will pop like a spellbinding enchantment.
5. Suspension Sorcery: Achieving the Perfect Ride
A Mustang's suspension is like its magical carpet ride. Learn to assess and replace worn-out components for a smoother, safer journey. Whether you're cruising down the highway or tackling tight corners, your DIY suspension skills will ensure a ride worthy of a car wizard.
6. Beyond the Basics: Customization Charms
What sets a Mustang enthusiast apart is the drive to personalize their ride. Whether it's upgrading the exhaust system for a fierce growl or installing a cold air intake for that extra boost, customization is where you can truly make your Mustang your own. Just like a wizard tailors their spells, you can tailor your Mustang to match your personality and style.
7. Troubleshooting Enchantments: Decoding Warning Signs
Even the best wizards face challenges, and Mustang maintenance is no different. Learn to decipher warning lights and strange noises. Is your Mustang murmuring a mysterious incantation? Dive into diagnostics, identify the issue, and cast a repair spell before it becomes a bigger problem.
In conclusion, being a Mustang enthusiast means more than just owning a car – it's a lifestyle. With this DIY maintenance guide in your magical repertoire, you'll be prepared to tackle everything from routine care to advanced customizations. Remember, a true car wizard embraces the journey, revels in the learning process, and never stops fine-tuning their craft. So, ignite your passion, grab your toolkit, and let the Mustang magic unfold on the open road!
0 notes
Text
youtube
Penkraft DIY kits are available for Clay Art, Cement Art, Clay Art, Pen Mandala, Cheriyal Painting, Pichwai Painting, Dot Mandala, Warli Painting, Madhubani Painting, Gond Art, Lippan Art, Kalamkari Painting, Kalighat Art, Pattachitra Art, Kerala Mural Art, Tanjore Painting, Pop Art, Resin Art, Fluid Art, Decoupage Art, Alcohol Ink Art, Knife Painting, Image Transfer, One Stroke Painting, Scandinavian Art, Water Colors, Resin Art Advanced, Coffee Painting, Pencil Shading, Cut Nib Calligraphy, Brush Pen Calligraphy, Devanagari Calligraphy, Copperplate Calligraphy, on a variety of surfaces, along with their video tutorials!
#PenkraftDIYKits#DIY#artist#artistic#artistoninstagram#Creativity#artsy#artwork#creative#artoftheday#hobby#diycrafts#diyinspiration#love#art#beautiful#instalike#instadaily#unleashyourinnerartist#homedecor#decor#indianart#india#lippanart#lippan#lippanartdesign#lippanartist#Youtube
0 notes
Text
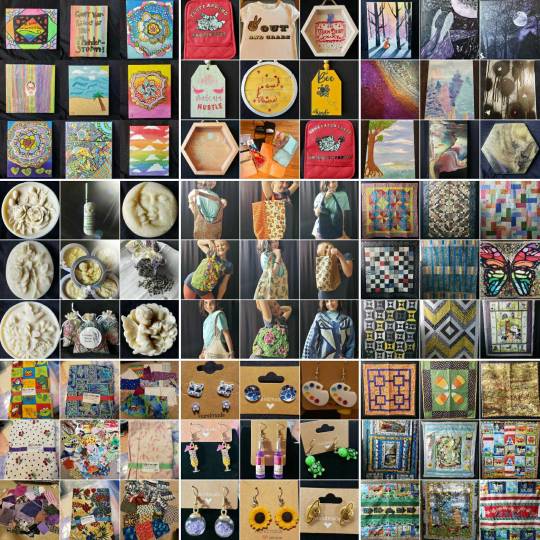
🌟 Welcome to our Nerd-tastic Craft Emporium! 🌟
🔮 Are you ready to embark on a whimsical journey through your favorite fictional realms? Look no further, because we've got a treasure trove of handcrafted wonders inspired by all things nerdy and fantastical! From spellbinding potions to fantastical jewelry, we've poured our hearts and souls into every piece.
🎲 Get ready to level up your crafting game with our unique range of nerdy DIY kits! Whether you're a seasoned crafter or just starting your creative adventure, our kits come complete with all the materials and instructions you need to create your very own geeky masterpiece. No magic spells required! ✨
🔍 Seeking a one-of-a-kind, bespoke creation? Our custom craft service is at your beck and call! Share your fandom obsessions, and we'll work our crafty magic to bring your vision to life. Let's make your dreams a tangible reality!
💌 More than just a business, we're building a close-knit community of nerdy crafters. Let's geek out together, swap crafting tips, and gush over the latest pop culture releases! 🤩 Join us on this adventure, and you'll find kindred spirits who share your love for all things nerdy.
💖 Your support means the world to us! By choosing our crafts, you're not only acquiring a unique piece of art but also supporting a small business fueled by passion and love for all things nerdy.
🚀 So, grab your magical wands, don your superhero capes, and hop on this intergalactic craft journey with us! Let's celebrate our fandoms, ignite our imaginations, and infuse every creation with a sprinkle of nerdy enchantment!
🌈 Spread the word, share the love, and let's build a crafting haven where creativity and fandoms collide! Thank you for being a part of our crafty family! 🌟
1 note
·
View note
Text
#Unleash the artist in you - Create your own masterpiece using #Penkraft Kerala Mural Art on Canvas DIY Kit This #Penkraft's Kerala Mural Art on Canvas DIY Kit provides you with all the necessary materials to undertake this activity- • 1 Canvas Board (8"X8") • Acrylic Colors Set of 6 • Brush No. 000 and 3 (One each) • Stencil on tracing paper • Free Video Tutorial The price of the DIY Kit is ₹599 /- DM us to buy or You can buy this Kit directly from our website. The link is in the bio Penkraft DIY kits are available for Clay Art, Cement Art, Pen Mandala, Cheriyal Painting, Pichwai Painting, Dot Mandala, Warli Painting, Madhubani Painting, Gond Art, Lippan Art, Kalamkari Painting, Kalighat Art, Pattachitra Art, Kerala Mural Art, Tanjore Painting, Pop Art, Resin Art, Fluid Art, Decoupage Art, Alcohol Ink Art, Knife Painting, Image Transfer, One Stroke Painting, Scandinavian Art, Water Colors, Resin Art Advanced, Coffee Painting, Pencil Shading, Cut Nib Calligraphy, Brush Pen Calligraphy, Devanagari Calligraphy, Copperplate Calligraphy, on a variety of surfaces, along with their video tutorials! For any queries/assistance, please contact us at 9136024968
0 notes
Text
Have you joined the DIY Art Revolution, yet? Be a DIY-er with Penkraft & see your hidden creativity blossom.
DIY Art Kit are buzzwords in the creative community but how do you go about crafting a new art piece for home or gift? Have you ever hunted the art objects, colors, glue, sparkles, etc. all around the marketplace, and ended up purchasing large volumes of expensive materials going to waste? We at Penkraft have already-packed, budget-friendly, creative DIY Art Kits with various Art forms ready for you.
For instance, you purchase DIY Art Kit and start decorating the item! Just assume you have a simple frame to be transformed into a trendy art piece that will stand apart from the rest. Try decorating your frame with different traditional, folk artwork or trendy abstract patterns of art, like Madhubani painting, Mandala art, Decoupage art. If you are confused about how to start watching video tutorials on Penkraft's YouTube channel for ideas and tips on decorating the frame. These videos help non-artists and beginners to learn and flourish their art skills. All you need to do is initiate your first step towards the creative world by purchasing the already-packaged DIY Art Kit and start exploring the creative world with different art forms.
The best thing about these DIY Art Kit is that you can gift them to your children, family, and friends who are art-lovers or gift them your handmade art piece on special occasions. Gifting your children with DIY Kits will help them have thoughtful and creative time learning and crafting new artform, during their vacations. For eager crafters, DIY Art Kits are no longer a hobby, but a moment. So, be a part of this moment and strike the creative fire in you. Decorate your room with a unique collection of traditional or trendy artwork all hand-painted by you.
Penkraft's DIY Art Kit has unique combinations of articles for each Artform set. Each kit has its own unique material in self-sufficient quantity, having no need to wander or hunt around the marketplace to purchase expensive objects, colors, brushes, and glue in large quantity. The price of the kit is quite affordable for a particular art.
Penkraft's DIY Kits are cost-effective and supplied worldwide. You simply have to log in to the Penkraft website order the kit of your choice and watch the available video tutorial for guidance on the art technique.
Penkraft is launching its new range of DIY Art Kits, take a step forward to be a DIY-er yourself and join the DIY Art Revolution. Do visit our website to purchase the DIY Art Kit of your choice now.
Penkraft conducts classes, course, online courses, live courses, workshops, teachers' training & online teachers' training in Handwriting Improvement, Calligraphy, Abacus Maths, Vedic Maths, Phonics and various Craft & Artforms - Madhubani, Mandala, Warli, Gond, Lippan Art, Kalighat, Kalamkari, Pichwai, Cheriyal, Kerala Mural, Pattachitra, Tanjore Painting, One Stroke Painting, Decoupage, Image Transfer, Resin Art, Fluid Art, Alcohol Ink Art, Pop Art, Knife Painting, Scandinavian Art, Water Colors, Coffee Painting, Pencil Shading, Resin Art Advanced etc. at pan-India locations. With our mission to inspire, educate, empower & uplift people through our endeavours, we have trained & operationally supported (and continue to support) 1500+ home-makers to become Penkraft Certified Teachers? in various disciplines.
0 notes
Last Seen Blogs

chrismartn
every teardrop is a waterfall.

raptor33sworld
Untitled

karenfordonte
Caring For Donte

cruissir-blog
Star Crusher

witchcraftqueen
Antisocial Socialite