#Unlock pattern without Gmail account
Explore tagged Tumblr posts
Visit Tumblr Blog
Explore Tumblr blogs with no restrictions, modern design and the best experience.
Last Seen Tumblr Blogs


Fun Fact
In Q3 of 2020, 31% of US users access the Tumblr app daily.
Text
Cyber Security Awareness Tips
Cybersecurity (and cybersecurity awareness) are critical to your survival in an industry dominated by growing virtual crime. Certainly, most people know about costly identity theft and reputation-destroying network hacks, which seem to be on the news almost every day. Organizations implement firewalls, comprehensive cybersecurity defense systems, and sophisticated IT protocols to keep themselves safe from online threats.
Why is cybersecurity awareness important?
Did you know that 95% of cybersecurity breaches are due to human error? On top of that, only 38% of global organizations state that they’re prepared to handle a sophisticated cyber-attack.
And worse, as much as 54% of companies say they have experienced one or more attacks in the last 12 months—this number rises every month.
Social engineering is a current favorite tactic among cybercriminals—the psychological manipulation of victims to convince them to willingly or unwittingly surrender private data that is then subverted for nefarious purposes. Another prominent technique is phishing, where phony emails or links are spread to employees who then have their login credentials mined. In fact, 95% of cyber attacks are a result of phishing scams so phishing awareness training is essential.
Alongside these two, malware is also a constant threat, with people downloading apps or software that is designed to compromise their devices or provide network access to hackers...read more at - Fraudwatchinternational.
Why cybersecurity awareness training is important
Working remotely/ telecommuting
Remote working is now a reality, thanks to cloud technology. The so-called telecommuting work-style has spread to the extent that organizations have separate policies for work-from-home employees with restricted and redefined ways to analyze productivity, profitability, and the title of “best” workers.
30 million people of the U.S. workforce work from home at least once a week.
It is estimated that 50% of the total workforce will work remotely by 2020.
The pattern of working remotely, using cloud technology, has increased the level of comfort but has equally brought organizations greater risk of uncertain intrusions. Employees are responsible for using any personal endpoint devices and should restrict the usage of official equipment only for corporate purposes. Having a cybersecurity awareness training educates remote employees on how to handle official devices when away from the official infrastructure.
The Internet of Things (IoT)
The fancy world of the internet has captured us to the extent where we can no longer imagine life without it. Employees connect personal devices to company networks or use them for official work. These devices are interconnected with other devices and networks, which only compound vulnerabilities.
The most popular MIRAI botnet attack, which was the largest DDoS attack ever, was launched on a service provider using an IoT botnet.
Increased government regulations
CAT is no more a choice, with many government regulations stressing on safe computer and network usage policies in the last two decades, an employee awareness program has become crucial. Government agencies and legislators have stressed on the importance of public and private enterprises protecting their IT assets and digital information. Government regulations have now defined how organizations behave with respect to safety standards, making it mandatory for employee training as well...find out more at - Eccouncil.org.

Don’t abandon your devices unlocked/unattended
Be it a computer or a mobile phone, the electronic devices that we own contain personal data on them that can destroy us if it got in the wrong hands. Make it a practice to never leave your phones unlocked and/or unattended at any place.
Be extra careful while clicking links and attachments in emails
The threats posed by phishing are real and millions of people find that out the hard way every year. Always be super-wary before clicking on attachments and links because, even though the sending party might look legitimate, there is a possibility that they might not be...get more to know at - Infosecinstitute.com.
Cyber Security Awareness Tips
Phishing Emails
Never respond to requests for personal information via email. Businesses will never ask for personal information in an email.
Do not enter personal information in a pop-up screen.
Do not click on any links listed in an e-mail message. Copy and paste the URL into your browser.
Marking phishy emails as spam in gmail will make it more likely gmail will identify future messages as spam for you and others with NMU accounts.
Use anti-virus and anti-spyware software and update them regularly.

Dispose of Information Properly
Destroy/shred hard copy confidential documents that contain personal information such as social security numbers, credit card numbers, bank account numbers, and health records.
Ensure you are using the right tools when destroying and disposing of personal information or media storage from your computer and mobile devices.
Ethics - Be a good cyber citizen
Do not engage in inappropriate conduct, such as cyberbullying, cyberstalking or rude and offensive behavior.
Do not do something in cyberspace that you would consider wrong or illegal in everyday life.
Do not impersonate someone else. It is wrong to create sites, pages, or posts that seem to come from someone else.
Adhere to copyright restrictions when downloading material from the Internet.
Do not use someone else's password or other identifying information.
Read more at - https://it.nmu.edu/.
The correct balance between awareness and vigilance is the key to a safe and yielding holiday shopping season, both for the retailers and consumers. However, the perfect strategy would be to keep the cyber security guard up, right across the year. This round-the-year approach helps imbibe the best online shopping practices; thereby safeguarding the finances and mitigating unfortunate attacks.For ore cyber security latest news, tips and advice you could check phishing protection.
1 note
·
View note
Text
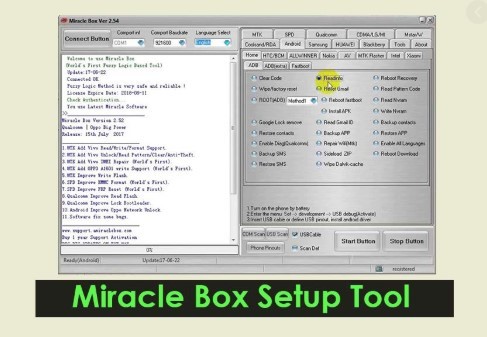
How to Download Miracle Box Setup Tool without Box
Miracle box set up tool is developed by the miracle team. Though this tool would primarily cover the Mediatek and Qualcommice, it now covers Mediatek, Qualcomm, Spreadtrum, and Android devices also. Though it is easy to download and use this tool, it can do a lot of complex tasks like formating, unlocking user locks, and bypassing the FRP Gmail account.

Miracle Box Setup Tool
Miracle Box Set-Up tool is an online tool that is used to restore IMEI, format unlocking, root device, and other tasks for the Mediateck and Qualcomm supported device users.
The Special Features of the Miracle Box Setup tool
The Qualcomm and Mediatek supported device users can do a lot of things with this online kit. You can do the following things by this tool.
Format the device.
Unlocking any kind of user locks such as pattern, figure, and PIN.
Restoring the device.
You can repair your network and modem.
It can remove the root access and you can set the rooting again.
You can bypass the FRP Gmail Account.
Clear Private code.
What is new in the new update?
In every update, it tries to give more facilities to the users. It adds numerous models in the latest version of this tool.
Miracle thunder is the new name of the miracle box. In the Miracle Thunder, you will get a lot of extra facilities. More than five thousand new models of mobile have been added to this version. You can do all the tasks done by the miracle box and miracle key by this tool. So, if you have a miracle thunder, you don’t need to set up a miracle box.
The differences between Miracle box and miracle thunder.
I have already mentioned that miracle thunder is the name of the updated version of the miracle box. Miracle thunder is easier to use and easy to keep safe. You can use either of the twos.
System Requirements before downloading the miracle box set up tool
Windows Operating system XP or Later versions. ( The architectural compatibility 32 or 64 bits.
RAM 512 MB or More.
The latest file size is 816 MB. You need to have at least 1 GB to completely download and install.
The Process of downloading miracle box setup tool without Box
First of all, go to the official download site to download the miracle box Latest set up. Click this link to go to the official site of the miracle box latest setup.
Based on the device and purpose, you need to download the necessary drivers and setup files.
Download the file and install the .exe files on the PC.
Final Words
Miracle box would come with miracle box hardware. Now you don’t need to buy hardware to format, unlock, and bypass the user and google locks. The basic difference between the miracle box with box and without box is that the previous version would come with a hardwire box and new version can be download from the online. Simply to say miracle box setup tool without box is equal to miracle thunder.
1 note
·
View note
Text
Android multi tool 1.02b

#Android multi tool 1.02b install
#Android multi tool 1.02b drivers
#Android multi tool 1.02b driver
Opens a link to where you can donate any money to the developer. rtf file made by the developer of the tool and automatically opens it for you.
#Android multi tool 1.02b drivers
Driver DownloadĪllows you to download any missing drivers that may not be installed on your PC. This helps you get in touch with the developer as well as submit any problems or bugs you might have encountered with the tool. Hardware Infoĭetermines the hardware info of the connected mobile device such as the IC number, the touch screen, camera, WI-FI, Bluetooth, Chipset and much more. This includes the firmware version, baseband version, Android version, Android Security Patch level and much more. This option will tell you about the software and ROM installed on your mobile device. This option allows you to exit Multi Tools and go back to the normal command prompt. This option allows you to exit Fastboot mode and reboot your device. This method will help you resolve these issues.
#Android multi tool 1.02b install
Usually, this happens when you are trying to install a new ROM or MOD. This comes in handy if your device is frozen, stuck on an infinite boot loop or is running slow. This option is for erasing data and cache while the phone is in Fastboot Mode. SEE ALSO Manufacturing Flash Tool | Download (All Versions) 8.
#Android multi tool 1.02b driver
To use this Fastboot mode check, you have to boot the phone to Fastboot mode and ensure that the Fastboot driver has been installed. This will check your device’s connection status when it is in Fastboot mode. It also allows you to exit from the ADB shell. This option allows you to reboot or restart your device and boot into normal mode. There is no way to cancel the operation once it has started and once the data is deleted, you cannot get it back in any way. Once you run this option, it will erase all your data and you’ll have to start from scratch. Before selecting this option, please ensure that you understand what it means and that you’ve backed up your data. This feature is used to wipe all data from your phone. This feature will help you reset your Gmail and Google account. Gmail is a free email service launched by Google. More importantly, once you unlock it, do not forget to disable it in the security menu. This feature allows you to unlock your phone without losing any data on Android devices running Android 4.1.x or higher. Gestures include patterns and other methods of locking your screen that isn’t password or pin-based. This feature helps you unlock Face / Gesture locks.
0 notes
Text
Android multi tool phone case

ANDROID MULTI TOOL PHONE CASE HOW TO
ANDROID MULTI TOOL PHONE CASE CRACKED
ANDROID MULTI TOOL PHONE CASE INSTALL
ANDROID MULTI TOOL PHONE CASE DRIVERS
In these times, use the following methods to unlock your device without losing data. Booting the device back to the factory setting would erase all the data and, thus, the memories. Many people have owned their smartphones for a long time and have valuable app history, chat logs, sweet selfies, music, and other multimedia with no backup or SD card to cover it. While some devices have special settings that require you to type your secret code every three days or less, most of the devices don’t, so once your phone accidentally or purposely reboots, your device will ask you to unlock it bu typing password, which you don’t remember. That comfort often leads to us forgetting manual passwords. New technologies such as fingerprint scanner and facial recognition have enabled us to unlock our device in less than a second. Forgetting your password, PIN, or lock pattern happens more often than one would think.
ANDROID MULTI TOOL PHONE CASE HOW TO
However, there are situations where you might have found an old device you’d like to use for some purpose but can’t remember how to unlock it. Requires root and enable Debug mode or fast boot.Bypassing lock screen security, while providing back the access to your smartphone, isn’t always the wisest idea.
ANDROID MULTI TOOL PHONE CASE INSTALL
Note: if Link Not work please comment belowįirst device must install correct driverThis program works with any Android device.
ANDROID MULTI TOOL PHONE CASE CRACKED
T07:49:17+06:00 Fahim Mahmud Cracked Tools imie repair tools Software Products (official support) android multi tools Password: Doid-Developers.ComServer 1 Download HereServer 2 Download HereServer 3 Download Here O.Donate for open link to donate to my account
ANDROID MULTI TOOL PHONE CASE DRIVERS
R.Report / Contact Me links to the specific problems of the Phase I program and a bookmark.ĭ.Driver Download for loading the drivers in case you do not have the driver installed in your PC H.Hardware Info for determine the IC number of Gsensor,touch screen,Camera,WIFI and more S.Software Info for info CPU inside,firmware version and etc. That is often found in the CPU Spreadtrum SC6280/SC8810.ĩ.Exit Fastboot Mode for reboot your PC or exit FastBoot.Ġ.Go To Command Promt for entering DOS promt.you can use command in this soft folder And can return to the main program by type exit After device reboot Then you can draw anything for unlock.don’t forget close lock in security menuĤ.Reset GMail for reset gmail login after try many time wrong unlockĥ.Wipe Data for reset all data to factory setting.Ħ.Reboot for reboot device to normal mode or exit from adb shell.ħ.Check Device On Fastboot Mode for check connection of device to on FastBoot mode.Ĩ.Wipe Data / Cache On Fastboot Mode for erase user datat and cache on Fastboot Mode to resolve freeze,stuk on boot logo or slow down device. Requires root and enable Debug mode or fast boot mode.Ĭhoice 1-6,S,H can work with Debug Mode only.Ĭhoice 7-9 can work with Fastboot Mode only.ġ.Check Device for check connection of device to PC.Ģ.Reset Face/PIN Lock for reset face lock on android 4.1.x and PIN lock without lost data.ģ.Reset Face/Gesture Lock for reset face lock on android 4.1.x and Gesture lock without lost data. This program works with any Android device. User Manual for Android Multi Tools v1.02b Note: if Link Not work please comment below Highlights of Android Multi Tools
0 notes
Text
Download UMT Dongle crack (serial key) latest version E1F;

💾 ►►► DOWNLOAD FILE 🔥🔥🔥 Posted by admin UMT Dongle 8. So for easy and safe flash you can download this tool on your computer. You can improve the different phones on the line. Simply download and submit the latest UMT dongle configuration. The complete download process will put a little effort to finish. So, in case the download has started, you need to hang it for a few minutes. The UMT domain division is most often used to highlight cell phones. In case you need to use the UMT dongle as light, you should follow a simple approach. UMT Dongle 8. You simply need to operate the easy UMT Dongle 8. You must create the phone and enter Busy Box. UMT Dongle will see every imaginable infection or malware all of them. It helps all Android units without memory loss. A secure system that scans your phones and improves the operability of your phones. After that, we install some applications on our mobile using Google Accounts permanently. You can also delete all accounts from Gmail in a few seconds. You can also get back all the accounts used on your phones. These features have made the tool more private than before. You can also remove the SIM lock. It is protected by a smart card. In addition, it guarantees that the mobile phone is ordered. Furthermore, you can remove the password, PIN or pattern from any device with the tool. With this tool, you can reset Samsung FRP device lock. Furthermore, it can detect the firmware rating mechanically. There is a function to unlock the mode for your ZTE devices. IMEI repair without scanning or resetting anything. You need a root to repair. Reset both IMEIs. Also, create a backup at work time on phones. With NVM backups you can repair the uncertain primary domain. Also, restore the NVM tool. System requirement: Operating system: Windows 7, 8, 8.
1 note
·
View note
Text
Download Miracle Box crack (license key) latest version OYT;

💾 ►►► DOWNLOAD FILE 🔥🔥🔥 Mobiles issues resolving software handles all hardware and software activities of android devices. Miracle Box is a massive and more useful tool to manage and resets your mobile problems. This is the time of multimedia, especially on android devices. You know, all products have some merits and demerits, so when you buy mobiles it has some technical issues where we cant able to reset. But, Miracle Box helps users to reset or fix all hardware and software problems efficiently. Miracle Box Setup has a wonderful platform to repair your mobile phones. Basically, Miracle Box Loader is designed for android phone issues. Miracle Box Crack Without Box Portable and wonderful software help the users at any stage of mobile problems. Sometimes we forget our password for mobile phones and we are not able to open these locked mobile phones. Now, open all these locked phones directly in a few seconds. It also allows you to reset your pattern locks. Now, you direct unlock your pattern and thumbnail password. Further, it reads your mobile codes and also writes some special codes. It scans your whole android device as a whole means all applications and hardware functions. It indicates and handles all kids of your mobile problems. More, Fantastic software removes all kinds of malware from your cell phones. Miracle Box 3. Also, Reset your dead phones. Free suggested software modifies your cell phones and enhances your mobile speed. It changes your IMEI number as new. You know, we face battery issues and we do not find its full solution. In other words, Miracle Box fully supports you to set up mobile phone battery problems. Menas, You can remove all kinds of locks from SIMs. Also, set a new and strong password on mobile phones and SIMs. Intuitive working software also sets your Andriod phone CUPs. So, Miracle Box has a different and effective procedure with worldwide technology to control and set your dangerous mobile issues. You can easily remove the Gmail account lock in a few seconds. Increase your mobile battery timings and detect your cell phone charge problems and also see charge pin problems. Fully integrated software has full ket to resolve all troubling issues. Miracle Box Loader comes with the latest and advanced technology for better performance. By the way, save your golden time and money. Miracle Box support almost all Andriod devices. The best thing about that is it shows notifications about any harmful working of your phone. It has its own storage memory to save your data permanently. Behind this, the operation of cell phones saves your all data completely. It supports multiple languages. So you select the basic language that you want. FRP lock support tool bypasses your android devices at once time. In this way, Secured your mobile phones from any incoming problems. Analyze your mobile problems and provide a full and pet solution. Find pins features directly. USB and cable-supported software. Repair all china phones and other android phones. Finally, support multiple languages. In addition, Supports all mac and windows versions. Hard Disk Space: MB of free space required. Processor: Intel Pentium 4 or later. How To Install Miracle Box? After that, Run the Miracle Box Setup as an administrator. Now, copy the license key from the updated setup and open the sitting option. Next, put the license key into setup and press it to allow all conditions and done. Download NOW.
1 note
·
View note
Text
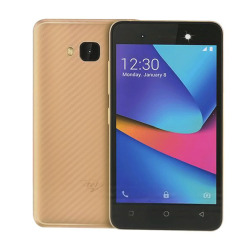
How To Unlock Itel 6800
Using your Google account to unlock your itel phone is one of the most common ways to unlock an Android device. However, in order to do this, you must know your Google account credentials and have an Internet connection on your itel 1700. If you meet the requirements to use this method, follow the steps below to unlock your phone. Unlock Blackview BV6800 Pro with Android Multi Tools With Android Tools and Drivers, You can unlock your mobile, Reset Gmail, Remove Pattern lock and Remove PIN etc. This method will not erase your mobile data.
Note that, most popular SPD phones like Itel Android phones mostly use the Spreadtrum SC8810/6820 CPU for the Android devices with old
Android OS while the feature phones use the SC6531 CPU.Others use the more recent CPUs.
You also need to hold the boot key on the device before connecting the USB from the PC.
The boot key for most SPD feature phones is options and call button while the boot key for SPD Android devices is Volume Up/Volume Down or both.
To unlock Itel keypad mobile phone,download/install the following files:
1. Install SPD USB Drivers on your PC – Download
2. Download Miracle Box
Steps To Remove Security Lock On SPD Devices
The steps outlined below will enable you to remove any kind of security lock, privacy protection lock or whatever on your Itel Spreadtrum
feature phones like Itel 2090, 2020, 6800 etc.
You will be able to safely unlock the phone without losing your user data and even know the current security code on the lock device.
1. After installing the SPD Drivers properly, download and extract the Miracle box.
3. Click on SPD tab, Select Read Unlock (RD Unlock), Select Clean passCode
4. Now click on Choose Type
5. Then manually select the SPD CPU type.Most or all of the Itel feature phones use the SPD6600L/RT/WT6226/6531 while devices like the Kimfly Z9, Z8, Z7, Z6, MBO, Tasen and some clone SPD devices use the very old and popular SPD8810/6820 CPU. Newer models use SPD77xx chips.
6. After selecting the CPU type, click on Start button.
7. You should now see scanning USB serial port.
8. It’s now time for you to turn off your device completely or remove and reinsert the battery(if possible), while holding the boot key for your SPD phone connect the USB cable.
9. The boot key for most SPD feature phones is the Options button, Call key, 0 or the back button. Some other devices might have a different boot key. SPD Android devices use either the Volume Up/Volume Down or both as boot keys.
10. If the boot key is held properly and drivers are also installed correctly, the process will begin and would take a while for SPD Android devices while SPD Feature phones wouldn’t take much time.
11. You will see 100% completed for SPD Feature phones, you will see all the security codes currently in use on the device. You can then manually use the codes to unlock your device.
Note:
If your SPD Itel 2150 device isn’t connecting, you can try this which always works for me instantly.
• Remove the battery from the SPD device.
• Connect the USB cable to your device and computer.
• Hit the start button on the Software/Tool on your PC.
• Now hold the boot key on the device before inserting the battery.
• CONGRATULATIONS! The whole thing would begin.
Check out this video below for more information:
Download Itel 6800 Flash File. Official Latest Version Firmware File, Stock ROM. This flash file of Itel Mobile is in the PAC extension, which describes how to flash and driver from SPD UpgradeDownload FlashTool. Here is how to flash an Itel Phone with a flash file, which is given below in full detail.
Read More: Download All Mobile Flash File (Firmware File)
If your phone is in dead mode, logo hangs, or the phone is locked, after flashing from this file all the problems will be fixed simultaneously and if you are locked with FRP then flashing will unlock it.
You can flash this flash file with any version of UpgradeDownload FlashTool. If an error occurs, SPD Upgrade Tool R4.0.0001 can flash with PAC on this version.
How to Flash Itel 6800:
How To Overclock Your Unlocked Intel® Core™ Processor
Download Itel 6800 Flash File and Install Driver, Charge the phone 30% before flashing.
First of all download the above files.
Extract All File From zipping Or Rar File.
Open the FlashTool folder and run UpgradeDownload.exe File
After that click on the load packet button and select a PAC file from the given flash file folder.
Wait for some time till the file is loaded
Then click on the download button
To connect the phone to the tool, put the phone in download mode.
Switch off the phone and press the volume up and down simultaneously and Plugin Data Cable.
Flashing will start waiting until flashing occurs.
During flashing the data cable may not go out of the phone or the phone can go into the dead mode.
How To Unlock Itel 6800 Phone
Note: During flashing, do not remove the data cable from the phone, otherwise the phone can go into a dead mode.
0 notes
Text
How To Unlock Itel Tablet

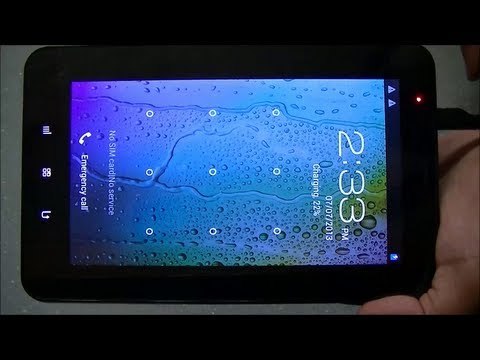
'I forgot the unlock pattern on my Android phone. I cannot hard reset my phone as there are very important data that I cannot lose. How can I unlock my locked Android phone pattern lock without losing data?'
How To Unlock Itel Tablet Instructions
Press the power button to bring up the lock screen. Then enter incorrect PIN, pattern, or password five times. You may see a screen where you will have 30 seconds to tap 'Forgot pattern?'
To start with, visit the official website of Dr.Fone - Screen Unlock (Android) and download it on your system. After installing it, launch the tool and select the option of “Screen Unlock” from the home screen. To use its forgot pattern lock feature, you need to connect your device to your system using a USB cable. Once your device has.
Are you looking to reset Itel S42 mobile phone to fix issues with mobile. In this tutorial we will guide you step-by-step on how to hard reset Itel S42 and restore it back to the factory default. Just follow the simple steps given below. These are common method to unlock and reset Itel mobile phone that works most of the times. Table of Content. GSM codes for Itel It2190 Change PIN code -.04. and enter the old PIN code, and twice a new PIN code. Change PIN2 code -.042. and enter the old PIN2 code, and twice the new PIN2 code. Unlock SIM (PIN) -.05. and enter the PUK code and new PIN code twice Unlock SIM (PIN2) -.052. and enter the PUK2 code and new PIN2 code twice.
Forgot your pattern/password for Android screen lock? If luckily, you can recall it by a few attempts analyzing your habit or the scene when you set up the screen lock. But what if you completely have no idea? Is there any way to remove the pattern lock on Android without factory reset?
Sure. Here are 7 effective methods for you to unlock Android pattern/password lock without losing data. Now let's see how to choose and perform the Android and Samsung lock screen removal method correctly.
Part 3. How to Remove Screen Lock of Android Phone with LockWiperRecommended!
1. Get Rid of Pattern/Password Lock on Android Phone with ADB (Android Debug Bridge)
This ADB method only works if USB debugging is enabled on your Android phones or tablets before you forgot password. Besides, it is required that you've allowed and trusted this computer before you're logged out of the device. What's worse, this method is not sure to work for those devices with encryption enabled. However, if you're lucky and meet these requirements, you can unlock password with super ease. (For some device may need to enable USB debugging on Broken Android).
Step 1. Plug Android phone to computer with USB.
Step 2. Open a command prompt window or a terminal window in the ADB installation directory on computer.
Step 3. Type the command and press enter: adb shell rm /data/system/gesture.key
Step 4. Restart your Android device and you'll see that the secure lock screen is temporarily gone.
Step 5. Set a new secure lock (pattern, PIN, or password) before you restart Android phone once again. Otherwise, your Android phone will be locked again.
2. ReBoot to Safe Mode to Bypass Third-Party App Screen Lock on Android
It is not difficult to bypass the pattern lock of third-party Apps (not the default screen lock) and access your Android device. All you need to do is to boot your Android phone into Safe Mode since it will disable the third-party screen lock application that you've installed on device temporarily. Therefore, you just need to uninstall the pattern screen lock app after you get your Android data. And your Android pattern/password screen lock will be removed even after you restart your device.
Step 1. Press and hold the Power button until the power menu turns up on the Android screen.
Step 2. Tap and hold the 'Power Off'.
Step 3. Tap on 'OK' option when being asked 'Do you want to reboot into safe mode?'
Step 4. Uninstall the third-party Android screen lock application and restart your device.
After that, you can download the third-party screen lock app again and then set up your new Android screen lock pattern.
3. How to Remove Screen Lock of Android Phone with LockWiper (Recommended)
iMyFone LockWiper (Android) can quickly remove the screen lock (PIN, password, or fingerprint) of an Android phone, and it almost supports all types of Android phones on the market. In addition, it is also able to remove the Google lock for Samsung phones. If you have a Samsung, you can remove the screen lock without data loss.
Step 1. You need to download and install iMyFone LockWiper (Android) on your PC. When you launch it select the Remove Screen Lock.
Step 2. Choose the right option according to your device's model. But only can Samsung devices remove without data loss. For other Android devices, it's also capable of unlocking your phone, but with all data erased.
Step 3. Click the 'Start' button to proceed, and then connect your phone to PC with a USB cable. If your phone can't be recognized, please follow the link to put device into recovery mode.
Step 4. LockWiper will automatically detect your device info. After that, double check to confirm. If all is well, then click Start to Unlock.
Step 4. It should start to download a data package and install to your device. Then, it will begin to remove the screen lock.
Step 5. Just wait for a few minutes, and the screen lock removal will complete.
4. How to Unlock Android Phone Pattern Lock without Factory Reset- FoneCope
Android Screen Lock Removal is also a great unlock Android pattern lock software helping you remove pattern, pin, and password lock on Samsung phone without losing data as well as unlock forgotten LG password screen lock. No need for Gmail or Factory Reset. You can unlock an Android phone pattern lock without losing data.
Let's see how to use this pattern lock remover to break pattern lock on Android phones. But this software so far only supports Samsung and LG phones on PC.
Supported Device: (Limited)
Samsung Galaxy S, Note, Tab series, and LG G2, G3, G4
Step 1. Choose Unlock feature in the Android toolkits
After you download and launch FoneCope Android Toolkits on PC, in the simple interface, you can click on the 'Unlock' pattern to remove your android phone's lock screen.
Now you'll be asked to connect your Samsung or LG phone to Windows computer via a USB cable, this Android Toolkits software will automatically detect it. And then you can click 'Start' to proceed with the next steps.
Step 2. Choose your device model and download recovery package
Please manually choose the right matching device model correctly, otherwise, your Android phone could be bricked. So far, the supported device model list is limited. If you can't find your device information from the list, it is because this device model is not supported yet. More is coming soon.
How can you know your phone's model name and number? You can go Settings or Options menu, scroll from top to the bottom, and find out 'About phone' 'About device' or other similar options. You can easily know your device name and model number on the page.
Once you select and confirm your device brand, name, and model, just click the 'Next' button to continue.
Step 3. Put Android device into Download mode
So as to unlock pattern lock on your Android phone or tablet without losing data, it is necessary to put your device into Download mode:
turn off your Android phone > press and hold the 3 buttons (Home + Volume Down + Power) simultaneously > release the buttons when a warning message appears on device screen > quickly press Volume Up button to enter Download mode
Hit 'Start' to begin downloading recovery page for your Android phone. It will take 5 to 10 minutes to finish the download task.
Step 4. Remove pattern lock on Android without losing data
As soon as FoneCope Android Lock Screen Removal ends downloading, it will break pattern lock on Android phones but delete nothing (files or setting) right away.
Now you can grab your Android phone with a hand and touch the home button. You will surprisingly find that you can access and enter Android phone without pattern lock. The screen lock setting is removed, which means that your Android phone is unlocked successfully. Why not download the FoneCope Android Lock Screen Removal and have a try now?
5. How to Unlock Android Pattern Lock with Android Device Manager
This method works if only Find My Device was enabled before your phone was locked. Besides, Google Android Device Manager does not help you set a password if you have locked Samsung S6/S6 Edge or newer Samsung devices. Unfortunately, there is no easy way to crack pattern lock on Android without losing any data. But, on the other hand, it's good for privacy protection.
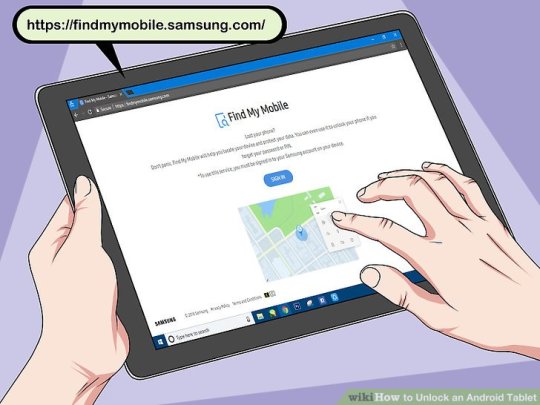
Step 1. Sign in Google Android Device Manager on this website: https://www.google.com/android/find
Step 2. Choose the lock Android phone that has been linked to Google account.
Step 3. Choose 'Lock' option from the screen.
Step 4. When a window pops up, you can enter a new lock screen password and confirm it again.
At last, you can save your screen lock change to remove the Android screen lock on device without factory resetting. (Update: But this bypass lock screen method no longer works because Google has disabled this feature to avoid facing legal trouble.
6. Reset Android Pattern Lock without Fs (Android 4.4 KitKat and Below)
It's easy to unlock pattern lock without losing data if you luckily have a locked Android running on Android 4.4 or older OS but forgot the password.
Step 1. Enter incorrect pattern lock for 5 times so that the forgot pattern hints will show up.
Step 2. Tap on 'Forgot pattern?' option
Step 3. Type your Google account name/email as well as the password to sign in Account Unlock page.
Step 4. Tap 'Screen lock' in the Setting menu list and choose screen lock type that you want to use on Android phone afterward.
Step 5. To reset a new screen lock, you can select 'None', 'Slide', 'Pattern', 'PIN', and 'Password'.
You'll be returned to Android home screen as soon as a new screen lock is set. But staying on older Android OS is not good for protecting your important personal data. You're recommended to transfer your priceless data to a computer regularly while using your old Android phone for simply calling and texting.
7. Factory Reset to Unlock Pattern and Password Lock on Android (Android 5.0 and up)
Unfortunately, it is no simple way to unlock your Android pattern lock without losing data if your device is running on Android 5.0, 6.0, 7.0, and 8.0 for it does a great job in protecting your data on the device. In this case, you need to restore your Android to original factory reset, by which the pattern lock will be deleted along with other data. You can reset pattern lock on Android without Google account. But this will wipe everything on your Android phone so that the default screen lock setting will be gone.
Tips: But at least you can pull out your SD card before removing the pattern lock on Android phone and tablet.
Step 1. Boot Android phone into recovery mode to break pattern lock
Reset a Locked Samsung phone: Switch off Samsung device > press and hold 'Home + Volume up + Power' buttons all together > let go of the buttons when the Logo pops up on the screen > wait for 10-15 seconds to enter Android recovery mode
Reset Locked Android Phones: LG, HTC, Sony, Motorola and more
Power off your Android device > Press and hold 'Home + Volume Down + Power' buttons Simultaneously > Release the 3 buttons when the device turns back on and the LOGO pops up on the screen (Now you're in recovery mode.)
Reset a Locked Google Pixel/Nexus: shut down your Google phone > press and hold 'Power + Volume Down' buttons at the same time (Fastboot Mode) > scroll down to Recovery Mode and quickly press the Power button
Step 2. Select 'Wipe data/factory reset' using the Volume down/up key, and then enter by pressing the power button.
Step 3. A system recovery message will pop up asking you to confirm if you want to delete everything on Android device. Please choose 'Yes – delete all user data'.
This will take minutes to process. Please don't touch your Android phone or press any buttons. Otherwise, it could brick or ruin your Android device permanently.
Once your Android phone reboots, the pattern lock should be removed. And you can use your Android device now.
The Bottom Line
How To Unlock Itel Tablet Instructions
This post lists 7 effective solutions to remove pattern lock on Android phone. This can definitely help you if you forgot the lock screen password or want to crack pattern lock without losing data. You can choose the best method for your Android phone since the 7 remove screen lock methods are discussed in the very detail, such as FoneCope Android Screen Lock Removal software, Android debug bridge, reboot to Safe Mode, Google account, and Android Device Manager, etc. Not every one of them works for your device. You're supposed to read and choose your method.
0 notes
Text
Spark For Mac How To Mark All Email Read In Folder

In Outlook for mac, you can only mark the messages in the current folder as read via the mark all as read option. If you want to mark the subfolders under the current folder, you have to mark them one by one. While I totally understand your inconvenience. I suggest you submit your ideas via the following link: https://outlook.uservoice.com. It’s easy to find an email message, no matter which mailbox or folder it’s hiding in. How to search for emails To explore the Mail User Guide, click Table of Contents at the top of the page, or enter a word or phrase in the search field.
There are three types of notifications in Spark:
All — get a notification for every incoming message.
Smart — mutes strangers and automated emails. People you reply to are considered important, and Spark notifies you about their emails.

No Notifications — you don’t receive any notifications.
Spark allows you to choose different notification types for different email accounts.
Select the notification type
Click Spark at the top left of your screen.
Open Preferences > Notifications.
Select one of your accounts.
Tick one of the notification types: All, Smart, No Notifications
Smart notifications are flexible. You can mark a contact as important or not important. Open an email from the needed person, right-click on his or her email address and click on the bell icon to mute or unmute this contact.
Note: To receive notifications, make sure Spark is open or running in the background. You won’t be able to get notifications after quitting the app.
Tap the menu icon at the top left.
Open Settings > Notifications.
In the Notification Type section, tap the needed email account.
Tick one of the notification types: All, Smart, No Notifications.
Note: Smart notifications are flexible. You can mark a contact as important or not important. Open an email from the needed person, tap his or her name and touch the bell icon to mute or unmute this contact.
Tap the menu icon at the top left.
Tap Settings > Notifications.
Select Notifications.
In the Notification Type section, tap one of your accounts.
Select the notification type: All, Smart, or No Notifications.
Note: Smart notifications are flexible. You can mark a contact as important or not important. Open an email from the needed person, tap his or her name and touch the bell icon to mute or unmute this contact.
Choose the notification preview
On your iOS or Android device, you can choose the appearance of Spark notifications. Spark can show a full message preview, a sender and a subject, only a sender, or no preview.
Tap the menu icon at the top left.
Open Settings > Notifications.
In the Notification Preview section, tick the option you wish and Spark shows how notifications will look.
Full Preview
Sender and Subject
Sender Only
No preview
Enable the Group Notifications by Threads toggle to group notifications by subject on your lock screen.
Tap the menu icon at the top left.
Tap Settings > Notifications.
In the Notification Preview section, tick the option you wish.
Set notification actions
In Spark for iOS and Android, you can set quick actions for notifications on the lock screen. For example, you can mark an email as read or archive it without unlocking your device.
Tap the menu icon at the top left.
Open Settings > Notifications.
In the Notification Actions section, tap Primary or Secondary Action.
Choose one of the actions: Mark as Read, Archive, Delete.

Tap the menu icon at the top left.
Tap Settings > Notifications.
In the Actions section, tap Primary or Secondary Action.
Choose one of the actions: Mark as Read, Archive, or Delete.
Adjust notification sounds
Click Spark at the top left.
Choose Preferences > General.
In the Sounds section, you can choose the sounds to use in Spark.
Tick Play Send Sound to play a sound when you send an email.
Tick Use Spark Notification Sound to enable Spark’s special sounds for notifications. If you want to keep the system sounds, untick this option.
To mute sounds in Spark:
On your Mac, open System Preferences > Notifications.
Select Spark on the list of apps.
Untick Play sound for notifications.
Tap the menu icon at the top left.
Open Settings > Sound Preferences.
Tick either Spark Sounds or Standard iOS Sounds.
Enable the Sent mail sound toggle to play a special sound when you send an email.
To mute sounds in Spark:
Open the iOS Settings app.
Tap Notifications and find Spark on the list of your apps.
Disable the Sounds toggle.
Spark lets you set different notification sounds for each of your accounts. To use this feature, please make sure you have Spark version 2.3.2 or later.
Tap the menu icon at the top left.
Tap Settings > Notifications.
Pick the desired email account.
In the Sound Set section, select either Spark Sounds or System Sounds.
If you’ve selected System Sounds, you can choose one of the ringtones by tapping Sound.
If you’d like to mute notification sounds, tap Notification style and select either Medium or Low.
You can also mute sounds in Spark in the Notifications section of the Settings app on your device. Check this article for more details.
Choose the notification style
Spark for Android lets you set the level of importance for your notifications which defines how they should behave. You can select different notification styles for each of your accounts.
Here are the notification styles available in Spark:
Urgent – notification makes a sound and stays on the home screen until you act on it.
High – makes a sound, is displayed in the status bar, on the lock screen, and in the notification shade.
Medium – no sound, is displayed in the status bar, on the lock screen, and in the notification shade.
Low – no sound, doesn’t appear in the status bar. You can still find it in the notification shade.
How to customize the notification style:
Tap the menu icon at the top left.
Tap Settings > Notifications.
Pick the desired email account.
Tap Notification style and select one of the options.
Note: To use this feature, please make sure you have Spark version 2.3.2 or later.
Customize vibration
In Spark for Android, you can select different vibration patterns for each of your accounts.
Tap the menu icon at the top left.
Tap Settings > Notifications.
Pick the desired email account.
Tap Vibrate and select one of the options.
Note: Please make sure you have Spark version 2.3.2 or later to use this feature.
Turn on LED notifications
Spark for Android lets you customize LED notification colors for each of your accounts.
Tap the menu icon at the top left.
Go to Settings > Notifications.
Pick the desired email account.
Make sure that the Notification style is set to anything but Low.
Tap LED and select one of the options.
Note: Spark shows this option only if your phone supports it and the app version is 2.3.2 or later.
Read next:

Threads
In Spark, you can easily create folders and subfolders to organize your emails. You can also manage folders on the native web page of your email account (Gmail, iCloud, etc.) and Spark syncs the changes across all your devices.
Add a new folder
Click Spark at the top left of your screen.
Open Preferences > Folders.
Click on the plus sign at the bottom left.
Select Folder.
In a pop-up window, click on the Location field and choose where to create a folder.
Fill out the Name field.
Click Create.
Tick your new folder on the list of folders to add it to the Favorites section on the sidebar.
Alternatively, you can click More on the sidebar and select Create New Folder. To keep it on the sidebar, open Spark > Preferences > Folders and tick this folder.
Tip: If you have multiple folders, you can color-code them for faster navigation:

Find a folder on the sidebar and right-click on it.
Select Change Folder Color.
Choose a color you wish.
Tap the menu icon at the top left.
Select Edit list on the sidebar.
Scroll down and select Add a Folder under one of your accounts.
Fill out the Name field.
Under Folder location, select where to add a folder. If you choose another folder as a location, a new folder will appear inside this folder.
Tap Save at the top right.
To keep your new folder on the sidebar, tap the plus icon near it.
Select Save at the top right of the sidebar.
Note: To create folders in Spark for iOS, you need the app version 2.3.0 or newer. If it hasn’t updated automatically, open the App Store > Updates, find Spark and select Update.
Tap the menu icon at the top left.
Select Edit list on the sidebar.
Scroll down and select Create a Folder under one of your accounts.
Fill out the Name field.
Under Folder location, select where to add a folder. If you choose another folder as a location, a new folder will appear inside this folder.
Tap Save at the top right.
To keep your new folder on the sidebar, tap the plus icon near it.
Select Save at the top right of the sidebar.
Note: To create folders in Spark for iOS, you need the app version 2.3.0 or newer. If it hasn’t updated automatically, open the App Store > Updates, find Spark and select Update.
Create a subfolder
Click Spark at the top left of your screen.
Open Preferences > Folders.
Click on the plus sign at the bottom left.
Select Folder.
Under Folder location, select a folder where you want to create a subfolder.
Fill out the Name field.
Click Create.
Alternatively, you can click More on the sidebar and select Create New Folder. Under Folder location, select a folder where you want to create a subfolder.
Open the sidebar and tap Edit list.
Scroll down and tap the More icon near the folder.
Select Create Subfolder.
Type the folder name.
Select Add at the top right.
Tap the plus icon near your new folder to keep it on the sidebar.
Select Save at the top right of the sidebar.
If you pinned a folder to the sidebar and want to create a subfolder inside it, you need to unpin it first. Find the needed folder on the list and tap the minus sign near it. Then, scroll down, tap More near the folder and select Create Subfolder.
Move emails to a folder
Open a needed email.
Click on the Move icon at the top toolbar.
Select a folder to move this email.
To move multiple emails at once, hold Cmd ⌘ and select the needed messages. Click on the Move icon on the right and select a destination folder.
Spark For Mac How To Mark All Email Read In Folder Outlook
Open a needed email.
Tap the More icon at the bottom.
Select Move .
Choose a folder to move this email. To switch between your accounts, tap your email address under Move to at the top.
To move multiple emails at once, long tap one of the emails in your inbox and then tap the other messages you want to select. Choose the Move option at the bottom or select More > Move .
Open a needed email.
Tap the More icon at the bottom.
Select Move.
Choose a folder to move this email. To switch between your accounts, tap your email address under Move to at the top.
Spark For Mac How To Mark All Email Read In Folders
To move multiple emails at once, long tap one of the emails in your inbox and then tap the other messages you want to select. Choose the Move option at the bottom or select More > Move .
Delete a folder
Note: When you delete a folder, all emails it contains are erased permanently. You can’t undo this action.
Click Spark at the top left of your screen.
Open Preferences > Folders.
Select the folder you want to delete.
Click on the minus sign at the bottom left.
In a pop-up message, click Delete the folder.
Alternatively, right-click on the folder on the sidebar and select Delete.
Open the sidebar and select Edit list.
Scroll down and tap the More icon near the folder.
Select Delete Folder.
In a pop-up message, tap Delete folder.
Spark For Mac How To Mark All Email Read In Folder Chrome
In case you pinned a folder to the sidebar, you need to unpin it first. Find your folder on the list and tap the minus sign near it. Then, scroll down, tap More near the folder and select Delete Folder.
Open the sidebar and select Edit list.
Scroll down and tap the More icon near the folder.
Select Delete Folder.
In a pop-up message, tap Delete folder.
In case you pinned a folder to the sidebar, you need to unpin it first. Find your folder on the list and tap the minus sign near it. Then, scroll down, tap More near the folder and select Delete Folder.
Spark For Mac How To Mark All Email Read In Folder Windows 10
Read next:Avatars in Spark
0 notes
Text
FRP Bypass APK 2019 | How To Remove FRP Lock

The issue of security on Android is something that has worried many users for years. The truth is that popular systems like iOS have almost always been one step ahead in this regard, as they had the iCloud block. It is practically impossible to skip for a user. That's why Google put the series and developed a similar security protocol. Here, we present FRP Bypass APK Download for All Smartphone.

With this security app, only the owner of a lost device could use the phone. The best part is that it is a native system, it does not depend on third-party applications that can easily bypass. That is why we are going to tell you all about the FRP Bypass APPS Download for All Smartphone.
What is FRP Bypass APK?
The abbreviation of FRP is Factory Reset Protection. The Factory Reset Protection (FRP) is a security method that was designed to avoid the weakest point in a stolen or lost Android, restore the factory device to use it even if the phone had a blocking pattern. As of Android Lollipop, this security protocol was launched, but the truth is that few know how to use it.This protocol is to link the phone to the Google account and make it only be used when entering the Gmail account that was introduced the first time. If you lose your phone or it is stolen, you will not be able to use it for absolutely nothing unless you know your Google credentials. Samsung FRP Unlock APK 2019 Download.

Android_5_GAM.apk Android_6_GAM.apk FRP_Android_7.apk Android_8-9_GAM.apk Apex_Launcher.apk Development_Settings.apk FRP_addROM.apk FRP_Bypass.apk Menu_Button.apk Nova_Launcher_v5.5.4.apk Phone_Clone.apk QuickShortcutMaker.apk How To Activate itAs its name suggests, it is as easy to do a factory reset, even if it does not work on all devices. In theory, the Google Nexus in Android 6.0 and 7.0 have this option already activated. So, by doing a factory reset from the settings you should be able to block your device. Have you tried this security method on your Android device?In other devices of other signatures, it will be enough to do the factory reset from the recovery. In others, you will have to establish a blocking method such as pin, password or fingerprint and then perform the reset. Each device does it in a different way.Your Require Related TopicFRP Bypass APK DownloadFRP Bypass APK Without PasswordFRP Bypass APK For SamsungFRP Bypass APK For LGFRP Bypass APK XiaomiFRP Bypass APK For OPPOFRp Bypass APK For VivoFRP Bypass APK 2019FRP Bypass Tool Latest VersionThe requirement for FRP Bypass APK Download for All SmartphoneYou should have Android 5.1 or higher.Laptop or Desktop PC.Good internet connection for downloading the required files.You Can Also LikeFRP Hijacker For Remove FRP LockMoto Auto Flash Tool Latest VersionWhen to disable the FRP protection?Uncertainty, you intend to sell your phone, for example, you will have to deactivate the FRP protection before doing so. If you delete everything step by step manually, the buyer will have a problem in the future since you will not be able to format the phone. However, you can remove the FRP protection before delivering it.For this, you will have to delete all the Google accounts that you have associated with your smartphone. After that, do the factory reset. Once you have done this, you should also remove the OEM protection.All Version Android https://www.youtube.com/watch?v=2Jli3FDaNiAAndroid 5.xx FRP Bypass APK: Downloadhttps://www.youtube.com/watch?v=rTgUO5W2r9kAndroid 6.xx FRP Bypass APK: Downloadhttps://www.youtube.com/watch?v=JksldQxhJV4Android 7.xx FRP Bypass APK: Downloadhttps://www.youtube.com/watch?v=FQWZTae_FSYAndroid 8.xx FRP Bypass APK : Downloadhttps://www.youtube.com/watch?v=sD5slt_LgnsAndroid 9.xx FRP Bypass APK: DownlooadAlternate Solution to the problem of FRPIf you fear or your country is not allowed to use to use this app, we suggest you visit near mobile and software servicing center of your area. They will take a minimum charge for FRP bypass. The charge will not more than $10. Samsung FRP Lock Remove Developer.Finally,Thanks to FRP Bypass APK owner and developers. You will not be able to use it if you delete all your data since you will need to know your Google account and your password in order to access the phone. When you try to log in, the phone will say: "This device was rebooted. To continue, sign in with a previously synchronized Google account on this device. " Read the full article
0 notes
Text
Download Android Multi Tools v1.02b Latest Version 2019

Android Multi Tools v1.02b All Pattern Lock Remover For Windows
Download Android Multi tools v1.02b Latest Version 2019: In this contemporary world, everything is getting smart. Starting with smartphones, we have smart TV’s, smart refrigerators, and smartwatches and the list goes on! With everything getting smart, humans are becoming dumb. Yes, we humans are relying on smart gadgets, and we are becoming lazy and keep forgetting things. Hence, we have reminders, alarms and other stuff in our devices. What if we forgot our phone password or lock? I mean who doesn’t lock their devices? Everyone does. Moreover, it is no wonder if someone forgets their passwords or pattern lock. I see myself forgetting my pattern quite often. Instead of going to service centres and local markets to get your phone unlocked is costly. Instead of relying on service centres, you can easily unlock your devices at your home. Yes, you heard it right. Android Multi Tools got you covered.
Download Android Multi tools So what is Android Multi Tools? Android Multi tools is developed for PC’s that unambiguously helps you unlocking the passwords. This tool can be helpful if you have forgotten your passwords, pattern or any Android lock methods. Besides unlocking the forgotten passwords, you can also check the software and hardware information of the device. Apart from this you can also wipe the internal data and reset google data. Peculiar Features of Android Multi Tools v1.02b: Using this tool one can remove the data of the target device without flashing third-party recoveries like TWRP and some other titles. You can easily remove or reset the Pin Lock of the Android device. Users can also remove or reset the pattern lock and password of Android Device. You can know your device’s software information. You can install the drivers of your device by using this tool without the need of installing separately. By using this tool, you can also get enough information about the hardware information of the target device. One can also bypass the device FRP Lock. This tool has an ability to reset your device in one click. In case of spoiled hardware keys, you can restart or power on and off your device using this tool. Using the Android Multi tools v1.02b: Using the Android Multi tools application is very easy. The interface doesn’t seem fancy. However, it is worth mentioning that, the usage is simple and everything is clicking away. When you run the application, it opens up in a small pop-up window with a green background and white text on it. All the features as mentioned earlier are available on the face of the application itself. You need not navigate into folders or anything. There are sixteen options in total. One to Nine numbers is assigned with their activity. By hitting one on the keyboard, check’s the device. Likewise hitting number four on the keyboard reset’s the Google or Gmail data. So, every number has its features. If you click the alphabet D on the keyboard, the application download’s the driver compatible for your device. Moreover, you can also donate the developer by hitting O. All these activities can be performed once the device is connected to your PC. If your device is not detected immediately, then you can download and install the necessary drivers from the application itself. As soon as the device is connected, you will be notified with a pop-up and an alert sound. If any of the features don’t work, you can directly get in touch with the developer. Step-by-Step Process of using Android Multi Tools v1.02b Download the Android Multi Tools from the link given below. You need to extract the downloaded file. To perform this action you’ll need WinRAR or any unzipping tool. Run the extracted application. It may ask for permissions, allow it without worrying. It doesn’t harm your PC or Android device. Now connect the target Android device with USB. It is recommended to use the original cable that came with the device. Using third-party cables may encounter compatibility issues. Once the phone is connected, it shows a pop-up as mentioned earlier. Now you can click the assigned numbers to unlock your devices. That is it. Now you’ve successfully removed pin/pattern lock on your device. Download Android Multi tools Latest Version Name Android Multi tools Size 3Mb Updated On 04-03-2019 Version v1.02b Download Android Multi Tools v1.02b Note: By pressing number 5 will completely wipe your device include the software of the device. I don’t recommend to do this if you do not have enough knowledge of flashing custom or stock ROM. Also Read: Download Mi Account Unlock tool/ Reset Remove Mi Account https://youtu.be/lUIljcUzX-0 Conclusion: To conclude, this is all about the Android Multi Tools. I hope this tutorial helped you to remove forgotten password/pin/pattern of your device. If this helped you, do share it with your friends and family who are facing these issues. That is all for now. Stay tuned with us for more tutorials like this. Read the full article
0 notes
Text
Oppo A37 Hard Reset and Recover Password
How to factory reset Oppo A37? How to wipe all data in Oppo A37 easily? Guide to bypass screen lock in Oppo A37? Full guide How to restore defaults Oppo A37 mobile phone? You can check out Hard Reset LG G6+ guideline here.
Important Notice: [If You] Hard Reset your mobile, Important data like Media files, Contacts numbers, All Apps & Settings will be deleted. So before to begin with Factory Reset, Backup all of your Important data to a safer place.
Hard Reset Oppo A37 Mobile Phone:
Here is the full guideline to hard reset Oppo A37 mobile phone. You can easily unlock your Oppo A37 using this method. There are 2 ways to hard reset your Oppo A37 smartphone. Both two methods are work seamlessly without creating any problem.
Method 1:
Switch off or Turn off your Oppo phone.
Then, Press and Hold 1. Volume Down + Power button (or) 2. Volume Up + Power button 3. Please try above all steps one by one, Until you will see Android reboot menu.
Then, Select language.
Next, select option: “wipe data/factory reset” using Volume Down, and Power button to confirm the operation.
After that, choose the option “yes” with Volume Down, to select and Power button to accept.
Finally, press Power button to enter option “ reboot system now ”.
Finally, Hard reset done on your mobile.
Method 2: Factory Reset Oppo A37
First, Open the Settings menu, On your mobile device.
Then, Under “ Personal ” touch Backup & reset Option. You need to enter your PIN, pattern, or password.
If you can not see Backup & Reset, try to find Reset option in your settings.
Next, Under “Personal data,” touch Factory data reset.
Next, read the information on the screen and touch Reset phone option.
If you have a screen lock, you will need to enter your PIN, pattern, or password.
Then after, When prompted, touch Erase everything Option to erase or delete all data from your mobile device’s internal storage.
Finally, When your device has finished formatting, select the option to reboot your device.
Factory reset done on your mobile.
Password Recovery of Oppo A37 With Android Tools
After that, install Drivers manually to your computer or PC.
Software creates a shortcut icon on your PC desktop.
Click on that shortcut icon.
If drivers will not create any shortcut, Open Android_Tool_Drivers / Android Multi-tool / Android Multi
Tools v1.02b gsmforum file from your downloaded file.
Next, you see the pop-up on your computer. Click on run option.
Finally, you see the Android tools and drivers command prompt.
below steps on your android phone :
Press and Hold
Volume down button + Power button or
Volume up button + Power button or
Volume down + Volume up + Power button For a while.
Please try above all steps one by one, Until you will see Android reboot menu.
After you see Android boot mode on your smartphone.
Now connect your android mobile to your computer via USB (Universal Serial Bus).
Now you need to type any number to perform Hard reset or password recovery.
Type 2 for reset face, type 4 for reset Gmail, type 5 for wipe data.
No data will be deleted if you choose 2, 3, 4 Options.
Above options clearly explained below.
Option 2: You can reset your face or PIN lock. No data will be deleted.
Option 4: you can reset your Gmail account. Means your old Mail deleted then new mail added to your mobile.
Option 5: Wipe all your data on your mobile. Means all data will be deleted.
Option 8: If you see fast boot mode on your mobile phone when you press volume buttons, You need
to enter number 8 to wipe all your data.
Type any number that you want then press enter.
Reset done on your android mobile phone.
Oppo A37 Reset Codes
##7780##
This code can be used for a factory data reset. It will remove following things:
Google account settings stored in your mobile phone
System and application data and settings
Downloaded applications (Android Apps)
27673855#
Think before you give this code. This code is used for factory format. It’ll remove all files and settings including the internal memory storage. It’ll also reinstall the mobile phone firmware.
##4636##
This code can be used to get some interesting information about your Mobile phone and battery. It shows following 5 menus on screen:
Android Phone information
Battery information
Usage statistics
Battery history
Wifi information
Soft Reset of Oppo A37
Press and hold Mobile Power button and wait until the Android phone turns off.
Wait about 10 seconds.
Now hold down the Power key for a short while, and wait until the mobile phone turns on.
Recover Password of Oppo A37
Password recovery with Google security question
After the number of failed attempts done on your mobile phone to unlock the device, tap Forgot pattern option ?.
After That, Tap Answer question.
Then, Type the google security answer, then tap Unlock.
Finally, If it shows Yes or No options, Tap Yes if you want to create a new pattern (PIN) or Tap No if you
don’t want to use a screen lock.
Unlock the screen pattern with Google account
After you have entered the wrong unlock pattern number of times, wait above 40 seconds, then tap Forgot pattern? option.
After that, sign in using your primary Google account means Gmail account username and password.
Then, draw a new unlock pattern or PIN or type password, then tap Continue.
Finally, again draw the new unlock pattern or PIN and tap Continue.
The post Oppo A37 Hard Reset and Recover Password appeared first on HardResetZone.
source https://hardresetzone.com/oppo-a37-hard-reset-and-recover-password/
0 notes
Quote
Vivo Y83 Pattern Unlock + FRP Lock [ Vivo Y83 Unlock Tool ] Once again we are here to unlock new Vivo Y83 frp and with pattern unlock method. If you are a Vivo Y83 Android smartphone user and forget the pattern lock or pin lock of the device, then this method is for you. Apart from this, this method can also remove frp lock from Vivo y83 mobile.Recently we published a full detail post about the Vivo Pattern and the FRP Unlock Tool, which can help you easily remove pattern lock and frp lock. This is a free tool, so there is no need to go with any professional equipment. We successfully tested this vivo unlock tool on several other vivo devices including Vivo Y83 Mobile. The use of Vivo Unlock Tool is very simple and does not require any professional technical skills. Just download the Vivo frp tool, set up the device and unlock Vivo Y83 without a password.You may know that by factory reset, users can remove pattern lock or pin lock from any Android device. But the problem is that the Vivo device will ask to enter the existing password to reset the factory. Similarly, if you are able to reset the device, in any case, you must enter the existing Google Account password to delete the verification screen on Vivo A83.Just enter the correct Gmail ID and password, which you were using on the device before factory reset, but what if you do not have a password. In that case, you have to bypass Vivo Y83 frp lock.Then this guide will help you unlock Vivo Y83 frp and unlock pattern using the Vivo Y83 Unlock Tool. Download Vivo Y83 Unlock Tool, Drivers Vivo y83 unlock tool Download Vivo y83 driver Download How to Unlock Vivo Y83 Pattern Lock and FRP Lock by Using Tool Now we will show you how easy it is to unlock Vivo Y83 pattern lock or FRP lock using the Vivo Unlock Tool. This device works on almost all vivo Android smartphones with the latest version. Enable just USB debugging interface on Lock Vivo Y83 and bypass FRP lock or pattern lock with this amazing Vivo FRP bypass tool 2019. Steps to Remove Patterns Lock and FRP Lock Please note: the process for Vivo Y83 FRP unlock and Vivo Y83 pattern unlock is similar. This means that it will unlock your device first and then automatically delete Google Account verification. Download and install the "Vivo Y83 USB Driver" on PC. The drivers should be installed, otherwise, the device will not detect the device in any case. If already installed, skip the phase. Now manually boot Vivo Y83 in Recovery mode. How to boot in recovery mode Power off the phone Press key + power key up volume at the same time Here you will see two different options like "Recovery" and "Reboot", just use the Volume key for navigation and select the "Recovery" option by using the power key to boot vivo in Recovery mode. In the next step, click the "Advance" option >> "Reboot with Adb" option. Please note: If the device is properly connected to ADB mode with PC, it will show the compact under the "Device Manager" section. Extract and open downloaded "VivoAddFormattool" on Windows PC. Once the tool opens, enter the same port number which is displayed under the Device Manager section as shown in the screenshot below. Again come back to the tool and hit "BTN2" button to remove vivo y83 pattern lock. The Vivo tool will show the "Finnish" message on the tool, which means the pattern unlock process. Please note: At this time, Vivo Mobile will automatically reboot and format the data. There is no need to do anything. Just wait to complete the whole process. Almost complete, so set up the device again. Between this process, you will see the "China logo" on the device screen, just click this China logo and then click OK from the next pop up message. Continue the device setup process without fridge set up and pattern lock. done!! In this way, you can remove pattern lock or pin lock using the Vivo Y83 unlock tool. In addition, this Vivo Y83 will automatically bypass Google account verification. This means that, vivo y83 unlocks the password without
http://www.mytechnotech.xyz/2019/06/vivo-y83-pattern-unlock-frp-lock.html
0 notes
Text
The Best Ways of Applying AI in Mobile App Development
In this digital age, mobile phones and mobile applications have become extremely popular as they are propelling the technological revolution further as the customer demand for instantaneous and on-the-go services through the internet is increasing rapidly. Now whether you take social media, gaming, food delivery service, cab booking to online banking, there is an app for that. Average user in US is spending over 5 hours a day on mobile applications hence mobile apps have become one of the main source of accessing internet by users. As mobile apps have become such a fundamental part of our day-to-day technological experience, there is a sense of urgency among tech companies and business houses to discover and distribute something in their mobile app that is really innovative, fresh and exciting.
That are the reasons why there is a strong demand for Artificial Intelligence Companies which can do research in AI and deliver amazing mobile apps. Right now the biggest trends that are taking shape in app creation are the integration of artificial intelligence, IoT, virtual reality and augmented reality in the mobile apps. Customers first have experienced the application of these advanced technologies with the launch of some gaming apps like Pokemon Go. Now the integration of AI, VR and AR, these are becoming a standard across the mobile app development industry. Actually we are now witnessing an important shift from a mobile first world to an AI first world.
Using AI, apps can create a more personalized experience for users by analyzing data and identifying key patterns in user behavior. If you too want to take benefits of the power of AI for your own business of mobile app development you can use the below tips to build your brand strategy across delivering AI based Mobile Apps.
Artificial Intelligence Combined With the Internet of Things(IoT) AI can also be used for your devices to communicate with each other. Soon AI is going to make tremendous changes by collecting all the real-time data and processing that data so that devices can learn to function and work on their own. Therefore, AI is helping so many innovative mobile app development companies which are working on AI too to learn and execute every information which is exchanged among various devices based on AI and then take the necessary action or step.
Face Unlock to Power More Smartphones
Apple has launched iPhone X in 2007 and with this it has also launched the feature of face unlock too. This has also led to the face unlock feature been introduced to so many Android based smartphones also. Apple and other Android based smartphones use AI and ML based algorithms for their face ID unlocking system. By using the combination of premium and specific hardware, the artificial intelligence system works to identify the face of the user to secure unlock. Now in future we will see more and more Android developers, smartphone makers and Android and iOS app developers to implement the face unlock features using AI technology to build and launch so many mobile apps based on it. These smartphones and mobile apps will be able to identify the user’s face with facial changes like beard or spectacles over time. Large banks and financial institutions will be the first to launch such kind of mobile banking apps with AI based face recognition technology for accessing users’ accounts for heightened security.
Using AI to Deliver Personalized Content
Machine learning is one of the most important uses of AI as using it companies can go through and understand the large quantities of data and make insightful conclusions and highly accurate predictions based on the derived information. This is very helpful for businesses because AI can analyze the users’ behavior and determine what are their preferences. For example, an ecommerce company can leverage machine learning to help generate more options of electronic items a customer may like to buy based on his previous purchase history. In similar way, a streaming company like Amazon’s Netflix can use artificial intelligence to help provide their viewers with recommendations for shows and movies they might find interesting. Nowadays delivering customized and personalized content to their users has become one of the most important part of any business because it keeps them engaged with their brand. If you use AI properly then you can show your audience that you are actively paying attention to what products and services, they like and don’t like. This kind of personalization helps improve your brand’s customer experience, increases user retention and also expand your business and improve sales and profits.
Using AI to Respond to Your Customers Intelligently
The business owners get hundreds or thousands of inquiries from their website and mobile apps which they need to respond each day. Most of these are from customers who are inquiring about anything from a specific product to its features, availability and nature of their business. Some of the big companies like Google has already integrated this feature into their mobile apps for user convenience and benefit. Gmail, Google’s mobile email app, now uses AI for smart reply to create customized responses based on the message you have received. You can select one of the recommended answers, use part of it or write it yourself, save it and use it the next time someone has a similar inquiry or email. This will definitely improve your company’s productivity and will drive your revenue forward. For e.g., retargeting users via email results in over 100% click-through rate in a campaign. You can answer a user inquiry and help him to convert easily. That’s why using AI to respond to your customers is becoming a powerful brand building tool nowadays as it provides your company the ability to create precise responses for your customers.
Using AI for Voice Powered Search and Technology
In last couple of years, voice search has become the most popular application which has become highly popular and it is based on artificial intelligence. Latest report says that there are now an estimated one billion voice searches taking place per month. It is estimated that by 2020, almost 30% of web browsing sessions will be done without a screen and voice search will account for 50% of all the searches happening. As this voice technology will evolve and refine more, it will enable businesses to integrate voice technology into their mobile app development too. You can also use the voice technology through the integration of virtual assistants. That means, your users will be able to activate some features of your app with their voice through the help of AI powered assistants like Siri, Cortana and Alexa. Dominos has already integrated Amazon’s Alexa into their mobile app so that customers can order pizza while doing their other works at home. This hands free access to the internet search and using mobile apps is making voice technology so much attractive and beneficial to customers. Conclusion We have just discussed how AI and ML is revolutionizing the mobile app development industry. By looking at the so much growth of AI and ML technologies, it can be said that more such kind of mobile apps will be launched in future which will offer innovative features in their mobile app using AI technology. Also the businesses will be more focused on the advertisements and companies which will micro-targeting using AI based technology for expanding their customer reach. Businesses have just begun to realize the importance of AI and they are beginning to integrate this technology with their brand to make sure they stay ahead in this highly competitive business environment.
0 notes
Link
Damien McFerran 23/01/2019 - 9:47am
Amazing specs for half the price of an iPhone
£499.00
While the battle began to banish bezels and create the ultimate big-screen smartphone has been rolling on for what seems like forever, we've yet to see a clear winner; sure, Apple's notch would appear to have emerged triumphant in the early rounds – based on the sheer volume of copycat devices that have launched since iPhone X arrived in 2017 – but the past 12 months has seen an impressive array of different solutions to this problem; we've had sliding camera modules, tiny top-and-bottom bezels and – more recently – 'hole punch' screens. The latter design has been hyped by more than one company, but it is Honor (also known as Huawei's budget brand) which has made it to western stores first.
Boasting Huawei's powerful new Kirin 980 processor and a staggering 48-megapixel Sony-made rear camera, the View 20 means business – but it's that eye-catching display which will arguably sell the phone. But does this breakthrough warrant a second glance, or is it just another screen gimmick, like the notch before it? Let's find out.
Honor View 20 Review; Design & Display
When it's switched off, the Honor View 20 looks like pretty much any other smartphone you could think of. It's got rounded, pebble-like edges, it has two cameras on the rear (along with a fingerprint scanner) and features metal and glossy, smudge-prone glass in its construction. Outside of the rather cool laser-etched 'V' pattern (Honor calls it 'Aurora Nanotexture') which is somehow baked into the glass back panel, there's nothing especially noteworthy about how the Honor View 20 looks. That's not to say it's unattractive – it's actually a very smart looking device – but at face value, you'd be pushed to tell it apart from the legions of other smartphones doing the rounds right now. That is, until you power up the screen.
The View 20 really does look stunning from the front. That 6.4-inch screen is remarkable; even when you take into account the potentially divisive hole punch and the tiny chin at the bottom, it's amazing to look at a display which appears to totally fill the phone's face. Over time, you quickly learn to mentally remove the hole punch, and it's striking how little impact it actually has over the UI experience; put it this way, if you lived with the notch then you're going to have zero issues here. It's definitely an improvement.
It's a shame that Honor couldn't have used an OLED screen, though – despite the general quality of the 1080 x 2310 pixel IPS LCD panel, there were times when we longed for the deep blacks, impressive viewing angles and punchy colours of an OLED display. Having said that, the View 20's screen is nonetheless impressive, and when placed alongside the iPhone XR's Liquid Retina LCD screen, it looked utterly fantastic in comparison. On the downside, our pre-production review unit had a small cluster of stuck pixels which were only noticeable when the screen was black. We've been assured by Honor that this is a problem that won't be present on the final production model.
Elsewhere, there's a USB-C port on the bottom, along with a powerful speaker. The View 20 lacks stereo sound which is a shame, but you're unlikely to miss a call or notification when the volume is set to maximum – this phone is seriously loud. The power and volume buttons are found on the right-hand edge of the phone, while the 3.5mm headphone jack is located on the top edge, accompanied by an IR blaster so you can use your View 20 as a remote control for other devices.
Another cool feature is the placement of the notification LED, which is found inside the tiny earpiece at the very top of the screen. It gently pulsates when you have an unread message, but is totally invisible when inactive.
It's worth noting that the View 20 carries no water or dust resistance rating, which may or may not be a big deal, depending on how often you accidentally drop your phone into bodies of water. Still, given that many other phones boast such ratings, it's worth mentioning. Honor includes a rather fetching silicone case in the box which fits snugly and – were it any other handset maker – would no doubt cost £30 separately. It covers up that lovely 'V' design on the back, but it provides a decent degree of protection.
Honor View 20 Review: Software
The View 20 is running Android 9 right out of the box, which is good news if you're sick of flagship phones rocking older variants of Google's OS. It sits beneath the Magic 2.0 UI skin, which looks and feels a lot like Huawei's EMUI – it even references Huawei in some of the app logos and legal messages which pop up the first time you open certain exclusive apps. This isn't an issue as such because EMUI is a fine Android skin, but it does make you wonder why Honor had to create a totally different name for it.
As well as featuring the usual suite of essential Google apps – like YouTube, Gmail, Drive, Google Photos and Google Maps – the View 20 also ships with several bespoke applications, such as its own music, video and app store. As ever, these apps needlessly duplicate functionality and are, by and large, a complete waste of time. Not only do you have to log into Huawei's own user account service to use many of them, some pre-installed apps cannot be disabled or uninstalled. While we understand that handset makers want to push you towards their own app stores in order to generate revenue, you almost always get a second-rate experience when compared to Google's own built-in Android services. Unless you're a seasoned Honor or Huawei fan, you're unlikely to bother.
That said, there are some nice touches on offer here. App Twin – the ability to have two different instances of the same application on the same device – isn't new, but it's handy if you need to keep different social media accounts separate. HiTouch is also quite cool – you hold down two fingers on an image and it will tell you where you can buy that item online – and Digital Balance is basically the View 20's version of Apple's screen time reports, so you can manage how much time you spend gawping at your phone's display. Oh, and Party Mode – which is also available on other Huawei devices – is present and correct, so if you want to hold an impromptu shindig by simultaneously sharing the same song with other people via their handsets, you can (although we're still not entirely sure why you'd want to).
Honor View 20 Review: Performance
Despite being a mid-range phone, the View 20 has the same Kirin 980 processor seen in Huawei's Mate 20 Pro, a phone which costs considerably more. Given that Huawei is keen to stress the 980's power when compared to Qualcomm's Snapdragon 845, it's obvious that we're dealing with cutting-edge silicon here; the first Kirin chipset to be manufactured using the 7nm process, the 980 is one of the most powerful chips on the market, and benchmarks prove that.
In Antutu Benchmark, the View 20 scores 277,827, which just beats the likes of the Google Pixel 3 (269,901) and Samsung Galaxy S9+ (266,871) but is behind the likes of the OnePlus 6T (295,942) and Xiaomi Mi 8 (291,329). In Geekbench 4, it ranks 3312 in the single-core test and 9745 in the multi-core test. Those ratings compare very favourably with many Android rivals which cost the same or more, which proves that the 980's power – although it goes without saying that the Snapdragon 855, due this year, will most likely smoke the competition.
Still, the 980 is inside the View 20, a phone which costs £500, and it delivers incredible performance when you consider it costs half the price of an iPhone XS. Navigating the UI is silky-smooth, and there's little in the way of delay when you move between open applications. 3D games – always a solid test of a phone's internals – run without issue; even intensive titles like Mortal Kombat X gave no cause for concern. However, the weaker GPU does mean that there's a slight performance drop when compared to the Snapdragon 845, although Huawei's GPU Turbo system – which enhances things but has to be patched into games by the developer – resolves this to a degree.
While in-screen fingerprint scanners are likely to be one of 2019's most talked-about features, the View 20 doesn't have one – which shouldn't be too surprising, given that it's a mid-range device. The rear-mounted scanner is fast and accurate though, even if it feels a little high and hard to reach at times. The View 20 also supports face unlock, although as far as we could tell, it's just using a 2D image of your face rather than a 3D map, like the iPhone X, XS and XR. That means it could potentially be fooled by a photo of your face so it's not as secure, but on the plus side, the phone was quick to recognise and unlock using this system – quicker than the iPhone XR, in fact. However, in low light situations it struggles and we had to rely on the fingerprint scanner instead.
Honor View 20 Review: Camera
The headline news with the View 20's camera is that it's brand-new Sony IMX586, which has a 48-megapixel sensor and an f1.8 aperture. There's a second sensor on the back, but it's not used for x2 optical zoom – instead, it's a 3D 'Time of Flight' sensor which, in theory, should allow for some seriously impressive photo effects, including good AR functions, such as making a 3D model of an object you've snapped. The trouble is, at the moment these features aren't good-to-go as the View 20 is not officially supported by Google's all-important ARCore app and the ToF lens is pretty much redundant – but it's there, and when Honor does eventually turn it on, it could provide something pretty special to the mix.
Back to the main Sony-made camera, then. With all those lovely pixels to make use of, detail is pretty striking and Honor's advanced 'AI Vision' software does a good job of making even the most casual of snaps seem like a masterpiece. There are some pretty deep 'pro' settings as well, which is good news for photography nerds. The f1.8 aperture is good enough for low-light shooting, but Honor also puts the 48-megapixel sensor to good use by employing a technique known as 'pixel-binning', where multiple pixels are combined to allow more light into the sensor. The View 20's night mode shows this off to good effect, capturing decent shots that require you to hold the camera steady during the snap. They're not in the same league as the low-light snaps seen on Google's Pixel 3, but they're still impressive.
What's rather less impressive is the way the phone's portrait mode works; it often blurs out the wrong part of the image, but this is something that – theoretically, at least – should improve once the power of that 3D ToF camera is fully harnessed. Honor's clumsy attempt at Animoji effects is also forgettable; the 3D faces lack the charm of those seen on Apple's phones, and because that 25-megapixel front-facing camera doesn't have 3D-mapping capabilities, animations look jerky and imprecise. The final disappointment is that the phone's cameras lack optical image stabilisation – something we'd expect to see on a flagship handset, but perhaps not one that costs £500.
For video, the View 20 can shoot 1080p at 60fps, or 4K video at 30fps. It also has slow-motion effects which are backed up by intelligent software which automatically decides when to shoot in slow-mo.
Honor View 20 Review: Battery Life & Storage
With a roomy 4000mAh battery, the View 20 has plenty of stamina. Even when we were putting it through its paces with web surfing, game playing and video recording, it always made it to the end of the day with plenty of juice left in the tank. Huawei’s SuperCharge Fast-charging system helps top the battery up swiftly, but there's sadly no wireless charging, despite that eye-catching glass back.
While the phone has space for two Nano SIM cards, there's sadly no room for a MicroSD card, so you'll need to choose wisely when it comes to picking your on-board storage. The base model has 128GB, but a 256GB version is also on offer.
Honor View 20 Review: Verdict
The View 20 doesn't get everything right – there's no wireless charging or water resistance, and the absence of an OLED panel might annoy some mobile purists – but for £500, it's something of a marvel. The hole-punch screen design might seem like a gimmick but once we grew accustomed to it, we had trouble going back to a device with a notch or pronounced bezels. The screen is something of a show-stopper then, but the camera setup is almost as impressive, and if Honor can do some meaningful stuff with that 3D ToF camera, then this could shape up to be pretty special as far as image capture is concerned. Add in a powerful chipset and likeable software, and you've got an early contender for 2019's best mid-price handset. We're sure that the View 20 will have plenty of competition over the next 12 months, but for now, this is arguably the best way to spend £500 in the Android sector – yes, even better than the OnePlus 6T.
from Featured Articles http://bit.ly/2UcnPF9
0 notes
Text
AppLock App for Android
New Post has been published on https://www.apkrich.com/applock-app-for-android/
AppLock App for Android
AppLock App for Android Download latest version. AppLock is the most downloaded app to protect your privacy. This app will work with password, pattern, fingerprint lock. It is the number 1 App lock in over 50 countries. This app has Over 400 Million users and it supports 45 languages. Read More Popular Android Apps, Minecraft Apk Download, LOCKit Apk Download
AppLock App Latest version
AppLock can lock Gallery, Whatsapp, Gmail, Settings, Snapchat, Facebook, Messenger, Instagram, SMS, Contacts, incoming calls and any app you choose. This app will Ensure security. The app also can hide pictures and videos. Hidden pictures and videos have vanished from Gallery and only visible in the photo and video vault. This app has a random keyboard and invisible pattern lock.
AppLock Apk Features
This app has Advanced Protection in Protect of AppLock. So nobody can uninstall or kill AppLock without a password. You can disable Advanced Protection when you don’t want it. This app is Well-designed Themes. It has also Incognito browser and private SNS. You will get a Customized background and profile option. It will auto lock or unlock according to time. This app has also AppLock widget feature. You can enable or disable AppLock with one tap. Now you can also Lock or unlock in notification bar easily. You can also block incoming calls.
Download APK
Additional Information
App Download Version 2.6.8 Last Updated June 11, 2018 Apk Size 6.9MB Offered By Free Tools App Category DoMobile Lab Content Rating Rated for 3+ Support Android Version Android 4.0.3 and up Installs 100,000,000+ Play Store Available Developer Email Yes Developer Website Available
AppLock App Permissions
This app has access to:
Device & app history
retrieve running apps
read sensitive log data
find accounts on the device
add or remove accounts
find accounts on the device
reroute outgoing calls
read phone status and identity
Photos/Media/Files
access USB storage filesystem
read the contents of your USB storage
modify or delete the contents of your USB storage
take pictures and videos
Wi-Fi connection information
view Wi-Fi connections
Device ID & call information
read phone status and identity
delete apps
directly install apps
update component usage statistics
close other apps
receive data from Internet
view network connections
pair with Bluetooth devices
access Bluetooth settings
0 notes