#VDM multialpha
Explore tagged Tumblr posts
Visit Tumblr Blog
Explore Tumblr blogs with no restrictions, modern design and the best experience.
Last Seen Tumblr Blogs


Fun Fact
Post activity is at the highest at 4:00 pm EDT; notes peak at 10:00 pm EDT.
Link
#zbrush#vdm#zbrushcore#zbrushalpha#zbrush3dalpha#VDM brush#VDM alpha#VDM multialpha#zbrush asset#zbrush brushes#3d sculpting#sculpting#3dart#3d design#VDM rock brush#zbrush VDM
1 note
·
View note
Text
4 Steps to better VDM with ZBrush
Freelance 3D artist and Vertex panelist Maya Jermy shows you how to master VDM. She will be appearing at Vertex as part of the panel on digital humans.
Vector Displacement Mesh (VDM) is a 3D sculpt used as brush building blocks that enables undercutting when drawing on a model’s surface. But what exactly does it mean?
The simplest way to understand it is to start with alphas. Alpha textures are greyscale images that we often use for sculpting fine-detailed patterns like wrinkles and skin pores. Without them we would have to painstakingly draw the details on by hand, one by one.
Alphas are awesome and quite efficient to use in combination with bushes, but they are basically flat images with black values, and they do not support undercuts and overhangs, which limits what can be done with them.
However, Alpha 3D stores the information of all XYZ axes and does not have any vertical elevation restrictions. By definition, it is 3D as it uses VDM in its system.
All you need to worry about is the polygon density to enable proper projection of the Vector Displacement Mesh onto your model. As I see it, Alpha 3D is an alpha with 3D information, or, a 3D sculpt plastered onto a plane and used as an alpha on steroids.
Step 01 – Sculpt the swirl
To start off, we first need to get a canvas, so head to Lightbox> Project>MISC and select the Brush 3D template. With a clay brush selected, build a little hill in the middle of the canvas, more or less to the size of the swirl. Now, with the radial symmetry on and DamStandard brush selected, start sculpting the grooves and peaks of the swirl shape.
Step 02 – Fix distorted edges
Make sure to stay away from the edges of the plane. If you accidentally mess up the edges, you have to fix them before saving the VDM: mask the edges, invert mask, go to Tool>Deformation>Relax Plane Grid or Morph to Grid, depending on the level of damage caused to your plane. This should reshape the edges and add more geometry.
Step 03 – Save out the VDM
To save out your sculpt as a VDM, you need to select a brush that can save all the information contained in your model. With Chisel3D selected, open the Brush palette, select Create and click on Create MultiAlpha Brush. This automatically creates a new Chisel brush out of your model. Your current Alpha texture now contains a VDM of the sculpt with a 3D mark in top-left corner.
Step 03 – Save out the brush
In order to now save out the brush and create an icon for it, open a 3D sphere and turn it into a polymesh. Divide it a few times and drag out your VDM. Position the sphere to capture the icon, go to the Brush palette, hold down the Alt key and click on SelectIcon. With the icon generated, you can finally save it out with Brush>Save As. Rename your brand-new brush and it is done!
— Learn more from Maya Jermy at Vertex Maya Jermy is a regular contributor to 3D World and has years of industry experience, working across various fields.
She will be at Vertex 2018, taking part in our panel discussion, along with other industry veterans including Chris Nichols and Brett Inerson, where the future of digital humans is the topic.
Make sure you get your chance to be there for the discussion, as well the workshops, recruitment fair and all the other activities we have throughout the day. Visit the Vertex site to book your tickets, from the free expo ticket, to the access all areas passes.
We look forward to seeing you there!
from RSSMix.com Mix ID 8265702 http://ift.tt/2oZvIDe via IFTTT
0 notes
Link
35 cloth folds, wrinkles, tufts, and cushion designs in one multi-alpha VDM brush.
Includes highly detailed cushion 3d alphas for fast iteration of furniture models.
ZTL Ztool of all 35 models also included!
Quickly and easily create wrinkles and folds in cloth, chesterfield tufting, and cushions!
All 3d alphas were generated with 6 levels of subdivision
Works with Zbrush 2019.1 or higher.
#zbrush#zbrush brushes#zbrush vdm#vdm brush#VDM alpha#VDM multialpha#zbrush tools#zbrush alpha#wrinkles#cloth#chesterfield#3d modeling#3d sculpting#zbrush sculpt
0 notes
Link
10 convenient and practical female breast shapes for both realistic and stylized character design sculpting.
9 highly detailed and realistic unisex nipple variations.
#zbrush#ZBrushCore#zbrush brushes#zbrush3dalpha#zbrushalpha#zbrushVDM#vdm#VDM multialpha#VDM brush#zbrush VDM#VDM alpha#3dbrush#3dsculpting#3dmodeling#3dart#3dmodelling#zbrush3dart#zbrush3dsculpt#3dsculptingart#3dbreast#3dboobs#3dnipples#cgart#zbrushcg
0 notes
Link
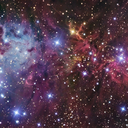
20 natural and sculpted rock formations for use with stylized or realistic 3d designs.
Formations include huge monoliths, stone carvings, caverns, caves, buttes, peaks, and mesa formations.
3d alphas also include a stone throne, skull cave, and Moai sculpture.
Quickly create rock structures, stone carvings, arid terrains, caves, and caverns on any model.
Includes one Multialpha VDM brush with 20 3d vector displacement alphas.
Works with Zbrush 2019.1 or higher.
#zbrush#zbrushcore#zbrushcoremini#zbrushtools#zbrushvdm#vdmbrush#vectordisplace#terrain#sculpting#3dsculpting#cgsculpting#cgmodeling#3dmodeling#3d model#zbrush3d#zbrushalphabrush#vdmbrushes#3dmodels#rock formations#stone sculpture#zbrush 3d brushes#zbrush vector vdm
0 notes
Text
4 Steps to better VDM with ZBrush
Freelance 3D artist and Vertex panelist Maya Jermy shows you how to master VDM. She will be appearing at Vertex as part of the panel on digital humans.
Vector Displacement Mesh (VDM) is a 3D sculpt used as brush building blocks that enables undercutting when drawing on a model’s surface. But what exactly does it mean?
The simplest way to understand it is to start with alphas. Alpha textures are greyscale images that we often use for sculpting fine-detailed patterns like wrinkles and skin pores. Without them we would have to painstakingly draw the details on by hand, one by one.
Alphas are awesome and quite efficient to use in combination with bushes, but they are basically flat images with black values, and they do not support undercuts and overhangs, which limits what can be done with them.
However, Alpha 3D stores the information of all XYZ axes and does not have any vertical elevation restrictions. By definition, it is 3D as it uses VDM in its system.
All you need to worry about is the polygon density to enable proper projection of the Vector Displacement Mesh onto your model. As I see it, Alpha 3D is an alpha with 3D information, or, a 3D sculpt plastered onto a plane and used as an alpha on steroids.
Step 01 – Sculpt the swirl
To start off, we first need to get a canvas, so head to Lightbox> Project>MISC and select the Brush 3D template. With a clay brush selected, build a little hill in the middle of the canvas, more or less to the size of the swirl. Now, with the radial symmetry on and DamStandard brush selected, start sculpting the grooves and peaks of the swirl shape.
Step 02 – Fix distorted edges
Make sure to stay away from the edges of the plane. If you accidentally mess up the edges, you have to fix them before saving the VDM: mask the edges, invert mask, go to Tool>Deformation>Relax Plane Grid or Morph to Grid, depending on the level of damage caused to your plane. This should reshape the edges and add more geometry.
Step 03 – Save out the VDM
To save out your sculpt as a VDM, you need to select a brush that can save all the information contained in your model. With Chisel3D selected, open the Brush palette, select Create and click on Create MultiAlpha Brush. This automatically creates a new Chisel brush out of your model. Your current Alpha texture now contains a VDM of the sculpt with a 3D mark in top-left corner.
Step 03 – Save out the brush
In order to now save out the brush and create an icon for it, open a 3D sphere and turn it into a polymesh. Divide it a few times and drag out your VDM. Position the sphere to capture the icon, go to the Brush palette, hold down the Alt key and click on SelectIcon. With the icon generated, you can finally save it out with Brush>Save As. Rename your brand-new brush and it is done!
— Learn more from Maya Jermy at Vertex Maya Jermy is a regular contributor to 3D World and has years of industry experience, working across various fields.
She will be at Vertex 2018, taking part in our panel discussion, along with other industry veterans including Chris Nichols and Brett Inerson, where the future of digital humans is the topic.
Make sure you get your chance to be there for the discussion, as well the workshops, recruitment fair and all the other activities we have throughout the day. Visit the Vertex site to book your tickets, from the free expo ticket, to the access all areas passes.
We look forward to seeing you there!
from RSSMix.com Mix ID 8265702 http://ift.tt/2oZvIDe via IFTTT
0 notes