#brown gives her an earthy vibe that's fitting for a grass type!
Text
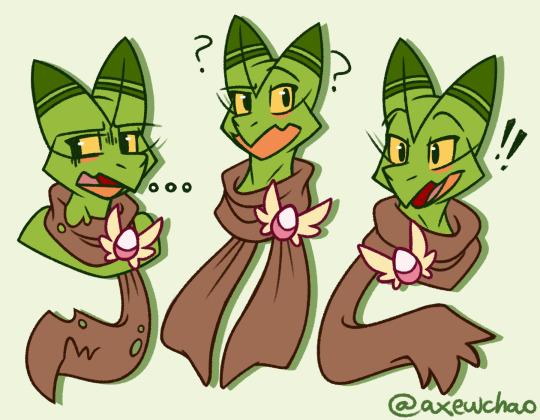
Because of her desire to find Dalex and get them both back to Hoenn, Valerie wouldn't be interested in joining any Rescue Teams.
Buuuut that won't stop her from trying on a scarf or two and wearing one of Team ACT's old rookie badges!
...What? The badges look cute and she always knew she could rock a kickass scarf >:3c
#pokemon#pokémon#pmd#Sceptile#Valerie Sceptile#originally the scarf was gonna be a shade of orange/red#but i didn't like it... at all-#brown gives her an earthy vibe that's fitting for a grass type!#i think the one with tears/holes fits her personality best#being a brash brawler means that whatever the hell she wears is GONNA get torn up eventually#...plus it'd match Dal's black tank top whenever he wears it! :D#axewchaoscribbles
296 notes
·
View notes
Text
Woodland Creature Final Update
(V Further refining of the model shape to add as much of a void to the central chest area as possible. Me twisting wire the ghetto way for my model’s ‘bones’.)


(^ Model finally put together.)
Here, the first thing that is noticeable is the oddly attached left leg. This was simply because of the design of the torso, it didn’t allow me to attach the left leg securely without either breaking the torso, or having the wire stick out. My friend suggested that I attach the left leg via its own wire, putting plasticine beneath it to help it mesh and blend in once I cover the whole model, and so it would take some of the pressure off of the thin torso walls. The loop of wire that sticks into the torso ended up working out as, once covered later, it appeared to be another rib like the ones above it.

(^ My process for covering the ribs in plasticine. Delicately adding strips of it and sticking it down with a combination of my little finger, toothpicks and small files. This perhaps took the longest to do out of anything else on the model.)

I covered the whole model in as thin a layer of plasticine as I could achieve, since I wanted the model to remain thin and couldn’t afford it getting any thicker.
I changed the design from lots of petals, to vines and leaves and petals in select areas of the body. It makes my life easier when it comes to adding the details to the model. I also moved the taproot heart to be carried at the waist of the model in a satchel sort of set up to make it more apparent it is a prop - also it wouldn’t fit in the chest area and wouldn’t be noticeable much in the whole model if kept in the chest area. Other ideas for props included plasticine leaves attached to wisps of wool to represent leaves caught in the wind - this wool would circle around the model, but I realised it may be too difficult to create.

(^ I eventually got the idea to use the vines to represent the ‘line of action’ on the model. They cover the limbs that contain the most movement at any given moment, allowing the model to ‘flow’. Since I was finding it difficult to distinguish between ship docking rope or vines, I added small leaves to them and that seemed to do the trick.)

(^ Added the leaf shaped feet by thickening up their original design and pushing them onto the exposed wire frame. Later added fine leaf details onto the back to further signify that they are leaves.)
Can see the vines along the leg here too, as it is the leg that would be moving if this model was animated. It is the leg that achieves the final pose.

(^ Making use of the negative space within the model and trying to make it more visually interesting. I wanted to add ferns onto the chest to signify breasts, but I eventually decided against it as the chest area was becoming too crowded with other details.)

I found some mushroom candles that I thought were too perfect to ignore. I sliced the base off and removed the wick. It was a pack of three but I only used one, not wanting to overcrowd my environment design. This also saved me time, meaning I didn’t have to model or paint mushrooms from scratch.
In the background you can see how the model is held into place. I had a lot of trouble with it, as I had deduced I would.
My process was drilling a hole into the platform, filling it with epoxy and then placing the exposed wire frame at the bottom of the leg into the epoxy. I made sure to put the foot down first to save myself the trouble of having to model a foot around the stuck leg. This didn’t keep the model up for long and so I loaded up on epoxy and coated the entire ankle/ foot area with it. Once dried this seemed to do the trick.
To be extra sure it wouldn’t eventually fall over, I glued rocks behind the foot - so I wouldn’t be hiding it - to serve as a sort of mini wall should the model begin to fall.
I had had an idea to create a sort of nut and bolt set up, or maybe magnets. But epoxy was the cheapest, easiest idea and I didn’t want to detach the model anytime in the future, so permanent was preferred.

Sculpting the face didn’t go well at all. I was using a character from a game as reference, whose wooden body would twist up and form the face with sharp, angular features. I tried to do something similar with the vines, hence the horns added later, but never really achieved the effect I wanted with the face.
(V The character I used as inspiration, from the game ‘Skyrim’. Note how the wood she is made from forms her features, this was the idea I wanted to follow from the very start, but it was difficult to pull off. The horns I think I managed well enough, and after I’d changed the face it almost gave my character a sort of helm.)


(^ Working on the plain looking back of the head.)
I had the idea to bring all of the vines to a stop at the back of the head, having them twist and meet in the middle where a blooming flower would be - sort of like hair that had been pulled into a tight bun. This gave the model a tough, warrior like vibe.

When it came to adding the long troubled after petal design, I found the best method to be adding tiny individual petals to the model. Now, this would take ages to do if I had covered the entire model like originally planned, so I decided to go with a prioritised design - grouping petals at the start and end of limbs, having them connect in single file along the length of the limbs. They ended up covering the arms, legas, part of the torso, and the face/ forehead of the model. The petals on the face further pushed this apparent ‘helm’ design that I had unintentionally added. It was then that I decided the character could be more warrior inclined if needed, since it stuck with the original ‘strong dancer’ idea. The petals can be seen in the final pictures of the model.
Background ideas:
Staple card to the platform and add birch bark for trees?
Tissue paper for a river?
Twigs and leaves? (They might decompose).
Have the environment be near a river in order to justify a lack of trees and a presence of mushrooms?
Sawdust for ground material?
Colour some wool balls with food dye and use as bushes/ grass?
Weft some wool/ yarn to ‘poof’ it up and use it as flooring?

I went with the wefting wool idea as I couldn’t find any green food dye or blue tissue paper - despite having thrown some away a few weeks ago ironically enough!
I found a few varieties of wool, one was the brown you see above, another was a light green. I intended to mix the two to create some earthy colours, but the final shop I entered had some perfectly coloured dark green/ brown wool all in one so I ended up using that. My roomate had some nice blue wool that she let me use for the river.
When wefting the wool I got two types from it, what I’ll be calling linear wool and floofy wool. These two types can be seen clearly in the final piece.
Linear wool was the result of wefting the strands tied to the coat hanger; they were considerably fluffier and had added volume - but stayed resonably straight. I wanted the majority of my model flooring to be made from this.
Floofy wool was the fibrous stuff left on the brush I was using to weft; it was soft and extremely fluffy - like the fur you get stuck on the brush after brushing your dog. I decided it could represent moss within my environment hence why it is on one side of the river.
Cutting the linear wool from the coat hanger left tiny tufts of excess, I used these to line the river on one side for some extra texture and they represented shrubbery/ small bushes.

(^ Excess tufts on the left side of the river and mossy floof on the right side. The river was wefted too, but the wool wasn’t as responsive as the other were and so remained mostly intact. The floofy blue wool stuck on the brush by the ned of it was used as foam/ splashing around the rock in the middle of the river. This can be seen better in later images.)


In the final model you can see the clear distinction between linear and floofy wool, which I was rather happy about. I didn’t add much to the environment as, after sticking the rocks and mushrooms down, I felt it didn’t need anything else.
The petal detailing can be seen clearly here and reminds me of armour bracing - structural support for the armour plates once they are added. This, again, gives off a warrior vibe and by this point I was happy to say that my character - due to her heavyness - was half wind based, half earth based. A forest guardian who guides lost souls to their final resting place.
Reflections:
The model design changed a lot during the detailing process, mostly for my own convenience and what limits my skill level imposed on me. I chose a pretty difficult idea to begin with but in the end I do believe I kept the essence of the original idea and simply adapted it into something a little different.
Next time, I will adjust my designs based on how thick the base foam has to be in order to support anything on the model. What really threw me off was how thick the arms and legs turned out because I couldn’t risk making them any thinner.
the back of the model looks sparse in comparison to the front. I did try to combat this with the satchel straps, intertwining vines and some petal detailing but it didn’t seem to do much. This may simply be because the torso is rather square - as I had trouble rounding the rectangular blocks the craft foam started off as. This makes the back protrude a certain amount in comparison to the front of the body, if it was more rounded then it would fit more snuggly with the rest of the model’s design. Something to remember for next time.
I knew I was going to have difficulties with getting the model to stand, and had a plan for it. However, in the future I may want to consider picking more stable poses/ designs.
0 notes
Last Seen Blogs

bonbonken
bonbonken's art blog

getosbigballsack
𝒯ℴ𝓃𝒾𝒶𝓃𝓃ت︎

okamiisama
okami

pinsbreaktheinternet
Pins Break the Internet

yegreenmen-blog
Ye Green Men