#but goofing with memes and fandom stuff is how i learned these types of programs!
Explore tagged Tumblr posts
Visit Tumblr Blog
Explore Tumblr blogs with no restrictions, modern design and the best experience.
Last Seen Tumblr Blogs


Fun Fact
Tumblr’s website traffic is steadily declining.
Text
Photoshop Meme Template Tutorial
I got bit by a bug to throw out a tutorial today because I had the time!
So for anyone who has found a neat little template online and wanted to use it - here's my attempt at explaining. This is assuming very little knowledge in these types of software. I will be using Clip Studio Paint as it's my preferred program, but anything with the ability to edit a .psd should have the same ability. (I will also add the inputs for Photopea as it is free and doesn't require any downloading.)
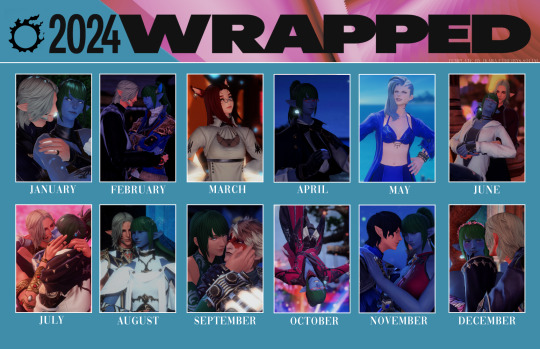
We'll be using this template by Ikara on Bluesky as our example.
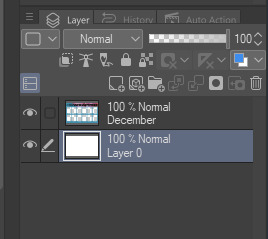
First off, open your file. (Drag the template from Downloads to the "Drop Any File Here" box. Then I would go "Views > Extras" and unclick that option.) The most useful part about .psd files for templates is the Layers. Every program that can edit a .psd should have a section of the screen that displays the layers. For the 2024 Wrapped, the layers are named "December" and "Layer 0". Everything under the "December" layer will be blocked by the non-transparent portions of that layer, and everything above "Layer 0" will be above the white.
So now we want to add some images. Open up your desired screenshot in any program and Copy>Paste (Ctrl+C and Ctrl+V) into your editing program. They should generate a new layer with only the image in it, but if it doesn't you can do Layer>New Layer to make a fresh one.

But, err... that's kinda too big to fit, isn't it? It is. So what we need to do is scale it down and possibly cut some of it out.

First, select your image layer and find a "Transform" or "Scale" tool. This is Edit>Free Transform (there is also "Transform" but I preferred free transform) in Photopea. There should be some options on the Scale section that are important. "Keep Aspect Ratio" is important to make sure that you don't squash or stretch your image. This is the set of chain links in Photopea. "Free Transform" also allows you to move the image into the right spot.


You can also use the numbers to scale it down from 100% to 50% or what ever your desired scale is (I liked 32-35% for Landscapes and 22-25% for Portraits for this template). Once it's to your liking, you can accept your transformation and move on. You can either delete the extraneous section of your image, or just leave it to be covered up by the other layers.

You will want to repeat this process until you have the template filled, making sure that each image is its own layer. This allows the most freedom when editing images if you want to go back and change anything. You can also use the layers to cover up other portions of different layers by moving it above or below each other.


If you have overlapping sections that can't be resolved with just layers, I would recommend deleting under the template rather than at the edge of the section because you might delete more than you wish. (I do not recommend using the "Crop" tool in Photopea as it effects your entire image rather than just your layer.) Use a Rectangle Select to pick the area you want deleted and hit "Delete" to do so.
So you've gotten all your images where you like them and cropped any overlapping bits, it's time to Export a new .png using File>Export as>PNG. "Export" creates a completely new image where "Save" just saves the image. You can Save the .psd for future use or if you feel like there may be a mistake that you aren't catching (which has definitely happened to me before) and then you have the ability to edit the entire thing again. A .png will not save the Layers, just all the visible stuff.
And that should be it! Feel free to ask any questions, it's entirely possible I didn't communicate something clearly or a tool works differently in the program you're using. I also included the .psd for the version I did so you can see behind the curtain. Happy memeing!
#tutorial#template memes#i hope i was clear#but goofing with memes and fandom stuff is how i learned these types of programs!#it's a good skill to have#there are also shortcuts in photopea and other programs you can use#but they vary program to program and i didn't want to mess with that
20 notes
·
View notes