#dreamstudiodollhouse
Text

The piano, it's done, maybe.
1:6 scale upright piano from kit from DreamStudioDollHouse on Etsy. Started in 2020, finished(ish) in February 2024.
#1/6 scale piano#1/6 scale furniture#sixth scale piano#1/6 scale upright piano#1/6 scale#1:6 scale#sixth scale
0 notes
Text
Assembling Doll Shell Chair: Tutorial

This product can be found in our store on Etsy: 1:6 Barbie scale, 1:4 MSD scale.
This tutorial can also be applied to our Shell Sofa: 1:6 Barbie scale, 1:4 MSD scale.

1) Carefully cut out the parts with a knife. All you need is to cut the small cross-pieces on the back side of the kit.
Аккуратно вырежьте детали ножом. Они держатся на нескольких тонких перемычках.

2) Assemble the details as shown below. Most of the details can be assembled and kept together without glue, but we strongly recommend to use glue for wood to make the items steady.
Соберите детали так, как показано на фото ниже. Большинство деталей собирается и держится без клея, но мы рекомендуем использовать клей для дерева (ПВА, Момент столяр), чтобы изделие получилось прочным.


59 notes
·
View notes
Photo

Golden Dream Cherry (ode to the name of my favourite childhood Barbie 🤩😆) #bemybabycherry #lounginglinda #miyuking #blythecouture #blytheoutfit #dollcouture #dolloutfit #goldbrocade #dreamstudiodollhouse #6thscalefurniture #gold #glitter https://www.instagram.com/p/Bss86O_Aoq_/?utm_source=ig_tumblr_share&igshid=1cdspm2794rn3
#bemybabycherry#lounginglinda#miyuking#blythecouture#blytheoutfit#dollcouture#dolloutfit#goldbrocade#dreamstudiodollhouse#6thscalefurniture#gold#glitter
2 notes
·
View notes
Text
Assembling Doll Wooden Toy: Tutorial

This product can be found in our store: Etsy
Youtube video tutorial

Recommended materials: glue for wood, acrylic primer, acrylic paint.
You can sand the details before painting, if you need too.
Рекомендуемые материалы: клей ПВА или Момент столяр, акриловый грунт, акриловая краска.
Перед покраской можно обработать детаи наждачной бумагой №120 или №150.

1. Carefully cut out the parts with a knife. All you need is to cut the small cross-pieces on the back side of the kit.
Отделите детали от подложки при помощи ножа, прорезая перемычки с обратной стороны фигурки.

2. Glue two parts of the animal figurine together.
Склейте левую и правую стороны игрушки.
3. At this stage you can paint the animal and the wheels with acrylic primer (1-2 layers) and acrylic paint. You can additionally cover the parts with acrylic varnish.
На этом этапе можно раскрасить игрушку и колесики. 1-2 слоя акрилового грунта, затем краска. По желанию вы можете покрыть окрашенные детали акриловым лаком.

4. Cut two pieces of toothpick (with scissors or a knife), approximately 12 mm (4,7 inches) each. Apply glue to the edges of the pieces of toothpicks and glue the first two wheels to them.
С помощью ножа или ножниц отрежьте от зубочистки 2 кусочка длиной 12 мм и приклейте к ним первую пару колесиков.

5. After the glue goes dry, insert the pieces of toothpick into the holes in the animal figurine and glue the second pair of wheels. If all done correctly, the wheels should spin after the glue goes dry.
Когда клей высохнет, проденьте зубочистку в отверстия в лапках фигурки и приклейте вторую пару колесиков. После того, как клей высохнет, колесики должны крутиться.


47 notes
·
View notes
Text
Tutorials: Master Post
Most of the photo-tutorials are available upon request! To get a tutorial for your items - please send us a message on Etsy, Instagram or e-mail us on [email protected] . Thank you for understanding!
Here are some examples of the tutorials:
Furniture (Мебель):

• Shell Chair (Кресло-ракушка) and Shell Sofa (и Диван-ракушка)
• Table #3 (Стол №3)
• Staircase Storage Unit (Стеллаж-лесенка)
• Bed #1 (Кровать №1)
• Chest of drawers #1, Tall chest of drawers (Комод №1, Комод высокий)
• Stepladder (Стремянка)
• Sofa #1 video tutorial (Диван №1: видео-инструкция)
• Office chair video tutorial (Рабочее кресло: видео-инструкция)
Toys (Игрушки):

• Mini-toys on wheels (Мини игрушки-каталки) photo-tutorial
Video Tutorial (видео-инструкция)
• Toy sledge video tutorial (Санки: видео-инструкция)
Upholstery and cushions (Обтяжка и подушки):

• Fabric upholstery for Doll Armchair #1, #3 (Тканевая обтяжка кресла №1, №3)
• Seat cushion for Doll Armchair #2, Sofa #2 and beds
#dreamstudiodollhouse#tutorial#DIY#how to#dollhouse#doll furniture#bjd#fashion doll#bjd furniture#master post
651 notes
·
View notes
Text
Fabric upholstery for Doll Armchair #1, #3: Tutorial

This products can be found in our store: Doll Armchair #1, Doll Armchair #3
You can order an upholstery for an armchair here.


Measure the seat of your chair for more for accurate fit.
Измерьте сиденье вашего кресла для точности.


#dreamstudiodollhouse#how to#diy#tutorial#doll furniture#dollhouse#bjd#bjd furniture#doll arcmchair#fashion doll#furniture upholstery
74 notes
·
View notes
Text
Assembling Doll Stepladder: Tutorial

This product can be found in our store: Etsy
1. Carefully cut out the parts with a knife. All you need is to cut the small cross-pieces on the back side of the kit.
Аккуратно вырежьте детали ножом. Они держатся на нескольких тонких перемычках.

2. Assemble the details as shown below. Most of the details can be assembled and kept together without glue, but we strongly recommend to use glue for wood to make the items steady.
Соберите детали так, как показано на фото ниже. Большинство деталей собирается и держится без клея, но мы рекомендуем использовать клей для дерева (ПВА, Момент столяр), чтобы изделие получилось прочным.


#dreamstudiodollhouse#DIY#how to#tutorial#dollhouse#doll furniture#bjd furniture#fashion doll#doll ladder#doll shelving
11 notes
·
View notes
Text
Assembling Doll Staircase Storage Unit: Tutorial

This product can be found in our store: Etsy
1. Carefully cut out the parts with a knife. All you need is to cut the small cross-pieces on the back side of the kit.
Аккуратно вырежьте детали ножом. Они держатся на нескольких тонких перемычках.

2. Assemble the details as shown below. Most of the details can be assembled and kept together without glue, but we strongly recommend to use glue for wood to make the items steady.
Соберите детали так, как показано на фото ниже. Большинство деталей собирается и держится без клея, но мы рекомендуем использовать клей для дерева (ПВА, Момент столяр), чтобы изделие получилось прочным.


#dreamstudiodollhouse#DIY#how to#tutorial#dollhouse#doll furniture#bjd furniture#fashion doll#doll shelving#doll shelf unit#doll storage
10 notes
·
View notes
Text
Making a cushion for Doll Armchair #2, Sofa #2 and beds: Tutorial

МК по изготовлению чехла для подушки из поролона (для кресла №2, дивана №2 и кровати). Автор Dinka53.

У меня был кусок поролона размером: Ширина (7 см) * Длина (9 см) * Высота (1 см).
Этот кусок я сфотографировала так, что он повернут к нам передней частью, то есть той частью, которая будет на виду. На этой части швов быть не должно.
I had a piece of foam rubber: 7 cm (2,7″) wide, 9 cm (3,5″) long and 1 cm (0,4″) thick.
I pictured the piece so it’s turned towards us with a front part, that will be in sight. There shouldn’t be any seams on it.

Нужно выкроить из ткани прямоугольник. Его размер определяется следующим образом:
1. Ширина: Ширина (7 см) + Высота (1 см) = 8 см.
2. Длина: Длина (9 см) + Длина (9 см) + Высота (1 см) + Высота (1 см) = 20 см. К этой величине добавить для нахлеста 1 см. Итого, длина будет равна 21 см.
3. Припуски на шов: к ширине - по 0,5 см, к длине - от 0,5, до 1 см. Я добавила 1.
You need to cut a rectangle piece out of your fabric. The measurements are defined as follows:
1. Width: width 7 cm (2,7″) + thickness 1 cm (0,4″) = 8 cm (3,1″).
2. Length: length 9 cm (3,5″) + length 9 cm (3,5″) + thickness 1 cm (0,4″) + thickness 1 cm (0,4″) = 20 cm (7,9″). Add 1 cm (0,4″) for overlap. 21 cm (8,3″) in total.
3. Overmeasure for the seams: 0,5 cm (0,2″) for the width, 0,5-1 cm (0,2-0,4″) for the length. I added 1 cm (0,4″).

Припуски на шов по длине загибаем на изнанку и отстрачиваем. Затем складываем полоску таким образом, чтобы разрез оказался примерно посередине прямоугольника.
Fold the overmeasure parts to the underside and stitch them. Then fold the strip so the slit is somewhere in the middle of the rectangle.

Совмещаем края, один край накладываем на другой не встык, а с нахлестом ~ 0,5 см. Закалываем булавками и сшиваем швы (по синим линиям).
Align the edges with an overlap of ~ 0,5 cm (0,2″). Pin it like that and sew the other edges (along the blue lines).

Дальше нужно оформить уголки. Складываем их так, как показано на фото, совмещая шов и сгиб. Затем рисуем линию шириной 1 см (высота поролона) и застрачиваем уголок по этой линии. Так нужно сделать для всех четырех углов.
Then you need to form the corners. Fold them as pictured, aligning the seam and the fold. Then draw the line of 1 cm (0,4″) (the thickness of the foam) and stitch the corner along this line. This needs to be done for all four corners.

Собственно - это все) Я загнула уголки и приметала их к шву. То же самое можно сделать и с припуском возле отверстия.
That’s it. I folded the corners and tacked them to the seam. The same can be done for the overmeasure parts near the slit.

В отверстие засовываем поролон и расправляем швы. Чехол готов.
Это вид снизу. Отверстие можно немного зашить через край, чтобы не расходилось, а можно оставить так.
Put the foam rubber through the slit and straighten the seams. The cushion is ready. This is the bottom view. The slit can be sewn together or left like this.

Это вид сверху, парадный)
This is the upper view.
#dreamstudiodollhouse#DIY#how to#tutorial#dollhouse#doll furniture#bjd furniture#fashion doll#doll arcmchair#doll sofa#doll bed#doll cushion
4 notes
·
View notes
Text
Assembling Doll Chest of Drawers: Tutorial

This product can be found in our store: Etsy
1. Carefully cut out the parts with a knife. All you need is to cut the small cross-pieces on the back side of the kit.
Аккуратно вырежьте детали ножом. Они держатся на нескольких тонких перемычках.

2. Assemble the details as shown below. Most of the details can be assembled and kept together without glue, but we strongly recommend to use glue for wood to make the items steady.
Соберите детали так, как показано на фото ниже. Большинство деталей собирается и держится без клея, но мы рекомендуем использовать клей для дерева (ПВА, Момент столяр), чтобы изделие получилось прочным.


#dreamstudiodollhouse#DIY#tutorial#how to#doll furniture#bjd#fashion doll#dollhouse#chest of drawers
8 notes
·
View notes
Text
Assembling Doll Table #3: Tutorial

1. Carefully cut out the parts with a knife. All you need is to cut the small cross-pieces on the back side of the kit.
Аккуратно вырежьте детали ножом. Они держатся на нескольких тонких перемычках.

2. Assemble the details as shown below. Most of the details can be assembled and kept together without glue, but we strongly recommend to use glue for wood to make the items steady.
Соберите детали так, как показано на фото ниже. Большинство деталей собирается и держится без клея, но мы рекомендуем использовать клей для дерева (ПВА, Момент столяр), чтобы изделие получилось прочным.


4 notes
·
View notes
Photo
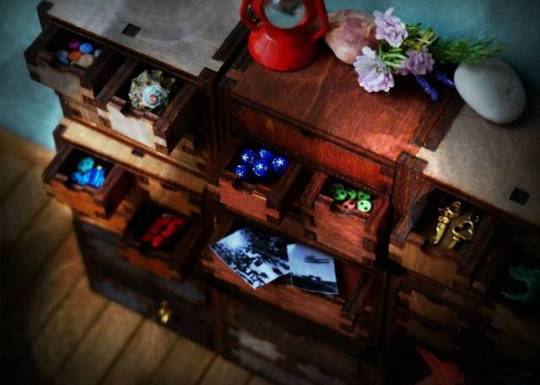
If you liked it, you can buy here: https://www.etsy.com/listing/237718299/wood-mini-chest-with-drawers-for-doll?ref=shop_home_active_34 #DreamStudioDollHouse #furniture #furnituredesign #dollfurniture #dollstagram #bjd #abjd #doll #russia #beautiful #мебельназаказ #кукольнаямебельручнойработы #продажамебели #furnituresale #mood #мечтысбываются #кукольнаямебель #румбоксы #вседлякукол #игрушки #игрушкиручнойработы #nippon #nipponmisaki #momoko #momokodoll #barbie #pullip #obitsu #blythe #blythedoll #блайз #azone #hottoys
#doll#dollfurniture#продажамебели#abjd#furnituresale#mood#obitsu#вседлякукол#nippon#azone#кукольнаямебельручнойработы#momoko#nipponmisaki#кукольнаямебель#блайз#blythedoll#furnituredesign#румбоксы#beautiful#russia#мебельназаказ#barbie#dreamstudiodollhouse#игрушки#dollstagram#hottoys#bjd#furniture#momokodoll#игрушкиручнойработы
3 notes
·
View notes
Photo
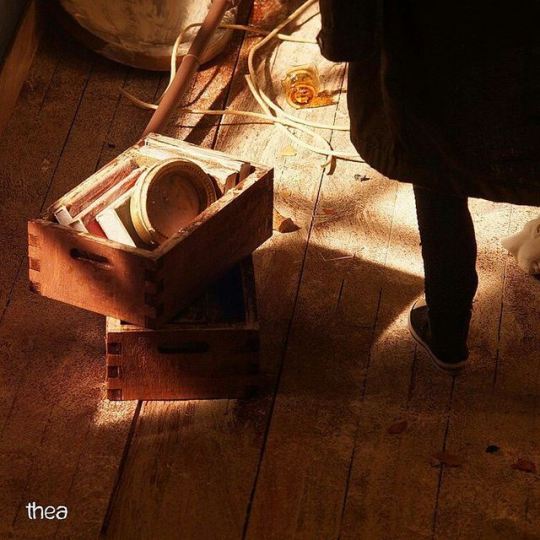
Thanks for the photo Angela Kozlov))) If you liked it, you can buy here: https://www.etsy.com/ru/shop/DreamStudioDollHouse?ref=hdr_shop_menu #DreamStudioDollHouse #furniture #furnituredesign #dollfurniture #dollstagram #bjd #abjd #doll #russia #beautiful #мебельназаказ #кукольнаямебельручнойработы #продажамебели #furnituresale #mood #мечтысбываются #кукольнаямебель #румбоксы #вседлякукол #игрушки #игрушкиручнойработы #nippon #nipponmisaki #momoko #momokodoll #barbie #pullip #obitsu #blythe #blythedoll #блайз #azone #hottoys #куклохобби #кукольныйдомик #куклы #dollhouse #dollhouseminiatures
#hottoys#nippon#momoko#dollhouseminiatures#мечтысбываются#блайз#кукольныйдомик#pullip#bjd#azone#dollstagram#куклохобби#furniture#румбоксы#игрушки#obitsu#dollhouse#doll#игрушкиручнойработы#куклы#dreamstudiodollhouse#beautiful#dollfurniture#furnituredesign#кукольнаямебель#мебельназаказ#momokodoll#barbie#вседлякукол#blythedoll
0 notes
Photo

Dear Friend! Only in June 2017! In our store https://www.etsy.com/ru/shop/DreamStudioDollHouse , a discount code ; HAPPYJUNE We will be glad to see!))
0 notes
Last Seen Blogs

nakred
繊維喪失

solomonkareshi
cassieeeee :3

galaksininbulutu
Karanlığın İçindeki

shadow294
Just another dreamer

ahyeon-min
ahyeon.zip