#essentialphoto
Photo

Futti anatomic shoes - SS2022 @futti.shoes Set design @crveni_papar . . . . . . . #futti #futtishoes #sandals #summershoes #shoeaddict #shoelover #summervibes #womensshoes #womensfashion #webstore #japanke #flipflops #stilllife #productphotography #productphotographer #simpleandstill #aquietstyle #seekthesimplicity #verilymoment #setdesign #stilllifesetup #croatacroatia #croatiandesign #madeincroatia #Snoot #Lighting #OpticalSnoot #Pixapro #EssentialPhoto https://www.instagram.com/p/CfWY-LGuJKB/?igshid=NGJjMDIxMWI=
#futti#futtishoes#sandals#summershoes#shoeaddict#shoelover#summervibes#womensshoes#womensfashion#webstore#japanke#flipflops#stilllife#productphotography#productphotographer#simpleandstill#aquietstyle#seekthesimplicity#verilymoment#setdesign#stilllifesetup#croatacroatia#croatiandesign#madeincroatia#snoot#lighting#opticalsnoot#pixapro#essentialphoto
1 note
·
View note
Photo

PIXAPRO Citi 600 ‘Unboxing’. A short little film going through the unboxing and overview of the new Pixapro Citi600 Pro flash head. First impressions- Got to say it’s really really nice. Here’s my video set up for today as well. I’ll be shooting with the new CIti600 Pro units on the LIVE Stage, with Fujifilm, at the Photography show. Come and say hi. :) #pixapro #citi600 #flash #strobe #photography #studio #location #fashion #beauty #photogear #essentialphoto #fujifilm #xt2 #arri #zoomh4n #xf23mmf2 #lastolite #gitzoinspires (at Southampton)
#photography#fashion#photogear#fujifilm#location#citi600#essentialphoto#xt2#xf23mmf2#lastolite#pixapro#beauty#strobe#flash#studio#zoomh4n#gitzoinspires#arri
2 notes
·
View notes
Photo

Reposted from @gilangrmdhn Be Bold #denim #denimfriday #boots #redwing #redwingsheritage #bataviaredwingsociety #bandungredwingenthusiast #redwingid #selvedge #selvedgeid #denimstyle #bootsstyle #moctoeredwings #moctoe #instaphoto #essentialphoto #localproduct #instastory #denimenthusiast #newnormal #motivation #eleganceheritage https://www.instagram.com/p/CCL1tXDA8hZ/?igshid=tcvu01sgmv62
#denim#denimfriday#boots#redwing#redwingsheritage#bataviaredwingsociety#bandungredwingenthusiast#redwingid#selvedge#selvedgeid#denimstyle#bootsstyle#moctoeredwings#moctoe#instaphoto#essentialphoto#localproduct#instastory#denimenthusiast#newnormal#motivation#eleganceheritage
0 notes
Photo

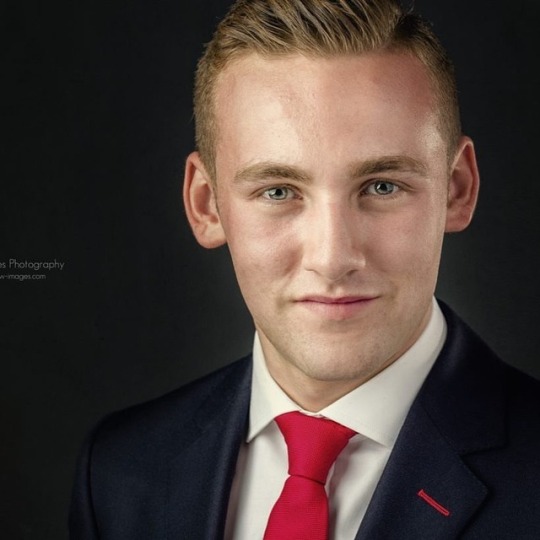
Selfie time in the studio today... #portraitstudio #instagram #standout #pixapro #essentialphoto #lighting #lumi400 #dwimagesphotography #DavidWellbelove #selfportrait #miltonkeynes #portraitphotography #people #humannature #humans #biggerpicture #buckinghamshire #badass www.dw-images.com #websiteinprofile (at D.W Images Photography)
#websiteinprofile#selfportrait#lighting#people#humans#portraitphotography#miltonkeynes#buckinghamshire#portraitstudio#biggerpicture#instagram#dwimagesphotography#badass#humannature#standout#davidwellbelove#pixapro#essentialphoto#lumi400
1 note
·
View note
Photo
So now that Bowens has officially closed its doors with no whiff of ever reopening them, it left me thinking what to do with all the thousands of pounds worth of S-fit modifiers I have. I feel a lighting test coming on 😅 Say hello to the S-fit PIXAPRO Citi 600 location head. The stats on this battery pack head look almost too good to be true so I'm looking forward to seeing what it can do. For those of you that don't know, Pixapro is a Godox Photo Equipment Co. Ltd head distributed by EssentialPhoto here in the U.K. and those Godox heads have been stealing the headlines for a while now so I had to test it out for myself👍🏻 Has anybody used Pixapro/Godox themselves? Any thoughts? Heard anything good or bad? Let me know👍🏻 I'll keep you posted on the results😎 #lighting #gear #studiolighting #travellighting #locationlighting #pixapro #godox #photography #strobist http://ift.tt/2ywkVDG
1 note
·
View note
Text
PiXAPRO LED200B III Light For Video Review
Why You Should Consider The PiXAPRO LED200B III For Your Filming
There is hot competition in the LED video lighting market, which makes it much harder to choose the ideal light for your shoots. After talking with colleagues, I decided to try out the PiXAPRO LED200B III, a competitor to the Aputure 120D II. The key difference between the two is that the LED200B III is bi-colour, with the favoured Aputure fixtures being daylight or tungsten.
To kick things off, here is a quick spec comparison between the LED200B III, Aputure C120D and C300D.
Aputure LS C120D II
5500K daylight
7,000 lux at 1m
CRI >96, TCLI 97
Equivalent to a 1K tungsten
Bowens S-type mount
DMX control
ABCD grouping
Mains and battery power
Aputure LS C300D II
5500K daylight
45,000 lux at 1m
CRI 96, TCLI 97
Equivalent output to a 2K tungsten ~
FX via remote and app control
Bowens S-type mount
ABCD grouping
Mains and battery power
LED200B III
3200-5600K bi-colour
16,000 lux at 1m
CRI >97, TCLI 97
Equivalent output of a 2K tungsten
Bowens S-type mount
4 memory settings
Wireless control via USB dongle
Mains power only
Creating a soft, ambient light
I recently used the LED200B III on an interior design shoot; the ambient light in the room room was downlit with tungsten panels and side lit (through tall windows) by daylight. Although the ambient light illuminated the room, it needed a boost of soft light to lift the shadows and even out the overall exposure.
The light was set to 3200K so it matched the main ambient light, and it proved a worthy fixture for the shoot.
Using the LED200B III as a hard light source
As well as a large diffuse light source through modification, the LED200B III can also be used as a powerful hard light source. The fixture was used on a recent shoot, employed as a 2K tungsten-style would be (through a window). It created a strong beam of light for the scene that complimented the scenes key lighting.
Filming interviews and creating a super-wide light source is the typical way of using these lights, but these different scenarious and shoots show how versatile the LED200B III is.
Filming with the LED200B III Outdoors
From using the light outside, I was really pleased to see that it lit the subjects very well, in a smooth wash of daylight. With the 95cm octodome applied, the shadows were softened. The subjects being filmed weren’t put off by a big, bright light source, which meant that they didn’t squint into the camera.
vimeo
PiXAPRO LED200B III Controls and Features
I was quickly able to set different brightness levels and colour temperatures into the memory bank, which is handy for quick setups or changes of location. Although the light can be controlled via a remote control, I haven’t tried this out but can imagine it would be useful if the fixture is rigged in a studio.
The light intensity is in steps of 1% and 10% increments, at 100% intensity the fixture is capable of 16,000 lux @ 1m. Rated at equivalent to a 2K tungsten, it is impressively bright, even with the octodome attached.
Unlike the Aputure 300B II LED light which has a single COB (chip on board) LED, the PiXAPRO LED200B III has four Integrated LED chips strips; two daylight (5600K) and two tungsten (3200K).
Using The Light In a Studio
The LED200B III proved to be the perfect choice for demonstrating lighting techniques at Kingston University. The students got hands on lighting different scenes to convey emotion, and saw how powerful the use of soft lighting is when filming people.
For filming interviews or pieces with subjects, I found that the light output was more than adequate when shooting at a shallow depth of field. The wrapping texture of the light meant that only an additional backlight/rim light was needed to accentuate the subject. This is easily achieved with another small LED fixture.
Corporate Interview Filming
Lighting interview subjects is a crucial skills that we are proud to have, especially on the corporate productions we work on. The LED200B III has played an important role in softly lighting subjects as a key light, with smaller lights filling in shadows from the side and back.
From using the light on a number of different video shoots, I found that it can be used as a single soft key light for more simple shoots or to create a slighty dramatic shadow effect, making it very versatile.
vimeo
My key reasons for choosing the LED200B III
Filming locations vary from day to day, so a bi-colour fixture was a must. The LED200B III is rated at 3200K - 5600K, which is an advantage over having a dedicated daylight or tungsten fixture. The downside to a bi-colour light is that the light output won’t be as bright as a dedicated colour temperature light.
A soft, diffuse light for filming products and interviews is a must. Using the 95cm octodome with the fixture creates a wonderful soft wash of light, with graduated shadows that gently fall off. The light is very pleasing for illuminating subjects. The light is very bright too, which is a key reason for choosing this model over the LED100B II model. Light output can always be dimmed, but you would need two light fixtures to reach the same maximum output as the LED200B III.
Cost was also a consideration, with the LED200B III, peli case and octodome coming in at under £600.00. Compare this to the Aputure competitors that are over £700.00 and over £1000.00 respectively, and without accessories. That being said, the ability to use batteries with the C120D II and C300D II is an advantage over the LED200B III. I had lengthy conversations with the EssentialPhoto customer services team, they informed me that it wasn’t possible to power the fixture with batteries unfortunately.
Creative effects and prograbbable fixtures are making their way into this type of light, so it is unfortunate that the LED200B III doesn’t have any built in (or available via an app). This appears to be a cost bracket, as higher priced units have effects such as strobing or glowing fire. Perhaps we will see this in future models.
If you are searching for a new LED light, you should definitely consider the PiXAPRO LED200B III. EssentialPhoto often have bundle deals available that include modifiers, peli cases and stands too.
#led light review#led light for filming#video lighting#surrey scouts#scoutabout 2020#video production#filming#panasonic eva-1#4k filming#led video light#videography surrey#videography london#PiXAPRO LED200B III#Pixapro lighting#pixapro led video light#led video lighting#outdoor filming
0 notes
Text
Biete: Softbox Twin Head Continuous Light Kit Studiolicht
Preis: 60 CHF Ich verkaufe mein gebrauchtes EssentialPhoto 1050W EzyLite Softbox Twin-Head Continuous Lighting Kit. Es ist in gutem Zustand. Bitte beachten Sie, dass das Set UK Plugs hat. Es [...] http://dlvr.it/P4rD43 #studentfilm
0 notes
Text
Pixapro Eco Trigger System
Written By MARK WILBREY
I have been using the Pixapro Eco Trigger system for a number of weeks, and felt I would like to share some of my thoughts on its performance.
One of the biggest problems facing a Photographer in the studio is which trigger system to buy or invest in. The market is swamped by and array of different models all offering their own plus and minus points. I have used Pocket Wizard, Calumet, Yongnuo and Hamnel all of which worked, completed the task and found no major issue with their performance, However what I did find when working alone with these systems is there was no way in controlling the power output from your flash trigger, and was running around the studio adjusting lights. The Yongnuo did offer this for speedlights but the menu systems was very complex and not very user friendly, and offer very little in the way of visual affirmation of your settings. There was also no easy way to integrate studio flash control with Speedlight control, again meaning two sets of triggers.
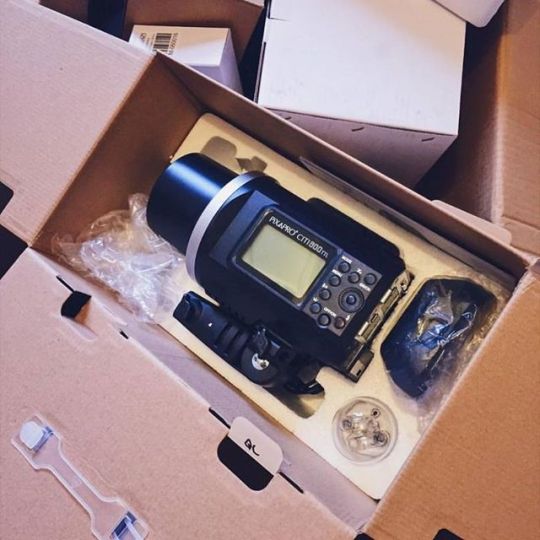
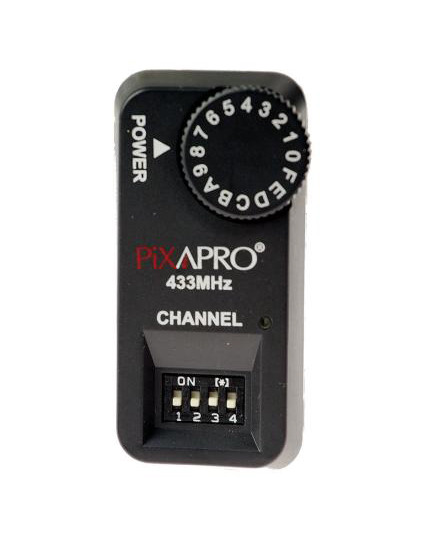
Then... along came the Pixapro FT-1 trigger system offering to solve all of the problems I had encountered when working alone. The trigger not only looks and feels robust it offers a very comprehensive lighting control system. It operates on 433MHz wireless frequency, boasting a 50m wireless range. Powered by 2AA batteries which on test seem to last and last, great news as batteries are always a photographer’s blight. There are two types of receivers available:
FT – 1 for the Pixapro studio flash (Both Lumi ranges and Storm)

Control Unit

Easy attach receiver
And ST-11 for Pixapro speedlights
Receiver Unit

So lets look a look at the unit, the unit has a rotating dial which allows you to control up to 16 flash heads individually and adjust their power setting.
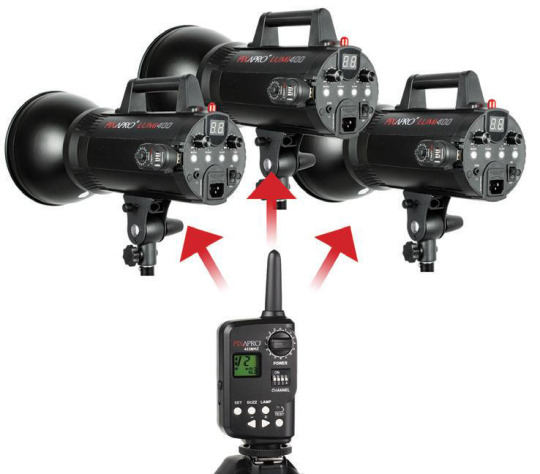
Control Up to 16 Studio Flash heads from your camera
This can be almost limitless if you have one or more flashes on the same channel. So how would this work in a studio setting.
So if we were to use standard studio flash setup for clipped lighting, the two strip box at the rear at set on channel C ; equal in their initial power setup. The front two lights are individual with A and B channels with my Key light set at F11 and the Fill set at F5.6. This means I adjust the two rear lights together both up and down and the front lights individually, and even turn them off without moving around the studio.
I also at this point should mention I use the Li-ion 580 speedlight in the studio for additional lighting, this is a great unit with its lithium battery and its integration with the trigger system, a further plus point is the same trigger may be used on the Powercore 400(A location lighting unit by Pixapro)
The trigger system would be great in an educational establishment with up to 16 channels, you could have 16 groups of students all managing their own lighting setups with an easy to read LCD on the trigger.
Performance and Reliability
I have to be honest and saying it is faultless, having used other brands which have a habit not firing around every 50-60 shots, the Pixapro Eco has yet to fail.
The ST1 receiver for the flash light could be a little more secure, if you pick the flash up to move it, it can ping off – however that being said you should always pick up the stand not the flash head.
The integration between studio and speedlights is great, being able to control the lights from the unit saves a lot of shooting time, the control unit is easy to use and user friendly, no multiple button presses to get to menus.
I really would recommend this system for anyone working either on location or studio , Pixapro really need to promote this system as it is a major selling point for all of their range.
#essentialphoto#pixapro#essential photo equipment#essential photo#lumi 400#lumi 200#power core 600#power core 400#li-ion 580#AA battery#canon#ETTL#ITTL#nikon#flash#speedlite#portable flash#portable#wedding shoot#photography#essential lighting#light shaping equipment#studio flash#studio equipment#studio photography
3 notes
·
View notes
Photo

Futti anatomic shoes - SS2022 @futti.shoes Set design @crveni_papar . . . . . . . #futti #futtishoes #sandals #summershoes #shoeaddict #shoelover #summervibes #womensshoes #womensfashion #webstore #japanke #flipflops #stilllife #productphotography #productphotographer #simpleandstill #aquietstyle #seekthesimplicity #verilymoment #setdesign #stilllifesetup #croatacroatia #croatiandesign #madeincroatia #Snoot #Lighting #OpticalSnoot #Pixapro #EssentialPhoto https://www.instagram.com/p/CfByoP6gPCv/?igshid=NGJjMDIxMWI=
#futti#futtishoes#sandals#summershoes#shoeaddict#shoelover#summervibes#womensshoes#womensfashion#webstore#japanke#flipflops#stilllife#productphotography#productphotographer#simpleandstill#aquietstyle#seekthesimplicity#verilymoment#setdesign#stilllifesetup#croatacroatia#croatiandesign#madeincroatia#snoot#lighting#opticalsnoot#pixapro#essentialphoto
1 note
·
View note
Photo
Professional Headshot and Portrait Studio photography by David Wellbelove at www.dw-images.com #DWImagesPhotography #pixapro #singlelight #lumi400 #DavidWellbelove #headsots #portraits #business #commercial #studio #branding #pixapro #essentialphoto #personalbranding #acting #actorslife #London #MiltonKeynes #professional #photography #headshotcrew #canonphotography #commercialheadshot #businessheadshot #actingheadshot #businessportraits #headshotphotography #businessbranding #buckinghamshire #igpodium_portraits #fadedspirits #makeportrait #humansmagazine #vcsoportrait #featuremeofh #folkportraits #iiwiimag #pursuitofportraits #facesobsessed #2instagoodportraitlove (at D.W Images Photography)
#headsots#business#makeportrait#facesobsessed#vcsoportrait#commercial#iiwiimag#branding#actingheadshot#humansmagazine#pursuitofportraits#fadedspirits#singlelight#miltonkeynes#buckinghamshire#professional#personalbranding#essentialphoto#headshotphotography#headshotcrew#london#businessbranding#2instagoodportraitlove#photography#dwimagesphotography#portraits#canonphotography#businessportraits#acting#studio
1 note
·
View note
Photo

Headshot photography by David Wellbelove @dwimagesphoto DW Images Photography www.dw-images.com based in #miltonkeynes #portraits #business #essentialphoto #pixapro #studiolights #canonphotography #personalbranding #standout #socialmediamarketing (at D.W Images Photography)
#essentialphoto#socialmediamarketing#pixapro#standout#studiolights#miltonkeynes#business#canonphotography#personalbranding#portraits
2 notes
·
View notes
Photo

Headshot and Portrait photography by David Wellbelove at www.dw-images.com #DWImagesPhotography #DavidWellbelove #headsots #portraits #business #commercial #studio #branding #personalbranding #acting #actorslife #London #MiltonKeynes #professional #photography #headshotcrew #commercialheadshot #businessheadshot #actingheadshot #businessportraits #headshotphotography #businessbranding #buckinghamshire #igpodium_portraits #fadedspirits #makeportrait #humansmagazine #vcsoportrait #featuremeofh #folkportraits #iiwiimag #pursuitofportraits #facesobsessed #2instagoodportraitlove #pixaprolighting #essentialphoto (at D.W Images Photography)
#headsots#actingheadshot#humansmagazine#vcsoportrait#miltonkeynes#essentialphoto#studio#featuremeofh#headshotphotography#actorslife#dwimagesphotography#2instagoodportraitlove#makeportrait#facesobsessed#personalbranding#buckinghamshire#davidwellbelove#branding#businessheadshot#professional#pixaprolighting#business#igpodium_portraits#businessportraits#pursuitofportraits#commercial#commercialheadshot#london#fadedspirits#acting
1 note
·
View note
Photo
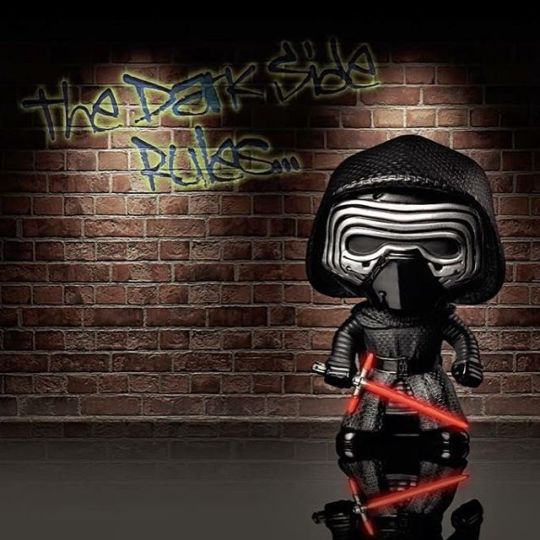
The Dark Side Rules #dwimagesphotography #davidwellbelove #commercial #photography #productphotography #studio #pixapro #essentialphoto #lumi400 #photoshop #popvinyl #starwars #darkside #miltonkeynes #uk (at D.W Images Photography)
#popvinyl#starwars#photography#lumi400#photoshop#darkside#essentialphoto#pixapro#davidwellbelove#dwimagesphotography#miltonkeynes#uk#commercial#productphotography#studio
0 notes
Video
youtube
This is now about to Premiere - If you're into LED lighting and want to see what these bad boys do head to head, then tune in now...
#Pixapro#LED100Bmkiii#aputure120d#ledlighting#waynejohns#fujifilm#xt3#fujixt3#xf23mm#cinematography#video#photography#fashion#beauty#videolighting#studiolighting#essentialphoto#fashionphotography#beautyphotography#filmlighting
0 notes
Photo

Does your LinkedIn profile image give potential clients and employers the right impression? Make sure your personal brand stands out from the crowd... www.dw-Images.com #marketing #personalbranding #businessheadshot #businessbranding #headshotcrew #headshotphotography #Headshots #corporate #portraitphotography #businessportraits #commercialheadshot #photography #miltonkeynes #bletchley #dwimagesphotography #DavidWellbelove #London #northampton #buckinghamshire #pixapro #essentialphoto (at D.W Images Photography)
#davidwellbelove#northampton#bletchley#london#commercialheadshot#pixapro#photography#miltonkeynes#essentialphoto#businessbranding#dwimagesphotography#corporate#marketing#personalbranding#businessheadshot#headshots#buckinghamshire#portraitphotography#headshotphotography#headshotcrew#businessportraits
0 notes
Photo

Does your LinkedIn profile image give potential clients and employers the right impression? Make sure your personal brand stands out from the crowd... www.dw-Images.com #marketing #personalbranding #businessheadshot #businessbranding #headshotcrew #headshotphotography #Headshots #corporate #portraitphotography #businessportraits #commercialheadshot #photography #miltonkeynes #bletchley #dwimagesphotography #DavidWellbelove #London #northampton #buckinghamshire #pixapro #essentialphoto (at D.W Images Photography)
#headshotphotography#photography#marketing#businessbranding#london#essentialphoto#corporate#headshots#commercialheadshot#dwimagesphotography#pixapro#buckinghamshire#northampton#headshotcrew#bletchley#portraitphotography#businessheadshot#personalbranding#davidwellbelove#miltonkeynes#businessportraits
0 notes
Last Seen Blogs

apupcalyptic
Bez tytułu

rohitmule
Rohit Mule Photography

scorbvnny
.dgdfgdfg..

dr-milfi
What About Ducks?
scorbvnny
.dgdfgdfg..