#fastcgi
Explore tagged Tumblr posts
Visit Tumblr Blog
Explore Tumblr blogs with no restrictions, modern design and the best experience.
Last Seen Tumblr Blogs


Fun Fact
Tumblr was attacked by a cross-site scripting worm deployed by the Internet troll group GNAA on Dec 3, 2012.
Text
Okay cool, I've migrated my existing website and put FreshRSS on my new VPS, that was not that bad. Just had to learn how fastcgi works so I could run FreshRSS. Using an incredible 90MB of RAM so far. I think 4GB should serve me fine. I should really shrink the 4GB of swap alpine's default setup gave me here, I do not need that much.
Next steps are to get SSL working which will involve swapping domain names with my old VPS so that certbot gives me the right cert, and then I can migrate IRC and that's about everything that was running before, this is a lot easier than I thought it was going to be.
Loaded an old OPML backup of my RSS feeds into the reader and they're mostly all still there, although I need to do spring cleaning, I don't really think I'm still reading *checks feed* actually no all these webcomics are bangers, I have great taste. Don't look too hard at QC there it's fine I'm fine.
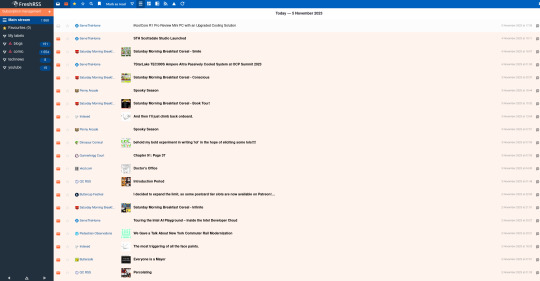
Some of them are dead though so that's a good reason to clean them up. Also I think subscribing to the entire boingboing feed was optimistic on, if nothing else, your attention span, 19 year old Kalium.
11 notes
·
View notes
Text
WordPress Hosting
Blogging and website content management system accelerated by the world’s fastest browser nginx. Our accelerated wordpress hosting runs on a VPS and is pre-installed with the latest wordpress and preconfigured with FastCGI, nginx caching and OPcache php caching software.
The design of the VPS is dedicated to WordPress optimization. As opposed to a standard VPS, the resources allocated for the WordPress Hosting VPS maximizes website functionality and efficiency. Enjoy another level of WordPress experience!
WordPress Hosting
2 notes
·
View notes
Text
Instalación, configuración de Apache 2.4 con php-fpm, con MariaDB 10.11 y el nuevo PHP 8
Amigos en este post explicaré cómo instalar PHP-FPM (Fast CGI Process Manager), esto nos permitirá mejorar el rendimiento de la ejecución de nuestro código. PHP-FPM solo interpreta una vez el código PHP, después de esto se reutiliza el código almacenado en la memoria cache. ¿Qué es PHP-FPM? FPM (FastCGI Process Manager) es una implementación alternativa al PHP FastCGI con algunas…
0 notes
Text
蜘蛛池需要哪些缓存技术?TG@yuantou2048
在互联网领域,蜘蛛池(Spider Pool)是指一种用于提高搜索引擎优化(SEO)效果的技术手段。它通过模拟大量用户访问网站来增加网站的权重和排名。为了确保蜘蛛池的高效运行,缓存技术是不可或缺的一部分。本文将探讨蜘蛛池中常用的几种缓存技术。
1. HTTP 缓存
HTTP 缓存是最基础也是最常用的缓存技术之一。它利用浏览器或代理服务器存储之前请求过的网页内容,当相同的请求再次发生时,直接从缓存中获取数据,而不需要重新向服务器发送请求。这不仅减少了服务器负载,还加快了页面加载速度。
2. 内存缓存
内存缓存是一种快速的数据存储方式,通常使用键值对的形式存储数据。常见的内存缓存系统包括 Redis 和 Memcached。这些系统能够快速响应请求,减少数据库查询次数,从而提升整体性能。对于蜘蛛池来说,可以将频繁访问的数据存储在内存中,以减少对数据库的依赖,提高响应速度。
3. 文件缓存
文件缓存将数据存储在磁盘上,虽然读写速度不如内存缓存快,但成本较低且易于实现。对于蜘蛛池而言,可以将爬取到的数据暂时存储在本地文件系统中,当有重复请求时,直接从缓存中读取数据,避免了每次都需要从数据库中获取数据的情况,特别适用于高并发场景下的数据读取。
3. 数据库缓存
数据库缓存主要应用于持久化存储场景。例如,可以将爬虫抓取到的内容先保存到文件系统中,当后续请求相同内容时,直接从文件系统中读取,减轻了数据库的压力。
4. 分布式缓存
分布式缓存如 Redis、Memcached 等,可以在多台机器之间共享缓存数据,适合处理大规模数据存储需求。这种方式尤其适用于需要长期保留的数据,比如静态资源或者不经常变化的信息。
5. CDN 缓存
内容分发网络(CDN)缓存可以将静态资源(如图片、CSS 文件等)分散到多个地理位置的服务器上,使得全球各地的用户都能快速访问到所需信息,降低了延迟时间。
6. 页面缓存
页面缓存则是将整个网页内容缓存起来,当用户请求某个 URL 时,如果该 URL 的内容已经被缓存,则直接返回缓存中的内容,大大提高了系统的响应速度。
7. 反向代理缓存
反向代理缓存通过在网络边缘节点上存储静态资源,让用户就近获取资源,减少了网络传输时间。这对于大型网站非常有效,因为它能显著降低源服务器的负担,并且可以根据地理位置为用户提供最近的副本,进一步加速页面加载速度。
8. 操作系统级别的缓存机制
操作系统级别的缓存机制能够有效地减少带宽消耗和服务器压力。通过设置合适的过期策略,可以有效缓解服务器压力,并且支持动态生成的内容也可以被缓存起来,这样即使原始服务器出现故障也不会影响用户体验。此外,还可以结合其他技术如 Varnish 或者 Nginx 的 FastCGI 过程中产生的临时文件进行缓存,减轻了主服务器的压力。
结论
综上所述,选择合适的缓存策略对于优化蜘蛛池的性能至关重要。合理运用上述各种类型的缓存方案,能够显著提升用户体验,同时保证了数据的一致性和可用性。
总结
总之,在构建高效的蜘蛛池时,合理配置多种类型的缓存策略组合使用,能够极大程度地提高网站加载速度。合理利用这些技术,可以显著改善蜘蛛池的整体效率。
加飞机@yuantou2048

SEO优化
谷歌留痕
0 notes
Text
Setting Up Apache with PHP-FPM on Ubuntu 24.04
This article explains how to set up Apache with PHP and PHP-FPM to improve performance on Ubuntu 24.04. PHP-FPM (FastCGI Process Manager) is an advanced PHP FastCGI implementation that helps handle web traffic and optimize PHP performance. It acts as a process manager for PHP, managing pools of PHP workers that can serve incoming requests. PHP-FPM is excellent at handling requests…
0 notes
Text
PHP-FPMとは?Nginxとバツグンの相性!高負荷のウェブサイトで威力を発揮するFastCGI実装
PHP-FPMの基本概念と特徴 PHP-FPM(FastCGI Process Manager)は、高負荷のWebサイトに最適化されたPHPの実行環境です。 2025���現在、WordPressやECサイトなど大規模Webアプリケーションの標準的な実行基盤として広く採用されています。 従来のCGI方式では、Webサーバーがリクエストを受け取るたびに新しいPHPプロセスを生成・破棄する必要がありました。 PHP-FPMはプロセスプール方式を採用し、事前に生成したプロセスを再利用することでオーバーヘッドを最小限に抑えます。 最新のPHP 8.3/8.4では、JITコンパイラーとの組み合わせにより、PHP…
0 notes
Text
wow, certbot has got a lot more automatic since I used it to set up my old server. You don't have to do anything if you're just running a standard webserver. You used to have to fuck around with cert paths and well-known a whole lot. It even set up keys for my fastcgi system automatically.
8 notes
·
View notes
Link
0 notes
Photo

Supercharge WordPress: 3 Step to Configure Redis Object Cache and Nginx FastCGI Page Cache
0 notes
Link
Nginx Nginx pronounced Engine-Ex, is a popular and open-source, lightweight, and high-performance web server software that also acts as a reverse proxy, load balancer, mail proxy, and HTTP cache. Nginx is easy to configure in order to serve static web content or to act as a proxy server.It can be deployed to also serve dynamic content on the network using FastCGI, SCGI handlers for scripts, WSGI application servers or Phusion Passenger modules, and it can serve as a software load balancer. Nginx uses an asynchronous event-driven approach, rather than threads, to handle requests. Nginx's modular event-driven architecture can provide predictable performance under high loads. In this tutorial, we are going to get started with Nginx on Linux and use the terminal commands to install and configure a test on it. You will get familiar with all the codes and commands for setting Nginx up and running on your operating system. What you need to get started: 1. This tutorial is based on Linux. If you are working with Ubuntu 20.04 Linux or Linux Mint, or any other OS of the Linux family, you have a suitable operating system for the following tutorial. 2. A user account with sudo or root privileges. 3. Access to a terminal window/command line Getting Started with Nginx 1. Installation First off, you need to update software repositories. This helps make sure that the latest updates and patches are installed. Open a terminal window and enter the following: Coppied to clipboard. sudo apt-get update Now, to install Nginx from Ubuntu repository, enter the following command in the terminal: Coppied to clipboard. sudo apt-get install nginx If you are on Fedora, you should instead enter this command to install Nginx. Coppied to clipboard. sudo dnf install nginx And if you are on CentOS or RHEL, the installation is done using this command: Coppied to clipboard. sudo yum install epel-release && yum install nginx finally, we test the installation success by entering: Coppied to clipboard. nginx -v If the installation has been successful, You should get a result like this: Coppied to clipboard. nginx version: nginx/1.18.0 (Ubuntu) 2. Controlling the Nginx Service Next, we should get familiar with the controlling commands. Using these commands, you will be able to start, enable, stop and disable the Nginx. First off, we should check the status of Nginx service. To do so, you can use the following command: Coppied to clipboard. sudo systemctl status nginx And you can see the result:
0 notes