#fomaspeed variant
Explore tagged Tumblr posts
Visit Tumblr Blog
Explore Tumblr blogs with no restrictions, modern design and the best experience.
Last Seen Tumblr Blogs


Fun Fact
China blocked Tumblr because of pornography and censorship problems in 2013.
Text
Pinhole – cont’d
Overall more successful than the previous days, despite not being 100% in the clear about a couple of issues.
The breakdown goes like this: I shot the remaining sheets of Foma paper in normal daylight. One, properly exposed, came out great, the other one was shot in much trickier lighting conditions (backlit), so it’s hella contrasty (and it would have benefited from at least 1 stop extra exposure). Still, no issues whatsoever. Everything was developed in the same Caffenol soup from yesterday (2nd batch).
So I decided to test that mystifying Ilford paper once more. I cut 4 sheets from a larger one that I picked from the bottom of the box. Developed one unexposed and came out uniformly stained, but clean. I left the second one underneath the safelight with an object on it, to see if the lamp was the culprit. Came out stained but clean all the same, with no trace of the object. From that, I could draw two conclusions and was left with a new question and no solution for the previous day’s issues: 1) the safelight was, indeed, safe and 2) there was no initial issue with base fog whatsoever. Why the developer suddenly started staining the paper, on the other hand, goes beyond me (I had not encountered any staining on the Foma and neither in the rare instances where I had actual whites on the Ilford, the previous day). It also meant I was back to square one to try and troubleshoot the cloudy patterns on yesterday’s pictures.
As the light was dropping fast, I headed outside to make the most of what was left. Beside repositioning the camera after I had already started exposing (hello slight double exposure), that was the first proper, decent shot I got on the Ilford. There were still traces of that cloudy pattern, though, so at this point I wonder if it is reflections of some sort on the paper’s surface (the Ilford is glossy, the Foma is “velvet”, which is a sort of semi-matte grainy finish). I did paint the inside of the camera matte black, but maybe it’s picking up some stray light from somewhere, somehow. Case in point, it’s mostly visible when the exposure is very long or the calculation resulted in slight overexposure.
The last test was back inside under artificial light. Unfortunately, I had to pull it before the exposure was complete (because I was in the kitchen, and it was near dinner time, so…) and it eventually came out underexposed. Still, knowing that, I’m fairly positive I’ve finally got the right numbers dialled in to get in the ballpark for proper exposures, when the lighting isn’t too tricky/contrasty to begin with.
A few questions remain: why the stain not showing immediately, when the developer is supposed to be stronger, but only after a while, and why those patterns (reflections?) only on the Ilford. Other than that, I’m happy with what I got. Now I’m out of fixer so no more tests for a while, but next time I’ll make sure to have some proper developer at hand, too.
Again, tl;dr
The shots, the shots!

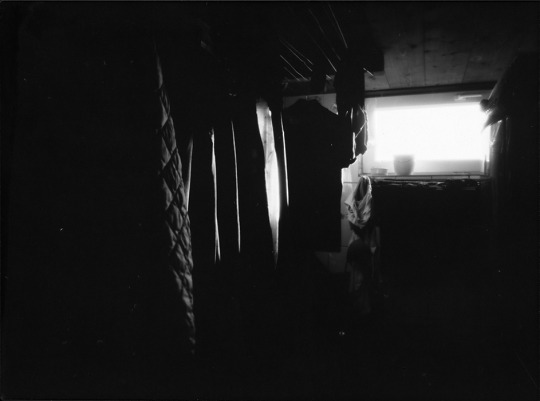
So this is the one daylight shot that came out quite right on the Foma. Timed at 2:30 min. Contrasty for sure, but mostly right. The scan is very much as-is.
This second attempt with the Foma, timed at around 20 min, was a tricky scene with a backlit situation. Given that anything comes out contrasty af on this paper even when the light is more even, I really couldn’t expect to get much out of it. On top of that, I think I could have let it get an extra stop of light. My bad.

Some 40 min worth of exposure, back on the Ilford. Notice the double exposure at the bottom (upside down) as I repositioned the camera after the countdown had started. The negative came out looking good, with good blacks and good whites, although some minor traces of what I thought was fogging are still visible. Perhaps they are reflections instead, jury’s still out on that one.
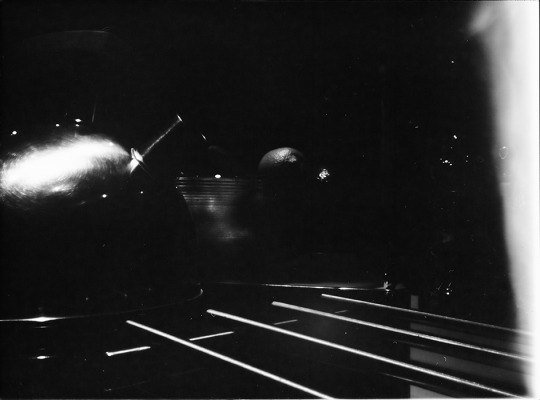
The last one on Ilford should have run for at least 1h20m but I had to cut it short, so it’s underexposed. Such a pity because I concocted a nice still life scene with shiny metallic and translucent objects that I was hoping would show some nice shades of grey. Oh well.
Generally speaking, the Foma was easier to deal with and much more predictable, albeit seemingly more contrasty. The Ilford would make a great candidate for midtones, but it’s way too crazy on development, reflections and whatnot. YMMV.
2 notes
·
View notes
Photo

Untitled
VDS 8x10 Industar-37 300mm Fomaspeed Variant 311 (paper negative)
Photo taken by Raphael Willerding.
Sharing great work taken on a film.
#nature#landscape#house#tree#shade#field#meadow#countryside#large format#monochrome#black and white#8x10#8×10#VDS 8x10#industar#industar-37 300mm#foma#fomaspeed variant 311#paper negative#film is not dead#film is alive#film photography#analogue#analog photography#sharing is caring#stay broke shoot film
0 notes
Photo

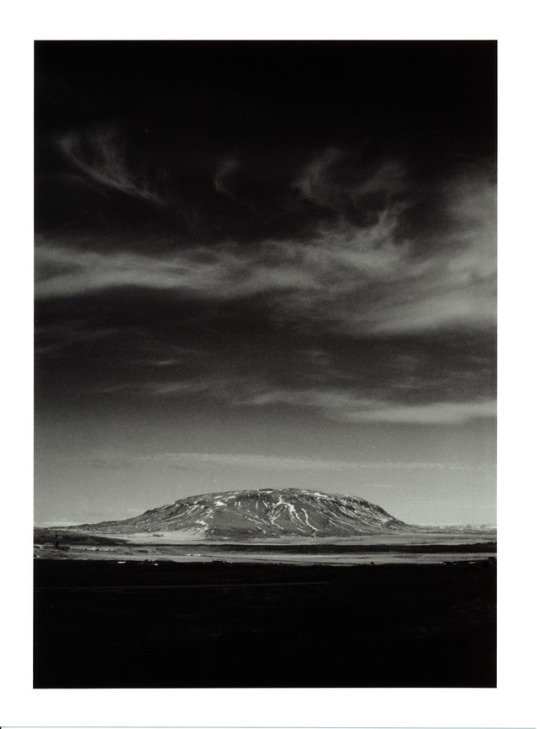
Gullfoss, Iceland, 2017
Kodak Tri-X, Adonal, Fomatol LQN, Fomaspeed Variant 313
#iceland#gullfoss#analog photography#original photographers#photographers on tumblr#darkroom#darkroomprint#fomatol#adonal#ricoh kr-10x#black and white landscape
78 notes
·
View notes
Photo

Rebecca. Minolta Srt101 - Rokkor 58/1,4 Hp5 (r09 1:50) Stampe 18x24cm su Fomaspeed Variant 111 (Glossy)
5 notes
·
View notes
Video

flickr
Down The Street #2 by Paweł Pająk Via Flickr: Lubitel 166B Film: Ilford Delta 400 Xtol (Fomadon Excel) stock 7:30min@20C Print: Fomaspeed Variant (hard) Fenal W14 Scanned with Epson V700 Taken: Bielsko-Biała, Poland
#analog#film#120#medium#format#lubitel#166b#ilford#delta400#xtol#kodak#foma#bielsko-biała#poland#print#darkroom#wetprint#fomaspeed
0 notes
Text
Random pinhole tests
A few years ago at photo school we built pinhole cameras out of coffee cans. The one I did worked pretty well, but I haven’t used it since because I didn’t really like the distortion caused by the rounded shape of the film plane given by the walls of the can.
So, fast forward to a few days ago, I built one from a square tin can (genius!). Since I couldn’t be bothered to dig up my notes from that school course (not to mention the fact that we got our sizes from a chart that our professor showed us, and I’m not sure I copied the whole thing down), I referred to the many online calculators available to try and pierce the optimal hole. I only had approximate measuring tools, though, so it may not be exactly what I think it is, but I figured I’d do a few tests and then draw my own exposure chart.
Aaaanyways… being a bit on a rush and lacking a proper developer I resorted to a Caffenol recipe, and some leftover stop and fix bath. That turned out to be the least of my problems. Since I didn’t want to waste proper paper, I dug up some old(-ish?) 17,8 x 24cm Ilford RC that I cut in four, and I was set.
On the first round of tests, I must have miscalculated greatly the exposure time, because everything came out severely overexposed. Nevermind, I adjusted the calculations and ran another two. This time I could make out the scene, but for some reason the paper came out with some weird cloudy fog. I still haven’t figured out at what point I screwed up, although I’d decidedly exclude anything in the developing process (because I gave it long enough time, it really can’t be…), so it’s either leaks in the pinhole camera, or somehow the paper fogged when I cut the sheets and stored them. Or maybe it’s just the lot that went bad for some reason.
On the second day I cut another 4 sheets from the same lot and did some more tests with natural light, but again, I obtained very low contrast paper negatives. At that point I also suspected the developer being slightly less powerful because the blacks (highlights) lacked a bit, but this doesn’t really explain why I had no whites (shadows) whatsoever. Plus, again, a rather cloudy-looking pattern.
So, I decided to toss the developer and make a fresh one, and I also cut 4 new sheets from another – fresher – box of Foma RC paper. By that time, I no longer had natural light so I set up a few lamps to get roughly the same readings as with the previous tests. Since I only had spots, the contrast was pretty high and it got further reinforced by the paper, but at least I obtained negatives with both blacks and whites and no fog or patterns whatsoever. I call this a success!
tl;dr
Here are some scans from these tests.

In this one you can see the cloudy pattern and all sorts of problems (light leaks too, maybe?). Generally speaking, the negative was fairly low contrast, and the shot was probably a little overexposed to begin with. Still, weird and uneven despite the long developing time.

This one was exposed more or less correctly, but again the negative was really really low contrast (I suspect, partly due to exhausted developer). The whites in the negative, though, were fairly muddy, which makes me think the paper was fogged from the start. Both this and the previous image had to have the curves adjusted in post to achieve some contrast.

Lastly, the first good one, after I had used a different and newer lot of paper (Foma). Lighting was artificial, and I only had spots, so the scene was already quite dramatic and contrasty. With a fresh soup I obtained proper blacks (highlights) and the paper itself didn’t show any fogging either (so, proper shadows too). This scan is unretouched (other than inverting it). It’s a start…
I plan on doing a couple more tests in natural light with this paper + developer combo to exclude a few variables, and draw some proper conclusions. I mean, obviously if I ran a stricter protocol I’d probably have the answers I need already, but I’m not quite set up for anything even remotely technically sound at the moment, so trial and error and lucky guesses will have to do.
Pinhole photography is definitely time consuming, but when it finally works, it’s quite cool.
0 notes
Photo

Seljalandsfoss, Iceland, 2017
Ilford FP4+, Adonal, Fomatol LQN, Fomaspeed Variant 312
#iceland#seljalandsfoss#analog photography#original photographers#photographers on tumblr#darkroomprint#black and white landscape#adonal#fomaspeed#ilford fp4+
28 notes
·
View notes
Photo
Grímsnes, Iceland, 2017
Ilford FP4+, Adonal, Fomatol LQN, Fomaspeed Variant 313
#iceland#grímsnes#photographers on tumblr#original photographers#analog photography#darkroom#darkroomprint#canon 9000f#ilford fp4+#adonal#fomaspeed#fomatol
23 notes
·
View notes