#from back when i was experimenting w png overlays
Explore tagged Tumblr posts
Visit Tumblr Blog
Explore Tumblr blogs with no restrictions, modern design and the best experience.
Last Seen Tumblr Blogs


Fun Fact
Users from the US are the majority of Tumblr visitors.
Photo
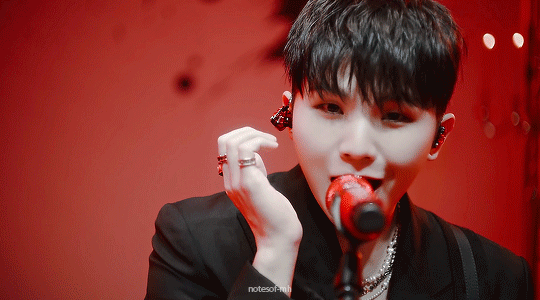
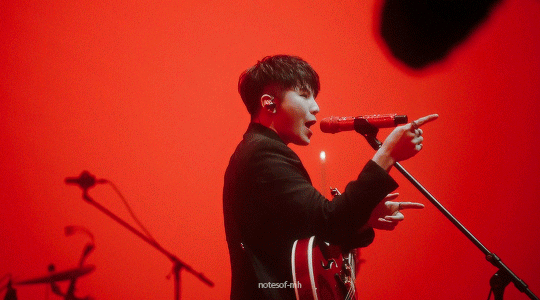
My forbidden fruit
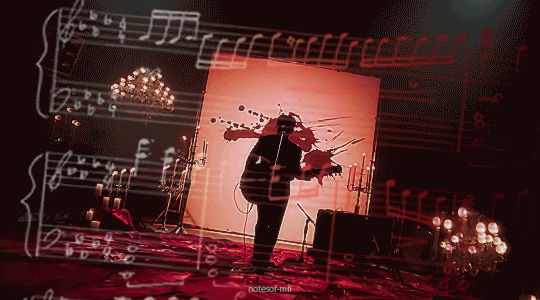
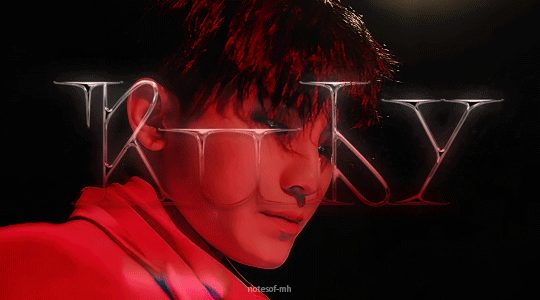
#lee jihoon#woozi#seventeen#svt#*gif#tw flashing#eml.gif#d: 220906#from back when i was experimenting w png overlays#happy woozi day!#omg i hope i did the math on this right
173 notes
·
View notes
Text
Twilight Princess w/o Text Boxes: A Dream Made Possible w/ Emulation
Okay. So.
Over the past couple months of running this blog, I’ve been thinking quite a lot about emulating Twilight Princesss in Dolphin, and the other day I finally bit the bullet and booted up the game for the first time. I had fun finally playing around with the emulator’s free look feature, and I decided now was as good a time as any to finally learn how to make GIFs the proper way--with Photoshop--so I messed around with the program a bit and ended up making this GIF, which I posted yesterday. It’s not great, but I’ve seen worse, so eh, whatever, right? At least I’m learning.
Anyway, @therealflurrin sees this GIF and it kicks of a conversation between us about emulation: how it works, what free look is, and what the potential for these kinds of tools are: GIF-making, edits, stills...general hilarity, y’know, basic stuff.
They ask me if I have any idea how to disable the UI of the game. No, I say; I do a quick cursory Google, and something like that would require texture dumping, editing, and reloading, and that sounds like a heckuva lot of work, doesn’t it? I’ll just stick to what I know how to do.
And then they say something else:
my DREAM is to capture all the TP cutscenes without the text overlays for AMV purposes......someday
And I'm like, ah.
Ah, shit.
I dunno about the rest of you, but back in the day, when I would stay up until 3 AM watching Midlink AMVs during a sleepover on my friends’ computers (because Hylia knows I didn’t have one, and what the f**k is a smart phone, it’s only 2007), I used to daydream about this exact thing. I watched a whole ton of (mostly shitty) AMVs, and most of them either completely disregarded any scenes with dialogue, zoomed to somewhat hide their presence, or used the cutscenes with text anyway, and their quality suffered for it regardless--but that was over 10 years ago, long before emulation was so readily accessible (and long before I would discover it), and as time passed, I quickly forgot about this little dream...
...until @therealflurrin reminded me of it.
How hard could it possibly be?
I can’t currently find the forum post I found that instructed another user on how to remove the UI of another (non-Zelda) game in Dolphin, but I can more than summarize the process myself after the day I had yesterday. Essentially, each aspect of the game’s UI is a texture in the game’s files; you can’t delete textures, but you can replace them using Dolphin’s built-in texture loading feature. In order to do what I had set out to, I had to:
Navigate to the graphics setting in Dolphin and turn on the “dump textures” feature, which could create viewable .png files of every single texture loaded into the game upon boot and direct them into a single folder.
Boot the game, ensuring that the elements of the UI I wanted to eliminate were clearly visible.
Find the textures responsible for these elements in the dump folder, making note of their file names.
Create and duplicate a 1x1 transparent .png file, renaming each duplication to match each of the various textures I want to replace from the previous step.
Place each of these “textures” into a folder that matches the name of the folder created by the dumping process, moving that folder into Dolphin’s custom textures directory, and again navigating to the graphics settings and checking “load custom textures.”
Doesn’t sound too difficult, right?
...Right.
Some textures were easy, of course. Getting rid of the text itself was as simple as finding the very few textures that had the letters of the alphabet on them and replacing them, but more than a couple of them were vague stills of nonsense, and combing through hundreds of these textures to find the right ones when I wasn’t even sure what I was looking for...
Well, it was quite the headache, and at some point I ended up saying “f**k it!” and just started replacing anything and everything that looked vaguely suspicious.
For instance, after eliminating the actual text from the boxes, there still remained the matter of the “glow effect” behind the text--upon inspection without the obstruction of this text, just a glowing circle. I just skimmed through the dump folder that resulted from me booting up the game for just a few seconds and I counted more than thirteen textures that fit that exact bill (plus several others that looked like they maybe could have also been the culprit, somehow), and I just kept on rebooting and replacing, rebooting and replacing until those stupid circles were gone. (Not the best method in the world, I know, but we learn from our mistakes.) I spent ages looking for the surely-it-must-be-a-long-black-rectangle-texture responsible for the backdrop, was unable to find it, and replaced a metric shit-ton of unimportant-looking textures until it, too, was somehow gone--and after a lot of trial and error, I finally got the result I was hoping for.
In doing so, however, I had eliminated a heckuva lot of textures that didn’t need replacing, and the entire thing left a bit of a...foul taste in my mouth.
So, like the perfectionist I am, I moved all of the work I had already completed to another location...and began again.
This time, I replaced textures one by one, rebooting the game each time to ensure that it was the correct one. That “long black rectangle” I was looking for ended up being a tall, transparent image merely 8 pixels wide. Those glowing circles ended up being the dang circle that I suspected least, go figure. Regardless, slowly but surely, I was able to replicate my previous success.
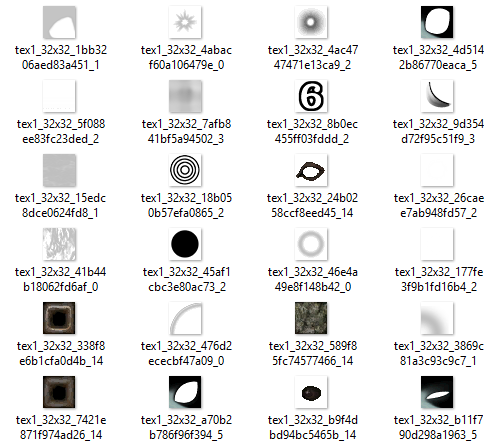
Now, my custom texture folder looks a little something like this:
And the in-game result has transformed this:
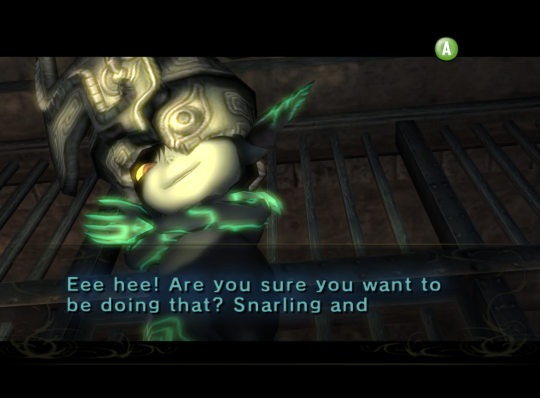
Into this:
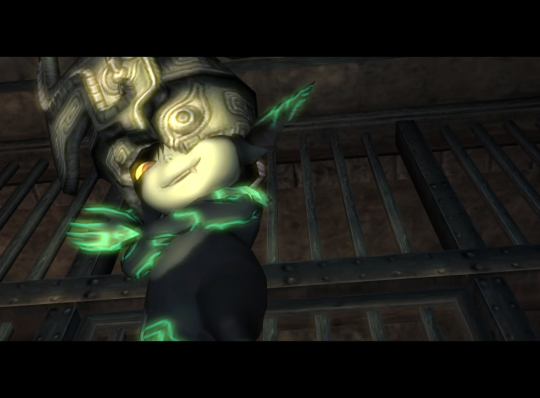
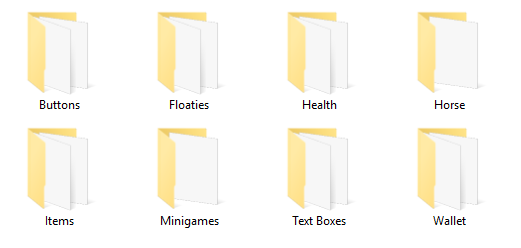
(As you can see, I’ve replaced many other elements of the UI outside of text boxes, and I put them into their own sub-folders for organization’s sake.)
It was a lot of work, but as far as ten-year-old me would be concerned, I have created a means in which to achieve my once impossible dream:
Twilight Princess cutscenes without text boxes.
What does any of this mean?
Effectively, I’ve created a “texture pack” of a sorts that removes most of the game’s UI elements, including the text boxes that have obstructed so many of the game’s better moments. It’s still far from completely finished, but as of now, it serves its primary function flawlessly, and all that’s left of my childhood dream is one eensy, teensy thing:
Recording, baby!
That is to say, video recording of all the game’s cutscenes with this texture pack in effect, so that kind of footage is available and out there--otherwise, all of this work I’ve done will have been for naught, yeah? Fortunately, I’m not just an idiot with an emulator and Photoshop; I’m an idiot with an emulator, Photoshop, and OBS Studio, ready and capable to do all of the hard work of capturing these moments for me.
And now, all that I have to do...is play the game.
So, what happens next?
I’m not going to put an estimate on how long this kind of thing is going to take; I have a life outside of this blog and outside of replaying a game I’ve played more than a few times, but over the next few weeks I’m going to be playing through Twilight Princess on Dolphin with the intention to:
Find and capture each of the game’s cutscenes without UI interference, and upload them (probably onto Google Drive) for use by the general public.
Create save states throughout my playthrough and upload them as well, so any person with a good PC, Dolphin, and a North American Twilight Princess .iso can jump into the game at any point they’d like.
Find and tweak any remaining elements of the game’s UI that I can find to make the experience as clean as possible...and perhaps upload this “texture pack” for general use if I am able to do so.
...But mostly the first thing, yeah? I may keep everyone updated on my progress, if anyone particularly cares, but I also may just keep quiet about it and then dump all of these files at once. Who knows! We’ll just have to wait and see.
TL;DR
There’s a whole lot of potential with this kind of thing, and even if it’s a decade too late and no one is really making Twilight Princess AMVs anymore, this is something I’m so stupidly passionate about that I intend to see it through regardless. I mean, Twilight Princess just happened to be the game that I chose! If it’s possible with this game, then it must surely be possible with others, and maybe this can inspire other similar "HUD-less” projects from others. But, even if it doesn’t, I’ll be okay with that.
In the end, if I can make even just one person happy with this little project of mine, that will be more than enough.
#loz#twilight princess#loz tp#midna#loztp#dolphin emulator#emulafun#long post#therealflurrin#my projects#my posts#text free tp
47 notes
·
View notes
Text
Luminar ai forum

#Luminar ai forum update
#Luminar ai forum free
You can freely explore any and all of your wildest ideas. With Luminar’s new Portrait Background Removal tool, nothing will slow down the creativity. My creative spark can be extinguished by this routine. Ivan Kutanin, CEO of Skylum, explained, ‘Manual masking and separating people from the background is a lot of boring work to me. Luminar Neo 1.0.6 Update: Enjoy powerful Mask AI & Histogram. Luminar Neo 1.0.7 Update: Pick your favorite tools. Luminar Neo 1.1.0 Update: Welcome Portrait Background Removal. Luminar Neo 1.1.1 Update: Duplicate Layers and bug fixes. The Background Brush helps to remove parts that may not have been detected by the AI. Check your internet, antivirus, or firewall settings and try again: Solutions. The Object Brush revives portrait details that may have been eliminated by the neural network. The Transition Brush refines the edges by removing unnecessary elements where the portrait and background touch. You can use the Transition, Object and Background brushes to adjust the zones and allow the AI to refine the selection. These help the AI to recognise the portrait and the background. However, the AI tool will take almost all of the fiddly editing away and just lets photographers use the Refinements Brush to clean up any rough edges.Īfter opening the Refinements Brush section the image will be highlighted with blue, orange and transparent zones. You can use the background extraction in combination with the other AI tools in Neo. Skylum has admitted there will be some scenarios where the Mask will still need to be cleaned up manually. If you’re dealing with a number of similar portraits you can edit several images in a single click with custom saved presets and make precise selections with minimal effort. Then, the image can be exported as a PNG file with a transparent background for compositing, or you can do more work within Luminar Neo. When you select this option, it’ll evaluate your image. Once updated to version Luminar Neo 1.1.0, the tool can be found in Neo’s Layer Masking options as Portrait Background Removal.
#Luminar ai forum update
For example, in the example below (I was trying to replicate the overlay bug), I simply used a combination of Luminance/Color range selection and manual magic selection with some Refine applied and I'd say it worked pretty good on that dead fir tree, which is the most challenging detail here (and I'm working from an Gigapixel enlarged low resolution version of the original at that.A portrait with a new background after using Luminar Neo Portrait Background Removal Update to Luminar Neo 1.1.0 The method of selection really matters not, whatever works best for the given image. If you want to bring back some of the areas of the sky because of the transparency, create a blank layer underneath the sky, and paint white where you want to hide the original sky coming through.
#Luminar ai forum free
The magazine asked forum PLUGINS 4 FREE - Free Audio Plug-ins and. I sometimes also simply painted white on the mask where the details were coarser, and the darken blend mode took care of blending the edges transitions. Luminar 4 is one of the most advanced AI-powered photo editing plugins on the market. I am experimenting a little bit and these are my findings: - Luminar AI demosaicing is pretty. 3 edit X-Transformer DNG in Lightroom and use Luminar as a plug-in. The way I look at it these are the options: 1 edit Fuji RAF in Luminar AI. When the mask leaves unwanted transition edges I fine tune (Select>Refine) it by copying it as a selection, adjusting the selection edges by a few pixels, and then recreate the mask from the adjusted selection. Therefore, are there any Fuji X shooters that use Luminar AI and how. For the image above I created a high contrast B&W version of the image, saved it and converted it to pure B&W in view mode then added it back as a layer, and copy pasted it as a mask, then deleted the layer. Applying some transparency also brought back some of the finer details. Sorry for the google translation Basically created a new layer with the sky, applied the Darken blend mode, and added a mask to protect the non-sky areas. How did you do this? I would be very happy to receive an answer. Still, I'm surprised at how well the ACDSee can do. It's true, Luminar (I have Luminar AI as a plugin) does it best, better than Photoshop.
0 notes