#having to reset and troubleshoot network adapter is getting annoying
Explore tagged Tumblr posts
Visit Tumblr Blog
Explore Tumblr blogs with no restrictions, modern design and the best experience.
Last Seen Tumblr Blogs


Fun Fact
Tumblr was created by web developers David Karp and Marco Arment.
Text
Tempted to look into upgrading to a newer laptop instead of just fixing the network adapter, but it's probably not in my budget
2 notes
·
View notes
Text
Handy Mobile Problem Fixes You Need Now
INTRODUCTION: - Our dependence on mobile devices has become a daily necessity in this fast-paced digital world. But along with convenience comes the anticipated rise in typical mobile issues that can impede our uninterrupted connectivity. These problems, which can range from abrupt battery draining to obstinate program breakdowns, can be annoying and inconvenient. But worry not—this tutorial presents a number of practical mobile troubleshooting solutions that you urgently require. These solutions are made to provide you with simple, efficient fixes for common issues with mobile devices, such as overheating, unresponsive touchscreens, and network problems. Let's explore some doable solutions that will maintain your smartphone functioning optimally, enabling you to maximize your digital encounters without needing
Solutions for Quick Battery Drain: Rapid battery drainage is a typical problem that affects mobile users. Start by looking for background-running, power-hungry programs to tackle this. Put an end to pointless programs and turn off background processes. More ways to improve battery efficiency include changing the brightness of your screen, disabling location services when not in use, and updating the software on your device. Problems with Overheating: If your smartphone frequently overheats, think about figuring out what could be causing it. Prolonged use, heavy gaming sessions, and overloaded processors can all lead to overheating. Make sure there is enough ventilation by taking off any covers or cases that could hold in heat. To lessen the burden on the processor, close any unneeded apps and avoid using your phone while it is charging.
Problems with Network Connection: Inadequate network access is a frequent source of annoyance. Turning on and off the airplane mode on your phone is a good place to start if you're having trouble with dropped calls or poor internet. Resetting the network connection with this can help. If the issue continues, see if there are any upgrades available and think about wiping your device's network settings. In addition, getting help from your service provider or getting a new SIM card could fix ongoing problems. App Freezes and Crashes: These issues can cause havoc with a mobile user's experience. Make sure your apps are up to date with the most recent versions in order to fix this. Try deleting the app's cache or reinstalling it if it's the one giving you trouble. Holding down the power button during a soft reset will work if the phone freezes completely.
Storage Low: The performance of your mobile device may be impacted if it is running out of storage space. First, get rid of any extraneous files, images, or programs. To save images and videos and move huge data to an external device, use cloud storage services. Future storage-related problems can also be avoided by routinely cleaning the cache on your device and improving storage settings. Unresponsive Touchscreen: Although it can be annoying, there are workarounds for an unresponsive touchscreen. Since oils and debris can alter sensitivity, properly clean the screen. Restart your device or, as a final option, carry out a factory reset if the problem continues. To fix touchscreen responsiveness, manufacturers frequently offer updates, so make sure the software on your device is up to current.
Charger Issues: Concerns about charging are not uncommon. Try using a different charging cable and adapter if your device is not charging or is charging slowly. Make sure there are no problems with the power source and clear any dust or debris from the charging port. If issues continue, your battery might be degrading and has to be replaced.
In conclusion: - tackling common mobile issues head-on is crucial to maintaining a seamless and efficient smartphone experience. From addressing battery drainage and overheating to resolving network connectivity and app-related problems, implementing these handy fixes can significantly enhance the functionality of your device. Regular maintenance, such as optimizing storage and keeping software up-to-date, goes a long way in preventing future complications. By being proactive in resolving mobile challenges, users can ensure that their devices operate smoothly, providing a reliable and enjoyable mobile experience. Remember, a little troubleshooting now can save you from major headaches later, allowing you to make the most out of your mobile device. If the issue is not resolved then visit .the issue is not resolved then visit Vivo Authorized Service Centre in Dhantoli Nagpur
0 notes
Text
Intel r ethernet connection 2 i219 v code 10

Intel r ethernet connection 2 i219 v code 10 install#
Intel r ethernet connection 2 i219 v code 10 drivers#
Method 2: Perform an Internet connection reset via Command Prompt. Click Network troubleshooter to diagnose and fix network problems. To diagnose your network configuration, perform the steps below:Ĥ. To resolve your concern, we suggest that you reset your TCP/IP or Internet Protocol to its default settings. Resetting your Internet connection can refresh your connectivity. It still just drops out and sometimes recovers it's self., but most of the time I switch the link speed and it's back up, but is super annoying. The link status, changed from dhcp to fixed IP and DNS, removed all power save options and tried every trick I could fine on the internet with regards to windows 10 internet dropouts. disabled firewalls, removed all parts of the internet connection apart from the absolute essentials, changed my powerline adapters, added the switch so I can see
Intel r ethernet connection 2 i219 v code 10 drivers#
I have checked for updates, made sure I have the latest drivers and bios for my motherboard. it does not matter what it's on I just have to swap it and the internet starts working again. All I have toĭo to get it working again is go into the Intel Ethernet connection I219-v properties and change the link speed from either Auto or 100 mbps full duplex. I can also still see the powerline adapters via the tp link utility. I did not have any issues on my older windows 7 system with the exact same network setup.Īt totally random times I can see my internet connection icon change and I loose my connection, but I dont loose my physical link and can see the switch is still working. Using a older powerline adapter, but I have upgraded to see if it will help with this problem. My internet connection is via a gigabit TP link powerline adapter and I have a netgear 10/100 switch.
Intel r ethernet connection 2 i219 v code 10 install#
I have just recently upgraded my pc with a new motherboard (intel strix b250f gaming), cpu (i5.7600) and a clean install of windows 10 pro.
0 notes
Text
Expert Fixes for the ‘Yahoo Connection to Server Failed’ Issue
Yahoo email has stayed one of the most-utilized email administrations all through such a long time. There are at present north of 200 million dynamic clients of this mail administration. Notwithstanding, despite the fact that it offers a decent presentation most times, clients report different mistakes in it occasionally. Yahoo association with server fizzled is one such issue. Yahoo clients face this mistake when they endeavor to connection to the mail server. There are different reasons that could cause this issue. Simultaneously, there are additionally different ways of fixing the issue. In this article, you'll grasp the causes as well as the fixes for it.
Why Do You Find ‘Yahoo Connection to Server Failed’ Error?
Aside from when you are attempting to connection to the mail server, you may likewise confront Yahoo Mail association with server fizzled while utilizing an outsider mail client. This issue happens because of the causes given beneath.
Your system does not support SSL encryption.
There are faulty POP or IMAP settings on your system.
An error related to login information.
There is a problem with your Android or iOS mail app.
Fixes for the ‘Yahoo Connection to Server Failed’ Issue
You can investigate this issue in different ways. In any case, before that, utilization this basic cycle and check whether you can dispose of the issue. In the event that the issue stays, carry out the goals referenced a short time later.
Conduct a Basic Troubleshooting
This problem can be especially annoying for those who need to check their email for important messages. If you face this issue, check for the following things.
Ensure that you have a good internet connection.
Restart your phone and see if the error gets fixed.
You can change the account password of your mail to resolve the server connection failure.
Move your emails to another folder. It can help to get rid of the problem.
Contact the network administrator and let them know of the server issues.
You can also reset your phone or device’s network settings.
Lastly, it’s also a good idea to factory reset your mobile device.
Confirm the Server Settings
Is it safe to say that you are utilizing an outsider application to deal with your Yahoo email record and face the association with server bombed Yahoo blunder message? Assuming this is the case, you should confirm your Yahoo mail server settings. In the event that they are wrong, you will keep dealing with this issue.
Open your Yahoo email account.
Next, head over to ‘Account Settings.’
Now click the button of ‘Advanced Settings.’
After that, examine the server settings. They must be exactly like the ones given below.
Incoming Mail Server Settings
The server name is imap.mail.yahoo.com. For POP, it is pop.mail.yahoo.com.
The port number for IMAP is 993, while that for POP is 995.
You require SSL for authentication.
Outgoing Mail Server Settings
Your outgoing mail server name is smtp.mail.yahoo.com.
The outgoing mail port number is 587.
Authentication is SSL or TLS, and it is required.
Update Your Browser
One more basic yet successful goal to the Yahoo Mail association with server bombed blunder is to refresh your internet browser. In the event that your program isn't refreshed to the new adaptation, you'll confront numerous errors. So update it to get to your Yahoo Mail account appropriately.
Unblock the Ports
Firewalls or antivirus programming are many times a main source of the Yahoo association server bombed issue. They block or totally stop the mail server ports. Thus, to determine what is happening, you should unblock the ports and inspect in the event that this issue is settled. To unblock ports, follow these means.
Head over to your system’s firewall settings. Disable their settings.
After that, turn off the antivirus or security software.
After you connect to the mail server, enable the security software to verify your Yahoo Mail connection. Now you won’t find this problem.
Inspect the Server Status
Assuming that you find yourself incapable to get to your Yahoo account, checking the server status is likewise best. You can do this toward the start or while no investigating method is giving you results. Really look at the status to guarantee that the Yahoo Mail server is working accurately. In the event that it's not, you'll need to stand by till the server works appropriately.
Steps to Fix ‘Yahoo Connection to Server Failed Error’ in iOS & Android
You can resolve this problem on your respective devices by following the simple set of instructions. They are explained in detail for both iOS and Android.
IOS Mail App
If you face this issue in your iOS mail app, the first thing you can do is update the operating system of your device. An older version will work only for older settings.
The server settings must be recent to properly access the Yahoo Mail account.
After verifying the settings, remove and re-add your mail account on your device. For doing so, navigate to ‘Settings‘ and choose ‘Mail Contacts, Calendars.’
Tap your account and choose the ‘Delete Account‘ option.
Now select ‘Delete‘ to delete your Yahoo Mail account.
Navigate to ‘Settings‘ and then select ‘Mail, Contacts, Calendars.’
Choose ‘Add Account‘ followed by ‘Yahoo.’
Fill all the needed fields and tap ‘Next‘ followed by ‘Save.’
1 note
·
View note
Text
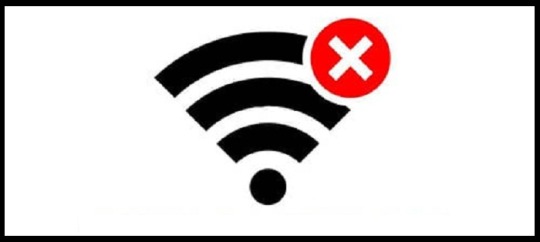
How to Fix the Windows 10 Network Adapter Missing Error?
Sometimes when you are ready to shoot the queries over the Internet. Suddenly you notice NO Network Connection on the system. You immediately become doleful viewing the error message on the screen. Not finding Wireless Adapter in the Network Connections window is a clear sign of the Network Adapter missing or not recognized on the Windows 10 OS. You are unable to link to either a WI-FI or Ethernet network. Several reasons behind this issue are outdated or incompatible network drivers and system updates, or corrupted programming data. If you want to get out of this annoying issue, then follow this blog.

Modify the Adapter Settings
To modify the adapter settings, pursue the on-screen steps provided below:
Launch the Settings application on your system.
You should click on the ‘Network and Internet’ option and choose the Ethernet option.
Then check for a wireless adapter that is recently performing.
Go to the ‘Internet Protocol Version 6 (TCP/IPv6)’ option and click on it.
Later, untick the IPv6 to turn it off and hit the OK button.
Now, reboot the system.
Activate and Deactivate Network Adapter
To activate and deactivate the network adapter, pursue the on-screen steps provided below:
Invoke the Settings application by hold the Win, and I button combination over the keyboard.
Then click on the ‘Network and Internet’ option and select the Status option.
Beneath the ‘Advanced network settings’ section over the right-hand side, you will locate the ‘Change adapter options.’
After that, select the ‘Network adapters’ option.
Later, select the Ethernet port or network adapter of the system and right-click on it, then pick the ‘Deactivate’ option.
For activation, select the Ethernet port or network adapter and right-click on it, then click on the ‘Activate’ button.
Reset the Network Adapter
To reset the network adapter, pursue the on-screen steps provided below:
Hold the Win, and I keys combination on the keyboard to open the Settings app.
Thereafter, reach the ‘Network & Internet’ and click on it.
Underneath the ‘Advanced network settings’ section, select the ‘Network reset’ option.
Now, click on the ‘Reset now’ option and hit the Yes button.
Once you have done it, the system will reboot itself.
Uninstall the Network Adapter
To uninstall the network adapter, pursue the on-screen steps provided below:
Firstly, you should launch the Settings application by following the above instructions.
Go to the ‘Network and Internet’ option and select it.
You should reach the left side of the screen and select the Status option.
Underneath the ‘Advanced network settings’ section over the screen’s right side, you will locate ‘Change adapter options.’
Then select the ‘Network adapters’ option.
Navigate to the doubtful network adapter, and right-click on it, then choose ‘Uninstall device.’
Now, hit the button of Uninstall and then reboot the PC.
Utilize the Network Troubleshooter
To utilize the network troubleshooter, pursue the on-screen steps provided below:
Once again, invoke the Settings application by hitting Win and I hotkeys altogether on the PC.
Navigate to the ‘Update & Security’ option and click on it, then pick Troubleshoot.
You should click on the ‘Internet Connections’ option.
Then choose ‘Run the Troubleshooter.’
Now, pursue further steps and allow the procedure complete.
Finally, reboot the system.
Source: How to Fix the Windows 10 Network Adapter Missing Error
0 notes
Text
How to Fix the No Internet, Secured Message?
Many users are complaining that after downloading the latest Operating System-associated updates, they encounter a ‘No Internet, secured’ error message. This error stops you from using the internet connection so, if you would like to solve this annoying error, then here some methods displayed below.

Launch the Troubleshooter
To launch the troubleshooter, follow the directions displayed below:
Hold the Win and R hotkeys simultaneously on the keyboard to launch the Settings application.
You should reach the section of ‘Update & Security’ and click on it.
Then click on the Troubleshoot option through the left menu.
Go to the right panel and choose the ‘Internet Connections’ option.
You should click on the ‘Run the troubleshooter’ option.
Reset the Connection
To reset the connection, follow these steps mentioned below:
You should select the network of Wi-Fi and click on the Forget option.
Also, detach the connected Ethernet cord.
Once you disconnect the device through the access point correctly, enable the Airplane mode.
You have to reboot the system and turn off the Airplane mode.
Now, link to the network of Wi-Fi and wait for a while before the connection goes to usual.
Modify the Adapter Settings
To modify the adapter settings, follow these steps mentioned below:
Navigate to the Network Adapter’s Properties and check the wireless adapter that is recently performing.
You should browse for the option of ‘Internet Protocol Version 6 (TCP/IPv6)’ beneath the options that bring up and untick the ‘IPv6’ to turn it off.
Finally, hit on the OK button and reboot the system to implement the modifications you made.
Reinstall Network Adapter
To reinstall the network adapter, follow these steps mentioned below:
Hold the Win + X hotkeys simultaneously on the keyboard to launch the menu.
Afterward, click on the Device Manager option.
You should click on the network device.
Go to the device you would like to remove and right-click on it, then choose the Uninstall device option.
Make sure to mark the ‘Delete the driver software for this device’ checkbox whether applicable.
Later, hit on the Uninstall button.
You should select the ‘Scan for hardware changes’ button to install the device again.
Finally, finish the installation process of the driver prior to rebooting the system.
Check the Needed Network Functions are Enabled
To check the needed network functions are enabled, follow these steps mentioned below:
You should select the icon of the network in the PC tray.
Then click on the name of the network through the list.
After that, select the feature of ‘Change adapter options.’
Go to the network connection and right-click on it, then pick the Properties option.
Once open the Properties screen, check the pursuing items are marked:
Reliable Multicast Protocol
Internet Protocol Version 6 (TCP/IPv6)
Link-Layer Topology Discovery Responder
Client for Microsoft Networks
File and Printer Sharing for Microsoft Networks
Link-Layer Topology Discovery Mapper I/O Driver
Internet Protocol Version 4 (TCP/IPv4)
Reset the Network Configuration
To reset the network configuration, follow these steps mentioned below:
Go to the Windows Search section on the PC.
Then insert ‘cmd’ in it and select the OK button to invoke the Command Prompt.
Once you get Command Prompt, right-click on it, then choose the ‘Run as administrator’ option.
After starting the Command Prompt, perform the pursuing commands individually:
netsh Winsock reset
netsh int ip reset
ipconfig /release
ipconfig /renew
ipconfig /flushdns
Once perform these commands, the network configuration will reset, and the problem can be fixed.
Mia Watson is a Internet Security expert and has been working in the technology industry since 2002. As a technical expert, she has written technical blogs, manuals, white papers, and reviews for many websites such as Check AskMeTop
Source: How to Fix the No Internet, Secured Message?
0 notes
Text
How to Fix Chromecast Audio Issue
Chromecast is one of the best devices to watch your desired videos, shows, and movies directly over your TV. To use “Chromecast” you have to connect it via USB cord that directs through your laptop or your smartphone. You can beam any videos or programs from almost all the Android and some of the iOS applications. It includes “Google Play Movies,” “YouTube,” “Hulu” and various other services.

Sometimes, users state some audio issues while streaming video or watching a particular movie on their TV. It seems very annoying and frustrates us if we are facing fluctuating or no sound issues on any electronic device. If you are one of them, then this blog is for you.
Here we are going to guide you on how to troubleshoot the sound issues of your Chromecast.
Checking Television Set-Up Options
Every electronic device can’t restore or recover to its problems, so it is recommended to check your TV settings properly. The sound issue may be due to the improper function of sound speakers.
Make sure that your TV speakers are set “Enabled” for volume as there are various modern TV systems that are coming that have the feature to disable the audio system in order to provide home theatre or for creating surround sounds.
You can run the factory reset feature to restore its settings in a default mode from the “Settings” menu of your display.
Checking Chromecast
After ensuring that your TV is perfectly functioning, then it is also advised to check that your Chromecast is running properly with enough power supply.
To troubleshoot the issue, you have to try to connect your “Chromecast” to a different HDMI jack.
Change the connecting port to micro USB one as your Chromecast also has a micro USB cord and check that it is connected to a well-performing USB jack.
Few of the TV’s runs of “service” USB cable as it might not function over all the “Chromecast.”
If the issue still exists, then you should use a compatible AC power adapter to provide enough energy to the Chromecast.
Fixing Chromecast Issues
Various issues can be removed by performing a reboot on your Chromecast as it removes minor bugs and glitches running on your device. If you wish to reboot your Chromecast, then follow these steps:
First of all, you have to launch your “Google Home” app on Chromecast.
Then, hit the “Devices” tab located at the upper right-hand side edge of your screen. It will show you the available “Chromecast” devices that present in that current time over the network.
Now hit your device and then navigate to the menu icon located at the uppermost right-hand side edge.
Then, tap on “Settings” option.
Next, hit the “More” tab in order to show extra settings option.
After that, hit the “Reboot” tab there.
Wait for a while to start rebooting procedures. It will remove all the minor issues, bugs related to sound and display too.
As an alternative way, you can unplug your device from the power socket to perform “force reset.”
Checking Your Smartphone or Tablet for Controlling Volume
If you have applied all the above steps and still you are facing such audio issues, then it is recommended to check your volume settings on your handheld device.
Your smartphone or other devices from which you are playing shows or programs on TV is used for managing sounds on your Chromecast.
Then, check that the audio is enabled for the Chromecast from your handheld device as you can adjust it by toggling the sound buttons.
Canceling and Restarting Chromecast Videos
Try to stop or restart method for your Videos that your streaming from your handheld device as this method troubleshoots various sound problems of Chromecast.
It refreshes the particular URL paths of the specific program or video that you are streaming on your TV.
To check the sound issues of the programming app and fix this issue, you can apply force shutting method to close the application at once.
It will make you ensure if the issue exists found in the particular app itself or not. You will also get the right cause if it’s a connection problem of the specific Chromecast and your application.
You can use the extension method of Chromecast if you are running a video from Chrome on “Chromebook,” or another PC for optimizing audio. To do this, follow these instructions:
Go to the extension option inside “Chrome.”
Then, you have to hit your “Chromecast” device.
Next, tap the option “Cast this tab.”
James Walker is a self-professed security expert; he has been making the people aware of the security threats. His passion is to write about Cyber security, cryptography, malware, social engineering, internet and new media. He writes for Norton security products at norton.com/setup.
Source: Chromecast Audio
0 notes
Link
Video_Dxgkrnl_Fatal_Error is a BSOD (Blue screen of Death) error and it is inconsistent. We can't predict anything in a computer, for a moment everything will seem fine and working smoothly and on another second a blue screen appears with a glaring face. When Video_Dxgkrnl_Fatal_Error error encounter in your system you will meet the blue screen of death, which is so annoying. BSOD can appear with various error codes like 0x680B871E, x05F6C614D, etc.
When this problem encounters so your system may start crash frequently, you are working with any program and suddenly the screen will freeze up and then BSOD, or in some cases, it happens that response time of program increases for any task. And Windows may restart with a blue screen error code 0x113.
If you are also facing Video_Dxgkrnl_Fatal_Error error on BSOD, so don't worry we have some fixes, and some techniques to troubleshoot the problem. Read the complete article, and try to use each method one by one. We hope you will be able to fix the error Video_Dxgkrnl_Fatal_Error. So follow these methods and fix your problem
How to Fix Video_Dxgkrnl_Fatal_Error Easily in Windows
Reasons
The main and foremost reason behind Video_Dxgkrnl_Fatal_Error error is related to drivers.
Corrupted or incompatible graphics/ display drivers can also lead to generating such error.
Upgradation from Windows 7/8.1 to Windows 10 (Majority victims of this error complain that they upgrade their system to Windows 10, and then got such error).
Conflicting device drivers or windows system files can also be the cause of this error.
Faulty Hardware drivers are another reason to cause Video_Dxgkrnl_Fatal_Error error.
Directx Graphics Kernel Subsystem Violation
Outdated BIOS
Recently installed Third-party software.
Also Read: How to Enable Group Policy Editor (gpedit.msc) in Windows 10 Home
Before You Start
This error leads to frequently restart your Windows if this is happening with you too. So try to boot in Windows with Safe mode. Because the error will restart the system again and again, and you will be unable to perform the troubleshooting. so you have to boot into safe mode. To do so, follow the following steps:
Go to start menu, and search Update & Security in the search bar.
Now, navigate to the Recovery option.
Select Restart Now, from Advance startup option.
If your Windows won't let you do this thing also, so you have to try a different way. In windows after three consecutive restarts, Windows itself starts into Advance Startup Options. So try doing this.
In Advance Startup options, select Startup Settings.
Then Select restart.
When your PC will restart, and after the restart, you will see some options.
Select F4 to start the system in Safe Mode.
Select F5 (if the Internet will be used) to start the system with Safe Mode in Networking.
Select F6 to start the system with Command Prompt.
When troubleshooting will be finished, restart your system to get into Normal Mode.
Also Read: How to Fix ‘Kmode_Exception_Not_Handled’ on Windows 10
Fixes
Update the Drivers
An outdated graphic driver or device driver can also cause the error Video_Dxgkrnl_Fatal_Error. To update the driver, follow the given steps:
Press WinKey+X simultaneously, and choose Device manager at the same time.
In the device manager window, expand the Display adapters.
Right-click on Graphics Driver.
Select Update Driver.
On the next screen, select Search Automatically for updated Drivers.
Follow all on-screen instructions, to complete the process.
Also Read: How to Fix Microsoft Compatibility Telemetry High Disk Usage in Windows 10
Uninstall Antivirus
Antivirus is used to save your system from malware but a lot of time they bring worst things into our system, so if you installed and Antivirus into your system, try uninstalling it to resolve the error Video_Dxgkrnl_Fatal_Error. To do so, follow the given steps:
Press WinKey+ R simultaneously, to open the run dialog box.
Type appwiz.cpl in the search bar.
Press Enter.
This will redirect you to the Antivirus Software in the Control Panel.
Find the error causing software and Uninstall it.
After a restart Windows defender will be your primary security software.
This may resolve the error Video_Dxgkrnl_Fatal_Error. If not, so proceed to the next instruction.
Also Read: How to Fix Confirm Form Resubmission ERR_CACHE_MISS Error
Reinstall Drivers
Corrupted, overdated device drivers may cause error Video_Dxgkrnl_Fatal_Error. So try reinstalling the drivers. To do so follow the following steps:
Visit the manufactures site, and download the latest drivers for your system.
Press WinKey+ R simultaneously, to open the run dialog box.
Type devmgmt.msc in the search bar.
Press Enter.
This will open the device manager.
Select the faulty driver, under Display adapters.
Right-click on it, and click on Uninstall.
If you have downloaded the latest drives, so after rebooting, Windows will install them automatically.
This may resolve the error Video_Dxgkrnl_Fatal_Error. If not, so proceed to the next instruction.
Also Read: How to Fix ‘No Audio Output Device is Installed’ Error in Windows
Disable Fast Start-up
Disabling fast Start-up also fixed the issue, To do so follow the given steps:
Go to start, and open the control panel.
Search for Power Options, and open it.
Select Choose What the Power Buttons do.
Tap onChange settings that are currently unavailable.
Uncheck the boxes in front of the option saying Turn on fast startup (recommended).
Now click the Save Changes button.
This will disable the fast startup of your system, so it may prevent your system from falling into frequent restarts, and resolve the Video_Dxgkrnl_Fatal_Error error on Windows.
Also Read: How to Restore Windows 10 PC Using Media Installation
Run the System File Checker Tool
Windows uses the SFC command to repair corrupted files. To do so, follow the following steps and resolve the error Video_Dxgkrnl_Fatal_Error on Windows.
Go to Start, type cmd in the search bar.
Right-click on Command Prompt.
Select Run as Administrator.
Type SFC/scannow, and hit enter.
It will scan your PC for corrupt Windows Files.
It will diagnose and repair corrupted files automatically.
Restart your system, and check the error Video_Dxgkrnl_Fatal_Error appearing again or not.
This may resolve the error Video_Dxgkrnl_Fatal_Error. If not, so proceed to the next method.
Also Read: How to Reset Windows 10 To Factory Settings
Update BIOS
The Overdated BIOS version also leads to Video_Dxgkrnl_Fatal_Error error. So you should update your BIOS, before updating BIOS you need to have complete information about your BIOS including BIOS version, manufacturer of BIOS, and other information. Once you have all the detail of BIOS, now you can update your BIOS to the latest version easily.
Visit your motherboard manufacturer's website.
Here, they have listed some guidelines regarding BIOS.
Type the model name in the search bar and choose the model name of your motherboard.
Then look for the proper drivers.
Get the latest version of BIOS.
Updating BIOS will resolve most of the problems in your system. If still, you are facing the Video_Dxgkrnl_Fatal_Error issue again so it may be due to some other reason, try the next method, it may help you.
Also Read: How To Fix “USB Device Not Recognized” Error in Windows 10
Clean Boot
If nothing is working for you, we can understand that you get frustrated after applying so many methods and Nothing is working. Boom, here we have the last option, this will throw out the error Video_Dxgkrnl_Fatal_Error from your system forever. This will clean boot all the non-Microsoft apps, by disabling them, and once every third-party app get to disable the error will resolve itself. To perform clean Boot follow the given steps:
Open Run Dialog Box, by pressing WinKey+R simultaneously.
Type MSConfig in the search bar.
Click on Ok.
Here, you can disable all apps which don't belong to Microsoft, you can disable them and this will also resolve the error Video_Dxgkrnl_Fatal_Error from your system because Third-party apps are also a reason for this error.
So that's it, guys, from our side, these were some fixes to resolve the error Video_Dxgkrnl_Fatal_Error easily on Windows. I hope you would like the method and also your problem has been solved, if still, the problem persists, please write your issue at Microsoft Support to file a bug. If you found something missing from the above content, or you have some more suggestions so please let us know in the comment section.
Are you facing any problems and issues with Windows 10? Then there is nothing to worry about, we have an article dedicated to Windows 10’s issues and guides, visit Windows 10 Troubleshooting Guide. I hope you would like this content if you have some more suggestions let us know in the comment section.
via TechLatest
0 notes