#headless wordpress with vue js
Explore tagged Tumblr posts
Visit Tumblr Blog
Explore Tumblr blogs with no restrictions, modern design and the best experience.
Last Seen Tumblr Blogs


imensosoftwaredevelopmentco-blog
Imenso Software - PHP & Software Development Company in India
1 post


Fun Fact
Tumblr is used by 21% of adults online aged 18-29 years.
Text
0 notes
Text
The ways to develop a website

You can approach various ways to developer website but depending on your goals, technical skill, and also resources. Below is an overview of the primary methods to develop a website:
1. Using website builders
Website builders are allow you to create website without calling knowledge and it is user friendly platform also. They offer pre designed templates and drag and drop interfaces.
• Popular tools: wordpress. com, shopify for eCommerce, wix, squarespace etc.
• How it works:
° You can choose the template that you want.
° Customize the design, layout and also content with using visual editor of the platform.
° You can also add forms, eCommerce, or blogs to plugins or also in built tools.
° Then publish the site with hosting that provided by the platform.
• Pros:
° No coding required and it is beginner friendly.
° Fast setup and development.
° Hosting, security and also updates are included.
• Cons:
°Compared to coding it have limited customisation.
° Monthly subscription costs.
° Migrating can be challenging because of platform dependency.
2. Content management system(CMS)
It require minimal coding and it allows you to manage website content efficiently with the customizable themes and plugins.
• Popular tools: wordpress. org, Joomla, drupal
• How it works:
° Install the CMS on a web server.
° With the basic coding or in built tool, you can select a theme and customize.
° To add functionality you can use plugins.
° Then you can manage content through dashboard.
• Pros:
° It is flexible and scalable and also it have thousands of themes and plugins.
° Provide community support and resources.
° It is useful for portfolios or blogs and also Complex sites.
• Cons:
° You should require some technical knowledge for the set up and maintenance.
° It have hosting and domain cost.
° It need security updates as also backups.
3. Coding from scratch (custom development)
Build a website with the raw code, it can give you complete control over design and functionality.
• Technologies:
° Frontend: HTML, CSS, JavaScript.
° Backend: python, PHP, Ruby, and node. JS
° Database: MySQL, mongoDB,postgreSQL.
° Tools: code editor, hosting, version control.
• How it works:
° You can design the site structure and visuals by using HTML/ CSS/ or JavaScript.
° For dynamic features build back end logic.
° You can connect to a database for data storage.
• Pros:
° Offers full customisation and flexibility.
° Unique functionality and also optimized performance.
° No platform restrictions.
• Cons:
° It requires coding expertise.
° Costly and also time intensive.
° Require ongoing maintenance such as security, updates.
4. Static site generator
It can create fast, and also secure website by pre rendering HTML files. It is useful for Blogs, or portfolios.
• Popular tools: Hugo, Jekyll, Next. js.
• How it works:
° You can write content in markdown or also similar format.
° Use template to generate static HTML, CSS, or JavaScript files.
° Use hosting platform like netlify,or vercel.
• Pros:
° It is fast and Secure and no server side processing.
° It provide free or low cost hosting.
° Easy to scale.
• Cons:
° It has Limited functionality.
° It required some technical knowledge.
5. Headless CMS with frontend frameworks
A headless CMS can provide a backend for content management with the conctent frontend for flexibility.
• Popular tools:
° Headless CMS: Strapy, contentful etc.
° Frontend framework: React, Vue. js etc
• How it works:
° To manage content via APIs, use headless CMS.
° With JavaScript framework built a custom frontend.
° To display the dynamic content connect both via APIs.
• Pros:
° Very much flexible and scalable.
° Allowing reuse across platforms such as web, mobile.
° Modern and also performant.
• Cons:
° It require coding skill and also familiarity with APIs.
° The setup can be complex.
6. Hiring a developer or agency
If you don't have time or lack of Technical skill, you can you can hire developer or agency.
• How it work:
° For custom development you can higher freelancers or agencies.
° They can provide your requirement such as design , features, and budget.
° In collaborate on design and functionality then launch the website.
• Pros:
° They provide professional result with your needs.
° Save time.
• Cons:
° Cost can be higher.
° Depend on third parties for maintenance.
7. Low code platforms
Low code platforms fill the gap between no code Builders and custom coding. And they offering visual development with the coding flexibility.
• Popular tools: bubble, Adalo, Outsystems.
• How it works:
° To design and configure the site, use Visual interface.
° And some custom code for specific features.
° Use built in or external hosting.
• Pros:
° It is faster than coding from scratch.
° You can offer more customizable than website Builders.
• Cons:
° Learning curve for advanced features.
° Require subscription or hosting cost.
Choosing the right method
• Beginners: if you are a beginner you can start the with the website Builders or wordpress.
• Budget conscious: if you are conscious about your budget you can use static site generators or also free CMS options.
• Developers: opt for custom coding or headless CMS for whole control.
• Businesses: for businesses, it is good to consider hiring professionals or using scalable CMS platform.
If you are looking for a website development with design, it is smart to work with an experienced agency. HollyMinds Technologies is a great choice, because they are the best website development company in Pune, and they make websites that are perfectly coded and structured to stand the test of time. The algorithms are set to bring visitors from across the globe. A structured website with right content, can bring more visitors to your business.
1 note
·
View note
Photo

Angular 9, a new decimal datatype for JS, and how to read specs
#474 — February 7, 2020
Read on the Web
JavaScript Weekly
Understanding the ECMAScript Spec — The meaty first post in a series looking at how to read parts of the formal ECMAScript spec that forms the basis for JavaScript and turns its formal notation into something you can learn from.
Marja Hölttä
Angular 9 Released: Project Ivy Has Arrived — A major release for Angular that includes an all new compilation and rendering pipeline (called Ivy) as well as updates across the entire framework including the CLI tools and Angular Material. “This is one of the biggest updates to Angular we’ve made in the past 3 years.”
Stephen Fluin
Locate Front-End Issues Like JavaScript or Network Errors Instantly — Get proactively alerted on any client-side issues such as JavaScript and network errors, optimize the load time of your front-end resources, and detect any UI issues that affect critical user journeys. Try it free with Datadog Synthetics.
Datadog sponsor
Electron 8.0.0 Released — The popular cross-platform desktop app development toolkit takes more steps forward, mostly in the area of dependencies, by moving to Chrome 80 (which only came out this week itself), V8 8.0, and Node 12.13. IPC communication now uses a new algorithm which is a lot faster for large and complex objects too. Offscreen rendering is currently disabled, however, so don’t upgrade if you depend on it.
Electron Project

A Proposal for a Built-In Decimal Datatype — An investigation into adding a built-in data type in JavaScript to represent base-10 decimal numbers that’s being presented to TC39. BTW, you may find this slidedeck to be more accessible.
Daniel Ehrenberg
Quick bytes:
Chrome 80 is out which brings support for ES modules in Web Workers.
TypeScript 3.8 RC is out. No changes anticipated before the final release.
There's a proposal for combining logical operators and assignment expressions.
Work on Babel 8 is underway. There will be breaking changes but there's an outline and plan.
💻 Jobs
Announcing a 100% Remote Opportunity as a Sr. Fullstack Dev (Node/React) — We’re passionate about giving developers the chance to do meaningful work by building transformational technology solutions.
Clevertech
JavaScript Developer at X-Team (Remote) — Work with the world's leading brands, from anywhere. Travel the world while being part of the most energizing community of developers.
X-Team
Find a Dev Job Through Vettery — Vettery is completely free for job seekers. Make a profile, name your salary, and connect with hiring managers from top employers.
Vettery
📘 Articles & Tutorials
Getting Acquainted With Svelte, the New Framework on the Block — We’ve mentioned Svelte, an interesting compile-time 'framework', a few times in the last year – here’s another take on why to consider it.
Tristram Tolliday
Formatting Dates with Intl.DateTimeFormat — A good demonstration of a modern way to format dates in a region friendly way using native APIs, as now supported in both Node and all major browsers.
Valentino Gagliardi
Top GitHub Best Practices for Developers - Expanded Guide — Implementing these best practices could save you time, improve code maintainability, and prevent security risks.
Datree.io sponsor
Adding a F#-Style Pipeline Operator to Your JavaScript with Babel — Using Babel’s custom transpilation powers to try out an alternative to the proposed pipeline operator.
George Dyrrachitis
Building an Accessible Autocomplete Control — Learn how to design and build an accessible autocomplete control from scratch.
Adam Silver
You (Possibly) Don't Need Moment.js — Moment.js is a popular date and time manipulation library but this repo shows off alternative approaches, including many native functions that do similar things. At the very least, this is a neat ‘cheat sheet’ for date and time manipulation :-)
Various Contributors
Implementing Basic 2D Physics in JavaScript — If you’ve ever seen a physics simulation on the Web and wondered about the basic math to pull it off, this will get you started.
Martin Heinz
▶ Building a Vue 3 Testing Framework from Scratch — This is not a guide to Vue testing but a look behind what’s necessary to implement your own testing framework for a framework like Vue.
Lachlan
How to Use Cloudflare JavaScript Workers to Deploy a Statically Generated Site
Ernesto Freyre
Debug JS Errors in Real-Time and Optimize Your Front-End Performance
Site24x7 sponsor
How To Create A Headless WordPress Site On The JAMstack
Sarah Drasner & Geoff Graham
3 Ways To Access Object Properties in JavaScript
Dmitri Pavlutin
10 Array Methods You Should Know — One for the beginners among you :-)
Rebecca Uranga
🔧 Code & Tools
CheerpJ 2.0 Released: A Java to WASM and JS Compiler — This is a commercial tool (though free for non-commercial purposes) but as someone who started on the Web in the 90s, the idea of Java being compiled to JavaScript continues to tickle me :-) Interesting tech.
Stefano De Rossi
vue-cli v4.2 Released — The latest release of the popular tools is fully baked with ESLint 6, optional chaining and nullish coalescing support, plus better Yarn 2 support if you’re using that.
Haoqun Jiang
Sharect: A Library to Let Users Share Text Selections to Social Networks — If you’ve seen how Medium lets readers select text and share it, it’s like that, but lighter.
Estevan Maito
New Time-Travel Debugger for JavaScript and TypeScript — Move forward and backwards through your code to understand the conditions that led to a specific bug, view runtime values, edit-and-continue, and more.
Wallaby.js sponsor
GLTFJSX 1.0: Turns GLTFs Into JSX Components — Turns GLTF (GL Transmission Format) files (as used for 3D models and scenes) into re-usable Three.js components.
Paul Henschel
Baretest: An 'Extremely Minimalistic' Alternative to Jest — A fast and simple JavaScript test runner that boasts a ‘brainless’ API. The motivation? Runniing tests as fast as possible.
volument
Vendure: A Headless GraphQL E-commerce Framework — Built on Node, Nest and TypeScript. The idea is you’d use this for the backend, then implement the front-end of your store however you prefer.
Vendure
defu: Recursively Assign Default Properties — In short, merge two objects together without the properties overwriting each other, as you might want to do when handling options and default settings on entry to a function.
JSLess
x-spreadsheet: A JS and Canvas-Powered Spreadsheet Control
myliang
by via JavaScript Weekly https://ift.tt/2UK3Xx1
0 notes
Text
How To Build Vue Wordpress Rest API Websites
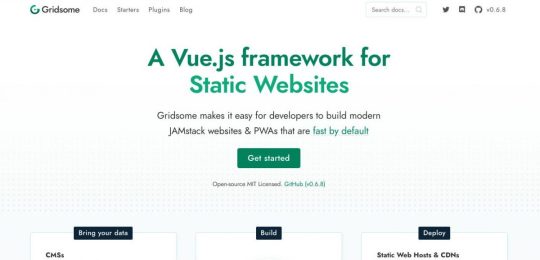
Want to build a Vue JS/Wordpress Rest API backend hybrid, with superfast loading times? Here we take a look at Gridsome static site generator for Vue JS, which is a similar tool to React's Gatsby generator, and build a site using the Vue Wordpress Rest API. The use of Jamstack (Javascript, API’s and Markup) technologies is on the rise nowadays, as they provide a simpler developer experience, better performance and greater scaleability. Most React developers are familiar with the Gatsby site generator, however with Vue JS there are a number of different options. Here we take a look at the Gridsome cli for Vue JS, which has some cool features out of the box, and a lot more that can be added with the use of plugins.

Gridsome for Vue Wordpress
With Gridsome, you get the following out of the box, in a quick two minute install. Local development with hot-reloading - See code changes in real-time. Data source plugins - Connect to any popular Headless CMSs, APIs or Markdown-files. File-based page routing - Quickly create and manage routes with files. Centralized data management - Pull data into a local, unified GraphQL data layer. Vue.js for frontend - A lightweight and approachable front-end framework. Auto-optimized code - Get code-splitting and asset optimization out-of-the-box. Static files generation - Deploy securely to any CDN or static web host. Built-in component that outputs an optimized progressive image - resizes and crops in real-time when developing.
Everything Lives in Github
With a JAMstack project, anyone should be able to do a git clone, install any needed dependencies with a standard procedure (like npm install), and be ready to run the full project locally. No databases to clone, no complex installs. This reduces contributor friction, and also simplifies staging and testing workflows.
Modern Build Tools
Take advantage of the world of modern build tools. It can be a jungle to get oriented in and it’s a fast-moving space, but you’ll want to be able to use tomorrow’s web standards today without waiting for tomorrow’s browsers. And that currently means Babel, PostCSS, Webpack, and friends.
Automated Builds
Because JAMstack markup is prebuilt, content changes won’t go live until you run another build. Automating this process will save you lots of frustration. You can do this yourself with webhooks, or use a publishing platform that includes the service automatically.
Wordpress Rest API
Since the introduction of the Wordpress Rest API , it has opened up a whole new world of possibilities for Viue JS/Wordpress hybrids, utilizing the features above and combining them with the vast infrastructure and support available with Wordpress. Whilst this may not be suitable for many requirements, there are certainly some which will benefit from this approach.
Wordpress Vue Starter Templates
The Gridsome Wordpress setup (there are others) has the features you need to connect to a Wordpress back end to pull in data to display at the Vue front end, typically loading faster than normal and with a lot of other benefits. For anyone interested in building a Vue JS front end and using the Wordpess Rest API Ive created some starter templates using Gridsome which have been enhanced from the standard Gridsome Wordpress starter with some extra bits, to get you up and running fast. Please note I haven't used the g-image here, so remember to change those when inserting your own images. The Wordpress API is https://vuewp.xhostcom.com/ and we use the endpoints from that to test some data. These are already in the config files, but if you have your own Wordpress setup you can obviously use that, just change the url in gridsome.config.js and netlify.toml You will first need NodeJS and NPM installed, and Gridsome using the command npm install --global @gridsome/cli And then clone from Github any of the following starters, which will get you up and running quickly.

Example Code (Bulma CSS)

Example Code (Bulma CSS)
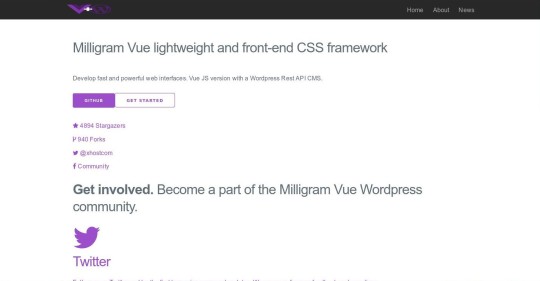
Example Code (Milligram CSS) Here's a blank one with just a nav bar and no CSS or JS


Example Code (No CSS) Once cloned, just run Yarn to grab the dependencies, and gridsome develop command to run the test server. You can of course change the CSS and add your own Javascript as required, but these get you up and running ready to go with the Wordpress Rest API data as is. You can just clear the markup in all the page templates back to the tags and put in your own markup. Creation of extra pages, once added to the menu in /components/header.vue will be routed accordingly with the superfast router, one of the best features I've found, and a breeze compared to others such as Nuxt. So these are just basic starter templates, there's a lot more that can be done using the GraphQL data bindings and other functionality in Gridsome and Wordpress to create your site. Feel free to contribute on Github.
Vue CLI 3 & UIKit
Finally, for those who prefer the official Vue JS CLI, here's one using that, and UIKit CSS/JS Framework, with a mobile nav bar which will blow your socks off! Its NOT configured for the Wordpress Rest API but can be with a little application, or you may want to port the styles using the Gridsome starter above.


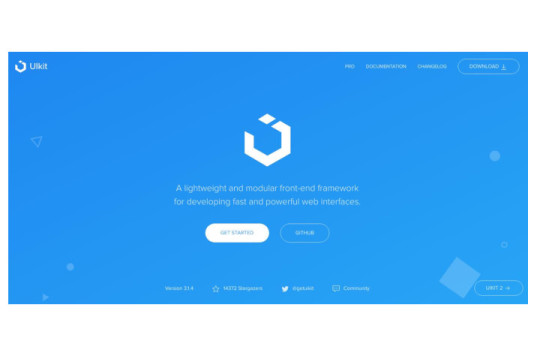
Example Code (Vue CLI - UIKit) So, there we have a few Gridsome Vue Wordpess Starters to have a look at, and also a Vue CLI with UIKit starter to play around with and get a feel for the Vue JS Wordpress API setup, although it can get a lot more interesting if we delve deeper in to Gridsomes GraphQL, extra functions and post template features. Feel free to check them all out on Github at Xhostcomweb Post by Xhostcom Wordpress & Digital Services, subscribe to newsletter for more Read the full article
0 notes
Text
Headless WordPress: The Ups And Downs Of Creating A Decoupled WordPress
Headless WordPress: The Ups And Downs Of Creating A Decoupled WordPress
Denis Žoljom
2018-10-26T13:45:46+02:002018-10-26T11:53:47+00:00
WordPress came a long way from its start as a simple blog writing tool. A long 15 years later it became the number one CMS choice for developers and non-developers alike. WordPress now powers roughly 30% of the top 10 million sites on the web.
Ever since REST API was bundled in the WordPress core, developers can experiment and use it in a decoupled way, i.e. writing the front-end part by using JavaScript frameworks or libraries. At Infinum, we were (and still are) using WordPress in a ‘classic’ way: PHP for the frontend as well as the backend. After a while, we wanted to give the decoupled approach a go. In this article, I’ll share an overview of what it was that we wanted to achieve and what we encountered while trying to implement our goals.
There are several types of projects that can benefit from this approach. For example, simple presentational sites or sites that use WordPress as a backend are the main candidates for the decoupled approach.
In recent years, the industry thankfully started paying more attention to performance. However, being an easy-to-use inclusive and versatile piece of software, WordPress comes with a plethora of options that are not necessarily utilized in each and every project. As a result, website performance can suffer.
Recommended reading: How To Use Heatmaps To Track Clicks On Your WordPress Website
If long website response times keep you up at night, this is a how-to for you. I will cover the basics of creating a decoupled WordPress and some lessons learned, including:
The meaning of a “decoupled WordPress”
Working with the default WordPress REST API
Improving performance with the decoupled JSON approach
Security concerns
Web forms are such an important part of the web, but we design them poorly all the time. The brand new Form Design Patterns book is our new practical guide for people who design, prototype and build all sorts of forms for digital services, products and websites. The eBook is free for Smashing Members.
Check the table of contents ↬
So, What Exactly Is A Decoupled WordPress?
When it comes down to how WordPress is programmed, one thing is certain: it doesn’t follow the Model-View-Controller (MVC) design pattern that many developers are familiar with. Because of its history and for being sort of a fork of an old blogging platform called “b2” (more details here), it’s largely written in a procedural way (using function-based code). WordPress core developers used a system of hooks which allowed other developers to modify or extend certain functionalities.
It’s an all-in-one system that is equipped with a working admin interface; it manages database connection, and has a bunch of useful APIs exposed that handle user authentication, routing, and more.
But thanks to the REST API, you can separate the WordPress backend as a sort of model and controller bundled together that handle data manipulation and database interaction, and use REST API Controller to interact with a separate view layer using various API endpoints. In addition to MVC separation, we can (for security reasons or speed improvements) place the JS App on a separate server like in the schema below:

Decoupled WordPress diagram. (Large preview)
Advantages Of Using The Decoupled Approach
One thing why you may want to use this approach for is to ensure a separation of concerns. The frontend and the backend are interacting via endpoints; each can be on its separate server which can be optimized specifically for each respective task, i.e. separately running a PHP app and running a Node.js app.
By separating your frontend from the backend, it’s easier to redesign it in the future, without changing the CMS. Also, front-end developers only need to care about what to do with the data the backend provides them. This lets them get creative and use modern libraries like ReactJS, Vue or Angular to deliver highly dynamic web apps. For example, it’s easier to build a progressive web app when using the aforementioned libraries.
Another advantage is reflected in the website security. Exploiting the website through the backend becomes more difficult since it’s largely hidden from the public.
Recommended reading: WordPress Security As A Process
Shortcomings Of Using The Decoupled Approach
First, having a decoupled WordPress means maintaining two separate instances:
WordPress for the backend;
A separate front-end app, including timely security updates.
Second, some of the front-end libraries do have a steeper learning curve. It will either take a lot of time to learn a new language (if you are only accustomed to HTML and CSS for templating), or will require bringing additional JavaScript experts to the project.
Third, by separating the frontend, you are losing the power of the WYSIWYG editor, and the ‘Live Preview’ button in WordPress doesn’t work either.
Working With WordPress REST API
Before we delve deeper in the code, a couple more things about WordPress REST API. The full power of the REST API in WordPress came with version 4.7 on December 6th, 2016.
What WordPress REST API allows you to do is to interact with your WordPress installation remotely by sending and receiving JSON objects.
Setting Up A Project
Since it comes bundled with latest WordPress installation, we will be working on the Twenty Seventeen theme. I’m working on Varying Vagrant Vagrants, and have set up a test site with an URL http://dev.wordpress.test/. This URL will be used throughout the article. We’ll also import posts from the wordpress.org Theme Review Teams repository so that we have some test data to work with. But first, we will get familiar working with default endpoints, and then we’ll create our own custom endpoint.
Access The Default REST Endpoint
As already mentioned, WordPress comes with several built-in endpoints that you can examine by going to the /wp-json/ route:
http://dev.wordpress.test/wp-json/
Either by putting this URL directly in your browser, or adding it in the postman app, you’ll get out a JSON response from WordPress REST API that looks something like this:
{ "name": "Test dev site", "description": "Just another WordPress site", "url": "http://dev.wordpress.test", "home": "http://dev.wordpress.test", "gmt_offset": "0", "timezone_string": "", "namespaces": [ "oembed/1.0", "wp/v2" ], "authentication": [], "routes": { "/": { "namespace": "", "methods": [ "GET" ], "endpoints": [ { "methods": [ "GET" ], "args": { "context": { "required": false, "default": "view" } } } ], "_links": { "self": "http://dev.wordpress.test/wp-json/" } }, "/oembed/1.0": { "namespace": "oembed/1.0", "methods": [ "GET" ], "endpoints": [ { "methods": [ "GET" ], "args": { "namespace": { "required": false, "default": "oembed/1.0" }, "context": { "required": false, "default": "view" } } } ], "_links": { "self": "http://dev.wordpress.test/wp-json/oembed/1.0" } }, ... "wp/v2": { ...
So in order to get all of the posts in our site by using REST, we would need to go to http://dev.wordpress.test/wp-json/wp/v2/posts. Notice that the wp/v2/ marks the reserved core endpoints like posts, pages, media, taxonomies, categories, and so on.
So, how do we add a custom endpoint?
Create A Custom REST Endpoint
Let’s say we want to add a new endpoint or additional field to the existing endpoint. There are several ways we can do that. First, one can be done automatically when creating a custom post type. For instance, we want to create a documentation endpoint. Let’s create a small test plugin. Create a test-documentation folder in the wp-content/plugins folder, and add documentation.php file that looks like this:
* Author URI: https://infinum.co/ * License: GPL-2.0+ * License URI: http://www.gnu.org/licenses/gpl-2.0.txt * Text Domain: test-plugin */ namespace Test_Plugin; // If this file is called directly, abort. if ( ! defined( 'WPINC' ) ) { die; } /** * Class that holds all the necessary functionality for the * documentation custom post type * * @since 1.0.0 */ class Documentation { /** * The custom post type slug * * @var string * * @since 1.0.0 */ const PLUGIN_NAME = 'documentation-plugin'; /** * The custom post type slug * * @var string * * @since 1.0.0 */ const POST_TYPE_SLUG = 'documentation'; /** * The custom taxonomy type slug * * @var string * * @since 1.0.0 */ const TAXONOMY_SLUG = 'documentation-category'; /** * Register custom post type * * @since 1.0.0 */ public function register_post_type() { $args = array( 'label' => esc_html( 'Documentation', 'test-plugin' ), 'public' => true, 'menu_position' => 47, 'menu_icon' => 'dashicons-book', 'supports' => array( 'title', 'editor', 'revisions', 'thumbnail' ), 'has_archive' => false, 'show_in_rest' => true, 'publicly_queryable' => false, ); register_post_type( self::POST_TYPE_SLUG, $args ); } /** * Register custom tag taxonomy * * @since 1.0.0 */ public function register_taxonomy() { $args = array( 'hierarchical' => false, 'label' => esc_html( 'Documentation tags', 'test-plugin' ), 'show_ui' => true, 'show_admin_column' => true, 'update_count_callback' => '_update_post_term_count', 'show_in_rest' => true, 'query_var' => true, ); register_taxonomy( self::TAXONOMY_SLUG, [ self::POST_TYPE_SLUG ], $args ); } } $documentation = new Documentation(); add_action( 'init', [ $documentation, 'register_post_type' ] ); add_action( 'init', [ $documentation, 'register_taxonomy' ] );
By registering the new post type and taxonomy, and setting the show_in_rest argument to true, WordPress automatically created a REST route in the /wp/v2/namespace. You now have http://dev.wordpress.test/wp-json/wp/v2/documentation and http://dev.wordpress.test/wp-json/wp/v2/documentation-category endpoints available. If we add a post in our newly created documentation custom post going to http://dev.wordpress.test/?post_type=documentation, it will give us a response that looks like this:
[ { "id": 4, "date": "2018-06-11T19:48:51", "date_gmt": "2018-06-11T19:48:51", "guid": { "rendered": "http://dev.wordpress.test/?post_type=documentation&p=4" }, "modified": "2018-06-11T19:48:51", "modified_gmt": "2018-06-11T19:48:51", "slug": "test-documentation", "status": "publish", "type": "documentation", "link": "http://dev.wordpress.test/documentation/test-documentation/", "title": { "rendered": "Test documentation" }, "content": { "rendered": "
This is some documentation content
\n", "protected": false }, "featured_media": 0, "template": "", "documentation-category": [ 2 ], "_links": { "self": [ { "href": "http://dev.wordpress.test/wp-json/wp/v2/documentation/4" } ], "collection": [ { "href": "http://dev.wordpress.test/wp-json/wp/v2/documentation" } ], "about": [ { "href": "http://dev.wordpress.test/wp-json/wp/v2/types/documentation" } ], "version-history": [ { "href": "http://dev.wordpress.test/wp-json/wp/v2/documentation/4/revisions" } ], "wp:attachment": [ { "href": "http://dev.wordpress.test/wp-json/wp/v2/media?parent=4" } ], "wp:term": [ { "taxonomy": "documentation-category", "embeddable": true, "href": "http://dev.wordpress.test/wp-json/wp/v2/documentation-category?post=4" } ], "curies": [ { "name": "wp", "href": "https://api.w.org/{rel}", "templated": true } ] } } ]
This is a great starting point for our single-page application. Another way we can add a custom endpoint is by hooking to the rest_api_init hook and creating an endpoint ourselves. Let’s add a custom-documentation route that is a bit different than the one we registered. Still working in the same plugin, we can add:
/** * Create a custom endpoint * * @since 1.0.0 */ public function create_custom_documentation_endpoint() { register_rest_route( self::PLUGIN_NAME . '/v1', '/custom-documentation', array( 'methods' => 'GET', 'callback' => [ $this, 'get_custom_documentation' ], ) ); } /** * Create a callback for the custom documentation endpoint * * @return string JSON that indicates success/failure of the update, * or JSON that indicates an error occurred. * @since 1.0.0 */ public function get_custom_documentation() { /* Some permission checks can be added here. */ // Return only documentation name and tag name. $doc_args = array( 'post_type' => self::POST_TYPE_SLUG, 'post_status' => 'publish', 'perm' => 'readable' ); $query = new \WP_Query( $doc_args ); $response = []; $counter = 0; // The Loop if ( $query->have_posts() ) { while ( $query->have_posts() ) { $query->the_post(); $post_id = get_the_ID(); $post_tags = get_the_terms( $post_id, self::TAXONOMY_SLUG ); $response[ $counter ]['title'] = get_the_title(); foreach ( $post_tags as $tags_key => $tags_value ) { $response[ $counter ]['tags'][] = $tags_value->name; } $counter++; } } else { $response = esc_html__( 'There are no posts.', 'documentation-plugin' ); } /* Restore original Post Data */ wp_reset_postdata(); return rest_ensure_response( $response ); }
And hook the create_custom_documentation_endpoint() method to the rest_api_init hook, like so:
add_action( 'rest_api_init', [ $documentation, 'create_custom_documentation_endpoint' ] );
This will add a custom route in the http://dev.wordpress.test/wp-json/documentation-plugin/v1/custom-documentation with the callback returning the response for that route.
[{ "title": "Another test documentation", "tags": ["Another tag"] }, { "title": "Test documentation", "tags": ["REST API", "test tag"] }]
There are a lot of other things you can do with REST API (you can find more details in the REST API handbook).
Work Around Long Response Times When Using The Default REST API
For anyone who has tried to build a decoupled WordPress site, this is not a new thing — REST API is slow.
My team and I first encountered the strange WordPress-lagging REST API on a client site (not decoupled), where we used the custom endpoints to get the list of locations on a Google map, alongside other meta information created using the Advanced Custom Fields Pro plugin. It turned out that the time the first byte (TTFB) — which is used as an indication of the responsiveness of a web server or other network resource — took more than 3 seconds.
After a bit of investigating, we realized the default REST API calls were actually really slow, especially when we “burdened” the site with additional plugins. So, we did a small test. We installed a couple of popular plugins and encountered some interesting results. The postman app gave the load time of 1.97s for 41.9KB of response size. Chrome’s load time was 1.25s (TTFB was 1.25s, content was downloaded in 3.96ms). Just to retrieve a simple list of posts. No taxonomy, no user data, no additional meta fields.
Why did this happen?
It turns out that accessing REST API on the default WordPress will load the entire WordPress core to serve the endpoints, even though it’s not used. Also, the more plugins you add, the worse things get. The default REST controller WP_REST_Controller is a really big class that does a lot more than necessary when building a simple web page. It handles routes registering, permission checks, creating and deleting items, and so on.
There are two common workarounds for this issue:
Intercept the loading of the plugins, and prevent loading them all when you need to serve a simple REST response;
Load only the bare minimum of WordPress and store the data in a transient, from which we then fetch the data using a custom page.
Improving Performance With The Decoupled JSON Approach
When you are working with simple presentation sites, you don’t need all the functionality REST API offers you. Of course, this is where good planning is crucial. You really don’t want to build your site without REST API, and then say in a years time that you’d like to connect to your site, or maybe create a mobile app that needs to use REST API functionality. Do you?
For that reason, we utilized two WordPress features that can help you out when serving simple JSON data out:
Transients API for caching,
Loading the minimum necessary WordPress using SHORTINIT constant.
Creating A Simple Decoupled Pages Endpoint
Let’s create a small plugin that will demonstrate the effect that we’re talking about. First, add a wp-config-simple.php file in your json-transient plugin that looks like this:
<?php /** * Create simple wp configuration for the routes * * @since 1.0.0 * @package json-transient */ define( 'SHORTINIT', true ); $parse_uri = explode( 'wp-content', $_SERVER['SCRIPT_FILENAME'] ); require_once filter_var( $parse_uri[0] . 'wp-load.php', FILTER_SANITIZE_STRING );
The define( 'SHORTINIT', true ); will prevent the majority of WordPress core files to be loaded, as can be seen in the wp-settings.php file.
We still may need some of the WordPress functionality, so we can require the file (like wp-load.php) manually. Since wp-load.php sits in the root of our WordPress installation, we will fetch it by getting the path of our file using $_SERVER['SCRIPT_FILENAME'], and then exploding that string by wp-content string. This will return an array with two values:
The root of our installation;
The rest of the file path (which is of no interest to us).
Keep in mind that we’re using the default installation of WordPress, and not a modified one, like for example in the Bedrock boilerplate, which splits the WordPress in a different file organization.
Lastly, we require the wp-load.php file, with a little bit of sanitization, for security.
In our init.php file, we’ll add the following:
* Author URI: https://infinum.co/ * License: GPL-2.0+ * License URI: http://www.gnu.org/licenses/gpl-2.0.txt * Text Domain: json-transient */ namespace Json_Transient; // If this file is called directly, abort. if ( ! defined( 'WPINC' ) ) { die; } class Init { /** * Get the array of allowed types to do operations on. * * @return array * * @since 1.0.0 */ public function get_allowed_post_types() { return array( 'post', 'page' ); } /** * Check if post type is allowed to be save in transient. * * @param string $post_type Get post type. * @return boolean * * @since 1.0.0 */ public function is_post_type_allowed_to_save( $post_type = null ) { if( ! $post_type ) { return false; } $allowed_types = $this->get_allowed_post_types(); if ( in_array( $post_type, $allowed_types, true ) ) { return true; } return false; } /** * Get Page cache name for transient by post slug and type. * * @param string $post_slug Page Slug to save. * @param string $post_type Page Type to save. * @return string * * @since 1.0.0 */ public function get_page_cache_name_by_slug( $post_slug = null, $post_type = null ) { if( ! $post_slug || ! $post_type ) { return false; } $post_slug = str_replace( '__trashed', '', $post_slug ); return 'jt_data_' . $post_type . '_' . $post_slug; } /** * Get full post data by post slug and type. * * @param string $post_slug Page Slug to do Query by. * @param string $post_type Page Type to do Query by. * @return array * * @since 1.0.0 */ public function get_page_data_by_slug( $post_slug = null, $post_type = null ) { if( ! $post_slug || ! $post_type ) { return false; } $page_output = ''; $args = array( 'name' => $post_slug, 'post_type' => $post_type, 'posts_per_page' => 1, 'no_found_rows' => true ); $the_query = new \WP_Query( $args ); if ( $the_query->have_posts() ) { while ( $the_query->have_posts() ) { $the_query->the_post(); $page_output = $the_query->post; } wp_reset_postdata(); } return $page_output; } /** * Return Page in JSON format * * @param string $post_slug Page Slug. * @param string $post_type Page Type. * @return json * * @since 1.0.0 */ public function get_json_page( $post_slug = null, $post_type = null ) { if( ! $post_slug || ! $post_type ) { return false; } return wp_json_encode( $this->get_page_data_by_slug( $post_slug, $post_type ) ); } /** * Update Page to transient for caching on action hooks save_post. * * @param int $post_id Saved Post ID provided by action hook. * * @since 1.0.0 */ public function update_page_transient( $post_id ) { $post_status = get_post_status( $post_id ); $post = get_post( $post_id ); $post_slug = $post->post_name; $post_type = $post->post_type; $cache_name = $this->get_page_cache_name_by_slug( $post_slug, $post_type ); if( ! $cache_name ) { return false; } if( $post_status === 'auto-draft' || $post_status === 'inherit' ) { return false; } else if( $post_status === 'trash' ) { delete_transient( $cache_name ); } else { if( $this->is_post_type_allowed_to_save( $post_type ) ) { $cache = $this->get_json_page( $post_slug, $post_type ); set_transient( $cache_name, $cache, 0 ); } } } } $init = new Init(); add_action( 'save_post', [ $init, 'update_page_transient' ] );
The helper methods in the above code will enable us to do some caching:
get_allowed_post_types() This method lets post types know that we want to enable showing in our custom ‘endpoint’. You can extend this, and the plugin we’ve actually made this method filterable so that you can just use a filter to add additional items.
is_post_type_allowed_to_save() This method simply checks to see if the post type we’re trying to fetch the data from is in the allowed array specified by the previous method.
get_page_cache_name_by_slug() This method will return the name of the transient that the data will be fetched from.
get_page_data_by_slug() This method is the method that will perform the WP_Query on the post via its slug and post type and return the contents of the post array that we’ll convert with the JSON using the get_json_page() method.
update_page_transient() This will be run on the save_post hook and will overwrite the transient in the database with the JSON data of our post. This last method is known as the “key caching method”.
Let’s explain transients in more depth.
Transients API
Transients API is used to store data in the options table of your WordPress database for a specific period of time. It’s a persisted object cache, meaning that you are storing some object, for example, results of big and slow queries or full pages that can be persisted across page loads. It is similar to regular WordPress Object Cache, but unlike WP_Cache, transients will persist data across page loads, where WP_Cache (storing the data in memory) will only hold the data for the duration of a request.
It’s a key-value store, meaning that we can easily and quickly fetch the desired data, similar to what in-memory caching systems like Memcached or Redis do. The difference is that you’d usually need to install those separately on the server (which can be an issue on shared servers), whereas transients are built in with WordPress.
As noted on its Codex page — transients are inherently sped up by caching plugins. Since they can store transients in memory instead of a database. The general rule is that you shouldn’t assume that transient is always present in the database — which is why it’s a good practice to check for its existence before fetching it
$transient_name = get_transient( 'transient_name' ); if ( $transient_name === false ) { set_transient( 'transient_name', $transient_data, $transient_expiry ); }
You can use it without expiration (like we are doing), and that’s why we implemented a sort of ‘cache-busting’ on post save. In addition to all the great functionality they provide, they can hold up to 4GB of data in it, but we don’t recommend storing anything that big in a single database field.
Recommended reading: Be Watchful: PHP And WordPress Functions That Can Make Your Site Insecure
Final Endpoint: Testing And Verification
The last piece of the puzzle that we need is an ‘endpoint’. I’m using the term endpoint here, even though it’s not an endpoint since we are directly calling a specific file to fetch our results. So we can create a test.php file that looks like this:
get_page_cache_name_by_slug( $post_slug, $post_type ) ); // Return error on false. if ( $cache === false ) { wp_send_json( 'Error, the page does not exist or it is not cached correctly. Please try rebuilding cache and try again!' ); } // Decode json for output. wp_send_json( json_decode( $cache ) );
If we go to http://dev.wordpress.test/wp-content/plugins/json-transient/test.php, we’ll see this message:
Error, page slug or type is missing!
So, we’ll need to specify the post type and post slug. When we now go to http://dev.wordpress.test/wp-content/plugins/json-transient/test.php?slug=hello-world&type=post we’ll see:
Error, the page does not exist or it is not cached correctly. Please try rebuilding cache and try again!
Oh, wait! We need to re-save our pages and posts first. So when you’re starting out, this can be easy. But if you already have 100+ pages or posts, this can be a challenging task. This is why we implemented a way to clear the transients in the Decoupled JSON Content plugin, and rebuild them in a batch.
But go ahead and re-save the Hello World post and then open the link again. What you should now have is something that looks like this:
{ "ID": 1, "post_author": "1", "post_date": "2018-06-26 18:28:57", "post_date_gmt": "2018-06-26 18:28:57", "post_content": "Welcome to WordPress. This is your first post. Edit or delete it, then start writing!", "post_title": "Hello world!", "post_excerpt": "", "post_status": "publish", "comment_status": "open", "ping_status": "open", "post_password": "", "post_name": "hello-world", "to_ping": "", "pinged": "", "post_modified": "2018-06-30 08:34:52", "post_modified_gmt": "2018-06-30 08:34:52", "post_content_filtered": "", "post_parent": 0, "guid": "http:\/\/dev.wordpress.test\/?p=1", "menu_order": 0, "post_type": "post", "post_mime_type": "", "comment_count": "1", "filter": "raw" }
And that’s it. The plugin we made has some more extra functionality that you can use, but in a nutshell, this is how you can fetch the JSON data from your WordPress that is way faster than using REST API.
Before And After: Improved Response Time
We conducted testing in Chrome, where we could see the total response time and the TTFB separately. We tested response times ten times in a row: first without plugins and then with the plugins added. Also, we tested the response for a list of posts and for a single post.
The results of the test are illustrated in the tables below:
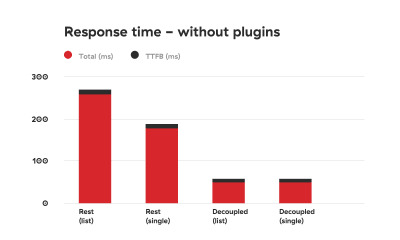
Comparison graph depicting response times of using WordPress REST API vs using the decoupled approach without added plugins. The decoupled approach is 2 to 3 times faster. (Large preview)

Comparison graph depicting response times of using WordPress REST API vs using the decoupled approach with added plugins. The decoupled approach is up to 8 times faster. (Large preview)
As you can see, the difference is drastic.
Security Concerns
There are some caveats that you’ll need to take a good look at. First of all, we are manually loading WordPress core files, which in the WordPress world is a big no-no. Why? Well, besides the fact that manually fetching core files can be tricky (especially if you’re using nonstandard installations such as Bedrock), it could pose some security concerns.
If you decide to use the method described in this article, be sure you know how to fortify your server security.
First, add HTML headers like in the test.php file:
header( 'Access-Control-Allow-Origin: your-front-end-app.url' ); header( 'Content-Type: application/json' );
The first header is a way to bypass CORS security measure so that only your front-end app can fetch the contents when going to the specified file.
Second, disable directory traversal of your app. You can do this by modifying nginx settings, or add Options -Indexes to your .htaccess file if you’re on an Apache server.
Adding a token check to the response is also a good measure that can prevent unwanted access. We are actually working on a way to modify our Decoupled JSON plugin so that we can include these security measures by default.
A check for an Authorization header sent by the frontend app could look like this:
if ( ! isset( $_SERVER['HTTP_AUTHORIZATION'] ) ) { return; } $auth_header = $_SERVER['HTTP_AUTHORIZATION'];
Then you can check if the specific token (a secret that is only shared by the front- and back-end apps) is provided and correct.
Conclusion
REST API is great because it can be used to create fully-fledged apps — creating, retrieving, updating and deleting the data. The downside of using it is its speed.
Obviously, creating an app is different than creating a classic website. You probably won’t need all the plugins we installed. But if you just need the data for presentational purposes, caching data and serving it in a custom file seems like the perfect solution at the moment, when working with decoupled sites.
You may be thinking that creating a custom plugin to speed up the website response time is an overkill, but we live in a world in which every second counts. Everyone knows that if a website is slow, users will abandon it. There are many studies that demonstrate the connection between website performance and conversion rates. But if you still need convincing, Google penalizes slow websites.
The method explained in this article solves the speed issue that the WordPress REST API encounters and will give you an extra boost when working on a decoupled WordPress project. As we are on our never-ending quest to squeeze out that last millisecond out of every request and response, we plan to optimize the plugin even more. In the meantime, please share your ideas on speeding up decoupled WordPress!

(md, ra, yk, il)
0 notes
Photo

RT @VueJSTutorials: Learn how to develop static websites with VueJS, a headless CMS and GraphQL https://t.co/xeUJQFni3K #vue #vuejs #laravel #php #dev #html5 #js #coder #code #geek #angularjs #coding #developer #wordpress #bootstrap #css3 #css #javascript #es6 https://t.co/IPDVkgn26T
0 notes
Photo

Click on the link and learn how to create a Headless WordPress website with Vue JsWell, around 455 million websites are built with the help of WordPress, and companies like Facebook, Netflix, Trivago, Grammarly, Gitlab, Behance, BMW, Upwork, Apple, and 9Gag use Vue.Js as their front-end development technology. So, if you can just mix WordPress and Vue js together and build a website why not take advantage of this opportunity. Now you will be asking how? Well already told you to click on the link and learn how to do it step by step. https://bit.ly/3rmC2Te#HeadlessWordPress #HeadlessWordPressWebsite #HeadlessWordPressVue #Vuejs #VuewithHeadless #WPWebInfotech
0 notes
Link
Would you like to know more about headless WordPress with Vue.? Explore how it works and how you can use it to build an app.
0 notes
Photo

Microsoft introduces beta of its new, Chrome-based Edge browser
#405 — August 21, 2019
Read on the Web
Frontend Focus
Microsoft Introduces 'Ready for Everyday Use' Beta of Its Chrome-Based Edge Browser — Available for Windows and macOS, the beta release of Edge is the third and final preview release of Microsoft’s new Chromium-based browser, although Microsoft is declaring it ‘ready for everyday use’ with this release. It also includes the ‘Internet Explorer mode’ for back compatibility with IE 11. Time to get testing.
Joe Belfiore (Microsoft)
▶ Is CSS a 'Programming Language'? — An hour long conversation asking questions about the label CSS carries, and picking apart if being designated a ‘programming language’ would encourage uptake, or if such characterization may end up being an exercise in exclusion — and ultimately whether it even matters.
Heydon Pickering and Stephen Hay podcast
GraphQL Tutorials for Frontend Developers — Learn GraphQL by doing in just 2 hours with these open-source tutorials for React, ReactNative, Vue, Angular, Elm, Android, iOS, Flutter & ReasonML developers.
Hasura sponsor
Optional HTML: Everything You Need to Know — A good look at optional code (such as the quotation marks of an attribute value), and how the balance between understandability and performance don’t need to be at odds with each other.
Jens Oliver Meiert
iframes Are Just Terrible. Here’s How They Could Be Better. — Daniel Brian, a lead engineer at PayPal highlights some of the issues with using <iframe>. “I really hope browser vendors start to treat UI based iframes as more of a first-class citizen on the web, and help fix some of the above issues which are not poly-fillable right now.”
Daniel Brain
Google to Deprecate FTP Support in Chrome — By version 82, shipping in Q2 of 2020, all FTP support will be removed from Chrome. This is expected to affect around 0.1% of users though if you do still offer downloads in an FTP-only form, now is the time to upgrade.
Paul Hill
Custom Elements for The Immersive Web — An introduction to <img-360> and <video-360>, two new custom elements designed to work with 360° images and video.
Fernando Serrano
💻 Jobs
Senior Software Engineer - Frontend (100% Remote) — Do you have a solid understanding of web technologies and want to design, implement, and launch major user features? Apply now.
Close
Frontend Engineer - In Dili, Timor-Leste or Possibly Remote — Work with people globally to create change, using technology to empower people, through our programs in aid and global development.
Catalpa International
Frontend developers are in demand on Vettery — Make a free profile, name your salary, and connect with hiring managers from top employers.
Vettery
📙 Articles, Tutorials & Opinion
Efficiently Load Third-Party JavaScript — How to avoid the common pitfalls of using third-party scripts to improve load times and user experience.
Milica Mihajlija
Lazy Load Embedded YouTube Videos — Here’s a clever idea via Arthur Corenzan which avoids using the default YouTube embed — which adds a sizeable number of resources to a page.
CSS Tricks
Accessibility for Web Developers. Get the Whitepaper — Learn everything you need to know about accessibility standards, how to conform to the laws and what this means to you.
Progress Kendo UI sponsor
The (Upcoming) WordPress Renaissance — The author asserts that the introduction of Gutenberg has made for a “much richer” Wordpress user experience. Here, he takes a look at the CMSs latest developments, and where it is heading next.
Leonardo Losoviz
CSS Can Do This.. And It's Terrifying — A curious look at a few things you can do with CSS, but maybe shouldn’t (including key logging & user tracking).
Aaron Powell
Variable Font Animation with CSS and Splitting JS — A look at what variable fonts are, and how they can be animated with CSS and a little bit of JavaScript.
Michelle Barker
The evolt.org Browser Archive Is 20 Years Old — When this browser archive launched in 1999 it featured links to 80 different browsers.
Adrian Roselli
Keyboard Accessible Performance Timelines Now in Chromium
Microsoft Edge DevTools on Twitter
▶ Why You Don't Need BEM with Utility-First CSS
Adam Wathan
Roll Your Own Comment System for a Static Site
Tania Rascia
📱 Work in mobile dev? We publish a mobile-focused newsletter every Friday.
🔧 Code, Tools & Resources
pagemap: A 'Mini Map' for Web Pages — A neat little idea that’s particularly useful on long pages. This adds a clickable/navigable overview of an entire page to the top right corner. Here’s the associated repo.
Lars Jung
Lexend: A Variable Font Designed for Better Reading — This new font family, created with reading proficiency in mind, is now available in Google Fonts — you can read more about its creation here.
Thomas Jockin
Make Your Images & Videos Load Fast & Look Beautiful with Cloudinary
Cloudinary sponsor
Quicklink: Faster Subsequent Page-Loads by Prefetching Visible Links — We shared this project from Google Chrome Labs last year - but it has just seen an update. It aims to make subsequent page loads quicker by prefetching links that are currently in the viewport during idle time.
Google Chrome Labs
extra.css: A CSS Houdini Library — ..with plenty of fun effects.
Una Kravets
An Accessible, Simple, and CSS-Only Styled Checkbox
Jen Simmons codepen
🗓 Upcoming Events
Web Unleashed 2019, September 13-14 — Toronto, Canada — Covers a variety of front-end topics leaving you 'informed, challenged and inspired'.
State of the Browser, September 14 — London, UK — A one-day, single-track conference with widely varying talks about the modern web.
CSSConf, September 25 — Budapest, Hungary — A community conference dedicated to the designers and developers who love CSS.
Accessibility Scotland, October 25 — Edinburgh, UK — One day of talks. Friendly, open discussion about accessibility.
🕰 ICYMI (Some older stuff that's worth checking out..)
How to take screenshots of pages dynamically using a headless browser.
Elad Shechter digs into the logic of how CSS position:sticky works.
Max Antonucci shares the web accessibility intro they wish they had.
Looking for a CSS foundation? backpack.css is a lightweight and somewhat opinionated option that's best suited to apps.
by via Frontend Focus https://ift.tt/2Zi5Ors
0 notes
Photo

SitePoint Premium New Releases: DevOps Security, jQuery & Vue Projects
We're working hard to keep you on the cutting edge of your field with SitePoint Premium. We've got plenty of new books and mini-books to check out in the library — let us introduce you to them.
Learning jQuery 3 Fifth Edition
A step-by-step, practical tutorial on creating efficient and smart web apps and high-performance interactive pages with jQuery 3.0. Create a fully featured and responsive client-side app using jQuery. Explore jQuery 3.0 features and code examples updated to reflect modern JS environments.
Read Learning jQuery 3 Fifth Edition.
How to Develop and Test Vue Components with Storybook
Learn Storybook, an interactive environment for developing and testing UI components. It allows you to build components and play with them in isolation from the app that you're building.
Read How to Develop and Test Vue Components with Storybook.
Build a Shopping List App with Vue, Vuex and Bootstrap Vue
Build a simple shopping list app using Vue, Vuex and Bootstrap. Along the way, you'll discover how Vue's official state management solution can help you manage state throughout your app as it grows.
Read Build a Shopping List App with Vue, Vuex and Bootstrap Vue.
Hands-On Security in DevOps
Protect your organization's security at all levels with the latest strategies for securing DevOps at each layer of the pipeline. Discover security practices to protect your cloud services by detecting fraud and intrusion. Explore solutions to infrastructure security using DevOps principles.
Read Hands-On Security in DevOps.
Building a Vue Front End for a Headless CMS
Learn how to build a modern blog site using Vue.js and GraphCMS, a headless CMS platform that delivers content via GraphQL, for a faster and more customizable website than using WordPress.
Read Building a Vue Front End for a Headless CMS.
A New Library Interface
If you're a Premium member, take our new library for a spin. We've launched a cleaner, faster library interface that makes tracking and resuming your current books much quicker.
And More to Come…
We're releasing new content on SitePoint Premium almost every day, so we'll be back next week with the latest updates. And don't forget: if you haven't checked out our offering yet, take our 7 day free trial for a spin.
The post SitePoint Premium New Releases: DevOps Security, jQuery & Vue Projects appeared first on SitePoint.
by Joel Falconer via SitePoint https://ift.tt/2HO84l8
0 notes