#i always carried around a 32 oz nalgene with me but i was so used to it that i felt like my water intake decreased
Text
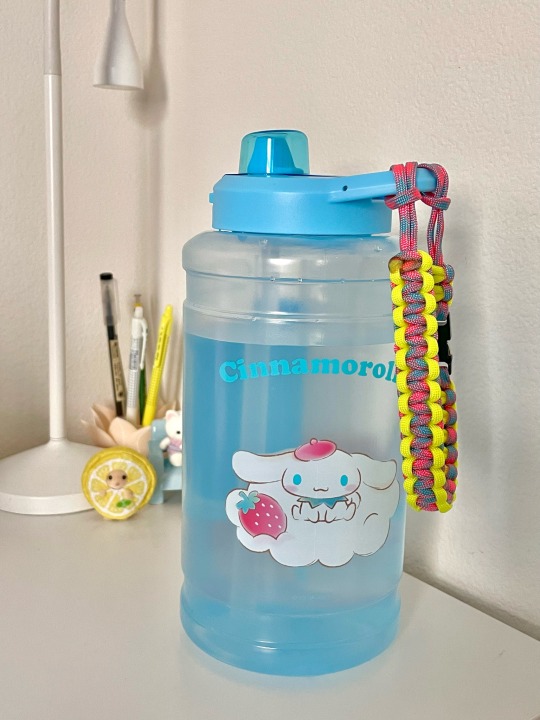
always kinda laughed in my head when people are like i got a water bottle so now i drink so much fucking water. and now look where i am with a 64 oz water bottle and pissing all the fucking time
#i always carried around a 32 oz nalgene with me but i was so used to it that i felt like my water intake decreased#and now that it’s double??? i’m so fucking hydrated lmao
11 notes
·
View notes
Text
what i packed to go to scout summer camp
as i’ve mentioned a bit lately, i spent a week at a scouts bsa summer camp working on earning merit badges and just generally having a good time doing scouting things. as girls have just recently been allowed into scouts bsa, this is the first summer (at least on a national scale) that girls will be attending scouts bsa summer camps and thus resources are limited on what camp is like, what to pack (specifically for girls), etc. so i decided i’d talk about what i packed (or what i wished i had) for my week!
clothing
class a uniform
this is kind of obvious for most scouts, but besides just traveling in them, the camp i was at asked us to wear them for evening flags and dinner, as well as the flag retirement ceremony they had
4 sports bras
i don’t mind rewearing stuff like this for a couple days, especially if i don’t get super sweaty during the day, so i don’t bring one for every day
8 pairs underwear
bring a pair for every day you’re going to be at camp, and a couple extra pairs for emergencies. hanes has underwear made from stretchy wicking material, which i greatly prefer when i’m outside as it’s both super breatheable and easy to wash if i need to. i don’t remember the exact product name but i get them in packs of four at target
9 pairs socks
i brought less than 9 pairs of socks, but i’m recommending that you bring at least nine. this was the only thing that towards the end of the week i started to get worried that i would run out of, especially because i wanted to make sure i keep my feet clean and dry so i went through a couple pairs some days. as i wore tennis shoes all week, i brought low cut athletic socks i got at khol’s or target or somewhere like that (just make sure they’re not cotton)
pajamas
i took nike athletic shorts and a quick dry shirt. please please please don’t sleep in cotton clothing if you can avoid it, you sweat as you sleep, which will make the cotton damp, and then you will get chilled as the night goes on, leaving you feeling like you’re clammy and freezing even in your sleeping bag
3 class b shirts
my troop gave all the girls who went to camp 3 class b shirts, which i found to be enough as i rewore them a couple times throughout the week. if your troop doesn’t provide class b shirts, just bring more regular shirts
2-3 regular shirts
while this isn’t something i packed, they definitely would have been nice to have to wear after showers, while hanging around camp, etc. just to change things up from wearing my class b’s
4 pairs shorts
i packed 3 pairs of patagonia baggies and one pair of patagonia barely baggies and i loved having them. not only are they super comfortable, very durable and quick to dry, but i was never afraid they were going to slip off while whitewater rafting or swimming
1 pair leggings
this is another thing that i didn’t pack but wish i had, as we had what i felt was an unseasonably cold week while i was at camp
1/4 zip pullover
i took one from rei like this and was super glad to have it, again because it was pretty chilly. i wore it pretty much all day, every day while i was there and felt like it did a great job of odor control (though i didn’t actually sweat that much while in it so that may be part of it)
2 one piece swimsuits
i only packed one of these (i didn’t want to spend the money on a second one, as i would only wear it at camp) but would say that having two would have been nice, not only for the variety but also because the one i took got pretty rough smelling towards the end of the week due to the scuzzy lake water
rain coat
this is a pretty obvious thing to bring, but i wore mine almost every day, not because it was raining but because it was the only other jacket i had besides my 1/4 zip and it helped to act as a wind breaker
2 pairs tennis shoes
though i wore the same pair the whole week, i would definitely recommend bringing two pairs in case one gets wet
flip flops
to use for shower shoes. most scout camps don’t allow you to wear open toed shoes except for in the shower, so no need to bring your chacos or similar sandals
water shoes
again, we were required to wear closed toed shoes for water activities so i took a pair of my mom’s old water shoes from when she windsurfed to wear when we went whitewater rafting. luckily though, we weren't required to wear them while swimming but every camp is different so make sure you get a pair that are comfortable
gear
footlocker
i took a footlocker like this one because it’s lockable, durable, and waterproof for the most part. i was able to fit everything i took in it with some careful arranging and it was able to slide under my cot in my tent
sleeping pad
while my camp provided us with cots, i wanted some extra comfort so i took my therm-a-rest z pad to put on top of it. i had no problems with it sliding off my cot during the night
sleeping bag
i took my marmot trestles 15 and was glad to have its warmth. some people recommend just bringing a light sleeping bag or sheets but i would say opt for your full sleeping bag, even if it’s going to be warm because you never know how chilly it may get at night
pillow
i would definitely recommend bringing one of these, especially because weight isn’t an issue with packing. i just took a small one i made using a pillow form and fleece i bought at a craft store
headlight + extra batteries
i much prefer a headlight to a flashlight as it leaves my hands free. it can also be hung in your tent to make a tent light in a pinch. always remember extra batteries!
2 water bottles
i took my 32 oz nalgene bottles, carrying one with me throughout the day and leaving one by my cot so i’d have one in case i needed water during the night
hammock and straps
the camp i go to (like most scout camps i’m assuming) is pretty infamous for its ‘hammock cities’ that develop in campsites, where scouts stack their hammocks and just generally form clusters of hammocks so i made sure to bring mine. i loved having it to hang out in while we were chilling in camp
clothesline + clothes pins
nice to hang wet clothes on (obviously) but also just air out the clothes i had worn that day. i have one from nite ize (i don’t think they make it anymore) that is a piece of paracord with two clips on the end that allow you to circle a tree and clip it back on itself, as well as adjust how long your rope is. i could totally use a regular piece of paracord and just tie it around a tree but i have this so,,,,i use it (hmu if you find something like what i talked about online though)
mesh laundry bag
i bought one in the laundry section at target for something like $10
toiletries
toothbrush + toothpaste
deodorant
chapstick
lotion
razor
soap and shampoo
liners/pads/tampons
even if you’re not supposed to be on your period that week, stuff happens and it’s better to be prepared (or share with someone in need)
2 bath towels
i found this to be plenty, as i dried them between uses and sometimes kept one in my bag when i went swimming though i never actually used it
3 washcloths
i took two but an extra would have been nice to have
daypack
28 liter daypack
i took my gregory 28 l daypack similar to this one and it had plenty of space for what i carried. i originally was going to take the backpack i use for school but was concerned that if it got wet, it would take forever to dry so i opted for my this bag instead
scout handbook
though i didn’t use it that much, i always take it with me on scout trips and recommend taking it with you
sunscreen + bug spray
most camps don’t allow aerosol canisters so keep that in mind when buying/packing
playing cards + uno cards
good ways to pass free time. pack them in a ziploc bag so they don’t get wet!
notebook + 2 pens
i took a regular sized notebook but most people brought a much smaller notebook, which i would recommend. how much writing you do depends on the merit badge classes you take but you won’t need a full sized notebook that’s for sure. remember and extra pen or two as well
first aid kit
not only is this just a good thing to have in general (i have this one), if you’re getting your first aid merit badge, you will need to show this for one of the requirements
portable phone charger + cord
every camp and troop is different in regards to phones but my troop was pretty relaxed in regards to them so i took my anker powercore and it was more than enough for how little i used my phone
sunglasses
tissues
what i took and didn’t need/use
rain pants
while i would still recommend packing these, i didn’t use them as it didn’t rain that much and when it did i didn’t really care if my shorts and legs got wet
camp chair
i took my rei flexlite chair but ended up not using it as in camp we either sat at the provided picnic table or in our hammocks
sleeping bag liner
as i took my regular sleeping bag and it didn’t get super cold at night, i didn’t need this
book
i took a book thinking i would read in my free time or before bed, but i ended up hanging out with my troop during free time and being too tired to read before bed
i hope this information will be useful to someone out there, even if you use it for something besides scout camp! let me know if you have any questions/comments/thoughts!
2 notes
·
View notes
Text
What to bring to college
Hey guys :) I just finished my first year of college and thought I’d share some advice on what helped me out at school.
• a good quality backpack! I know there are tons of wicked cute backpacks that are aesthetic and great for pictures, but you have to be practical for college. textbooks, notebooks and laptops are HEAVY and you’ll tire yourself out quickly carrying them around all day. I recommend spending a little extra $; I know it’s hard esp for broke college kids, but investing in a backpack with good support and lots of space will def help in the long run.
• a water bottle at all times! staying hydrated is really important. I have a 32 oz Nalgene with me 24/7 and I push myself to drink at least 3 bottles full every day. Dehydration can have negative effects on your studying abilities, so drinking lots of water is important! As a college athlete, staying hydrated is just as important (if not more important) as eating healthy food.
• a tiny sewing kit. I was skeptical when my mom told me to bring a mini sewing kit to college with me, but I ended up using it all the time! By the end of the year, I’d sewn up half my socks and my favorite leggings due to rough washing machines and sitting on uneven surfaces.
• a good laptop!! I know that laptops are expensive, but it’s definitely worth it to buy a good quality one for school. I have a MacBook Pro, which has worked really well for me, but my bff prefers a Dell touchscreen one--know your preferences! Also, portability is really important in a laptop. Buying one that fits into your backpack and is fairly light is definitely a good idea.
• electric water heater/boiler. this was a lifesaver for me! I drink a lot of coffee and tea, and I’m kind of a coffee snob so I ended up making coffee in my room instead of using the coffee from the dining hall. I bought an electric tea kettle from Amazon for $20 and it was a great investment. It boiled really quickly and was waaaay easier than microwaving water would have been.
•mini first aid kit. I always had a box of Band-Aids, Advil, and neosporin in my desk at school. It was helpful for me and my friends as well, because not all of them had basic medical supplies at hand.
•laundry hamper. I’d never shared a room with anyone before starting college, so I had a lot to get used to regarding privacy. My roommate used a huge drawstring bag for her laundry, while I used a mesh hamper. It doesn’t matter what you use as long as you’re not leaving laundry in piles around the room--roommates don’t like that.
•room decorations! I loved decorating my dorm room. I coordinated a couple things with my roommate, like a carpet and a board for our door, but personalizing my space made my dorm feel so much more like home. I put up a poster for my favorite movie (the princess bride!) and some cute pictures of my friends and family. Being far away from home for 4-5 months is hard, and making my dorm feel home-y helped a lot.
• a water filter!! the tap water at my school was just nasty, so bought a Brita filter and it helped me a ton. Filtering my own water was way easier than tracking down water fountains on my way to class.
• sleeping mask?, good headphones (earplugs?) roommates and floormates can be wicked loud and I found it helpful to have noise-cancelling headphones to drown out the partying :) I also got into the ASMR rooms youtube channel (esp Harry Potter ambience! )
• extension cords! I had tons of stuff to plug in in my dorm and my room only had 3 outlets that were spaced out weirdly, so extension cords were really helpful!
I hope this is helpful for all you new college students! Let me know if you have any questions and feel free to add to this list :)
12 notes
·
View notes
Text
Tutorial: Make a Canteen from a Birdhouse Gourd!
I’m always on the lookout for lightweight, character-appropriate ways to carry water around at Dagorhir events, so when I spotted birdhouse gourds drying in my gardener-mother’s back hall, I knew I had to beg one off her to turn into a canteen. The process was interesting enough that I thought I would share!
You’ll need:

Gulf Wax + a cup to pour it with.
A thoroughly dried birdhouse gourd
A craft knife
A handful of gravel
A dust mask (like the kind you wear to paint and sand around the house)
1 lb of paraffin wax (look for it by the canning supplies or buy it online. I buy Gulf Wax brand, which should be closer to ~$6 in physical stores)
A throwaway container for melting the wax (an empty tin can or plastic container works well)
A stove and a pot of water
If you’re playing along at home, you can buy pre-dried birdhouse gourds on eBay. These come in many different shapes, but they all have one thing in common: unlike, say, pumpkins or butternut squash, they have really thick rinds. This is why the drying is the important part: these thick-walled gourds are hollow when they’re dried, but it takes a long time for them to be ready— between six months and two years! My gourd was already dried, so I was ready to go.
Warnings:
You’ll be playing around with a fair number of hazardous processes and, in one case, a hazardous material (gourd dust, ick). Woodburners can burn YOU, and gourd-dust, when inhaled, can make you really sick, and hot wax is dangerous, flammable, and annoying to clean up. Take your time and be careful, and don’t let kids do this unsupervised!
Process:
1. Decorate your gourd!
I wanted my gourd-bottle to be interesting, so I used a cheap soldering iron from the hardware store to do some pyrography on its surface. I practiced on some wee gourds I’d bought from a merchant to get the technique down.
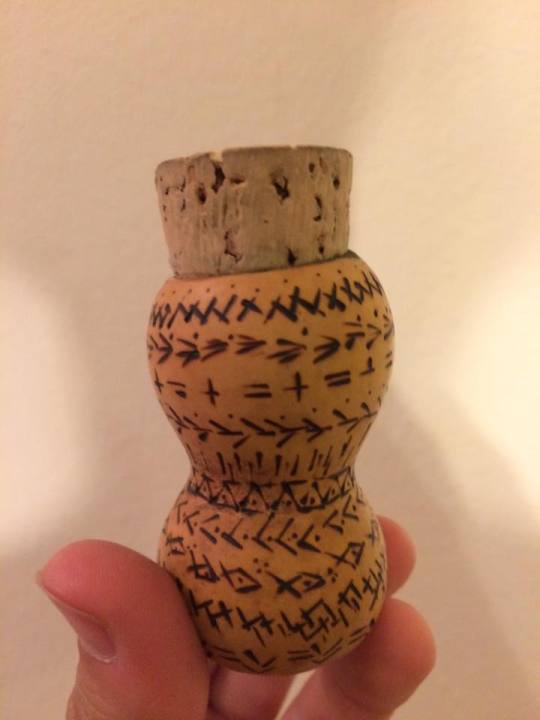
Here’s a tiny gourd I use to hold healing potions! The pattern was inspired by basic embroidery stitches.
The gourds have thick walls, so there was no danger of burning through it. Do ALL your wood burning decoration before you wax the gourd’s interior. Paraffin WILL catch on fire if it gets hot enough, so don’t try to use your iron on your finished gourd!
The gourd is decorated with instructions for how to find Drentha camp, a list of my names, titles, and boasts, a bunch of doodles, and a long curse detailing what will happen to anyone who steal its. It took a few sessions of Drentha’s Skype craft nights to finish it, but it wasn’t difficult— just tedious!
2. Cut the top opening

This will by the hole through which you’ll remove the gourd’s pith and seeds.
I had decent luck cutting through the top with a craft knife. The walls of the gourd may be thicker than you expect-- mine are about 1/4″ thick-- so work carefully. Some people have better luck cutting this hole open with a dremmel or by working around the opening with a thin drill bit.
Don’t make this hole too large. You may want to trace the cork you’ll use as a stopper to see how big the hole should be. You can always go larger, but you can’t fix a too-large hole.
3. Clean out your gourd.
The gourd is dried out, so it’s not wet or fleshy inside like a pumpkin, but it will need some work before the internal cavity is totally hollow: it still has pith and seeds inside.
The easiest way to get the gunk out is to drop a handful of sharp gravel into the gourd, shake it like blazes, and dump the ensuing dust, seeds, and gravel back out. Repeat until you’re not getting big pieces out. You might want to run a bent bit of wire along the inside to dislodge any stubborn seeds. Anything you don’t pull out will get encased in wax, though, so it doesn’t need to be perfect.
Warning: When you clean out your gourd, you’ll be producing a LOT of gourd-dust. Inhaling these particles can make you feel awful, so wear, and use, your dust mask! If you go without, you might come down with something crafters call the “gourd flu.” Even worse, the inside of your gourd might have been moldy, which is not something you want to introduce into your lungs. Buy and use a mask, dang it.
If your gourd has a “neck,” like mine, and the opening in it looks really small, try poking down through it and testing the “walls” of the gourd there. You might find that there are a few layers of papery pith there that you can punch through and pull back out, giving the gourd’s neck a larger opening so you can fill it with water faster.
4. Heat up your gourd.
Put your oven to 200 F, no higher, and put the gourd inside on the rack. This will gently heat the gourd up so the wax won’t instantly solidify when you pour it into the gourd. We want the wax to stay nice and liquid so we can slosh it around and coat every bit of the cavity. Heat the gourd for ~20 minutes.
Lay down some newspaper or paper towels on your work surface. You’ll have to work fast when the wax is ready, so everything should be in its place BEFORE you need it.
5. Melt your wax in a double-boiler.
Coating the inside of your gourd will make it waterproof, which will keep your water from tasting like old dried squash and prevent the inside of your canteen from getting moldy.
I used about half a box of Gulf Wax, or 1/2 lb, but you can get by with using a single block, depending on the size of your gourd.
I’m impatient, so I chopped my wax up into small pieces on my cutting board so it would melt faster. Paraffin is perfectly food-safe (though not exactly tasty), so no worries about toxicity here.

Paraffin is flammable, so rather than melt it directly over the stove, we’ll be making a quick and dirty double boiler. This just means we’ll put the container with the wax in a pot of hot water. I sacrificed a cheap Tupperware plastic container to hold my wax, but a clean aluminum can also works. (Since we’ll be pouring out hot wax later, the can might be even better— crimp the top of the can, a little, and it will have a spout that facilitates pouring out the wax!) In a double-boiler, the wax can’t get hotter than the temperature of boiling water, so there’s no anger of it catching on fire. Just make sure you don’t drop wax scraps onto the burner of the stove!

Put your wax-container in a small pot containing hot water to about half its height. Turn the stove to medium-low heat. Don’t walk away from it— again, paraffin is a synthetic that will catch on fire. The wax will melt faster if you stir it around a bit and break up any clumps that form.
Turn the stove off when the wax is melted. The hot water will keep the wax from solidifying.
6. Coat the inside of the gourd with melted wax.
You’ll be sloshing hot wax around in the next step, so put on some oven mitts and shoo small children and underfoot pets out of the way.

Grab your gourd from the oven (it shouldn’t be too hot to touch, but be careful anyway), and, working quickly, pour your wax into its interior. Slosh the wax around so it coats the cavity. Don’t worry if you’re not getting everything this pass— we’ll do another coat. When the wax starts to feel solid, not liquid (it’ll swish in a slightly different way), pour the excess wax out of the gourd back into your container.

Your used wax might look disgusting because it trapped bits of the gourd’s inside that you couldn’t get earlier. That’s fine! Better trapped in wax than in your body. My used wax was so gross that I decided to melt a new batch for the next coat. This is up to you.
7. Set the gourd aside to let the first coat cool.
Don’t put it back in the oven (you can turn that off, now). The first coat of wax needs to cool completely, or you’ll just melt it right back off when you pour more hot wax in for the second coat. After half an hour or so, it should be solidified enough for you to do coat #2.
8. Add another coat of wax.
Melt your wax again, but don’t put the gourd back in the oven. This second coat is to get the bits you missed the first time, so we don’t want to melt off the first coat.
Pour the wax into the gourd again and carefully swish it around, paying special attention to the neck and the top “bulb” of the gourd. Pour it out.
9. Stick the cork in while the wax is still warm.
While the wax is still hot around the opening of the gourd, jam your cork in so the wax will take the impression of its shape and create a good seal. You might need to cool the gourd and do a third coat for this, but that’s fine!
The outside doesn’t really need to be coated, so you’re basically done!
10. Rig up a strap for your gourd.
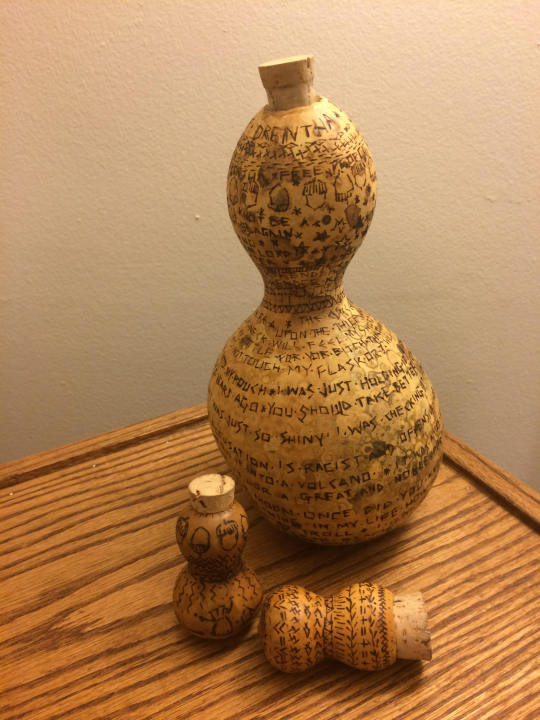
Once your cork fits in and the gourd is cool, you’re done waxing! Your gourd is now waterproof. Rig up a strap to carry it and carry it with pride! (I was rushing to prepare for a battle, so I just threw my Amtgard warrior sash around mine. It deserves something nicer!)

Since the walls of the gourd are so thick, my water stays cool even in the Florida heat. Also: I am super cute. ;)
My finished canteen is about 9″ tall and holds 40 oz water. I now can carry water to carry to the field without resorting to my ugly mundane Nalgene water bottle (which only holds 32 o!), and I have a new piece of kender-appropriate gear to add to my kit.
I had tons of fun making this, so I’m going to make some more wee containers. They would be perfect for holding shots of liquor, or for carrying salves and balms. Tiny pot of aloe for sunburns? A gob of lip balm? Small container for Tylenol or candy? There are so many uses for these beyond drinking gourds— and now we can ALL explore the possibilities!
(Huge thanks to my mom for giving me gourds, inspiring me to be crafty, and never judging me for being a weirdo. <3)
#canteen#larp#dagorhir#sca#tutorial#costuming#props#gourd#larping#soft kit#amtgard#birdhouse#pyrography#belegarth
25 notes
·
View notes
Last Seen Blogs