#kubernetes controller vs operator
Explore tagged Tumblr posts
Visit Tumblr Blog
Explore Tumblr blogs with no restrictions, modern design and the best experience.
Last Seen Tumblr Blogs


Fun Fact
Hackers stole 65M passwords from Tumblr in 2013.
Text
Hire DevOps Developers to Accelerate Your SDLC and Improve ROI

In today’s fast-paced digital landscape, businesses are under immense pressure to deliver software quickly, efficiently, and with fewer bugs. That’s where the decision to hire DevOps developers becomes crucial. DevOps isn't just a buzzword—it’s a transformative culture and approach that brings development and operations teams together for seamless delivery. If you're aiming to reduce time-to-market and enhance software performance, hiring DevOps professionals is no longer optional—it's strategic.
Understanding DevOps and Its Value
DevOps is a set of practices that merges software development (Dev) and IT operations (Ops). The goal is simple: shorten the systems development life cycle while delivering features, fixes, and updates frequently in close alignment with business goals. When you hire DevOps developers, you're investing in automation, continuous integration and deployment (CI/CD), infrastructure as code (IaC), and monitoring—all critical for scaling efficiently.
Why Businesses Need to Hire DevOps Developers
Organizations that hire DevOps developers gain a competitive edge through streamlined workflows and fewer manual errors. Whether you're a startup or an enterprise, these professionals help build robust CI/CD pipelines, enforce code quality standards, and integrate tools like Docker, Kubernetes, Jenkins, and Terraform.
Software Development—everything you need to know indicates that companies embracing DevOps are 46x more likely to deploy code faster and 96x quicker at recovering from failures than those that don’t. The ROI on DevOps is clear: speed, stability, and security.
What DevOps Developers Actually Do
When you hire DevOps developers, you’re not just bringing on someone to write scripts—they architect entire systems. These engineers are responsible for configuring servers, automating processes, and ensuring scalability across cloud platforms like AWS, Azure, or GCP. Their job is to enable development teams to push code that’s stable and production-ready, faster.
A Custom Software Development Company that integrates DevOps in its delivery model tends to produce higher-quality apps with better user satisfaction and retention.
How DevOps Accelerates SDLC
The Software Development Life Cycle (SDLC) consists of planning, developing, testing, deploying, and maintaining applications. The decision to hire DevOps developers can significantly streamline each of these stages through automation and constant feedback loops.
What is SDLC? Process, Phases, and Importance explores how DevOps facilitates early detection of bugs, ensures consistent deployments, and enables rollback mechanisms—all of which contribute to faster and safer software delivery.
When Should You Hire DevOps Developers?
You should consider hiring DevOps experts when:
Your development and operations teams are siloed.
Releases are inconsistent or delayed.
Your infrastructure lacks scalability.
You're transitioning to microservices or container-based architecture.
By choosing to hire DevOps developers, you ensure that your systems are future-proof and aligned with industry best practices.
Benefits of Hiring DevOps Developers
Here are some key benefits:
Faster development and deployment cycles.
Better collaboration between teams.
Reduced costs due to automation.
Improved product quality and customer experience.
A project led by a seasoned DevOps team—whether in-house or from a Hire DevOps Developers agency—can result in up to 30% cost reduction in long-term IT operations.
In-House vs Outsourcing: What’s Better?
Choosing between in-house hiring and outsourcing depends on your goals. An in-house team offers better control, but requires ongoing investment. Outsourcing to a best DevOps company ensures you get highly experienced professionals without long-term overheads. Either way, the goal is to hire DevOps developers who understand your business objectives and technical needs.
Skills to Look For When Hiring DevOps Developers
When hiring, ensure your DevOps engineer is skilled in:
CI/CD tools (Jenkins, GitLab CI)
Configuration management (Ansible, Chef, Puppet)
Cloud services (AWS, GCP, Azure)
Scripting (Python, Bash)
Monitoring (Nagios, Prometheus)
A candidate with this mix can contribute effectively to your Cross-Platform App Development company or enterprise-level systems alike.
best DevOps company teams also offer guidance on selecting the right tech stack and setting up performance monitoring frameworks that align with your business.
How to Measure ROI When You Hire DevOps Developers
ROI is not just about cost—it’s about value. When you hire DevOps developers, track metrics like:
Deployment frequency
Lead time for changes
Change failure rate
Mean time to recovery (MTTR)
Each of these KPIs will help you assess how DevOps is contributing to your bottom line. Implementing tools like DORA metrics can help benchmark success.
Final Thoughts
To hire DevOps developers is to make a strategic move toward operational efficiency and software excellence. Whether you're enhancing an existing system or launching a product from scratch, having the right DevOps team can transform the way your business delivers value to users. As the market grows more competitive in 2025, companies that prioritize DevOps will lead the charge in innovation and customer satisfaction.
0 notes
Text
Kubernetes vs. Traditional Infrastructure: Why Clusters and Pods Win
In today’s fast-paced digital landscape, agility, scalability, and reliability are not just nice-to-haves—they’re necessities. Traditional infrastructure, once the backbone of enterprise computing, is increasingly being replaced by cloud-native solutions. At the forefront of this transformation is Kubernetes, an open-source container orchestration platform that has become the gold standard for managing containerized applications.
But what makes Kubernetes a superior choice compared to traditional infrastructure? In this article, we’ll dive deep into the core differences, and explain why clusters and pods are redefining modern application deployment and operations.
Understanding the Fundamentals
Before drawing comparisons, it’s important to clarify what we mean by each term:
Traditional Infrastructure
This refers to monolithic, VM-based environments typically managed through manual or semi-automated processes. Applications are deployed on fixed servers or VMs, often with tight coupling between hardware and software layers.
Kubernetes
Kubernetes abstracts away infrastructure by using clusters (groups of nodes) to run pods (the smallest deployable units of computing). It automates deployment, scaling, and operations of application containers across clusters of machines.
Key Comparisons: Kubernetes vs Traditional Infrastructure
Feature
Traditional Infrastructure
Kubernetes
Scalability
Manual scaling of VMs; slow and error-prone
Auto-scaling of pods and nodes based on load
Resource Utilization
Inefficient due to over-provisioning
Efficient bin-packing of containers
Deployment Speed
Slow and manual (e.g., SSH into servers)
Declarative deployments via YAML and CI/CD
Fault Tolerance
Rigid failover; high risk of downtime
Self-healing, with automatic pod restarts and rescheduling
Infrastructure Abstraction
Tightly coupled; app knows about the environment
Decoupled; Kubernetes abstracts compute, network, and storage
Operational Overhead
High; requires manual configuration, patching
Low; centralized, automated management
Portability
Limited; hard to migrate across environments
High; deploy to any Kubernetes cluster (cloud, on-prem, hybrid)
Why Clusters and Pods Win
1. Decoupled Architecture
Traditional infrastructure often binds application logic tightly to specific servers or environments. Kubernetes promotes microservices and containers, isolating app components into pods. These can run anywhere without knowing the underlying system details.
2. Dynamic Scaling and Scheduling
In a Kubernetes cluster, pods can scale automatically based on real-time demand. The Horizontal Pod Autoscaler (HPA) and Cluster Autoscaler help dynamically adjust resources—unthinkable in most traditional setups.
3. Resilience and Self-Healing
Kubernetes watches your workloads continuously. If a pod crashes or a node fails, the system automatically reschedules the workload on healthy nodes. This built-in self-healing drastically reduces operational overhead and downtime.
4. Faster, Safer Deployments
With declarative configurations and GitOps workflows, teams can deploy with speed and confidence. Rollbacks, canary deployments, and blue/green strategies are natively supported—streamlining what’s often a risky manual process in traditional environments.
5. Unified Management Across Environments
Whether you're deploying to AWS, Azure, GCP, or on-premises, Kubernetes provides a consistent API and toolchain. No more re-engineering apps for each environment—write once, run anywhere.
Addressing Common Concerns
“Kubernetes is too complex.”
Yes, Kubernetes has a learning curve. But its complexity replaces operational chaos with standardized automation. Tools like Helm, ArgoCD, and managed services (e.g., GKE, EKS, AKS) help simplify the onboarding process.
“Traditional infra is more secure.”
Security in traditional environments often depends on network perimeter controls. Kubernetes promotes zero trust principles, pod-level isolation, and RBAC, and integrates with service meshes like Istio for granular security policies.
Real-World Impact
Companies like Spotify, Shopify, and Airbnb have migrated from legacy infrastructure to Kubernetes to:
Reduce infrastructure costs through efficient resource utilization
Accelerate development cycles with DevOps and CI/CD
Enhance reliability through self-healing workloads
Enable multi-cloud strategies and avoid vendor lock-in
Final Thoughts
Kubernetes is more than a trend—it’s a foundational shift in how software is built, deployed, and operated. While traditional infrastructure served its purpose in a pre-cloud world, it can’t match the agility and scalability that Kubernetes offers today.
Clusters and pods don’t just win—they change the game.
0 notes
Text
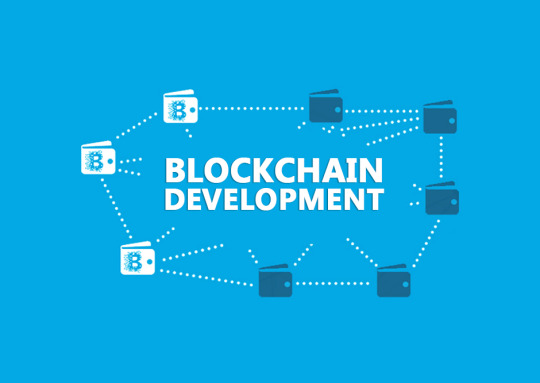
Which are the Best Technology and Stacks for Blockchain Development?
The Digital palpitation of Blockchain
The world is still being rewritten by lines of law flowing through blockchain networks. From banking to supply chain and indeed healthcare, the monumental plates of technology are shifting — and blockchain is at the center.
Why Choosing the Right Tech mound Matters
In the blockchain realm, your tech mound is not just a toolkit; it’s your legion. Picking the wrong combination can lead to security loopholes, scalability agonies, or simply development backups. In discrepancy, the right mound empowers invention, adaptability, and lightning-fast performance.
A regard Into Blockchain’s Core Principles
Blockchain is basically a distributed tally. inflexible, transparent, and decentralized. Every decision about development tech must round these foundational values.
Public vs Private Blockchains Know the Battleground
Public blockchains like Ethereum are open, permissionless, and unsure. Private blockchains like Hyperledger Fabric offer permissioned access, suitable for enterprises and healthcare CRM software inventors looking for regulated surroundings.
Top Programming Languages for Blockchain Development
Reliability The Ethereum Favorite
erected specifically for Ethereum, Solidity is the language behind smart contracts. Its tight integration with Ethereum’s armature makes it a no- brainer for inventors entering this space.
Rust The Arising hustler
Lightning-fast and memory-safe, Rust is dominating in ecosystems like Solana and Polkadot. It offers fine- granulated control over system coffers a gift for blockchain masterminds.
Go Concurrency Champion
Go, or Golang, stands out for its simplicity and robust concurrency support. habituated considerably in Hyperledger Fabric, Go helps gauge distributed systems without breaking a sweat.
JavaScript & TypeScript Web3 Wizards
From UI to connecting smart contracts, JavaScript and TypeScript continue to dominate frontend and dApp interfaces. Paired with libraries like Web3.js or Ethers.js, they bring the Web3 macrocosm alive.
Smart Contract Platforms The smarts Behind the Chain
Ethereum
The undisputed leader. Its vast ecosystem and inventor community make it a top choice for smart contract development.
Solana
Known for blazing speed andultra-low freights, Solana supports Rust and C. Ideal for high- frequence trading and DeFi apps.
Frontend Technologies in Blockchain Apps
Reply and Angular UX Anchors
Both fabrics give interactive, scalable stoner interfaces. React’s element- grounded design fits impeccably with dApp armature.
and Ethers.js
They're the islands between your blockchain and cybersurfer. Web3.js supports Ethereum natively, while Ethers.js offers a lighter and further intuitive API.
Backend Technologies and APIs
Perfect for handling multiple connections contemporaneously, Node.js is extensively used in dApps for garçon- side scripting.
A minimalist backend frame, Express.js integrates painlessly with APIs and Web3 libraries.
GraphQL
In a data- driven ecosystem, GraphQL enables briskly, effective queries compared to REST APIs.
Blockchain fabrics and Tools
Truffle Suite
Complete ecosystem for smart contract development collecting, testing, and planting.
Databases in Blockchain Systems
IPFS( InterPlanetary train System)
A peer- to- peer storehouse result that decentralizes train storehouse, essential for apps demanding off- chain data.
BigchainDB
Blending blockchain features with NoSQL database capabilities, BigchainDB is knitter- made for high- outturn apps.
Essential DevOps Tools
Docker
Ensures harmonious surroundings for development and deployment across machines.
Kubernetes
Automates deployment, scaling, and operation of containerized operations.
Jenkins
The robotization backbone of nonstop integration and delivery channels in blockchain systems.
Security Considerations in Blockchain Tech Stacks
Security is n’t a point. It’s a necessity. From contract checkups to secure portmanteau integrations and sale confirmation, every subcaste needs underpinning.
Tech mound for Blockchain App Development A Complete Combo
Frontend React Web3.js
Backend Node.js Express GraphQL
Smart Contracts reliability( Ethereum) or Rust( Solana)
fabrics Hardhat or Truffle
Database IPFS BigchainDB
DevOps Docker Kubernetes Jenkins
This tech stack for blockchain app development provides dexterity, scalability, and enterprise- readiness.
Part of Consensus Algorithms
evidence of Work
Secure but energy- ferocious. PoW is still used by Bitcoin and other heritage systems.
evidence of Stake
Energy-effective and fast. Ethereum’s transition to PoS marked a vital shift.
Delegated Proof of Stake
Used by platforms like EOS, this model adds governance layers through tagged validators.
Part of Artificial Intelligence in Banking and Blockchain Synergy
AI and blockchain are reconsidering banking. Fraud discovery, threat modeling, and smart contracts are now enhanced by machine literacy. The role of artificial intelligence in banking becomes indeed more potent when intermingled with blockchain’s translucency.
Blockchain in Healthcare A Silent Revolution
Hospitals and pharma titans are integrating blockchain to track case records, medicine authenticity, and insurance claims.
Healthcare CRM Software Developers Leading the Change
By bedding blockchain features in CRM platforms, companies are enhancing data sequestration, concurrence shadowing, and real- time health analytics. In this invention surge, healthcare CRM software developers Leading the Change are setting new norms for secure and effective case operation.
Popular Blockchain Use Cases Across diligence
Finance Smart contracts, crypto holdalls
Supply Chain Tracking goods from origin to shelf
Voting Tamper- proof digital choices
Gaming NFTs and digital power
Challenges in Blockchain App Development
Interoperability, scalability, energy operation, and evolving regulations challenge indeed the stylish inventors.
The Future of Blockchain Development Tech Stacks
We'll see confluence AI, IoT, and edge computing will integrate with blockchain heaps, making apps smarter, briskly, and indeed more decentralized.
0 notes
Link
#AIdevelopment#AISecurity#cloudcomputing#developertools#Enterprisetechnology#GoogleGemini#OpenAI#Workspaceautomation
0 notes
Text
DevOps with Docker and Kubernetes Coaching by Gritty Tech
Introduction
In the evolving world of software development and IT operations, the demand for skilled professionals in DevOps with Docker and Kubernetes coaching is growing rapidly. Organizations are seeking individuals who can streamline workflows, automate processes, and enhance deployment efficiency using modern tools like Docker and Kubernetes For More…
Gritty Tech, a leading global platform, offers comprehensive DevOps with Docker and Kubernetes coaching that combines hands-on learning with real-world applications. With an expansive network of expert tutors across 110+ countries, Gritty Tech ensures that learners receive top-quality education with flexibility and support.
What is DevOps with Docker and Kubernetes?
Understanding DevOps
DevOps is a culture and methodology that bridges the gap between software development and IT operations. It focuses on continuous integration, continuous delivery (CI/CD), automation, and faster release cycles to improve productivity and product quality.
Role of Docker and Kubernetes
Docker allows developers to package applications and dependencies into lightweight containers that can run consistently across environments. Kubernetes is an orchestration tool that manages these containers at scale, handling deployment, scaling, and networking with efficiency.
When combined, DevOps with Docker and Kubernetes coaching equips professionals with the tools and practices to deploy faster, maintain better control, and ensure system resilience.
Why Gritty Tech is the Best for DevOps with Docker and Kubernetes Coaching
Top-Quality Education, Affordable Pricing
Gritty Tech believes that premium education should not come with a premium price tag. Our DevOps with Docker and Kubernetes coaching is designed to be accessible, offering robust training programs without compromising quality.
Global Network of Expert Tutors
With educators across 110+ countries, learners benefit from diverse expertise, real-time guidance, and tailored learning experiences. Each tutor is a seasoned professional in DevOps, Docker, and Kubernetes.
Easy Refunds and Tutor Replacement
Gritty Tech prioritizes your satisfaction. If you're unsatisfied, we offer a no-hassle refund policy. Want a different tutor? We offer tutor replacements swiftly, without affecting your learning journey.
Flexible Payment Plans
Whether you prefer monthly billing or paying session-wise, Gritty Tech makes it easy. Our flexible plans are designed to suit every learner’s budget and schedule.
Practical, Hands-On Learning
Our DevOps with Docker and Kubernetes coaching focuses on real-world projects. You'll learn to set up CI/CD pipelines, containerize applications, deploy using Kubernetes, and manage cloud-native applications effectively.
Key Benefits of Learning DevOps with Docker and Kubernetes
Streamlined Development: Improve collaboration between development and operations teams.
Scalability: Deploy applications seamlessly across cloud platforms.
Automation: Minimize manual tasks with scripting and orchestration.
Faster Delivery: Enable continuous integration and continuous deployment.
Enhanced Security: Learn secure deployment techniques with containers.
Job-Ready Skills: Gain competencies that top tech companies are actively hiring for.
Curriculum Overview
Our DevOps with Docker and Kubernetes coaching covers a wide array of modules that cater to both beginners and experienced professionals:
Module 1: Introduction to DevOps Principles
DevOps lifecycle
CI/CD concepts
Collaboration and monitoring
Module 2: Docker Fundamentals
Containers vs. virtual machines
Docker installation and setup
Building and managing Docker images
Networking and volumes
Module 3: Kubernetes Deep Dive
Kubernetes architecture
Pods, deployments, and services
Helm charts and configurations
Auto-scaling and rolling updates
Module 4: CI/CD Integration
Jenkins, GitLab CI, or GitHub Actions
Containerized deployment pipelines
Monitoring tools (Prometheus, Grafana)
Module 5: Cloud Deployment
Deploying Docker and Kubernetes on AWS, Azure, or GCP
Infrastructure as Code (IaC) with Terraform or Ansible
Real-time troubleshooting and performance tuning
Who Should Take This Coaching?
The DevOps with Docker and Kubernetes coaching program is ideal for:
Software Developers
System Administrators
Cloud Engineers
IT Students and Graduates
Anyone transitioning into DevOps roles
Whether you're a beginner or a professional looking to upgrade your skills, this coaching offers tailored learning paths to meet your career goals.
What Makes Gritty Tech Different?
Personalized Mentorship
Unlike automated video courses, our live sessions with tutors ensure all your queries are addressed. You'll receive personalized feedback and career guidance.
Career Support
Beyond just training, we assist with resume building, interview preparation, and job placement resources so you're confident in entering the job market.
Lifetime Access
Enrolled students receive lifetime access to updated materials and recorded sessions, helping you stay up to date with evolving DevOps practices.
Student Success Stories
Thousands of learners across continents have transformed their careers through our DevOps with Docker and Kubernetes coaching. Many have secured roles as DevOps Engineers, Site Reliability Engineers (SRE), and Cloud Consultants at leading companies.
Their success is a testament to the effectiveness and impact of our training approach.
FAQs About DevOps with Docker and Kubernetes Coaching
What is DevOps with Docker and Kubernetes coaching?
DevOps with Docker and Kubernetes coaching is a structured learning program that teaches you how to integrate Docker containers and manage them using Kubernetes within a DevOps lifecycle.
Why should I choose Gritty Tech for DevOps with Docker and Kubernetes coaching?
Gritty Tech offers experienced mentors, practical training, flexible payments, and global exposure, making it the ideal choice for DevOps with Docker and Kubernetes coaching.
Is prior experience needed for DevOps with Docker and Kubernetes coaching?
No. While prior experience helps, our coaching is structured to accommodate both beginners and professionals.
How long does the DevOps with Docker and Kubernetes coaching program take?
The average duration is 8 to 12 weeks, depending on your pace and session frequency.
Will I get a certificate after completing the coaching?
Yes. A completion certificate is provided, which adds value to your resume and validates your skills.
What tools will I learn in DevOps with Docker and Kubernetes coaching?
You’ll gain hands-on experience with Docker, Kubernetes, Jenkins, Git, Terraform, Prometheus, Grafana, and more.
Are job placement services included?
Yes. Gritty Tech supports your career with resume reviews, mock interviews, and job assistance services.
Can I attend DevOps with Docker and Kubernetes coaching part-time?
Absolutely. Sessions are scheduled flexibly, including evenings and weekends.
Is there a money-back guarantee for DevOps with Docker and Kubernetes coaching?
Yes. If you’re unsatisfied, we offer a simple refund process within a stipulated period.
How do I enroll in DevOps with Docker and Kubernetes coaching?
You can register through the Gritty Tech website. Our advisors are ready to assist you with the enrollment process and payment plans.
Conclusion
Choosing the right platform for DevOps with Docker and Kubernetes coaching can define your success in the tech world. Gritty Tech offers a powerful combination of affordability, flexibility, and expert-led learning. Our commitment to quality education, backed by global tutors and personalized mentorship, ensures you gain the skills and confidence needed to thrive in today’s IT landscape.
Invest in your future today with Gritty Tech — where learning meets opportunity.
0 notes
Text
Understanding the Architecture of Red Hat OpenShift Container Storage (OCS)
As organizations continue to scale containerized workloads across hybrid cloud environments, Red Hat OpenShift Container Storage (OCS) stands out as a critical component for managing data services within OpenShift clusters—whether on-premises or in the cloud.
🔧 What makes OCS powerful?
At the heart of OCS are three main operators that streamline storage automation:
OCS Operator – Acts as the meta-operator, orchestrating everything for a supported and reliable deployment.
Rook-Ceph Operator – Manages block, file, and object storage across environments.
NooBaa Operator – Enables the Multicloud Object Gateway for seamless object storage management.
🏗️ Deployment Flexibility: Internal vs. External
1️⃣ Internal Deployment
Storage services run inside the OpenShift cluster.
Ideal for smaller or dynamic workloads.
Two modes:
Simple: Co-resident with apps—great for unclear storage needs.
Optimized: Dedicated infra nodes—best when storage needs are well defined.
2️⃣ External Deployment
Leverages an external Ceph cluster to serve multiple OpenShift clusters.
Perfect for large-scale environments or when SRE/storage teams manage infrastructure independently.
🧩 Node Roles in OCS
Master Nodes – Kubernetes API and orchestration.
Infra Nodes – Logging, monitoring, and registry services.
Worker Nodes – Run both applications and OCS services (require local/portable storage).
Whether you're building for scale, resilience, or multi-cloud, OCS provides the flexibility and control your architecture demands.
📌 Curious about how to design the right OpenShift storage strategy for your org? Let’s connect and discuss how we’re helping customers with optimized OpenShift + Ceph deployments at HawkStack Technologies.
For more details - https://training.hawkstack.com/red-hat-openshift-administration-ii-do280/
#RedHat #OpenShift #OCS #Ceph #DevOps #CloudNative #Storage #HybridCloud #Kubernetes #RHCA #Containers #HawkStack
0 notes
Text
Getting Started with Google Kubernetes Engine: Your Gateway to Cloud-Native Greatness
After spending over 8 years deep in the trenches of cloud engineering and DevOps, I can tell you one thing for sure: if you're serious about scalability, flexibility, and real cloud-native application deployment, Google Kubernetes Engine (GKE) is where the magic happens.
Whether you’re new to Kubernetes or just exploring managed container platforms, getting started with Google Kubernetes Engine is one of the smartest moves you can make in your cloud journey.
"Containers are cool. Orchestrated containers? Game-changing."
🚀 What is Google Kubernetes Engine (GKE)?
Google Kubernetes Engine is a fully managed Kubernetes platform that runs on top of Google Cloud. GKE simplifies deploying, managing, and scaling containerized apps using Kubernetes—without the overhead of maintaining the control plane.
Why is this a big deal?
Because Kubernetes is notoriously powerful and notoriously complex. With GKE, Google handles all the heavy lifting—from cluster provisioning to upgrades, logging, and security.
"GKE takes the complexity out of Kubernetes so you can focus on building, not babysitting clusters."
🧭 Why Start with GKE?
If you're a developer, DevOps engineer, or cloud architect looking to:
Deploy scalable apps across hybrid/multi-cloud
Automate CI/CD workflows
Optimize infrastructure with autoscaling & spot instances
Run stateless or stateful microservices seamlessly
Then GKE is your launchpad.
Here’s what makes GKE shine:
Auto-upgrades & auto-repair for your clusters
Built-in security with Shielded GKE Nodes and Binary Authorization
Deep integration with Google Cloud IAM, VPC, and Logging
Autopilot mode for hands-off resource management
Native support for Anthos, Istio, and service meshes
"With GKE, it's not about managing containers—it's about unlocking agility at scale."
🔧 Getting Started with Google Kubernetes Engine
Ready to dive in? Here's a simple flow to kick things off:
Set up your Google Cloud project
Enable Kubernetes Engine API
Install gcloud CLI and Kubernetes command-line tool (kubectl)
Create a GKE cluster via console or command line
Deploy your app using Kubernetes manifests or Helm
Monitor, scale, and manage using GKE dashboard, Cloud Monitoring, and Cloud Logging
If you're using GKE Autopilot, Google manages your node infrastructure automatically—so you only manage your apps.
“Don’t let infrastructure slow your growth. Let GKE scale as you scale.”
🔗 Must-Read Resources to Kickstart GKE
👉 GKE Quickstart Guide – Google Cloud
👉 Best Practices for GKE – Google Cloud
👉 Anthos and GKE Integration
👉 GKE Autopilot vs Standard Clusters
👉 Google Cloud Kubernetes Learning Path – NetCom Learning
🧠 Real-World GKE Success Stories
A FinTech startup used GKE Autopilot to run microservices with zero infrastructure overhead
A global media company scaled video streaming workloads across continents in hours
A university deployed its LMS using GKE and reduced downtime by 80% during peak exam seasons
"You don’t need a huge ops team to build a global app. You just need GKE."
🎯 Final Thoughts
Getting started with Google Kubernetes Engine is like unlocking a fast track to modern app delivery. Whether you're running 10 containers or 10,000, GKE gives you the tools, automation, and scale to do it right.
With Google Cloud’s ecosystem—from Cloud Build to Artifact Registry to operations suite—GKE is more than just Kubernetes. It’s your platform for innovation.
“Containers are the future. GKE is the now.”
So fire up your first cluster. Launch your app. And let GKE do the heavy lifting while you focus on what really matters—shipping great software.
Let me know if you’d like this formatted into a visual infographic or checklist to go along with the blog!
1 note
·
View note
Text
Measuring ROI in an AI Proof of Concept

Return on investment (ROI) guides organizations in deciding whether new initiatives justify resources. With an ai proof of concept, the stakes often feel higher—machine learning models, specialized data sets, and new infrastructure can rack up costs. Yet success can yield major wins, from operational gains to deeper user engagement. This blog explores how to systematically measure ROI in AI pilot projects and ensure those insights translate into more confident, data-driven expansions.
1. Defining Success Indicators
Cost-Reduction Metrics: E.g., “15% decrease in manual review time per day.”
Performance Upgrades: E.g., “Automated suggestions improved accuracy by 30%.”
User Engagement: E.g., “Chatbot usage soared by 40% after launch.”
Clear definitions let you quantify how the pilot aligns with strategic goals. If none of the metrics show improvement, the pilot might need rethinking.
2. Cost Components
Data Preparation: Labeling, cleaning, or merging data from scattered sources.
Model Development: ML engineering overhead—like CPU/GPU usage, specialized data scientists, or dev tools.
Pilot Deployment: Docker, Kubernetes, or cloud hosting charges.
Maintenance: Fixes, updates, and model re-training if performance drifts.
Tracking these helps you isolate each expense, forming a robust cost baseline for your ROI calculations.
3. Quantifying Benefits
Efficiency Gains: Did the pilot reduce manual steps? For instance, a helpdesk AI might cut average resolution time from 12 minutes to 6 minutes, saving labor hours.
Revenue Uplift: In some cases, a well-targeted AI pilot—like product recommendations—may boost cross-sales or conversions.
Quality Improvements: If AI-led inspection or analytics yields fewer defects or better forecasts, the resulting cost avoidance translates to real business value.
While intangible benefits like brand innovation or team morale matter, tangible metrics usually take precedence in ROI justification.
4. Data-Driven Approaches to ROI Tracking
4.1 A/B Testing Compare user interactions or processes in an AI pilot group vs. a control group. For example, half your site visitors see the AI-driven feature, half do not. Differences in behavior or outcomes highlight pilot benefits.
4.2 Real-Time Dashboards Visualizing cost usage, time saved, or user uptake as the pilot runs ensures immediate feedback. If metrics stall, you can adapt quickly—like adjusting model hyperparameters or focusing on new data sets.
4.3 Post-Pilot Analysis After the pilot, compile key stats into a final report: cost savings, success rates, or user opinions. This summary shapes the argument for further expansions or more advanced AI features.
5. Bridging the Gap Between Pilot and Full-Scale Implementation
Refine the Model: If the pilot’s accuracy was borderline acceptable, further data or re-training might close the gap for enterprise usage.
Enhance Architecture: For large-scale usage, add better DevOps integration or advanced orchestration with microservices.
Stakeholder Buy-In: Present the pilot’s ROI. If a chatbot saved 200 staff-hours monthly, scaling across more teams multiplies that advantage.
6. Potential Challenges in ROI Analysis
Attribution Issues: Distinguishing which gains come directly from the AI pilot vs. outside factors like seasonal demand spikes.
Overlapping Initiatives: If multiple transformations happen at once, it may be tough to isolate the pilot’s contribution.
Long-Term vs. Short-Term Gains: A short pilot might show minimal immediate gains, but set the foundation for bigger future returns.
7. Finalizing ROI-Focused Recommendations
Document Everything: Each cost item, from labeling hours to pipeline integration, ensures transparent budgeting.
Emphasize Quick Wins: Even small improvements can encourage broader stakeholder acceptance.
Propose Next Steps: If ROI is positive, highlight immediate expansions or features that could amplify results.
Conclusion
Calculating ROI for an ai proof of concept involves analyzing cost inputs meticulously against measurable improvements. By zeroing in on efficiency, accuracy, or revenue metrics, you can gauge the pilot’s tangible value. A well-structured ROI evaluation not only justifies the pilot’s budget but provides a roadmap for scaling AI across the enterprise—where real transformation, market competitiveness, and sustainable growth are realized. With data-driven ROI insights, your organization can confidently move from pilot success to broad-scale AI adoption.
0 notes
Text
How to Ensure 24/7 Uptime in Cryptocurrency Exchange Development

Cryptocurrency exchanges operate in a high-stakes environment where even a few minutes of downtime can result in significant financial losses, security vulnerabilities, and loss of customer trust. Ensuring 24/7 uptime in cryptocurrency exchange development requires a combination of advanced infrastructure, strategic planning, security measures, and continuous monitoring. This guide explores the best practices and technologies to achieve maximum uptime and ensure seamless operations.
1. Choosing the Right Infrastructure
The backbone of any high-availability exchange is its infrastructure. Consider the following:
1.1 Cloud-Based Solutions vs. On-Premises Hosting
Cloud-based solutions: Scalable, reliable, and backed by industry leaders such as AWS, Google Cloud, and Microsoft Azure.
On-premises hosting: Offers more control but requires extensive maintenance and security protocols.
1.2 High Availability Architecture
Load balancing: Distributes traffic across multiple servers to prevent overload.
Redundant servers: Ensures backup servers take over in case of failure.
Content Delivery Networks (CDNs): Improve response times by caching content globally.
2. Implementing Failover Mechanisms
2.1 Database Redundancy
Use Primary-Replica architecture to maintain real-time backups.
Implement automatic failover mechanisms for instant switching in case of database failure.
2.2 Active-Passive and Active-Active Systems
Active-Passive: One server remains on standby and takes over during failures.
Active-Active: Multiple servers actively handle traffic, ensuring zero downtime.
3. Ensuring Network Resilience
3.1 Distributed Denial-of-Service (DDoS) Protection
Implement DDoS mitigation services like Cloudflare or Akamai.
Use rate limiting and traffic filtering to prevent malicious attacks.
3.2 Multiple Data Centers
Distribute workload across geographically dispersed data centers.
Use automated geo-routing to shift traffic in case of regional outages.
4. Continuous Monitoring and Automated Alerts
4.1 Real-Time Monitoring Tools
Use Nagios, Zabbix, or Prometheus to monitor server health.
Implement AI-driven anomaly detection for proactive issue resolution.
4.2 Automated Incident Response
Develop automated scripts to resolve common issues.
Use chatbots and AI-powered alerts for instant notifications.
5. Regular Maintenance and Software Updates
5.1 Scheduled Maintenance Windows
Plan updates during non-peak hours.
Use rolling updates to avoid complete downtime.
5.2 Security Patching
Implement automated patch management to fix vulnerabilities without disrupting service.
6. Advanced Security Measures
6.1 Multi-Layer Authentication
Use 2FA (Two-Factor Authentication) for secure logins.
Implement hardware security modules (HSMs) for cryptographic security.
6.2 Cold and Hot Wallet Management
Use cold wallets for long-term storage and hot wallets for active trading.
Implement multi-signature authorization for withdrawals.
7. Scalability Planning
7.1 Vertical vs. Horizontal Scaling
Vertical Scaling: Upgrading individual server components (RAM, CPU).
Horizontal Scaling: Adding more servers to distribute load.
7.2 Microservices Architecture
Decouple services for independent scaling.
Use containerization (Docker, Kubernetes) for efficient resource management.
8. Compliance and Regulatory Requirements
8.1 Adherence to Global Standards
Ensure compliance with AML (Anti-Money Laundering) and KYC (Know Your Customer) policies.
Follow GDPR and PCI DSS standards for data protection.
8.2 Audit and Penetration Testing
Conduct regular security audits and penetration testing to identify vulnerabilities.
Implement bug bounty programs to involve ethical hackers in security improvements.
Conclusion
Achieving 24/7 uptime in cryptocurrency exchange development requires a comprehensive approach involving robust infrastructure, failover mechanisms, continuous monitoring, and security best practices. By integrating these strategies, exchanges can ensure reliability, security, and customer trust in a highly competitive and fast-evolving market.
0 notes
Text
The Future of Load Balancing: Trends and Innovations in Application Load Balancer
The future of load balancing is rapidly evolving with advancements in technology, particularly in the realm of application load balancers (ALBs). As businesses increasingly shift to cloud-native architectures and microservices, ALBs are becoming more crucial in ensuring efficient traffic distribution across applications. Innovations such as AI-powered load balancing, real-time traffic analytics, and integration with containerized environments like Kubernetes are enhancing the scalability and performance of ALBs. Additionally, the rise of edge computing is pushing ALBs closer to end-users, reducing latency and improving overall user experience. As security concerns grow, ALBs are also incorporating advanced threat detection and DDoS protection features. These trends promise a more reliable, efficient, and secure approach to managing application traffic in the future.
What is an Application Load Balancer (ALB) and How Does It Work?
Application Load Balancer (ALB) is a cloud-based service designed to distribute incoming network traffic across multiple servers, ensuring optimal performance and high availability of applications. ALBs operate at the application layer (Layer 7) of the OSI model, which means they can make intelligent routing decisions based on the content of the request, such as URL, host headers, or HTTP methods. This differs from traditional load balancers that operate at the network layer. ALBs offer more sophisticated features for modern web applications, making them essential for scalable, highly available cloud environments.
Key Features of Application Load Balancer (ALB)
ALBs provide several features that make them highly suitable for distributed applications:
Content-Based Routing: ALBs can route traffic based on the URL path, host headers, or HTTP methods, enabling fine-grained control over the distribution of requests.
SSL Termination: ALBs can offload SSL termination, decrypting HTTPS requests before forwarding them to backend servers, thus improving performance.
Auto Scaling Integration: ALBs integrate seamlessly with auto-scaling groups, ensuring that traffic is evenly distributed across new and existing resources.
WebSocket Support: ALBs support WebSocket connections, making them ideal for applications requiring real-time, two-way communication.
Advantages of Using an Application Load Balancer in Cloud Environments
Application Load Balancers offer several benefits, particularly in cloud environments:
Improved Availability and Fault Tolerance: ALBs distribute traffic to healthy instances, ensuring high availability even if some backend servers fail.
Better Performance and Latency Optimization: By routing traffic based on specific parameters, ALBs can reduce response times and ensure efficient resource utilization.
Scalability: With ALBs, applications can scale horizontally by adding or removing instances without affecting performance, making them ideal for elastic cloud environments like AWS and Azure.
Security Enhancements: ALBs provide SSL termination, reducing the load on backend servers and offering better security for user data during transmission.
Application Load Balancer vs. Classic Load Balancer: Which One Should You Choose?
When choosing a load balancer for your application, understanding the difference between an Application Load Balancer (ALB) and a Classic Load Balancer (CLB) is crucial:
Layer 7 vs. Layer 4: ALBs operate at Layer 7 (application layer), while CLBs work at Layer 4 (transport layer). ALBs offer more sophisticated routing capabilities, whereas CLBs are simpler and more suitable for TCP/UDP-based applications.
Routing Based on Content: ALBs can route traffic based on URLs, headers, or query parameters, whereas CLBs route traffic at the IP level.
Support for Modern Web Apps: ALBs are designed to support modern web application architectures, including microservices and containerized apps, while CLBs are more suited for monolithic architectures.
SSL Offloading: ALBs offer SSL offloading, whereas CLBs only support SSL pass-through.
How to Set Up an Application Load Balancer on AWS?
Setting up an ALB on AWS involves several steps:
Step 1: Create a Load Balancer: Begin by creating an Application Load Balancer in the AWS Management Console. Choose a name, select the VPC, and configure listeners (typically HTTP/HTTPS).
Step 2: Configure Target Groups: Define target groups that represent the backend services or instances that will handle the requests. Configure health checks to ensure traffic is only sent to healthy targets.
Step 3: Define Routing Rules: Configure routing rules based on URL paths, hostnames, or HTTP methods. You can create multiple rules to direct traffic to different target groups based on incoming request details.
Step 4: Configure Security: Enable SSL certificates for secure communication and set up access control policies for your load balancer to protect against unwanted traffic.
Step 5: Test and Monitor: Once the ALB is set up, monitor its performance via AWS CloudWatch to ensure it is handling traffic as expected.
Common Use Cases for Application Load Balancer
Application Load Balancers are suitable for various use cases, including:
Microservices Architectures: ALBs are well-suited for routing traffic to different microservices based on specific API routes or URLs.
Web Applications: ALBs can efficiently handle HTTP/HTTPS traffic for websites, ensuring high availability and minimal latency.
Containerized Applications: In environments like AWS ECS or Kubernetes, ALBs can distribute traffic to containerized instances, allowing seamless scaling.
Real-Time Applications: ALBs are ideal for applications that rely on WebSockets or require low-latency responses, such as online gaming or live chat systems.
Troubleshooting Common Issues with Application Load Balancer
While ALBs offer powerful functionality, users may encounter issues that need troubleshooting:
Health Check Failures: Ensure that the health check settings (like path and response code) are correct. Misconfigured health checks can result in unhealthy targets.
SSL/TLS Configuration Issues: If SSL termination isn’t set up properly, users might experience errors or failed connections. Ensure SSL certificates are valid and correctly configured.
Routing Misconfigurations: Ensure that routing rules are properly defined, as incorrect routing can lead to traffic being sent to the wrong target.
Scaling Issues: If targets are not scaling properly, review auto-scaling group configurations to ensure they align with the ALB's scaling behavior.
Conclusion
Application Load Balancers are critical in optimizing the performance, availability, and scalability of modern web applications. By providing intelligent routing based on content, ALBs enable efficient handling of complex application architectures, such as microservices and containerized environments. Their ability to handle high volumes of traffic with low latency, integrate seamlessly with auto-scaling solutions, and enhance security makes them an invaluable tool for businesses looking to scale their operations efficiently. When setting up an ALB, it is essential to understand its key features, use cases, and best practices to maximize its potential. Whether deployed on AWS, Azure, or other cloud platforms, an Application Load Balancer ensures your applications remain responsive and available to users worldwide.
0 notes
Text
Ansible and Kubernetes Automation: Simplifying Cluster Management
Kubernetes is the go-to platform for container orchestration, but managing clusters at scale can become complex and time-consuming. This is where Ansible, a powerful IT automation tool, steps in to simplify Kubernetes management. In this blog, we’ll explore how Ansible can automate various Kubernetes tasks, making your operations more efficient and less error-prone.
Why Use Ansible for Kubernetes?
Ansible provides a flexible framework for automating Kubernetes tasks, offering benefits such as:
Centralized Management: Manage Kubernetes clusters alongside other infrastructure components from a single platform.
Consistency: Standardize how deployments, configurations, and updates are handled across multiple clusters.
Ease of Use: Human-readable playbooks make it easy to define and execute tasks without deep programming knowledge.
Integration: Seamlessly connect Kubernetes automation with tools like Helm, Prometheus, or external APIs.
Use Cases for Kubernetes Automation with Ansible
Deploying Applications Across Clusters Ansible can automate the deployment of applications across multiple Kubernetes clusters, ensuring uniformity. This is particularly useful in hybrid or multi-cloud environments.
Streamlining Resource Management From creating namespaces and ConfigMaps to updating deployments and scaling services, Ansible can handle all routine Kubernetes operations effortlessly.
Automating Security and Compliance Tasks like applying Role-Based Access Control (RBAC) policies, configuring network policies, and auditing resource usage can be automated with Ansible, improving security and compliance.
Simplifying Helm Chart Management Helm charts make deploying complex Kubernetes applications easier. With Ansible, you can automate the entire process, from fetching a chart to applying customized configurations.
Integrating with CI/CD Pipelines Ansible bridges the gap between Kubernetes and CI/CD systems, enabling seamless deployment of changes in development, staging, and production environments.
How Ansible Fits into Kubernetes Automation
Declarative vs. Imperative: While Kubernetes is declarative by nature, Ansible complements it with a task-based approach, making it ideal for orchestrating end-to-end workflows.
Cross-Environment Automation: Ansible can connect Kubernetes operations with other systems like load balancers, monitoring tools, and cloud providers, enabling a unified automation strategy.
Simplified Access Control: By integrating with Kubernetes APIs, Ansible ensures secure and controlled access to clusters.
Advantages of Using Ansible for Kubernetes
No Dependency on Agents: Ansible communicates directly with Kubernetes APIs, eliminating the need for agents or additional software on the cluster.
Idempotency: Ansible ensures tasks are performed consistently without unintended consequences, even if playbooks are run multiple times.
Scalability: Handle configurations for multiple clusters simultaneously, whether on-premises, cloud, or hybrid setups.
Improved Productivity: Teams can focus on strategic tasks as repetitive workflows are automated.
Best Practices for Ansible-Kubernetes Integration
Version Control Your Playbooks: Keep all automation scripts in a version control system like Git to maintain transparency and enable collaboration.
Test Before Production: Always test Ansible playbooks in a staging environment before applying them to production clusters.
Use Variables and Templates: Leverage variables to make playbooks reusable across different clusters or environments.
Follow Kubernetes Standards: Ensure your automation aligns with Kubernetes best practices for configurations and resource management.
Conclusion
Combining Ansible with Kubernetes brings together the best of automation and orchestration. By leveraging Ansible’s capabilities, you can simplify Kubernetes management, reduce manual errors, and improve operational efficiency. Whether you’re managing a single cluster or multiple environments, Ansible offers a robust and scalable solution for Kubernetes automation.
Start integrating Ansible into your Kubernetes workflows today, and experience a smoother, more efficient way to manage your clusters!
For more information visit: https://www.hawkstack.com/
0 notes
Text
Pods in Kubernetes Explained: The Smallest Deployable Unit Demystified
As the foundation of Kubernetes architecture, Pods play a critical role in running containerized applications efficiently and reliably. If you're working with Kubernetes for container orchestration, understanding what a Pod is—and how it functions—is essential for mastering deployment, scaling, and management of modern microservices.
In this article, we’ll break down what a Kubernetes Pod is, how it works, why it's a fundamental concept, and how to use it effectively in real-world scenarios.
What Is a Pod in Kubernetes?
A Pod is the smallest deployable unit in Kubernetes. It encapsulates one or more containers, along with shared resources such as storage volumes, IP addresses, and configuration information.
Unlike traditional virtual machines or even standalone containers, Pods are designed to run tightly coupled container processes that must share resources and coordinate their execution closely.
Key Characteristics of Kubernetes Pods:
Each Pod has a unique IP address within the cluster.
Containers in a Pod share the same network namespace and storage volumes.
Pods are ephemeral—they can be created, destroyed, and rescheduled dynamically by Kubernetes.
Why Use Pods Instead of Individual Containers?
You might ask: why not just deploy containers directly?
Here’s why Kubernetes Pods are a better abstraction:
Grouping Logic: When multiple containers need to work together—such as a main app and a logging sidecar—they should be deployed together within a Pod.
Shared Lifecycle: Containers in a Pod start, stop, and restart together.
Simplified Networking: All containers in a Pod communicate via localhost, avoiding inter-container networking overhead.
This makes Pods ideal for implementing design patterns like sidecar containers, ambassador containers, and adapter containers.
Pod Architecture: What’s Inside a Pod?
A Pod includes:
One or More Containers: Typically Docker or containerd-based.
Storage Volumes: Shared data that persists across container restarts.
Network: Shared IP and port space, allowing containers to talk over localhost.
Metadata: Labels, annotations, and resource definitions.
Here’s an example YAML for a single-container Pod:
yaml
CopyEdit
apiVersion: v1
kind: Pod
metadata:
name: myapp-pod
spec:
containers:
- name: myapp-container
image: myapp:latest
ports:
- containerPort: 80
Pod Lifecycle Explained
Understanding the Pod lifecycle is essential for effective Kubernetes deployment and troubleshooting.
Pod phases include:
Pending: The Pod is accepted but not yet running.
Running: All containers are running as expected.
Succeeded: All containers have terminated successfully.
Failed: At least one container has terminated with an error.
Unknown: The Pod state can't be determined due to communication issues.
Kubernetes also uses Probes (readiness and liveness) to monitor and manage Pod health, allowing for automated restarts and intelligent traffic routing.
Single vs Multi-Container Pods
While most Pods run a single container, Kubernetes supports multi-container Pods, which are useful when containers need to:
Share local storage.
Communicate via localhost.
Operate in a tightly coupled manner (e.g., a log shipper running alongside an app).
Example use cases:
Sidecar pattern for logging or proxying.
Init containers for pre-start logic.
Adapter containers for API translation.
Multi-container Pods should be used sparingly and only when there’s a strong operational or architectural reason.
How Pods Fit into the Kubernetes Ecosystem
Pods are not deployed directly in most production environments. Instead, they're managed by higher-level Kubernetes objects like:
Deployments: For scalable, self-healing stateless apps.
StatefulSets: For stateful workloads like databases.
DaemonSets: For deploying a Pod to every node (e.g., logging agents).
Jobs and CronJobs: For batch or scheduled tasks.
These controllers manage Pod scheduling, replication, and failure recovery, simplifying operations and enabling Kubernetes auto-scaling and rolling updates.
Best Practices for Using Pods in Kubernetes
Use Labels Wisely: For organizing and selecting Pods via Services or Controllers.
Avoid Direct Pod Management: Always use Deployments or other controllers for production workloads.
Keep Pods Stateless: Use persistent storage or cloud-native databases when state is required.
Monitor Pod Health: Set up liveness and readiness probes.
Limit Resource Usage: Define resource requests and limits to avoid node overcommitment.
Final Thoughts
Kubernetes Pods are more than just containers—they are the fundamental building blocks of Kubernetes cluster deployments. Whether you're running a small microservice or scaling to thousands of containers, understanding how Pods work is essential for architecting reliable, scalable, and efficient applications in a Kubernetes-native environment.
By mastering Pods, you’re well on your way to leveraging the full power of Kubernetes container orchestration.
0 notes
Text
Class E IP Address Space Helps GKE Manage IPv4 Depletion

Using Class E IPv4 Address space to help GKE address IPv4 depletion problems. The need for private IPv4 addresses is growing along with the amount of services and apps hosted on Google Kubernetes Engine (GKE) (RFC 1918). The RFC1918 address space is becoming harder to come by for a lot of big businesses, which makes IP address depletion a problem that affects their application scalability.
This precise address depletion problem is resolved by IPv6, which offers a large number of addresses. But not every business or application is prepared for IPv6 just yet. You may continue to expand your company by entering the IPv4 address space (240.0.0.0/4), which can handle these problems.
Class E addresses (240.0.0.0/4) are set aside for future usage, as indicated in RFC 5735 and RFC 1112, as stated in Google VPC network acceptable IPv4 ranges; nevertheless, this does not preclude you from using them in certain situations today. Google will also provide tips for organizing and using GKE clusters with Class E.
Recognizing Class E addresses
IPv4 addresses
Some typical criticisms or misunderstandings about the use of Class E addresses are as follows:
Other Google services do not function with class E addresses. This is untrue. Class E addresses are included in the acceptable address ranges for IPV4 that Google Cloud VPC offers. Furthermore, private connection techniques using Class E addresses provide access to a large number of Google controlled services.
Communicating with services outside of Google (internet/on-premises/other clouds) is limited when using Class E addresses. False. You may use NAT or IP masquerading to convert Class E addresses to public or private IPv4 addresses in order to access destinations outside of Google Cloud, since Class E addresses are not routable and are not published over the internet or outside of Google Cloud. Furthermore,
a. Nowadays, a large number of operating systems support Class E addresses, with Microsoft Windows being the prominent exception.
b. Routing the addresses for usage in private DCs is supported by several on-premises suppliers (Cisco, Juniper, Arista).
There are scale and performance restrictions on Class E addresses. This is untrue. Regarding performance, there is no difference between the addresses and other address ranges used by Google Cloud. Agents can grow to accommodate a high number of connections without sacrificing speed, even with NAT/IP Masquerade.
Therefore, you may utilize Class E addresses for private usage inside Google Cloud VPCs, for both Compute Engine instances and Kubernetes pods/services in GKE, even though they are reserved for future use, not routable over the internet, and shouldn’t be publicized over the public internet.
Advantages
Class E IP Addresses
Despite these limitations, Class E addresses provide some benefits:
Large address space: Compared to standard RFC 1918 private addresses (around 17.9 million addresses vs. about 268.4 million addresses for it), Class E addresses provide a much bigger pool of IP addresses. Organizations experiencing IP address depletion will benefit from this abundance as it will enable them to expand their services and applications without being constrained by a finite amount of address space.
Growth and scalability: It addressing’s wide reach facilitates the simple scalability of services and apps on Google Cloud and GKE. IP address restrictions do not prevent you from deploying and growing your infrastructure, which promotes innovation and development even during times of high consumption.
Effective resource utilization: By using Class E addresses to enhance your IP address allocation procedures, you may reduce the possibility of address conflicts and contribute to the efficient use of IP resources. This results in reduced expenses and more efficient operations.
Future-proofing: Although it is not supported by all operating systems, its use is anticipated to rise in response to the growing need for IP addresses. You can future-proof your infrastructure scalability to enable company development for many years to come by adopting Class E early on.
Class E IP addresses
Things to be mindful of
Even though Class E IP addresses provide many advantages, there are a few crucial things to remember:
Compatibility with operating systems: At the moment, not all operating systems enable Class E addressing. Make sure your selected operating system and tools are compatible before putting Class E into practice.
Software and hardware for networking: Check to see whether your firewalls and routers (or any other third-party virtual appliance solutions running on Google Compute Engine) are capable of handling the addresses. Make sure any programs or software that use IP addresses are updated to support it as well.
Migration and transition: To ensure there are no interruptions while switching from RFC 1918 private addresses to it, meticulous preparation and execution are needed.
How Snap implemented Class E
Network IP management is becoming more difficult due to the growing use of microservices and containerization systems such as GKE, particularly by major clients like Snap. Snap’s finite supply of RFC1918 private IPv4 addresses was rapidly depleted with hundreds of thousands of pods deployed, impeding cluster scalability and necessitating a large amount of human work to release addresses.
Originally contemplating an IPv6 migration, Snap ultimately opted to deploy dual-stack GKE nodes and GKE pods (IPv6 + Class E IPv4) due to concerns over application readiness and compatibility. In addition to preventing IP fatigue, this approach gave Snap the scale of IP addresses it required for many years to accommodate future expansion and cut down on overhead. Furthermore, this technique was in line with Snap’s long-term plan to switch to IPv6.
Fresh clusters
Requirement
Construct native VPC clusters.
Steps
Make a subnetwork with supplementary ranges for services and pods, if desired. It range (240.0.0.0/4) has CIDRs that may be used in the secondary ranges.
When creating the cluster for the pod and services CIDR ranges, use the previously generated secondary ranges. This is an example of the user-managed secondary range assignment mechanism.
Setup IP masquerading to source network address translation (SNAT) to map the IP address of the underlying node to the source network address.
Migrating clusters
Requirement
The clusters need to be native to the VPC.
Steps
It is not possible to modify the cluster’s default pod IPv4 range. For more recent node pools that support Class E ranges, you may add pod ranges.
Workloads from earlier node pools may potentially be moved to newer node pools.
IPv4 Vs IPv6
Making the switch from IPv4 to IPv6 Class E
For enterprises experiencing IP depletion, switching to dual-stack clusters with the IPv4 and IPv6 addresses now is a wise strategic step. By increasing the pool of IP addresses that are accessible, it offers instant relief and permits expansion and scalability inside Google Cloud and GKE. Furthermore, implementing dual-stack clusters is an essential first step toward a more seamless IPv6-only transition.
Read more on Govindhtech.com
#ClassE#IPAddress#GKE#IPv4#IPv6#VPCnetwork#GoogleKubernetesEngine#GKEclusters#VPC#ClassEaddresses#news#technews#technologynews#technologytrends#govindhtech
0 notes
Text
Kubernetes with HELM: Kubernetes for Absolute Beginners

Kubernetes is an open-source platform that automates the management, scaling, and deployment of containerized applications. Its complexity can be overwhelming for newcomers, especially when it comes to managing Kubernetes workloads in an efficient and simplified manner. HELM, a package manager for Kubernetes, comes into play as a solution for this. In this blog, we’ll explore the basics of Kubernetes, the role of HELM, and how Kubernetes with HELM: Kubernetes for Absolute Beginners can be your gateway into the cloud-native ecosystem.
What is Kubernetes?
Before diving into HELM, it's crucial to understand the core platform: Kubernetes. Kubernetes, often abbreviated as K8s, is a powerful orchestration tool that automates the deployment, management, and scaling of containerized applications. It's widely used in DevOps and IT operations for handling large-scale, distributed systems. The flexibility, scalability, and self-healing nature of Kubernetes make it a favorite for organizations adopting microservices architecture.
Key Concepts in Kubernetes
Nodes: These are the individual servers (or virtual machines) where Kubernetes runs applications. Nodes contain the necessary components for running and managing containers.
Pods: A Pod is the smallest and simplest Kubernetes object. It contains one or more containers that share resources such as networking and storage.
Cluster: A group of nodes working together to manage containerized applications.
Kubelet: This is an agent that runs on each node in the Kubernetes cluster. It ensures containers are running as expected.
Kube-API: The Kubernetes API is the interface for interacting with the Kubernetes cluster. Administrators and developers use it to create, delete, and manage resources.
What is HELM?
HELM is a package manager for Kubernetes, designed to simplify the deployment and management of Kubernetes applications. Think of HELM as the "apt" or "yum" of Kubernetes. It allows users to define, install, and upgrade complex Kubernetes applications. With HELM, developers can easily manage and deploy their applications as packages called Charts.
A HELM Chart is a collection of files that describe a related set of Kubernetes resources. It’s the central concept in HELM, and using these Charts makes Kubernetes simpler for beginners and experts alike.
Why Use HELM with Kubernetes?
The synergy between HELM and Kubernetes is profound. As Kubernetes can be complex to set up and manage, HELM offers a streamlined approach. With HELM, developers can package Kubernetes applications in Charts, allowing for:
Reusable configuration: You can package your configurations and reuse them across multiple environments.
Ease of installation: Installing complex applications on Kubernetes becomes easier with HELM's simplified commands.
Version control: HELM allows for easy upgrades and rollbacks, giving you version control over your Kubernetes deployments.
HELM vs Manual Kubernetes Setup
Without HELM, setting up Kubernetes applications can involve manually defining numerous YAML files for various resources, including services, deployments, and pods. This manual approach is prone to errors and inefficiencies. HELM automates this, turning complex deployments into easy one-liners.
For absolute beginners, this is crucial. HELM abstracts the intricacies of Kubernetes, providing a layer of simplicity and making it accessible to those new to container orchestration.
Getting Started: Kubernetes with HELM for Beginners
Now, let’s dive into how absolute beginners can start using Kubernetes with HELM. If you're just starting with Kubernetes, it might seem intimidating at first. However, by using HELM to manage your Kubernetes applications, you can streamline your learning curve.
1. Installing Kubernetes and HELM
Before using HELM, you need to install Kubernetes. There are several ways to set up a Kubernetes environment, such as using Minikube, Kubeadm, or a managed Kubernetes service like Google Kubernetes Engine (GKE), Amazon EKS, or Azure Kubernetes Service (AKS).
After Kubernetes is set up, installing HELM is straightforward. Here’s how to get started:
Installing HELM:
bash
Copy code
curl https://raw.githubusercontent.com/helm/helm/main/scripts/get-helm-3 | bash
This will install the latest version of HELM on your system.
2. Creating a HELM Chart
Once HELM is installed, you can start creating your first HELM Chart. This will package your application for easy deployment. Use the following command to create a new Chart:
bash
Copy code
helm create my-first-chart
This command generates a basic directory structure for your Chart, including template files for deployments, services, and configuration maps.
3. Deploying a Kubernetes Application with HELM
Deploying your application using HELM is simple. After creating or downloading a HELM Chart, you can install it using the following command:
bash
Copy code
helm install my-release my-first-chart
This command deploys the Kubernetes resources defined in the Chart. In this example, my-release is the name of the deployment, and my-first-chart is the Chart you created earlier.
4. Managing HELM Releases
One of the benefits of HELM is the ease of managing Kubernetes deployments. With HELM, you can easily upgrade or roll back to previous releases.
Upgrading a HELM release:
bash
Copy code
helm upgrade my-release my-first-chart
Rolling back to a previous release:
bash
Copy code
helm rollback my-release 1
These commands are especially useful when managing production environments, as they give you full control over application versions.
HELM and Kubernetes in DevOps
HELM plays a vital role in DevOps pipelines, particularly for teams practicing Continuous Integration (CI) and Continuous Delivery (CD). It simplifies Kubernetes deployments, making it easier to integrate Kubernetes into CI/CD tools such as Jenkins, GitLab, or GitHub Actions.
By packaging Kubernetes applications into Charts, developers can create automated pipelines to deploy, test, and manage applications across multiple environments. HELM allows teams to version control their infrastructure, ensuring that deployments are consistent and reliable.
For organizations adopting a microservices architecture, HELM is especially useful for managing complex, multi-service Kubernetes clusters. Instead of deploying services manually, HELM enables you to automate the process.
Conclusion: Master Kubernetes with HELM
Kubernetes with HELM is a powerful combination that simplifies the management of containerized applications. Whether you are an absolute beginner or an experienced developer, HELM helps in reducing the complexities of Kubernetes. It streamlines the installation, management, and upgrade of Kubernetes applications, making it accessible to anyone starting their journey in the cloud-native world.
By learning Kubernetes with HELM: Kubernetes for Absolute Beginners, you will gain the foundational knowledge needed to manage applications at scale. Start with the basics of Kubernetes, and as you grow, leverage HELM to manage complex deployments with ease.
HELM is especially valuable for DevOps teams and developers working in cloud environments like AWS, Google Cloud, or Azure, where Kubernetes plays a critical role in managing microservices and distributed systems.
0 notes
Text
OpenShift vs Kubernetes: Key Differences Explained
Kubernetes has become the de facto standard for container orchestration, enabling organizations to manage and scale containerized applications efficiently. However, OpenShift, built on top of Kubernetes, offers additional features that streamline development and deployment. While they share core functionalities, they have distinct differences that impact their usability. In this blog, we explore the key differences between OpenShift and Kubernetes.
1. Core Overview
Kubernetes:
Kubernetes is an open-source container orchestration platform that automates the deployment, scaling, and operation of application containers. It provides the building blocks for containerized workloads but requires additional tools for complete enterprise-level functionality.
OpenShift:
OpenShift is a Kubernetes-based container platform developed by Red Hat. It provides additional features such as a built-in CI/CD pipeline, enhanced security, and developer-friendly tools to simplify Kubernetes management.
2. Installation & Setup
Kubernetes:
Requires manual installation and configuration.
Cluster setup involves configuring multiple components such as kube-apiserver, kube-controller-manager, kube-scheduler, and networking.
Offers flexibility but requires expertise to manage.
OpenShift:
Provides an easier installation process with automated scripts.
Includes a fully integrated web console for management.
Requires Red Hat OpenShift subscriptions for enterprise-grade support.
3. Security & Authentication
Kubernetes:
Security policies and authentication need to be manually configured.
Role-Based Access Control (RBAC) is available but requires additional setup.
OpenShift:
Comes with built-in security features.
Uses Security Context Constraints (SCCs) for enhanced security.
Integrated authentication mechanisms, including OAuth and LDAP support.
4. Networking
Kubernetes:
Uses third-party plugins (e.g., Calico, Flannel, Cilium) for networking.
Network policies must be configured separately.
OpenShift:
Uses Open vSwitch-based SDN by default.
Provides automatic service discovery and routing.
Built-in router and HAProxy-based load balancing.
5. Development & CI/CD Integration
Kubernetes:
Requires third-party tools for CI/CD (e.g., Jenkins, ArgoCD, Tekton).
Developers must integrate CI/CD pipelines manually.
OpenShift:
Comes with built-in CI/CD capabilities via OpenShift Pipelines.
Source-to-Image (S2I) feature allows developers to build images directly from source code.
Supports GitOps methodologies out of the box.
6. User Interface & Management
Kubernetes:
Managed through the command line (kubectl) or third-party UI tools (e.g., Lens, Rancher).
No built-in dashboard; requires separate installation.
OpenShift:
Includes a built-in web console for easier management.
Provides graphical interfaces for monitoring applications, logs, and metrics.
7. Enterprise Support & Cost
Kubernetes:
Open-source and free to use.
Requires skilled teams to manage and maintain infrastructure.
Support is available from third-party providers.
OpenShift:
Requires a Red Hat subscription for enterprise support.
Offers enterprise-grade stability, support, and compliance features.
Managed OpenShift offerings are available via cloud providers (AWS, Azure, GCP).
Conclusion
Both OpenShift and Kubernetes serve as powerful container orchestration platforms. Kubernetes is highly flexible and widely adopted, but it demands expertise for setup and management. OpenShift, on the other hand, simplifies the experience with built-in security, networking, and developer tools, making it a strong choice for enterprises looking for a robust, supported Kubernetes distribution.
Choosing between them depends on your organization's needs: if you seek flexibility and open-source freedom, Kubernetes is ideal; if you prefer an enterprise-ready solution with out-of-the-box tools, OpenShift is the way to go.
For more details click www.hawkstack.com
0 notes
Text
Decoding OpenStack vs. OpenShift: Unraveling the Cloud Puzzle
In the ever-evolving landscape of cloud computing, two prominent players, OpenStack and OpenShift, have emerged as key solutions for organizations seeking efficient and scalable cloud infrastructure. Understanding the nuances of these platforms is crucial for businesses looking to optimize their cloud strategy.
OpenStack: Foundation of Cloud Infrastructure
OpenStack serves as a robust open-source cloud computing platform designed to provide infrastructure-as-a-service (IaaS). It acts as the foundation for creating and managing public and private clouds, offering a comprehensive set of services, including compute, storage, and networking. OpenStack is highly customizable, allowing organizations to tailor their cloud environment to specific needs.
With OpenStack, businesses gain flexibility and control over their infrastructure, enabling them to build and manage cloud resources at scale. Its modular architecture ensures compatibility with various hardware and software components, fostering interoperability across diverse environments. OpenStack is particularly beneficial for enterprises with complex requirements and a desire for a high level of customization.
OpenShift: Empowering Containerized Applications
On the other hand, OpenShift focuses on container orchestration and application development within a cloud-native environment. Developed by Red Hat, OpenShift builds upon Kubernetes, the popular container orchestration platform, to streamline the deployment, scaling, and management of containerized applications.
OpenShift simplifies the development and deployment of applications by providing a platform that supports the entire application lifecycle. It offers tools for building, testing, and deploying containerized applications, making it an ideal choice for organizations embracing microservices and containerization. OpenShift's developer-friendly approach allows teams to accelerate application development without compromising on scalability or reliability.
Differentiating Factors
While both OpenStack and OpenShift contribute to cloud computing, they cater to distinct aspects of the cloud ecosystem. OpenStack primarily focuses on the infrastructure layer, providing the building blocks for cloud environments. In contrast, OpenShift operates at a higher level, addressing the needs of developers and application deployment.
Organizations often choose OpenStack when they require a flexible and customizable infrastructure, especially for resource-intensive workloads. OpenShift, on the other hand, is preferred by those looking to streamline the development and deployment of containerized applications, fostering agility and scalability.
In conclusion, decoding the OpenStack vs. OpenShift dilemma involves understanding their specific roles within the cloud landscape. OpenStack empowers organizations to build and manage infrastructure, while OpenShift caters to the needs of developers and accelerates application deployment. By aligning their cloud strategy with the unique strengths of these platforms, businesses can unlock the full potential of cloud computing in their operations.
1 note
·
View note