#lupertutorials
Text
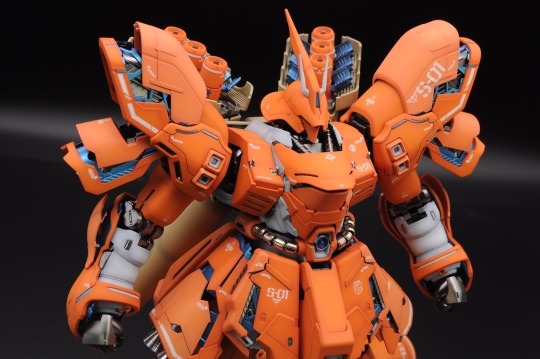
i wanna gab about preshading and how ive been doing it lately. trying to type longer guides on patreon and HV but let's try a quick and dirty version here and see if that helps me get those posts together better. as far as tools used for this, i use an iwata hp-cs and hp-ch (which are .3 and .2mm nozzle airbrushes respectively) along with gaianotes paints for painting gunpla. proper ppe (nitrile gloves, a well fitting respirator and a spraybooth that moves enough air) are a must when working with lacquers. dont give yourself lung or liver cancer for plamo plskthx. pics are from a mixture of the mg sazabi's WIP and some test junk i was doing with the hguc sinanju.
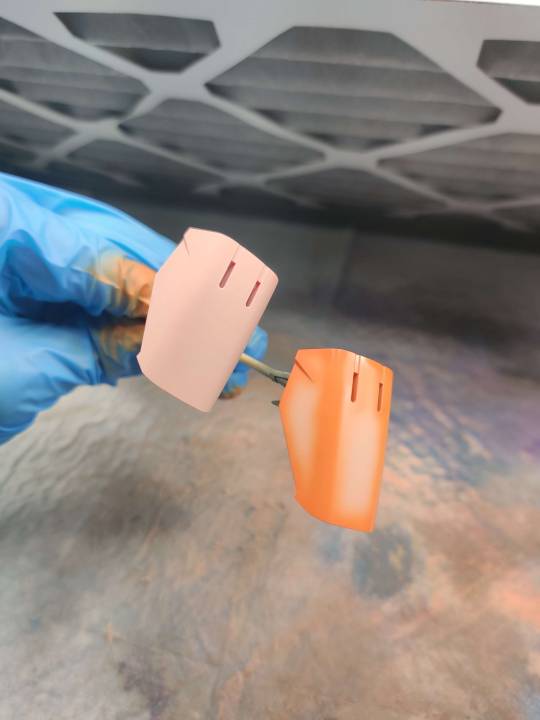
step 1: primer yer part
i like to use colored primers cause it really ups the saturation on the paint you use on it. pink for reds/oranges/yellows, blue for purple/blues, grey or white for whites/greys
step 2: mix your preshade color
ymmv on these but personally i like using a darker shade of the main color to do the shading by adding a complimentary color to it. for example, for these parts i mixed brown in to the custom orange color i made. you can use whatever you want though. some folks like using black as a preshade and that's ok! i preshade my orange-yellow paints with pure orange, and blues with either a darker blue or blue with some purple/black mixed in. to goal is to compliment/blend a bit with the color that's going on top.
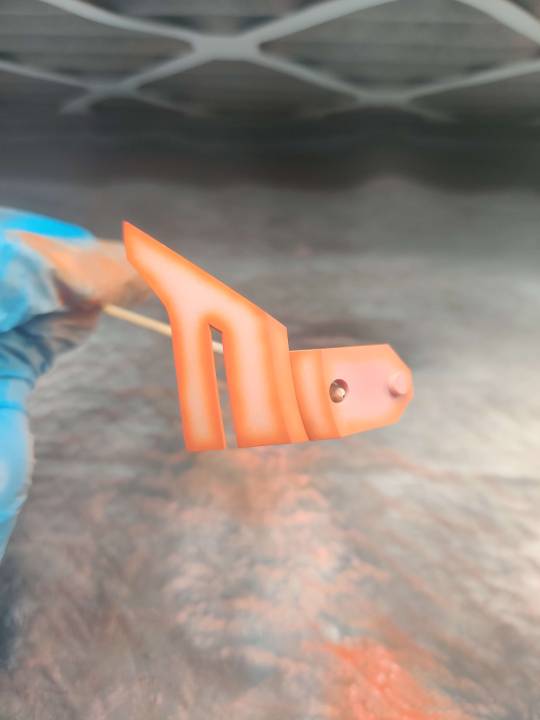
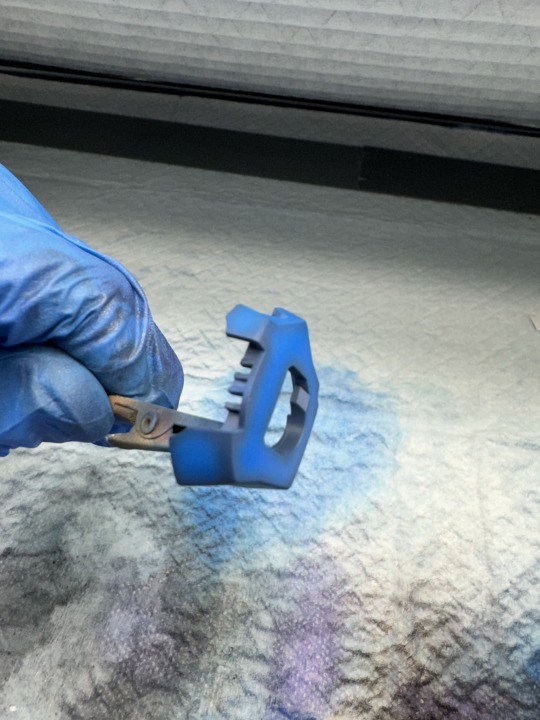
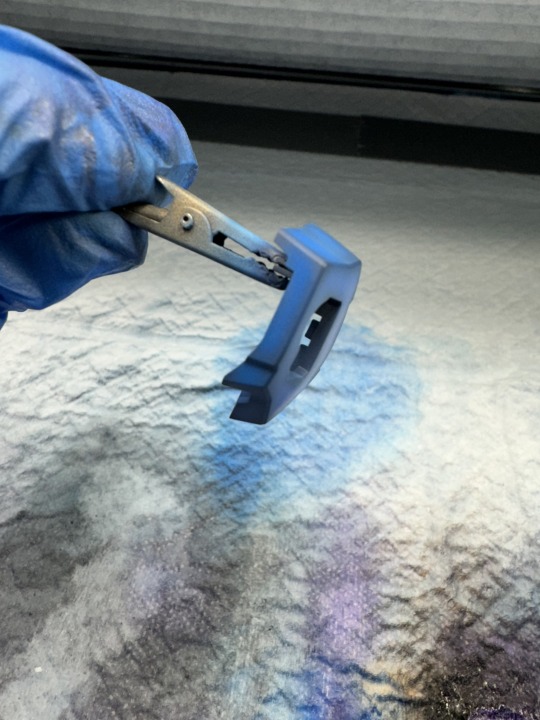
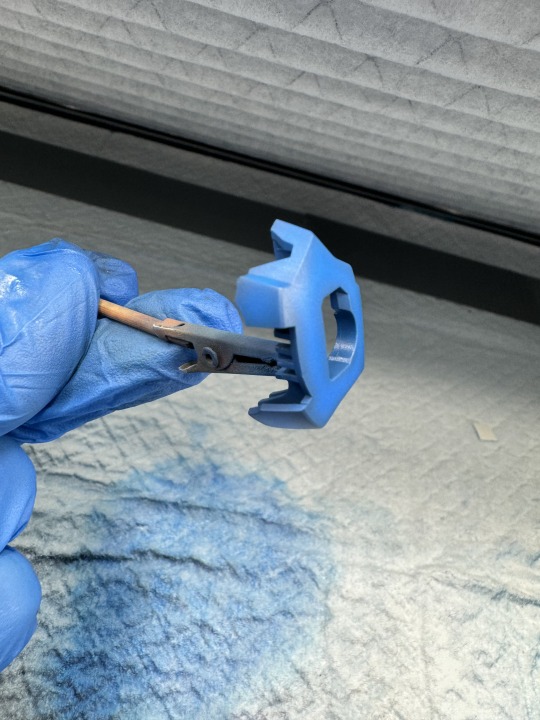
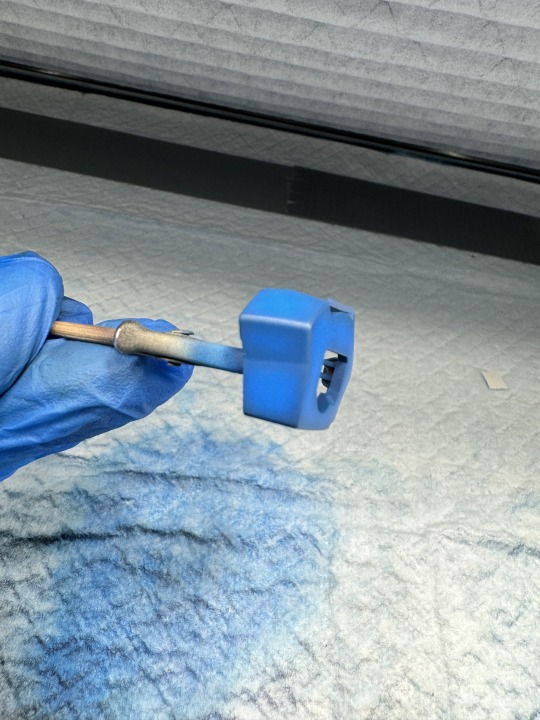
step 3: go around the edges and panel lines with your dark color, leaving room to fill in with your main paint.
hope your hand is steady and your paints are mixed/thinned well! very carefully, go around the part and darken up the edges/panel lines/underside of your parts. i shade anywhere where the "light" might darken up on a real world object but i can't speak to how accurate of a sentiment that is, if that makes sense? it's just what looks 'right' to my eye to do it this way. but the part that's shaded above should serve as a good indicator. here are a few other parts pre-filling in:

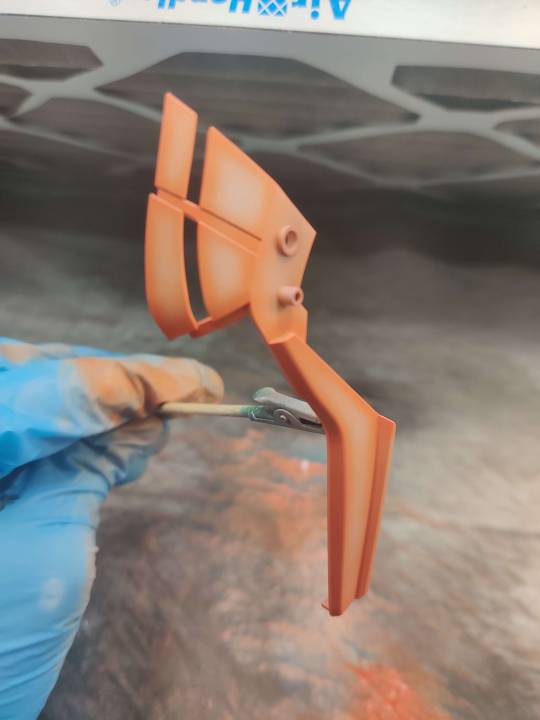
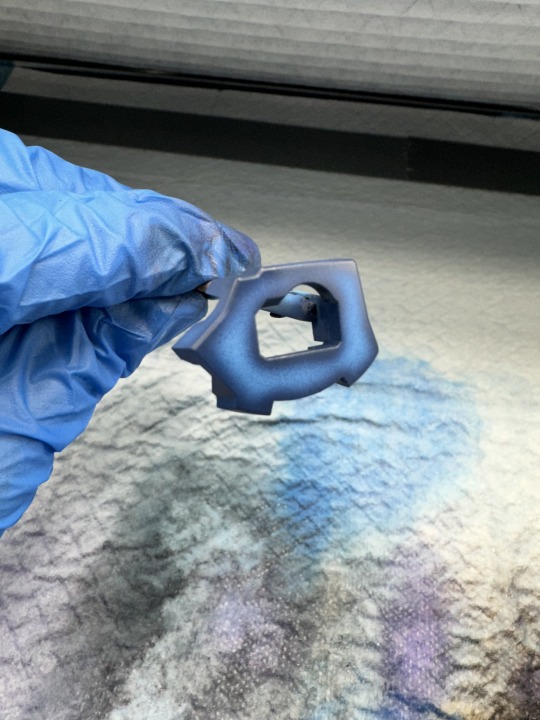
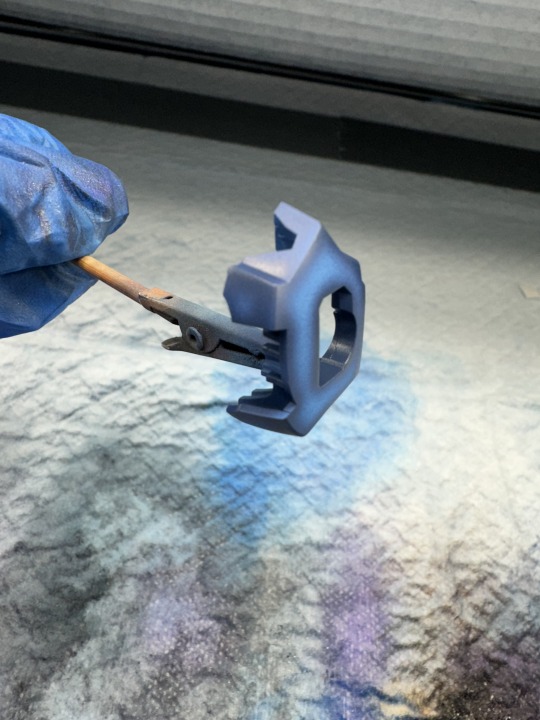
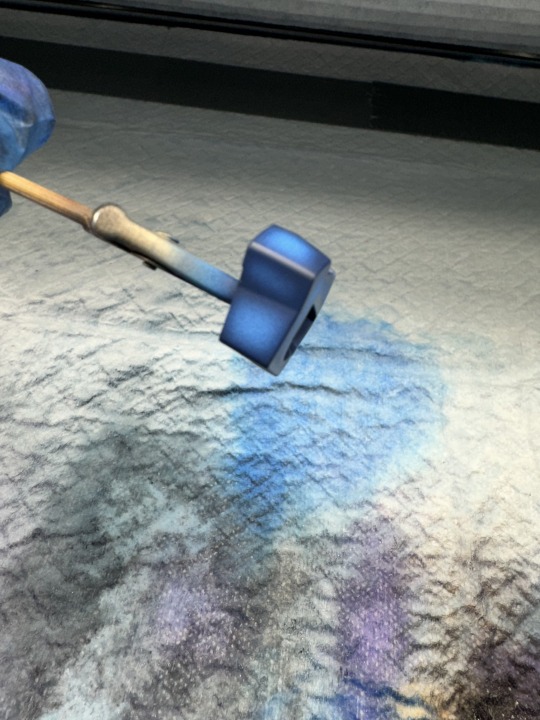
i do this this way for three reasons: first and second, im lazy and cheap. i don't want to waste time and paint coating the entire part when i'm just gonna cover it up anyway. third, if i coat the entire part in the preshade color that's going to have an effect on the main color that's going on top. mainly, it's going to make it darker. i don't want that so i landed on shading stuff this way.
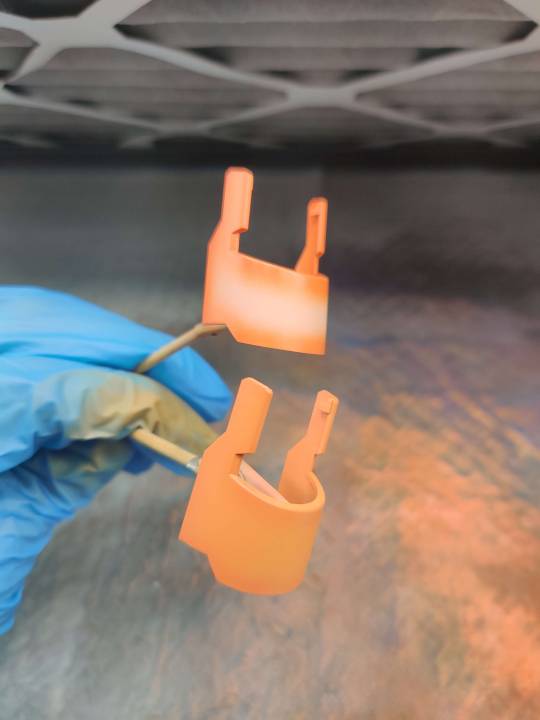
step 4: fill in your main color
okay so i always do a shitty job taking pictures of this step (that's why there are no sazabi pictures here) but once you have the edges and stuff painted now it's time to take your main color and fill in the primer-spaces. don't go over your preshade lines, just get as close as you can to that line. it's fine if you hit the edge a little, after all this is the topmost layer of color. even if it doesn't turn out perfect, just work with the wabisabi of the whole thing. embrace the shading not being perfectly uniform. after all, things in real life have degrees of variance.
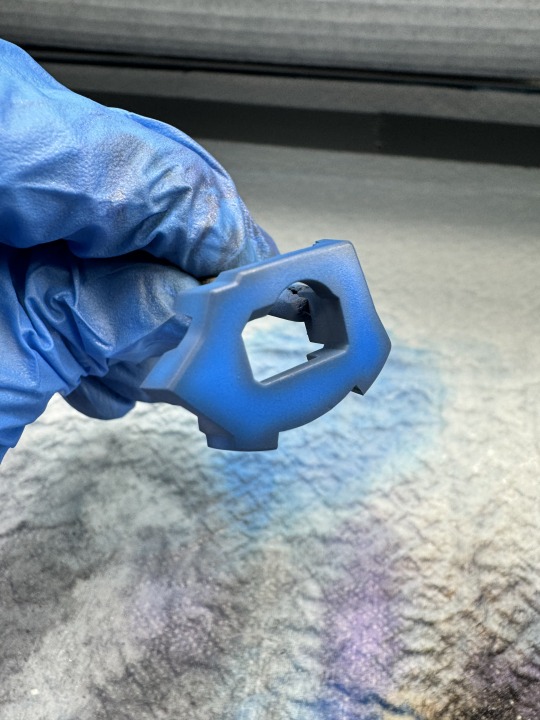
take your time, work with a psi around ~12-15, thin your paints well, and be very gentle on the trigger. i work really really close to the part for this step and have to be very careful to avoid splattering or overspraying. this is probably???? one of the trickier parts of this??? i don't know. when you've been doing this for so long your definition of that sorta changes. if you need extra help, look in to something to help steady your arm/hand while doing this part.
step 5: blending
okay, so you've got your shading down, you filled in the rest of the space with the main color and it's feelin pretty good. but. there's one more step. get a little distance from your part and give the whole thing the lightest coat you can manage. the goal is to blend the primary color and shading layer together with one or two very light coats of paint. i'm not trying to cover up the preshading, i just want a very thin layer of the main color to harmonize everything.

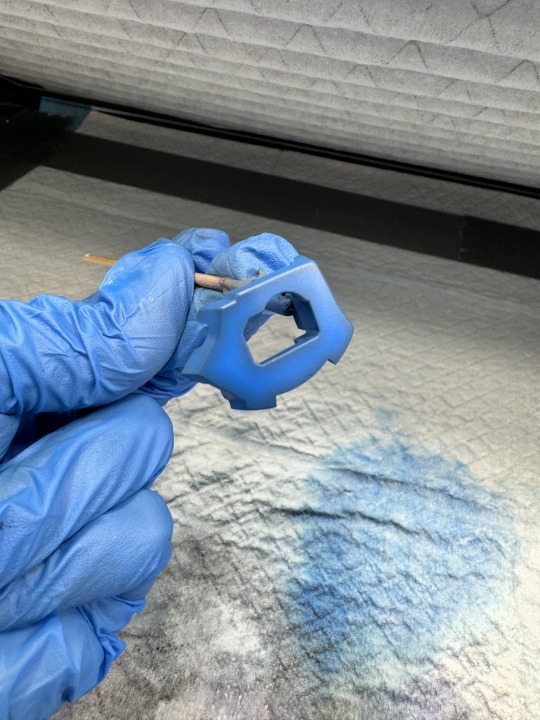
see how the preshading isn't so stark now that we've given it those final two coats? i think this is the key to bringing the shading and main layers together. everything feels nice and "finished" now. from here, gloss coat the parts for panel lining and decals or flat coat (or whatever finish you wanna use) it if it's not getting any of those.
and...that's pretty much it. as an aside, glossy finishes tend to make the colors appear darker and flatcoats tend to look lighter but that could just be my eyes being weird.
and uhh....yeah. thanks for coming to my gunpla talk.
19 notes
·
View notes
Last Seen Blogs

kitsunetsuki
And promise me you won't resuscitate

yohanajen
M I N E

lolualloys
Lolu Alloys Ltd

onesixer-please
Documenting Him