#monkibox
Explore tagged Tumblr posts
Visit Tumblr Blog
Explore Tumblr blogs with no restrictions, modern design and the best experience.
Last Seen Tumblr Blogs


Fun Fact
Total funding amounts to $125.3M.
Text
Week 24: Kicking Play Ideas to Help Your Baby Roll

Your baby’s 24th week is a vibrant period of change and development. Around this time, many babies begin working on foundational gross motor skills—especially rolling over, which sets the stage for crawling, sitting up, and eventually walking. One of the best ways to support your baby's progress is through kicking play—a series of purposeful, fun, and sensory-rich activities that help build strength, coordination, and confidence.
At Week 24, your baby may already be experimenting with rolling from back to tummy or tummy to back. If not, don’t worry—every baby develops at their own pace. The key is creating a nurturing and engaging environment that gently encourages them to explore their bodies, strengthen their core muscles, and use their legs as the power source for rolling.
In this guide, we���ll explore what’s happening developmentally at Week 24, the importance of kicking play, and provide a list of expert-backed, fun activities to help your baby roll. We’ll also answer frequently asked questions and provide additional resources.
🍼 Explore more on this topic: Kicking Play Ideas to Help Your Baby Roll – MonkiBox Blog
What’s Happening at Week 24?
By 24 weeks (approximately 5.5 to 6 months), your baby is becoming increasingly active, alert, and mobile. Here’s a snapshot of typical developments:
Core strengthening: Tummy time and leg play have built foundational strength.
Improved vision: Babies can track toys and movement across midline.
Intentional movement: Kicking, reaching, and grasping are now purposeful.
Rolling milestones: Many babies begin rolling both ways or are practicing with support.
Body awareness: They’re learning how their arms, legs, and torso work together.
Even if your baby hasn’t rolled yet, don’t stress. The wide range for this milestone is 4 to 6 months. With the right activities and encouragement, most babies reach it naturally.
Why Kicking Play Matters
You might wonder: Why focus on kicking? Isn’t rolling a core or arm-driven action?
Kicking is an essential precursor to rolling and crawling. It helps:
Build lower body strength, especially in the thighs and hips.
Activate core muscles by challenging stability.
Develop spatial awareness and coordination.
Encourage crossing the midline, which is crucial for future motor skills.
Rolling involves a beautiful interplay between leg thrust, core engagement, and shoulder rotation. Kicking provides the base from which these movements become synchronized.
Best Kicking Play Ideas to Help Your Baby Roll
These activities are designed to be safe, engaging, and developmentally appropriate for babies around 24 weeks. Make sure baby is well-rested and alert during playtimes and always supervise closely.
1. Tummy Time with a Twist
Purpose: Strengthens neck, back, shoulders, and arms while encouraging rolling.
How to do it:
Place your baby on a playmat or soft surface.
Position a high-contrast or musical toy just out of reach to one side.
Encourage baby to turn and pivot toward the toy by kicking and shifting weight.
Pro Tip: Place a rolled-up towel under their chest to ease the effort and make it more enjoyable.
2. Crinkle Paper Under the Feet
Purpose: Provides sensory feedback to encourage intentional kicking.
How to do it:
Place your baby on their back.
Slip crinkly tissue paper, a mylar blanket, or a MonkiBox crinkle toy under their feet.
As baby kicks, the noise reinforces their cause-effect understanding and motivates repetition.
Why it works: The sound encourages repetitive leg movement, which activates the right muscles for rolling.
3. Toy-to-Toe Play
Purpose: Boosts coordination and helps baby discover the power of their legs.
How to do it:
Use a soft hanging toy (like those in baby gyms) at the height of your baby's feet.
Encourage baby to kick it by lightly tapping their feet with it and then stepping back.
Celebrate with claps or smiles when they make contact.
Variation: Try using a toy with bells or lights for extra excitement.
4. Side-Lying Play
Purpose: Helps initiate the rolling motion.
How to do it:
Lay your baby on their side with a small rolled blanket behind their back for support.
Dangle a toy in front of them or shake a rattle to prompt them to reach and rotate.
Let their top leg cross over—this often triggers the rest of the body to follow.
Encouragement: Praise every attempt, even if they don’t complete the roll.
5. Leg Bicycle Game
Purpose: Builds coordination between left and right sides of the body.
How to do it:
Lay your baby on their back.
Gently hold their legs and move them in a slow bicycle motion.
Sing or talk to your baby as you go.
Bonus: This movement supports digestive health too!
6. Mirror Motivation
Purpose: Encourages reaching, kicking, and rolling toward reflection.
How to do it:
Prop a baby-safe mirror next to your baby during tummy or side-lying time.
Most babies love faces, and seeing themselves motivates movement.
Place a toy next to the mirror to add curiosity and inspire rolling attempts.
7. Kick and Reach Combo
Purpose: Strengthens cross-body coordination.
How to do it:
Lay your baby on their back.
Hold a favorite toy above their belly and encourage them to reach.
Tap their opposite foot gently while holding the toy on one side to help them connect the foot-to-hand movement pattern.
How Often Should You Do These Activities?
Consistency matters more than intensity. Aim for short, frequent play sessions, such as:
3–5 times per day, 5–10 minutes each
Always based on baby’s mood and readiness
After naps or diaper changes when baby is calm and alert
Key Tips for Supporting Rolling
Give plenty of floor time: Limit time in bouncers, swings, or seats.
Let baby play in various positions: Back, tummy, side.
Celebrate small wins: Rolling takes practice—cheer for every attempt.
Follow their lead: If they seem tired or frustrated, give a break.
Be patient: Every baby hits milestones at their own pace.
Real Parent Tip
“We placed a musical toy just out of reach during tummy time. One day, she finally kicked and twisted her way toward it. She was so proud—and so were we!” — Laura, mom of 6-month-old Ava
When to Talk to Your Pediatrician
While there's a wide range of normal, reach out to your pediatrician if by 6-7 months, your baby:
Isn’t attempting to roll in either direction
Has very stiff or floppy muscle tone
Doesn’t seem to respond to toys or play
Isn’t showing interest in moving their body
Early intervention makes a big difference, so don't hesitate to seek guidance.
Conclusion
Your baby’s sixth month is a time of joyful discovery, and kicking play is an ideal way to support one of their biggest milestones: rolling. Whether they’re just beginning to experiment with side-lying or already halfway across the playmat, your encouragement, environment, and play ideas are the magic behind their progress.
Through simple yet powerful activities like crinkle play, mirror time, and guided leg movements, you’re not just helping your baby roll—you’re setting the foundation for all the exciting movement ahead, including crawling, standing, and walking.
Keep the experience light, fun, and filled with smiles. Celebrate every wiggle and kick as a step forward in their growth journey.
👉 Dive deeper into expert ideas and product recommendations at Kicking Play Ideas to Help Your Baby Roll – MonkiBox Blog
Frequently Asked Questions (FAQs)
1. Is it normal for my baby to not be rolling at 6 months?
Yes, rolling typically occurs between 4 and 6 months, but some babies take longer, especially if they were born early. If your baby isn’t rolling by 7 months, consider speaking with your pediatrician.
2. How can I encourage my baby to roll from tummy to back?
Tummy-to-back rolling usually comes first. Try placing a toy or mirror to one side during tummy time, and gently guide their hips to help them discover the motion. Consistent tummy time is key.
3. My baby hates tummy time. What can I do?
Start with short sessions, even just 1–2 minutes. Use a rolled towel under their chest, or lay them on your chest while you recline. Keep toys or mirrors within reach to make it fun.
4. What if my baby only rolls one way?
That’s common early on. You can encourage balance by positioning toys on the other side or helping them shift their weight toward the non-dominant direction during play.
5. How long should each kicking play session last?
Keep sessions short and engaging—about 5–10 minutes, several times a day. Stop if your baby gets fussy, overstimulated, or tired.
6. Are there toys designed specifically for kicking?
Yes! Many play gyms and activity mats include toys at foot level. MonkiBox’s curated kits often feature crinkle toys and hanging rattles ideal for this purpose.
7. Can I still do these activities if my baby has reflux?
Yes, but be mindful of their position. Wait 30–60 minutes after feeding before tummy or active play, and adjust positions as needed to keep them comfortable.
8. When will kicking turn into crawling?
Kicking strengthens the muscles needed for crawling, which often begins between 7–10 months. Every baby’s timeline is different, and rolling is a crucial step on the way.
For more weekly developmental insights and activity ideas, explore the MonkiBox Community Blog.
0 notes
Photo


Assignments - Artwork of the ‘Founding Fathers’ on display at Emirates Palace to mark the United Arab Emirates 50th National Day, UAE marks 50th National Day celebrations along the Corniche, Rana El Sakhawy, Founder and CEO of MonkiBox, an early childhood education learning platform that provides play tools, and activities grounded in science, and child-development research in Knowledge Village, Dubai, Abu Dhabi City Municipality, MOTN Funhouse known for Instagramable rooms in the Inspire Space zone at Mother of The National festival on Corniche, Abu Dhabi. (Khushnum Bhandari/ The National News)
1 note
·
View note
Text
Week 45: The Wonders of Containers (And How to Play)

When babies reach Week 45, the developmental world opens up in ways that are as fascinating for caregivers as they are for the little ones themselves. One of the most magical play tools at this stage? Containers.
At first glance, they might seem simple—just boxes or cups. But in the hands of a 10-to-11-month-old, containers become powerful learning devices, offering a treasure trove of developmental benefits. In this deep dive into Week 45: The Wonders of Containers (And How to Play), we explore what makes this period so special, how containers support crucial milestones, and how to make the most of this play stage.
Read the full article on the official MonkiBox blog here: The Wonders of Containers and How to Play
Understanding Week 45 in Baby Development
At around 45 weeks (roughly 10.5 months), your baby is transitioning from babyhood into toddler territory. Milestones become increasingly interactive and exploratory. Cognitively, babies start to understand basic problem-solving, cause and effect, and spatial awareness.
One major cognitive leap at this point? Object permanence. Your baby now knows that things continue to exist even when they can't see them—which is why hiding objects in containers is suddenly thrilling.
Add in stronger fine motor skills, better hand-eye coordination, and an insatiable curiosity, and you've got the perfect storm for container play.
Why Containers Are a Developmental Powerhouse
While seemingly ordinary, containers offer endless opportunities for learning and development. Here's why containers are a favorite in developmental play:
1. They Promote Cognitive Development
Putting objects into a container and then taking them out supports your baby's understanding of:
Object permanence
Cause and effect
Early classification and sorting
Spatial concepts (in/out, full/empty)
Babies also begin to grasp that certain items fit better in certain containers. This kind of experimentation helps lay the groundwork for early problem-solving and logical thinking.
2. They Enhance Fine Motor Skills
At Week 45, babies are rapidly developing their pincer grasp—the ability to pick up small items using the thumb and forefinger. Using containers to place or remove objects provides the perfect workout for these tiny muscles.
It also encourages:
Hand strength
Wrist rotation
Bimanual coordination (using both hands together)
3. They Build Gross Motor Skills and Balance
As your baby reaches for containers, shifts positions, or crawls over to explore them, their body is hard at work. They’re not just playing—they’re building:
Core strength
Balance
Coordination
Controlled mobility
Container play often involves turning, twisting, leaning, and reaching, all of which are fundamental gross motor movements.
4. They Encourage Language Development
As you narrate the play (“Let’s put the red ball in the cup,” or “Where did the bear go?”), your baby is absorbing language structure, vocabulary, and tone. Repetitive words like “in,” “out,” “where,” and object names help cement early language concepts.
Try asking questions or using enthusiastic reactions (“Wow! You found it!”) to keep them engaged and tuned into your speech.
5. They Support Emotional Development and Confidence
Every successful attempt to place an item in a container or retrieve a hidden toy gives your baby a mini confidence boost. These small victories promote:
Patience
Persistence
Problem-solving confidence
Emotional regulation through trial and error
It’s a safe and positive way to introduce challenges that your baby can master with time and repetition.
How to Play with Containers at Week 45
Here’s where the real fun begins. Playing with containers can be as structured or as open-ended as you want it to be. Here are a few activity ideas and techniques to make the most of container play:
1. Fill-and-Spill Play
Give your baby a small container and some lightweight items like soft balls, wooden rings, or scarves. Show them how to fill the container, then dump it out.
Why it’s great: Babies love repetition, and this activity helps reinforce cause and effect, while improving both fine and gross motor skills.
2. Surprise Box
Place a favorite toy inside a container and close the lid (if it's safe). Encourage your baby to open it and find the object.
Why it’s great: Supports object permanence and gives a sense of reward and achievement.
3. Nested Containers
Offer cups or boxes that stack or nest inside each other. Show your baby how one fits into the other, and let them experiment.
Why it’s great: Encourages spatial awareness, trial and error, and critical thinking.
4. Hide and Seek with Objects
Hide small items inside containers and ask your baby to find them. Try using familiar toys to encourage their curiosity.
Why it’s great: It taps into your baby’s growing cognitive abilities and boosts confidence as they “solve” where the object is hidden.
5. Bath Time Containers
Plastic cups or bowls make excellent water toys. Practice scooping, pouring, and floating/sinking games.
Why it’s great: Engages sensory exploration while developing hand strength and wrist rotation.
6. Sensory Container
Fill a plastic container with different textures like rice, pom-poms, or fabric swatches (under supervision). Let your baby explore safely.
Why it’s great: Provides tactile stimulation and introduces new sensory experiences.
Safety Tips for Container Play
While container play is developmentally enriching, safety is paramount. Keep these tips in mind:
Supervise always: Babies still explore by putting things in their mouths.
Choose safe sizes: Avoid small items that could be choking hazards.
Check materials: Use non-toxic, BPA-free plastics or natural materials like wood or silicone.
Keep it simple: Sometimes, the fewer the toys, the better. Too much stimulation can overwhelm.
Watch for frustration: If your baby gets upset trying to open something too difficult, offer a gentler challenge.
The MonkiBox Approach to Container Play
The MonkiBox system is designed around age-appropriate play that promotes cognitive and physical growth. In their Week 45 play kit, MonkiBox includes container-based activities tailored to a baby’s emerging capabilities.
Some of the standout elements include:
Thoughtfully designed nesting cups
Safe materials for mouthing and manipulation
Guides and cards for caregivers to understand the why behind each play element
By supporting caregivers with science-backed play tools and education, MonkiBox ensures that container play isn’t just fun—it’s foundational.
Real Parent Insights
Parents who’ve used the Week 45 MonkiBox rave about the simplicity and power of container play:
“I never realized how much my baby could learn from just putting balls into cups. He’s obsessed—and I’ve seen huge improvements in his fine motor control!” – Maria, Dubai
“The guide helped me understand that what seemed like random play was actually really complex learning. I love how MonkiBox breaks that down for us.” – Fariha, Riyadh
These real-world experiences highlight how container play becomes a gateway for deeper, more meaningful engagement with your little one.
Conclusion: The Simple Magic of Containers
In a world filled with high-tech toys and overstimulation, container play reminds us that sometimes the simplest tools provide the richest learning experiences. At Week 45, your baby is primed for exploration, and containers offer a safe, satisfying, and developmentally powerful outlet for their curiosity.
Whether it’s a plastic cup, a nesting bowl, or a specially designed developmental toy, what matters most is the opportunity to interact, discover, and grow—together.
Want to dive deeper into Week 45 and learn how to play with containers step-by-step? Read the full article on the MonkiBox Blog: The Wonders of Containers and How to Play
FAQs: Week 45 & Container Play
Q1. Is it too early to introduce container play before Week 45? Not necessarily. Some babies show interest earlier, around 8–9 months. However, Week 45 is a peak time for this type of exploration because cognitive and motor skills align perfectly for deeper engagement.
Q2. Can I use household items as containers? Absolutely! Clean Tupperware, small boxes, plastic bowls, or muffin tins are great. Just ensure there are no sharp edges or small parts that could pose a choking risk.
Q3. My baby just dumps everything out—is that OK? Yes! “Dumping” is a normal and valuable part of learning. It helps babies understand cause and effect and gives them a sense of control. Over time, they’ll also learn to fill.
Q4. What if my baby gets frustrated with container toys? Try adjusting the difficulty. Start with open containers and large items, then gradually introduce lids or smaller openings. Always offer encouragement and simplify if needed.
Q5. How long should I let my baby play with containers each day? There’s no strict limit. Let your baby lead—most will naturally engage for short bursts of 5–15 minutes. You can revisit the activity multiple times throughout the day.
Q6. What comes after container play? As babies approach 12 months, they often begin stacking, sorting by color or size, and attempting puzzles. Container play builds the foundation for all these next-level skills.
#early childhood development#montessori baby play#container play ideas#baby milestones week 45#monkibox review
0 notes
Text
Week 90: The Importance of Matching Skills

By the time your little one reaches Week 90, a significant transformation has already begun. The brain is blooming with connections, motor skills are refining rapidly, and the desire to engage with the environment is stronger than ever. One of the most pivotal and often underestimated milestones around this time is the development of matching skills. While it might seem like just another cute game toddlers enjoy, matching plays a central role in early cognitive development, problem-solving, and critical thinking.
In this in-depth review, we will explore why matching skills are important, how they evolve around Week 90, and how thoughtfully designed toys and activities—like those from MonkiBox—support this growth. We’ll break down the core benefits, signs of matching development, and what parents and caregivers can do to enhance the learning experience at this exciting age.
What Are Matching Skills?
Matching skills refer to the ability to identify similarities between objects, pictures, shapes, colors, or even abstract concepts. This cognitive ability starts in infancy and builds through toddlerhood, evolving from simple visual discrimination (e.g., “these two blocks are the same color”) to more complex categorization (e.g., “this toy goes with that because they’re both animals”).
Around Week 90 (approximately 21 months old), toddlers typically enter a phase where they not only recognize similarities but also start pairing objects intentionally. This isn’t just “play”—it’s the foundation for skills used later in:
Mathematics (pattern recognition, sorting, classification)
Literacy (letter recognition, phonics association)
Logical reasoning (making connections between ideas)
Executive functioning (decision-making, task sequencing)
Why Matching Skills Matter at Week 90
According to MonkiBox’s article on the Importance of Matching Skills, Week 90 marks a critical time in the brain’s synaptic development, when toddlers are refining how they interact with the world. Matching is more than just a visual exercise—it’s a neural workout.
Here’s why it’s especially important around this age:
1. Strengthens Cognitive Pathways
Every time a child identifies a match—whether it’s two identical puzzle pieces or two blocks of the same shape—they’re strengthening neural pathways responsible for visual processing, memory, and logical reasoning.
2. Builds Foundation for Pre-Academic Skills
Matching lays the groundwork for concepts like same/different, grouping, and classification, which are essential in math and science. These early classification experiences lead to better performance in school-age learning environments.
3. Boosts Focus and Attention Span
Engaging in matching tasks requires sustained attention, a key executive function. Toddlers learn to analyze multiple features and retain information long enough to make the right pairing.
4. Develops Visual Discrimination
Visual discrimination is the ability to notice subtle differences and similarities in objects. Matching exercises improve a toddler’s capacity to differentiate shapes, sizes, and colors, sharpening observational skills.
5. Encourages Language Development
As toddlers match objects, caregivers can label them: “These are both circles,” or “This is a blue block like this one.” Repetitive labeling during matching games boosts vocabulary acquisition and language comprehension.
How Matching Skills Evolve
The development of matching follows a general pattern: AgeMatching Ability12–18 monthsMatches identical objects or images (e.g., two balls)18–24 monthsMatches simple shapes, colors, or categories24–30 monthsBegins matching items based on function (e.g., cup and spoon) or abstract features30+ monthsMatches based on relational concepts (e.g., big/small, light/heavy)
By Week 90, most toddlers are right at the threshold between object-to-object matching and conceptual matching.
Tools to Support Matching Skills
To effectively nurture this milestone, parents need access to age-appropriate and expert-designed tools. One of the standout offerings comes from MonkiBox’s developmental playboxes, which deliver science-backed activities curated by early childhood experts.
The MonkiBox Matching-Focused Activities
In Week 90, MonkiBox includes toys and games designed to stimulate matching abilities. For instance:
Shape sorters that require visual matching and fine motor precision.
Color cards or blocks that promote color matching and grouping.
Image matching puzzles to encourage logical associations.
Each activity is designed to align with developmental windows, meaning it arrives exactly when your toddler is ready to engage with the challenge—not too early, not too late.
For an inside look at what’s included and how these activities work, check out MonkiBox's full blog post on the importance of matching skills.
How to Encourage Matching at Home
You don’t need a ton of materials to encourage matching—although curated boxes like MonkiBox certainly make it easier. Here are some simple and effective ways to nurture this skill at home:
1. Use Everyday Objects
Match socks from the laundry, group plastic cups by color, or pair shoes together. Real-life tasks provide built-in matching opportunities.
2. Read Matching Books
Books that ask “Which one is the same?” or have flaps revealing matching images help solidify connections through storytelling.
3. Play Sorting Games
Give your child a tray with various objects and ask them to group by color, size, or shape. Even snack time can be matching time—“Can you match all the round crackers?”
4. Talk Through the Matching Process
Verbal reinforcement is powerful. Say things like “This is a red block, and here’s another red one—let’s put them together!” This supports both cognition and language development.
5. Offer Praise and Patience
Celebrate correct matches and encourage persistence when your child struggles. This builds confidence, and more importantly, a love of learning.
Real Parent Reviews: What Families Say
Many parents report noticing huge strides in problem-solving and independent play when focusing on matching activities around Week 90. Here’s what some had to say (based on user feedback on MonkiBox):
“My daughter started recognizing patterns in her books right after using the shape matching set from MonkiBox. It was amazing to watch that connection form in real-time.”
“The activities didn’t just entertain—they taught. Matching became her favorite game, and now she groups her toys by color on her own.”
These anecdotes highlight the transformative power of guided play, especially when it targets developmental skills like matching.
Common Pitfalls and How to Avoid Them
While introducing matching seems straightforward, there are a few common mistakes:
Offering Activities That Are Too Complex
Jumping to abstract matching too early can frustrate toddlers. Always match the activity to the child’s current level.
Lack of Repetition
Matching is a skill built over time. Don’t expect instant mastery—repetition is key.
Not Explaining Matches Verbally
Missing the language piece means losing out on a powerful reinforcement tool. Always talk through the logic behind the match.
Conclusion: Matching Skills Are a Gateway to Lifelong Learning
By Week 90, your toddler is ready for more than just stacking blocks—they’re ready to think, compare, and connect. Matching skills represent the brain’s first big step into organized thinking, logical sequencing, and abstract understanding. Supporting this skill doesn’t require special talent or tools—just time, attention, and the right resources.
For parents looking for structured, developmentally-timed support, MonkiBox provides exactly that. Their playboxes are designed to meet your child at every milestone, turning daily play into powerful brain development.
Start focusing on matching today—and watch your child’s cognitive world unfold.
FAQs: Matching Skills at Week 90
1. When should I start teaching matching skills?
Most children begin recognizing basic matches around 12 to 15 months, but structured matching activities become especially impactful around 18–24 months, with Week 90 being a prime window for more complex matching games.
2. What are some signs that my child is developing matching skills?
Look for behaviors like:
Putting two identical toys together
Sorting objects by color or shape
Pointing out matching images in books
Completing beginner puzzles
3. How do matching skills help with future academics?
Matching builds the foundation for math, reading, and science, particularly through pattern recognition, visual discrimination, and logical connections.
4. Can I use screens or apps to help with matching?
While there are apps that promote matching, hands-on, physical activities offer better sensory integration and fine motor development. Use screens sparingly and always in conjunction with real-world play.
5. How often should I practice matching activities?
Aim for short, daily sessions (10–15 minutes). The key is consistency and variety—repeat basic games, then introduce slightly more complex ones over time.
6. What if my child shows no interest in matching?
Children develop at different rates. If your toddler resists matching games, try using more engaging materials like favorite toys, snacks, or music-themed items. Stay patient and make the experience playful.
Ready to Match? Start with Confidence
Matching is a small step with big developmental implications. Around Week 90, your toddler is more than ready to rise to the challenge—with your help. Whether you DIY it or use expertly designed tools like MonkiBox’s developmental play kits, matching activities can spark a world of curiosity, learning, and fun.
0 notes
Text
Your Newborn Baby’s Reflexes Explained
From the moment your baby is born, they begin to exhibit a set of instinctual movements known as newborn reflexes. These primitive reflexes are nature’s built-in tools for survival and development in the early weeks and months of life. Whether it's the way they grasp your finger or startle at a loud sound, every twitch and movement in a newborn has meaning. Understanding these reflexes not only helps you bond with your baby more deeply but also gives you insights into their healthy development.
In this guide, we will explore the fascinating world of newborn reflexes—what they are, why they happen, when they typically disappear, and what to watch for. For a visual and in-depth guide, you can also refer to the original source at Monkibox’s blog.
What Are Newborn Reflexes?
Newborn reflexes are automatic movements that occur in response to specific stimuli. They are controlled by the brainstem and spinal cord and do not require conscious thought. These reflexes are essential indicators of your baby’s neurological development and motor function.
Most of these reflexes are temporary, fading as your baby's nervous system matures and voluntary movements begin to take over. Pediatricians routinely check these reflexes during well-baby visits to assess developmental progress.
Key Newborn Reflexes and What They Mean
Let’s break down the major reflexes you’re likely to observe in your newborn during the first few months:
1. Moro Reflex (Startle Reflex)
What it is: When a baby is startled by a loud sound or sudden movement, they throw their arms out, arch their back, then quickly pull their arms back in.
Why it matters: This reflex is believed to be a protective response, signaling to a caregiver that the baby needs comfort or help. It also demonstrates the baby’s neurological response to stimuli.
When it appears/disappears: Present at birth and typically fades by 4 to 6 months.
2. Rooting Reflex
What it is: When you stroke your baby’s cheek, they turn their head in that direction and open their mouth.
Why it matters: This reflex helps the baby locate the breast or bottle for feeding. It’s an essential part of the feeding process, especially in the early days when hunger cues aren’t clearly established.
When it appears/disappears: Present at birth, fades around 4 months when voluntary head movements begin.
3. Sucking Reflex
What it is: Touch the roof of your baby’s mouth and they will begin to suck.
Why it matters: Like rooting, the sucking reflex is vital for nourishment. It helps the baby latch onto the breast or bottle and take in milk efficiently.
When it appears/disappears: Begins around 32 weeks of pregnancy, fully developed by 36 weeks. Becomes voluntary by 4 months.
4. Palmar Grasp Reflex
What it is: When you place a finger in your baby’s palm, they will close their hand around it.
Why it matters: This reflex not only amazes parents (that firm little grip!) but also indicates proper neurological and motor development.
When it appears/disappears: Present at birth, fades around 5 to 6 months as voluntary grasping emerges.
5. Plantar Grasp Reflex
What it is: Similar to the palmar reflex, but occurs when the sole of the foot is touched. The baby’s toes will curl inward.
Why it matters: It’s another sign of early neurological functioning. This reflex is less discussed than the palmar reflex but equally important.
When it appears/disappears: Present at birth, disappears by 9 to 12 months.
6. Babinski Reflex
What it is: When the sole of the foot is stroked, the big toe moves upward while the other toes fan out.
Why it matters: A normal reflex in newborns that indicates proper nerve function. However, if it persists beyond 2 years, it could signal neurological issues.
When it appears/disappears: Present at birth, disappears by 12 to 24 months.
7. Tonic Neck Reflex (Fencing Reflex)
What it is: When your baby’s head is turned to one side, the arm on that side stretches out while the opposite arm bends at the elbow.
Why it matters: This helps your baby prepare for future voluntary reaching and hand-eye coordination.
When it appears/disappears: Appears around 1 month, disappears by 5 to 7 months.
8. Stepping Reflex (Walking Reflex)
What it is: When held upright with their feet touching a flat surface, your baby appears to take steps or "dance."
Why it matters: This reflex is a precursor to walking. It shows early motor planning and muscle response.
When it appears/disappears: Present at birth, fades around 2 months, re-emerges as real walking between 9 to 15 months.
9. Galant Reflex
What it is: When the skin along one side of the baby’s back is stroked, they will curve toward that side.
Why it matters: This reflex assists in the birthing process and also helps with early movement and crawling preparation.
When it appears/disappears: Present at birth, fades by 6 months.
Why Are These Reflexes Important?
These early movements aren’t random—they serve very specific biological and developmental purposes, including:
Feeding: Rooting and sucking reflexes help ensure your baby can eat.
Protection: Reflexes like the Moro or Galant help your baby respond to sudden changes in environment.
Bonding: The palmar grasp may seem simple, but it facilitates a tactile connection between caregiver and infant.
Motor Development: Many reflexes lay the groundwork for later skills like crawling, standing, and walking.
Pediatricians monitor these reflexes to evaluate the maturity and health of the nervous system. If a reflex is absent or unusually persistent, it might prompt further assessment to rule out developmental issues.
When to Be Concerned
While every baby develops at their own pace, certain reflex-related signs could be worth a discussion with your pediatrician:
Reflexes absent at birth
Reflexes persist beyond expected age
Reflexes appear asymmetrical (only one side of the body responds)
Your baby seems overly rigid or floppy
These signs don't always indicate serious problems, but they can help in early diagnosis of conditions such as cerebral palsy, nerve damage, or developmental delays.
Encouraging Healthy Reflex Development
While these reflexes are involuntary, you can still support your baby’s healthy development through everyday activities:
Skin-to-skin contact encourages calming and rooting reflexes.
Tummy time builds strength and helps transition from reflexes to voluntary movement.
Feeding on demand allows the rooting and sucking reflexes to function properly.
Responding to startles with gentle touch and soothing sounds can reinforce security.
You don’t need to “train” reflexes, but creating a nurturing environment helps your baby grow out of them at a healthy pace.
Conclusion
Your newborn’s reflexes are more than just adorable little quirks—they are windows into their brain and body development. From gripping your finger to "dancing" on your lap, these reflexes serve as essential survival tools and developmental milestones. While they will gradually fade as your baby matures, each one plays a crucial role in the early stages of life.
As a parent, understanding these reflexes helps you know what to expect and when. It also gives you the confidence to recognize if something might be off and needs medical attention. Just remember, every baby is unique, and variations in timing are normal.
To explore more expert-backed parenting insights, check out the full article at Monkibox's Newborn Reflexes Explained.
Frequently Asked Questions (FAQs)
Q1: What reflexes should my baby have at birth?
A: Most babies will exhibit the Moro, rooting, sucking, palmar grasp, and stepping reflexes at birth. These are checked routinely by pediatricians.
Q2: When do newborn reflexes go away?
A: It varies. Most reflexes fade between 4 to 6 months, although some like the Babinski reflex may last up to 2 years. Each has its own timeline.
Q3: Should I try to stimulate my baby’s reflexes at home?
A: While you don’t need to actively stimulate reflexes, normal interaction like cuddling, feeding, and tummy time naturally supports their function and development.
Q4: What does it mean if a reflex is missing or delayed?
A: An absent or delayed reflex may suggest a neurological or developmental issue, especially if combined with other concerns. Always consult your pediatrician for a professional evaluation.
Q5: Can these reflexes affect sleep?
A: Yes. The Moro reflex, for example, can cause your baby to wake up suddenly. Swaddling can help reduce these startle responses during sleep.
Q6: What if my baby has asymmetrical reflexes?
A: Reflexes should generally be equal on both sides. If your baby consistently only reacts on one side, consult your healthcare provider.
Understanding and appreciating your baby's reflexes is a beautiful part of early parenting. These tiny but powerful signs show that your baby is wired for survival, learning, and connection from the very start.
For more detailed insights, head over to the full blog post on Monkibox’s website.
0 notes
Text
Baby Developing a Flat Spot? 6 Activities to Prevent Flat Head Syndrome

The health and well-being of a baby’s head development is a top concern for parents worldwide. One common issue that many new parents encounter is the development of a flat spot on their baby’s head, medically known as Positional Plagiocephaly, or more commonly, Flat Head Syndrome. With modern caregiving practices, particularly the “Back to Sleep” campaign promoting placing babies on their backs to sleep, the incidence of flat spots has increased, making awareness and prevention more important than ever.
If you have noticed a flat spot forming on your baby’s head or simply want to ensure it never develops, this review will guide you through the crucial activities that help prevent Flat Head Syndrome and promote healthy cranial development.
For an in-depth resource on this topic, you can visit Monkibox's blog on Activities for Flat Spot Prevention.
Understanding Flat Head Syndrome
Flat Head Syndrome occurs when a baby’s soft skull develops a flat spot due to prolonged pressure on one area. Since babies spend a significant amount of time lying down, especially in their first few months when neck muscles are weak and they are less mobile, the back or one side of the head can become flattened.
Why Does It Happen?
Prolonged supine position: Babies placed on their backs for sleep can develop flat spots if they consistently rest their head in the same position.
Limited tummy time: Babies who spend less time on their stomachs during awake periods may not develop strong neck muscles or have opportunities to relieve pressure on the back of the head.
Prematurity: Premature infants often have softer skulls and spend more time lying in one position, increasing risk.
Tight neck muscles (Torticollis): If a baby has difficulty turning their head due to muscle tightness, they might favor one side, leading to flattening.
The Importance of Prevention
While mild flat spots can sometimes self-correct as babies grow and become more mobile, prevention is crucial because severe flattening can impact skull shape, facial symmetry, and potentially cause developmental issues if untreated.
Parents should balance safe sleep guidelines (to reduce SIDS risk) with proactive prevention of Flat Head Syndrome by incorporating activities that encourage varied head positions and strengthen neck muscles.
6 Activities to Prevent Flat Head Syndrome
Below are six effective, evidence-based activities that parents can implement daily to minimize the risk of flat spots developing or worsening.
1. Tummy Time
Tummy time is the cornerstone activity for preventing flat spots. It involves placing your baby on their stomach while they are awake and supervised.
Benefits: Strengthens neck, shoulder, and arm muscles; promotes motor skills; relieves pressure on the back of the head.
Tips for Success:
Start with short periods (2-3 minutes) several times a day, gradually increasing as your baby gets stronger.
Use a soft mat or blanket and engage your baby with toys or your face to encourage lifting their head.
Incorporate tummy time immediately after diaper changes or naps to build routine.
2. Alternate Head Positions During Sleep
Although babies should always sleep on their backs, you can vary the direction your baby’s head faces to avoid constant pressure on one area.
When placing your baby down to sleep, alternate which side the head is turned toward.
Use crib mobiles or sounds to encourage looking in different directions.
Avoid always placing your baby with the same side of the head against the mattress.
3. Hold Your Baby Upright More Often
Holding your baby upright reduces time spent lying flat on the back.
Carry your baby in an upright position during feeding, soothing, and playtime.
Use baby carriers or slings that support the head and allow for upright positioning.
This helps relieve pressure on the skull and also promotes bonding and sensory development.
4. Use a Variety of Play Surfaces
Different textures and inclines during play can encourage your baby to move their head and body differently.
Place your baby on inclined cushions or wedges during supervised play to alter pressure points.
Utilize baby gyms or activity mats that encourage reaching and turning.
Change play locations frequently to stimulate movement and head turning.
5. Address Neck Muscle Tightness Early
If your baby shows signs of favoring one side or has limited neck movement, consult a pediatrician or physical therapist.
Early treatment for torticollis (tight neck muscles) can prevent uneven head pressure.
Physical therapy exercises can help your baby gain full range of motion and reduce the risk of flattening.
6. Encourage Head Turning During Feeding
Feeding sessions can also be opportunities to change your baby’s head position.
Alternate sides when bottle feeding or breastfeeding.
Hold your baby so they have to turn their head to feed from different directions.
This helps balance muscle development and prevents consistent pressure on one side.
How to Monitor Your Baby’s Head Shape
Prevention is most effective when parents are vigilant. Monitor your baby’s head shape by:
Gently feeling for any flat areas or asymmetry.
Noticing if your baby consistently favors looking or sleeping on one side.
Consulting your pediatrician during regular check-ups about your baby’s head growth and shape.
If flattening is detected early, conservative measures like the activities above are often sufficient to correct or prevent worsening. In more severe cases, helmet therapy might be recommended by specialists.
Why Is Early Prevention Essential?
The bones in a baby’s skull are soft and flexible, allowing for growth and shaping.
Early months are critical; after 6 months, babies begin to sit, crawl, and spend less time lying down.
Intervention during this early period can significantly improve outcomes without invasive treatment.
Additional Tips for Parents
Use flat, firm sleep surfaces recommended for infants.
Limit time spent in car seats, swings, or bouncers where the head rests in the same position.
Engage with your baby often to encourage movement and head control development.
Conclusion
Flat Head Syndrome can be a distressing condition for new parents, but the good news is that it is largely preventable with simple, intentional activities. By incorporating tummy time, varying head positions during sleep, holding your baby upright, diversifying play surfaces, addressing neck tightness early, and alternating feeding sides, you can significantly reduce the risk of your baby developing a flat spot.
These strategies not only prevent flat spots but also support your baby’s overall physical development and comfort. Remember, consistency and early intervention are key. For comprehensive guidance, detailed tips, and real-parent experiences.
visit Monkibox’s community blog on activities for flat spot prevention.
Frequently Asked Questions (FAQs)
Q1: Is Flat Head Syndrome dangerous? Flat Head Syndrome is generally not dangerous but can affect the symmetry of the head and face. Severe cases might lead to developmental concerns or require medical intervention.
Q2: When should I be concerned about a flat spot? If you notice a persistent flat area after a few weeks or if your baby consistently favors one side, it is advisable to consult a pediatrician for evaluation.
Q3: How much tummy time should my baby get daily? Start with 2-3 minutes several times a day and gradually increase to about 20-30 minutes per day as your baby grows stronger.
Q4: Can helmet therapy fix flat head syndrome? Helmet therapy can be effective for moderate to severe flattening if started between 4-12 months of age, but many cases improve with positional adjustments and exercises.
Q5: Is it safe to change my baby’s sleeping position to prevent flat head? Always place your baby on their back to sleep to reduce SIDS risk. However, you can alternate the head position by gently turning the head to different sides while maintaining the supine position.
Q6: What should I do if my baby has torticollis? Consult your pediatrician immediately. Physical therapy is usually recommended to gently stretch and strengthen neck muscles, helping to prevent flat spots.
By actively applying these prevention strategies and regularly monitoring your baby’s head development, you can ensure a healthier, more comfortable start for your little one. For detailed insights and additional resources, remember to check out Monkibox's article on activities for flat spot prevention.
0 notes
Text
Week 27: Our Favorite Sensory Bottles

As your baby hits Week 27, their world starts to expand rapidly—every sound, color, texture, and movement sparks curiosity. This phase of development is especially ripe for sensory stimulation, and one of the most effective, fun, and easy-to-make tools is the sensory bottle. These vibrant, safe, and interactive toys are more than just visually appealing; they’re instrumental in helping your baby explore their environment, regulate emotions, and develop early cognitive and motor skills.
In this comprehensive guide, we’ll explore:
What sensory bottles are
Why they’re perfect for your 27-week-old
Our favorite DIY sensory bottle ideas
How each one supports your baby’s development
Safety tips and how to get started
FAQs and a helpful conclusion to tie it all together
Let’s dive into the colorful, calming world of sensory bottles.
What Are Sensory Bottles?
Sensory bottles, also known as discovery bottles, are clear containers filled with various items—beads, glitter, water, oil, buttons, or small toys. The contents are carefully selected to stimulate a baby’s senses: sight, sound, and sometimes touch (when shaken or rolled).
Designed to be visually engaging and soothing, these bottles offer babies a screen-free, hands-on way to explore their surroundings and begin to understand cause-and-effect relationships.
Most importantly, sensory bottles provide an ideal sensory experience without mess. That’s a big win for both babies and parents!
Why Sensory Bottles Are Perfect for Week 27
At 27 weeks (approximately 6–7 months), babies begin showing more purposeful movement and stronger curiosity. They’re working on developing:
Fine motor skills like grasping and shaking
Visual tracking (watching objects as they move)
Sensory regulation, learning to calm themselves through repeated stimuli
Cognitive connections like cause and effect (e.g., "If I shake this, it makes noise!")
Sensory bottles support all of these areas and can even help with emotional regulation—offering calming visuals when your baby feels overstimulated or cranky.
Our Favorite Sensory Bottles (and How to Make Them)
Here are some of our go-to sensory bottle recipes, tested and loved by the MonkiBox community. They’re safe, budget-friendly, and easily customizable.
1. Glitter Swirl Bottle (Visual Soothing Bottle)
You’ll need:
Clear plastic bottle with tight-sealing lid (like a VOSS bottle)
Water
Clear glue (or hair gel for a slower swirl)
Fine glitter
A few drops of food coloring (optional)
How to make it:
Fill the bottle halfway with warm water.
Add about 1/4 cup of clear glue.
Stir in glitter and food coloring.
Fill the rest of the bottle with water, leaving about 1 inch of space.
Seal tightly and shake!
Benefits:
Visual tracking
Emotional regulation
Calm-down tool
2. Floating Beads Bottle (Color and Movement Tracking)
You’ll need:
Clear plastic bottle
Water and baby oil or mineral oil
Colorful beads, sequins, or buttons
How to make it:
Fill half the bottle with water and half with oil.
Drop in colorful beads or small lightweight items.
Secure lid tightly.
Benefits:
Encourages visual scanning
Teaches about liquid density and buoyancy (as baby gets older)
Promotes grasp and shake motion
3. Sound Sensory Bottle (Auditory Discovery)
You’ll need:
Dry pasta, rice, beans, or popcorn kernels
Clear plastic bottle
How to make it:
Fill about 1/4 to 1/3 of the bottle with your chosen sound materials.
Secure the lid tightly.
Let your baby shake and listen!
Benefits:
Supports auditory development
Introduces rhythm and sound variation
Great for early music exploration
4. Nature Bottle (Outdoor Exploration)
You’ll need:
Small twigs, leaves, pebbles, sand, flower petals
Clear bottle
Optional: small amount of water
How to make it:
Go on a mini nature walk with your little one.
Collect safe, clean, dry items.
Add them to the bottle and seal.
Benefits:
Introduces natural textures and colors
Encourages connection with nature
Stimulates curiosity and storytelling
5. Glow-in-the-Dark Bottle (Night-Time or Dim Play)
You’ll need:
Glow-in-the-dark paint or mini glow sticks
Clear bottle
Water or baby oil
How to make it:
Add glow-in-the-dark materials into the bottle.
Fill with water or oil.
Charge the bottle in bright light before dimming the room.
Benefits:
Visual stimulation in low-light settings
Fascination with light and shadows
Ideal for quiet play before bed
Developmental Benefits of Sensory Bottles
Sensory bottles provide more than just entertainment. They can help in areas such as:
1. Fine Motor Skills
Grasping, shaking, and rotating the bottles strengthen hand-eye coordination and small muscle control.
2. Cognitive Development
Babies start making connections, like understanding that shaking creates noise or movement. This is an early sign of problem-solving!
3. Language Development
Describing the bottle’s colors, shapes, and movements introduces your baby to new vocabulary. Try saying words like “blue,” “sparkle,” “swirl,” or “soft.”
4. Sensory Regulation
Babies may become overstimulated at times. Watching glitter settle or listening to soft swishing sounds can be incredibly calming.
5. Independent Play
Sensory bottles promote focused attention, giving parents a moment to relax while their little ones explore safely.
How to Introduce Sensory Bottles to Your Baby
Here’s how to make the most out of sensory bottle play at 27 weeks:
Start with supervised sessions: Sit with your baby and encourage reaching, rolling, and shaking.
Observe what captures their attention: Some babies are more into colors, others like sound. Customize based on their reactions.
Use in tummy time or seated play: Lay the bottle in front of your baby or hold it above their line of sight to encourage tracking.
Talk about what’s inside: Narrate what’s happening in the bottle to strengthen language skills.
Keep rotating bottles: Change contents weekly to keep engagement high and introduce new stimuli.
Safety Tips
Always seal bottles tightly: Use strong glue or tape to prevent leaks or choking hazards.
Choose age-appropriate items: Avoid anything small or sharp.
Supervise your baby during play: Especially important if your child is teething or tends to mouth objects.
Use BPA-free plastic bottles: For safety and durability.
Why We Love Sensory Bottles at MonkiBox
At MonkiBox, we’re all about intentional play that nurtures development and strengthens the parent-child bond. Sensory bottles align beautifully with our mission. They’re DIY-friendly, completely customizable, and capable of growing with your child.
Want to learn more and get inspired? Check out our full guide to DIY Sensory Bottles here
Conclusion
At Week 27, your baby is developing faster than ever. The world is full of wonder, and simple tools like sensory bottles can bring that wonder within reach. Whether it’s a glittery swirl calming them during a fussy moment or the sound of beads encouraging their first shake, these bottles do more than entertain—they teach, soothe, and inspire.
Sensory bottles are a wonderful addition to your baby’s learning environment, and they’re as fun to make as they are to use. So gather your supplies, involve your little one in the process, and watch as they discover a world of color, sound, and motion—one shake at a time.
FAQs
1. Are sensory bottles safe for babies under 1 year? Yes, as long as you use non-toxic materials and secure the lids tightly, they are generally safe. Always supervise play, especially if your baby mouths toys.
2. What kind of bottle should I use? Use clear, BPA-free plastic bottles like VOSS or baby drink bottles. Avoid glass, which can break.
3. How long do sensory bottles last? Well-made sensory bottles can last months. If you notice cloudiness, leaks, or mold, discard and make a new one.
4. Can I use sensory bottles for older kids? Absolutely! As kids grow, you can create more complex bottles for science exploration, mindfulness, or art.
5. What if my baby loses interest? Rotate the sensory bottles and introduce new themes (like holidays or seasons) to re-spark curiosity.
Ready to make your own sensory bottles? Explore MonkiBox's full article and DIY guide here
0 notes
Text
Week 72: Why Do Toddlers Carry Things Around?

If you're the parent or caregiver of a toddler, chances are you’ve witnessed your little one moving from room to room with arms full of toys, books, or even random household items. From stuffed animals clutched tightly against their chest to toy trucks stashed in diaper bags, toddlers at this stage are busy little carriers. This behavior, while amusing and at times puzzling, is actually an important developmental milestone.
According to a MonkiBox article titled “Week 72: Why Do Toddlers Carry Things Around?”, this phase is much more than toddlers simply playing “delivery person.” It reflects a profound cognitive and emotional evolution in your child’s growing world. But what does it really mean when your toddler begins hauling their favorite objects across the house?
Let’s explore the psychology, developmental milestones, and parenting strategies that help make sense of this behavior—along with tips to support your toddler’s growth through this unique and charming stage.
The Psychology Behind Carrying Objects
At around 72 weeks (or roughly 17 months), toddlers are rapidly developing in terms of mobility, memory, independence, and emotional expression. The simple act of picking up an object and carrying it from one place to another taps into several core areas of development.
1. A Sign of Developing Independence
When toddlers carry items around, it often signals that they are beginning to exercise autonomy. This stage marks the early emergence of the “I can do it myself” mindset. Carrying an object from one room to another may seem like a trivial task to adults, but for a toddler, it’s a form of self-expression and decision-making. It shows they are testing their ability to control their environment, something crucial for developing self-confidence.
2. Strengthening Memory and Problem-Solving Skills
Toddlers begin to demonstrate more complex working memory around 17 months. This means they can remember where they last saw a toy or predict where they want to take it. They may start gathering toys in one location as part of pretend play, or even try to “clean up” or organize. This action isn't random; it's a sign that your toddler is starting to make mental maps of spaces and relationships between objects.
3. Emotional Attachment and Comfort
Carrying items can also be deeply emotional. Many toddlers form attachments to specific objects—a favorite stuffed animal, a blanket, or even a spoon. Carrying these objects helps soothe anxiety and provides a sense of safety, particularly when navigating new or uncertain situations. Think of it as your child’s way of taking a piece of “home” with them.
4. Motor Skills in Action
Let’s not forget the physical aspect. Toddlers are developing both gross motor skills (like walking and balancing) and fine motor skills (grasping and manipulating objects). Carrying things around provides a fun and engaging way to practice these new abilities. It also promotes coordination and spatial awareness—especially when they attempt to carry multiple or oversized items.
What Experts Say
The MonkiBox article rightly emphasizes how this behavior is connected to schemas—repeated patterns of behavior that toddlers use to explore the world. One such schema is the transporting schema, where children feel an intense urge to move objects from one place to another.
Early childhood development theorists like Jean Piaget have long acknowledged the importance of such schemas in early cognitive development. When children engage in repetitive transporting, it allows them to test cause and effect, improve muscle memory, and gain a sense of control over their surroundings.
According to child psychologist Dr. Laura Markham, author of Peaceful Parent, Happy Kids, “Repetition is how young children learn. If your toddler is carrying items back and forth, they’re not just playing—they’re learning spatial orientation, building muscle strength, and reinforcing memory.���
Encouraging and Supporting This Behavior
Rather than discouraging your toddler from carrying things around (even if it gets a little messy), it’s actually helpful to embrace and guide this phase. Here are some practical tips:
1. Create Opportunities for Safe Transport
Offer your toddler objects that are safe to carry and encourage them to move things between spaces. Consider using small baskets, bags, or toy carts to make it more engaging.
Tip: Use a toddler-friendly shopping cart or a wagon indoors. It gives your child a job and purpose as they transport items around.
2. Use Routine Activities
Turn everyday activities like tidying up into games. Ask your toddler to help “deliver” clean socks to a drawer or move toys from the floor into a bin.
Tip: Praise their effort and give them specific tasks like, “Can you take the blocks to the toy box?” It strengthens their sense of responsibility.
3. Foster Emotional Security
If your child carries a particular item for comfort, don’t rush to remove it. It’s a tool for emotional regulation. Keep comfort objects within reach, especially during stressful transitions such as travel, naps, or social gatherings.
4. Support Pretend Play
Children often mimic adults during this stage. Carrying objects may be part of an emerging imaginative play sequence. Encourage this by playing along.
Example: “Oh! Are you delivering mail today? What’s in your bag?”
This helps toddlers build language and social skills while reinforcing their sense of purpose.
When Should You Be Concerned?
In most cases, carrying objects is perfectly typical and even beneficial. However, it’s helpful to be mindful of a few signs that might indicate a need for additional observation:
Repetitive behavior with distress: If your toddler gets anxious or angry when prevented from carrying specific items or does it excessively without engaging in other activities.
Lack of interest in other play: If carrying things is the only activity your child engages in, and they aren’t interested in exploring, stacking, pretend play, or communicating.
Delayed motor skills: If your toddler seems physically unable to carry age-appropriate objects or struggles with balance more than peers.
In such cases, discussing concerns with a pediatrician or child development specialist can provide clarity and guidance.
Real Parent Insights
Parents often share anecdotes that underscore just how universal this stage is:
“My daughter walks around with a bag full of random toys—she calls it her ‘important stuff.’ It’s her daily ritual.” — Fatima, mom of a 17-month-old
“Our son insists on bringing his toy truck to every room. Even to bed. We’ve learned to just roll with it—he’s happier when he has it.” — David, dad of twins
These stories reflect how this seemingly quirky behavior is really a window into a toddler’s rich inner world.
Conclusion
By week 72, toddlers are in a fascinating stage of development. The instinct to carry objects isn’t just random behavior—it’s a sign of growing independence, developing memory, fine motor strength, and emotional expression. When your toddler picks up a toy and moves it across the house for the tenth time, they’re not just playing. They’re learning about the world and their place within it.
As the MonkiBox article emphasizes, this transporting phase is part of a much larger journey in cognitive and emotional growth. Encouraging it with the right tools and attitude can help your toddler develop essential life skills in the most natural way.
Frequently Asked Questions (FAQs)
1. Is it normal for toddlers to carry objects all the time?
Yes, it is completely normal. This behavior typically emerges around 15 to 18 months and reflects healthy cognitive and motor development. It’s part of a larger schema-based behavior called the “transporting schema.”
2. Why does my toddler insist on taking objects to bed?
Objects often serve as sources of emotional comfort. If your child insists on taking a toy or blanket to bed, it likely provides a sense of security and routine, which is very important at this developmental stage.
3. Should I stop my toddler from carrying household items around?
As long as the items are safe and not breakable, there’s no need to stop them. Instead, offer safe alternatives and encourage structured transporting through pretend play or tidy-up games.
4. My toddler throws tantrums when I take an object away. What should I do?
Try to understand the emotional significance of the object. Offer a trade or give them a few minutes to transition. Sudden removal can be distressing, especially if they’re using it for comfort or control.
5. How can I support this phase without cluttering the house?
Use baskets or bins to encourage cleanup routines. You can rotate toys weekly to keep things fresh without overwhelming your space. Toy wagons or carts can be designated carrying tools to keep the mess contained.
6. When does this behavior usually phase out?
Many children begin to move beyond the transporting schema between 2 and 3 years old as their play becomes more imaginative and social. However, individual timelines vary, and some children revisit this behavior during times of change or stress.
0 notes
Text
Week 41: Benefits of Setting Up an Obstacle Course and How to Do It

From their first attempts at crawling to standing and walking, babies undergo a rapid evolution in movement by the time they’re around 41 weeks old. At this exciting developmental stage, caregivers often look for new, fun, and effective ways to encourage gross motor skills, coordination, and spatial awareness. One powerful and engaging solution? The baby obstacle course.
Setting up a safe and developmentally appropriate obstacle course at home can offer a multitude of benefits for babies and toddlers — and it doesn’t require a professional gym or expensive equipment to get started.
In this article, we’ll dive into the many benefits of creating an obstacle course for your baby, how to set one up safely and effectively, and some expert-approved tips to make it both fun and purposeful. Plus, we’ll explore some commonly asked questions from parents navigating this important milestone.
To read the original article from MonkiBox on this topic, visit: Benefits and How-To of Baby Obstacle Courses
Why Week 41 Is the Perfect Time to Introduce Obstacle Courses
At around 41 weeks, many babies are crawling confidently, pulling themselves up to stand, cruising along furniture, and experimenting with transitions — from sitting to standing and even taking those tentative first steps. Their curiosity is booming, their muscles are strengthening, and their coordination is maturing.
This is an ideal window to introduce more dynamic physical challenges through purposeful play, such as an obstacle course. The idea isn’t to train for a toddler triathlon — it’s about creating a safe space where your baby can explore movement, build confidence, and develop critical motor pathways.
Benefits of Setting Up a Baby Obstacle Course
Obstacle courses may look like simple setups of pillows and cushions, but the physical, cognitive, and emotional benefits they offer are far-reaching. Let’s break them down:
1. Enhances Gross Motor Skills
Obstacle courses challenge babies to crawl, climb, roll, balance, and stretch. These activities promote gross motor development — the foundation for walking, running, jumping, and climbing. Navigating the various elements of a course strengthens muscles, improves flexibility, and builds endurance.
2. Improves Coordination and Balance
When babies have to figure out how to move over a pillow or crawl through a tunnel, they engage their vestibular (balance) and proprioceptive (body awareness) systems. These two systems work together to improve coordination, which is crucial not only for movement but also for tasks like dressing, sitting at a desk, and even handwriting later on.
3. Encourages Problem-Solving and Cognitive Growth
An obstacle course isn’t just physical — it’s a puzzle. Your baby will need to decide how to get from one point to another, navigate around barriers, and try different strategies. This fosters early problem-solving skills, executive functioning, and decision-making.
4. Boosts Confidence and Independence
Mastering a physical challenge, no matter how small, can make a baby feel empowered. Watching them figure it out, try again, and succeed helps build their confidence. Obstacle courses also offer an opportunity for safe, independent exploration.
5. Provides Sensory Stimulation
Textures, resistance, balance, and motion all provide essential sensory input. Moving across different surfaces — like soft mats, cushions, or a bumpy blanket — helps babies process and integrate sensory information, supporting their sensory development.
6. Strengthens the Parent-Child Bond
Creating and navigating an obstacle course together gives parents and caregivers the chance to encourage, cheer, and guide their baby — building trust and connection. It’s also a great opportunity for quality one-on-one play.
How to Set Up a Safe and Effective Obstacle Course
You don’t need expensive gear or a large playroom to set up a great baby obstacle course. What matters is creativity, safety, and matching the challenge to your baby’s current abilities.
Step-by-Step Guide
1. Choose a Safe Space
Pick a soft, hazard-free area such as a carpeted room or play mat zone. Ensure sharp corners, breakables, or hard surfaces are blocked or padded.
2. Start with Basic Elements
Use items already in your home:
Couch cushions for crawling over
Rolled-up blankets for climbing or stepping across
Boxes or tunnels to crawl through
Low furniture to cruise along
Step stools or soft stairs for climbing practice (supervised closely)
3. Create a Clear Path
Design a logical route — for example, crawl under a table, over a cushion, through a tunnel, and to a toy at the end. Keep it short and age-appropriate.
4. Incorporate Motivators
Place a favorite toy or a musical object at the end of the course to encourage movement. You can also use textured fabrics, balls, or mirrors along the path to pique curiosity.
5. Adjust Based on Baby’s Level
Start simple. As your baby becomes more confident, increase the challenge by adding height, distance, or interactive tasks (like putting a ball in a basket halfway through).
6. Supervise and Encourage
Always stay close and be ready to assist if your baby needs help. Use positive reinforcement — cheer, clap, and offer high-fives for every effort.
7. Rotate and Refresh
Keep your baby engaged by changing up the course every few days. Rotate materials, change the order, or add themed elements based on holidays or interests.
Sample Obstacle Course Ideas for 41-Week-Olds
Need inspiration? Try these beginner-friendly setups:
Tunnel Adventure: Crawl through a tunnel made of couch cushions and a blanket.
Mountain Climb: Climb over stacked pillows with a stuffed animal at the top.
Balance Beam: Crawl across a low pool noodle taped to the floor.
Toy Rescue: Reach through a curtain (or light fabric) to grab a hidden toy.
Pull-to-Stand Station: Finish the course with a pull-up on a low, sturdy surface like an ottoman.
Safety Tips to Keep in Mind
Never leave your baby unattended in the obstacle course.
Check all items for stability and cleanliness.
Avoid using anything too high, sharp, or unstable.
Use non-slip mats to prevent slipping.
Ensure clear visibility for your baby throughout the course.
Expert Tip from MonkiBox
As MonkiBox highlights in their guide, obstacle courses aren’t about perfection — they’re about exploration. Let your baby take their time, experiment, and even “fail” a few times. That’s where the learning magic happens. The course should grow with your child, becoming slightly more complex as their motor skills advance.
Read the full expert guide at MonkiBox’s Blog
Conclusion
At Week 41, your baby is eager to explore, climb, crawl, and conquer. A baby obstacle course offers an affordable, accessible, and deeply beneficial way to support that growth. With just a few soft items, a bit of space, and your loving supervision, you can turn your living room into a developmental playground.
The beauty of obstacle courses lies in their flexibility — they can be tailored to your child’s stage, interests, and pace. And the best part? Every wiggle, wobble, and victory is not just adorable — it’s building the strong, agile, and confident person your baby is becoming.
Frequently Asked Questions (FAQs)
1. At what age can I start using obstacle courses with my baby?
You can introduce very basic obstacle elements as early as 6–8 months, once your baby is confidently crawling. By Week 41 (around 9–10 months), most babies are ready for more complex crawling, cruising, and climbing challenges.
2. What materials are safe for a DIY obstacle course?
Soft household items like pillows, cushions, foam play mats, boxes, tunnels, rolled-up blankets, and low furniture are ideal. Avoid hard, sharp, or unstable items.
3. How often should I set up an obstacle course?
You can set one up a few times a week or even daily if your baby enjoys it. Changing the layout and elements keeps the course fresh and engaging.
4. Will obstacle courses help my baby walk faster?
While not a guarantee for earlier walking, obstacle courses strengthen the muscles and coordination needed for walking, potentially supporting more confident first steps.
5. What if my baby gets frustrated or disinterested?
That’s okay! Every baby has different moods and preferences. Try simplifying the course, adding favorite toys, or taking a break. Follow your baby’s lead and keep it positive.
6. Is it okay to guide my baby through the course?
Yes! At first, gentle guidance or modeling may help them understand the path. Over time, let them explore independently while staying close for safety.
7. Can I buy pre-made baby obstacle kits?
Yes, there are commercial options available, but DIY setups using soft and safe items at home are just as effective — and often more customizable.
0 notes
Text
Week 81: Helping Your Child Understand and Name Body Parts

Understanding and naming body parts is a critical part of your child’s early development. By week 81 — roughly 19 months into your toddler’s journey — they are becoming more curious, responsive, and eager to communicate. This is an excellent time to introduce them to the names and functions of different body parts in fun, engaging, and age-appropriate ways.
This developmental milestone not only supports vocabulary expansion but also enhances a toddler’s self-awareness and communication skills. In this guide, we’ll walk through the importance of body part identification, age-appropriate techniques to teach your child, the role of play-based learning, and practical tips to help make the process enjoyable and effective.
For more inspiration and a detailed overview, visit the original article here: Toddler Body Parts Learning - MonkiBox Blog
Why Teaching Body Parts Matters at 19 Months
At 81 weeks old, most toddlers are experiencing a burst of cognitive and verbal development. They may already understand simple instructions, point to objects, and even speak a handful of words. Introducing body parts at this stage supports:
1. Language Development
When children learn to associate words with physical parts of their bodies, it expands their vocabulary and comprehension. It lays the foundation for more complex sentence structures later on and aids in effective communication.
2. Cognitive Growth
Identifying and naming body parts helps children develop categorization skills and mental connections between visual input and language.
3. Self-Awareness
Recognizing their own body parts helps toddlers begin to understand their own physical presence, promoting body awareness and autonomy.
4. Safety and Boundaries
As your child becomes more aware of their body, it becomes easier to teach them about personal boundaries and privacy — essential lessons for personal safety as they grow.
Signs Your Toddler Is Ready
You might wonder, “Is my child ready to start learning about body parts?” Here are a few developmental cues to look out for:
They respond to simple instructions (e.g., “Give me the ball”).
They point to familiar objects when named.
They show curiosity about their own body (e.g., pointing to their nose, touching their toes).
They have started mimicking your actions and words.
If your toddler shows some or all of these signs, it’s a good indication they’re developmentally ready to begin this next step.
How to Teach Body Parts to Toddlers: Effective Strategies
1. Start Simple
Begin with major and visible body parts like:
Eyes
Ears
Nose
Mouth
Hands
Feet
Tummy
These are often the first parts toddlers learn because they’re referenced regularly during daily routines like washing, dressing, or brushing teeth.
2. Use Everyday Activities
Daily routines are packed with opportunities to reinforce body part learning. Examples include:
Bath time: “Let’s wash your tummy,” or “Can you splash with your feet?”
Getting dressed: “Let’s put your shirt on your arms.”
Mealtime: “Wipe your mouth,” or “Use your hands to pick up the food.”
Repetition in familiar contexts builds strong associations.
3. Interactive Play
Play is a child’s primary language. Use it wisely:
Songs and Rhymes: Classics like “Head, Shoulders, Knees, and Toes” or “If You’re Happy and You Know It” are both entertaining and educational.
Body Part Toys: Dolls, animals, or even plush figures can be used to demonstrate body parts.
Flashcards and Books: Use toddler-friendly picture books or flashcards that label and point out different parts of the body.
4. Mirror Play
Toddlers love seeing themselves. Use a mirror to make learning more personal and effective. Point to body parts and encourage them to mimic or name what they see.
For example: “Where’s your nose?” – point to it and then have them try. “Can you find your eyes?” – then wait for them to respond.
5. Use Positive Reinforcement
Celebrate every little success — a smile, clap, or gentle praise boosts their confidence and motivates them to keep learning.
6. Be Patient and Repetitive
Some children will catch on quickly, while others may need more time. Repetition is essential. Don’t rush the process — every child learns at their own pace.
Fun Body Part Learning Activities
Here are a few engaging activities you can incorporate into your daily routine to help your toddler master body part identification:
● Simon Says (Toddler Version)
Adapt the game to include commands like “Simon says touch your nose,” or “Simon says clap your hands.”
● Stickers or Band-Aids Game
Give your toddler stickers or (safe) Band-Aids and ask them to place one on different body parts you name.
● Sing-Along Dance
Combine movement and learning with dancing songs that name body parts.
● Drawing and Coloring
Use body outlines and ask your child to color in body parts as you name them. You can even trace your toddler’s body on large paper and label it together.
● Puppet Play
Use hand puppets or finger puppets to sing songs and point to body parts in a fun, animated way.
Encouraging Body Positivity and Respect
While teaching body parts, it’s also a great time to instill healthy messages about body positivity and boundaries.
1. Use Correct Terms
Use the anatomically correct names for all body parts, including private ones. This promotes a healthy understanding and removes stigma or shame. It also helps them communicate clearly in case of any issues.
2. Normalize All Bodies
Use books and toys that show diverse body types, colors, and abilities to help children appreciate and accept differences.
3. Teach About Privacy and Consent
Even at a young age, toddlers can begin to understand basic concepts of body autonomy. Phrases like “We keep our private parts private,” and “Always ask before touching someone else” are appropriate and essential.
Language Development Milestones and Body Part Vocabulary
By 19 months, your child may:
Know 10–50 words
Point to at least 3–5 body parts
Combine simple words like “my hand” or “mommy eyes”
Follow simple two-step instructions (“Touch your head and clap”)
Use this milestone as an opportunity to gently stretch their language comprehension. Introduce adjectives (e.g., “big hands,” “cold feet”) or simple verbs (“kick with your legs,” “touch your toes”).
Potential Challenges and How to Overcome Them
● Short Attention Spans
Keep sessions short and lively — toddlers have limited attention spans. A few minutes here and there is often more effective than long sessions.
● Frustration or Disinterest
If your toddler resists or seems uninterested, don’t force it. Try again later or introduce a new method (e.g., switch from a book to a song).
● Confusion Between Left and Right
Most toddlers won’t grasp “left” and “right” until age 3 or beyond. You can still model the language, but don’t expect mastery yet.
When to Seek Professional Advice
While developmental milestones vary, consult your pediatrician if:
Your child doesn't respond to body part prompts by 24 months
They don't point to familiar objects or follow simple instructions
There's a noticeable lack of speech or interaction
Early intervention can help address any speech or developmental delays.
Conclusion
By week 81, your toddler is eager to learn, explore, and connect. Helping them understand and name their body parts is more than a fun activity — it’s a powerful foundation for communication, self-awareness, and emotional growth.
From playful games and songs to daily routines and reading together, every interaction is an opportunity to support their learning. Stay consistent, patient, and celebrate their progress. And remember — every child develops at their own unique pace, so make the journey joyful.
To dive deeper into more ideas and insights on teaching body parts to toddlers, check out this resource from MonkiBox: Toddler Body Parts Learning - MonkiBox Blog
FAQs
1. What are the first body parts a toddler usually learns?
Typically, toddlers first learn to identify and name visible parts such as eyes, nose, mouth, hands, and feet because these are referenced frequently during daily routines.
2. At what age should a child know body parts?
Most children begin identifying basic body parts between 18–24 months. However, every child develops differently, so some may start earlier or later.
3. Is it okay to use baby words instead of correct body part names?
It’s always best to use anatomically correct names from the start. This supports clear communication and helps remove shame or confusion around private parts later on.
4. How can I make learning body parts fun for my child?
Use songs, books, mirror play, drawing activities, and interactive games like “Simon Says” to make learning enjoyable and engaging.
5. What if my child isn’t interested in learning body parts yet?
That’s completely normal. Keep introducing the concept gently and incorporate it into everyday play and routines. Give them time and space to engage at their own pace.
6. Why is teaching body parts important for safety?
Knowing body parts — especially private ones — helps children communicate clearly in case of discomfort, pain, or inappropriate behavior. It’s a vital part of body safety education.
0 notes
Text
Week 63: Fun and Safe Climbing Activities for Your Toddler

As your baby hits the 63-week milestone — just past their first birthday and well into their toddlerhood — you'll likely begin noticing a dramatic leap in their physical capabilities. At this age, toddlers are curious, energetic, and naturally inclined to climb everything in sight, whether it's the couch, stairs, or even you! It’s part of their developmental journey toward mastering gross motor skills, building confidence, and exploring the world around them.
While their climbing urges can sometimes give parents heart palpitations, they are crucial for motor development. So instead of discouraging this behavior, why not embrace it — safely and intentionally? That’s where fun and safe climbing activities come in.
In this review, we’ll explore toddler-safe climbing options, how to support their natural curiosity through intentional play, and what tools and setups you can implement to turn your home into a safe climbing paradise. Whether you're a first-time parent or a seasoned caregiver, these ideas will help you channel your toddler’s energy productively, all while keeping safety top-of-mind.
Related: Toddler-Safe Climbing Activities (MonkiBox Blog)
Why Do Toddlers Love to Climb?
Climbing is more than just a fun pastime for toddlers — it’s a developmental necessity. By 63 weeks, your toddler is in the thick of mastering standing, cruising, and possibly even running. Climbing activities offer:
Gross motor development: Strengthens large muscle groups in the arms, legs, and core.
Balance and coordination: Enhances stability and control.
Spatial awareness: Helps toddlers understand distances, heights, and positioning.
Confidence building: Conquering obstacles boosts self-esteem.
Risk assessment: Toddlers begin learning to make judgments about what’s safe and what’s not.
Of course, climbing does present risks — but these can be greatly reduced with the right equipment, supervision, and intentionality.
Best Fun and Safe Climbing Activities for Toddlers at 63 Weeks
Here’s a curated list of toddler-safe climbing activities that are both enriching and fun. These are tailored for 14–15-month-old toddlers and consider their developing motor skills and need for safe exploration.
1. Soft Climbing Blocks
What it is: Foam climbing structures with varied shapes (ramps, steps, cubes) covered in soft, easy-to-clean vinyl.
Why it’s great: Perfect for indoor playrooms or nurseries. These blocks are low to the ground, minimizing fall risks while encouraging crawling, climbing, and creative play.
Safety tip: Place them on a carpet or playmat to absorb any unexpected tumbles.
Developmental bonus: Supports gross motor skills, balance, and early problem-solving as toddlers decide how to navigate different shapes.
2. Pikler Triangle
What it is: A wooden, triangular climbing frame that promotes open-ended play and physical development.
Why it’s great: The Pikler Triangle is ideal for fostering independence and motor confidence. Toddlers can use it to pull up, climb over, and even turn it into a fort.
Safety tip: Ensure the floor beneath is padded and the frame is securely latched or folded properly.
Developmental bonus: Teaches cause-and-effect and strengthens grip strength, foot coordination, and risk calculation.
3. Couch Cushion Obstacle Course
What it is: DIY indoor climbing using couch cushions, pillows, and blankets.
Why it’s great: No fancy gear needed! Rearranging your sofa cushions into a fort, steps, or tunnels lets your toddler explore safely in a familiar environment.
Safety tip: Avoid cushions near sharp furniture corners or windows. Stay close by during play.
Developmental bonus: Boosts creativity and problem-solving as your toddler maneuvers through homemade terrain.
4. Soft Slide and Climber Combos
What it is: Toddler-sized plastic or foam climber sets with mini slides and stairs.
Why it’s great: Offers multiple functions — climbing up stairs, sliding down, crawling through tunnels — all in one unit.
Safety tip: Always supervise slide use and secure it on a non-slip surface.
Developmental bonus: Encourages spatial planning and directional movement.
5. Stair Climbing with Supervision
What it is: Allowing your toddler to climb stairs while closely supervising.
Why it’s great: Practicing on actual stairs helps toddlers build real-world motor skills.
Safety tip: Always stay behind them and use stair gates when not supervising.
Developmental bonus: Builds leg strength and coordination with each step.
Safety Guidelines for Toddler Climbing Play
Ensuring a safe play environment is key when incorporating climbing into your toddler’s routine. Here are essential guidelines every parent or caregiver should follow:
1. Supervise Actively
Never leave your toddler alone during climbing activities. Even safe environments require eyes-on supervision.
2. Create a Padded Play Area
Use thick play mats or rugs under climbing structures to cushion falls.
3. Secure Climbing Equipment
Ensure that any climbing toys or furniture are on flat surfaces and don’t wobble. If using store-bought climbers, double-check weight limits and assembly instructions.
4. Teach Controlled Climbing
Show your toddler how to climb up and, importantly, down. Many toddlers can get up but don’t know how to descend safely.
5. Dress for the Activity
Barefoot is best! Shoes can slip, while socks may be too slick on certain surfaces. Clean, bare feet give the best grip.
Supporting Development Through Climbing
Climbing is not just physical—it’s cognitive and emotional too. At 63 weeks, toddlers benefit from activities that engage all aspects of development. Here's how climbing enriches their growth:
- Cognitive Skills: Navigating a climbing route builds early problem-solving and spatial intelligence.
- Emotional Resilience: Falling and trying again boosts persistence and resilience.
- Social Play: Climbing with peers (safely) fosters turn-taking, patience, and shared joy.
How to Encourage Climbing Safely at Home
If you’re unsure how to introduce climbing activities into your home without overwhelming your space or your nerves, consider the following:
1. Start Small
Introduce one small climbing structure, such as a foam ramp or a Pikler triangle. Let your toddler get used to it before adding more.
2. Involve Them in Setup
Letting your toddler help "build" or explore the space before play can increase their interest and help them feel in control.
3. Rotate Challenges
Switch up the obstacle course every few days to keep it fresh and encourage problem-solving.
4. Limit Distractions
Ensure climbing playtime happens in a focused, clutter-free area to reduce risks.
Recommended Products for Toddler Climbing
If you’re looking to invest in climbing tools or toys, here are some tried-and-true recommendations:
Little Partners Climbing Cube
Wiwiurka Foldable Triangle and Ramp
ECR4Kids SoftZone Climb and Crawl Playset
MonkiBox Developmental Play Kits – Age-appropriate kits that promote safe exploration through curated tools and parent guidance.
Find out more at MonkiBox’s guide to toddler climbing
Final Thoughts: Embrace the Climb
At week 63, your toddler is ready to scale new heights—literally and developmentally. Rather than shushing their climbing urges, redirect them into safe, enriching activities that support full-body development and independent play. With the right tools, supervision, and mindset, climbing can become one of the most rewarding experiences in your child’s early years.
So go ahead — set up that soft play zone, stack those cushions, and cheer on your little mountaineer. The view from the top, even if it’s just the couch, is always worth the climb.
Frequently Asked Questions (FAQs)
1. Is it safe for a 14–15-month-old toddler to climb?
Yes — with the right supervision and environment. Toddlers at this age are naturally inclined to climb as part of their gross motor development. Providing soft and age-appropriate climbing options reduces the risk of injury.
2. What kind of climbing toys are best for indoor use?
Great indoor climbing toys include:
Foam climbing blocks
Pikler triangles
Soft climber-slide combos
Couch cushion obstacle courses
These options are designed to be safe for indoor use and encourage skill-building.
3. How do I prevent my toddler from climbing unsafe furniture?
Redirect their climbing impulses to safer alternatives. Give them a designated climbing zone with toddler-appropriate equipment. Teaching consistent boundaries (e.g., “we don’t climb the bookshelves”) also helps over time.
4. Are Pikler Triangles safe for toddlers?
Yes, when used correctly. They should be placed on a padded floor, used under supervision, and introduced gradually. Many toddlers thrive with Pikler-style climbing because of the structure’s simplicity and developmental design.
5. How often should I let my toddler engage in climbing play?
Daily climbing play — even for 15–30 minutes — helps build coordination, strength, and confidence. Like any physical activity, balance it with quieter sensory and language play throughout the day.
For more insights and climbing activity ideas tailored to your toddler's developmental stage, visit the full article: Read more on MonkiBox: Toddler-Safe Climbing Activities
0 notes
Text
Week 18: Fun & Easy Sensory Ideas for Tummy Time

Tummy time is a crucial activity during infancy, laying the foundation for physical development, sensory exploration, and motor milestones. By week 18, your baby is likely starting to hold their head up with greater control, push through their arms, and even experiment with rolling. It's a stage full of growth, curiosity, and energy — making it the perfect time to elevate tummy time with sensory-rich experiences that are both fun and developmentally beneficial.
In this guide, we explore easy and enjoyable sensory ideas for tummy time during week 18, designed to boost engagement, encourage movement, and support overall development. Whether you’re a new parent or an experienced caregiver, these creative activities will add value to your daily routine and bring joy to your baby’s exploration time.
For more expert-backed insights and developmental tools, check out the full article here: Sensory Tummy Time Ideas – Monkibox Blog
Why Sensory Play Matters During Tummy Time
Before diving into the activities, it's essential to understand why sensory integration during tummy time is so beneficial:
Supports Brain Development: Multisensory experiences activate different parts of the brain, laying the groundwork for learning and cognitive skills.
Strengthens Muscles: Sensory objects motivate babies to lift, reach, and turn — all of which build muscles in the neck, shoulders, arms, and back.
Enhances Motor Coordination: Reaching for and grasping textured objects improves fine motor skills and hand-eye coordination.
Encourages Body Awareness: Babies learn about their bodies and surroundings by interacting with sensory materials.
By combining tummy time with sensory play, you're giving your baby a full-body, full-brain workout!
Fun & Easy Sensory Ideas for Tummy Time (Week 18 Edition)
Here are 10 engaging sensory activities perfect for your 18-week-old during tummy time:
1. Mirror, Mirror on the Mat
Place an unbreakable baby-safe mirror in front of your baby during tummy time. Babies are naturally intrigued by their own reflection. Watching their own facial expressions and movements not only entertains them but also supports visual tracking and self-awareness.
Pro Tip: Try talking to your baby in the mirror. Your voice and reflection together provide multisensory stimulation.
2. Sensory Scarves or Ribbons
Introduce colorful, lightweight scarves or ribbons that your baby can reach for and feel. The fluttery movement catches their eye, and the soft texture provides tactile exploration.
Safety Note: Always supervise this activity to avoid tangling or choking hazards.
3. High-Contrast Flashcards
Week 18 is a great time to introduce high-contrast cards, especially if your baby is still developing visual tracking skills. Use black-and-white or bold-colored cards with simple shapes and faces to grab your baby's attention.
Activity Tip: Move the cards slowly from side to side to encourage your baby to turn their head and follow the motion.
4. Water Mat Fun
Inflatable water mats filled with floating shapes or glitter are a fantastic sensory tool. They engage sight and touch, encouraging your baby to press, pat, and watch the motion beneath their hands.
Developmental Benefit: Strengthens arm muscles and builds interest in cause-and-effect.
5. Textured Play Mats or Blankets
Lay your baby on a textured blanket or mat that offers a mix of sensory zones (e.g., crinkly, soft, bumpy). This allows babies to explore textures with their fingers, toes, and tummy.
DIY Tip: Make your own sensory mat using various fabrics like satin, corduroy, and fleece stitched into a quilt pattern.
6. Crinkle Books and Soft Toys
Soft cloth books with crinkly pages, squeaky sections, or different fabric textures encourage babies to bat, grab, and listen — all from their tummy position.
Bonus: Choose books with baby faces or simple animal images to add a layer of visual delight.
7. Sensory Balls and Rolling Toys
Soft rubber or fabric-covered sensory balls with nubs, bumps, or holes are excellent for tactile input. Gently roll a ball in front of your baby to entice them to reach forward or try crawling movements.
Motor Skill Support: Encourages reaching, coordination, and core strength.
8. Music & Rhythm Play
Soft, soothing tunes or gentle lullabies can transform tummy time into a calming, enjoyable experience. You can also use simple rhythm instruments like baby-safe maracas or rattles placed just within reach.
Try This: Clap along or shake a rattle slowly to encourage your baby to lift their head toward the sound.
9. Nature-Based Sensory Bottles
Create DIY sensory bottles using small clear bottles filled with safe items like dry rice, pasta, leaves, or colorful water beads. These make captivating sights and sounds that engage auditory and visual senses.
Why It Works: Watching the particles move inside the bottle can mesmerize babies and keep them focused longer on tummy time.
10. Parent Face Time
Don’t underestimate the power of your face! Lie down in front of your baby during tummy time and talk, sing, or make funny faces. Your baby’s favorite sensory input is you.
Bonding Tip: Add gentle strokes or tickles to make it a full sensory experience.
How to Make Tummy Time Successful at 18 Weeks
While activities are important, how you approach tummy time can make a big difference. Here are a few practical tips to keep things smooth and fun:
Keep Sessions Short & Frequent
Instead of long sessions, aim for multiple short bursts throughout the day — 3 to 5 minutes several times is better than one long 15-minute stretch.
Use Props for Support
At 18 weeks, your baby might enjoy a small tummy time wedge or rolled-up towel under their chest for support and added comfort.
Read Baby's Cues
If your baby starts to fuss or show signs of fatigue, take a break. Never force tummy time — keep it positive and responsive.
Stay Engaged
Always stay near your baby, offering encouragement and eye contact. Your presence makes them feel secure and more willing to explore.
Conclusion: Building Foundations Through Sensory Play
Week 18 is a beautiful time of exploration and growth, and combining tummy time with sensory activities amplifies both physical and cognitive development. From mirrors and crinkle toys to textured mats and parent bonding, each small moment adds up to something big — helping your baby build strength, coordination, and confidence.
By incorporating these simple, sensory-rich ideas into your routine, you make tummy time not only more tolerable but something your baby actually looks forward to. Keep things fun, flexible, and engaging — and watch your little one thrive, one tummy time session at a time.
Want more age-appropriate ideas and developmental tools? Visit the original article here: Monkibox – Sensory Tummy Time Ideas
FAQs About Tummy Time and Sensory Play (Week 18)
1. How much tummy time should my 18-week-old have each day?
Experts recommend at least 20-30 minutes per day, broken into short sessions. As your baby grows more comfortable, you can gradually increase the duration.
2. What should I do if my baby hates tummy time?
Start slow and use sensory distractions like mirrors or music. Try doing tummy time on your chest or lap for comfort. Patience and consistency help build tolerance.
3. Are sensory toys necessary for tummy time?
Not strictly necessary, but they help! Sensory toys enhance engagement and motivation, making tummy time more enjoyable and beneficial.
4. Can tummy time be done on a bed or couch?
It's best to use a firm, flat surface like a playmat on the floor. Softer surfaces like beds can be less stable and safe, especially as babies become more mobile.
5. What developmental milestones can tummy time help with?
Tummy time supports:
Neck and upper body strength
Head control
Rolling over
Crawling preparation
Visual tracking
Sensory exploration
6. When should I stop doing tummy time?
Tummy time remains helpful until your baby begins crawling. However, once your baby is mobile, they'll naturally spend more time on their tummy through play.
Tummy time doesn't have to be a struggle — with the right sensory tools and a bit of creativity, it can become a joyful and enriching experience. At week 18, your baby is ready to engage with the world in deeper ways, and you're right there helping them grow every step of the way.
0 notes
Text
Play Ideas to Strengthen Your Baby’s Leg Muscles: Guide for Parents in 2025
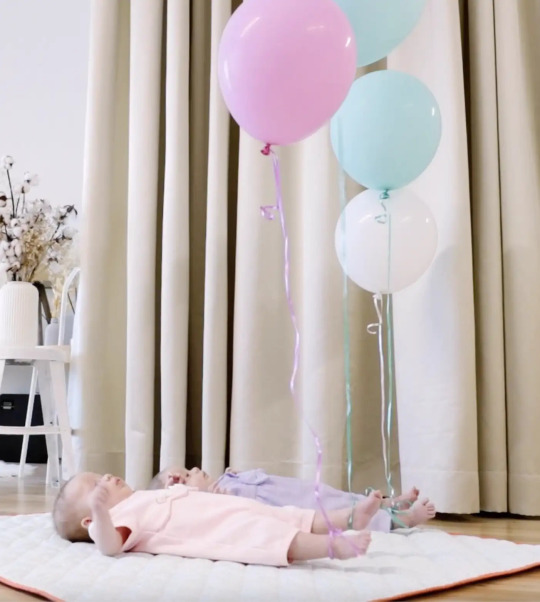
As your baby begins their journey through the early stages of life, one of the most exciting developments you’ll witness is their growing ability to move. From lifting their head to sitting upright, crawling, standing, and eventually walking, your child’s motor skills are built on a strong foundation—muscle development, especially in the legs.
Leg strength plays a critical role in gross motor milestones. Without adequate muscle support, babies may face delays in crawling, pulling to stand, and walking. The good news is, with thoughtful play and age-appropriate activities, you can encourage natural development while bonding with your baby in meaningful ways.
In this article, we’ll walk through expert-approved play ideas to help strengthen your baby’s leg muscles, backed by research and parenting insights. You’ll also find a set of frequently asked questions and a conclusion to guide your journey.
For more guidance and products that support developmental milestones, check out the original article on MonkiBox’s Community Blog.
Why Focus on Leg Muscle Development?
The leg muscles are central to a child’s gross motor skills. These muscles not only support mobility but also enhance coordination, balance, and posture. Developing strength in the quadriceps, hamstrings, calves, and hip flexors helps your child eventually transition from sitting to standing and walking.
The first year of a baby’s life is especially crucial. Encouraging safe and effective play ideas during this window ensures your baby’s physical milestones are met timely.
Key Principles Before Starting
Before we dive into the activities, keep these foundational principles in mind:
Tummy time is essential: A strong core supports leg muscle development.
Safety first: Always supervise and ensure a hazard-free space.
Every baby is unique: Respect your baby's pace—don’t rush milestones.
Make it playful: Babies thrive when learning is fun and interactive.
Age matters: Choose activities based on developmental stage, not just age in months.
1. Tummy Time with Leg Kicks
Age Range: Newborn to 6 Months
Tummy time is one of the first activities you’ll use to stimulate your baby's muscle strength.
How it helps: While it primarily works the neck and core, the natural kicking reflex also engages the glutes, thighs, and calves.
How to do it:
Lay your baby on a soft mat on their stomach.
Use a high-contrast or musical toy to capture their attention.
As they move to reach the toy or express excitement, you’ll notice leg kicks.
Pro Tip: Try lying in front of your baby to mimic their movement and encourage interaction.
2. Bicycle Legs
Age Range: 0–3 Months
This is a gentle movement that mimics the pedaling of a bicycle, helping develop joint mobility and leg muscle strength.
How to do it:
Lay your baby on their back.
Gently hold their legs and move them in a cycling motion.
Sing or talk during the process to maintain engagement.
Benefits:
Prevents stiffness
Supports digestion
Builds early leg coordination
3. Supported Standing on Your Lap
Age Range: 2–6 Months
Even before babies can stand independently, they enjoy the sensation of bearing weight on their legs.
How to do it:
Sit with your baby facing you on your lap.
Gently support them under the arms and allow their feet to touch your thighs.
Encourage gentle bouncing motions.
This helps to:
Strengthen thigh and calf muscles
Build neural connection between movement and stability
Caution: Avoid prolonged standing if your baby seems tired or uncomfortable.
4. Kick and Play Piano Gym
Age Range: 2–6 Months
Investing in a baby piano gym can turn leg movement into rewarding play.
How it works:
When babies kick the piano pedals, musical sounds are triggered.
This teaches cause and effect while encouraging repetitive kicking.
What to look for:
Soft pedals
Adjustable arch with hanging toys
Sensory-friendly design
Great for: Encouraging muscle memory and strengthening hamstrings and glutes.
5. Leg Pressing Against Resistance
Age Range: 3–6 Months
How to do it:
Place your hand or a soft object (like a rolled towel) against the sole of your baby’s feet.
Gently allow them to push.
Why it matters:
Engages leg muscles without overexertion
Builds strength and introduces resistance training safely
6. Rolling Over Practice
Age Range: 4–7 Months
Although rolling primarily involves the core, the motion of pushing off one leg and rotating uses the hip flexors and quadriceps.
Encourage rolling by:
Placing a favorite toy to one side
Helping them shift weight by gently guiding the hips
Note: Don’t overdo it—focus on one or two rolls at a time and make it enjoyable.
7. Obstacle Crawling
Age Range: 6–10 Months
Once crawling begins, you can enhance leg strength by offering resistance through soft obstacles.
Setup tips:
Use small pillows, rolled blankets, or play tunnels.
Place toys just beyond the obstacle.
Benefits:
Strengthens thighs, glutes, and calves
Enhances problem-solving and coordination
8. Cruising Along Furniture
Age Range: 9–12 Months
Babies pulling themselves up and moving along the edge of furniture (called cruising) is a major milestone.
Create a cruising-friendly space:
Ensure the furniture is sturdy and at chest level.
Place toys slightly out of reach to motivate side-stepping.
Muscles engaged:
Calves
Hip stabilizers
Inner thighs
Encouragement tip: Clap and celebrate their steps—positive reinforcement boosts confidence.
9. Push Toys and Wagons
Age Range: 9–15 Months
Push toys provide a safe way for babies to practice walking while stabilizing their steps.
Choose wisely:
Weighted bases
Anti-slip wheels
Ergonomic handles
Strengthens:
Calves
Ankles
Glutes
Overall coordination
10. Water Play or Infant Swimming
Age Range: 6 Months+
Why it works: Water provides resistance without strain, making it excellent for building strength.
Activities to try:
Kicking while supported
Floating on back with slight leg movement
Parent-assisted “swimming” motions
Caution: Always maintain direct contact and never leave your baby unattended near water.
11. Dance and Bounce Time
Age Range: All Ages
Dancing with your baby is not just fun—it’s beneficial. Holding your baby while bouncing gently to music stimulates vestibular development and engages leg muscles through rhythmic movement.
Bonus tip: Use a baby carrier with good leg support and bounce gently to the beat.
Tools and Toys That Support Leg Development
Activity gyms with piano pedals
Baby bouncers (limited use)
Soft play mats
Push walkers
Low-height furniture for cruising
Explore more parenting-approved tools on MonkiBox’s website, where curated play kits are designed to align with developmental stages.
Conclusion
Building your baby's leg muscle strength doesn't require fancy equipment or rigid routines. It’s all about intentional, interactive play. Each game, kick, or push brings your baby closer to essential milestones like crawling, standing, and walking.
As a parent, your presence and encouragement are just as important as the activities themselves. Whether it’s during tummy time, a rolling game, or pushing a toy wagon, these shared moments not only strengthen muscles but also deepen your bond with your little one.
Remember: progress looks different for every baby. Some may crawl early, while others take time to walk independently. Trust your instincts, consult your pediatrician if unsure, and most of all—enjoy the ride!
For a more detailed breakdown of baby development and activity ideas, explore this full article on MonkiBox.
Frequently Asked Questions (FAQs)
1. When should I start leg-strengthening activities with my baby?
You can begin gentle activities like tummy time and bicycle legs from birth. As your baby grows and gains head control, you can gradually introduce more dynamic movements like standing support or crawling games.
2. How do I know if my baby’s legs are getting stronger?
Look for milestones such as:
Kicking more forcefully during play
Bearing weight when held upright
Attempting to roll, crawl, or stand
Showing curiosity in movement
3. Are baby walkers safe for leg development?
Traditional baby walkers are generally not recommended by pediatricians, as they can interfere with natural walking development and pose safety risks. Instead, use push toys that promote upright movement with proper support.
4. What if my baby doesn’t enjoy these activities?
Every baby has different preferences. If one activity isn’t working, try another. Keep the sessions short, playful, and interactive. If your baby is consistently resistant to movement or seems delayed, consult a pediatrician.
5. How often should I do these exercises?
Aim for short daily sessions—a few minutes of tummy time multiple times a day, supported standing for 2–5 minutes, etc. Consistency is more important than duration.
6. Can these activities help my baby walk earlier?
These play ideas support natural progression, but rushing walking isn't advised. Babies walk when they are neurologically and physically ready—usually between 9 to 18 months.
7. Is resistance training safe for infants?
Yes, as long as it’s done gently and with bodyweight or minimal resistance like soft pushing against your hand. Avoid using weights or overexertion.
0 notes
Text
Easy Ways to Develop Your Baby’s Visual & Auditory Tracking Skills

In your baby’s first year, their brain undergoes incredible development—absorbing sights, sounds, and movements at a rapid pace. Two of the earliest and most important skills babies begin to develop are visual tracking and auditory tracking. These are the abilities to follow objects with their eyes and turn toward sounds, respectively.
Though these might seem like simple milestones, they are crucial building blocks for cognitive, language, motor, and social development. The best part? You can support these skills right at home, with easy, playful activities woven into everyday routines.
In this article, we’ll explore gentle and effective ways to nurture your baby’s tracking abilities. We’ll also explain why these skills matter, when they typically develop, and how to tell if your baby is on track.
To dive deeper, visit the original post from MonkiBox here: 👉 MonkiBox Blog – Developing Newborn Visual Tracking Skills
Understanding Visual and Auditory Tracking
Visual tracking refers to your baby’s ability to follow moving objects with their eyes, while auditory tracking is the skill of locating and turning toward sounds. These abilities help your child interpret the world and form the foundation for more complex tasks like reading, speaking, and navigating their surroundings.
As your baby grows, these tracking skills evolve naturally—but like all aspects of development, they benefit from intentional, gentle stimulation.
When Do Babies Start Tracking?
Tracking skills begin to emerge from birth and continue strengthening through the first year:
0–1 month: Brief attention to light and nearby faces.
2–3 months: Begins to follow slow-moving objects and turn toward familiar sounds.
4–6 months: Better eye coordination; turns head to locate voices and sounds more consistently.
6–12 months: Tracks faster-moving objects and starts responding to more complex sound cues, such as their name.
Every baby is different, so it's best to observe progress over time rather than comparing to fixed milestones.
Easy Activities to Boost Visual Tracking
1. Make the Most of Face Time
Hold your baby close—about 8 to 12 inches away—so they can see your face clearly. Smile, talk, and move slowly from side to side, allowing them to follow your facial expressions. Your face is your baby’s favorite thing to look at!
2. Use Bold, High-Contrast Objects
In the first few months, your baby sees high-contrast patterns more clearly than pastel or detailed visuals. Use black-and-white toys, cards, or board books, and move them gently in your baby's line of sight. Slowly shift them horizontally and vertically to encourage eye movement.
Tip: Make your own high-contrast cards with black shapes on white paper.
3. Play with Mobiles and Hanging Toys
A simple mobile with contrasting colors can help stimulate your baby’s visual attention. Hang it slightly off-center so your baby must move their eyes (or head) to follow the motion. Choose mobiles that move slowly or include gentle sound to add an auditory element.
4. Engage During Tummy Time
Tummy time isn’t just great for neck strength—it’s also a chance to encourage visual tracking. Place an interesting toy in front of your baby and slowly move it to either side. This encourages them to lift their head and follow the movement with their eyes.
5. Introduce Mirror Play
Place a shatterproof mirror near your baby during tummy time or while lying down. Babies are fascinated by their own reflection, and watching movement in the mirror supports focus and eye coordination.
6. Slow Object Movement
Hold a small toy or object about 10 inches from your baby’s face. Move it slowly in different directions. Give them time to lock onto the object and follow it. This simple game helps your baby develop smooth pursuit movements in their eyes.
Simple Activities for Auditory Tracking
1. Talk, Sing, and Narrate
Your voice is powerful. Speak softly to your baby, sing lullabies, or hum tunes while moving slowly from one side to another. This helps your baby learn to recognize and locate familiar voices.
Bonus: Use a gentle sing-song tone—babies are especially responsive to melodic patterns.
2. Try Sound Cues with Rattles
Use soft rattles or sound-making toys just out of your baby's visual range. Shake the rattle gently on one side, pause, and observe if they turn toward the sound. Then repeat on the other side. This helps develop directional hearing.
3. Clap or Tap Gently
Sit in front of your baby and clap softly or tap a surface, then pause to see if your baby looks toward the sound. Repeat the same sound pattern from different sides.
4. Encourage Name Recognition
Frequently say your baby’s name and pause to see how they respond. Over time, they’ll begin associating the sound of their name with attention and presence—key steps in communication development.
5. Use Toys with Music or Sound Buttons
Toys that light up and produce sound simultaneously are great tools for combining visual and auditory tracking. Demonstrate how the toy works, and let your baby explore both senses at once.
6. Read Aloud
Choose simple storybooks with rhymes, repetition, or animal sounds. The more expressive you are, the more your baby will enjoy and engage. Try pausing to let them react to your voice or sound effects.
Activities that Combine Both Senses
Some activities are especially effective because they stimulate both vision and hearing at the same time. These multisensory experiences accelerate learning and increase retention.
Peek-a-boo with sound: Hide behind a blanket and say your baby’s name before revealing your face.
Sensory bottles: Fill clear bottles with small beads or rice. Shake them so your baby sees movement and hears the sound.
Musical movement toys: Slowly move a toy that makes gentle music—your baby will track with both their eyes and ears.
How to Know if Your Baby Is Progressing
Look for these signs that tracking skills are developing:
Eye contact becomes more sustained
Your baby begins to follow objects more smoothly
Turning toward familiar voices or sounds
Increased interaction with toys and movement
Smiling or cooing in response to your voice
If you're ever concerned about your baby's development, it’s best to speak with a pediatrician or developmental specialist.
Safety First
Always keep safety in mind when using toys or engaging in play:
Choose non-toxic, baby-safe materials
Never leave your baby unattended during tummy time
Keep sessions short and enjoyable—stop if your baby seems overstimulated
Why These Skills Matter Long-Term
Early development of visual and auditory tracking supports:
Attention span
Language and speech development
Hand-eye coordination
Cognitive processing
Social engagement
These foundational abilities play a significant role in how your child interacts with the world and learns in future years. Nurturing them from infancy sets the stage for confident, curious growth.
Conclusion
Developing your baby's visual and auditory tracking skills doesn’t require expensive tools or complicated programs. With just a few minutes each day, your love, voice, and playful interaction can make all the difference.
By incorporating face-to-face play, gentle sound cues, mirror time, and story sessions into your baby’s daily routine, you’re helping them develop essential life skills in the most natural and nurturing way.
Explore more expert-backed tips and developmentally appropriate products at MonkiBox Blog – Developing Newborn Visual Tracking Skills
FAQs
1. When should I start tracking activities with my baby?
You can begin from day one. Newborns can see high-contrast objects and respond to familiar voices almost immediately.
2. What are signs that my baby’s tracking skills are developing?
Your baby will begin to maintain eye contact, follow moving objects, turn toward your voice, and engage with toys or faces by 2–3 months.
3. What if my baby isn’t tracking yet?
It’s normal for babies to develop at their own pace. If you're concerned by 3–4 months, consult your pediatrician for further evaluation.
4. Do I need special toys for this?
Not at all. Your voice, face, and simple household items are often the best tools for early stimulation.
5. How long should I practice these skills each day?
Just a few short sessions a day during playtime, diaper changes, or feeding are sufficient. It’s more about consistency than duration.
6. Can overstimulation be harmful?
Yes. Watch your baby’s signals—if they seem fussy or disinterested, take a break. A calm, happy baby is more receptive to learning.
#baby development#parenting tips#infant milestones#early childhood education#visual and auditory tracking
0 notes
Text
Reaching & Grasping: Why It’s Important and How to Encourage It
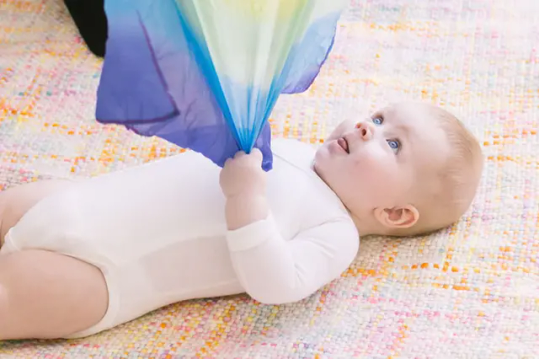
From the moment babies begin to interact with the world, one of their earliest and most important milestones is learning how to reach and grasp. Though these actions may seem simple, they represent the foundation for a child’s physical, sensory, and cognitive development.
In this guide, we’ll dive into why reaching and grasping are so essential, how they evolve during infancy, and the most effective ways to encourage these abilities in your baby.
👉 Read the original source article here: Monkibox Blog: Importance of Reaching and Grasping
What Are Reaching and Grasping?
Reaching refers to the movement of extending an arm toward an object, while grasping is the act of using the hand and fingers to take hold of it. These two skills are often the first signs of intentional movement in a baby’s development and signal the brain’s growing ability to control the body.
These movements are more than physical tasks—they are gateways to exploration, learning, and independence. Over time, they become essential for everyday activities such as feeding, dressing, writing, and even social interaction.
Why These Skills Matter
1. Building Motor Skills
Reaching and grasping strengthen core, shoulder, arm, and hand muscles, laying the groundwork for gross and fine motor development. These muscles are later used in crawling, self-feeding, and manipulating objects with precision.
2. Hand-Eye Coordination
When babies reach for a toy they see, they are practicing the ability to coordinate their visual input with physical movement—a fundamental life skill that supports everything from playing sports to tying shoes.
3. Cognitive Growth
These movements require planning and adjusting based on feedback—crucial for cognitive functions like problem-solving and decision-making. Reaching for a toy and figuring out how to grasp it activates neural connections that build memory and learning.
4. Sensory Learning
Different textures, sizes, weights, and temperatures help babies learn through touch. As they hold and explore various objects, they improve their sensory processing and begin understanding their environment.
5. Emotional Confidence
Successfully grabbing something fosters confidence and independence. These small victories encourage persistence and curiosity, shaping emotional growth and resilience.
Milestones: How Reaching and Grasping Develop
Every baby develops at their own pace, but these general stages offer a guide for what to expect during the first year:
0–3 Months
Movements are largely reflexive.
The palmar grasp reflex is present—babies automatically close their fingers around anything that touches their palm.
Hands are often in a closed fist and lack controlled movement.
3–5 Months
Intentional reaching begins.
Babies explore their hands and attempt to touch nearby objects.
Their movements become more focused and less jerky.
5–7 Months
Babies begin grasping with intention.
They may hold toys using the whole hand (palmar grasp).
Transferring objects between hands becomes common.
7–9 Months
Improved control over hand movements.
Begin using a raking motion to bring objects closer.
Experiment with holding, dropping, and banging toys together.
9–12 Months
Develop the pincer grasp, using the thumb and forefinger to pick up small items.
Begin using fingers for pointing, poking, or turning pages.
Can feed themselves soft foods using hands.
How to Encourage Reaching and Grasping
Parents and caregivers play a vital role in promoting these milestones. Here are simple yet effective strategies to support your child’s development:
1. Practice Tummy Time
Tummy time strengthens neck, shoulder, and arm muscles—all essential for reaching. Offer supervised sessions daily and place toys just out of reach to motivate movement.
2. Provide Toys of Various Textures and Sizes
Soft fabrics, rubbery teethers, wooden rings, and crinkly paper can all stimulate sensory curiosity. Choose toys that are safe and easy to grip.
3. Hang Toys Overhead
Use a baby gym to hang lightweight toys within reach. This setup encourages babies to reach up or swipe across their midline, helping with balance and bilateral coordination.
4. Encourage Side Reaching
Lay your baby on their side or slightly off-center and place a toy nearby. This challenges them to shift weight and reach across their body, which is great for developing core strength and coordination.
5. Introduce Finger Foods
As your baby becomes ready for solids (around 6 months), soft finger foods like bananas or puffs can promote grasping while also building self-feeding skills.
6. Play "Toy Just Out of Reach"
Put a favorite toy just beyond where your baby is lying or sitting. This encourages them to stretch and strategize how to get to the object, which strengthens motor planning.
7. Be Present and Engaging
Interact with your baby by smiling, making eye contact, and talking to them during play. Your positive energy makes the activity more engaging and encourages more attempts.
When to Be Concerned
Every baby develops uniquely, but some signs may indicate the need for a professional evaluation:
No intentional reaching by 6 months.
Not transferring objects between hands by 8 months.
Shows a strong preference for one hand over the other before 12 months.
Difficulty grasping or manipulating objects beyond 9 months.
If you observe any of these signs, consult with your pediatrician or a pediatric occupational therapist. Early intervention can make a meaningful difference.
How Developmental Play Kits Help
Products like those offered by Monkibox are designed specifically to support milestones like reaching and grasping. Their expert-designed kits include age-appropriate toys and tools that encourage your baby’s curiosity and development at every stage.
These kits eliminate the guesswork for parents and are backed by developmental science—ensuring your child engages in the right kind of play at the right time.
Check out their full article and kits here: 👉 Read More on Monkibox Blog
Conclusion
Reaching and grasping are more than simple motions—they are the building blocks of your baby’s exploration and understanding of the world. These skills spark curiosity, support physical strength, and form the base for more complex tasks ahead.
By creating opportunities for movement, offering engaging toys, and being a responsive play partner, you’re giving your baby the tools they need to thrive. Remember, progress doesn’t happen overnight, but each tiny reach is a giant leap in development.
FAQs
When do babies typically start reaching for things?
Most babies start intentionally reaching between 3 and 5 months old.
Is it normal for babies to use one hand more than the other?
Before 12 months, babies often switch hands. A strong preference early on may need evaluation.
What is the difference between palmar and pincer grasp?
Palmar grasp uses the whole hand, while pincer grasp uses the thumb and forefinger—usually developing around 9 months.
How can I tell if my baby is having trouble with these skills?
If they aren’t reaching by 6 months or don’t grasp or transfer objects by 8–9 months, consider speaking with a pediatrician.
Do I need special toys to help my baby learn to grasp?
Not necessarily. Everyday items like soft cloths, plastic spoons, or textured balls work well. However, curated kits like those from Monkibox can offer structured developmental support.
0 notes
Text
Your Baby’s Grasping Milestones Explained
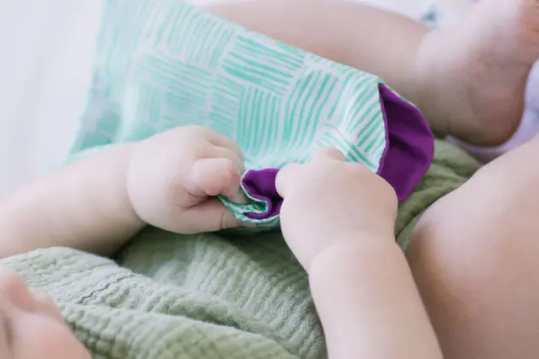
One of the most exciting parts of your baby’s early development is watching them gain control over their tiny hands. What begins as involuntary movement quickly transforms into deliberate, purposeful actions—starting with the ability to grasp. These movements may seem small, but they are foundational to your baby’s physical, cognitive, and sensory development.
In this comprehensive guide, we’ll walk you through the major grasping milestones that babies typically reach in their first 18 months. You'll also learn how to support these stages at home, what to look out for, and when to speak with a pediatrician. For an expanded visual guide with developmental activities and age-specific toy suggestions, you can explore the Monkibox grasping stages article here.
Why Grasping Is So Important
Grasping is more than just a motor skill—it's your baby’s first step toward independence. Through grasping, babies begin to feed themselves, play more interactively, and eventually develop fine motor skills necessary for writing, drawing, and daily self-care routines.
Some of the critical skills supported by grasping include:
Hand-eye coordination
Muscle strength and control
Cognitive and problem-solving abilities
Sensory integration
Exploratory learning
Encouraging grasping through play and interaction lays the foundation for many future milestones.
Grasping Development by Age
Every child develops at their own pace, but here’s a general timeline of what you can expect during your baby’s first year and a half.
0–2 Months: Reflexive Holding
What happens: Your newborn shows the palmar grasp reflex, instinctively closing their fingers around anything placed in their palm.
Why it matters: Though involuntary, this reflex helps activate the muscles needed for future purposeful grasping.
How to encourage: Offer your finger for them to hold and lightly introduce soft textures.
2–4 Months: Growing Awareness
New skills:
Your baby may begin opening their hands more often.
They start noticing their hands and bringing them to their mouth.
Significance: This marks the beginning of intentional movement and sensory exploration.
Support ideas: Use contrasting colors and gentle toys to stimulate visual and tactile interest.
4–6 Months: Intentional Reaching and Grasping
Grasp style: Ulnar palmar grasp (using the pinky side of the hand).
Milestones:
Reaching for toys with both hands
Grabbing and bringing toys to the mouth
Play suggestions: Soft rattles, plush toys, and silicone teethers are ideal during this phase.
6–7 Months: The Raking Grasp
Grasp style: Raking grasp, where the baby uses all fingers (minus the thumb) to sweep objects toward themselves.
What you might see:
Picking up food or toys using a sweeping motion
Transferring items between hands
Support with: Finger foods (like puffs or small banana pieces) and textured objects to encourage grip strength.
7–9 Months: Thumb Engagement Begins
Grasp style: Radial palmar grasp, where the thumb begins assisting the fingers.
Abilities:
Improved object control
Picking up toys using both hands more strategically
Best activities: Stacking cups, sensory balls, and toys that encourage pressing or squeezing.
9–10 Months: Developing Precision
Grasp style: Radial digital grasp using the thumb, index, and middle fingers.
Key skills:
Lifting smaller toys and manipulating them with better control
Exploring toys by twisting or banging them together
Encouragement tools: Play with blocks, open-and-close toys, or toys that encourage matching and sorting.
10–12 Months: The Pincer Grasp Appears
Grasp styles:
Inferior pincer grasp: pads of the thumb and forefinger.
Superior pincer grasp: tips of the thumb and forefinger.
Why it matters: This is essential for self-feeding, dressing, and eventually writing.
Activities:
Introduce small, safe foods to pick up (e.g., peas, tiny cereal bits).
Offer puzzles and object insertion toys.
12–18 Months: Emerging Fine Motor Skills
What improves:
Turning book pages (one or a few at a time)
Beginning to use utensils
Scribbling and stacking toys
Helpful activities: Drawing with jumbo crayons, stacking blocks, and sorting toys by color or shape.
At this point, your child is developing functional skills that support more complex activities, from dressing to playing pretend.
How You Can Support Your Baby’s Grasping Milestones
You don’t need specialized tools—just intentional play, patience, and responsive caregiving. Here’s how to make a difference:
Use varied textures: Offer materials like wood, silicone, fabric, or rubber to build sensory experiences.
Encourage tummy time: Builds strength for upper body movement and control.
Offer finger foods: This encourages hand control and coordination during self-feeding.
Let them explore safely: Give your child time to reach for objects on their own instead of handing everything directly to them.
Rotate toys often: New shapes and functions keep curiosity alive and skill development on track.
When Should You Be Concerned?
All children develop at different speeds. However, talk to your pediatrician if you notice:
No reaching or swatting at objects by 6 months
Trouble transferring objects between hands by 8 months
Consistent preference for one hand before 12 months
Lack of pincer grasp by 12 months
Stiff or floppy hand movements
Early identification of delays allows for timely support and intervention if needed.
Explore More on Grasping Stages
If you’re interested in toy recommendations, expert insights, or a visual timeline of your child’s grasping development, check out this detailed resource from Monkibox’s blog. It’s designed to help parents align toys and activities with real developmental needs.
Conclusion
From their first reflexive grip to more refined movements like using a spoon or turning pages, grasping is a building block in your baby’s physical and cognitive development. As these skills grow, they empower your child to feed themselves, explore creatively, and become more independent.
By understanding the stages of grasping and providing simple, supportive activities, you give your baby the tools they need to thrive. Every reach, grip, and hold is another step toward independence—and a moment worth celebrating.
FAQs
1. When do babies start grasping objects intentionally?
Most babies begin intentional grasping around 3 to 4 months, transitioning from reflexive to voluntary control.
2. Is it concerning if my baby uses only one hand to grasp?
Early in development, hand dominance can vary. If your baby consistently favors one hand before 12 months, it’s worth discussing with your doctor.
3. What are the best toys to support grasping?
Soft rattles, silicone teethers, stacking cups, and textured balls are all great tools. Rotate toys to keep things interesting and developmentally stimulating.
4. How can I help my baby improve their fine motor skills?
Offer a mix of toys and daily activities (like self-feeding or turning pages) that require coordination and finger strength.
5. What if my baby misses a milestone?
Minor delays can be normal. If you're concerned, your pediatrician can help assess your child's motor development and suggest early interventions if needed.
0 notes