#myth and pancake make underpinnings
Text
So I didn’t mention this back when I made my hand-sewn eyelet guides, but for a fully buttonhole/lock-stitched eyelet, you’re going to need way more thread than you think.
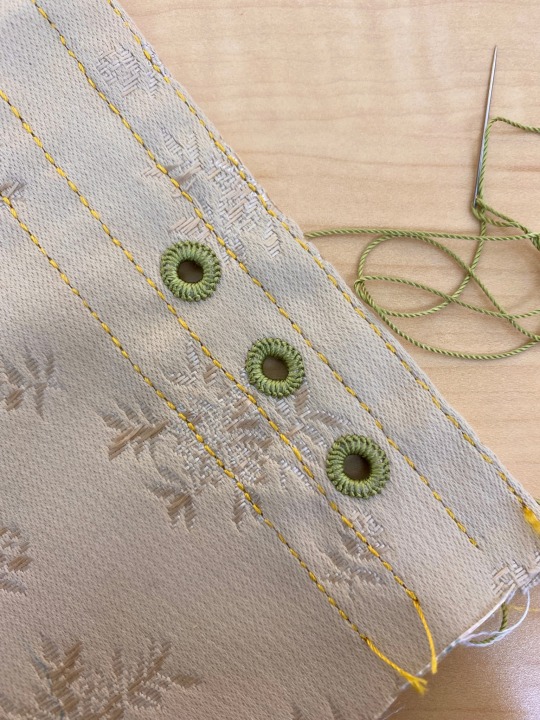
My eyelets are averaging about 25 stitches each, and every single stitch uses up about 1cm of thread. That’s 25cm per eyelet, which comes out to just shy of 10 inches. Per eyelet.
What this means for my fellow eyelet hand-sewers is that you only want to cut enough thread for around 3 eyelets each time you have to “reload” your needle. I suggest around 36 inches of silk twist (or equivalent size perle cotton*) at a time because any longer than that gets really unmanageable and you may end up with knots and snags. The extra 6” gives you leeway with the number of stitches and provides enough length to keep the needle threaded all the way to the end of the third eyelet.
*i recommend size 8 or 12 perle cotton. If you’re going for a more rustic look or like. A hobbit costume, 8 will give you a chunkier aesthetic, whereas 12 is a smidge finer than silk buttonhole twist and you’ll get a denser, more refined look. The reason I prefer silk is that it doesn’t need to be waxed and it retains its strength and shine much better. If you choose to use cotton, stick to 2 eyelets at a time, or else your thread will just start to disintegrate in your hands.
60 notes
·
View notes
Text
13 notes
·
View notes
Text
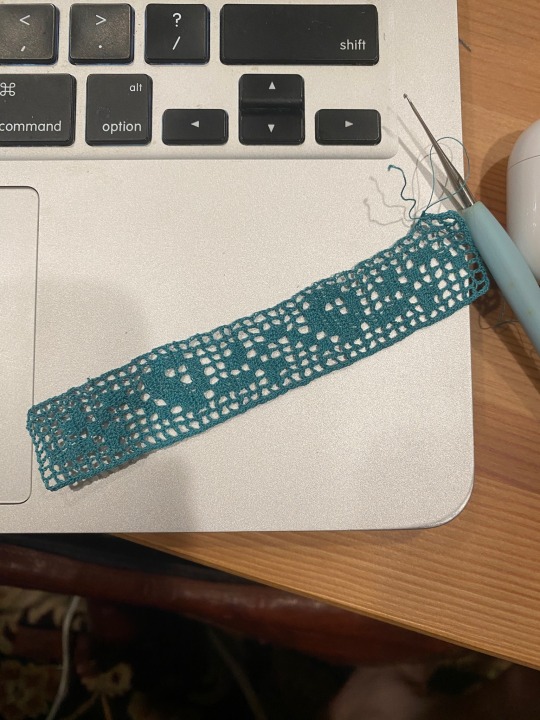
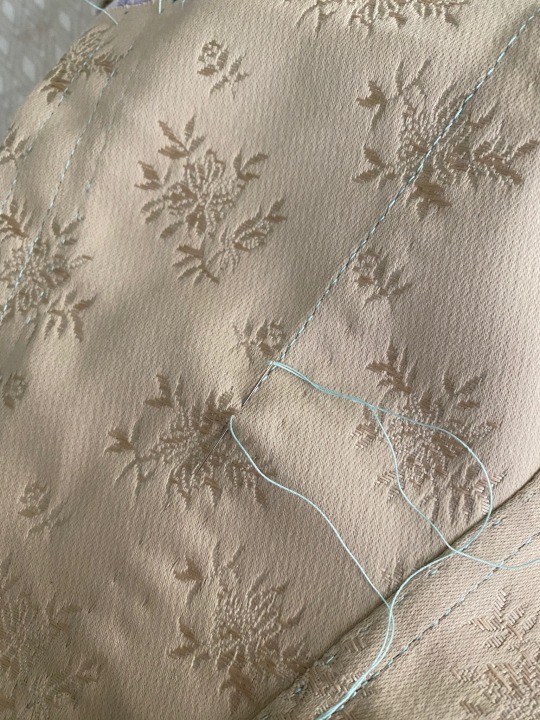
Back on my sewing thread bullshit and I’ve kind of fallen in love with fillet crochet. I never liked it much before, because it’s usually worked in heavier threads and always felt a bit chunky and blah. But in a 40wt sewing thread, it’s delicate and stretchy(!) and really feels like lace.
#i need to make a pair of camisole straps#and also a yoke#maybe something strawberry themed?#myth and pancake make underpinnings
13 notes
·
View notes
Text
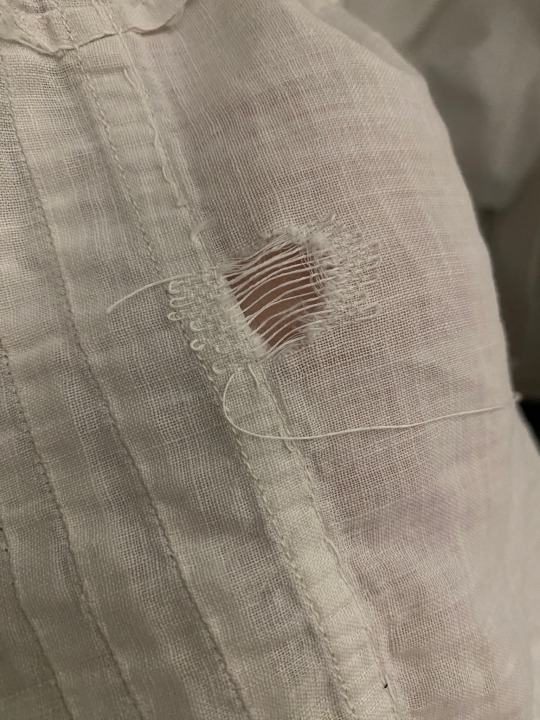
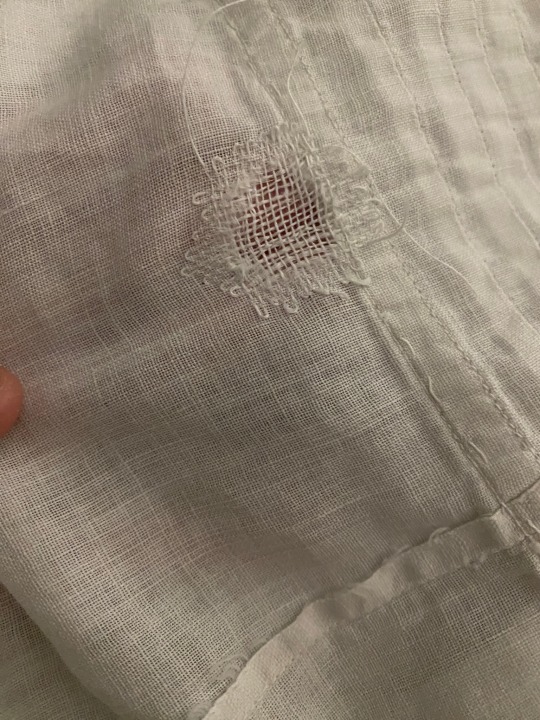
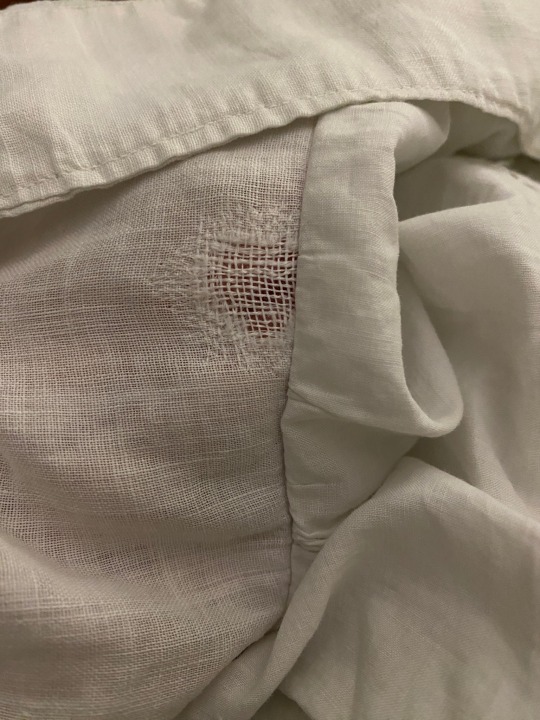
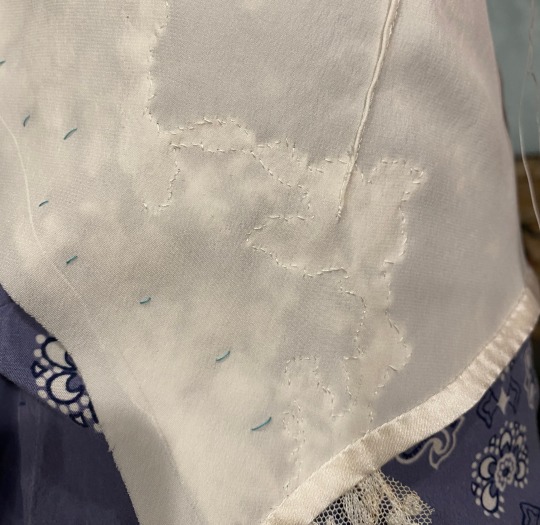
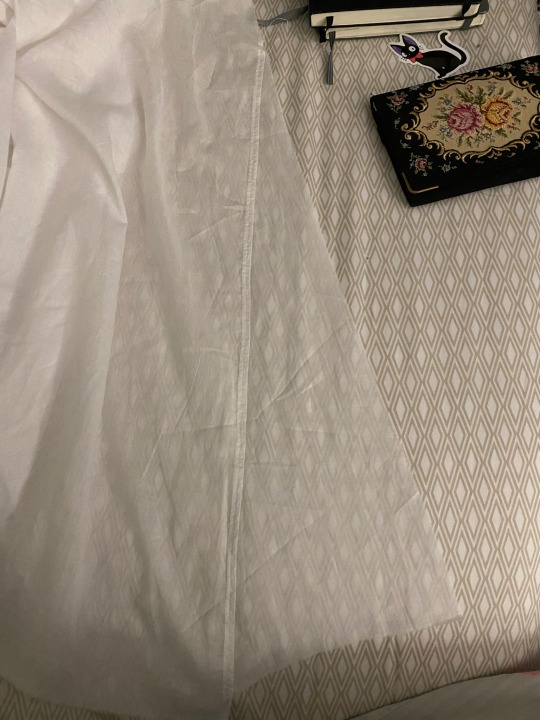
Darned a giant hole in my petticoat! It’s hidden under the lace ruffle at the hem, or else I probably would have made it denser. As it stands, it might not be pretty but it’s structurally sound. I used a linen thread to match the linen fabric, but it was thicker than I expected. I may swap to a thinner silk thread for the more visible areas of darning.
When darning woven fabric you should work from the underside of the fabric and leave loops when turning to pass the thread back and forth over the gap. This way, it doesn’t pull on the intact fabric and cause new tears, and you can pull on the loops to tension the threads. You also don’t want to turn at the same thread in the weave each time. Stagger the turns to distribute the tension across different threads and reduce the strain on any single thread.
#pancake talks textiles#myth and pancake make underpinnings#sort of lol#i couldn’t be assed to do finer darning over such a large gap#stitch witchery
23 notes
·
View notes
Text
Sharing a little of the process of the charmeuse slip I’m working on. All the seams and lace attachment were done by hand.
The underarms were bound with a “bias” tape. It’s more like 22deg bias than a true 45 because it was just the straight-ish off-cut from between two of the skirt panels, trimmed down to 1” wide and cut to length. The curve isn’t that dramatic and charmeuse stretches a bit so it worked perfectly.
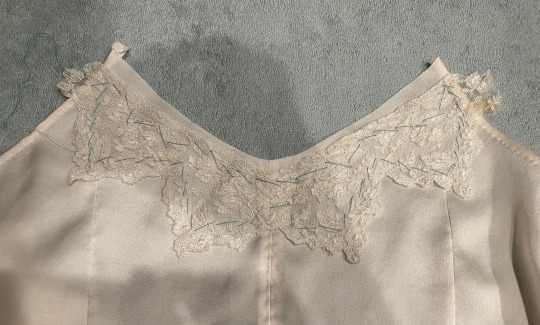
The lace is vintage, hence the foxing on the overhanging bit on the right. The center-back V shape was made by snipping between the embroidered bits, overlapping them, and felling down the edges of the motifs to the lace below. I then flipped it over, trimmed back the underlay where necessary, and felled the edges of that to the top layer. I find this to be a much more discreet way of joining pieces of lace of this style.
I then basted this shaped piece to the bodice, which at this point hadn’t been joined to the skirt yet to keep things more manageable. I used a bright aqua thread to make it easier to avoid while stitching down the lace. I also unpicked parts of it as I went.
For lace insertion I always start with stitching down the edge first. I use a very fine, tightly spaced whipstitch. It’s basically invisible on the front. The second line of stitching is to secure the “cutline” of the fabric to the lace. I try to follow the edges of the motifs to keep the stitchline continuous and discreet. On the front, I made this line more shallow for uhhhh coverage. I also keep in mind where I would need to attach straps and facings and left more backing fabric in these areas for structure.

The silk then gets trimmed back to 1mm from the stitching. Yes, 1mm. The edges won’t fray much and this slip is never going to see the inside of a washing machine. The overhanging bits of lace will be folded under and tacked down rather than fully trimmed back.

The facings on the center-front opening are just strips of crepe de chine that I’d previously dyed blush for another project I hadn’t gotten around to yet. They’re practically invisible beneath the lace when held against my skin. In my experience, crepe de chine doesn’t really fray past a certain point so i just understitched the facing along the front and tacked it down to the lace along the top. The other edges are just raw.
Last steps will be to attach the straps and closures. Right now the plan is some itty bitty white pearl buttons, but I’m wondering whether smoke pearl buttons might add some nice contrast.
The straps will be 1/2” strips of teal charmeuse for a pop of color. To make flat straps, measure [(4 X final width) - 1/8”]. Cut a strip of fabric that wide and as long as you need on the straight grain. Fold in half wrong sides together, press, and stitch straight down the middle, (final width) away from the folded edge. Turn the strip right side out and give it a quick soak and a press to fix the crease.
3 notes
·
View notes
Text
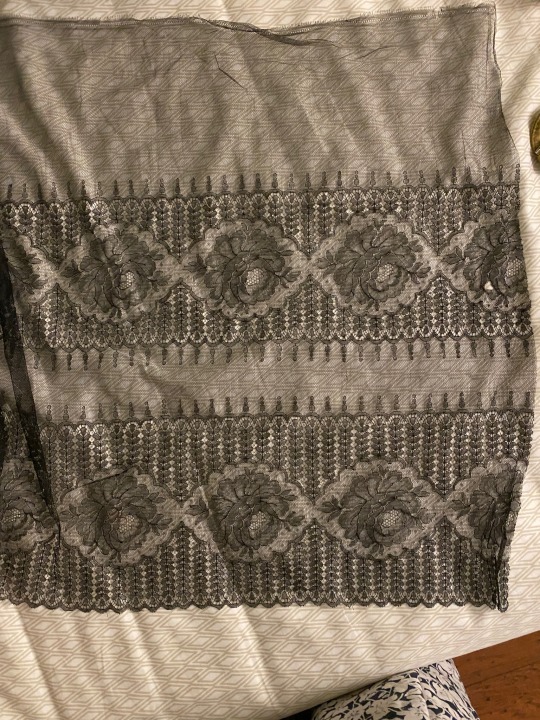
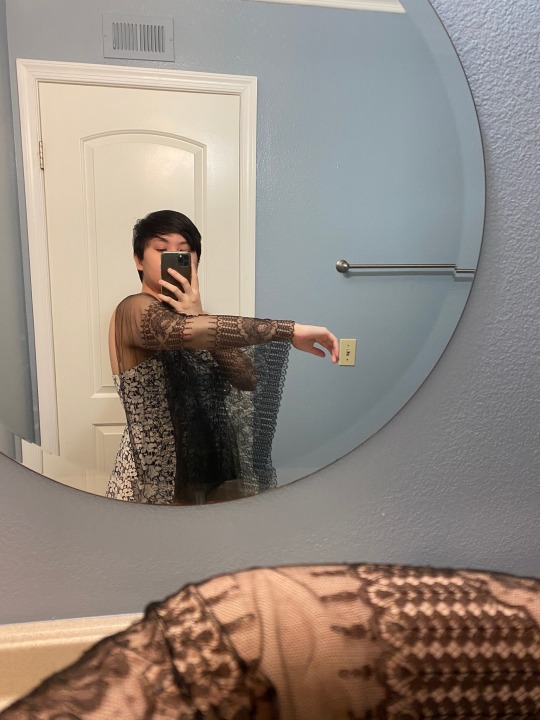
I don’t believe in fate, and I don’t believe that objects have souls, but sometimes the universe is serendipitous.


When I bought this collar, all I knew was that it was a) definitely Edwardian, and b) it was mine, because somehow it had not yet been claimed even though it had been over an hour since it was listed and this seller’s listings get claimed within seconds of posting. It arrived. It was Edwardian. It was so fucking beautiful. The lace is soft and airy and seemingly delicate, but the threads are in excellent condition.


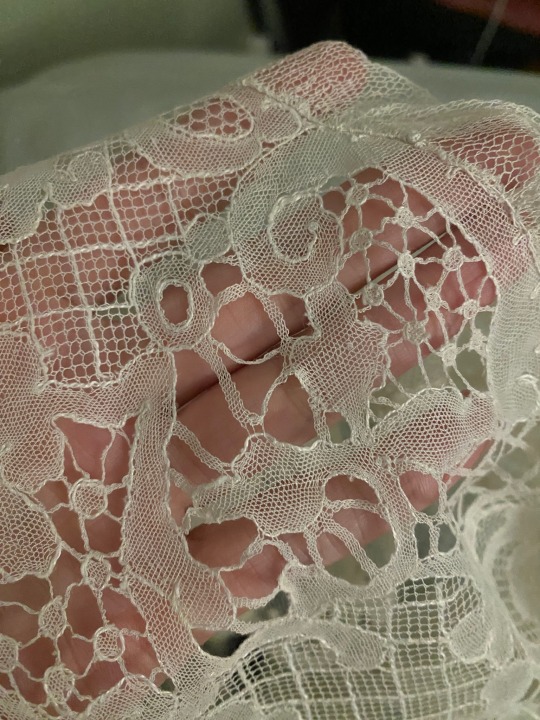
And like I mentioned before, I am not shy about using antique textiles. I did know that I didn’t want to cut into the lace, because it had finished edges and was not an infinite repeat in the way that lace edgings or insertions often are—the flat yoke and the flounce were both discrete pieces. So I spent several hours painstakingly taking out the original seam holding the two together. This was thankfully a simple running stitch and I was able to remove it without damaging the lace at all. The flounce was long:
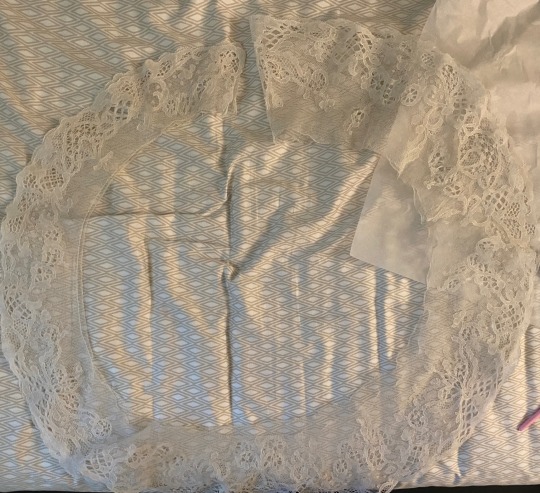
It is folded in half in the image above. Much too long for me to sew into any kind of blouse without cutting it. So I toyed with the idea of making it into a frilly Edwardian petticoat.
Guys.

Guys. It is exactly the right length. That is some serious serendipity at work.
#pancake talks textiles#myth and pancake make underpinnings#the flat yoke will be used for another project don’t worry#if the vertical length of the petticoat seems short that’s bc it’s a midi-length petticoat#and not an ankle or floor-length one#i don’t want that lace hem anywhere near my shoes or the ground when im walking#and I am intentionally making this *very* sheer so that it can also function as a fancy overskirt#there will be a bobbinet extension between the upper voile portion and the flounce#which will be slightly scalloped and narrow towards the back to counteract the widening of the lace#this way it’ll look really nice layered over a colored skirt#i will also make a more plain petticoat to wear under this for volume#aaaaall the swishy goodness
16 notes
·
View notes
Text
Sewing with knits is a weird new experience for me and I’m glad I tried it because it’s actually pretty fun and not as daunting a task as it seems. By its very nature, knit fabric is forgiving so you can be a little less precise and still get something that looks very sharp. Also you can straight up just backstitch it. A backstitch uses about 2-3 times as much thread as the length of the stitch line, so it has lots of room to give and expand with the fabric.
Tensioning your stitches takes some getting used to, and they will inevitably end up much shorter than they seemed when you inserted your needle, but once you learn to account for that it’s just as easy as working with woven fabric imo.
What is critical, in my opinion, is using a blunt needle and smooth thread. This helps the needle glide though the knit without snagging anything, but more importantly it helps prevent you from piercing your own thread as you backstitch! Your thread needs to be able to move freely in order to expand and contract without snapping. If you pierce your thread you lose that freedom of movement and that becomes a point of rigidity in the seam.
Stockings progress below the cut:
Here’s the first stage of mocking up my stockings:
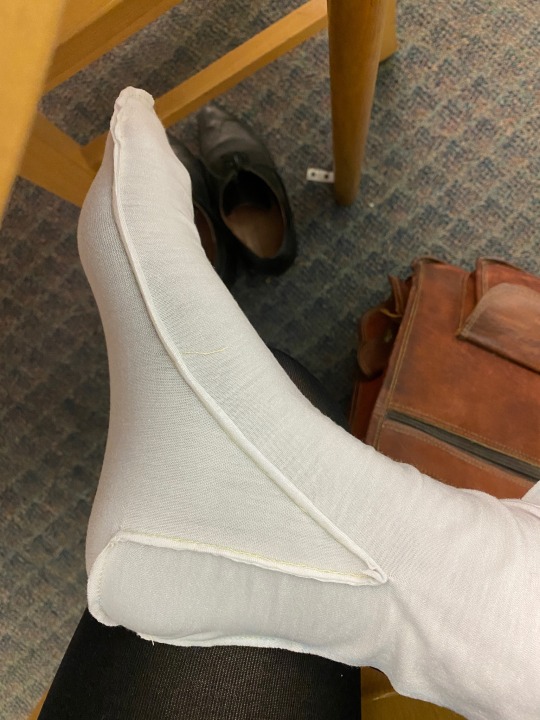
I don’t know if you can tell but it’s too big lol. It’ll probably fit Myth just fine the foot and ankle are loose on me. Granted, the rayon is Very Squishy and the silk is much less so. I’ll probably have to do a silk mock-up which is terrifying to think about, but necessary if I want a good fit.
The gusset also ended up a little wider at the base than I wanted it to be. Not a structural problem at all but an aesthetic one that I want to correct before I take my scissors to silk.
Heel shape is slightly awkward but I feel that is a problem that will be easily rectified by having the correct length of foot. For now I won’t touch that, since the rayon is so squishy.
Now I need to finish the back seam to check how it fits with the tension properly distributed.
13 notes
·
View notes
Text
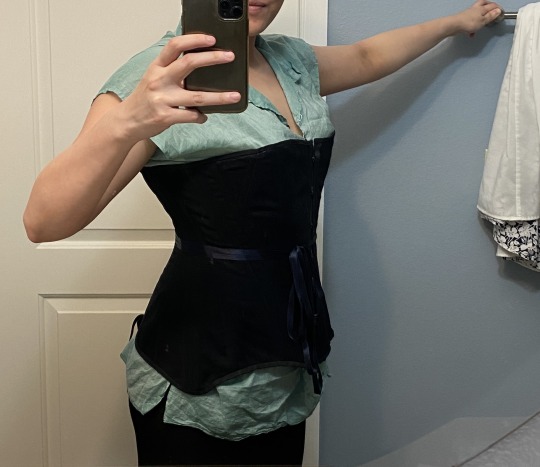
Thank you so much to @lord-luci for helping me finish this corset, could not have done it without you! I can now finally start working on the Glass Gown, which conveniently happened to win the poll for what project y’all want to see next! The petticoat I’m making will be part of the ensemble.
#it needs some minor adjustments and also a hook and eye at the top edge but other than that!#just needs flossing!#myth and pancake make underpinnings#corsetry#also my posture in this is. so different holy shit#it’s not necessarily a visible difference but i feel it the moment i take it off#it’s not uncomfortable at all but i am forced to stand taller when i wear it#if i made this again i’d raise the front lower edge by a half inch#just to sit more comfortably#it doesn’t hurt it just is There#and i’m holding onto the towel rack because i’m too short for the lower edge to show when im standing flat-footed 😂
9 notes
·
View notes
Text

First bit of stocking embroidery ! It was an interesting learning curve, figuring out how best to pad my satin stitching. It’s important to pad your stitching in a way that will keep everything very smooth and even. I don’t think I’ve fully achieved that yet, but I’m happy with how these first stems look 🥰
#it does not help that i’m starting out with fussy delicate embroidery on the most annoying possible garment#pancake talks textiles#pancake makes the fanciest socks#myth and pancake make underpinnings
7 notes
·
View notes
Text
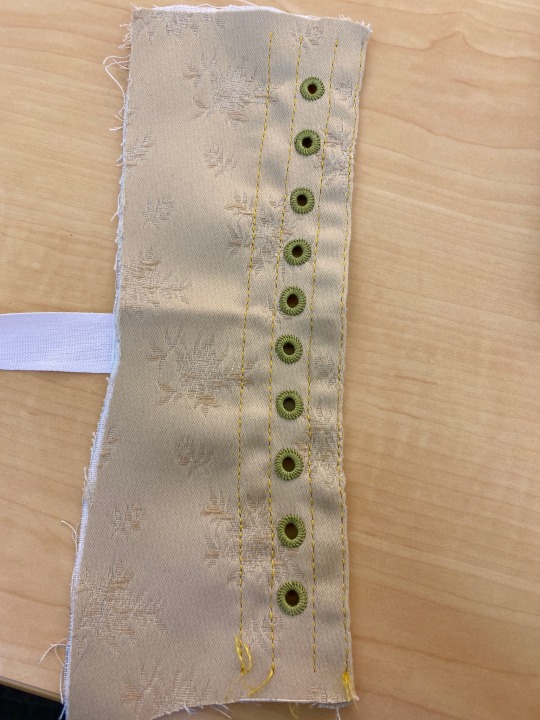
Here’s the whole row of eyelets for the left side of this little underbust corset. Note the middle two are spaced a little closer together because those will be taking the most strain, right at the squishiest part if my me. And if you’re thinking the yellow is a bit out of place with this green and beige, no it’s not because:
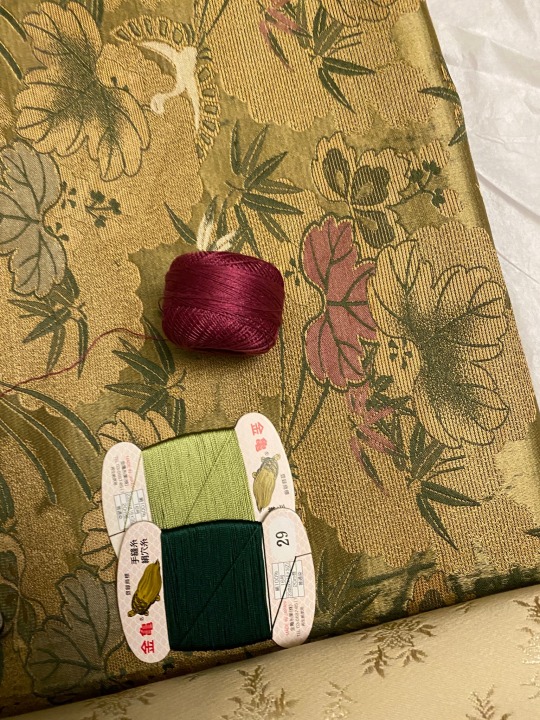
the side panels are going to get overlaid with this fabric! The plum cotton is for flossing, and the dark green silk will not be used. Not pictured is the binding for the edges, because I haven’t found one I like yet lol.
#i think i want to find a plum or green satin ribbon for the edge binding#tho a petersham ribbon would work too#myth and pancake make underpinnings#pancakes corsetry
15 notes
·
View notes
Text
There is a wobble. It is less that a millimeter deviated from being perfectly straight. You can’t even tell which wobble I’m talking about because it’s laid out on an uneven surface and is partially bunched up. When I tell you that it took all my willpower to not undo all the stitching to fix the wobble—
But it’s done, I’ve done it, I’m moving on, I am NOT FIXING THE WOBBLE (not fixing the wobble), and the end is finally in sight.
The takeaway from this is two things: first, that perfection is the enemy of completion; second, if your seams are fussy, suck it up and baste them.
Don’t pin. Baste. Just do it. It may feel like sewing an extra line of stitching for no reason, but the 10 minutes that it takes to sew a line of quarter-inch long stitches is a small sacrifice to make to save yourself restitching the same seam five times. Listen to me. Baste your seams.
#myth and pancake make underpinnings#i will maybe embroider this shift in the future but not right now#pancake talks textiles#pancake makes the chemise a la belle
18 notes
·
View notes
Text
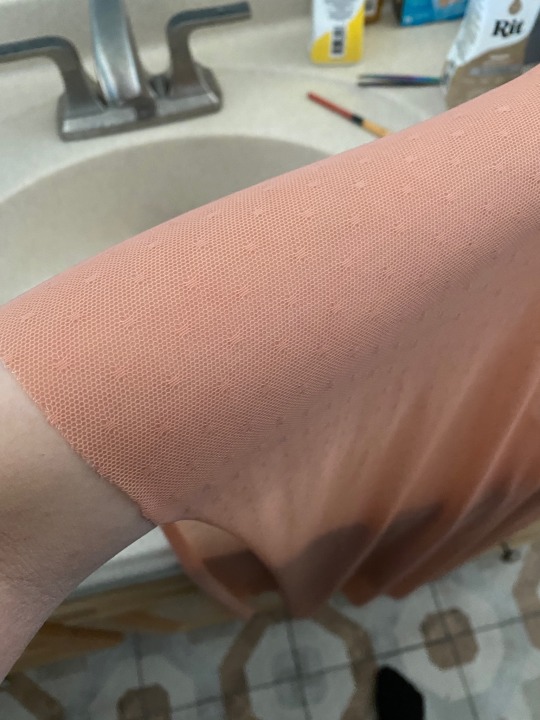
Braject update: I dyed some nylon-elastane netting to use as the lining. The color by itself is very, very punchy. Waaaay too deep for my skintone, but with the lace overlay, it’s perfect. I still need to acquire some rings to attach the straps, and then I can put this thing together!
7 notes
·
View notes
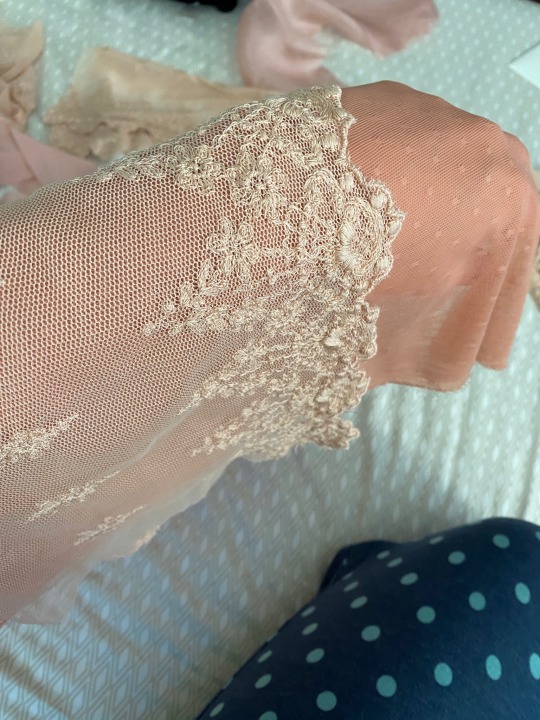
Text
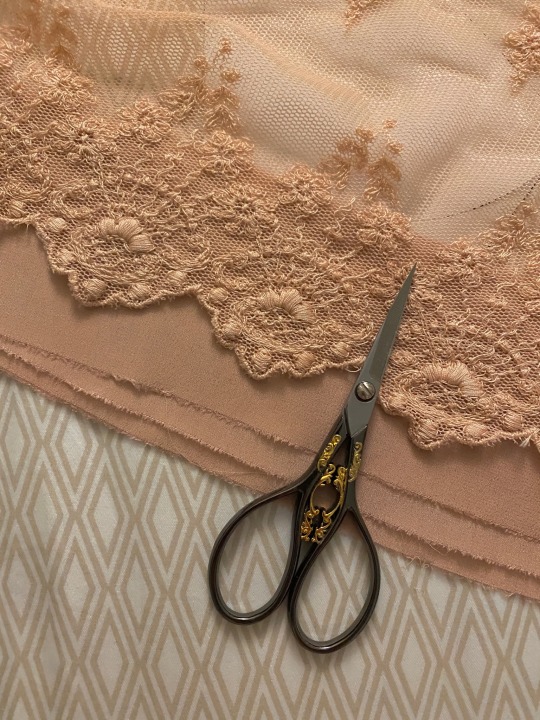
I think that’s a pretty damn good match, wouldn’t you say? I dyed a strip of silk crepe de chine to match the lace I’ll be using for some fancy new underpinnings.
#myth and pancake make underpinnings#bc standard modern bras are ass i hate them so much#fuck underwires fuck elastic straps and sliders#i want comfy straps that don’t constantly fall off my shoulders when they aren’t digging into me#and soft cording instead of pokey wires#and a wide band that doesn’t kill my back or ribs#and i want it to be CUTE dammit
9 notes
·
View notes
Text
I’ve talked about basting before, and if you look it up online there will be plenty of information about it. But most people don’t seem to baste things the way I’ve come to prefer, so here’s how I do it, and the rationale behind it:
I use the thinnest thread in the closest color match that I have on hand. I work from the ‘wrong’ side of the fabric and sew exactly on my sewing lines to tack the pieces together or to ‘threadmark’ a piece—ie to trace the sewing line onto the right side without using a pen or other writing device that would potentially stain my fabric. On the wrong side I take a longish stitch, while on the right I take as short a stitch as i can without destroying the weave. This leaves teeny tiny pinprick stitches on the outside which will get completely hidden by the final stitching, while being much more precise than pinning.
I like doing it this way because I hate ripping out my basting afterwards and it doesn’t distort the fabric like pins do. It behaves like the fabric does because it’s flexible, while still holding everything in place while you sew. Also no pins stabbing you while you sew or snapping your needles if you’re using a machine.
15 notes
·
View notes
Text
Look at this incredible piece of machine-made silk lace I found in a local shop today! It definitely has some flaws but the majority is in good condition and strong enough to be used. I think it’s screaming to be backed with some ivory crepe de chine and turned into a camisole blouse.
#pancake talks textiles#myth and pancake make underpinnings#sort of lol bc this is definitely *not* being worn *under* jack shit lol#with peach pink stitching#and tiny pearl buttons#do i want to go through the pain of stitching actual buttonholes or will i do thread loops?#a question for future pancake!
10 notes
·
View notes
Text
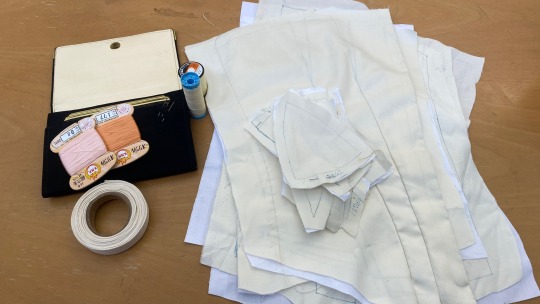
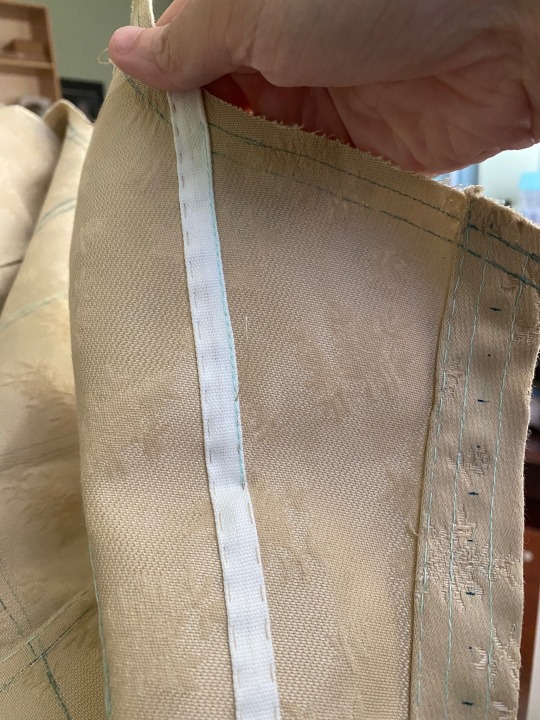
Wish me luck yall, I’m trying to put together a corset by hand in time for renfaire next saturday. I’ve got darts to sew and ten gussets to set and eyelets and—
My fabric for this is a cream-colored cotton sateen (think nice cotton sheets) with a white, tightly-woven muslin lining (it’s lightweight but very sturdy). The boning channels will be cotton twill tape.
I’m using two kinds of silk thread for the stitching, both in a matching cream—Gütermann, a German brand, which is a lower quality, less shiny thread for the basting; and Kinkame, a Japanese brand that is much stronger and shinier for the final seams. I’m using cream thread for the basting/thread-marking because I don’t want to bother ripping out the basting at the end, so this way it won’t be noticeable even if the stitches peek out on the outside.
For the eyelets and flossing, I have buttonhole twist in blush pink and creamsicle orange, but I’ll probably stick to the pink for this.
12 notes
·
View notes
Last Seen Blogs

onyxking67
OnyxKing's Tumblr Page

youkeptmyhoodie
areas to improve

xkrabatx
Sparkwood and 21

mariangeles1005
Only Xiao Zhan 🦐

vana-avan
snotaerme MMI