#mywifiext.net new extender setup
Text
Can’t Find New Extender Setup Button After Connecting To Netgear_Ext? -
Netgear WiFi range extender can be set up and installed using various different ways. However, the most used way to install a Netgear extender is the manual method. Whether you want to perform the Netgear EX3700 setup or the latest Nighthawk model setup, the manual method requires you to connect to Netgear_Ext SSID and access mywifiext.net.
Once you have logged in to mywifiext, you will see the ‘New Extender Setup’ button. That’s where a majority of users often stuck! If you are also not able to find the New Extender Setup button, we have got your back. This post is all about to get rid of this issue. Scroll down to read more.
For More Info - https://streamingwords.com/cant-find-new-extender-setup-button-after-connecting-to-netgear_ext/
0 notes
Text
Setting Up Netgear New Extender Setup: A Comprehensive Guide
For Netgear new extender setup, plug it into a power outlet within the range of your existing WiFi network. Wait for the power LED to turn solid green. Connect your device to the extender's network (usually named "NETGEAR_EXT"). Open a web browser and enter "http://mywifiext.net" in the address bar. Follow the on-screen instructions to complete the setup process, including connecting the extender to your existing WiFi network and configuring settings. To know more visit our website.
0 notes
Text
How to Set Up Your Netgear Extender
Step 1: Plug in Your Extender
The first step is to plug in your extender to an electrical outlet. The power LED should light up to indicate that the extender is on. If the power LED does not light up, check that the extender is plugged in correctly and that the outlet is working.
Step 2: Connect to the Extender's WiFi Network
Connect your computer or mobile device to the extender's WiFi network. The extender's default WiFi network name (SSID) is NETGEAR_EXT. The extender network either has no password or the default password is password.
Step 3: Launch a Web Browser and Enter mywifiext.net or 192.168.1.250
Open a web browser and enter mywifiext.net or 192.168.1.250 in the address bar. This will open the New Extender Setup page.
Step 4: Click or Tap NEW EXTENDER SETUP
Click or tap NEW EXTENDER SETUP to begin the setup process.
Step 5: If Prompted to Accept Terms and Conditions, Click or Tap YES or I AGREE
If you are prompted to accept the terms and conditions, click or tap YES or I AGREE to continue.
Step 6: Select Your WiFi Network
Select your home WiFi network from the list of available networks.
Step 7: Enter Your WiFi Password
Enter your home WiFi password in the Password field.
Step 8: Click or Tap NEXT
Click or tap NEXT to continue.
Step 9: Select an Extender Name
Enter a name for your extender. This name will be used to identify your extender on your network.
Step 10: Click or Tap FINISH
Click or tap FINISH to complete the setup process.
0 notes
Text
How to Update Netgear Ex6110 Ac1200 Firmware Version? Netgear Extender Software Update
youtube
___________________________________________Netgear Ex6110 Ac1200 Extender #Firmware Update can be done by logging in to the netgear extender web management page. So, first connect your computer/laptop to netgear ext network name and then type mywifiext.net into the url. In case you cant update netgear extender firmware then follow our step by step guide to complete #ex6110 firmware update.Do Like And Subscribe If The Video Was Useful To Support My Channel!!!Our Official website for Technical help:- https://devicessetup.comDownload Netgear Extender Latest Firmware File From here :- https://downloadcenter.netgear.comNetgear Wifi Extender Setup SCAM :- https://youtu.be/Mr4zMKXhLBcNetgear Ex6110 setup guide :-How to Login Into Wifi Extender Using Its Ip Address:- https://youtu.be/Iszz2Oyna4EHow to reset netgear ex6110 extender :- https://youtu.be/c8i3ryUpyCQHow to setup netgear extender as access point or using ethernet cables :- https://youtu.be/uxce3UpK3uoHow to turn Netgear Extender Leds On or Off? :- https://youtu.be/5LWIo9NlsqM----------------------------**FAIR USE**Copyright Disclaimer under section 107 of the Copyright Act 1976, allowance is made for “fair use” for purposes such as criticism, comment, news reporting, teaching, scholarship, education and research.Fair use is a use permitted by copyright statute that might otherwise be infringing.Non-profit, educational or personal use tips the balance in favor of fair use.--------------------#netgearextenderfirmwareupdate #netgearex6110#ex6110ac1200 #netgearextenderex6110 #netgearexthelp #wifiextender #wifirepeater #diy #technicalhelp #netgear #devicessetup
1 note
·
View note
Text
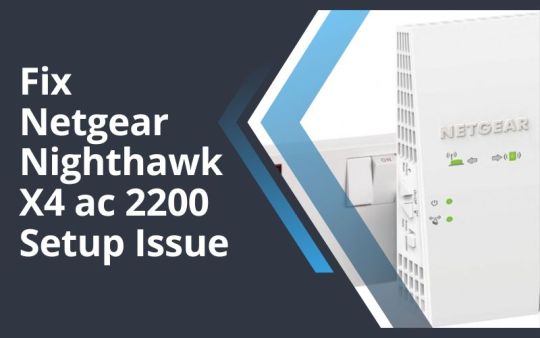
Ultimate Guide For Netgear Nighthawk X4 ac 2200 Setup Issue
Netgear Nighthawk X4 ac 2200 Setup is quite an easy and straightforward task. In this, you will get a step-by-step guide to do the same. If you are unable to find how to Netgear Nighthawk X4 ac 2200 Setup. Then you are at the right place, here you will learn how to do so. Netgear Nighthawk X4 ac 2200 is a WiFi range extender, that expands your existing WiFi range with speeds up to 2200 Mbps.
It also provides the most steady WiFi and the most instantaneous internet connection. But many users don’t know how to Netgear Nighthawk X4 ac 2200 Setup. And some of them find doing this difficult, especially, those who are non-technical. If you are one of them, then do not get upset. Below is the guide for Netgear Nighthawk X4 ac 2200 Setup. Simply go through the following instructions.
Step-by-Step Guide for Netgear Nighthawk X4 ac 2200 Setup
Netgear Nighthawk X4 ac 2200 Setup is not a complicated task as you think, it is more straightforward than you think. In this, you will get to know how to do this. With this, extender device, you can develop a better vigorous WiFi network at home. This is the most simple and effective way to extend the WiFi range of the router.
There are three methods through which you can easily Netgear Nighthawk X4 ac 2200 Setup. The first is through Netgear Installation Assistance, the second is through the WPS button, and the third is through Fastlane Technology.
Steps for Netgear the Nighthawk X4 ac 2200 Setup Via Installation Assistance
Doing this through the Netgear Installation Through is not a complicated task, it is simpler than you think. Follow the below instruction to do the same via the installation assistance.
Turn on your Nighthawk X4 ac 2200 by connecting it to the power outlet.
After this, place your wireless router near the extender.
Now you need to plug your Netgear extender into a power outlet.
Then wait for some seconds, until the extender LED light turns green.
Now you have to attach the extender to the router and launch the web browser in your system.
And then enter www.mywifiext.net in the search field, and you will see Netgear installation assistant on the screen.
After this, you have to follow the on-screen instructions and attach the Netgear extender to the existing network.
Now place your extender in the most suitable location.
If still, the connection is poor, then move the extender closer to your router, and try again. Do this, until you see the link status LED light turn white.
Once you have located the most acceptable location, then connect the other device to the extender.
Techniques for the Netgear Nighthawk X4 ac 2200 Setup through the WPS button
If you don’t want to Netgear Nighthawk X4 ac 2200 Setup through the Netgear Installation Assistance. Then here is another method to do the same, that is through the WPS button. To do this, you just need to read and follow all steps.
Turn on the WiFi extender, and place your extender close to the router in the same place.
Then plug in your Netgear WiFi extender into the power source, and wait until the power LED light on the extender turns green.
Now press the WPS on the extender, located on the rear or back side of it.
The white LED light on the Netgear Nighthawk X4 ac 2200 indicates a good connection between the router and the extender.
Now you can move your Netgear extender to a new location.
Try to place it in the location, where you have poor or weak WiFi coverage.
Ways for the Netgear Nighthawk X4 ac 2200 Setup Via FastLane Technology
Setup through FastLane Technology, allows you to enjoy maximum WiFi performance. Here are the steps to do the setup via the FastLane technology.
Firstly, connect your router to the Netgear Nighthawk X4 ac 2200.
After this, use any internet browser, and make sure that you use the latest version of your preferred browser.
After this, in the search field of the web browser, enter mywifiext.net.
Then the login page of the extender will appear, in this fill in your username and password and click on the login button.
Now when the Netgear Genie page appears, click on “Do More” and then on “FastLane.”
Then there are two options for users. The first option is, the device is connected to the extender at 2.4GHz.
And the second is, it is connected to the extender at 5 GHz, and the extender is connected to the router at 2.4 GHz.
You can choose according to your preference. And then click on the button to save the changes you made.
Binding Up
It is quite frustrating when you are unable to set up your Netgear Nighthawk X4 ac 2200. Follow the above instructions for the Netgear Nighthawk X4 ac 2200 Setup. And hopefully, this above guide will help you with the same. You just need to follow the above easy and detailed instructions as given to do the same.
Doing setups of the Netgear Nighthawk X4 ac 2200 extender is not a complicated task, it is simpler than you think. If you don’t know how to do this, then simply obey the above instructions. So, before seeking assistance from someone else, try to go through the techniques, that are given above for Netgear Nighthawk X4 ac 2200 Setup.
1 note
·
View note
Text
When you set up the Netgear WiFi extender at your home, you connect it to the host router. Whether you are using the web browser method via mywifiext.net, or using the Nighthawk app or the WPS button for setup, connectivity with the router or the main gateway is common and an essential step. But what if you need to change or replace the existing router? There may be various reasons that may put you in a situation where you need to change your router. If that is the case with you then you will again need to configure the Netgear extender with the new router. Walk through this article to learn about the process of adding the existing Netgear WiFi extender to the new router after replacing it.
0 notes
Text
Netgear EX6400 Extender Setup
The Netgear EX6400 Extender Setup is a simple and efficient solution to extend your existing Wi-Fi network coverage. With its easy-to-use setup process, you can quickly enhance the range and strength of your wireless signal. The EX6400 supports dual-band Wi-Fi, allowing you to connect multiple devices simultaneously on both 2.4GHz and 5GHz frequencies. Its FastLane technology ensures high-speed connectivity for bandwidth-intensive activities like streaming and gaming. The extender also features an Ethernet port for wired connections and comes with LED indicators for signal strength monitoring. Whether you're at home or in the office, the Netgear EX6400 Extender Setup ensures a seamless and reliable Wi-Fi experience.
Here are the steps to set up your Netgear EX6400 extender:
Place the extender near your existing wireless router. Make sure it's within range of your router's signal.
Plug in the extender to a power outlet and turn it on.
Connect your computer or mobile device to the extender's WiFi network. The default network name (SSID) is "NETGEAR_EXT" and the default password is "password".
Open a web browser on your device and go to the Netgear extender setup page by entering "mywifiext.net" or "192.168.1.250" in the address bar.
Follow the on-screen instructions to complete the setup process. You may be prompted to create a new password for your extender's network.
Once the setup is complete, you can disconnect your device from the extender's network and connect to your home WiFi network.
Optionally, you can move the extender to a location where it can enhance your home WiFi signal. You can use the extender's LEDs to determine the best location for optimal signal strength.
That's it! Your Netgear EX6400 extender is now set up and ready to use.
0 notes
Text
#mywifiext.net setup#mywifiext.net#mywifiext#www.mywifiwxt.net setup#netgear nighthawk extender setup
0 notes
Text
Unlock Your Netgear Extender: A Guide to Default Password and Login Details
In Netgear Extender, you will find a wide range of modern features. There is also a Netgear extender default password that many users need to learn. You must enter the default username and password to access the Netgear extender settings. Users typically use "admin" as their username and "password" as their password. It is possible to access the extender settings page once you have entered the correct credentials.
To access the Netgear extender settings, you must enter the default username and password. Most users use "admin" as their username and "password" as their password. Once you have entered the correct credentials, you can access the extender settings page.

Steps to Change the Netgear Extender Default Password
You can check out the below steps to change the Netgear extender default password.
The Netgear extender must be connected to the device before the default password can be changed.
Internet browsers must be open on all devices, including laptops and PCs. You can use any type of browser. Depending on the preferences of the user, updates must be made.
Click here for Netgear's official website, and here for myWifiext's setup instructions. Windows users can scan their devices using mywifiext.net.
If you are using an Apple device or Mac OS, mywifiext is required. For Android users, you can change your Netgear password using 92.168.1.250.
Log in with admin as your username and password as your password. Usernames and passwords should be case-sensitive.
Once you have logged in, check the website's security settings once you click on "login."
You also updated regularly the settings to ensure maximum security and privacy. In addition, ensure that the website uses encryption protocols.
Using the Netgear Genie smart setup wizard, click on the maintenance button to access the admin panel.
Changing your password is as simple as selecting an option.
To change your current username and password, you'll need your old password.
Passwords and SSIDs can now be changed to something you'll remember.
You can now save your settings by tapping the "Apply" button. You will then be able to use all changes as soon as they are saved. There will be an easier way to adjust the settings in the future.
Your old password is required to change your existing username and password. With the new feature, it is now possible to change the SSID and password to something you can remember.
By tapping the "Apply" button, you can now save your settings. You can use all the changes when you need them by saving all changes. The settings can be adjusted more easily in the future. It is not necessary to restart the work.
It is also possible for users to store and manage their passwords securely using a password manager. Users are often alerted if their password has been compromised if they use password managers with additional security features, such as two-factor authentication. It is also possible for users to change their passwords to ensure account security. As well as making sure their passwords are strong, they can prevent hackers from guessing them.
Wrap Up
You can use the above-mentioned steps for changing the Netgear extender default password. It is always critical to secure your device so you can use strong passwords and remember them properly so you don’t face any issues while login to the Netgear extender.
0 notes
Text
Ultimate Guide On Netgear Extender Default Password
Netgear Extender is packed with many modern features. Many users don’t aware that it also comes with a Netgear extender default password. It also needs to in setting up your extender and also needs login. You must remember that both usernames and passwords are case-sensitive when setting up Netgear extenders. To access the Netgear Genie setup wizard on mywifiext, you must enter these default Netgear extender login credentials. It is also important to know that you can change the default password on your device to ensure its security.
A strong password is essential to protect your network from unauthorized access and to keep your personal information and data secure. Leaving the default password unchanged makes your network vulnerable to hackers and other malicious users.

Why Change the Netgear Extender Default Password?
It is also important to change your Netgear extender default password. Millions of Netgear devices are produced every year, and Netgear extender default passwords and usernames are included in all of these devices. These default passwords and usernames are a security risk, as they make it easy for hackers to access the devices. To stay safe, all Netgear users should change the default passwords and usernames to strong, unique combinations.
Additionally, users can regularly check for updates and patches to ensure the latest security features are in place. For security reasons, many Netgear wifi extender users want to change their password to a stronger one.
A Wi-Fi device connected to your Netgear extender network can access your data without your permission if you guess the default password for your extender. Someone correctly guesses your Netgear wifi extender password, and you lose access to your wifi. You can even be blocked from your network without even knowing it since they can change settings on your router to gain access.
You have your Netgear WiFi extender password correctly guessed, and someone can access your network. It is also possible that hackers can change the settings of your router and quickly access your network. They can also easily block you from the network, and you don’t even know it. It is crucial to change the Netgear extender default password quickly.
How to Change the Netgear Extender Default Password
Netgear wifi extender passwords need to be changed immediately. Simple and quick, you can change it from any device such as a Mac, Windows, or Android. Passwords can be reset by users if they forget them. It is also important to follow the below steps to change the Netgear extender default password.
You must connect your Netgear extender network to the device you are using to change your default password.
An Internet browser must be open on any device, such as a laptop or PC. Browsers of all kinds can be used. Users must update it according to their preferences.
The official Netgear extender website can be accessed here and myWifiext setup can be viewed here. Windows users use mywifiext.net to scan their devices. Using an Apple device or Mac OS requires you to go to mywifiext. local. With this tool, you can change your Netgear password as well as 92.168.1.250 if you are using an Android phone.
To log in, enter admin in the username field and password in the password field. There is a case-sensitive difference between the username and password.
Now it is vital to click on login. Once logged in, make sure to check the website's security settings. These settings should be regularly updated to ensure optimal security and privacy. Additionally, ensure that the website is using secure encryption protocols.
Admin panel can be accessed through the Netgear Genie smart setup wizard by clicking on it and selecting maintenance.
By selecting an option from the available options, you can set a new password.
Your old password will be required to change your existing username and password in this step.
It is now possible to enter a new SSID and password that you can remember.
The settings will now be saved when you tap the apply button. This will ensure that all the changes you have made are stored and ready to be used. This will make it easier for you to make further adjustments in the future. No need to redo all the work.
As a result, the default password of the Netgear extender can be easily changed. There are times when users are unable to log into the Netgear Genie Smart Wizard when trying to change their Netgear wifi extender password. It is also important to use the correct credentials of the Netgear extender default password so you can avoid many different errors.
Wrapping Up
To set up and log in to the Netgear extender, you must know the default password. For your device to be secure, you must also change the password. While changing the Netgear wifi extender password, it is imperative to use a strong password. It is always possible to save them after you have changed them. Users can reset their forgotten passwords if they have forgotten them.
0 notes
Text
How do I setup Netgear genie login?
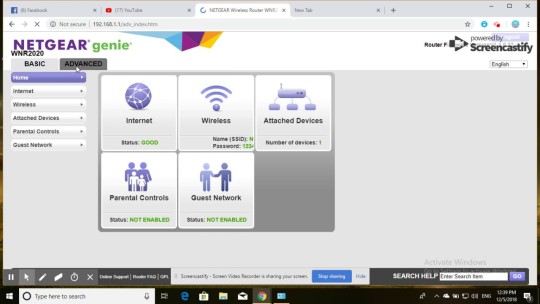
We'll explain the Netgear genie setup setup app on your laptop, desktop, or smartphone in this blog post. An app called Netgear Genie allows you to easily and quickly manage your Netgear extender and router. Users of this programme will be able to manage and fix their home networks. You may adjust your network settings, identify network problems, and set up parental controls with the aid of the genie application. The application's main function is to manage and set up your Netgear device. If you wish to use a Netgear genie programme to graphically setup and manage Netgear home routers.
Netgear Genie Smart Setup
To set up your extender using the Netgear genie smart setup method, follow the instructions below:
You should join a wireless network with your extender.
Connect any device to the current network.
Launch a web browser.
Enter mywifiext.net as the URL.
Your default username and password should be entered.
The Genie setup page will open on your device.
After that, change the technical setting as necessary.
Don't worry; if you run into any problems while completing the tasks above, we can assist you. Simply get in touch with our technical experts and ask them to set up your Netgear extender.
Note:- If you need any assistance regarding your Netgear genie setup so contact our technician or visit the official website that is www.mywifiext.net setup
Netgear Genie Wizard to set up my Netgear extender?
Here, we explain how to set up your Netgear extender for Netgear Genie setup. For Netgear Genie setup, follow to the instructions displayed on-screen:
Connect your extender first.
Your device must be connected to the accessible network.
Fire up your web browser.
Type 192.168.1.250 or mywifiext.net.
Next, select New Extender Setup.
Your default username and password should be entered.
Then, set upd your Netgear Genie by following the instructions displayed on the screen.
You've now finished the Netgear genie setup procedure. We will discuss how to access Netgear genie in this blog.
What does Netgear Genie be used for?
The objective of Netgear genie is to make managing and configuring Netgear devices simpler than by using the standard way. Netgear genie can be installed on a PC or Macbook as well as Android and iOS smartphones. A dashboard called Netgear Genie makes it simple to control your network. You can control your router's settings with it. enabling you to control and turn on parental controls. If your computer loses connection to the internet, Netgear Genie will be able to assist you in resolving the issue because it continually tracks your internet connectivity. Any wireless network can be accessed using Netgear Genie. The Netgear Genie can set the most typical wireless issues and will be able to automatically remedy the problem.
What is the Netgear genie login procedure?
You should need to download the Netgear genie in order to log in to the app. In Windows 10, Netgear Genie is employed.
The Netgear genie login procedure only takes 5 simple steps:
Connect to the extender first.
Launch your browser.
Visit mywifiext.net now.
Use your username and password to log in.
Click again to log in.
Please remember not to remove your extender while attempting to log in.
How is Netgear Genie firmware updated?
The purpose of a firmware upgrade is initially to boost extender performance. If your internet connection is slow and you have trouble with buffering. If so, just click on firmware upgrade.
Follow the instructions provided to update the most recent firmware for your extender on your Netgear device.
You can upgrade your Netgear extender by following these easy steps:
To the Netgear extender, connect.
Restart your browser.
Visit mywi-ext.net
Use your username and password to log in.
Select "Firmware update" from the menu.
Select the most recent firmware from the administration bar.
The firmware upgrade will take a few minutes, perhaps two.
Don't switch the power off when performing the upgrade.
Your Netgear extender then begins to reboot.
You may upgrade your Netgear firmware using this method. If your Netgear extender is providing you any problems after the setup process. Then you may easily phone or use live chat to speak with our experienced professionals.
0 notes
Text
How do connect with mywifiext setup
Simple Login Configuration Mywifiext
To connect to mywifiext.net, follow these steps:
Connect a power supply to the booster.
As you wait for the LED to turn green, hold your breath.
As soon as the power light turns green, connect to the extender.
The device's LED should go completely green.
Any web browser should work. Enter a message in the address bar by clicking on it.
In the address bar, type Mywifiext.net.
LOGIN TO CONFIGURE A MYWIFIEXT WIFI EXTENDER
On the website mywifiext.net, you may create your own wireless network.
To finish the Mywifiext setup procedures, link your device to the Netgear Ext network.
Open any online browser and go to the mywifiext setup page, for example, Google Chrome.
Enter the web URL in the browser's address bar.
Type 192.168.1.250 into the address bar.
You must click the new extension setup button when it appears.
Access the mywifiext setup page by creating an account right away and then clicking Continue.
How can I access www.mywifiext.net?
The Procedure For www.mywifiext.net Account Setup Page
We'll go through a step-by-step tutorial for setting up your Netgear Nighthawk Mesh WiFi Extender using Mywifiext.net or Mywifiext.local, both of which are local login pages for your WiFi Range Extender Setup.
Alternatively, you may log in using Mywifiext.net's default IP address of 192.168.1.250. Observe the following setup instructions to access your Netgear WiFi Range Extender Page:
Your Netgear WiFi extender should be connected to Powerline.
Wait for it to light up right now.
Wait until your Netgear Extender Setup's lights turn completely green.
Grab a laptop or a desktop in the meanwhile.
Open any web browser, such as Mozilla Firefox or Google Chrome.
Now go to www.mywifiext.net or Mywifiext.local, which is the default login URL.
To begin the setup, click the New Extender Setup button.
Complete the configuration of your Netgear Nighthawk WiFi Range Extender by entering the default login information.
Note: If you continue to have issues setting up your new or old Netgear WiFi Range Extender, try using its default login URL, www.mywifiext.net or mywifiext.local, or try using its default login IP address, 192.168.1.250. If you need any assistance, don't.
How can I configure mywifiext.local?
It's easy to set up your Netgear Nighthawk WiFi Extender using Mywifiext.local. The mywifiext.local setup page can only be accessed by MAC or IOS devices. If you want to know how to access mywifiext.local, keep reading our next section.
For the mywifiext.local setting? Following are the steps:
Before turning on your Nighthawk WiFi Extender, watch for the power light to solidify. View a computer or a mobile device.
Use your web browser to go to mywifiext.local.
Make sure your device is connected to the nighthawk extender network.
To finish the Mywifiext local setup procedure, adhere to the directions displayed on the screen.
Once the setup is finished, place the Extender in the desired location.
To get to mywifiext.net, do the following:
After being unpacked, connect the Extender to the power supply.
After turning on the extender, launch a web browser.
Type mywifiext.net into the address bar and wait for it to load.
Mywifiext.net's IP address, 192.168.1.250, should load if it doesn't otherwise.
Your login information will be requested on the Netgear genie screen.
Go to mywifiext.net and log in with your credentials to manage or instal your Wi-Fi extender.
If configured correctly, an extender might expand the reach of your network and provide you access to service outside, such as in your yard.
Extenders don't require a lot of space. The majority are single-piece devices that plug into an outlet and look like oversized plug-in air fresheners.
What is the address 192.168.1.250?
To access 192.168.1.250, follow the instructions below.
*Launch a current web browser on your laptop or computer.
*Then, enter the Mywifiext login IP address (192.168.1.250) in the address box.
*After inputting this IP address and clicking the enter key, you'll be sent to the Mywifiext login screen.
*The list's first item is.
*You must first log in with your username and password in order to access the page.
How can I set up a mywifiext extender?
Mywifiext extender configuration:
The Netgear range extender must first be linked to your wifi device.
Open any web browser and navigate to http://mywifiext.net.
Select New Extender Setup from the menu.
Create a profile on mywifiext.net right now.
Decide on your present Wi-Fi.
Click Next after entering your network security key.
Give the extender two to three minutes to complete the setup.
Both must be right if you see the warning "Username and password is incorrect." Before your login information is shown when you choose the "Forget" option, you will be asked to answer two security questions.
1 note
·
View note
Text
Guide For Netgear Extender Setup Wizard
The Netgear extender setup wizard allows you to configure your new extender with the existing router’s network. To visit the Netgear extender setup wizard, you need to login to your extender. Use the default web address myWiFiext.net through a web browser. Enter the login username and password to reach the setup wizard.
0 notes
Text
Netgear Genie Setup
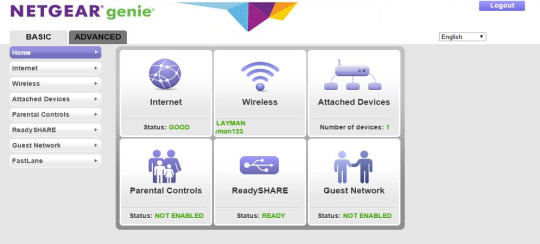
Netgear Genie setup is a desktop programme that works on both Windows and Mac computers. It can be set up to handle Netgear home routers and provides a simple dashboard for monitoring Netgear Genie setup , controlling, and repairing home networks. (Ensure that the router is running the most recent firmware; earlier firmware may not support all genie functionalities.
Features of Netgear Genie
Use Netgear Genie Smart Setup to connect. If you are not instantly sent to Netgear Genie, click here. Launch a web browser and type mywifiext.net into the address field before pressing the enter key. It will establish a connection with Netgear Genie Smart Setup. If you continue to have problems, contact our Experts for a free diagnosis of your connectivity concerns. WiFi Analytics is a feature that allows you to analyse your network.
Debug any network problems. So here are the main advantages of Netgear Genie :
Join, monitor, and manage your home wireless settings from your mobile device or tablet.
Stream films and audio files from My Media on your network to smartphones in real time.
By adding AirPrint capability to any printer, you may print from your phone or iPad.
Using the EZ mobile connect function, you may secure your connection through mobile or tablet with a QR code.
Smartphones make it simple to use the parental control feature.
Network settings in Network App may be simply checked and adjusted.
All Guest Access on the network is monitored in-house.
Using the WiFi Analytics Feature, you can keep track of your network's WiFi analytics.
Debug any network problems
Mywifiext.net and Mywifiext.local are the same words, so if you are still having issues, you may verify your default login IP address, call us at our toll-free number, or chat online with one of our professionals..
Netgear Genie Setup Process
Follow the steps below to connect your extender using the Netgear genie setup method:
You should use your extender to connect to a wifi network.
Connect any current network device.
Open a web browser.
Enter the website address mywifiext.net.
You should enter your id and password.
On your device, the Genie setup page will appear.
After that, make any required adjustments to the technical settings.
Netgear genie login procedure
To access the app, you should first download the Netgear genie. Netgear Genie is used in Windows 10.
The Netgear genie login procedure is comprised of simply five easy steps:
First, connect to the extension.
Start your browser.
Go to mywifiext.net right now.
Log in with your username and password.
To log in, click once more.
Please keep your extension in place while attempting to log in.
If you are still facing any problem regarding mywifiext.net or mywifiext.local ,they both are the same terms, so you can check via Default login IP address and also you can contact us on our toll free number and via live chat with our technicians.
Netgear Genie Login Guide
We show you how to set up your Netgear extender for Netgear Genie. Follow the on-screen instructions for Netgear Genie setup:
First, attach your extender.
Your device must be linked to a network that is available.
Launch your web browser.
Enter the address 192.168.1.250 or mywifiext.net.
Then, choose New Extender Setup.
You should enter your default login and password.
Then, set up your Netgear Genie by following the on-screen directions.
You have just completed the Netgear genie setup process. This guide will go through how to use Netgear genie.
How To Connect To Netgear Genie Setup
Follow these simple steps to update your Netgear extender:
Connect to the Netgear extender. Start your browser. Go to mywifiext.net.
Log in with your name and password.
From the menu, choose "Firmware update."
From the administrative bar, select the latest firmware.
The firmware upgrade should just take a few minutes, if not two.
When doing the update, do not turn off the power.
Your Netgear extender will then start to reset.
You may use this approach to upgrade the firmware on your Netgear router.
If your Netgear extender isn't working properly after you put it up.
These instructions will help you configure your Netgear Genie correctly. If you still face any problem , you may get in touch with one of our knowledgeable professionals by calling our toll-free number or via live chat. We are available to you 24*7
0 notes
Text
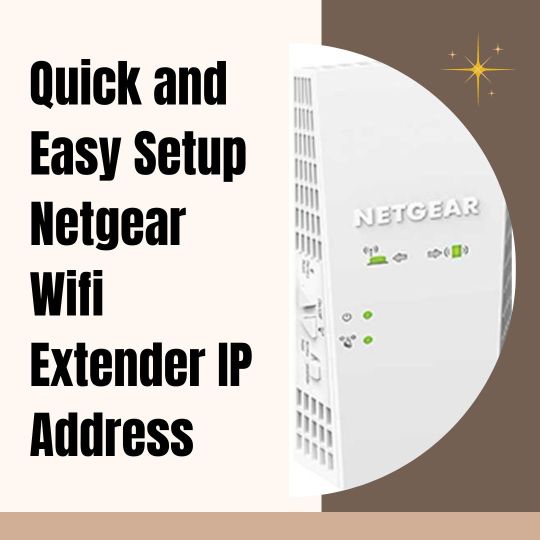
Ultimate Guide on Netgear Wifi Extender IP Address
The Netgear WiFi Extender IP address is the IP address used for connecting to the Netgear WiFi Extender. It is typically a 192.168.1.250 IP address. You can find this IP address at the bottom of the WiFi extender or in the extender settings. The default Netgear WiFi Extender IP address is 192.168.1.250 or 192.168.0.250, depending on the model. You can also find it by logging into your router and looking for the extender's IP address in the list of connected devices.
Some extenders come with a label that lists the IP address, but if the label has been removed or is not visible, you can still find it by logging into your router and looking for the extender's IP address in the list of connected devices. This allows you to easily access the extender's settings and make any necessary changes. You can use the IP address for the Netgear wifi extender login.
Method To Access Netgear Wi-Fi Extender IP Address
You can quickly access the Netgear wifi extender IP address, so you need to follow the below steps. It is imperative to follow all steps correctly.
To begin, open a web browser on your device.
In the address bar, enter the IP address 192.168.1.250 of your Netgear wifi extender.
You can now proceed to the mywifiext login page by pressing enter.
You need to enter your username and password correctly.
Whenever you install a new Wi-Fi router or extender, you need to input the latest values.
Pressing Enter will bring up a panel.
Netgear extenders can be set up at www.mywifiext.net.
You can log in with your username.
After these steps, you can quickly access the Netgear wifi extender's IP address. It is now easier for you to log in to your Netgear wifi extender.
Steps For Netgear Wifi Extender Login by Using Netgear Wifi Extender IP Address
Users can follow the below steps for Netgear wifi extender login, and you can use the Netgear wifi extender IP address.
You need to turn on your Netgear extender.
Your favorite device's web browser can be launched here.
It is now possible for users to search for http://192.168.1.250.
To sign in, you must provide your username and password.
It is also possible to enter the Netgear wifi extender's IP address, 192.168.1.250.
Users can now access the admin panel. The smart setup process for your extender can be accessed and settings can be changed through this page. Logging into the 192.168.1.250 admin page will also give you access to advanced settings for your WiFi extender. The default password can now be changed and you can create a stronger password.
When you create a new password, you can also save it. Another device can also track the device you track on your network. There is also an option to update the firmware using the Netgear wifi extender's IP address.
Common Problems with Netgear Wifi Extender Login by Using IP address 192.168.1.250
Many problems may arise when setting up an extender using the Netgear wifi extender IP address of 192.168.1.250. In this way, you can minimize inconveniences and difficulties. Users can encounter various problems when logging in to their Netgear wifi extender using their IP address. Here we can discuss the primary issues that users face while Netgear wifi extender login using the Netgear wifi extender IP address. It helps you figure out the problem and solve it quickly.
You cannot set up your new Mywifiext extender by connecting to the Netgear wifi extender's IP address of 192.168.1.250 or by going to Mywifiext.net. The majority of users encounter these issues regularly.
There are no steps to create an account when you enter 192.168.1.250 or Mywifiext.net.
On the setup page for 192.168.1.250 or the login page for Mywifiext, users may overlook the registration instructions.
Netgear extenders are sometimes unable to log in because users don't understand how to install and set them up.
The WPS setup process for Netgear extenders is often confusing to users.
There is a need to read all the instructions and follow them accurately so you can quickly solve the issue related to the Netgear wifi extender login.
Wrap Up
Users need to use the Netgear wifi extender IP address for the Netgear wifi extender login. It is a quick way to log in to the extender and use it properly. You can also access the settings and update the firmware and other settings with the help of an IP address.
1 note
·
View note
Text
Netgear AC1200 WiFi Range Extender Setup
In this guide, we will share the two methods to set up the Netgear AC1200. The first one will be by the use of an installation assistant and the second one is using the WPS.

Netgear AC1200 Extender Setup: Manual Method
To install the AC1200 Wifi extender, plug it in and turn it on.
Wait for the Netgear ac1200 wifi extender's power light to turn solid green.
Now connect any of your wireless devices to Netgear ext.
On your device, the Netgear Extender Setup screen will appear.
Make an AC1200 login account and connect the Netgear WiFi Extender Setup to your home network.
NOTE: For the AC1200 new extender setup, please place the extender 2-3 feet away from the main router.
Netgear AC1200 Setup Instruction: ( W.P.S )
Connect the Netgear AC1200 to a power outlet and wait for the green light to show.
When you press the W.P.S button on your AC1200, the green light on the extender will blink.
Push the W.P.S button on your wireless router or modem within 1 - 2 minutes.
So the extender is now communicating with your main router.
When the green light on your extender stops flashing.
Your Ac1200 wireless extender will show three green lights.
The Ac1200 is now linked to the wireless network at home.
Netgear AC1200 Setup using NETGEAR Installation Assistant:
Get a PC or mobile device to install Netgear AC1200.
Make sure the EX6120 is plugged in close to the main router or modem.
Once the WIFI repeater has a solid green light.
Now, on your laptop or smartphone, navigate to the WIFI connection manager and search for the "NETGEAR Ext" network.
Open a web browser and connect your device to the AC1200.
Go to mywifiext.net now. The installation assistant from NETGEAR will be displayed.
Follow the on-screen instructions to connect your Netgear EX6120 to your existing WiFi network.
Once the AC1200 configuration is complete. Unplug the repeater and place it in an area with a poor Wi-Fi signal.
For more information and troubleshooting you can visit our website and also chat or call our expert team. They will guide you everywhere.
#Mywifiextsetup#netgearac1200wifirangeextendersetup netgearextendersetup netgearextenderlogin USA Technology
1 note
·
View note
Last Seen Blogs

largedenominationsplease
i’m bi, actually

townhousemlg-blog
Malang Townhouse

sameekshyame-blog
Untitled

scrotumnose
ScrotumZone

amorexo
༺・Amore♡︎・༻