
Don't wanna be here? Send us removal request.
Statistics
We looked inside some of the posts by wifiext-netsetup and here's what we found interesting.
Average Info
Notes Per Post
1
Likes Per Post
1
Reblog Per Post
0
Reply Per Post
0
Time Between Posts
18 days
Number of Posts By Type
Text
7
Last Seen Tumblr Blogs


Fun Fact
Tumblr has 411 employees.
Text
How do I log into my NETGEAR extender IP address?
If you are unable to netgear wifi extender log in on your own, then you are at the right place. In this, you will get to know How do I log into my NETGEAR extender IP address? Netgear wifi extender is operated to increase the speed of the internet and delivers adequate coverage in difficult-to-reach locations. Netgear wifi extender is seated in between the device and the wireless router. It is the most adequate procedure to boost the speed of the existing network, and it should be within the range of the wireless router. And it also offers us access to speedy and lag-free internet in every location of your home. Netgear wifi extender IP address prevents others from using the extender and allows the extender to connect to the direct network.
The IP address is a series of numbers, which is assigned to an internet connected device. Doing this is not a difficult task, you can do it without requesting for assistance from somebody. If you have a disabled wifi connection, outdated firmware, improper wireless range, and use an incorrect IP address, then you will be unable to do so. So, make sure that your wifi extender does not have these issues, and also check that it is plugged in properly. And update the firmware on the existing wireless router and Netgear range extender to the latest available version. Here are the techniques for How do I log into my NETGEAR extender IP address? Obey the below steps for the netgear wifi extender log in.

Method for Netgear wifi extender log in:
If you do not know How do I log into my NETGEAR extender IP address? Then simply go through the following instructions to complete the Netgear wifi extender log in:
Before proceeding with the further steps, connect the Netgear wifi extender through the ethernet cable.
Then launch the web browser on your computer or laptop. Afterward, enter the default IP address 192.168.1.250 of the Netgear extender on the search bar of the browser.
And also make sure that you entered the correct IP address. Now the login page of the Netgear wifi extender will appear.
After this, fill in the default login credential i.e., username and password, and then click on the login tad.
At last, a pop-up message will appear on the computer screen, showing that you have successfully logged into the Netgear extender.
Sum up:
Hopefully, the above steps will help you with the How do I log into my NETGEAR extender IP address? Netgear wifi extender log in is not as difficult as it looks, this is more straightforward than you think. You just have to obey each and every step very carefully netgear wifi extender log in. If none of the above steps help you out, then you might need some expert assistance. Try to get in contact with the Netgear experts, they will provide you with full assistance.
0 notes
Text
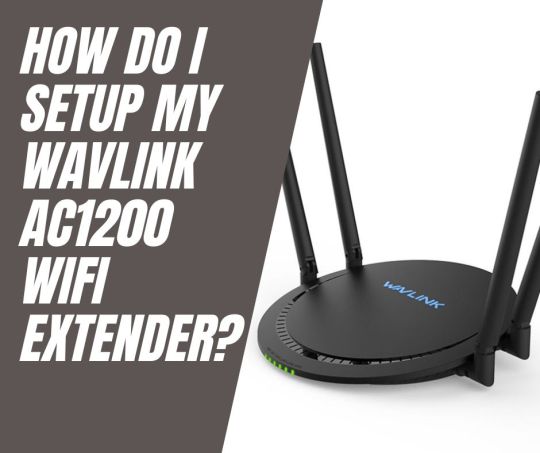
How Do I Setup My Wavlink AC1200 Wifi Extender?
Wavlink AC1200 provides fast speeds and reliable connections for multiple devices. With two high-gain antennas, it provides wide coverage and stable connections. A USB port allows users to access shared files easily. The device is easy to set up and use and works with most wireless devices. You can also set up parental controls to keep your children safe online. It takes a few minutes to complete the Wavlink AC1200 setup. You can use the WPS and web browser to start the setup process of the Wavlink AC1200 wifi extender.
WPS Method To Wavlink AC1200 Setup
A step-by-step guide to Wavelink AC1200 Setup WPS is here.
Your extender's power adapter can be connected to a power outlet.
Isolate all wires before connecting them.
When the extender is powered on, a blue light will appear.
The Wavlink extender can be connected to your WiFi router.
You must press the WPS button on both the router and the extender at the same time.
The two buttons need to be pressed together for two minutes for this step.
Ensure that the LED light is solid blue.
When the router and extender are both connected, a solid blue LED will illuminate.
Whenever an extender is connected to a wireless network, it automatically boosts it. Both devices will have the same SSID and password.
It will be possible for you to log in using the same password.
You can use your Wavlink AC1200 device after you complete the setup process.
Using a Web Browser for Wavlink AC1200 Setup
The Wavlink AC1200 setup can also be done via a web browser. It also depends on users' preferences which they want to use. Here are the steps for setting up the system.
Wavlink AC1200 devices must be plugged into power outlets.
You will need to configure your device to repeat the connection.
You can find the network settings on your laptop by going to the settings menu.
By finding the network, you can connect to Wavlink.AC 1200.
To access 192.168.10.1, launch any web browser and type the address in the address bar.
There will be a configuration page for the Wavlink AC1200.
By following the instructions on the screen, you can now connect your home's network to the extender.
The Wavlink AC1200 setup is now ready for use. Once the router is plugged in, the LED lights will indicate when the router is properly connected to the modem. After that, users can access the router's settings page via any web browser to customize their network setup and connect their devices to the internet.
Once the LED lights are lit, users will be able to connect their devices to the router's network and access the internet. They can also access the router's settings page, which will allow them to customize their network setup and adjust settings such as the network name and password.
Wrapping Up
You can use above both methods for the Wavlink AC1200 setup. Users need to read all the instructions so they can follow all steps perfectly.
0 notes
Text
Unlock Your Netgear Extender: A Guide to Default Password and Login Details
In Netgear Extender, you will find a wide range of modern features. There is also a Netgear extender default password that many users need to learn. You must enter the default username and password to access the Netgear extender settings. Users typically use "admin" as their username and "password" as their password. It is possible to access the extender settings page once you have entered the correct credentials.
To access the Netgear extender settings, you must enter the default username and password. Most users use "admin" as their username and "password" as their password. Once you have entered the correct credentials, you can access the extender settings page.

Steps to Change the Netgear Extender Default Password
You can check out the below steps to change the Netgear extender default password.
The Netgear extender must be connected to the device before the default password can be changed.
Internet browsers must be open on all devices, including laptops and PCs. You can use any type of browser. Depending on the preferences of the user, updates must be made.
Click here for Netgear's official website, and here for myWifiext's setup instructions. Windows users can scan their devices using mywifiext.net.
If you are using an Apple device or Mac OS, mywifiext is required. For Android users, you can change your Netgear password using 92.168.1.250.
Log in with admin as your username and password as your password. Usernames and passwords should be case-sensitive.
Once you have logged in, check the website's security settings once you click on "login."
You also updated regularly the settings to ensure maximum security and privacy. In addition, ensure that the website uses encryption protocols.
Using the Netgear Genie smart setup wizard, click on the maintenance button to access the admin panel.
Changing your password is as simple as selecting an option.
To change your current username and password, you'll need your old password.
Passwords and SSIDs can now be changed to something you'll remember.
You can now save your settings by tapping the "Apply" button. You will then be able to use all changes as soon as they are saved. There will be an easier way to adjust the settings in the future.
Your old password is required to change your existing username and password. With the new feature, it is now possible to change the SSID and password to something you can remember.
By tapping the "Apply" button, you can now save your settings. You can use all the changes when you need them by saving all changes. The settings can be adjusted more easily in the future. It is not necessary to restart the work.
It is also possible for users to store and manage their passwords securely using a password manager. Users are often alerted if their password has been compromised if they use password managers with additional security features, such as two-factor authentication. It is also possible for users to change their passwords to ensure account security. As well as making sure their passwords are strong, they can prevent hackers from guessing them.
Wrap Up
You can use the above-mentioned steps for changing the Netgear extender default password. It is always critical to secure your device so you can use strong passwords and remember them properly so you don’t face any issues while login to the Netgear extender.
0 notes
Text
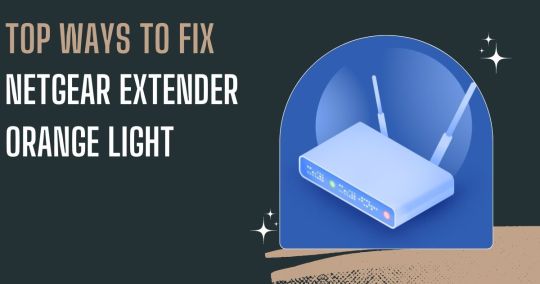
Top Ways To Fix Netgear Extender Orange Light
Most of the time Netgear extender works perfectly but sometimes there is the issue of the Netgear extender orange light issue will occur. It shows that your extender is not properly attached to the router. There is a need to solve the problem quickly so you can again use your extender effectively.
Why Does My Netgear Router Have an Orange Light?
Netgear wifi extenders' orange lights can be caused by multiple factors. A damaged cable and an extender are the primary causes. You see the orange light error when you use the outdated version of the Netgear extender. An incorrect setup of the Netgear extender is also possible. The error may occur when there is signal interference. You need to solve the error quickly.
Ways to Fix the Netgear Extender Orange Light
It is also essential for users to use the best ways to solve the Netgear extender orange light. Here you can check the different methods.
Check the Ethernet Connection
Your Netgear extender needs to be connected to your router. Ensure your devices are not loosely connected or have faulty cables. You need to replace the Ethernet cable connecting your devices. The best thing to do is to replace it right away. Once this is done, you can check whether the Netgear extender orange light issue has been resolved.
Check Your Power Supply
There are times when the power outlets on Netgear extenders are damaged or faulty. The importance of checking power outlets cannot be overstated. Power can also be supplied to the extender by changing the wall socket. Also, it is important to check if the issue has been resolved.
Reboot Your Netgear Extender
Restart your Netgear wireless range extender to get it going. It might be a good idea to reboot your Netgear wifi extender if you are experiencing orange light issues.
The first thing you can do is power off your Netgear range extender.
You can now disconnect it from the power outlet.
There is a need to wait for a few seconds and turn it off by unplugging it from the power outlet.
After this, there is a need to wait for a few seconds again and plug the router again with the power socket and turn it on.
It is also important to check whether Netgear extender orange light issue is solved or not.
Update Netgear Extender Firmware
It is also vital to use the latest version of the firmware of the Netgear extender. When you are using the outdated version this issue will occur so it is important to update the version.
There is a need to open a web browser and go to the setup page of the Netgear extender.
Here it is essential to choose settings > maintenance > firmware update.
After this, you can check available firmware updates and tap on the latest one.
It takes a few minutes to update the firmware of the Netgear extender.
After this, it is vital to check whether the Netgear orange light issue is solved or not.
Wrap Up
It is also important to use the above methods to solve the Netgear extender's orange light. It's important to proceed through all the steps in the right order so you can quickly solve the issue.
0 notes
Text
How To Change Netgear Extender Default Password
You can use the Netgear extender easily because it is simple to use. There is also an option for users to attach many devices with them. You can also use its advanced features to remove dead zones from your home. It also comes with a Netgear wifi extender default password, so you can also change it anytime. It simplifies all processes. Here we can check the proper method to change it.

Meaning of Netgear Wifi Extender Default Password
To access the extender's settings, the default password is usually printed on the label underneath the device. If the label is not present, the default password can be found in the user manual. It is important to change the password after logging in for security purposes.
A Netgear wifi extender's default password is imperative to know. Default passwords and usernames for Netgear extenders are password and admin, respectively. Passwords and usernames need to be case-sensitive. You can use it to set up and log in to your Netgear extender. The Netgear Genie setup wizard on mywifiext requires these default Netgear extender credentials. In addition to changing your device's default password, you can also change its security settings.
Your extender network can be accessed by random users without your permission. By guessing your Netgear password, they can easily access your data through Wi-Fi devices connected to your extender network. When a hacker guesses the Netgear extender password, he can access the password for your WiFi extender.
The attackers may even be able to alter your router's settings to gain access to your network and even prevent you from accessing it without your knowledge. It is necessary to change the default password for the Netgear extender. You can access Netgear Genie Smart Wizard by visiting the official Netgear extender website.
Steps to Change Netgear Wifi Extender Default Password
It is also crucial for users to change the Netgear wifi extender default password. You can change it on any device, such as Android phones, Mac PCs, or Windows PCs. There is a need to follow all steps accordingly and change the default password.
You must connect your Netgear extender network to the device you are using during this process. WiFi networks need to be fast and stable.
It is necessary to open a web browser on any device, such as a laptop or PC. You can use any web browser you like, but the latest version is recommended.
Open the official Netgear extender website to access mywifiext setup. On a Windows device, you'll need to go to mywifiext.net. On a Mac or Apple device, you'll need to navigate to mywifiext. local. If you're using an Android device, you'll need to navigate to 92.168.1.250.)
You will then need to log in with the default username and password, which is an admin in the username field and password in the password field. Passwords and usernames are case-sensitive.
After this, you can tap on login.
Select maintenance from the admin panel option in the Netgear Genie smart setup wizard.
You can create a new password by selecting one of the available options.
There is also a need to enter your old password so you can change your current username and password.
Here you can enter the new SSID and password into the system.
After this, you can save it and note down your new Netgear wifi extender default password.
These are the steps above for changing the Netgear wifi extender's default password. When you complete the process, you need to save your username and password.
Wrapping Up
You can use the above-mentioned steps to change the Netgear wifi extender's default password. It is also important to follow all steps accurately and change the password.
0 notes
Text
How To Resolve If Netgear Extender Won't Connect To Router?
Users must setup their Netgear Extender properly and connect to the router. Most of the time users face the error of the Netgear extender won't connect to the router. There are multiple reasons for the Netgear wifi extender not connecting to the internet. In this article, we can discuss its reasons and solutions so users can quickly use their Netgear Extender.
When you place the Netgear extender in the wrong location it shows the error. Sometimes there is a loose wire connection to the router. There is also the chance of lost internet connectivity issues. Most of the time users do a partial reset of the extender. When the configuration of the wifi router is improper so Netgear wifi extender not connecting to the internet.

Methods to Fix Netgear Extender Won't Connect To Router
It is important to fix the issue of the Netgear wifi extender not connecting to the internet. You can check these steps to solve the error. Necessary Points
It is necessary to remember the basic points before you want to fix the Netgear extender won’t connect to router.
There is no fluctuation in the power supply for the Netgear extender and router. Your router and Netgear extender power are on.
You can check the status of the LED lights on your extender. Your power supply must be stable
Place your router in the same room as your extender.
You do not have a problem with the Netgear WiFi range extender's hardware.
Change the Location of the Netgear Extender
You may have connection issues if you place the Netgear extender incorrectly. Consider the following tips when placing your Netgear extender.
You can always choose the center location for your Netgear extender.
It is necessary to place the extender away from walls, ceilings, or corners.
You can never place electronic devices near the extender because it blocks the signals.
It is also vital to avoid placing the products such as fish tanks, ovens, microwaves, and many others from the extender.
After changing the location users can check whether the Netgear wifi extender not connecting to the internet is fixed or not.
Power Cycle Your Netgear Extender
Even after placing the Netgear WiFi extender optimally, the extender will not connect to the router. You don't need to worry! Use the power-cycle method. We give steps for power cycling your Netgear extender below.
First, you can unplug your wifi extender from the power socket.
Here you can wait for a few seconds.
Now you can again attach the extender to a power outlet.
After this, you can turn on your Netgear extender.
It is also necessary to reboot your router. Now you can check whether the Netgear wifi extender not connecting to the internet.
Review Connections
Your Netgear extender may not be connecting to your router because of loose or improper connections. You might want to consider making a wired connection between your extender and router instead of a WiFi connection. A cut-free and undamaged Ethernet cable are needed to use. You can also connect your PC or laptop to the WiFi extender if the router requires a browser login. Reset your WiFi range extender to its default factory settings if all connections are proper.
Wrap Up
Users can easily fix the Netgear wifi extender not connecting to the internet with the above steps. It is necessary to follow all the steps accordingly. Users can also change the location of their extenders. It is also necessary to use the original cables with the Netgear extender.
0 notes
Text
Guide to Fix Netgear Wi-Fi Extender Orange Light Issue
Netgear wireless range extenders provide blazing-fast and lag-free internet access in every area of your home. However, like any technical device, WiFi extenders are also susceptible to certain problems. Among them is the orange light issue on Netgear Wi-Fi extenders. Having orange light issues with your Netgear extender? Then we've got you covered. This post contains a few fixes for Netgear Wi-Fi Extender Orange Light issues that will surely help you cure them. So, what are you waiting for? Continue reading by scrolling down.

Netgear Wi-Fi Extender Orange Light Causes
First, let's discuss the reasons that may have led to the orange light issue.
Several factors contribute to the issue you are facing:
Possibly, your Netgear extender setup is incorrect.
Wireless range extenders and routers do not have stable Ethernet connections.
In addition, your device's firmware is not up-to-date.
Further, you may experience interference with your Wi-Fi extender's signals.
A technical glitch can also cause the lights on your extender to turn orange.
Netgear Wi-Fi Extender Orange Light (Solved) Let's now discuss how to troubleshoot the Netgear WiFi extender orange light problem.
Reboot the Netgear Wi-Fi Extender
Restart your Netgear wireless range extender to start with. You may resolve the orange light issue by simply rebooting your device. Thus, you will not have to spend time on other troubleshooting methods.
The following steps will help you reboot your wireless device:
Turn off your Netgear range extender and unplug it from the wall.
Give it some time.
After that, turn on your extender by plugging it back into the socket.
Next, check whether your Netgear WiFi extender displays orange light. If yes, you should keep reading this blog.
Install the Latest Firmware for Netgear Devices
An alternative method for troubleshooting the orange light issue is to update the firmware. Below are the instructions for updating your device's firmware to the latest version:
Install an updated internet browser on your computer.
Next, visit the new set-up page for the extender.
Select Firmware Update from Settings > Maintenance.
Then, follow the onscreen instructions for an updated version.
Also, you can consider contacting our technical experts if you have any problems updating the firmware of your Netgear range extender.
Connect the Ethernet Cable Your router and Netgear extender must be connected. Further, you should ensure there is no loose or faulty cable connection between your devices. So, get a new Ethernet cable immediately if your old one has any cuts.
Resetting your Netgear Extender
If you continue to have orange light problems even after trying the troubleshooting tips above, perform a factory default reset on your router.
To restore your device to factory defaults, follow these steps:
Find your wireless extender's Reset button.
Then, use a pointed object such as an oil pin to gently press it.
Subsequently, connect your WiFi-enabled device to the Netgear_ext network and reconfigure it.
At the End: If none of these fixes helped you fix the Netgear Wi-Fi Extender Orange light problem, contact our technical experts. Additionally, if you have any other questions related to the same issue, they'll be able to help you.
1 note
·
View note