#pip3
Explore tagged Tumblr posts
Visit Tumblr Blog
Explore Tumblr blogs with no restrictions, modern design and the best experience.
Last Seen Tumblr Blogs


Fun Fact
The KCSC sent more than 20K requests to delete posts related to prostitution and porn to Tumblr from January to June 2017.
Text
Reference preserved on our archive
TL;DR: Non-pharmaceutical interventions (e.g. Masks, distancing, mass testing, isolation) outperformed pharmaceutical interventions during the public health crisis in Tunisia. Other studies have shown similar trends in other countries, highlighting the need for continued non-pharmaceutical interventions for covid and other diseases.
Vax and relax gets us more death than vax and mask.
Abstract Background In COVID-19 management, a variety of pharmaceutical interventions (PI) and non- pharmaceutical interventions (NPI) were adopted to limit the spread of the disease and its associated deaths. We aimed to evaluate the impact of PI and NPI on risks of COVID-19 transmission and deaths.
Method We collected aggregate data from March 2nd, 2020, to December 1, 2022 from the Tunisian Ministry of Health's website and OurWorldInData.org site. NPI Periods (NPIP: March 2020 to March 2021) and PI Periods (PIP) were distributed to NPIP1, 2, 3 and 4 and to PIP1, 2, 3 and 4, respectively. We calculated the Relative Risks (RR) and 95% Confidence Intervals (CI) by comparing the subsequent period with previous one.
Results The risk of SARS-CoV-2 transmission increased progressively from the zero cases period (NPIP2) to the mitigate strategy period (NPIP3) (RR = 14.0; 95% CI: 12.4–15.8) and to the stop-and-go epidemic control period (NPIP4) (RR = 23.1 (95% CI: 22.4–23.9). It was stabilized in the targeted vaccination period (PIP1) (RR = 1.08, 95% CI: 1.07–1.08) and reduced during the mass vaccination period (PIP2) (RR: 0.50, 95% CI: 0.50–0.51). SARS-CoV-2 transmission, increased during PIP3 concomitant with the Omicron wave (RR = 2.65, 95% CI: 2.64–2.67). It remained at a low level in PIP4 (RR = 0.18; 95% CI: 0.18–0.18).
Compared to NPIP2, NPIP3 and NPIP4 were associated with a higher risk of COVID-19 mortality (RR = 3.337; 95% CI: 1.797–6.195) and (RR = 72.63 (95% CI: 54.01–97.68), respectively. Since the start of the immunization program, the risk of COVID-19 death has consistently decreased. In comparison to each previous period, the risk transitioned in PIP1 to RR = 0.91; 95% CI: 0.88–0.93, then to RR = 0.85; 95% CI: 0.83–0.88 in PIP2, to RR = 0.47; 95% CI: 0.45–0.50 in PIP3, and to RR = 0.19; 95% CI: 0.18–0.24 during PIP4.
Conclusion In terms of lowering the risk of transmission and mortality, the NP strategy at the beginning of the epidemic outperformed the IP strategy during the outbreak.
#mask up#covid#pandemic#wear a mask#public health#covid 19#wear a respirator#still coviding#coronavirus#sars cov 2
26 notes
·
View notes
Text
Im soooo glad nobody has dropp3d a pip3 bomb in my ask, mostly b3ca>s3 3<3ryon3 knows that im too strong and wo>ld ob<io>sly s>r<i<3
39 notes
·
View notes
Text
Hướng dẫn tạo Telegram UserBot bằng Python + Telethon trên server Linux (VPS) để tự động nhắ n tin vào kênh Telegram cực kỳ chi tiết
💥 Hướng dẫn tạo Telegram UserBot bằng Python + Telethon trên server Linux (VPS) để tự động nhắn tin vào kênh Telegram cực kỳ chi tiết 💖👉🍀 1️⃣ Cài đặt Python và Telethon trên VPS 🐧 sudo apt update sudo apt install python3 python3-pip -y pip3 install telethon 2️⃣ Đăng ký Telegram API ID + Hash 🔑 👉 Truy cập: https://my.telegram.org → Đăng nhập bằng số điện thoại Telegram của bạn → Vào API…
0 notes
Text
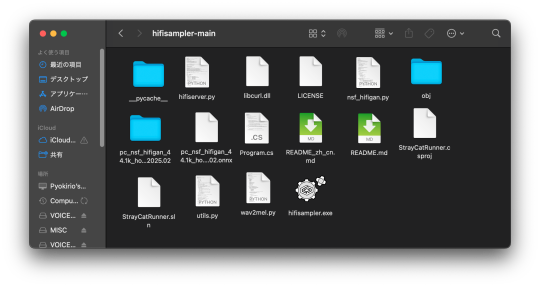
📁 HiFiSampler on MacOS (ft. chevrefee)
Today's tutorial will be going over the installation for Hifisampler for MacOS. This was made in collaboration with chevrefee who helped me through the entirety of the install so it was all made possible with their help! Before we get into the specifics of installation we will be going over the currently tested MacOS environments and explain the differences in installation.
For users of Silicon MacOS that are on Sonoma, it is recommended to use the distributed client. Make sure you download both the resampler and client zip files.
For Intel MacOS and Silicon MacOS that are on Ventura and Sequoia, refer to the window’s exe installation method. To prep the environment for the installation please refer to my resampler tutorial before proceeding with this tutorial.
Link ▶︎ https://keitaiware.com/post/766063532617973761/resamplers-on-macos
MacOS that are on versions before Ventura cannot natively support this resampler. Consider using Bootcamp and following an installation guide for Windows.
What you will need in order to begin the installation. . .
Anaconda
Python 3.10
Section 1, “Installing necessary files.”
Install the general Hifisampler installer.
To check if Anaconda is installed to your system, open Terminal and run the command . . .
conda -V
This command will run back what version of anaconda you have installed.
We will now create the conda environment inside Terminal. To set up the conda environment,
conda create -n py10 python=3.10 anaconda
Now that the environment has been created, we will now activate it and install all the necessary modules. *(numpy, scipy, resampy, onnxruntime, soundfile pyloudnorm, librosa, soundfile)
pip install numpy, scipy, resampy, onnxruntime, soundfile pyloudnorm, librosa, soundfile
Our next install will be separate from these modules.
pip3 install torch torchvision
To continue with the preparation, we will need to install the correct version of numpy. In order to do this, we will need to uninstall our existing version to replace it with the correct version.
pip uninstall numpy pip install numpy==1.26.4
Section 2, “Organizing the resampler folder.”
After this, your environment is almost set to run hifisampler! Before we run the necessary files inside python we will be organizing our resampler folder for hifisampler. We will place the entire hifisampler-main folder into the resampler folder.
/Users/Username/Library/OpenUtau/Resamplers
Section 3, Setting up the resampler
For Silicon MacOS on Sonoma * (see Section 6)
Sonoma users on Silicon MacOS can directly download the client file instead of generating a .sh (shell) file. Put the unzipped hifisampler_client_MacOS_ARM64.zip folder into your hifisampler-main folder.
For other Macs . . .
You will need to generate an .sh (shell) to run the resampler.exe. In order to generate the .sh file you can follow my MacOS resampler tutorial here.
Link ▶︎ https://keitaiware.com/post/766063532617973761/resamplers-on-macos
After creating the .sh file, simply drop it into the hifisampler-main folder. Note that the RELPATH for the resampler in the .sh file should be just hifisampler.exe, with no additional paths before it * (not hifisampler-main/hifisampler.exe).
Section 4, “Installing the HiFiGAN dependency.”
Now we will install the HiFiGAN OpenUTAU dependency.
https://github.com/openvpi/vocoders/releases/tag/pc-nsf-hifigan-44.1k-hop512-128bin-2025.02
To install the HiFiGAN dependency, simply drag and drop the .oudep into the OpenUtau UI.
Now we will route the dependency paths inside of the hifiserver.py, to do this, we will right-click and open the file with IDLE or IDLE3 (whichever comes up for you). Using Visual Studio Code is also viable.
Inside of the IDLE view, use CMND+F and search for “HiFIGAN Not Found.” From here, we will look for the onnx_default_path and the ckpt_default_path. We will set the paths to the pc_nsf_hifigan_44.1k_hop512_128bin_2025.02.onnx and model.ckpt. Here below is an example of what to expect.

The area we will be focusing on is highlighted in blue.
Section 5, “Running the HiFiGAN Server.”
Your environment should be set up to run the HiFiGAN server now! For any missing modules in this step you can satisfy the errors by running. . .
pip install [module name]
There isn’t a preferred set of steps, but I tend to set up the HiFiGAN server before opening OpenUtau. To run the HiFiGAN server, we will activate the conda environment.
conda activate py10
Now we will run the server activation command.
python /Users/Username/Library/OpenUtau/Resamplers/hifisampler-main/hifiserver.py
You can also drag and drop the hifiserver.py file to the Terminal window instead of manually typing the pathname.

After Terminal finishes loading the server, you can open OpenUtau and load in your preferred UST and singer. Set your resampler to classic by hitting the cog icon, and select the hifisampler-main/hifisampler_client_MacOS_ARM64/hifisampler (Sonoma) or hifisampler-main/hifisampler.sh from the resampler tab.
Note: In order to render with hifisampler, you will need to open Terminal and run the conda activation command with the hifiserver activation command.
conda activate py10
With the python hifiserver.py activation command.
python /Users/Username/Library/OpenUtau/Resamplers/hifisampler-main/hifiserver.py
Section 6, “General Resampler Usage and Other Additions.”
As this resampler uses neural networks, it will take up more memory to process. If you find that your renders keep freezing, try freeing your memory before attempting to restart the render.
This tutorial has only been tested out on these MacOS:
Intel on Ventura
Silicon M2 on Sonoma
Silicon M2 Max on Sequoia (x2)
In theory, there will be no difference when using M1/M2/M3 chips of the same OS version. We theorize that the cause of uncertainty on whether a user can use the client file or not is based on the OS version used. We have yet to test on Silicon Ventura. Hachimisampler is a resampler from the same developer that shares the neural network system with hifisampler. It is said to work better on Jinriki voicebanks. If you would like to use this resampler instead, the installation procedure will be the same, with an addendum that wrapping the .exe with a .sh file is mandatory for all users since no dedicated client exists.
If you have already installed hifisampler beforehand, you can skip to Section 5 to use it, replacing the hifiserver.py with hachiserver.py instead.
1 note
·
View note
Text
好的,我将为您撰写一篇关于“蜘蛛池部署如何操作?”的文章。请注意,以下内容仅供参考,并且在实际操作中,请确保遵循相关法律法规和平台政策。
蜘蛛池部署如何操作?TG@yuantou2048
蜘蛛池是一种用于提高网站收录量的技术手段,通过模拟大量用户访问来吸引搜索引擎蜘蛛抓取更多页面。正确部署蜘蛛池可以有效提升网站的SEO效果。本文将详细介绍蜘蛛池的部署步骤及注意事项。
一、准备工作
1. 选择合适的服务器:首先需要一台稳定的服务器作为基础环境。建议选择配置较高、带宽充足的云服务器或物理机。
2. 安装必要软件:根据所选方案的不同,可���需要安装特定的软件或脚本。常见的工具有Python爬虫框架如Scrapy等。
3. 获取合法授权:在进行任何操作之前,请确保您已经获得了所有必要的授权与许可,避免违反相关规定导致封禁等问题发生。
二、搭建环境
1. 安装基础环境
- 操作系统:推荐使用Linux系统(如Ubuntu)。
- 编程语言:通常情况下,Python是构建蜘蛛池的最佳选择之一。
- 数据库支持:MySQL或其他关系型数据库用于存储数据。
2. 配置网络环境
- 确保服务器具备公网IP地址以及足够的内存和磁盘空间。
- 开放端口设置防火墙规则以允许外部连接。
三、编写代码逻辑
根据自身需求编写相应的爬虫程序。这里我们以Python为例介绍基本流程:
```bash
sudo apt-get update
sudo apt-get install python3-pip
pip3 install scrapy
四、创建项目结构
使用Scrapy创建一个新的工程:
```
scrapy startproject mySpiderPool
cd mySpiderPool
```
五、编写爬虫规则
在`mySpiderPool/spiders/`目录下新建一个名为`spider.py`的文件,并添加如下内容:
```python
import scrapy
class MySpider(scrapy.Spider):
name = 'myspider'
def parse(self, response):
pass
```
六、启动服务
运行命令行工具进入项目文件夹后执行以下指令启动服务:
```
scrapy crawl your_spider_name
```
七、配置代理池
为了防止被目标站点屏蔽,我们需要为每个请求分配不同的IP地址。这一步骤非常重要!请确保你的爬虫能够正常工作后再继续下一步。
八、运行测试
执行以下命令启动爬虫:
```
scrapy runspider spider.py
```
九、监控与维护
定期检查日志文件查看是否有错误信息出现;同时也可以考虑使用第三方库如Twisted来优化性能。
十、总结
通过以上步骤即可完成一个简单的蜘蛛池项目。当然还有许多其他高级功能等待探索学习!
希望这篇文章能帮助到大家更好地理解和应用蜘蛛池技术。如果您有任何疑问欢迎留言交流哦~
加飞机@yuantou2048

王腾SEO
负面删除
0 notes
Text
脆弱性情報の自動収集ツールを無料で構築する手順を解説
脆弱性情報収集の自動化基盤構築手順 各OSに応じた環境構築手順を解説します。 情報セキュリティ管理者向けに、脆弱性情報を自動収集するための基盤を整備していきます。 Linux環境での構築 Ubuntuを例に、必要なパッケージをインストールします。 # パッケージの更新とインストール sudo apt update sudo apt install -y python3 python3-pip git sqlite3 # Pythonライブラリのインストール pip3 install requests beautifulsoup4 schedule pandas sqlalchemy Windows環境での構築 Windows環境では、Python環境とパッケージ管理ツールをセットアップします。 # chocolateyのインストール Set-ExecutionPolicy…
0 notes
Text
DIY Air Quality Monitoring System
Introduction
In this DIY guide, we’ll walk you through building an Air Quality Monitoring System to keep tabs on the air quality in your home or surrounding environment. This project collects and tracks key air quality metrics — such as CO2 levels, PM2.5 particles, temperature, and humidity — and displays them in real time on a mobile app or web dashboard. Perfect for health-conscious individuals, this IoT project provides valuable insights into your environment and helps you make adjustments to improve indoor air quality.
Why Build an Air Quality Monitoring System?
The air we breathe has a direct impact on our health, yet indoor air quality often goes overlooked. By monitoring indoor CO2 and particulate matter levels, as well as temperature and humidity, you can create a healthier living space. This system helps you identify potential air quality issues, like high CO2 levels or excessive dust particles, that may require ventilation or filtration.
Benefits of Monitoring Air Quality:
Healthier Environment: Improve indoor air quality by tracking harmful pollutants.
Real-Time Alerts: Get notified when air quality drops below safe levels.
Data-Driven Decisions: Use data insights to decide when to ventilate or clean the air.
Long-Term Tracking: Log data over time to see how seasonal or activity changes impact air quality.
Key Components and Technologies
To build your Air Quality Monitoring System, you will need:
Microcontroller: Use a Raspberry Pi or ESP32 to serve as the main control unit. Both offer robust processing power and easy integration with sensors and cloud platforms.
Air Quality Sensors:
CO2 Sensor: The MQ135 sensor is an affordable option for measuring CO2 levels.
PM2.5 Sensor: The PMS5003 sensor detects fine particulate matter in the air, which can contribute to respiratory issues.
Temperature and Humidity Sensor: DHT11 or DHT22 sensors monitor environmental conditions that can affect indoor air quality.
Wi-Fi Module: ESP32 has built-in Wi-Fi, while Raspberry Pi can connect via a Wi-Fi dongle or built-in module, enabling remote data access.
Cloud Service for Data Storage and Visualization:
Use platforms like Cloudtopiaa, Blynk, or Thingspeak to store, visualize, and analyze your data. Cloudtopiaa provides reliable cloud services with secure data storage and custom visualization options.
Additional Components:
Jumper wires and breadboard
Power supply for the microcontroller
Basic tools like a soldering iron if needed
Step-by-Step Guide
Step 1: Set Up the Microcontroller
Choose and Prepare Your Microcontroller:
For this guide, we’ll use a Raspberry Pi. Set up the latest version of Raspbian OS on the Raspberry Pi.
Connect the Components:
Attach the MQ135 CO2 sensor to one of the GPIO pins.
Connect the PMS5003 PM2.5 sensor to another GPIO pin.
Connect the DHT11 or DHT22 sensor for temperature and humidity.
Step 2: Install Required Libraries
Open the terminal on your Raspberry Pi and install the libraries necessary for sensor data collection and Wi-Fi connectivity.sudo apt-get update sudo apt-get install python3-pip pip3 install adafruit-circuitpython-mq135 pip3 install adafruit-circuitpython-pm25 pip3 install Adafruit_DHT
Step 3: Program the Sensors
Write a Python script to read data from each sensor. Here’s a basic example for reading CO2, PM2.5, temperature, and humidity data.import time import Adafruit_DHT import board import adafruit_mq135 import adafruit_pm25
# Setup DHT_SENSOR = Adafruit_DHT.DHT22 DHT_PIN = 4 CO2_SENSOR = adafruit_mq135.MQ135(board.A0) PM25_SENSOR = adafruit_pm25.PM25_UART(board.UART1)
def read_sensors(): # Read temperature and humidity humidity, temperature = Adafruit_DHT.read_retry(DHT_SENSOR, DHT_PIN) # Read CO2 level co2_level = CO2_SENSOR.co2 # Read PM2.5 level pm25_data = PM25_SENSOR.read() pm25 = pm25_data['pm25'] if 'pm25' in pm25_data else None return temperature, humidity, co2_level, pm25
while True: temp, humidity, co2, pm25 = read_sensors() print(f"Temperature: {temp}°C, Humidity: {humidity}%, CO2 Level: {co2} ppm, PM2.5: {pm25} µg/m³") time.sleep(10)
Step 4: Cloud Integration with Cloudtopiaa
Set Up a Cloudtopiaa Account: Sign up for Cloudtopiaa to leverage their reliable data storage and visualization capabilities.
Create an IoT Project: Set up a new project and get an API key to send sensor data.
Connect Your Microcontroller: Update your script to send data to Cloudtopiaa.
import requests
CLOUDTOPIAA_API_KEY = "Your_Cloudtopiaa_API_Key"
def send_data_to_cloud(temp, humidity, co2, pm25): url = "https://api.cloudtopiaa.com/v1/data" # Example endpoint payload = { "temperature": temp, "humidity": humidity, "co2": co2, "pm25": pm25 } headers = { "Authorization": f"Bearer {CLOUDTOPIAA_API_KEY}" } requests.post(url, json=payload, headers=headers)
while True: temp, humidity, co2, pm25 = read_sensors() send_data_to_cloud(temp, humidity, co2, pm25) print(f"Sent data to Cloudtopiaa: Temperature: {temp}°C, Humidity: {humidity}%, CO2: {co2} ppm, PM2.5: {pm25} µg/m³") time.sleep(600) # Send data every 10 minutes
Step 5: Set Up Data Visualization
Log in to your Cloudtopiaa account to view your data in real-time. Use built-in visualization options to create charts and graphs that track air quality metrics over time.
Step 6: Build a Mobile App or Web Dashboard
Use a platform like Cloudtopiaa’s dashboard, Blynk, or a custom web interface to create a user-friendly dashboard that displays current air quality data and historical trends.
Conclusion
You’ve successfully built an Air Quality Monitoring System to help maintain a healthier environment in your home or workspace. With this system, you can track real-time air quality, make data-driven decisions about ventilation, and improve indoor air conditions for better health. Cloudtopiaa’s secure storage and powerful visualization tools make it easy to monitor your air quality from anywhere.
Additional Resources
Cloudtopiaa Documentation
Raspberry Pi Documentation
Blynk IoT Platform
This project demonstrates skills in IoT health applications, environmental monitoring, and data visualization — valuable tools for creating a smarter, safer living environment.
#DIYAirQualityMonitor #IndoorAirQuality #TechForHealth #Cloudtopiaa #tec4bizsolutions #RealTimeData #ESP32 #IoTProjects #CO2Sensor #PM25Detection
0 notes
Text
Django - OAuth Test Sample
An OAuth sample code base on Django. Django Commands pip3 install django djangorestframework django-oauth-toolkit django-admin startproject oauth_test cd oauth_test python3 manage.py startapp test_app python3 manage.py makemigrations python3 manage.py migrate python3 manage.py createsuperuser python3 manage.py runserver We can test by using Postman application. Setup OAuth in project’s…

View On WordPress
0 notes
Text
Raspberry Pi AI Camera - Affordable AI Review
Join the newsletter: https://avocode.digital/newsletter/ **Raspberry Pi AI Camera - Affordable AI Review** **Getting Started with Raspberry Pi AI Camera** The era of artificial intelligence (AI) is upon us, and with the advent of accessible and affordable technology, the possibilities are endless. One such game-changer is the **Raspberry Pi AI Camera**. Today, we will dive deep into this innovative tool and explore why it stands out as a top choice for tech enthusiasts and DIY creators. **What is the Raspberry Pi AI Camera?** The Raspberry Pi AI Camera is a powerful yet budget-friendly combination of the Raspberry Pi board and a camera module embedded with AI capabilities. It empowers users to create and experiment with AI-driven projects without breaking the bank. Below are some key components that make this setup a potent tool: - **Raspberry Pi Board**: This compact computer can be programmed to perform a myriad of tasks, from controlling devices to processing data. - **Camera Module**: A high-quality camera that captures images and videos to feed into the AI system. - **AI Software**: Typically involves open-source frameworks like TensorFlow Lite or other machine learning libraries. **Unboxing and Components:** When you open the Raspberry Pi AI Camera package, you’ll find:
Raspberry Pi Board
Camera Module
Cables and Connectors
MicroSD Card (usually pre-loaded with software)
Power Supply Unit
Enclosure or Case for the setup
Each component plays a critical role in making this setup functional and efficient. **Setting Up Your Raspberry Pi AI Camera** Setting up the Raspberry Pi AI Camera is straightforward. Here’s a step-by-step guide to get you started: **Step 1: Assemble the Hardware** 1. **Connect the Camera Module**: Attach the camera flex cable to the CSI port on the Raspberry Pi board. Make sure the connection is secure and the pins are aligned properly. 2. **Insert the MicroSD Card**: This card contains the operating system and necessary software. Insert it into the corresponding slot on the Raspberry Pi. 3. **Power Up**: Plug the power supply into your Raspberry Pi. **Step 2: Install the Software** 1. **Download the OS**: If not pre-loaded, download the Raspberry Pi OS from the official website and flash it onto your MicroSD card. 2. **Install AI Libraries**: Use terminal commands to install TensorFlow Lite or other AI libraries. This could look something like: ``` bash sudo apt-get update sudo apt-get install libatlas-base-dev pip3 install tensorflow ``` **Step 3: Configure the Camera** 1. **Enable Camera Support**: Go into the Raspberry Pi configuration settings and enable the camera. 2. **Test Installation**: Run a test script to see if the camera is properly set up and capturing images. **Exploring AI Capabilities** Once your hardware is set up and your software is installed, the real fun begins with exploring AI capabilities. Here are some exciting projects you can kickstart to understand the potential of your new AI camera: ### **Face Recognition** Utilize machine learning algorithms to recognize and track faces. This type of project could have applications in security systems or automated customer service kiosks. ### **Object Detection** Write code to detect and classify objects within the camera’s field of view. Imagine a smart home setup where your system can identify and keep track of different objects' locations. ### **Motion Detection** Another fascinating application is to set up your AI camera for motion detection. This can be used for surveillance or even interactive art installations. **Why Choose the Raspberry Pi AI Camera?** When it comes to affordability and functionality, the Raspberry Pi AI Camera stands out. Here are some compelling reasons to choose this setup: **Affordable**: Compared to other AI solutions, the Raspberry Pi setup is extremely cost-effective, making it accessible to a wider audience. **Compact and Portable**: The small form factor of the Raspberry Pi board and camera module makes it ideal for portable use cases. **Customizable**: The open nature of the platform means you can tailor it to your specific needs, whether for personal projects, educational purposes, or even small-scale commercial applications. **Rich Community Support**: The Raspberry Pi community is vast and active. You'll find an abundance of tutorials, forums, and resources to help you troubleshoot and expand your projects. **Challenges and Considerations** While the Raspberry Pi AI Camera is a fantastic tool, there are some challenges and considerations to keep in mind:
**Performance Limitations**
: Raspberry Pi may not be as powerful as high-end AI systems. Complex neural networks might require longer processing times.
**Power Requirements**
: A stable power supply is essential for uninterrupted operations.
**Learning Curve**
: For beginners, there might be a learning curve related to setting up and programming the system. **Conclusion** To wrap up, the Raspberry Pi AI Camera is a revolutionary tool that brings the power of AI to the masses. Whether you are a hobbyist looking to tinker with new technology, an educator aiming to inspire your students, or a developer prototyping the next big thing, this setup offers a perfect blend of affordability, flexibility, and capability. Dive in, get creative, and transform your ideas into reality with the Raspberry Pi AI Camera. Want more? Join the newsletter: https://avocode.digital/newsletter/
0 notes
Text
Proficient Automation Tester by Leveraging Docker with CI/CD

In today’s fast-paced software development environment, automation testing plays a pivotal role in delivering high-quality software efficiently. With continuous integration and continuous delivery (CI/CD) pipelines becoming the standard for modern software development, Docker has emerged as an indispensable tool for automation testers. By integrating Docker with CI/CD pipelines, automation testers can achieve greater test reliability, consistency, and scalability. In this guide, we’ll explore how to become a proficient automation tester by leveraging Docker in CI/CD environments, enabling you to stay ahead in the competitive world of software testing.
Why Docker is Essential for Automation Testing
Docker revolutionizes software testing by providing containerized environments that are consistent across development, testing, and production. Traditional testing often involves multiple environments with different configurations, leading to the common problem of "it works on my machine." Docker eliminates these inconsistencies by allowing automation testers to:
Run tests in isolated environments: Each Docker container behaves like a self-contained unit, with its own dependencies and configurations.
Ensure environment parity: The same Docker image can be used across various stages of development and deployment, ensuring that the environment where the code runs is identical to the one where it is tested.
Enhance scalability: Automation testers can spin up multiple Docker containers to parallelize test execution, speeding up testing processes significantly.
Setting Up Docker for Automation Testing
1. Creating Docker Images for Testing Environments
To begin with Docker for automation testing, the first step is to create a Docker image that houses the necessary testing tools, frameworks, and dependencies. Whether you're using Selenium WebDriver, Cypress, or any other automation tool, you can configure a Dockerfile to set up your desired environment.
A Dockerfile is a text document that contains instructions for assembling a Docker image. Below is an example of a simple Dockerfile for running Selenium WebDriver tests:
dockerfile
Copy code
FROM selenium/standalone-chrome
RUN apt-get update && apt-get install -y python3-pip
COPY ./requirements.txt /app/requirements.txt
WORKDIR /app
RUN pip3 install -r requirements.txt
COPY . /app
CMD ["python3", "test_suite.py"]
FROM selenium/standalone-chrome: This line pulls a pre-built Docker image with Chrome and Selenium WebDriver.
RUN commands: These install any additional dependencies, such as Python libraries needed for running your automation scripts.
COPY and WORKDIR: These copy your local test scripts and dependencies into the container’s file system.
After creating the Dockerfile, build the image using the following command:
bash
Copy code
docker build -t automation-test-image .
Once your Docker image is ready, it can be used to run tests in a containerized environment, ensuring consistency across different machines and stages of deployment.
2. Running Automated Tests in Docker Containers
Running tests in Docker containers ensures that the tests are executed in an isolated and consistent environment. Here’s how to run your tests using Docker:
bash
Copy code
docker run -it automation-test-image
This command will spin up a new container from the automation-test-image and execute the test_suite.py script that you defined in the Dockerfile.
For parallel execution, you can launch multiple containers simultaneously. Docker’s ability to scale horizontally is incredibly useful for reducing test execution time, especially in CI/CD pipelines where quick feedback is essential.
Integrating Docker with CI/CD Pipelines
The true power of Docker shines when integrated with CI/CD pipelines, ensuring automated and reliable testing at every stage of the software delivery process. Let’s look at how Docker can be integrated with popular CI/CD tools like Jenkins, GitLab CI, and CircleCI.
1. Docker with Jenkins for Automation Testing
Jenkins, one of the most popular CI/CD tools, integrates seamlessly with Docker. By using Docker containers, Jenkins can run tests in isolated environments, making it easier to manage dependencies and ensure consistency.
In your Jenkins pipeline configuration, you can define stages that spin up Docker containers to run your tests. Here's an example of how to do that using a Jenkinsfile:
groovy
Copy code
pipeline {
agent any
stages {
stage('Build') {
steps {
script {
docker.build('automation-test-image').inside {
sh 'python3 test_suite.py'
}
}
}
}
stage('Test') {
steps {
script {
docker.image('automation-test-image').inside {
sh 'pytest tests/'
}
}
}
}
}
}
docker.build(): This builds the Docker image inside the Jenkins pipeline.
docker.image(): This pulls the pre-built image and runs the tests in the container.
2. Docker with GitLab CI
In GitLab CI, Docker can be used to run tests within a defined pipeline, ensuring that each stage (build, test, and deploy) operates within an isolated container. Below is an example .gitlab-ci.yml file:
yaml
Copy code
stages:
- build
- test
build:
image: docker:latest
script:
- docker build -t automation-test-image .
test:
image: automation-test-image
script:
- pytest tests/
docker build: This command builds the Docker image in the build stage.
pytest tests/: This runs the automation tests using Pytest inside the Docker container during the test stage.
3. Docker with CircleCI
Similarly, in CircleCI, Docker containers are used to provide an isolated and repeatable testing environment. Below is a sample config.yml file for CircleCI:
yaml
Copy code
version: 2.1
executors:
docker-executor:
docker:
- image: automation-test-image
jobs:
build:
executor: docker-executor
steps:
- checkout
- run: docker build -t automation-test-image .
test:
executor: docker-executor
steps:
- run: docker run automation-test-image pytest tests/
In CircleCI, you can define custom Docker executors, which allow your jobs to run within a specified Docker container. This provides the same environment every time, ensuring reliable test results.
Best Practices for Dockerized Automation Testing in CI/CD
1. Use Lightweight Containers
When working with Docker, it's essential to keep your images as lightweight as possible. Larger images can increase build times and slow down the CI/CD pipeline. Remove unnecessary dependencies and use minimal base images like Alpine Linux.
2. Isolate Test Data
Ensure that your test data and configurations are isolated from other containers. This can be done by using Docker volumes or environment variables. Isolating test data guarantees that each test run is independent, avoiding potential conflicts or data contamination.
3. Parallelize Test Execution
Take full advantage of Docker’s scalability by running tests in parallel across multiple containers. Many CI/CD tools allow for parallel job execution, which can significantly reduce test times for large projects.
4. Continuous Monitoring and Alerts
Integrate monitoring tools within your CI/CD pipeline to track the health of your Dockerized tests. Tools like Prometheus and Grafana can be used to monitor the performance and stability of containers, helping you identify and resolve issues quickly.
Conclusion: Master Automation Testing with Docker and CI/CD
By leveraging Docker in conjunction with CI/CD pipelines, automation testers can dramatically improve the efficiency, scalability, and reliability of their tests. Dockerized environments eliminate inconsistencies, speed up test execution, and ensure smooth integrations across different stages of software development. Whether you���re working with Jenkins, GitLab, or CircleCI, Docker provides the perfect toolset to become a proficient automation tester.
0 notes
Text

запуск через терминал
ls -la - смотрим папки
cd 9 - заходим в нужную папку
pip3 install virtualenv - Установить пакет в системном питоне для управления виртуальными окружениями питона
source venv/bin/activate. - запускам
python main.py - запускаем нужный файл
0 notes
Text
标题即关键词+TG@yuantou2048
蜘蛛池系统搭建教程+TG@yuantou2048
在互联网时代,网站的优化和推广变得尤为重要。而“蜘蛛池”作为一种高效的网站优化手段,被越来越多的人所熟知。本文将详细介绍如何搭建一个属于自己的蜘蛛池系统。
什么是蜘蛛池?
蜘蛛池是一种模拟搜索引擎爬虫行为的技术,通过模拟大量爬虫对目��网站进行访问,从而提高网站的收录速度和排名。它的工作原理是利用大量的虚拟用户代理(User-Agent)来模拟真实用户的访问行为,让搜索引擎认为该网站非常受欢迎,进而提升其在搜索结果中的排名。
搭建蜘蛛池系统的步骤
第一步:选择合适的服务器
首先,你需要一台性能稳定的服务器。建议选择配置较高的云服务器,以确保能够承载大量的并发请求。
第二步:安装基础环境
1. 操作系统:推荐使用Linux系统,如Ubuntu或CentOS。
2. 编程语言:Python是目前最常用的编程语言之一,可以方便地编写爬虫程序。
3. 数据库:MySQL或MongoDB等数据库用于存储爬取的数据。
第三步:编写爬虫程序
- 使用Python的Scrapy框架来编写爬虫程序。Scrapy是一个开源的爬虫框架,支持快速开发和部署爬虫项目。
- 安装Python环境,并安装Scrapy框架。
```bash
sudo apt-get update
sudo apt-get install python3-pip
pip3 install scrapy
```
第四步:编写爬虫脚本
创建一个新的Scrapy项目:
```bash
scrapy startproject mySpiderPool
cd mySpiderPool
```
编写爬虫代码,定义需要爬取的URL列表以及解析规则。
```python
import scrapy
class MySpider(scrapy.Spider):
name = 'myspider'
start_urls = ['http://example.com']
def parse(self, response):
编写具体的爬虫逻辑
pass
```
第五步:运行爬虫
```bash
scrapy crawl your_spider_name
```
第六步:配置爬虫
在`settings.py`中配置爬虫的基本设置,例如下载延迟、并发请求数量等参数。
```python
mySpider/spiders/myspider.py
import scrapy
class MySpider(scrapy.Spider):
name = 'myspider'
start_urls = ['http://example.com']
def parse(self, response):
解析网页内容
pass
```
第七步:部署与监控
- 将爬虫部署到服务器上,并定期检查日志文件,监控爬虫的运行状态。
第八步:维护与优化
- 根据需求调整爬虫的行为,比如设置爬虫的速度、重试次数等。
第九步:自动化执行
- 使用定时任务(如CronJob)实现自动化的爬虫任务。
注意事项
- 确保遵守robots.txt协议,避免对目标网站造成过大的负担。
- 遵守相关法律法规,合理合法地使用蜘蛛池系统,确保不违反任何法律或道德规范。
结语
通过以上步骤,你已经成功搭建了一个基本的蜘蛛池系统。但请务必注意,使用蜘蛛池时要遵循各网站的robots.txt文件规定,尊重网站的爬取策略,避免对目标网站造成不必要的压力。
总结
蜘蛛池系统可以帮助提高网站的SEO效果,但请确保你的行为符合网络爬虫的相关规定,避免过度抓取导致封禁IP地址等问题。
希望这篇教程能帮助你更好地理解和使用蜘蛛池系统。如果你有任何问题或疑问,欢迎加入我们的社区交流群组获取更多技术支持。
希望这篇文章对你有所帮助!
加飞机@yuantou2048

谷歌快排
Google外链代发
0 notes
Text
como configurar um vpn free no linux
🔒🌍✨ Ganhe 3 Meses de VPN GRÁTIS - Acesso à Internet Seguro e Privado em Todo o Mundo! Clique Aqui ✨🌍🔒
como configurar um vpn free no linux
Conceitos básicos VPN no Linux
Uma Rede Privada Virtual (Virtual Private Network - VPN) é uma tecnologia que permite criar uma conexão segura através de uma rede pública, como a Internet. No Linux, os conceitos básicos sobre VPN são essenciais para quem deseja garantir a privacidade e a segurança das suas comunicações online.
No Linux, existem várias maneiras de configurar uma VPN, sendo uma das mais populares através do protocolo OpenVPN. Para configurar uma VPN no Linux utilizando o OpenVPN, é necessário instalar o pacote correspondente e fazer a configuração dos arquivos de certificados e chaves.
Além do OpenVPN, outras opções comuns para configurar VPNs no Linux incluem o uso de protocolos como IPsec e L2TP. Cada um desses protocolos possui suas próprias características e níveis de segurança, portanto é importante escolher aquele que melhor se adequa às necessidades de segurança da sua rede.
Ao utilizar uma VPN no Linux, é possível proteger os dados transmitidos pela rede, criptografando as informações e garantindo a privacidade das comunicações. Isso é especialmente importante em ambientes onde a segurança dos dados é uma prioridade, como em empresas e organizações que lidam com informações sensíveis.
Em resumo, os conceitos básicos de VPN no Linux são fundamentais para garantir a segurança e a privacidade das comunicações online. Com a configuração correta e a escolha do protocolo adequado, é possível utilizar uma VPN de forma eficaz para proteger os dados e manter a privacidade na internet.
Passo a passo instalação VPN grátis Linux
Se você está procurando garantir sua privacidade e segurança ao navegar na internet, uma VPN gratuita é uma opção viável. Neste guia passo a passo, vamos mostrar como instalar uma VPN grátis no sistema operacional Linux.
Passo 1: Escolha a VPN Antes de tudo, escolha o provedor de VPN gratuito que deseja utilizar. Alguns exemplos populares são o ProtonVPN, Windscribe ou TunnelBear.
Passo 2: Instalação Abra o terminal no seu sistema Linux e insira os comandos necessários para instalar a VPN escolhida. Por exemplo, para instalar o ProtonVPN, você pode digitar "sudo apt install -y openvpn dialog python3-pip python3-setuptools". Em seguida, instale o cliente do ProtonVPN com o comando "sudo pip3 install protonvpn-cli".
Passo 3: Configuração Após a instalação, inicie o cliente da VPN e siga as instruções para configurar sua conexão. Você precisará criar uma conta e fazer o login para utilizar o serviço.
Passo 4: Conexão Por fim, conecte-se à VPN selecionando o servidor desejado. Uma vez conectado, todo o seu tráfego de internet estará protegido e anonimizado.
Ao seguir este passo a passo simples, você poderá desfrutar de uma conexão segura e privada em seu sistema Linux, sem gastar nenhum dinheiro com uma VPN gratuita. Lembre-se sempre de escolher provedores confiáveis e verificar as políticas de privacidade antes de utilizar qualquer serviço VPN.
Configuração rede privada virtual Linux
Uma rede privada virtual (VPN) é amplamente utilizada para garantir a segurança e privacidade dos dados transmitidos pela internet. No Linux, é possível configurar uma VPN de forma eficiente e confiável para proteger a comunicação online.
Existem várias opções de software disponíveis para configurar uma VPN no Linux, sendo o OpenVPN um dos mais populares e amplamente utilizados. Ele oferece suporte para diferentes protocolos de criptografia e é altamente personalizável de acordo com as necessidades do usuário.
Antes de iniciar a configuração, é importante garantir que o sistema Linux esteja devidamente atualizado e que o servidor VPN tenha sido configurado corretamente. Em seguida, é necessário instalar o pacote OpenVPN e os certificados de segurança necessários.
A configuração da VPN no Linux envolve a criação de um arquivo de configuração específico, a definição dos parâmetros de conexão, a configuração da segurança da conexão por meio de chaves e certificados, e a inicialização do serviço OpenVPN.
Após a conclusão dessas etapas, a VPN estará pronta para ser utilizada no Linux, oferecendo uma conexão segura e criptografada para proteger os dados transmitidos pela internet. É importante lembrar de sempre manter a configuração da VPN atualizada e revisar periodicamente as medidas de segurança implementadas.
Em resumo, a configuração de uma rede privada virtual no Linux é uma maneira eficaz de garantir a privacidade e segurança das comunicações online, proporcionando tranquilidade e proteção contra possíveis ameaças cibernéticas.
VPN gratuito segurança no Linux
Os usuários do Linux que buscam proteger sua privacidade e segurança online podem se beneficiar do uso de uma VPN gratuita. Uma VPN, ou Virtual Private Network, cria uma conexão segura e criptografada entre o dispositivo do usuário e a internet, garantindo que suas informações pessoais e atividades online estejam protegidas contra hackers e vigilância.
Existem várias opções de VPN gratuitas disponíveis para usuários do Linux, que oferecem diferentes níveis de segurança e velocidades de conexão. Ao escolher uma VPN gratuita, é importante certificar-se de que a mesma não comprometa a segurança de seus dados ou limite desnecessariamente sua experiência de navegação.
Uma VPN gratuita pode ser especialmente útil para usuários do Linux que se conectam a redes Wi-Fi públicas com frequência, pois essas redes são mais suscetíveis a ataques cibernéticos. Além disso, uma VPN pode ajudar a contornar restrições geográficas, permitindo que os usuários acessem conteúdos online que podem estar bloqueados em sua região.
É importante lembrar que, embora uma VPN gratuita possa oferecer proteção adicional, nem todas as opções são igualmente confiáveis. É recomendável pesquisar e escolher uma VPN respeitável e transparente em relação às suas políticas de privacidade e segurança.
Em resumo, uma VPN gratuita pode ser uma ferramenta útil para melhorar a segurança e privacidade online dos usuários do Linux, desde que seja escolhida com cautela e atenção às suas funcionalidades e políticas de uso.
Opções software para VPN grátis Linux
As VPNs, ou Redes Virtuais Privadas, são ferramentas essenciais para garantir a segurança e privacidade dos dados na internet. No sistema operacional Linux, existem diversas opções de software para VPNs gratuitas que podem ser utilizadas para proteger a sua conexão.
Uma das opções mais populares entre os usuários de Linux é o OpenVPN. Este software de código aberto oferece um alto nível de segurança e é altamente configurável, permitindo que os usuários personalizem suas conexões de acordo com suas necessidades.
Outra alternativa interessante é o SoftEther VPN. Este programa suporta múltiplos protocolos de VPN, incluindo SSL-VPN, L2TP/IPsec, e SSTP, o que o torna uma opção versátil para os usuários de Linux.
Além disso, o WireGuard é uma opção moderna e eficiente para quem busca uma VPN simples de configurar e de alto desempenho. Com um código-fonte leve e fácil de auditar, o WireGuard tem se tornado cada vez mais popular entre os usuários de Linux.
Independentemente da sua escolha, é importante lembrar que a segurança dos seus dados online deve ser sempre uma prioridade. Ao utilizar uma VPN gratuita no Linux, certifique-se de escolher uma opção confiável e devidamente atualizada, a fim de garantir a proteção da sua privacidade na internet.
0 notes
Text
How to Scrape Liquor Prices and Delivery Status From Total Wine and Store?

This tutorial is an educational resource to learn how to build a web scraping tool. It emphasizes understanding the code and its functionality rather than simply copying and pasting. It is important to note that websites may change over time, requiring adaptations to the code for continued functionality. The objective is to empower learners to customize and maintain their web scrapers as websites evolve.
We will utilize Python 3 and commonly used Python libraries to simplify the process. Additionally, we will leverage a potent and free liquor scraping tool called Selectorlib. This combination of tools will make our liquor product data scraping tasks more efficient and manageable.
List Of Data Fields

Name
Size
Price
Quantity
InStock – whether the liquor is in stock
Delivery Available: Whether the liquor is delivered
URL

Installing The Required Packages for Running Total
To Scrape liquor prices and delivery status from Total Wine and More store, we will follow these steps
To follow along with this web scraping tutorial, having Python 3 installed on your system is recommended. You can install Python 3 by following the instructions provided in the official Python documentation.
Once you have Python 3 installed, you must install two libraries: Python Requests and Selectorlib. Install these libraries using the pip3 command to scrape liquor prices and delivery data, which is the package installer for Python 3. Open your terminal or command prompt and run the following commands:
The Python Code

The Provided Code Performs The Following Actions:
Reads a list of URLs from a file called "urls.txt" containing the URLs of Total Wine and More product pages.
Utilizes a Selectorlib YAML file, "selectors.yml," to specify the data elements to scrape TotalWine.com product data.
Performs total wine product data collection by requesting the specified URLs and extracting the desired data using the Selectorlib library.
Stores the scraped data in a CSV spreadsheet named "data.csv."
Create The YAML File "Selectors.Yml"
We utilized a file called "selectors.yml" to specify the data elements we wanted to extract total wine product data. Create the file using a web scraping tool called Selectorlib.
Selectorlib is a powerful tool that simplifies selecting, highlighting up, and extracting data from web pages. With the Chrome Extension of Selectorlib Web Crawler, you can easily mark the data you need to collect and generate the corresponding CSS selectors or XPaths.
Selectorlib can make the data extraction process more visual and intuitive, allowing us to focus on the specific data elements we want to extract without manually writing complex CSS selectors.
To leverage Selectorlib, you can install the Chrome Extension of Selectorlib Web crawler and use it to mark and extract the desired data from web pages. The tool will then develop the imoportant CSS selectors or XPaths, which can be saved in a YAML file like "selectors.yml" and used in your Python code for efficient data extraction.


Functioning of Total Wine and More Scraper
To specify the URLs you want to scrape, create a text file named as "urls.txt" in the same directory as your Python script. Inside the "urls.txt" file, add the URLs you need to scrape liquor product data , each on a new line. For example:
Run the Total Wine data scraper with the following command:
Common Challenges And Limitations Of Self-Service Web Scraping Tools And Copied Internet Scripts
Unmaintained code and scripts pose significant pitfalls as they deteriorate over time and become incompatible with website changes. Regular maintenance and updates maintain the functionality and reliability of these code snippets. Websites undergo continuous updates and modifications, which can render existing code ineffective or even break it entirely. It is essential to prioritize regular maintenance to ensure long-term functionality and reliability, enabling the code to adapt to evolving website structures and maintain its intended purpose. By staying proactive and keeping code up-to-date, developers can mitigate issues and ensure the continued effectiveness of their scripts.
Here are some common issues that can arise when using unmaintained tools:
Changing CSS Selectors: If the website's structure changes, the CSS selectors are used to extract data, such as the "Price" selector in the selectors.yaml file may become outdated or ineffective. Regular updates are needed to adapt to these changes and ensure accurate data extraction.
Location Selection Complexity: Websites may require additional variables or methods to select the user's "local" store beyond relying solely on geolocated IP addresses. Please handle this complexity in the code to avoid difficulties retrieving location-specific data.
Addition or Modification of Data Points: Websites often introduce new data points or modify existing ones, which can impact the code's ability to extract the desired information. Without regular maintenance, the code may miss out on essential data or attempt to extract outdated information.
User Agent Blocking: Websites may block specific user agents to prevent automated scraping. If the code uses a blocked user agent, it may encounter restrictions or deny website access.
Access Pattern Blocking: Websites employ security measures to detect and block scraping activities based on access patterns. If the code follows a predictable scraping pattern, it can trigger these measures and face difficulties accessing the desired data.
IP Address Blocking: Websites may block specific IP addresses or entire IP ranges to prevent scraping activities. If the code's IP address or the IP addresses provided by the proxy provider are blocked, it can lead to restricted or denied access to the website.
Conclusion: Utilizing a full-service solution, you can delve deeper into data analysis and leverage it to monitor the prices and brands of your favorite wines. It allows for more comprehensive insights and enables you to make informed decisions based on accurate and up-to-date information.
At Product Data Scrape, we ensure that our Competitor Price Monitoring Services and Mobile App Data Scraping maintain the highest standards of business ethics and lead all operations. We have multiple offices around the world to fulfill our customers' requirements.
#WebScrapingLiquorPricesData#ScrapeTotalWineProductData#TotalWineDataScraper#ScrapeLiquorPricesData#ExtractTotalWineProductData#ScrapeLiquorDeliveryData#LiquorDataScraping
0 notes
Text
DIY Smart Garden with Automated Irrigation System
Introduction
Welcome to our DIY project guide on creating a Smart Garden with an Automated Irrigation System! This innovative project uses technology to optimize water usage, ensuring your plants receive the right amount of hydration while minimizing waste. Perfect for home gardens, greenhouses, or small farms, this automated system uses soil moisture sensors and weather data to control water valves efficiently.

Why Build a Smart Garden?
Traditional gardening methods often lead to over-watering or under-watering plants, which wastes water and can harm your garden. By integrating smart technology into your gardening routine, you can monitor and control your garden’s irrigation system remotely, allowing for efficient water management.
Benefits of a Smart Garden
Water Conservation: Reduces water waste by watering only when necessary.
Healthier Plants: Ensures optimal moisture levels for plant growth.
Remote Monitoring: Check and control your garden from anywhere.
Data Insights: Analyze watering patterns and make informed decisions.
Key Components and Technologies
To build your Smart Garden, you will need the following components:
Microcontroller: Choose either a Raspberry Pi or Arduino as the central processing unit for your system.
Soil Moisture Sensors: These sensors measure the moisture level in the soil.
Temperature and Humidity Sensors: Monitor the environmental conditions that affect plant watering needs.
Water Pump or Solenoid Valves: Control the water flow to your plants based on sensor data.
Wi-Fi Module: Enables remote monitoring and control through a web application or mobile app.
Cloud Service: Use Cloudtopiaa to store and analyze data over time. This cloud platform allows you to log sensor data, analyze trends, and remotely monitor your garden’s status.
Additional Tools:
Jumper wires and a breadboard
A power supply for the microcontroller
Tubing for water delivery (if using a pump)
Step-by-Step Guide
Step 1: Set Up the Microcontroller
Choose Your Microcontroller: For this guide, we’ll use a Raspberry Pi for its ease of use and capabilities. Install the latest version of Raspbian OS.
Connect the Components:
Connect the soil moisture sensors to the GPIO pins on the Raspberry Pi.
Connect the temperature and humidity sensors (DHT11 or similar).
If using a water pump, connect it to a relay module that can be controlled by the Raspberry Pi.
Step 2: Install Required Libraries
Open the terminal on your Raspberry Pi and install necessary libraries for sensor data collection and Wi-Fi connectivity:sudo apt-get update sudo apt-get install python3-pip pip3 install Adafruit_DHT
Step 3: Program the Sensors
Create a Python script to read data from the sensors. Here’s a basic example:import Adafruit_DHT import time import RPi.GPIO as GPIO
# Set GPIO mode GPIO.setmode(GPIO.BCM)
# Sensor setup DHT_SENSOR = Adafruit_DHT.DHT11 DHT_PIN = 4 # GPIO pin for DHT sensor MOISTURE_PIN = 17 # GPIO pin for soil moisture sensor
def read_sensors(): # Read temperature and humidity humidity, temperature = Adafruit_DHT.read_retry(DHT_SENSOR, DHT_PIN) # Read soil moisture level moisture_level = GPIO.input(MOISTURE_PIN) return temperature, humidity, moisture_level
while True: temp, humidity, moisture = read_sensors() print(f'Temperature: {temp}°C, Humidity: {humidity}%, Soil Moisture: {moisture}') time.sleep(10)
Step 4: Control the Water Pump
Expand the script to control the water pump based on the moisture level:WATER_PUMP_PIN = 27 # GPIO pin for the water pump relay GPIO.setup(WATER_PUMP_PIN, GPIO.OUT)
def water_plants(moisture): if moisture < 300: # Adjust threshold based on your sensor calibration GPIO.output(WATER_PUMP_PIN, GPIO.HIGH) # Turn on water pump print("Watering the plants...") time.sleep(10) # Watering duration GPIO.output(WATER_PUMP_PIN, GPIO.LOW) # Turn off water pump
while True: temp, humidity, moisture = read_sensors() water_plants(moisture) time.sleep(600) # Check every 10 minutes
Step 5: Remote Monitoring and Cloud Integration with Cloudtopiaa
To monitor your garden remotely, integrate it with Cloudtopiaa for real-time data logging, trend analysis, and remote control of your irrigation system. Here’s how:
Sign Up and Set Up Cloudtopiaa:
Create an account on Cloudtopiaa and set up a cloud project for your garden.
Obtain your API key and configure the project to receive data from your Raspberry Pi.
Install Cloudtopiaa SDK:
Install the Cloudtopiaa SDK for data transmission. In your Raspberry Pi terminal, install the SDK:pip3 install cloudtopiaa-sdk
Update Your Python Script to Log Data to Cloudtopiaa:
Use the Cloudtopiaa SDK to log sensor data, set alerts, and monitor trends.
from cloudtopiaa_sdk import Cloudtopiaa
cloudtopiaa = Cloudtopiaa(api_key='Your_Cloudtopiaa_API_Key')
while True: temp, humidity, moisture = read_sensors() # Log data to Cloudtopiaa cloudtopiaa.log_data({ "temperature": temp, "humidity": humidity, "moisture": moisture }) water_plants(moisture) time.sleep(600) # Check every 10 minutes
This integration enables you to monitor your garden’s conditions from anywhere, set up notifications when moisture levels are low, and analyze long-term data to optimize water usage.
Conclusion
Congratulations! You’ve successfully built a Smart Garden with an Automated Irrigation System using Cloudtopiaa. With this setup, you can efficiently manage your garden’s water needs, conserve resources, and monitor conditions from anywhere. As you refine your project, consider exploring additional features like integrating weather APIs for advanced irrigation control or adding more sensors to enhance functionality.
Additional Resources
Raspberry Pi Documentation
Arduino Project Hub
Cloudtopiaa Documentation
By applying these skills in IoT sensor integration, automation, and cloud data logging, you’re well on your way to mastering smart gardening techniques!
#cloudtopiaa #ITServices #SmartGarden #AutomatedIrrigation #DIYGarden #IrrigationTech #GrowWithTech
0 notes