#powershell pass multiple parameters to script
Explore tagged Tumblr posts
Visit Tumblr Blog
Explore Tumblr blogs with no restrictions, modern design and the best experience.
Last Seen Tumblr Blogs


Fun Fact
1,644 Tumblr posts in 1 second.
Text
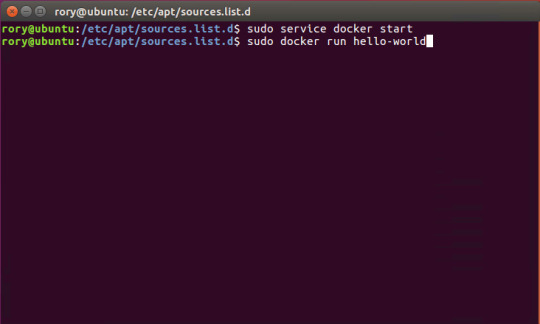
Start Docker In Ubuntu

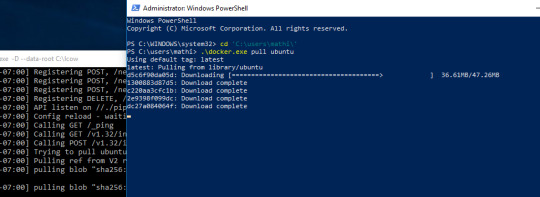
A Linux Dev Environment on Windows with WSL 2, Docker Desktop And the docker docs. Docker Desktop WSL 2 backend. Below is valid only for WSL1. It seems that docker cannot run inside WSL. What they propose is to connect the WSL to your docker desktop running in windows: Setting Up Docker for Windows and WSL. By removing /etc/docker you will loose all Images and data. You can check logs with. Journalctl -u docker.services. Systemctl daemon-reload && systemctl enable docker && systemctl start docker. This worked for me.
$ docker images REPOSITORY TAG ID ubuntu 12.10 b750fe78269d me/myapp latest 7b2431a8d968. Docker-compose start docker-compose stop. After installing the Nvidia Container Toolkit, you'll need to restart the Docker Daemon in order to let Docker use your Nvidia GPU: sudo systemctl restart docker Changing the docker-compose.yml Now that all the packages are in order, let's change the docker-compose.yml to let the Jellyfin container make use of the Nvidia GPU.
Complete Docker CLI
Container Management CLIs
Inspecting The Container
Interacting with Container
Image Management Commands
Image Transfer Comnands
Builder Main Commands
The Docker CLI
Manage images
docker build
Create an image from a Dockerfile.
docker run
Run a command in an image.
Manage containers
docker create
Example
Create a container from an image.
docker exec
Example
Run commands in a container.
docker start
Start/stop a container.
docker ps
Manage containers using ps/kill.
Images
docker images
Manages images.
docker rmi
Deletes images.
Also see
Getting Started(docker.io)
Inheritance
Variables
Initialization
Onbuild
Commands
Entrypoint
Configures a container that will run as an executable.
This will use shell processing to substitute shell variables, and will ignore any CMD or docker run command line arguments.
Metadata
See also
Basic example
Commands
Reference
Building
Ports
Commands
Environment variables
Dependencies
Other options
Advanced features
Labels
DNS servers
Devices
External links
Hosts
sevices
To view list of all the services runnning in swarm
To see all running services
to see all services logs
To scale services quickly across qualified node
clean up
To clean or prune unused (dangling) images
To remove all images which are not in use containers , add - a
To Purne your entire system
To leave swarm
To remove swarm ( deletes all volume data and database info)
To kill all running containers
Contributor -
Sangam biradar - Docker Community Leader
The Jellyfin project and its contributors offer a number of pre-built binary packages to assist in getting Jellyfin up and running quickly on multiple systems.
Container images
Docker
Windows (x86/x64)
Linux
Linux (generic amd64)
Debian
Ubuntu
Container images
Official container image: jellyfin/jellyfin.
LinuxServer.io image: linuxserver/jellyfin.
hotio image: hotio/jellyfin.
Jellyfin distributes official container images on Docker Hub for multiple architectures. These images are based on Debian and built directly from the Jellyfin source code.
Additionally the LinuxServer.io project and hotio distribute images based on Ubuntu and the official Jellyfin Ubuntu binary packages, see here and here to see their Dockerfile.
Note
For ARM hardware and RPi, it is recommended to use the LinuxServer.io or hotio image since hardware acceleration support is not yet available on the native image.
Docker
Docker allows you to run containers on Linux, Windows and MacOS.
The basic steps to create and run a Jellyfin container using Docker are as follows.
Follow the offical installation guide to install Docker.
Download the latest container image.
Create persistent storage for configuration and cache data.
Either create two persistent volumes:
Or create two directories on the host and use bind mounts:
Create and run a container in one of the following ways.
Note
The default network mode for Docker is bridge mode. Bridge mode will be used if host mode is omitted. Use host mode for networking in order to use DLNA or an HDHomeRun.
Using Docker command line interface:
Using host networking (--net=host) is optional but required in order to use DLNA or HDHomeRun.
Bind Mounts are needed to pass folders from the host OS to the container OS whereas volumes are maintained by Docker and can be considered easier to backup and control by external programs. For a simple setup, it's considered easier to use Bind Mounts instead of volumes. Replace jellyfin-config and jellyfin-cache with /path/to/config and /path/to/cache respectively if using bind mounts. Multiple media libraries can be bind mounted if needed:
Note
There is currently an issue with read-only mounts in Docker. If there are submounts within the main mount, the submounts are read-write capable.
Using Docker Compose:
Create a docker-compose.yml file with the following contents:
Then while in the same folder as the docker-compose.yml run:
To run the container in background add -d to the above command.
You can learn more about using Docker by reading the official Docker documentation.
Hardware Transcoding with Nvidia (Ubuntu)
You are able to use hardware encoding with Nvidia, but it requires some additional configuration. These steps require basic knowledge of Ubuntu but nothing too special.
Adding Package RepositoriesFirst off you'll need to add the Nvidia package repositories to your Ubuntu installation. This can be done by running the following commands:
Installing Nvidia container toolkitNext we'll need to install the Nvidia container toolkit. This can be done by running the following commands:
After installing the Nvidia Container Toolkit, you'll need to restart the Docker Daemon in order to let Docker use your Nvidia GPU:
Changing the docker-compose.ymlNow that all the packages are in order, let's change the docker-compose.yml to let the Jellyfin container make use of the Nvidia GPU.The following lines need to be added to the file:
Your completed docker-compose.yml file should look something like this:
Note
For Nvidia Hardware encoding the minimum version of docker-compose needs to be 2. However we recommend sticking with version 2.3 as it has proven to work with nvenc encoding.
Unraid Docker
An Unraid Docker template is available in the repository.
Open the unRaid GUI (at least unRaid 6.5) and click on the 'Docker' tab.
Add the following line under 'Template Repositories' and save the options.
Click 'Add Container' and select 'jellyfin'.
Adjust any required paths and save your changes.
Kubernetes
A community project to deploy Jellyfin on Kubernetes-based platforms exists at their repository. Any issues or feature requests related to deployment on Kubernetes-based platforms should be filed there.
Podman
Podman allows you to run containers as non-root. It's also the offically supported container solution on RHEL and CentOS.
Steps to run Jellyfin using Podman are almost identical to Docker steps:
Install Podman:
Download the latest container image:
Create persistent storage for configuration and cache data:
Either create two persistent volumes:
Or create two directories on the host and use bind mounts:
Create and run a Jellyfin container:
Note that Podman doesn't require root access and it's recommended to run the Jellyfin container as a separate non-root user for security.
If SELinux is enabled you need to use either --privileged or supply z volume option to allow Jellyfin to access the volumes.
Replace jellyfin-config and jellyfin-cache with /path/to/config and /path/to/cache respectively if using bind mounts.
To mount your media library read-only append ':ro' to the media volume:

To run as a systemd service see Running containers with Podman and shareable systemd services.
Cloudron
Cloudron is a complete solution for running apps on your server and keeping them up-to-date and secure. On your Cloudron you can install Jellyfin with a few clicks via the app library and updates are delivered automatically.
The source code for the package can be found here.Any issues or feature requests related to deployment on Cloudron should be filed there.
Windows (x86/x64)
Windows installers and builds in ZIP archive format are available here.
Warning
If you installed a version prior to 10.4.0 using a PowerShell script, you will need to manually remove the service using the command nssm remove Jellyfin and uninstall the server by remove all the files manually. Also one might need to move the data files to the correct location, or point the installer at the old location.
Warning
The 32-bit or x86 version is not recommended. ffmpeg and its video encoders generally perform better as a 64-bit executable due to the extra registers provided. This means that the 32-bit version of Jellyfin is deprecated.
Install using Installer (x64)
Install
Download the latest version.
Run the installer.
(Optional) When installing as a service, pick the service account type.
If everything was completed successfully, the Jellyfin service is now running.
Open your browser at http://localhost:8096 to finish setting up Jellyfin.
Update
Download the latest version.
Run the installer.
If everything was completed successfully, the Jellyfin service is now running as the new version.
Uninstall
Go to Add or remove programs in Windows.
Search for Jellyfin.
Click Uninstall.
Manual Installation (x86/x64)
Install
Download and extract the latest version.
Create a folder jellyfin at your preferred install location.
Copy the extracted folder into the jellyfin folder and rename it to system.
Create jellyfin.bat within your jellyfin folder containing:
To use the default library/data location at %localappdata%:
To use a custom library/data location (Path after the -d parameter):
To use a custom library/data location (Path after the -d parameter) and disable the auto-start of the webapp:
Run
Open your browser at http://<--Server-IP-->:8096 (if auto-start of webapp is disabled)
Update
Stop Jellyfin
Rename the Jellyfin system folder to system-bak
Download and extract the latest Jellyfin version
Copy the extracted folder into the jellyfin folder and rename it to system
Run jellyfin.bat to start the server again
Rollback
Stop Jellyfin.
Delete the system folder.
Rename system-bak to system.
Run jellyfin.bat to start the server again.
MacOS
MacOS Application packages and builds in TAR archive format are available here.
Install
Download the latest version.
Drag the .app package into the Applications folder.
Start the application.
Open your browser at http://127.0.0.1:8096.
Upgrade
Download the latest version.
Stop the currently running server either via the dashboard or using the application icon.
Drag the new .app package into the Applications folder and click yes to replace the files.
Start the application.
Open your browser at http://127.0.0.1:8096.
Uninstall
Start Docker In Ubuntu Virtualbox
Stop the currently running server either via the dashboard or using the application icon.
Move the .app package to the trash.
Deleting Configuation
This will delete all settings and user information. This applies for the .app package and the portable version.
Delete the folder ~/.config/jellyfin/
Delete the folder ~/.local/share/jellyfin/
Portable Version
Download the latest version
Extract it into the Applications folder
Open Terminal and type cd followed with a space then drag the jellyfin folder into the terminal.
Type ./jellyfin to run jellyfin.
Open your browser at http://localhost:8096
Closing the terminal window will end Jellyfin. Running Jellyfin in screen or tmux can prevent this from happening.
Upgrading the Portable Version
Download the latest version.
Stop the currently running server either via the dashboard or using CTRL+C in the terminal window.
Extract the latest version into Applications
Open Terminal and type cd followed with a space then drag the jellyfin folder into the terminal.
Type ./jellyfin to run jellyfin.
Open your browser at http://localhost:8096
Uninstalling the Portable Version
Stop the currently running server either via the dashboard or using CTRL+C in the terminal window.
Move /Application/jellyfin-version folder to the Trash. Replace version with the actual version number you are trying to delete.
Using FFmpeg with the Portable Version
The portable version doesn't come with FFmpeg by default, so to install FFmpeg you have three options.
use the package manager homebrew by typing brew install ffmpeg into your Terminal (here's how to install homebrew if you don't have it already
download the most recent static build from this link (compiled by a third party see this page for options and information), or
compile from source available from the official website
More detailed download options, documentation, and signatures can be found.
If using static build, extract it to the /Applications/ folder.
Navigate to the Playback tab in the Dashboard and set the path to FFmpeg under FFmpeg Path.
Linux
Linux (generic amd64)
Generic amd64 Linux builds in TAR archive format are available here.
Installation Process
Create a directory in /opt for jellyfin and its files, and enter that directory.
Download the latest generic Linux build from the release page. The generic Linux build ends with 'linux-amd64.tar.gz'. The rest of these instructions assume version 10.4.3 is being installed (i.e. jellyfin_10.4.3_linux-amd64.tar.gz). Download the generic build, then extract the archive:
Create a symbolic link to the Jellyfin 10.4.3 directory. This allows an upgrade by repeating the above steps and enabling it by simply re-creating the symbolic link to the new version.
Create four sub-directories for Jellyfin data.
If you are running Debian or a derivative, you can also download and install an ffmpeg release built specifically for Jellyfin. Be sure to download the latest release that matches your OS (4.2.1-5 for Debian Stretch assumed below).
If you run into any dependency errors, run this and it will install them and jellyfin-ffmpeg.
Due to the number of command line options that must be passed, it is easiest to create a small script to run Jellyfin.
Then paste the following commands and modify as needed.
Assuming you desire Jellyfin to run as a non-root user, chmod all files and directories to your normal login user and group. Also make the startup script above executable.
Finally you can run it. You will see lots of log information when run, this is normal. Setup is as usual in the web browser.
Portable DLL
Platform-agnostic .NET Core DLL builds in TAR archive format are available here. These builds use the binary jellyfin.dll and must be loaded with dotnet.
Arch Linux
Jellyfin can be found in the AUR as jellyfin, jellyfin-bin and jellyfin-git.
Fedora
Fedora builds in RPM package format are available here for now but an official Fedora repository is coming soon.
You will need to enable rpmfusion as ffmpeg is a dependency of the jellyfin server package
Note
You do not need to manually install ffmpeg, it will be installed by the jellyfin server package as a dependency
Install the jellyfin server
Install the jellyfin web interface
Enable jellyfin service with systemd
Open jellyfin service with firewalld
Note
This will open the following ports8096 TCP used by default for HTTP traffic, you can change this in the dashboard8920 TCP used by default for HTTPS traffic, you can change this in the dashboard1900 UDP used for service auto-discovery, this is not configurable7359 UDP used for auto-discovery, this is not configurable
Reboot your box
Go to localhost:8096 or ip-address-of-jellyfin-server:8096 to finish setup in the web UI
CentOS
CentOS/RHEL 7 builds in RPM package format are available here and an official CentOS/RHEL repository is planned for the future.
The default CentOS/RHEL repositories don't carry FFmpeg, which the RPM requires. You will need to add a third-party repository which carries FFmpeg, such as RPM Fusion's Free repository.
You can also build Jellyfin's version on your own. This includes gathering the dependencies and compiling and installing them. Instructions can be found at the FFmpeg wiki.
Start Docker In Ubuntu Lts
Debian
Repository
The Jellyfin team provides a Debian repository for installation on Debian Stretch/Buster. Supported architectures are amd64, arm64, and armhf.
Note

Microsoft does not provide a .NET for 32-bit x86 Linux systems, and hence Jellyfin is not supported on the i386 architecture.
Install HTTPS transport for APT as well as gnupg and lsb-release if you haven't already.
Import the GPG signing key (signed by the Jellyfin Team):
Add a repository configuration at /etc/apt/sources.list.d/jellyfin.list:
Note
Supported releases are stretch, buster, and bullseye.
Update APT repositories:
Install Jellyfin:
Manage the Jellyfin system service with your tool of choice:
Packages
Raw Debian packages, including old versions, are available here.
Note
The repository is the preferred way to obtain Jellyfin on Debian, as it contains several dependencies as well.
Download the desired jellyfin and jellyfin-ffmpeg.deb packages from the repository.
Install the downloaded .deb packages:
Use apt to install any missing dependencies:
Manage the Jellyfin system service with your tool of choice:
Ubuntu
Migrating to the new repository
Previous versions of Jellyfin included Ubuntu under the Debian repository. This has now been split out into its own repository to better handle the separate binary packages. If you encounter errors about the ubuntu release not being found and you previously configured an ubuntujellyfin.list file, please follow these steps.
Run Docker In Ubuntu 18.04
Remove the old /etc/apt/sources.list.d/jellyfin.list file:
Proceed with the following section as written.
Ubuntu Repository
The Jellyfin team provides an Ubuntu repository for installation on Ubuntu Xenial, Bionic, Cosmic, Disco, Eoan, and Focal. Supported architectures are amd64, arm64, and armhf. Only amd64 is supported on Ubuntu Xenial.
Note
Microsoft does not provide a .NET for 32-bit x86 Linux systems, and hence Jellyfin is not supported on the i386 architecture.
Install HTTPS transport for APT if you haven't already:
Enable the Universe repository to obtain all the FFMpeg dependencies:
Note
If the above command fails you will need to install the following package software-properties-common.This can be achieved with the following command sudo apt-get install software-properties-common
Import the GPG signing key (signed by the Jellyfin Team):
Add a repository configuration at /etc/apt/sources.list.d/jellyfin.list:
Note
Supported releases are xenial, bionic, cosmic, disco, eoan, and focal.
Update APT repositories:
Install Jellyfin:
Manage the Jellyfin system service with your tool of choice:
Ubuntu Packages
Raw Ubuntu packages, including old versions, are available here.
Note
The repository is the preferred way to install Jellyfin on Ubuntu, as it contains several dependencies as well.
Start Docker In Ubuntu 20.04
Enable the Universe repository to obtain all the FFMpeg dependencies, and update repositories:
Download the desired jellyfin and jellyfin-ffmpeg.deb packages from the repository.
Install the required dependencies:
Install the downloaded .deb packages:
Use apt to install any missing dependencies:
Manage the Jellyfin system service with your tool of choice:
Migrating native Debuntu install to docker
It's possible to map your local installation's files to the official docker image.
Note
You need to have exactly matching paths for your files inside the docker container! This means that if your media is stored at /media/raid/ this path needs to be accessible at /media/raid/ inside the docker container too - the configurations below do include examples.
To guarantee proper permissions, get the uid and gid of your local jellyfin user and jellyfin group by running the following command:
You need to replace the <uid>:<gid> placeholder below with the correct values.
Using docker
Using docker-compose
0 notes
Text
Spybot For Mac

Spybot For Macbook Air
Spybot Mac Os X Download
Spybot For Mac
Spybot For Mac Os
Spybot Mac Gratuit
Spybot – Search & Destroy Technician Edition provides an extended set of tools for technicians who want to have a deeper look into all parts of the operating system. To analyze problems, check configurations, define own rules and more. Or just to maintain computers within workgroups or whole companies.
Download Spybot - Search & Destroy and enjoy it on your iPhone, iPad and iPod touch. Spybot News is now available as an official smartphone app! Regular news, images, dates. Your privacy and the security of your computer is important to us, see how we can help you! Our approved Spybot – Search & Destroy protects your computer against malware. Spybot Anti-Beacon helps to stop your data being sent out to third parties. The new Spybot Identity Monitor helps you to realize and take action when your personal information held by third parties was compromised. Spybot for mac free download - WinZip Mac, Avast Free Mac Security, AVG AntiVirus for Mac, and many more programs. Spybot +AV replaces the scan-only, spyware-only protection of the free Spybot with a full-scale antivirus that promises to scan for all kinds of malware on demand and in real time. It shares quite.
This is why …
… Spybot is different. Spybot uses a unique technique to find the spyware, adware and more unwanted software that threatens your privacy that others don��t find. And the +Antivirus Editions give you complete protection with the best available Antivirus solution already integrated.
So take advantage of the essential tools to keep control over your computer and find the version that suits your needs best.
Donate now!
Please donate to support our fight against spyware!
Features

Anti-Spyware
Spybot's Anti-Spyware protection uses our unique technology to find and remove all kinds of spyware, including adware, tracking software, keyloggers and other unpopular software. Your privacy is our ultimate goal!
Anti-Virus
To provide you with the best possible protection, we've included an award winning anti-virus engine. It's the engine of choice of the best rated anti-virus products on AV-Test and AV comparatives.
And on top of that most elaborate malware protection, you get our own specialized anti-spyware engine that covers the spyware grounds beyond!
Live Protection
Live Protection is Spybots form of real time protection. Live protection scans and monitors all newly created and running processes on your system. Malicious processes are blocked before they start to prevent infection on your system.
Anti-Beacon
Our anti-telemetry tool Anti-Beacon Plus is available to all users of the Spybot Professional and the commercial editions.
System Immunization
Immunization pro-actively protects your system against malware attacks by blocking access to sites known to contain malicious or unwanted software. It also blocks tracking cookies and browser plugins that are known to contain malware. Immunization supports many popular browsers, including Internet Explorer, Opera, Firefox and Chrome.
Startup Tools
Startup Tools allow you to manage what happens and what gets loaded at system startup. If you open this tool you will see a comprehensive set of tabs. Clicking on a tab will allow you to inspect and change the behaviour of what is loaded. This powerful tool should be used with caution as it allows you to make registry changes as well as other changes that effect your system.
It can be useful if you suspect changes may have been made without your knowledge.
Rootkit Scan
Rootkits use technologies to hide themselves and their actions from users and other system processes. The Rootkit Scan is a special scan that can locate these rootkits. This scan includes checks of the file system, the registry and some process related lists.
Automatic Signature Updates
Staying up to date with all malware signatures is essential for your security. All paid editions of Spybot will download new signatures multiple times per day - automatically and in the background.
Task Scheduling
If you have purchased Spybot you have the advantage of being able to automate tasks. Using the Schedule option in Advanced Tools → Settings Spybot can create a Windows Scheduler task to keep your Spybot up to date, immunized and run system scans regularly.
Protected Repair Environment
When you choose the Protected Repair Environment, a new Windows Desktop is opened and the Start Center runs in a way so that other software cannot interact with it. This prevents keyloggers and other malware taking over control of Spybot, using the same security desktop separation technology that the Windows Login screen and the User Account Control dialogs use.
System Registry Repair
Most registry cleaner software promises to speed up your system which is not really possible. These cleaners may also come with unwanted additions such as adware or spyware. Our System Registry Repair allows you to do some basic cleanup and repair in a number of categories where changes might positively affect user experience, for instance helping Windows find misplaced Help files. It can either delete or repair broken entries by offering you you the options, for example, of locating or searching for files that have been moved. In general, we recommend that you do not use Registry Cleaners, Optimizers or Defragmentation utilities unless you are an experienced user.
Priority Support
Beside the standard support options we at Safer-Networking Ltd. strive to support you in case of questions or problems. So if need help, do not hesitate to use our contact page!
Secure Shredder
The Secure Shredder is a tool to safely remove files from magnetic hard drives. It uses multiple passes to make sure the files cannot be recovered.
Script Editor
If you are familiar with a common programming language you might want to define some detection patterns yourself. Just to get rid of some unwanted files or any item you regard as malware. This is not too complex when using our OpenSBI syntax and Pascal. A simple script that you could implement using a simple .sbi file might look like this:
Command Line Tools
The system administrator may schedule tasks and use Command Line Parameters or even Command Line Tools to perform different tasks without user interaction. Powershell Scripts or Batch Files may help and the Windows scheduler can support special tasks as well.
Command Line Tools are available for:
File Scan
System Scan
Immunization
Cleaning
Updating
FileAlyzer
FileAlyzer is a tool to analyze files. It shows basic file content, a hex viewer, and a range of customized displays for interpreted file structures.
It also supports generation of OpenSBI advanced file parameters.
Start Center
The simple Start Center shows you the important information about the last scan, the immunization and update status. It helps you to stay safe with a minimum of clicks.
Spybot For Macbook Air
Spybot 2.8 Immunization
Immunization pro-actively protects your system against malware attacks by blocking access to sites known to contain malicious or unwanted software. It also blocks tracking cookies and browser plugins that are known to contain malware. Immunization supports many popular browsers, including Internet Explorer, Opera, Firefox and Chrome.
Reviews
Great. Excellent. Brilliant!
My Google Chrome browser was always triggering to unwanted page - Adcash and DoubleClick. Sometimes my browser triggering to porn sites. Other softwares fails to detect it, but Spybot Search & Destroy can do so through the scanning function. In the next review, Spybot Search & Destroy can improve this detection function in realtime protection. Thank you Spybot Search & Destroy version 2.4.40.
This is a great fully-featured security application…
Pros: Host File Protection, Browser Guards, Realtime Spyware and Malware Protection, Process Control, Deep System Scanning, and many others you normally wouldn’t find in a traditional security software suite.
Cons: The only con I can rightly say is that it consumes a lot of system resources and some of the scans can take a while, depending on the size of your system and the configurations of the scan you choose.
Summary: This is a robust security application that is an excellent supplement to existing security software and especially useful for those whom still use the Internet Explorer browser, because of the protections it offers, including that of the host file as well as a user’s homepage. Even if you don’t want to pay for the full version, the free version is still worth the download and is a formidable contender in the world of antimalware software.
It is essential in our computer
What do you like best?
can be downloaded for free in its free version, and its main task is to detect and remove corrupt files, suspicious or spyware robots, which can be harmful to our computer.
The design of this program is really simple, with practically four buttons, to do everything, but still, it has many options.
What most attracts the attention of the program, at least to me, is the possibility of configuring it in several languages.
What do you dislike?
They should add other skins.
Spybot Mac Os X Download
and it has a relatively high Ram Consumption [Note from Safer-Networking: this has been fixed in Spybot 2.7].
Recommendations to others considering the product
I recommend it because it is free and has a simple interface with intuitive options, it is effective, it removes malware, and it is always updated.
What business problems are you solving with the product? What benefits have you realized?
protection in the work stations in combination with other antivirus makes me feel more protective against computer intrusions and malicious advertising.
Download
Spybot 2.8
Get this to install on a 32 or 64 bit Windows system.
Why use the Technician’s Edition?
Spybot – Search & Destroy Technician Edition provides an extended set of tools for technicians who want to have a deeper look into all parts of the operating system. To analyze problems, check configurations, define own rules and more. Or just to maintain computers within workgroups or whole companies. Use the complete protection against malware and viruses including Live Protection on your own system and define tasks you want performed on other systems. Thus, the license also includes the use of a portable device on systems that you support, where it may not be permanently installed.
As with the Corporate Edition it uses two scan engines for different tasks like scanning for viruses and malware. It provides cleaning system startup and you may use some very special features.
Buy now!
How many business use copies do you need?
Features
Anti-Spyware
Spybot's Anti-Spyware protection uses our unique technology to find and remove all kinds of spyware, including adware, tracking software, keyloggers and other unpopular software. Your privacy is our ultimate goal!
Anti-Virus
To provide you with the best possible protection, we've included an award winning anti-virus engine. It's the engine of choice of the best rated anti-virus products on AV-Test and AV comparatives.
And on top of that most elaborate malware protection, you get our own specialized anti-spyware engine that covers the spyware grounds beyond!
Live Protection
Live Protection is Spybots form of real time protection. Live protection scans and monitors all newly created and running processes on your system. Malicious processes are blocked before they start to prevent infection on your system.
Anti-Beacon
Our anti-telemetry tool Anti-Beacon Plus is available to all users of the Spybot Professional and the commercial editions.
System Immunization
Immunization pro-actively protects your system against malware attacks by blocking access to sites known to contain malicious or unwanted software. It also blocks tracking cookies and browser plugins that are known to contain malware. Immunization supports many popular browsers, including Internet Explorer, Opera, Firefox and Chrome.
Startup Tools
Startup Tools allow you to manage what happens and what gets loaded at system startup. If you open this tool you will see a comprehensive set of tabs. Clicking on a tab will allow you to inspect and change the behaviour of what is loaded. This powerful tool should be used with caution as it allows you to make registry changes as well as other changes that effect your system.
It can be useful if you suspect changes may have been made without your knowledge.
Rootkit Scan
Rootkits use technologies to hide themselves and their actions from users and other system processes. The Rootkit Scan is a special scan that can locate these rootkits. This scan includes checks of the file system, the registry and some process related lists.
Automatic Signature Updates
Staying up to date with all malware signatures is essential for your security. All paid editions of Spybot will download new signatures multiple times per day - automatically and in the background.
Task Scheduling
If you have purchased Spybot you have the advantage of being able to automate tasks. Using the Schedule option in Advanced Tools → Settings Spybot can create a Windows Scheduler task to keep your Spybot up to date, immunized and run system scans regularly.
Protected Repair Environment
When you choose the Protected Repair Environment, a new Windows Desktop is opened and the Start Center runs in a way so that other software cannot interact with it. This prevents keyloggers and other malware taking over control of Spybot, using the same security desktop separation technology that the Windows Login screen and the User Account Control dialogs use.
System Registry Repair
Most registry cleaner software promises to speed up your system which is not really possible. These cleaners may also come with unwanted additions such as adware or spyware. Our System Registry Repair allows you to do some basic cleanup and repair in a number of categories where changes might positively affect user experience, for instance helping Windows find misplaced Help files. It can either delete or repair broken entries by offering you you the options, for example, of locating or searching for files that have been moved. In general, we recommend that you do not use Registry Cleaners, Optimizers or Defragmentation utilities unless you are an experienced user.
Priority Support
Beside the standard support options we at Safer-Networking Ltd. strive to support you in case of questions or problems. So if need help, do not hesitate to use our contact page!
Secure Shredder
The Secure Shredder is a tool to safely remove files from magnetic hard drives. It uses multiple passes to make sure the files cannot be recovered.
Script Editor
If you are familiar with a common programming language you might want to define some detection patterns yourself. Just to get rid of some unwanted files or any item you regard as malware. This is not too complex when using our OpenSBI syntax and Pascal. A simple script that you could implement using a simple .sbi file might look like this:
Command Line Tools
The system administrator may schedule tasks and use Command Line Parameters or even Command Line Tools to perform different tasks without user interaction. Powershell Scripts or Batch Files may help and the Windows scheduler can support special tasks as well.
Command Line Tools are available for:
File Scan
System Scan
Immunization
Cleaning
Updating
FileAlyzer
FileAlyzer is a tool to analyze files. It shows basic file content, a hex viewer, and a range of customized displays for interpreted file structures.
https://distinguishedalpacatheorist.tumblr.com/post/642312771633119232/topogun-for-mac. It also supports generation of OpenSBI advanced file parameters.
Protected Repair Environment
When you choose the Protected Repair Environment, a new Windows Desktop is opened and the Start Center runs in a way so that other software cannot interact with it. This prevents keyloggers and other malware taking over control of Spybot, using the same security desktop separation technology that the Windows Login screen and the User Account Control dialogs use.
Spybot For Mac
System Registry Repair
Most registry cleaner software promises to speed up your system which is not really possible. These cleaners may also come with unwanted additions such as adware or spyware. Our System Registry Repair allows you to do some basic cleanup and repair in a number of categories where changes might positively affect user experience, for instance helping Windows find misplaced Help files. It can either delete or repair broken entries by offering you you the options, for example, of locating or searching for files that have been moved. In general, we recommend that you do not use Registry Cleaners, Optimizers or Defragmentation utilities unless you are an experienced user.
Download mamp for mac. MAMP is commonly used with WordPress and Drupal for setting up a local web development environment. The most key element of using MAMP is that user can develop web applications offline and then easily transfer it later to the web host provider.
Script Editor
Spybot For Mac Os
If you are familiar with a common programming language you might want to define some detection patterns yourself. Just to get rid of some unwanted files or any item you regard as malware. This is not too complex when using our OpenSBI syntax and Pascal. A simple script that you could implement using a simple .sbi file might look like this:
Reviews
Leigh Rach
Spybot Mac Gratuit
This to me looks like the best antimalware / antivirus on the market. will purchase soon. A must for every investor. Been using the free version for a very long time
FossHub
Spybot Search and Destroy (Free Edition) is a free security software, an excellent antispyware, anti-adware removal tool. It will detect and remove most of these threats: Adware files, Trojans, Dialers, PUPs, Browser Hijackers (unwanted toolbars), Keyloggers, Rootkits and other malware or junkware files can infect your computer. It will also allow you to fix the Windows® Registry inconsistencies, to be more specific - those related to malicious applications that you are installing and adware.
Several years ago was a revolution and today is on the same level
Simple but revolutionary software that is a pleasure to work with. After installation 1st thing to do is to immunize a PC, only after that you can go with all other interesting options.
0 notes
Text
Converting Azure Pipeline with Task Groups to Yaml
We have a fairly complex pipeline which builds, tests and deploys our ASP.net MVC app to an Azure WebApp in an App Service Environment. Because we have several high profile customers we actually deploy the app to separate web apps for each customer 'instance' so they have database and application isolation.
Because each customer instance is identical except for some App Settings to point to a separate database; deployment is the same except the web app location. Currently we have a Task Group with parameters setting the name of the instance (for the Task Display Name), the app location and the staging url so we can run tests.
I would prefer to use the new YAML pipeline for this app so its easier to add new customer 'instances' in the future and we can source control the pipeline.
After some investigation, I discovered I can pass parameter 'objects' into a template YAML file to pretty much do what I want; the only tricky bit was to have multiple properties per instance parameter 'object' and using the new template {{ each }} expression.
Below is how I constructed my yaml files for this solution.
azure_pipelines.yml
pool: name: Hosted VS2017 demands: - npm - msbuild - visualstudio - vstest steps: - template: azure_webapp_template.yml parameters: webapps: - name: Customer 1 url: customer1.azurewebsites.net - name: Customer 2 url: customer2.azurewebsites.net - name: Customer 3 url: customer3.azurewebsites.net - name: Customer 4 url: customer4.azurewebsites.net
As you can see above, we are creating an object webapps and then we have some nested properties for each 'webapp'.
Then in our 'template' we can iterate over each of the objects in the webapps parameter and expand the property in our iterated tasks.
azure_webapp_template.yml
# Proving ability to loop over params a number of times parameters: - name: 'webapps' type: object default: {} steps: - ${{ each webapp in parameters.webapps }}: - task: PowerShell@2 displayName: 'Task Group Test 1 ${{webapp.name}}' inputs: targetType: 'inline' script: | Write-Host "Name: ${{webapp.name}} with url ${{webapp.url}}" failOnStderr: true workingDirectory: '$(Build.SourcesDirectory)' - task: PowerShell@2 displayName: 'Task Group Test 2 ${{webapp.name}}' inputs: targetType: 'inline' script: | Write-Host "Name: ${{webapp.name}} with url ${{webapp.url}}" failOnStderr: true workingDirectory: '$(Build.SourcesDirectory)'
I hope this finds some use to others.
0 notes
Text
Original Post from Trend Micro Author: Trend Micro
by Hara Hiroaki and Loseway Lu (Threats Analysts)
TA505 is a prolific cybercriminal group known for its attacks against multiple financial institutions and retail companies using malicious spam campaigns and different malware. We have been following TA505 closely and detected various related activities for the past two months. In the group’s latest campaign, they started using HTML attachments to deliver malicious .XLS files that lead to downloader and backdoor FlawedAmmyy, mostly to target users in South Korea.
Figure 1. TA505’s latest infection chain
This blog post covers three main points involving TA505: their recent activity in specific regions, shifting tactics and payloads, and suspicious activity possibly associated with the group. We also touch on the latest TA505 developments, including an email stealer, their use of legitimate software and MSI Installer, and more.
Recent activity in Latin America and East Asia
As previously mentioned, TA505, first named by Proofpoint, is known for targeting financial enterprises. Since last December, TA505 has been very active and has been using legitimate or compromised RATs (remote access trojans) such as FlawedAmmyy, FlawedGrace, and Remote Manipulator System (RMS).
While monitoring their activities, we found that the group is still updating their tactics, techniques, and procedures (TTPs). In April, TA505 targeted Latin American countries Chile and Mexico, and even Italy using either FlawedAmmyy RAT or RMS RAT as payload. By the end of April, we learned that the group started to go after targets in East Asian countries such as China, South Korea, and Taiwan using FlawedAmmyy RAT as its payload.
TA505 has also recently used LOLbins and legitimate Windows OS processes to perform malicious activities and deliver a payload without being detected. As the entry point of an attack, it delivers a sophisticated email containing a malicious Excel or Word file. The group notably abuses Excel 4.0 macro — a particularly old macro likely used to evade typical macro detection.
Figure 2. Korean language (left), simplified Chinese language (right) Microsoft Office instructions on how to enable macro
Figure 3. Excel 4.0 macro
This said macro executes a command to download the first stage payload using msiexec.exe, a Microsoft Installer tool that can download and run a Windows Installer file. The first stage payload is an MSI Installer that was created using an EXE to MSI converter.
Figure 4. MSI Installer payload that used EXE to MSI converter
The actual malicious payload is in the MSI Installer package. The payload can vary in each campaign, but it typically uses the FlawedAmmyy downloader, ServHelper, or RMS RAT launcher.
Payload as FlawedAmmyy downloader
The MSI Installer itself contains a FlawedAmmyy downloader, which is always signed.
Figure 5. FlawedAmmyy downloader
Figure 6. Digitally signed FlawedAmmyy downloader
The downloader will check if the infected machine is running in the Active Directory (AD) network. It then runs the “net group /domain” command and checks if “workgroup” is contained in the output result. (If it does not exist, it means that the PC is running in AD.) After performing the check, it downloads the RC4-encrypted FlawedAmmyy RAT, decrypts it, and executes it as the final payload.
We recently observed an instance where the FlawedAmmyy downloader was not digitally signed (FlawedAmmyy RAT payload is still signed, however). It could be a blip — perhaps a one-off — but it’s still notable.
Payload as ServHelper
ServHelper is classified as a backdoor, but it can also work as a downloader for FlawedGrace. If the MSI Installer package contains ServHelper as a payload, it will come with an NSIS (Nullsoft Scriptable Install System) installer.
Figure 7. NSIS Installer
NSIS is a legitimate tool that manages the installation for Windows, but some hacking groups also abuse it. TA505, for instance, abuses NSIS to install ServHelper. This NSIS installer has two files: (nsExec.dll and repotaj.dll) and [NSIS].nsi. The latter is a configuration file that handles files to install.
Figure 8. NSIS Installer sections
In this case, repotaj.dll, which is ServHelper, will be extracted to %TEMP% and execute with the “feast” parameter as its export function. Once ServHelper is executed, it runs a PowerShell script to get information from the infected machine.
Payload as RMS RAT
TA505 also uses RMS, a legitimate RAT, in their campaigns. If the MSI Installer package contains RMS RAT as its payload, it will include a self-extracting RAR.
Figure 9. SFXRAR
This SFXRAR extracts three files to %TEMP% and executes one of the files, where exit.exe is a launcher for i.cmd; i.cmd renames kernel.dll to uninstall.exe, then executes it with parameters.
Figure 10. Three files extracted from SFXRAR
Figure 11. Executed parameters
As indicated in the parameter above, kernel.dll/uninstall.exe is also SFXRAR, but password-protected. It will extract the following files (Figure 12) and execute exit.exe, where the said executable is also a launcher of i.cmd that registers winserv.exe (the actual RMS RAT) and executes it. The password used to extract from the RAR file will be passed by the parameter “-p”, which is set in i.cmd.
Figure 12. Extracted files
Figure 13. RMS RAT is added to the startup registry and executed
Updates on TA505’s tactics, techniques and procedures
Since the tail end of April through early June, we observed TA505 changing its tactics, techniques, and procedures (TTPs) in a variety of ways. The following is a quick rundown of the group’s varying methods.
Using Amadey to distribute EmailStealer
On April 24, we detected an attack that used Amadey as its first stage payload. Amadey is a known downloader for another payload (FlawedAmmyy downloader) and EmailStealer, which steals email accounts or SMTP credentials from infected PCs.
In this particular attack, we discovered that the C&C server of EmailStealer had an open directory, allowing us to view the information that EmailStealer stole. We presume the information, primarily comprised of lists of email addresses, will be used in future attacks.
Using VBA macro
TA505 has been using Excel 4.0 macro for a while, but we recently observed the group using the usual VBA (Visual Basic for Applications) macro along with Excel 4.0 macro. However, they still hide the command and malicious URL in “UserForm” and not in VBA code.
Figure 14. Malicious command and URL hidden in UserForm
Avoiding the use of msiexec.exe
As previously mentioned, TA505 abuses msiexec.exe to install its first stage payload, but we recently observed the group just directly downloading the first stage payload binary and executing it. Like the VBA macro code, the group just executes the downloaded file 234.exe by cmd.exe. This is possibly because endpoint security solutions easily detect msiexec.exe.
Using HTML as an attack entry point
TA505 has been using Excel file, Word document, or .WIZ files as its attack entry point. However, as mentioned earlier, the group has also started to attach an HTML link in emails to trick users into opening the Excel file.
Figure 15. Attached HTML
Opening this HTML link will redirect the user to a malicious URL that hosts the malicious Excel file. The Excel file still has the same style of VBA macro, which was described in the previous section. This could mean that the group is trying to change the entry point’s file type to bypass macro detection.
In early June, for instance, we saw HTML in emails that used a friendly tone so recipients would download the Excel file. Some recent cases we observed even had the Excel file directly attached to the emails.
Figure 16. HTML shows a message before Excel download (Translation from Korean: Downloading … … will be taken to the download page after a while …. If you wait a while and continue to see this message, please click on ”> link ! Thank you.)
Suspicious activity involving TA505
While analyzing TA505’s activities, we encountered strange attacks that were very similar to TA505’s TTPs but with some differences. This section discusses a particular attack that, like the usual TA505 attack, distributes RMS RAT via Excel and SFXRAR. But it also contains Kronos, a known banking trojan; and SmokeLoader, which is another payload downloader. While the attack shows characteristics that are similar those of TA505’s attacks, we suspect that this could be a forged attack. As for the reason why we are dubious about this attack, another report has also since surfaced discussing that some threat actor was using similar tools to TA505’s.
In this attack, the basic TTPs and tools used seem similar, but we found five interesting points that set them apart:
Using .rar or .zip as attachment
The TA505 group usually attaches a malicious file without any compression. But this attack sent an email with a .rar or .zip attachment. However, this may not be a significant difference.
Using a similar image on Excel but with different macro and attribution
The following image on Excel appears similar to the one TA505 has been using.
Figure 17. Display on Excel for this suspicious attack
But there are a few differences in this Excel file. For one thing, it has a different style of VBA macro. TA505 has been using Excel 4.0 macro and VBA macro without heavy obfuscation, but this particular Excel file was heavily obfuscated and had a different style.
Figure 18. VBA macro with heavy obfuscation
Another factor is its different codepage. Malicious Excel files that TA505 distributed had information harvesting capabilities. For example, the codepage of Excel has always been “1251” Cyrillic (Windows), but the code page of this particular attack was “1252” Western European (Windows).
Figure 19. Information of Excel file used in this suspicious attack
Figure 20. Information of the usual Excel file distributed by TA505
Lacking the use of fast flux infrastructure
TA505 uses fast flux, a DNS technique used to mask botnets by quickly shifting among compromised hosts, which allows cybercriminals to delay or evade detection. The domains the group has been using to distribute payloads were usually resolved across a lot of IPs.
But in this attack, the domains used to distribute the payload only had one IP. It should be noted, however, that TA505 may have used different infrastructure for this instance, or another attacker may have performed malicious activities under the guise of TA505.
Using Kronos and SmokeLoader (v2019)
TA505 previously used Amadey to distribute the FlawedAmmyy downloader before, so the use of Kronos and SmokeLoader can’t be considered strong evidence of false attribution.
Using a different infrastructure to distribute spam
The strongest evidence that this attack might not come from TA505 is that this attack operator used a different spam infrastructure. Our daily monitoring of TA505’s activities show that the group sends spam from specific IPs; this suspicious attack used different sender IPs. We couldn’t find any of the IPs used in previous attacks.
We can’t say for sure if this particular attack comes from TA505, another threat actor, an imitator, or perhaps just TA505 using another infrastructure. This reiterates the tricky business of attribution in cybersecurity, which calls for careful inspection. While it’s easy to attribute similar incidents to certain threat actors, groups, or even countries, attribution should ultimately be based on technically provable information. After all, attributions can be used to operationalize appropriate incident response and remediation.
Defending against TA505’s malicious activities
TA505 has been responsible for many large-scale attacks since at least 2014, using malicious email campaigns to distribute various banking trojans, ransomware, RATs, and backdoors. They had also targeted retail brands and even different financial companies across the world. TA505 has been focused on delivering downloaders, information stealers, and other malware — threats that can remain in affected systems if not prevented or remediated. With the group’s use of email as an entry point for malicious activities, the threat has become more serious for unwitting users and organizations. Here are some best practices:
Regularly update systems and applications.
Incorporate multilayered security mechanisms such as firewalls and intrusion detection and prevention systems.
For system administrators, secure the email gateway to prevent it from becoming an attack entry point and proactively monitor possible attack vectors.
To defend against spam and threats from the TA505 group, businesses can consider Trend Micro endpoint solutions such as Trend Micro Smart Protection Suites and Worry-Free Business Security. Both solutions can protect users and businesses from threats by detecting malicious files and spammed messages as well as blocking all related malicious URLs. Trend Micro Deep Discovery has an email inspection layer that can protect enterprises by detecting malicious attachments and URLs.
Trend Micro Hosted Email Security is a no-maintenance cloud solution that delivers continuously updated protection to stop spam, malware, spear phishing, ransomware, and advanced targeted attacks before they reach the network. It protects Microsoft Exchange, Microsoft Office 365, Google Apps, and other hosted and on-premises email solutions.
The list of indicators of compromise (IoCs) related to this threat can be found in this appendix.
The post Shifting Tactics: Breaking Down TA505 Group’s Use of HTML, RATs and Other Techniques in Latest Campaigns appeared first on .
#gallery-0-5 { margin: auto; } #gallery-0-5 .gallery-item { float: left; margin-top: 10px; text-align: center; width: 33%; } #gallery-0-5 img { border: 2px solid #cfcfcf; } #gallery-0-5 .gallery-caption { margin-left: 0; } /* see gallery_shortcode() in wp-includes/media.php */
Go to Source Author: Trend Micro Shifting Tactics: Breaking Down TA505 Group’s Use of HTML, RATs and Other Techniques in Latest Campaigns Original Post from Trend Micro Author: Trend Micro by Hara Hiroaki and Loseway Lu (Threats Analysts)
0 notes
Link
SQL Server Agent is a Windows service that is widely used by database administrators and developers to automate the different types of critical and complex business and administrative tasks, to be executed based on a regular predefined schedule. It provides us with the ability to schedule an operating system CMD command, PowerShell script, SQL Server Analysis Services command or query, SQL Server Integration Services package or simply a T-SQL script.
The process of creating a SQL Server Agent job is straight-forward including the need to define the steps that contain the logic that the SQL Agent job will execute, in the correct order that meets the business requirements, then pick or define a schedule that will specify the time and frequency of the SQL Agent job execution. In other words, you are able to easily automate and schedule most of your SQL Server database maintenance tasks and business-related tasks, such as processing the application data or purging the system logs.
At the end of the day, after automating and scheduling all the required tasks using the SQL Agent jobs, the developers and business owners will sleep deeply as their tasks will be executed automatically at night, and enjoy their lunch as the tasks will be running during the day without any effort required from their side. But what about the database administrator, who owns the SQL Server that contains hundred of SQL Agent Jobs? These jobs should be controlled and monitored, especially when there is no notification mechanism that is defined on these jobs to notify the job owner if the SQL Agent job failed and what is the reason behind this failure.
In this article, we will discuss how to monitor the SQL Server Agent jobs execution and view detailed information about the execution result of each step within the SQL Server Agent job.
MSDB Overview
MSDB database is a system database that is used by the SQL Server Agent to store system activities about the Database Mail, Service Broker, Database Backup and Restore history, maintenance plans and the SQL Agent jobs. The SQL Server Agent jobs information stored in the MSDB database includes the jobs schedules, steps, alerts and execution history, as shown below:
Due to the important information that is stored in the MSDB system database, it is recommended to change the recovery model of that database from Simple to Full recovery model and take a regular backup of that database. In addition, do not try to modify or delete the data stored in the MSDB database tables manually. Instead, you should perform the change properly from the related configuration wizard or using the documented system stored procedure to modify or delete the data.
Sysjobhistory Table
dbo.sysjobhistory table is the MSDB system table that contains detailed historical information about the execution of the SQL Server Agent scheduled jobs. This information includes the SQL Server Agent job step name, the execution result, the execution date, execution time and duration for each step within the job.
In order to get the execution history about a specific SQL Server Agent job, you should join the sysjobhistory table with the sysjobs table, to filter on that Agent job, as in the query below:
SELECT J.[name] ,[step_name] ,[message] ,[run_status] ,[run_date] ,[run_time] ,[run_duration] FROM [msdb].[dbo].[sysjobhistory] JH JOIN [msdb].[dbo].[sysjobs] J ON JH.job_id= J.job_id WHERE J.name='Log_Failed_Logins'
And the returned result, that shows the SQL Agent job history, will be like:
sp_help_jobhistory
Rather than querying the system table directly, which is not recommended by Microsoft, you can easily use the sp_help_jobhistory system stored procedure and pass the name of the job that you are interested in checking its history, without the need to have knowledge about the structure of these system tables in order to join between them. The below query can be used to retrieve the history of the same SQL Server Agent job checked in the previous script:
USE msdb; GO EXEC dbo.sp_help_jobhistory @job_name = N'Log_Failed_Logins'; GO
And the SQL Agent job history returned from that system stored procedure, that contains less details about the steps execution, will be like:
sp_help_jobhistory_full
To retrieve more detailed information about the execution result of the SQL Server Agent job steps, you can use the full copy of the sp_help_jobhistory system stored procedure, that is called sp_help_jobhistory_full. Unfortunately, when executing this system stored procedure, all the parameters are mandatory and should be provided in the execution statement, as in the query below:
EXEC dbo.sp_help_jobhistory_full @job_id='3EA411A6-EB6E-416C-AB0F-FAFEF3DBEFB0', @job_name = N'Log_Failed_Logins', @step_id=NULL, @sql_message_id=NULL, @sql_severity=NULL, @start_run_date=NULL, @end_run_date=NULL, @start_run_time=NULL, @end_run_time=NULL, @minimum_run_duration=NULL, @run_status=NULL, @minimum_retries=NULL, @oldest_first=NULL, @server=NULL, @mode=NULL, @order_by=NULL, @distributed_job_history=NULL GO
And the detailed historical information of the SQL Server Agent job, returned from the sp_help_jobhistory_full system stored procedure will be like:
Limitations
Although the previous queries provide us with detailed information about the SQL Server Agent jobs execution, this information still not presented properly. For example, the run_date and run_time columns, that describes the execution date, in YYYYMMDD format, and execution time, in HHMMSS format, of the SQL Agent job step, are stored separately in two different columns, and stored as INT values, instead of displaying it in more meaningful way in one column as datetime value.
In addition, the run_duration column, that is stored as INT data type in HHMMSS format, is also confusing and not friendly when analyzing the execution history of SQL Agent jobs running for long time. In other words, run_duration of 1250, I may read it as 1250 seconds, where in fact it is 12 minutes and 50 seconds. Another point that we need to consider is the shape of the queries result, when trying to check the history for multiple jobs and each job consists of multiple steps.
In order to create a user-friendly report for the SQL Agent jobs execution history, you should have advanced T-SQL development skills that help us in presenting this result in more readable way.
SQL Agent Job Activity Monitor
The execution history of the SQL Server Agent jobs can be also checked from the Job Activity Monitor window, under the SQL Server Agent node, as below:
To view the execution history of specific job, right-click on that job and choose the View History option, as below:
The displayed window will show the execution result, for the selected job, including the execution time, duration and result message, with detailed information about the execution result of each step under that job, as shown below:
Notice that there is no option here to check the consolidation view for all the SQL Agent jobs execution history from that windows, as it shows the execution result for the selected job only.
Another option is taking benefits from the ApexSQL Job to review and analyze the history of the SQL Agent jobs under a specific SQL Server instance.
ApexSQL Job
SQL Server Agent jobs are a powerful component to the feature ecosystem of SQL Server, but value-added solutions exist to expand on the capabilities of this technology. One is ApexSQL Job, a 3rd party database automation tool from ApexSQL
Before installing ApexSQL Job to your machine, you should download the installation file, less than 40MB, from the ApexSQL download center. During the installation process, follow the straight-forward wizard, that will ask you to specify the installation path for ApexSQL Job and if you plan to create a shortcut for the tool in the desktop, for faster access:
Getting started
Once you have ApexSQL Job completely installed to your machine, you can run it by clicking on the “job organization bag” icon:
To connect to your SQL Server instance and check the execution history of the scheduled SQL Agent jobs, click on the Add button, from the SQL Server tasks category, under the Home tab, as follows:
In the Add SQL Server window, provide the name of the SQL Server instance that you plan to connect to, and the authentication mode for the privileged user that you will use to connect to your SQL Server instance, similar to the information you provide when connecting using the SQL Server Management Studio, as shown below:
ApexSQL Job, being a centralized administration tool, allows you to connect to multiple SQL Server instances and check the execution history of the scheduled SQL Server Agent jobs from one place. In order perform that, it organizes the servers under customized folders. This is why you will be asked to add the server under the default “Unset” folder, or create a new folder to include your SQL Server instance under it, as shown below:
After connecting to your SQL Server instance, you need to make sure that the SQL Server Agent Service, that is responsible for the SQL Agent jobs, is running. To achieve that, click on the Start button, from the Agent tasks category, under the Home tab. If the service is not running, ApexSQL Job will start the it and notify you, as shown below:
If the SQL server Agent service is already running, no action will be performed, and ApexSQL Job will notify you that it is already running, as below:
View the SQL Agent Jobs list
In order to view the list of SQL Server Agent jobs that are defined under your SQL Server instance, choose the SQL Server instance from the folder that you created then click on the Jobs tab, and the list of jobs will be displayed as shown below:
SQL Server Agent Job History
In ApexSQL Job, there is a separate tab, History, from which you can easily check the execution history of the scheduled SQL Agent jobs. If you click on the History tab, you will see that the functions are divided into two categories, Data and View. The Data category contains the functions related to exporting the selected SQL Agent jobs history and refreshing the displayed history. On the other hand, the View category controls the way that the SQL Agent jobs history will be displayed. If you choose the Timeline view option as below:
The execution results summary of the scheduled SQL Agent jobs will be displayed in horizontal timeslots of the day, with the ability to move between the days using the top arrows. This summary will show if the SQL Agent job executed successfully or failed, with colorful representation for the SQL Server Agent job status, as shown below:
Changing the view to Day:
The summary view of the scheduled SQL Agent jobs execution results will be changed to vertical timeslots of the day. The SQL Server Agent job execution summary in this view will show the execution start and end date of that execution attempts with the execution result, Succeeded or Failed, as shown below:
If you click on any execution result, a tooltip will be displayed, showing the job name, and the exact start and end date, in a user-friendly format, as shown below:
The lower part of the SQL Agent jobs history window contains detailed execution history for the selected job. If you click on any timeslot that contains a job execution result, the lower part will display the detailed execution result for the selected slot. This contains the job name, instead of displaying the job id which has no meaning for the user, the SQL Server instance name, the job execution status in graphical format, instead of displaying a bit value of 0 or 1 that may confuse the user, the job execution date and time, in one field and displayed in a user-friendly format that requires no conversion, the job execution duration, in a format that shows the hours, minutes and seconds clearly, and finally a message that describes the execution result of the SQL Server Agent job, with the ability to drag any column name and sort the execution history for the SQL Agent jobs based on the selected column, as shown below:
In addition to the detailed information about the job execution, ApexSQL Job provides us with the ability to expand the job execution result to display the execution result for all the steps executed within the selected job. This comprehensive information will be displayed in hierarchical way, that makes easier to read the parent job execution information and dive down in the execution information for the child steps, as shown below:
It is clear from the previous result, the ability of ApexSQL Job to review the execution history for all the SQL Agent jobs located under the connected server from one window, or simply concentrate on a specific timeslot if the day and see what is executing during that time. Whatever aspect you are interested in, ApexSQL Job will provide you with the ability to analyze your SQL Agent jobs execution from that side.
Export the SQL Server Agent Job History
ApexSQL Job provides us with the ability to export the execution history for the selected SQL Agent jobs to multiple formats. This includes exporting the execution history to CSV, XML, HTML and PDF formats. To do that, on the lower part of the execution history window, select the jobs execution history logs that you plan to export, right-click on the window and choose the Export to option then choose the format for the file to which this history will be exported to, as shown below:
Once the exported is completed successfully, ApexSQL Job will ask you to open the generated file for viewing, as shown below:
If you click Yes, the file that contains the execution history for the selected SQL Server Agent job will be opened, where you can keep that file and analyze it in the future, or attach it to your email or report as a proof for the related team, as below:
0 notes
Link
I was reading Kendra Little’s ( b | t ) post on SQL Server Edition Changes and it reminded me of the work I did at my last position. I did LOTS of downgrades, seriously, LOTS.
When we started auditing our systems we found TONS of Enterprise and Standard Editions being used in development and QA environments. In the past, Microsoft gave us a pass and only cared about what was being used in production, but this year they indicated that not to be the case, so a remediation was in order.
Since I had done a good deal of work with Michael Well’s ( b | t ) Scripted PowerShell Automated Deployment Engine (SPADE) for new server setups, I was the best candidate to handle the job. I lost count of the total number of downgrades that I did, but I have a few dozen pages in my notebooks that look like the one below. This page would have been one night’s work.
The process which got me through a few hundred downgrades was fairly simple:
The first step of downgrading is copying off your system files. If you are not sure where your system files are you can simply view the Start Up Parameters of the SQL Service. I usually copy this value to a draft email or temp file for reference, just in case. Once I find the master I copy the master, model, and msdb database to a temp folder. If you skip this step, they will be deleted during the uninstall. Don’t ask me how I know this.
Now that we have the lifeblood of our instance saved safely away, we can proceed with step 2, uninstall, which is just as it sounds. Most of the time I will simply run the uninstaller and select everything as there is nothing better than a fresh install. If you have SSAS or SSRS there are extra steps to safely migrate those services, which aren’t covered here.
By default, when SPADE is run, it copies all of the install media over one time and sets a file indicating that the media is in place. If you run SPADE a subsequent time, it will see the file indicating the media is already copied locally and skip that step completely. If you’ve used SPADE in the past this would result in you installing the previously installed version, again. So prior to running SPADE, ensure you have deleted the install folder if it is there.
Once SPADE has done its thing, installing everything, checking all the standard settings etc, we need to shut SQL down and move our old system databases back into place. If you installed your INSTALLSQLDATADIR in a different location than you had prior, you will need to place your old system files in the new INSTALLSQLDATADIR location, once done, start the SQL Service again. If all went well, it should start right up with no issues.
In some cases, we were actively changing the names of the instance being downgraded, and this would require us to remove the old SPN entry and add a new one. If you get linked server issues with AD logins, you likely forgot this step. As you can see from my checklist, there aren’t any checks on this column, as this was not the norm, but normal enough that it had its own check-box.
If you are going to be industrious as I was and perform multiple downgrades at the same time, I recommend that you pre-stage the install media prior to your actual downgrade window. SPADE has a -PRE flag that will allow you to run all the pre-checks without doing the actual install, this will stage your media locally, which will save you some time during the actual work. This check box was for just that, one check would be for version, other services (SSRS, SSIS, second instances) that would require more investigation, and I forget what the other check-box was for.
All in all, I was able to knock out this process multiple times, over multiple nights spread over a 2-3 month time frame. Any thing that came up out of the ordinary during downgrade time I would simply skip that server and knock out the remainder.
One thing to note is that all of the servers that contained SSRS databases had to be coordinated with the team that ran those servers as the SQL Engine and SSRS engines have to be the same version, otherwise it wouldn’t operate. Another gotcha, was SCOM I believe. Luckily upgrading to a higher version has been a built in option of SQL Installers since 2005 I believe, a quick manual run of the install media in your SPADE folder and it can be upgraded in place, less than a minute in most cases.
This had been my experience, yours may vary. If you have a large environment and find yourself doing builds fairly regularly, I highly suggest checking out SPADE, it can automate nearly all of your install and standardization tasks right out of the gate. Quick and Easy!
0 notes
Text
To SDB, Or Not To SDB: FIN7 Leveraging Shim Databases for Persistence
In 2017, Mandiant responded to multiple incidents we attribute to FIN7, a financially motivated threat group associated with malicious operations dating back to 2015. Throughout the various environments, FIN7 leveraged the CARBANAK backdoor, which this group has used in previous operations.
A unique aspect of the incidents was how the group installed the CARBANAK backdoor for persistent access. Mandiant identified that the group leveraged an application shim database to achieve persistence on systems in multiple environments. The shim injected a malicious in-memory patch into the Services Control Manager (“services.exe”) process, and then spawned a CARBANAK backdoor process.
Mandiant identified that FIN7 also used this technique to install a payment card harvesting utility for persistent access. This was a departure from FIN7’s previous approach of installing a malicious Windows service for process injection and persistent access.
Application Compatibility Shims Background
According to Microsoft, an application compatibility shim is a small library that transparently intercepts an API (via hooking), changes the parameters passed, handles the operation itself, or redirects the operation elsewhere, such as additional code stored on a system. Today, shims are mainly used for compatibility purposes for legacy applications. While shims serve a legitimate purpose, they can also be used in a malicious manner. Mandiant consultants previously discussed shim databases at both BruCon and BlackHat.
Shim Database Registration
There are multiple ways to register a shim database on a system. One technique is to use the built-in “sdbinst.exe” command line tool. Figure 1 displays the two registry keys created when a shim is registered with the “sdbinst.exe” utility.
Figure 1: Shim database registry keys
Once a shim database has been registered on a system, the shim database file (“.sdb” file extension) will be copied to the “C:\Windows\AppPatch\Custom” directory for 32-bit shims or “C:\Windows\AppPatch\Custom\Custom64” directory for 64-bit shims.
Malicious Shim Database Installation
To install and register the malicious shim database on a system, FIN7 used a custom Base64 encoded PowerShell script, which ran the “sdbinst.exe” utility to register a custom shim database file containing a patch onto a system. Figure 2 provides a decoded excerpt from a recovered FIN7 PowerShell script showing the parameters for this command.
Figure 2: Excerpt from a FIN7 PowerShell script to install a custom shim
FIN7 used various naming conventions for the shim database files that were installed and registered on systems with the “sdbinst.exe” utility. A common observance was the creation of a shim database file with a “.tmp” file extension (Figure 3).
Figure 3: Malicious shim database example
Upon registering the custom shim database on a system, a file named with a random GUID and an “.sdb” extension was written to the 64-bit shim database default directory, as shown in Figure 4. The registered shim database file had the same MD5 hash as the file that was initially created in the “C:\Windows\Temp” directory.
Figure 4: Shim database after registration
In addition, specific registry keys were created that correlated to the shim database registration. Figure 5 shows the keys and values related to this shim installation.
Figure 5: Shim database registry keys
The database description used for the shim database registration, “Microsoft KB2832077” was interesting because this KB number was not a published Microsoft Knowledge Base patch. This description (shown in Figure 6) appeared in the listing of installed programs within the Windows Control Panel on the compromised system.
Figure 6: Shim database as an installed application
Malicious Shim Database Details
During the investigations, Mandiant observed that FIN7 used a custom shim database to patch both the 32-bit and 64-bit versions of “services.exe” with their CARBANAK payload. This occurred when the “services.exe” process executed at startup. The shim database file contained shellcode for a first stage loader that obtained an additional shellcode payload stored in a registry key. The second stage shellcode launched the CARBANAK DLL (stored in a registry key), which spawned an instance of Service Host (“svchost.exe”) and injected itself into that process.
Figure 7 shows a parsed shim database file that was leveraged by FIN7.
Figure 7: Parsed shim database file
For the first stage loader, the patch overwrote the “ScRegisterTCPEndpoint” function at relative virtual address (RVA) “0x0001407c” within the services.exe process with the malicious shellcode from the shim database file.
The new “ScRegisterTCPEndpoint” function (shellcode) contained a reference to the path of “\REGISTRY\MACHINE\SOFTWARE\Microsoft\DRM”, which is a registry location where additional malicious shellcode and the CARBANAK DLL payload was stored on the system.
Figure 8 provides an excerpt of the parsed patch structure within the recovered shim database file.
Figure 8: Parsed patch structure from the shim database file
The shellcode stored within the registry path “HKLM\SOFTWARE\Microsoft\DRM” used the API function “RtlDecompressBuffer” to decompress the payload. It then slept for four minutes before calling the CARBANAK DLL payload's entry point on the system. Once loaded in memory, it created a new process named “svchost.exe” that contained the CARBANAK DLL.
Bringing it Together
Figure 9 provides a high-level overview of a shim database being leveraged as a persistent mechanism for utilizing an in-memory patch, injecting shellcode into the 64-bit version of “services.exe”.
Figure 9: Shim database code injection process
Detection
Mandiant recommends the following to detect malicious application shimming in an environment:
Monitor for new shim database files created in the default shim database directories of “C:\Windows\AppPatch\Custom” and “C:\Windows\AppPatch\Custom\Custom64”
Monitor for registry key creation and/or modification events for the keys of “HKLM\SOFTWARE\Microsoft\Windows NT\CurrentVersion\AppCompatFlags\Custom” and “HKLM\SOFTWARE\Microsoft\Windows NT\CurrentVersion\AppCompatFlags\InstalledSDB”
Monitor process execution events and command line arguments for malicious use of the “sdbinst.exe” utility
from To SDB, Or Not To SDB: FIN7 Leveraging Shim Databases for Persistence
0 notes
Link
This year I set myself a little project to see if I could use some of the tools and platforms provided in Office 365 to create something mildly useful. I wanted to start with something basic and achievable without having to spend months and months of trial and error experiments and thought that Phone Number management could be that starter project.
I will preface this blog by stating that there are already various number management solutions out there, some paid and some free and this hasn’t been created to compete with them. It is a project that enables me to learn and develop new skills but also has some use cases that may benefit you, hence the reason for sharing.
Often when I speak with customers and ask them about their number management solution, they invariably say Excel. They’d like to move towards a more suitable product but those offering these solutions are sometimes out of reach of the budget available. Using a basic Excel sheet has it’s own problems, but mainly keeping the thing up to date with all adds, moves and changes. So I thought there must be a way to leverage what is available in just an E1 Office 365 licence to create a middle ground. Something in between Excel and the paid apps must surely be possible?
So I looked at Lists in SharePoint Online. This seemed the logical choice in the Office 365 product suite to use a my “database” as it where. Out of the box it had a lot of built in features that meant I could save time by not having to create user interfaces, search filters and different views. It also acts like Excel so that you can easily update multiple records in-line and provide a single pane of glass experience without having to install any software on to a bunch of admin workstations. However, a SharePoint List on it’s own is probably no better than that Excel sheet stored on a file share somewhere. It needed a way in which admins can interact with it and easily use in day to day tasks. More importantly it needed a way to talk to Skype for Business to ensure that the list kept was the single, undisputed source of truth.
What it needed was a PowerShell Module to bridge the gap between SharePoint Online and Skype for Business. I then found that the SharePoint Online Management Shell allowed management of tasks, but offered no way to interact or manipulate the data held within SharePoint. I quickly learned that in order for me to manipulate data I needed to use the Client Side Object Model (CSOM) for SharePoint Online.
Enter first problem. I know nothing about CSOM. Worse still I seem to have a mental block in understanding how to code in .Net or C#, but I can do some basic PowerShell. I am glad to say that this was quickly resolved with the thanks to Arleta Wanat (a SharePoint MVP) who had already create her own PowerShell module for manipulating data within SharePoint Online. A great set of commandlets that everyone should have in their back pocket. You can download the module here: http://ift.tt/2n3os3A
I thought all my birthdays had come at once with this module, until I found some limitations to some of the functions I was using. Mainly these where down to the size of the data being extracted from SharePoint Online in order to return my custom list fields, and the dreaded 5,000 item view limit of SharePoint Online!
So I had to customise it slightly to allow me to continue as it worked really well for 5,000 phone numbers but failed miserably with 5,001! Having overcome this, the theoretical maximum this can handle if somewhere in the region of 50,000,000 (Yes, 50 million) phone numbers.
Key Features
I am pretty sure right now, you don’t want a life story of development, but rather want to know what does this thing do, right?
Skype for Business On-Prem and Cloud PBX Support
Firstly, this works for Skype for Business On-Prem and Skype for Business Online (Cloud PBX) so you’re covered in all three states (On-Prem, Hybrid and Cloud Only).
Synchronizes Phone Numbers
Whether you run Skype for Business Server or Cloud PBX or Both you can synchronize numbers from these systems into the Phone Inventory List. All Cloud PBX numbers will be synchronized whether they are subscriber or service numbers. If they are assigned to a service or user, then this information is passed back to the list so that it immediately understands the allocation landscape. The same for On-Prem, synchronization happens and retrieves all used numbers within the ecosystem for users, conference, RGS, Trusted Applications etc etc. Again passing back their assignments.
Integration with Numverify
For On-Prem numbers it can be hard sometimes to gather a list of cities, countries and even carriers each phone number relates to. If you don’t have this information to hand, then the task of finding this out can be arduous. Therefore, there is integration with the numverify api (https://numverify.com/) which will search for this information and retrieve it automatically when you synchronize or import your numbers. The API is free to use (up to a max of 250 calls per month) and requires you to sign up for an account for your own personal API key.
PowerShell Module
The PowerShell module is the beating heart of all this. There are several commandlets that give admins the power to allocate numbers to users individually or in bulk as well as allow you to reserve a number or a block of numbers so that they cannot be used unless specifically chosen. This is useful for planning projects that require a bank of numbers to be allocated but not yet assigned in Skype for Business. There are also commandlets that allow you to import numbers from a CSV, or just by stating the start number and how many numbers in sequence you want to add.
PowerBI
If you want to produce graphs on consumed numbers per area, per usage, per site etc. This can all be done in PowerBI with a live data connection to the SharePoint list. PowerBI free is sufficient, but you will need the PowerBI desktop app to create the data connection.
Mobile support using PowerApps
Want to be able to quickly reserve or assign a number to a user? Maybe add one that you forgot whilst on the train home? No problem, easily create a mobile app using PowerApps and you can manage your DDIs wherever you are.
Requirements
An active Office 365 E1 licence subscription assigned to each admin account
Each admin must have at least contribute permission on the SharePoint list
Each admin must have Skype for Business Online Admin permission if you are using Cloud PBX
Each admin must have at least Voice Administrator permission on Skype for Business On-Prem
The SharePoint Online Client Side Components must be installed on the machine the PowerShell module is going to be run on
Skype for Business Management components required on the machine the module is going to be run on
Skype for Business Online Management Shell installed on the machine the module is going to be run on
SharePoint Site Collection and Site (not required to be dedicated)
PowerShell Commands
Connect-MyPhoneInventory
You must use this command at the beginning of each session to establish a connected session to SharePoint Online, Cloud PBX and Skype for Business Server. The command accepts four mandatory parameters. When connection has been established, a full copy of the SharePoint List will be downloaded into memory to enable faster access to the subsequent commands used in the session. Please be aware that as the list grows, the longer it will take to download the list. Estimate performance to be around one minute per 5,000 numbers.
Parameters
-Username [string]
-Password [string]
-Url [string]
-ConnectOnline [bool]
Usage
Connect-MyPhoneInventory –Username [email protected] –Password <mypassword> –Url http://ift.tt/2mIZVVn –ConnectOnline $true | $false
Sync-Cache
This command you can use to update your local cache based on the data held on SharePoint. This is useful in case the local cache becomes inconsistent, or something happens where the cache is lost. This command accepts no parameters.
Usage
Sync-Cache
Get-Cache
This command you can use to bring the cache out of the private data area into a custom variable you can use for other commandlets not included in this module. This commandlet accepts no parameters
Usage
$Data = Get-Cache
Get-MyNextNumber
This command gets the next available number(s) from the pool in which you specify. When executed, this command will put a “soft” reserve on the numbers returned. This allows you to assign numbers to bulk users in your scripts without having to synchronize with SharePoint after each one. Please be aware that after you have finished using this command you should perform a Sync-Cache to return an accurate copy of the list if no changes have been made in Skype for Business / Cloud PBX. If there have been, a full Skype for SharePoint synchronization is required.
Parameters
-Area [string][optional] – The Area / City to get the next number from
-Carrier [string][optional] – The carrier from which to get the next number from
-NumberType – [string][optional] [valid types] – Subscriber, Conference, RGS, Service, Private
-Block – [num][optional] – The number of free numbers to return in the result
Usage
Get the next 10 numbers available in the town called Crewe where the Carrier is BT and the Number is a Subscriber.
Get-MyNextNumber -Area Crewe -Carrier BT -NumberType Subscriber -Block 10
Get-MyNextNumber on it’s own returns the next available number in the list based on ID
Get-MyAvailableNumber
This command returns all the available numbers in the pool in which you specify.
Parameters
-Area [string][optional] – The Area / City to get the next number from
-Carrier [string][optional] – The carrier from which to get the next number from
-NumberType – [string][optional] [valid types] – Subscriber, Conference, RGS, Service, Private
Usage
Get-MyAvailableNumber -Area Crewe -Carrier BT -NumberType Conference | Format-Table
Count-MyAvailableNumber
This command returns a count of all the available numbers in the pool in which you specify.
Parameters
-Area [string][optional] – The Area / City to get the next number from
-Carrier [string][optional] – The carrier from which to get the next number from
-NumberType – [string][optional] [valid types] – Subscriber, Conference, RGS, Service, Private
Usage
Count-MyAvailableNumber -Area Crewe -Carrier BT -NumberType Conference
Reserve-MyNumberRange
This command allows you to reserve numbers in ranges from 1 to unlimited, or by number type and how many based on area.
Parameters
-StartNumber [number] must be in E164
-EndNumber [number] must be in E164
-Area [string][optional] – The Area / City to get the next number from
-NumberType – [string][optional] [valid types] – Subscriber, Conference, RGS, Service, Private
Usage
Reserve-MyNumberRange -StartNumber +441270212000 -EndNumber +4412702121000
Or
Reserve-MyNumberRange -Area Crewe -NumberType Subscriber -BlockTotal 500
Count-MyReservedNumber
This command allows you to count how many numbers are reserved but not assigned yet in the pool in which you specify. This is useful for identifying number that require scavenging / recycling back into the available pool.
Parameters
-Area [string][optional] – The Area / City to get the next number from
-Carrier [string][optional] – The carrier from which to get the next number from
-NumberType – [string][optional] [valid types] – Subscriber, Conference, RGS, Service, Private
Usage
Count-MyReservedNumber -Carrier BT
Get-MyReservedNumber
This command outputs all the reserved numbers in your chosen selection
Parameters
-Area [string][optional] – The Area / City to get the next number from
-Carrier [string][optional] – The carrier from which to get the next number from
-NumberType – [string][optional] [valid types] – Subscriber, Conference, RGS, Service, Private
Usage
Get-MyReservedNumber -Area Crewe | Format-Table
Get-MyNextReservedNumber
This command returns the next unallocated reserved number in your selection
Parameters
-Area [string][optional] – The Area / City to get the next number from
-Carrier [string][optional] – The carrier from which to get the next number from
-NumberType – [string][optional] [valid types] – Subscriber, Conference, RGS, Service, Private
-Block [int] – the number of numbers to return
Usage
Get-MyNextReservedNumber -Area Crewe -Carrier BT -NumberType Service -Block 10
Release-MyReservedNumber
This command is used to release reserved numbers that will not be allocated to a user or service back into the available pool.
Parameters
-StartNumber [number] – Must be in E164 format
-EndNumber [number] – Must be in E164 format
-Area [string][optional] – The Area / City to get the next number from
-Carrier [string][optional] – The carrier from which to get the next number from
-NumberType – [string][optional] [valid types] – Subscriber, Conference, RGS, Service, Private
-BlockTotal [int] How many numbers to release
-Site [string] – The site the numbers belong to
Usage
Release-MyReservedNumber -StartNumber +441270212000 -EndNumber +441270212500
Or
Release-MyReservedNumber -Area Crewe -NumberType Subscriber -BlockTotal 500
Or
Release-MyReservedNumber -Site ManchesterOffice -NumberType Service -BlockTotal 100
Count-MyUsedNumber
This command returns a count of all used numbers within the pool chosen
Parameters
-Area [string][optional] – The Area / City to get the next number from
-Carrier [string][optional] – The carrier from which to get the next number from
-NumberType – [string][optional] [valid types] – Subscriber, Conference, RGS, Service, Private
Usage
Count-MyUsedNumber -Area Crewe -Carrier BT -NumberType Service
Get-MyUsedNumber
This command returns a list of all used numbers within the pool chosen
Parameters
-Area [string][optional] – The Area / City to get the next number from
-Carrier [string][optional] – The carrier from which to get the next number from
-NumberType – [string][optional] [valid types] – Subscriber, Conference, RGS, Service, Private
Usage
Get-MyUsedNumber -Area Crewe -Carrier BT -NumberType Service | Format-Table
Sync-MyNumbersFromSkype
This command gathers all the allocated numbers within Skype for Business Server and uploads them to the SharePoint List. This command also updates the assignments to users and other services that may use numbers. It is recommended that you create a schedule task to run this command at least once per day during quiet times to ensure that the list remains current and up to date.
Parameters
-UserNumbers [bool] [optional] $true | $false
-ConferenceNumbers [bool] [optional] $true | $false
-PrivateNumbers [bool] [optional] $true | $false
-RgsNumbers [bool] [optional] $true | $false
-ServiceNumbers [bool] [optional] $true | $false
Usage
Sync-MyNumbersFromSkype
Use parameters only if you want to synchronize a sub portion of numbers based on type.
Import-MyNumberBlock
This command allows you to add new numbers to the SharePoint List from a CSV File
Parameters
-Path [string] – Path to CSV file
Usage
Import-MyNumberBlock -Path C:NumbersMyNumbers.csv
Please note that columns in the CSV should be named as follows:
Number – The full phone number in E164 format
Exten – The extension number
Carrier – The name of the Carrier
Type – The Number Type i.e. Subscriber, Service, Conference, Rgs, Private
Country – The country of origin
Area – The city / town or area
Reserved – Yes or No
Site – Site where the number terminates
User – The SIP address of the user assigned to the number – must match sip:[email protected]
Residency – The system type, e.g. On-Prem or Online
Export-MyNumberBlock
This command allows you to export the data from the SharePoint list to a CSV. The default behaviour is to export from the current data held in memory.
Parameters
-ExportPath [string] [mandatory] – The path where the file will be saved
-FromSharePoint [bool][default $false] [optional] $true
Usage
Export-MyNumberBlock -ExportPath C:NumbersMyNumbers.csv
Or
Export-MyNumberBlock -ExportPath C:NumbersMyNumbers.csv -FromSharePoint $true
Add-MyNewNumberBlock
This command allows you to add sequential number blocks to SharePoint without a CSV. If you don’t know the area, country or carrier of the numbers, then you can use numverify to retrieve these.
Parameters
-StartNumber [number] [mandatory] – Must be in E164 format
-BlockTotal [int] [mandatory] – number of sequential numbers to add
-NumberType [optional][valid options] Subscriber,Conference, RGS, Service, Private
-Area [string][optional] – The city town or area of the number’s residence
-Country [string][optional] – The country the number belongs to
-Carrier [string][optional] – The name of the carrier
-ExtensionLength [int][optional][default = 4] – The extension length (taken from last X of DDI. Default is 4 if none specified)
-Site [string][optional] – The name of your site where the number terminates
-Reserved [bool][optional] – Should the number be immediately reserved. Values $true | $false
-Residency [string][mandatory][valid options] – On-Prem,Online
Usage
Add-MyNewNumberBlock -StartNumber +441270212000 -BlockTotal 2000 -NumberType Subscriber -Area Crewe -Country "United Kingdom" -Carrier BT -ExtensionLength 5 -Site CreweOffice -Reserved $False -Residency On-Prem
Or with numverify enabled
Add-MyNewNumberBlock -StartNumber +441270212000 -BlockTotal 2000 -NumberType Subscriber -ExtensionLength 5 -Site CreweOffice -Reserved $False -Residency On-Prem
If no results found, or numverify not enabled, then “unknown” will be entered in missed fields.
Remove-MyNumberBlock
This command removes numbers that are not allocated to users or services from the list
Parameters
-StartNumber [number] [mandatory] – Must be in E164 format
-BlockTotal [int] [mandatory] – number of sequential numbers to remove
Usage
Remove-MyNumberBlock - StartNumber +441270212000 -BlockTotal 1000
Show-MyNumberSummary
This command produces a summary of the current number allocation
Parameters
-Area [string][optional] – The Area / City to get the next number from
-Carrier [string][optional] – The carrier from which to get the next number from
-NumberType – [string][optional] [valid types] – Subscriber, Conference, RGS, Service, Private
Usage
Show-MyNumberSummary -Area Crewe
Or
Show-MyNumberSummary -Carrier BT
Or
Show-MyNumberSummary -NumberType Subscriber -Area Crewe -Carrier BT
Or
Show-MyNumberSummary
Sync-MyOnlineNumber
This command synchronizes Cloud PBX numbers to the list and updates assignments. It is recommended to create a scheduled task to run this command at least once per day to ensure the list is kept up to date. This command accepts no parameters
Usage
Sync-MyOnlineNumber
Get-MyOnlineNumberArea
This command is used to retrieve the Cloud PBX area allocation code which can be used to find available and reserve numbers. This command accepts no parameters
Usage
Get-MyOnlineNumberArea
Get-MyOnlineNextNumber
This command return the next available number(s) from Cloud PBX that have been acquired by your tenant. Please note that this command places a “soft” reserve on returned numbers so it an be used in a script. Please ensure that you run Sync-MyOnlineNumber command once finished to update the cache.
Parameters
-NumberType [string][mandatory][valid options] Subscriber, Service
-Area [string] – output of Get-MyOnlineNumberArea
-Block [int][optional] – Number of numbers to return
Usage
Get-MyOnlineNextNumber -NumberType Subscriber -Area EMEA-UK-ALL-ENG_CR -Block 10
Reserve-MyOnlineNumber
This command reserves Cloud PBX numbers in the list so they cannot be allocated.
Parameters
-NumberType [string][mandatory][valid options] Subscriber, Service
-Area [string] – output of Get-MyOnlineNumberArea
-Block [int][optional] – Number of numbers to return
Usage
Reserve-MyOnlineNumber -Area EMEA-UK-ALL-ENG_CR -NumberType Subscriber -Block 5
Release-MyOnlineReservedNumber
This command releases any reserved but not allocated numbers in the list that are Cloud PBX numbers.
Parameters
-NumberType [string][mandatory][valid options] Subscriber, Service
-Area [string] – output of Get-MyOnlineNumberArea
-Block [int][optional] – Number of numbers to return
Usage
Release-MyOnlineReservedNumber -Area EMEA-UK-ALL-ENG_CR -NumberType Subscriber -Block 10
Get-MyOnlineReservedNumber
This command return a list of all reserved numbers in the selection chosen
Parameters
-NumberType [string][mandatory][valid options] Subscriber, Service
-Area [string] – output of Get-MyOnlineNumberArea
-Block [int][optional] – Number of numbers to return
-All [bool][optional] – Set to $true if you want to return all reserved numbers regardless of type or area
Usage
Get-MyOnlineReservedNumber -All $true
Or
Get-MyOnlineReservedNumber -Area EMEA-UK-ENG_CR -NumberType Subscriber
Count-MyOnlineReservedNumber
This command returns a count of all numbers reserved in Cloud PBX
Parameters
-Area [string] – output of Get-MyOnlineNumberArea
-Block [int][optional] – Number of numbers to return
-All [bool][optional] – Set to $true if you want to return all reserved numbers regardless of type or area
Usage
Count-MyOnlineReservedNumber -All $true
Or
Count-MyOnlineReservedNumber -Area EMEA-UK-ENG_CR -NumberType Subscriber
Count-MyOnlineAvailableNumber
This command returns a count of all numbers available in Cloud PBX
Parameters
-Area [string] – output of Get-MyOnlineNumberArea
-Block [int][optional] – Number of numbers to return
-All [bool][optional] – Set to $true if you want to return all reserved numbers regardless of type or area
Usage
Count-MyOnlineAvailableNumber -All $true
Or
Count-MyOnlineAvailableNumber -Area EMEA-UK-ENG_CR -NumberType Subscriber
Count-MyOnlineUsedNumber
This command returns a count of all numbers in use in Cloud PBX
Parameters
-Area [string] – output of Get-MyOnlineNumberArea
-Block [int][optional] – Number of numbers to return
-All [bool][optional] – Set to $true if you want to return all reserved numbers regardless of type or area
Usage
Count-MyOnlineUsedNumber -All $true
Or
Count-MyOnlineUsedNumber -Area EMEA-UK-ENG_CR -NumberType Subscriber
Get-MyOnlineAvailableNumber
This command returns a list of all available numbers in Cloud PBX
Parameters
-Area [string] – output of Get-MyOnlineNumberArea
-Block [int][optional] – Number of numbers to return
-All [bool][optional] – Set to $true if you want to return all reserved numbers regardless of type or area
Usage
Count-MyOnlineAvailableNumber -All $true
Or
Count-MyOnlineAvailableNumber -Area EMEA-UK-ENG_CR -NumberType Subscriber
Installation
Install the sharepoint components in the Components Directory
Create a folder in your My Documents called WindowsPowerShell
Create a sub folder within this directory called Modules
Copy the PhoneInventory Folder and place it inside the Module folder you created above
In SharePoint Online click on Site Contents > Site Settings
Click on List Templates in the Web Designer Galleries
Click on the Files tab and click Upload Document
Browse to the SharePoint Online folder and select the PhoneInventory.stp file and press OK
Now go to your SharePoint Home Page and select Add lists, libraries and other apps
Find the app called PhoneInventory and click on it
You must call it PhoneInventory. No other name will work! Press Create
You should now be able to browse to your list
Enabling numverify Integration
To enable numverify integration, go to C:users<your name>documentswindowspowershellmodulesphoneinventory and open PhoneInventory.psm1. Around Line 13 you will see a variable $numverify that is commented out. Uncomment this variable and replace <your-key> with the API key given to you by numverify. Save the file and reload any open PowerShell windows.
Download
To download PhoneInventory please click here
Public BETA
This is currently in BETA. There may be bugs or features missing. If you come across any, please use the comment section below and I will work with you to get a stable release in the coming weeks / months.
0 notes
Text
How to Consolidate JSON Assessment Reports
Starting from Data Migration Assistant (DMA) v 2.1, DMA provides command-line support for running assessments in unattended mode. This feature helps to run the assessments at scale. The command-line version of DMA generates the assessment results in the form of a JSON or CSV file.
You can assess multiple databases in a single instantiation of DMA command line utility and export the all the assessments results into a single JSON file or assess one database at time and later consolidate the results from these multiple JSON files into a SQL database.
Check out the following link on how to run the DMA tool from command line: Data Migration Assistant: How to run from command line
Use the attached PowerShell script to import the assessment results from JSON files into a SQL Server database.
Using the PowerShell script:
You will need to provide the following information upon script execution:
serverName: SQL Server instance name that you want to import the assessment results from JSON files.
databaseName: The database name that the results gets imported to
jsonDirectory: The folder that the assessment results saved in one or more JSON files.
processTo: SQLServer
Supply the above parameter values in the PowerShell script in the “EXECUTE FUNCTIONS” section as it appears below.
dmaProcessor -serverName localhost ` -databaseName DMAReporting ` -jsonDirectory “C:\temp\DMACmd\output\” ` -processTo SQLServer
The PowerShell script creates the following objects in the SQL instance you have specified if they don’t already exist:
Database – The name provided in the PowerShell parameters
Main repository
Table – ReportData
Data for reporting
Table – BreakingChangeWeighting
Reference table for all breaking changes. Here you can define your own weighting values to influence a more accurate % upgrade success ranking
View – UpgradeSuccessRanking
View displaying a success factor for each database
View – DatabaseCategoryRanking
View displaying new feature recommendation ranking
Stored Procedure – JSONResults_Insert
Used to import data from JSON file into SQL Server
Table Type – JSONResults
Used to hold the JSON table and passed into the above stored procedure
The PowerShell script will create a “Processed” directory inside the directory you provided which contains the JSON files that are to be processed.
Once the script completes, the results are imported into the table ReportData.
Viewing the Results in SQL Server
Once the data has been loaded, connect up to your SQL Server instance. You should see the following:
The dbo.ReportData table contains the contents of the JSON file in it’s raw form.
To see a list of databases and their % success rank, select from the dbo.UpgradeSuccessRanking view:
Here we can see for a given database what the upgrade success chance is split by greater compatibility levels. So for example, HR was assessed against compatibility level 100, 110, 120 and 130. This helps you visually see how much effort is involved in migrating to a greater version of SQL Server to the one the database is currently on.
Usually the metric we care about is how many breaking changes there are for a given database. In the above example we can see that the HR database has a 50% upgrade success factor.
This metrics can be influenced by altering the weighting values in the dbo.BreakingChangeWeighting table.
For example, I’ve decided that the effort involved in fixing the syntax issue in the HR database is quite high so I’ve assigned a value of 3, it wouldn’t take long to fix so I’ve assigned a value of 1 and there would be some cost involved in making the change so I’ve assigned a value of 2. This changes the blended Changerank to 2.
Note: The scoring is on a scale of 1-5. 1 being low 5 being high. Also note that ChangeRank is a computed column.
Now when I query the dbo.UpgradeSuccessRanking view my upgrade success factor for Breaking Changes now drops:
In a future post we will look at a method for reporting on this data using PowerBi.
Get the script here
dma_processor_v3_1
Learn more
Data Migration Assistant Blog
from Microsoft Data Migration Blog http://ift.tt/2lrFBCE via IFTTT
0 notes
Text
Original Post from FireEye Author: Ankit Anubhav
Introduction
FireEye recently observed a sophisticated campaign targeting individuals within the Mongolian government. Targeted individuals that enabled macros in a malicious Microsoft Word document may have been infected with Poison Ivy, a popular remote access tool (RAT) that has been used for nearly a decade for key logging, screen and video capture, file transfers, password theft, system administration, traffic relaying, and more. The threat actors behind this attack demonstrated some interesting techniques, including:
Customized evasion based on victim profile – The campaign used a publicly available technique to evade AppLocker application whitelisting applied to the targeted systems.
Fileless execution and persistence – In targeted campaigns, threat actors often attempt to avoid writing an executable to the disk to avoid detection and forensic examination. The campaign we observed used four stages of PowerShell scripts without writing the the payloads to individual files.
Decoy documents – This campaign used PowerShell to download benign documents from the Internet and launch them in a separate Microsoft Word instance to minimize user suspicion of malicious activity.
Attack Cycle
The threat actors used social engineering to convince users to run an embedded macro in a Microsoft Word document that launched a malicious PowerShell payload.
The threat actors used two publicly available techniques, an AppLocker whitelisting bypass and a script to inject shellcode into the userinit.exe process. The malicious payload was spread across multiple PowerShell scripts, making its execution difficult to trace. Rather than being written to disk as individual script files, the PowerShell payloads were stored in the registry.
Figure 1 shows the stages of the payload execution from the malicious macro.
Figure 1: Stages of payload execution used in this attack
Social Engineering and Macro-PowerShell Level 1 Usage
Targets of the campaign received Microsoft Word documents via email that claimed to contain instructions for logging into webmail or information regarding a state law proposal.
When a targeted user opens the malicious document, they are presented with the messages shown in Figure 2, asking them to enable macros.
Figure 2: Lure suggesting the user to enable Macros to see content
Bypassing Application Whitelisting Script Protections (AppLocker)
Microsoft application whitelisting solution AppLocker prevents unknown executables from running on a system. In April 2016, a security researcher demonstrated a way to bypass this using regsvr32.exe, a legitimate Microsoft executable permitted to execute in many AppLocker policies. The regsvr32.exe executable can be used to download a Windows Script Component file (SCT file) by passing the URL of the SCT file as an argument. This technique bypasses AppLocker restrictions and permits the execution of code within the SCT file.
We observed implementation of this bypass in the macro code to invoke regsvr32.exe, along with a URL passed to it which was hosting a malicious SCT file, as seen in Figure 3.
Figure 3: Command after de-obfuscation to bypass AppLocker via regsv32.exe
Figure 4 shows the entire command line parameter used to bypass AppLocker.
Figure 4: Command line parameter used to bypass AppLocker
We found that the malicious SCT file invokes WScript to launch PowerShell in hidden mode with an encoded command, as seen in Figure 5.
Figure 5: Content of SCT file containing code to launch encoded PowerShell
Decoding SCT: Decoy launch and Stage Two PowerShell
After decoding the PowerShell command, we observed another layer of PowerShell instructions, which served two purposes:
1. There was code to download a decoy document from the Internet and open it in a second winword.exe process using the Start-Process cmdlet. When the victim enables macros, they will see the decoy document shown in Figure 6. This document contains the content described in the spear phishing email.
Figure 6: Decoy downloaded and launched on the victim’s screen
2. After launching the decoy document in the second winword.exe process, the PowerShell script downloads and runs another PowerShell script named f0921.ps1 as shown in Figure 7.
Figure 7: PowerShell to download and run decoy decoy document and third-stage payload
Third Stage PowerShell Persistence
The third stage PowerShell script configures an encoded PowerShell command persistently as base64 string in the HKCU: ConsoleFontSecurity registry key. Figure 8 shows a portion of the PowerShell commands for writing this value to the registry.
Figure 8: Code to set registry with encoded PowerShell script
Figure 9 shows the registry value containing encoded PowerShell code set on the victims’ system.
Figure 9: Registry value containing encoded PowerShell script
Figure 10 shows that using Start-Process, PowerShell decodes this registry and runs the malicious code.
Figure 10: Code to decode and run malicious content from registry
The third stage PowerShell script also configures another registry value named HKCUCurrentVersionRunSecurityUpdate to launch the encoded PowerShell payload stored in the HKCU: ConsoleFontSecurity key. Figure 11 shows the code for these actions. This will execute the PowerShell payload when the user logs in to the system.
Figure 11: PowerShell registry persistence
Fourth Stage PowerShell Inject-LocalShellCode
The HKCUConsoleFontSecurity registry contains the fourth stage PowerShell script, shown decoded in Figure 12. This script borrows from the publicly available Inject-LocalShellCode PowerShell script from PowerSploit to inject shellcode.
Figure 12: Code to inject shellcode
Shellcode Analysis
The shellcode has a custom XOR based decryption loop that uses a single byte key (0xD4), as seen in Figure 13.
Figure 13: Decryption loop and call to decrypted shellcode
After the shellcode is decrypted and run, it injects a Poison Ivy backdoor into the userinit.exe as shown in Figure 14.
Figure 14: Code injection in userinit.exe and attempt to access Poison Ivy related DAT files
In the decrypted shellcode, we also observed content and configuration related to Poison Ivy. Correlating these bytes to the standard configuration of Poison Ivy, we can observe the following:
Active setup – StubPath
Encryption/Decryption key – version2013
Mutex name – 20160509
The Poison Ivy configuration dump is shown in Figure 15.
Figure 15: Poison Ivy configuration dump
Conclusion
Although Poison Ivy has been a proven threat for some time, the delivery mechanism for this backdoor uses recent publicly available techniques that differ from previously observed campaigns. Through the use of PowerShell and publicly available security control bypasses and scripts, most steps in the attack are performed exclusively in memory and leave few forensic artifacts on a compromised host.
FireEye HX Exploit Guard is a behavior-based solution that is not affected by the tricks used here. It detects and blocks this threat at the initial level of the attack cycle when the malicious macro attempts to invoke the first stage PowerShell payload. HX also contains generic detections for the registry persistence, AppLocker bypasses and subsequent stages of PowerShell abuse used in this attack.
#gallery-0-5 { margin: auto; } #gallery-0-5 .gallery-item { float: left; margin-top: 10px; text-align: center; width: 33%; } #gallery-0-5 img { border: 2px solid #cfcfcf; } #gallery-0-5 .gallery-caption { margin-left: 0; } /* see gallery_shortcode() in wp-includes/media.php */
Go to Source Author: Ankit Anubhav Spear Phishing Techniques Used in Attacks Targeting the Mongolian Government Original Post from FireEye Author: Ankit Anubhav Introduction FireEye recently observed a sophisticated campaign targeting individuals within the Mongolian government.
0 notes
Text
Original Post from FireEye Author: Sumith Maniath
Introduction
Malware authors attempt to evade detection by executing their payload without having to write the executable file on the disk. One of the most commonly seen techniques of this “fileless” execution is code injection. Rather than executing the malware directly, attackers inject the malware code into the memory of another process that is already running.
Due to its presence on all Windows 7 and later machines and the sheer number of supported features, PowerShell has been a favorite tool of attackers for some time. FireEye has published multiple reports where PowerShell was used during initial malware delivery or during post-exploitation activities. Attackers have abused PowerShell to easily interact with other Windows components to perform their activities with stealth and speed.
This blog post explores a recent phishing campaign observed in February 2019, where an attacker targeted multiple customers and successfully executed their payload without having to write the executable dropper or the payload to the disk. The campaign involved the use of VBScript, PowerShell and the .NET framework to perform a code injection attack using a process hollowing technique. The attacker abused the functionality of loading .NET assembly directly into memory of PowerShell to execute malicious code without creating any PE files on the disk.
Activity Summary
The user is prompted to open a document stored on Google Drive. The name of the file, shown in Figure 1, suggests that the actor was targeting members of the airline industry that use a particular aircraft model. We have observed an increasing number of attackers relying on cloud-based file storage services that bypass firewall restrictions to host their payload.
Figure 1: Malicious script hosted on Google Drive
As seen in Figure 2, attempting to open the script raises an alert from Internet Explorer saying that the publisher could not be verified. In our experience, many users will choose to ignore the warning and open the document.
Figure 2: Alert raised by Internet Explorer
Upon execution, after multiple levels of obfuscation, a PowerShell script is executed that loads a .NET assembly from a remote URL, functions of which are then used to inject the final payload (NETWIRE Trojan) into a benign Microsoft executable using process hollowing. This can potentially bypass application whitelisting since all processes spawned during the attack are legitimate Microsoft executables.
Technical Details
The initial document contains VBScript code. When the user opens it, Wscript is spawned by iexplore to execute this file. The script uses multiple layers of obfuscation to bypass static scanners, and ultimately runs a PowerShell script for executing the binary payload.
Obfuscation techniques used during different levels of script execution are shown in Figure 3 and Figure 4.
Figure 3: Type 1 obfuscation technique, which uses log functions to resolve a wide character
Figure 4: Type 2 obfuscation technique, which uses split and replace operations
This script then downloads and executes another encoded .vbs script from a paste.ee URL, as seen in Figure 5. Paste.ee is a less regulated alternative to Pastebin and we have seen multiple attacks using this service to host the payload. Since the website uses TLS, most firewall solutions cannot detect the malicious content being downloaded over the network.
Figure 5: Downloading the second-stage script and creating a scheduled task
The script achieves persistence by copying itself to Appdata/Roaming and using schtasks.exe to create a scheduled task that runs the VBScript every 15 minutes.
After further de-obfuscation of the downloaded second-stage VBScript, we obtain the PowerShell script that is executed through a shell object, as shown in Figure 6.
Figure 6: De-obfuscated PowerShell script
The PowerShell script downloads two Base64-encoded payloads from paste.ee that contain binary executable files. The strings are stored as PowerShell script variables and no files are created on disk.
Microsoft has provided multiple ways of interacting with the .NET framework in PowerShell to enhance it through custom-developed features. These .NET integrations with PowerShell are particularly attractive to attackers due to the limited visibility that traditional security monitoring tools have around the runtime behaviors of .NET processes. For this reason, exploit frameworks such as CobaltStrike and Metasploit have options to generate their implants in .NET assembly code.
Here, the attackers have used the Load method from the System.Reflection.Assembly .NET Framework class. After the assembly is loaded as an instance of System.Reflection.Assembly, the members can be accessed through that object similarly to C#, as shown in Figure 7.
Figure 7: Formatted PowerShell code
The code identifies the installed version of .NET and uses it later to dynamically resolve the path to the .NET installation folder. The decoded dropper assembly is passed as an argument to the Load method. The resulting class instance is stored as a variable.
The objects of the dropper are accessed through this variable and method R is invoked. Method R of the .NET dropper is responsible for executing the final payload.
The following are the parameters for method R:
Path to InstallUtil.exe (or other .NET framework tools)
Decoded NETWIRE trojan
When we observed the list of processes spawned during the attack (Figure 8), we did not see the payload spawned as a separate process.
Figure 8: Processes spawned during attack
We observed that the InstallUtil.exe process was being created in suspended mode. Once it started execution, we compared its memory artifacts to a benign execution of InstallUtil.exe and concluded that the malicious payload is being injected into the memory of the newly spawned InstallUtil.exe process. We also observed that no arguments are passed to InstallUtil, which would cause an error under normal execution since InstallUtil always expects at least one argument.
From a detection evasion perspective, the attacker has chosen an interesting approach. Even if the PowerShell process creation is detected, InstallUtil.exe is executed from its original path. Furthermore, InstallUtil.exe is a benign file often used by internal automations. To an unsuspecting system administrator, this might not seem malicious.
When we disassembled the .NET code and removed the obfuscation to understand how code injection was performed, we were able to identify Windows win32 API calls associated with process hollowing (Figure 9).
Figure 9: Windows APIs used in .NET dropper for process hollowing
After reversing and modifying the code of the C# dropper to invoke R from main, we were able to confirm that when the method R is invoked, InstallUtil.exe is spawned in suspended mode. The memory blocks of the suspended process are unmapped and rewritten with the sections of the payload program passed as an argument to method R. The thread is allowed to continue after changes have been made to the entry point. When the process hollowing is complete, the parent PowerShell process is terminated.
High-Level Analysis of the Payload
The final payload was identified by FireEye Intelligence as a NETWIRE backdoor. The backdoor receives commands from a command and control (C2) server, performs reconnaissance that includes the collection of user data, and returns the information to the C2 server.
Capabilities of the NETWIRE backdoor include key logging, reverse shell, and password theft. The backdoor uses a custom encryption algorithm to encrypt data and then writes it to a file created in the ./LOGS directory.
The malware also contains a custom obfuscation algorithm to hide registry keys, APIs, DLL names, and other strings from static analysis. Figure 10 provides the decompiled version of the custom decoding algorithm used on these strings.
Figure 10: Decompiled string decoding algorithm
From reversing and analyzing the behavior of the malware, we were able to identify the following capabilities:
Record mouse and keyboard events
Capture session logon details
Capture system details
Take screenshots
Monitor CPU usage
Create fake HTTP proxy
From the list of decoded strings, we were able to identify other features of this sample:
“POP3”
“IMAP”
“SMTP”
“HTTP”
“Software\Microsoft\Windows NT\CurrentVersion\Windows Messaging Subsystem\Profiles\Outlook\”
“Software\Microsoft\Office\15.0\Outlook\Profiles\Outlook\”
“Software\Microsoft\Office\16.0\Outlook\Profiles\Outlook\”
Stealing data from an email client
“GoogleChromeUser DataDefaultLogin Data”
“ChromiumUser DataDefaultLogin Data”
“ComodoDragonUser DataDefaultLogin Data”
“YandexYandexBrowserUser DataDefaultLogin Data”
“Opera SoftwareOpera StableLogin Data”
“SoftwareMicrosoftInternet ExplorerIntelliFormsStorage2”
“vaultcli.dll: VaultOpenVault,VaultCloseVault,VaultEnumerateItem,VaultGetItem,VaultFree”
“select * from moz_login”
Stealing login details from browsers
A complete report on the NETWIRE backdoor family is available to customers who subscribe to the FireEye Intelligence portal.
Indicators of Compromise
Host-based indicators:
dac4ed7c1c56de7d74eb238c566637aa
Initial attack vector .vbs file
Network-based indicators:
178.239.21.]62:1919
kingshakes[.]linkpc[.]net
105.112.35[.]72:3575
homi[.]myddns[.]rocks
C2 domains of NETWIRE Trojan
FireEye Detection
FireEye detection names for the indicators in the attack:
Endpoint security
Exploit Guard: Blocks execution of wscript
IOC: POWERSHELL DOWNLOADER D (METHODOLOGY)
AV: Trojan.Agent.DRAI
Network Security
Backdoor.Androm
Email Security
Malicious.URL
Malware.Binary.vbs
Conclusion
Malware authors continue to use different “fileless” process execution techniques to reduce the number of indicators on an endpoint. The lack of visibility into .NET process execution combined with the flexibility of PowerShell makes this technique all the more effective.
FireEye Endpoint Security and the FireEye Network Security detect and block this attack at several stages of the attack chain.
Acknowledgement
We would like to thank Frederick House, Arvind Gowda, Nart Villeneuve and Nick Carr for their valuable feedback.
#gallery-0-5 { margin: auto; } #gallery-0-5 .gallery-item { float: left; margin-top: 10px; text-align: center; width: 33%; } #gallery-0-5 img { border: 2px solid #cfcfcf; } #gallery-0-5 .gallery-caption { margin-left: 0; } /* see gallery_shortcode() in wp-includes/media.php */
Go to Source Author: Sumith Maniath Dissecting a NETWIRE Phishing Campaign’s Usage of Process Hollowing Original Post from FireEye Author: Sumith Maniath Introduction Malware authors attempt to evade detection by executing their…
0 notes