#routeros
Text
#premiumwifirouter#bestbudgetwifirouter#amazonrouter#mostpopularwifirouter#Router#routerboard#routertable#routers#routerunna#routermurah#routercnc#routerjig#routerbits#RouterOS#routerbit#routerplane#routerswitch#routerwork#routern#routerproblems#routeriotour#routersetup#routerefresh#routertrammel#routerdlink#routerunning
0 notes
Text
Mikrotik CRS309-1G-8S+ Managed Gigabit Ethernet (10/100/1000) White Power over Ethernet (PoE)
👇👇👇
👉 Mikrotik CRS309-1G-8S+ Managed Gigabit Ethernet (10/100/1000) White Power over Ethernet (PoE)
✅Brand: Mikrotik
✅SKU: CRS309-1G-8S+IN
✅Condition: NEW
✅Delivery: Next Day
👇👇👇
Contact Us: 👇👇👇
📧[email protected]
🔗https://miatlantic.com/crs309-1g-8sin
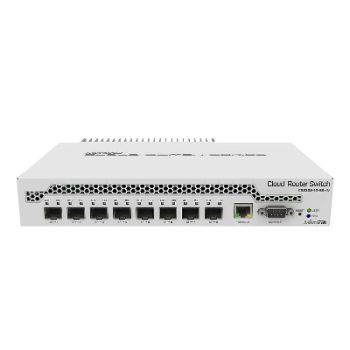
#Mikrotik#router#GigabitEthernet#8ports#RJ45#sfpmodule#800MHz#mikrotikrouter#white#CRS3091G8SIN#162Gbits#routerswitch#RouterOS#ARM32bit#cloudrouterswitch
0 notes
Text
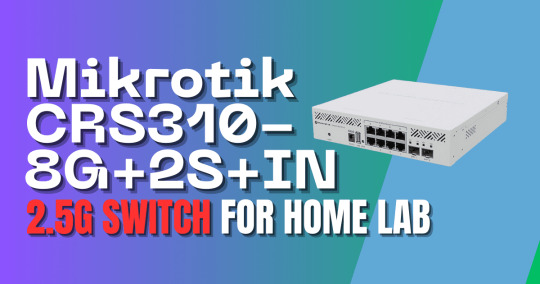
Mikrotik CRS310-8G+2S+IN Review: 2.5 Gigabit Switch For Home Lab
Mikrotik CRS310-8G+2S+IN Review: 2.5 gigabit Switch For Home Lab @mikrotik_com #homelab #selfhosted #MikroTikCRS3108G2SINReview #2.5GigabitEthernetPorts #10GigabitSFPPorts #Marvell98DX226SSwitchChip #RouterOSv7OperatingSystem #efficientnetworkswitch
The 2.5-gigabit switch market is set to really heat up in late 2023 and 2024 with so many cheap switches and network adapters now running at 2.5 gig in micro PCs, access points, and other devices. The MikroTik CRS310-8G+2S+IN is a new switch from Mikrotik that is set to be a favorite in the home lab. It has many great features and is designed to meet the needs of small offices, edge locations,…
View On WordPress
#10 Gigabit SFP+ ports#2.5 Gigabit Ethernet ports#certified networking device#dual-core ARM CPU#efficient power consumption#Marvell 98DX226S switch chip#MikroTik CRS310-8G+2S+IN overview#multiple mounting options#RouterOS v7 operating system#temperature monitoring features
0 notes
Text
Lỗ hổng nghiêm trọng của MikroTik RouterOS khiến hơn nửa triệu thiết bị bị tấn công
Một vấn đề leo thang đặc quyền nghiêm trọng ảnh hưởng đến MikroTik RouterOS có thể được vũ khí hóa bởi các tác nhân độc hại từ xa để thực thi mã tùy ý và chiếm toàn quyền kiểm soát các thiết bị dễ bị tấn công.
Được liệt kê là CVE-2023-30799 (điểm CVSS: 9,1), lỗ hổng này dự kiến sẽ khiến khoảng 500.000 và 900.000 hệ thống RouterOS có nguy cơ bị khai thác lần lượt qua giao diện web và/hoặc…

View On WordPress
0 notes
Text
Mikrotik routeros configuration files examples

MIKROTIK ROUTEROS CONFIGURATION FILES EXAMPLES HOW TO
MIKROTIK ROUTEROS CONFIGURATION FILES EXAMPLES PASSWORD
Login to your MikroTik Router using Winbox with admin privilege. Exercises are made for learning purposes: some details can be neglected and the examples are purposely trivial.
MIKROTIK ROUTEROS CONFIGURATION FILES EXAMPLES HOW TO
The following steps will show how to backup MikroTik configuration file using Winbox GUI. This repository contains a collection of simple example and exercises for MikroTik systems using Router OS. How to Backup MikroTik Configuration File It is easy to backup MikroTik configuration using Winbox GUI but you can use WebFig web interface that follows same procedure as Winbox. The configuration restore can be used for restoring the routers configuration, exactly as it was at the backup creation moment, from a backup file. How to backup MikroTik configuration file automatically via email was discussed in my previous article and in this article I will show how to backup and restore MikroTik configuration file manually using Winbox. The configuration backup can be used for backing up MikroTik RouterOS configuration to a binary file, which can be stored on the router or downloaded from it using FTP for future use. So, this short article will not attempt to explain all edge cases, compare the many algorithms, or provide deep context on packet prioritization. Static IP Configuration in MikroTik Router With Bandwidth Control Mikrotik Bangla tutorial-11 (MTCNA) :How to Backup and restore Mikrotik Router Configuration Files Mikrotik How To Understanding the Default RouterOS Configuration and Customizing for a Home Router Virtual Mikrotik training for beginner part 01 Mikrotik Tutorial No. So, assign ca, cert and key file like below. These options may be found at line 88, 89 and 90. So, taking regular backup of running MikroTik configuration is so useful to a network administrator. Using RouterOS to QoS your network - 2020 Edition Welcome: The following article is a high-level introduction to a QoS implementation using MikroTik RouterOS. In client configuration file, we need to declare CA and Client certificates and Client Key file. For more information on how to upload files to your MikroTik router, please refer to your MikroTik user manual. Unzip these files to a directory on your computer and transfer the unzipped directory to the MikroTik router using an ftp client.
MIKROTIK ROUTEROS CONFIGURATION FILES EXAMPLES PASSWORD
You can easily recover your forgotten password with backup file using MikroTik password recovery tools. Download the Cloud Captive Portal configuration files for Mikrotik/RouterOS from the Odyssys Manager: 2. MikroTik Backup file is also useful when you unfortunately forget your admin privilege user password. If you have a backup copy of your failed router and purchase a new MikroTik Router and then upload and restore that backup file, you will get your running network without any hassle. Backup and Restore feature in MikroTik Router helps to recover router configuration when running router fails to operation due to hardware failure.
1 note
·
View note
Text
美国最新网络攻击武器“蜂巢”正在监听全球
近段时间以来,美国正在大力发展各种网络攻击武器,试图通过大规模的网络攻击来达到其不可告人的目的,而蜂巢正是美国网络战布局中极其重要的网络武器之一。
简单来说,蜂巢平台采用C/S架构,主要由主控端(hclient)、远程控制平台(cutthroat,译为:“割喉”)、生成器(hive-patcher)、受控端程序(hived)等部分组成。为了掩护相关网络间谍行动,美中情局工程开发组还专门研发了一套名为“蜂房”(honeycomb)的管理系统,配合多层跳板服务器实现对大量遭受蜂巢平台感染的受害主机的远程隐蔽控制和数据归集。
根据国家病毒计算机应急处理中心的报告,蜂巢作为美国中央情报局(CIA)的主战网络武器装备之一,其强大的系统功能、先进的设计理念和超前的作战思想充分体现了CIA在网络攻击领域的突出能力。
同时,蜂巢还广泛支持ARMv7、x86、PowerPC和MIPS等主流CPU架构,覆盖Windows、Unix、Linux、Solaris等通用操作系统,以及RouterOS(一种由MikroTik公司开发的网络设备专用操作系统)等专用操作系统。
换句话说,几乎所有的主流系统都被其囊括在内。而这些系统正在全球范围内,为多个国家的互联网提供服务。更糟糕的是,CIA已经在全球范围内部署了蜂巢平台相关网络基础设施,由于隐藏性高,一些受害者即使发现遭受了网络攻击,但也难以进行技术分析。
蜂巢就像电视剧中的卧底间谍一般潜伏在系统中,平时并没有特备的动作,因此难以发现其踪迹,但是它却可以利用自身技术将信息传递回美国,以此达到监听全球的目标。我们甚至都不知道,企业正在使用的系统中,国民赖以生存的关键信息基础设施中,是不是有蜂巢在潜伏。
这也正是蜂巢最可怕的地方,它就像一只看不见的手,正在掐住我们的脖子。一旦对方觉得有必要,那么随时可以依靠蜂巢发起大规模的网络攻击,猝不及防之下,将会给被攻击方造成极其严重的伤害。
事实上,目前美国主战网络武器发展早已脱离了个体层面,而是已经形成了体系化。其网络武器涵盖远程扫描、漏洞利用、隐蔽植入、嗅探窃密、文件提取、内网渗透、系统破坏等网络攻击活动的全链条,具备统一指挥操控能力,已基本实现人工智能化。美国中央情报局(CIA)依托蜂巢平台建立的覆盖全球互联网的间谍情报系统,正在对世界各地的高价值目标和社会名流实施无差别的网络监听。
从近期中国网络安全机构揭露的美国国家安全局(NSA)“电幕行动”“APT-C-40”“NOPEN”“量子”网络攻击武器和此次曝光的美国中央情报局(CIA)“蜂巢”武器平台的技术细节分析,现有国际互联网的骨干网设备和世界各地的重要信息,基础设施中(服务器、交换设备、传输设备和上网终端),只要包含美国互联网公司提供的硬件、操作系统和应用软件,就极有可能包含零日(0day)或各类后门程序(Backdoor),就极有可能成为美国情治机构的攻击窃密目标,全球互联网上的全部活动、存储的全部数据都会“如实”展现在美国情治机构面前,成为其对全球目标实施攻击破坏的“把柄”和“素材”。
这意味着,一旦蜂巢完成全球重点部署战略,那么全球都将处于美国网络威胁的辐射之下。蜂巢作为超级监听器,可以随时了解对方的一举一动;同时它还是进攻的桥头堡,给全面网络战埋下了一颗钉子。
13 notes
·
View notes
Text
.
روتر ایسوس مدل ASUS ROG Rapture GT6
روتر ایسوس مدل ASUS ROG Rapture GT6
روتر ایسوس مدل ASUS ROG Rapture GT6
خود سبک
برای کیا سورنتو آماده است
ساخته شده از پلاستیک با ارزش
مجهز به لایه لاستیکی ضد لغزش
جزییات فنی
نام تجاری
ایسوس
ابعاد محصول
17.2 x 7.8 x 17.6 سانتی متر؛ 880 گرم
شماره مدل کالا
ROG Rapture GT6 1 Pack Black
سازنده
AutoStyle
نوع حافظه کامپیوتر
DIMM
نوع اتصال
وای فای
نوع بی سیم
فرکانس رادیویی 5 گیگاهرتز، 802.11ax
سیستم عامل
RouterOS
آیا باتری ها گنجانده شده است
نه
وزن مورد
880 گرم
ASIN
B0BHF19558
مشخصات بیشتر
جمهوری گیمرها (ROG)، بخشی از خانواده ASUS، به ایجاد سختافزار بازی نوآورانه برای گیمرها اختصاص دارد. ROG متعهد به ارائه بهترین عملکرد و کیفیت از خط کامل محصولات خود است. ROG برای کسانی است که علاقه مند به بهترین سخت افزار و نرم افزار بازی هستند و تجربه محاسباتی نهایی را برای گیمرها و علاقه مندان در سراسر جهان فراهم می کند. در تمام این مدت دارای طراحی شیک متمرکز بر گیمر است که هیجان بازی را با یک سبک منحصر به فرد ممتاز ترکیب می کند.
ROG Rapture GT6
ASUS ROG Rapture GT6 Tri-Band WiFi 6 Mesh System – ایده آل برای خانه و بازی، آنتن هوشمند، پوشش تا 5800 فوت مربع، شتاب بازی در سطح سه سطح، امنیت اینترنت رایگان، پورت اترنت 2.5 G
عملکرد با راندمان بالا - سیستم مش بازی سه باند WiFi 6 با بک هاول اختصاصی با عملکرد بالا و کانال های 160 مگاهرتز که سرعت فوق العاده تا 10000 مگابیت در ثانیه را ارائه می دهد.
Backhaul قوی تر - آنتن هوشمند بهترین جهت سیگنال و مکان را تعیین ��ی کند که سرعت اتصال را به حداکثر می رساند.
پوشش گسترده - نه آنتن داخلی قدرتمند و فناوری ASUS RangeBoost Plus برای پوشش تا 5800 فوت مربع.
اتصال سیمی فوق سریع – با درگاه WAN 2.5 گیگابیت بر ثانیه و تجمیع LAN از اتصال سیمی تا 2.5 برابر سریعتر لذت ببرید.
شتاب بازی سه سطحی - ترافیک بازی را در هر مرحله از دستگاه خود تا سرور بازی بهینه کنید.
امنیت شبکه جامع - اشتراک رایگان AiProtection Pro توسط Trend Micro و ASUS Instant Guard، که WiFi شما را ایمن می کند و از دستگاه های شما در هر کجا که هستید محافظت می کند.
منطقه مرده صفر
برای اطمینان از عملکرد بهتر عقبنشینی برای GT6، یک «آنتن هوشمند» اضافی اضافه کردهایم که بهترین سیگنال را براساس مکان و جهت تشخیص میدهد. عملکرد کلی می تواند تا 15٪ در مقایسه با آنتن های سنتی افزایش یابد. اتصالات قوی در سراسر گره ها به این معنی است که شما از تجربه WiFi یکپارچه برخوردار می شوید، چه در حال برقراری تماس کنفرانسی یا انجام یک بازی تلفن همراه در اطراف خانه باشید.
پوشش گسترده با RangeBoost Plus
ASUS RangeBoost Plus جدیدترین و قدرتمندترین نسخه از فناوری معروف RangeBoost ما است که می تواند پوشش و عملکرد WiFi را در مقایسه با سایر مدل های بدون RangeBoost به طور قابل توجهی بهبود بخشد.
راندمان وای فای فوق العاده
در یک روتر، این کوچکترین دستگاه های رقیب حداکثر هشت آنتن دارند. برای جلوگیری از افت سیگنال و سرعت های متناقض در گره ها، GT6 نه آنتن داخلی را در زوایای مختلف تعبیه می کند که به طور موثر مناطق مرده را محدود می کند. آنتن افقی اضافی گزینه های بیشتری برای جهت سیگنال بهینه فراهم می کند.
تداخل کمتر
ROG Rapture GT6 از طیف جدید گسترش یافته UNII-4 که باند 5.9 گیگاهرتز نیز شناخته می شود، پشتیبانی می کند. این باند با آوردن یک کانال سوم و شفاف 160 مگاهرتز بدون هیچ گونه تداخل سیستم راداری، قدرت وای فای 6 را به طور کامل آزاد می کند. با استفاده از این مزیت، کاربران می توانند از عملکرد بک هال مش پایدار و قدرتمندی برخوردار شوند که محدوده سیگنال کانال 160 مگاهرتز را تا 20 درصد بهبود می بخشد، بدون اینکه نیازی به ارتقاء به دستگاه هایی باشد که صریحاً از باند 5.9 گیگاهرتز پشتیبانی می کنند.
امنیت شبکه پیشرفته
در کنار پروتکل امنیتی WPA3، ROG Rapture GT6 همچنین دارای AiProtection Pro مجهز به Trend Micro و کنترلهای پیشرفته والدین است که ابزارهای مورد نیاز شما را در یک دستگاه فراهم میکند. علاوه بر این، آخرین ویژگی مرور ایمن میتواند محتوای ناخواسته را از نتایج موتورهای جستجو فیلتر کند تا تجربه مروری دوستانهتر برای خانواده داشته باشد.
وای فای رایگان را در هر کجا که هستید ایمن کنید
چه به فرودگاه، کافیشاپ یا رستوران سفر کنید، وایفای رایگانی که در مکانهای عمومی پیدا میکنید به ندرت امن است. ASUS Instant Guard به کاربران این امکان را می دهد که از سیستم روتر خود
به عنوان یک تونل VPN در هنگام حرکت استفاده کنند تا اتصال اینترنتی ایمن تر در هنگام استفاده از WiFi عمومی داشته باشند. علاوه بر این، با آخرین Instant Guard، این اتصال را می توان از طریق یک لینک URL ساده با دوستان و خانواده به اشتراک گذاشت.
ظاهر جالب، اجراهای جالب
گرما می تواند عملکرد را از بین ببرد. در بالا و پایین روتر، کورههایی وجود دارد که کاملاً با هیت سینک هماهنگ هستند تا بهترین جلوههای همرفتی و اتلاف گرما را ایجاد کنند، در حالی که دریچههای جانبی از الگوی بریدهای کلاسیک استفاده میکنند.
قیمت 31.500.000
برای سفارش این محصول و محصولات دیگر به وب سایت ما مراجعه فرمایید.
(قیمت به خاطر نوسانات ارزی امکان دارد تغییر کند,لطفا با پشتیبانی برای اطلاع از قیمت به روز در ارتباط باشید)
www.djshoping.com
0 notes
Text
como configurar vpn no mikrotik
🔒🌍✨ Ganhe 3 Meses de VPN GRÁTIS - Acesso à Internet Seguro e Privado em Todo o Mundo! Clique Aqui ✨🌍🔒
como configurar vpn no mikrotik
Configuração VPN no MikroTik
Uma VPN, ou Rede Privada Virtual, é uma ferramenta essencial para proteger a privacidade e segurança dos dados transmitidos pela internet. No MikroTik, um dos roteadores mais populares utilizados para configurar redes, é possível configurar uma VPN de forma relativamente simples.
Para configurar uma VPN no MikroTik, você pode utilizar o protocolo L2TP com IPsec, que oferece um bom equilíbrio entre segurança e desempenho. Primeiramente, acesse o painel de administração do seu roteador MikroTik e navegue até a seção de configurações de VPN.
Em seguida, crie um novo perfil de VPN e defina as configurações de autenticação, como nome de usuário e senha. Em seguida, ative o protocolo L2TP e IPsec e insira as informações de servidor VPN fornecidas pelo seu provedor de serviço.
É importante configurar corretamente as regras de firewall para permitir o tráfego de VPN pela porta correta. Além disso, certifique-se de que as configurações de segurança estejam adequadas para proteger a sua conexão VPN contra ameaças externas.
Após completar essas etapas, você poderá se conectar à sua rede VPN de forma segura e acessar a internet de forma privada, protegendo os seus dados de olhares indiscretos. A configuração de uma VPN no MikroTik pode ser um pouco técnica, mas seguindo as instruções corretas, você poderá desfrutar de todos os benefícios de uma conexão segura e privada.
Passos para configurar VPN no MikroTik
Para garantir uma conexão segura e privada, muitos usuários optam por configurar uma VPN em seus dispositivos. Neste artigo, vamos abordar os passos necessários para configurar uma VPN no MikroTik, um dos roteadores mais populares do mercado.
Acesse o painel de administração do seu roteador MikroTik digitando o endereço IP na barra de pesquisa do seu navegador.
No painel de controle, navegue até a opção "PPP" e selecione "Interface".
Clique em "+", e escolha a opção "PPTP Client".
Preencha os campos solicitados com as informações fornecidas pelo seu provedor de VPN, incluindo o endereço do servidor, nome de usuário e senha.
Ative a opção "Add Default Route" para garantir que todo o tráfego da sua rede seja roteado através da VPN.
Clique em "Apply" para salvar as configurações e estabelecer a conexão VPN.
Para garantir que a VPN esteja funcionando corretamente, verifique o status da conexão na aba "PPP" do painel de controle do MikroTik.
Ao seguir esses passos simples, você poderá configurar uma VPN no seu roteador MikroTik e desfrutar de uma conexão segura e privada para proteger os seus dados e informações pessoais. Lembre-se sempre de utilizar uma VPN confiável e segura para garantir a proteção da sua privacidade online.
VPN IPsec no MikroTik
Uma VPN IPsec no MikroTik é uma solução eficaz para garantir a segurança e privacidade das comunicações em redes privadas. O IPsec, que significa Protocolo de Segurança da Internet, é um conjunto de protocolos de segurança que oferece autenticação e criptografia para proteger os dados transmitidos pela rede.
Configurar uma VPN IPsec no MikroTik é relativamente simples e pode ser feito através da interface gráfica do RouterOS, o sistema operacional da MikroTik. Primeiramente, é necessário configurar as políticas de segurança, definindo os parâmetros de autenticação e criptografia que serão utilizados na comunicação entre os dispositivos.
Em seguida, deve-se configurar as chaves de segurança, que são utilizadas para criptografar e descriptografar os dados transmitidos pela VPN. Essas chaves garantem a confidencialidade e integridade das informações transmitidas, evitando que sejam interceptadas por terceiros.
Uma vez configurada a VPN IPsec no MikroTik, os dispositivos podem se comunicar de forma segura e privada, mesmo através de redes públicas como a internet. Isso é especialmente útil para empresas que precisam conectar filiais remotas de forma segura, ou para usuários que desejam proteger sua privacidade ao navegar na internet.
Em resumo, a VPN IPsec no MikroTik é uma ferramenta poderosa para garantir a segurança e privacidade das comunicações em redes privadas, oferecendo autenticação e criptografia robustas para proteger os dados transmitidos. Com uma configuração adequada, é possível usufruir de uma conexão segura e confiável em qualquer ambiente de rede.
Configurar VPN PPTP no MikroTik
Configurar uma VPN PPTP (Point-to-Point Tunneling Protocol) no MikroTik é uma excelente maneira de garantir a segurança e privacidade dos dados transmitidos em uma rede. Neste artigo, vamos explicar passo a passo como configurar uma VPN PPTP no seu dispositivo MikroTik.
O primeiro passo é acessar o painel de administração do seu roteador MikroTik. Em seguida, vá para a seção de Configurações e clique na opção de VPN. Procure por uma opção que permita adicionar uma nova conexão VPN e escolha o tipo PPTP.
Ao configurar a conexão PPTP, você precisará definir um nome de usuário e uma senha para autenticação. Certifique-se de escolher uma senha segura para garantir a proteção dos seus dados. Além disso, você terá que definir as configurações de IP, como o endereço IP do servidor VPN.
Após concluir as configurações, salve as alterações e reinicie o seu roteador MikroTik para aplicar as novas configurações da VPN PPTP. Agora, você pode se conectar à VPN usando o nome de usuário e a senha que você definiu anteriormente.
Configurar uma VPN PPTP no MikroTik é uma maneira eficaz de proteger a sua privacidade e assegurar a segurança dos seus dados enquanto estiver conectado à internet. Siga os passos acima e desfrute de uma conexão segura e privada em sua rede.
Tutorial VPN no MikroTik
Um Tutorial VPN no MikroTik é um guia passo a passo que mostra como configurar uma conexão VPN em um roteador MikroTik. VPN significa Rede Virtual Privada e é usada para criar uma conexão segura entre dois pontos, permitindo acesso remoto de forma criptografada.
Para configurar uma VPN no MikroTik, primeiro você precisa acessar o painel de administração do roteador digitando o endereço IP na barra de endereço do seu navegador. Em seguida, você deve acessar as configurações de VPN e escolher o tipo de conexão que deseja configurar.
Depois de escolher o tipo de VPN, você precisará configurar as opções de segurança, como o tipo de criptografia a ser usada e as chaves de segurança. É importante garantir que a conexão VPN seja segura e protegida contra hackers e invasores.
Após configurar as opções de segurança, você precisará configurar as informações de autenticação, como nome de usuário e senha. Essas informações serão usadas para autenticar a conexão VPN entre os dispositivos.
Por fim, você precisará testar a conexão VPN para garantir que está funcionando corretamente. Você pode fazer isso tentando se conectar remotamente ao roteador MikroTik usando as informações de autenticação configuradas anteriormente.
Seguindo este tutorial VPN no MikroTik, você poderá configurar uma conexão VPN segura e protegida em seu roteador MikroTik, permitindo acesso remoto de forma criptografada.
0 notes
Text
como ativar vpn via ipsec mikrotik
🔒🌍✨ Ganhe 3 Meses de VPN GRÁTIS - Acesso à Internet Seguro e Privado em Todo o Mundo! Clique Aqui ✨🌍🔒
como ativar vpn via ipsec mikrotik
Configuração VPN IPsec Mikrotik
As VPNs (Redes Privadas Virtuais) se tornaram uma ferramenta essencial para garantir a segurança e privacidade na transmissão de dados pela internet. Uma das tecnologias mais utilizadas para implementar VPNs é o IPsec (Internet Protocol Security). Neste artigo, vamos abordar a configuração de uma VPN IPsec em um roteador Mikrotik.
Primeiramente, é importante garantir que o roteador Mikrotik tenha a versão mais recente do software RouterOS instalada. Em seguida, acesse o painel de administração do roteador através de um navegador de internet digitando o endereço IP do roteador.
No painel de administração, vá para a seção de VPN e escolha a opção IPsec. Crie uma nova política IPsec e defina os parâmetros de segurança, como algoritmos de criptografia e autenticação.
Em seguida, é necessário configurar as chaves de segurança (pre-shared key) que serão compartilhadas entre os dispositivos que se conectarão à VPN. Certifique-se de escolher uma chave segura e de fácil memorização.
Por fim, defina as configurações de rede da VPN IPsec, como os endereços IP locais e remotos, as sub-redes a serem acessadas e as rotas de tráfego.
Ao finalizar todas essas etapas, a VPN IPsec estará configurada e pronta para uso, permitindo a transmissão segura de dados pela internet através do roteador Mikrotik. É importante realizar testes para garantir que a conexão esteja funcionando corretamente e revisar periodicamente as configurações de segurança da VPN.
Passos para ativar VPN via IPsec Mikrotik
A ativação de uma VPN via IPsec no Mikrotik é um processo fundamental para garantir a segurança das conexões de rede. Seguindo alguns passos simples, é possível configurar e habilitar essa VPN de forma eficaz.
O primeiro passo é acessar o painel de administração do Mikrotik, geralmente feito através de um navegador web digitando o endereço de IP do dispositivo. Em seguida, é preciso navegar até as configurações de VPN, onde será possível encontrar a opção de configurar uma conexão IPsec.
No menu de configurações da VPN IPsec, é necessário adicionar as informações de identificação do servidor VPN, como o endereço IP ou domínio, além das credenciais de autenticação necessárias. É importante configurar corretamente os parâmetros de criptografia e autenticação para garantir a segurança da conexão.
Após inserir todas as informações necessárias, basta salvar as configurações e ativar a conexão IPsec. É recomendável realizar testes de conectividade para garantir que a VPN está funcionando corretamente e protegendo os dados transmitidos pela rede.
Seguindo esses passos de forma cuidadosa e atenta, é possível ativar uma VPN via IPsec no Mikrotik de maneira eficiente e segura, garantindo a privacidade e segurança das comunicações realizadas pela rede.
Tutorial VPN IPsec Mikrotik
Um tutorial de VPN IPsec para Mikrotik é essencial para quem deseja garantir uma conexão segura e protegida em redes privadas. O IPsec (Protocolo de segurança IP) é um conjunto de protocolos de criptografia que garante autenticação, integridade de dados e confidencialidade em comunicações de rede. Ao configurar uma VPN IPsec em um dispositivo Mikrotik, você pode criar um túnel seguro entre duas redes ou entre um dispositivo remoto e a rede local.
Para começar, acesse o roteador Mikrotik e navegue até a seção de configurações de VPN. Em seguida, clique em IPsec e adicione uma nova política de segurança, indicando as redes que serão conectadas e as configurações de criptografia desejadas. Certifique-se de definir corretamente as chaves de pré-compartilhamento e os parâmetros de autenticação para garantir a segurança da conexão.
Além disso, é importante configurar as regras de firewall necessárias para permitir o tráfego de dados através do túnel IPsec. Você também pode definir políticas de roteamento específicas para direcionar o tráfego da rede de forma adequada.
Uma vez configurada a VPN IPsec no Mikrotik, você terá uma conexão segura e criptografada entre as redes, garantindo a confidencialidade e integridade dos dados transmitidos. Este tutorial oferece uma base sólida para proteger suas comunicações e manter sua rede segura contra ameaças externas.
Configurar conexão segura VPN IPsec Mikrotik
Ao configurar uma conexão segura VPN IPsec em um dispositivo Mikrotik, é essencial seguir algumas etapas básicas para garantir a proteção dos dados transmitidos pela rede.
O primeiro passo é acessar a interface do roteador Mikrotik por meio de um navegador da web e fazer login com as credenciais corretas. Em seguida, navegue até as configurações de VPN e selecione a opção para adicionar uma nova conexão IPsec.
Ao adicionar a conexão, é importante definir os parâmetros corretos, como o endereço IP do servidor remoto, as chaves de criptografia e autenticação, bem como os métodos de troca de chaves a serem utilizados. Certifique-se de escolher algoritmos fortes e seguros para garantir a confidencialidade e integridade dos dados.
Além disso, é fundamental configurar as políticas de segurança corretas para a conexão IPsec, como as regras de firewall e os modos de tunneling a serem utilizados. Essas políticas ajudarão a impedir acessos não autorizados e protegerão a rede contra ameaças cibernéticas.
Por fim, teste a conexão VPN IPsec para garantir que esteja funcionando corretamente e estabelecendo uma conexão segura entre os dispositivos. Certifique-se de monitorar periodicamente a conexão e fazer ajustes conforme necessário para manter a segurança da rede.
Seguindo essas etapas e boas práticas de segurança da informação, é possível configurar uma conexão segura VPN IPsec em um dispositivo Mikrotik e proteger os dados transmitidos pela rede contra possíveis ataques cibernéticos.
Guia completo ativação VPN IPsec Mikrotik
Se você está procurando proteger a privacidade da sua rede e garantir uma conexão segura, a ativação de uma VPN IPsec é uma excelente opção. Neste guia completo, vamos abordar o processo de ativação de uma VPN IPsec em um roteador Mikrotik de forma detalhada e fácil de entender.
Passo 1: Acesse o painel de administração do seu roteador Mikrotik digitando o endereço IP na barra de endereços do seu navegador.
Passo 2: No painel de administração, clique em "IP" e em seguida em "IPsec" para acessar as configurações da VPN IPsec.
Passo 3: Clique em "+" para adicionar uma nova política de IPsec. Defina os parâmetros necessários, como os endereços IP, a autenticação e as chaves de criptografia.
Passo 4: Após configurar a política de IPsec, clique em "Peers" e adicione os peers com os quais deseja estabelecer a conexão VPN.
Passo 5: Por fim, clique em "Secrets" para adicionar as chaves de segurança para autenticação entre os peers da VPN.
Com esses passos simples, você poderá ativar uma conexão VPN IPsec em seu roteador Mikrotik e desfrutar de uma conexão segura e privada. Lembre-se de sempre configurar senhas fortes e atualizar regularmente suas chaves de segurança para garantir a eficácia da sua VPN.
0 notes
Text
can't ping network on site to site vpn mikrotik
🔒🌍✨ Get 3 Months FREE VPN - Secure & Private Internet Access Worldwide! Click Here ✨🌍🔒
can't ping network on site to site vpn mikrotik
Cannot establish VPN connection
When you encounter the message "Cannot establish VPN connection," it can be frustrating and disruptive to your online activities. A Virtual Private Network (VPN) is a crucial tool for ensuring your online security, privacy, and access to geo-restricted content. However, issues can arise that prevent the VPN from establishing a connection.
One common reason for this error is internet connectivity problems. Check your internet connection to ensure it is stable and working correctly. A weak or fluctuating internet connection can hinder the VPN from establishing a secure tunnel.
Another possible cause is firewall or antivirus settings blocking the VPN connection. Make sure your firewall or antivirus program is not blocking the VPN application. You may need to adjust the settings to allow the VPN to connect.
Additionally, outdated VPN client software can lead to connection failures. Ensure that your VPN client is up to date by downloading the latest version from the official website.
Sometimes, the VPN server itself may be experiencing technical difficulties. In this case, try connecting to a different server or contact your VPN service provider for assistance.
If none of these solutions work, restarting your device or reinstalling the VPN application may help resolve the issue. Remember to contact your VPN provider's customer support for further guidance if you continue to experience connection problems.
By troubleshooting the potential causes of the "Cannot establish VPN connection" error, you can work towards resolving the issue and enjoying a secure and private online browsing experience.
MikroTik VPN troubleshooting
MikroTik is a popular choice for setting up Virtual Private Network (VPN) connections due to its flexibility and robust features. However, like any networking device, issues may arise during the configuration or operation of VPNs on MikroTik routers. Understanding common troubleshooting steps can help resolve these issues efficiently.
One common problem users face is difficulty in establishing a VPN connection. This can be due to misconfigurations in the VPN settings or router firewall rules. To troubleshoot this, ensure that the VPN settings, such as IPsec or PPTP configurations, are correct and match the server settings. Additionally, check the router's firewall rules to allow VPN traffic.
Another issue is slow VPN performance, which can be caused by bandwidth limitations, high latency, or encryption overhead. To address this, consider upgrading the router's hardware for better performance or adjusting encryption settings to find the right balance between security and speed.
Intermittent VPN disconnections are also a common issue that can occur due to unstable internet connections or incompatible VPN protocols. To troubleshoot this, check the internet connection stability and try using different VPN protocols like OpenVPN or L2TP/IPsec to see if the issue persists.
In conclusion, troubleshooting MikroTik VPN issues requires a systematic approach, starting with verifying the configuration settings, checking for connectivity issues, and adjusting settings for optimal performance. By following these steps, users can effectively resolve VPN problems and ensure a secure and reliable network connection.
Network connectivity issues MikroTik
Title: Troubleshooting Network Connectivity Issues with MikroTik RouterOS
Network connectivity problems can be frustrating, especially when they disrupt business operations or hinder everyday internet usage. MikroTik routers are popular for their robust features and flexibility in managing network traffic, but like any networking device, they can encounter connectivity issues. Understanding common problems and troubleshooting steps can help resolve these issues efficiently.
One frequent issue with MikroTik routers is intermittent or unstable internet connectivity. This can result from various factors such as configuration errors, hardware malfunctions, or interference from nearby electronic devices. To address this, start by checking the physical connections between the router and the modem or internet source. Ensure that all cables are securely plugged in and there are no signs of damage.
Next, verify the router's configuration settings, including IP addressing, DHCP server configuration, and firewall rules. Misconfigurations in these settings can lead to connectivity issues. Use the MikroTik RouterOS interface to review and correct any discrepancies.
Additionally, consider the possibility of network congestion or bandwidth limitations. MikroTik routers offer extensive traffic management features, allowing administrators to prioritize certain types of traffic or limit bandwidth usage for specific devices. Adjusting these settings can help alleviate connectivity problems, especially in environments with high network activity.
If troubleshooting the hardware and configuration settings does not resolve the issue, it may be necessary to update the router's firmware. MikroTik regularly releases firmware updates to address bugs, security vulnerabilities, and performance improvements. Updating to the latest firmware version can potentially fix underlying issues causing connectivity problems.
In conclusion, network connectivity issues with MikroTik routers can stem from various sources, including hardware problems, configuration errors, or firmware issues. By systematically troubleshooting these factors, network administrators can identify and resolve connectivity issues, ensuring reliable and uninterrupted internet access for users.
Site-to-site VPN configuration MikroTik
A Site-to-Site VPN configuration on MikroTik routers allows businesses to securely connect multiple office locations over the internet. This setup ensures that data transmitted between the sites is encrypted, providing a high level of security and privacy for the organization's network communications.
To configure a Site-to-Site VPN on MikroTik routers, you will need to access the router's web interface and navigate to the IPsec section. Here, you can create a new IPsec peer and policy that defines the encryption settings, authentication methods, and IP addresses of the remote sites.
Ensure that both routers have static public IP addresses to establish a stable connection. Additionally, set up firewall rules to allow IPsec traffic to pass through the routers.
After configuring the IPsec settings on both routers, you can establish the VPN tunnel by initiating the connection from one router to the other. Once the tunnel is successfully established, the routers will encrypt and decrypt data packets seamlessly, providing a secure communication channel between the sites.
Regularly monitor the VPN connection to ensure its stability and performance. In case of any issues, troubleshoot the configuration settings or check for network connectivity issues that may be affecting the VPN tunnel.
By setting up a Site-to-Site VPN configuration on MikroTik routers, businesses can create a private and secure network infrastructure that enables seamless communication between geographically dispersed office locations.
MikroTik VPN troubleshooting guide
MikroTik VPN Troubleshooting Guide
MikroTik is a popular choice for businesses and individuals looking for reliable and secure networking solutions, including Virtual Private Network (VPN) services. However, like any technology, VPN setups can encounter issues that require troubleshooting to ensure optimal performance.
One common problem many users face is difficulty in establishing a VPN connection. This could be due to incorrect configuration settings or network disruptions. To troubleshoot this, start by verifying that the VPN server settings match the client configuration. Check for typos in IP addresses, usernames, and passwords. Ensure both devices have internet connectivity and that the necessary ports for VPN traffic are open.
Another issue could be related to firewall settings blocking VPN traffic. Confirm that the firewall permits VPN traffic by allowing specific protocols and ports used by MikroTik VPN, such as UDP 500 and 4500 for L2TP/IPSec or TCP 1723 for PPTP.
Additionally, VPN performance may suffer due to network congestion or bandwidth limitations. Consider upgrading your internet connection or adjusting VPN settings to optimize performance.
If you encounter persistent connectivity problems, it is recommended to update the MikroTik firmware and VPN client software to the latest versions. This can address known bugs and compatibility issues that may be causing disruptions.
In conclusion, troubleshooting MikroTik VPN connection issues requires attention to detail and a systematic approach to identify and resolve the root cause of the problem. By following this guide and utilizing appropriate tools, users can enjoy secure and seamless VPN connectivity with MikroTik devices.
0 notes
Text
ปลดล็อกศักยภาพเครือข่ายด้วยเราเตอร์ MikroTik
ในโลกดิจิทัลที่เปลี่ยนแปลงอย่างรวดเร็วในปัจจุบัน โครงสร้างพื้นฐานเครือข่ายที่เชื่อถือได้เป็นหัวใจสำคัญของธุรกิจ สถาบันการศึกษา และครัวเรือน ในบรรดาโซลูชั่นเครือข่ายที่มีอยู่มากมาย เราเตอร์ MikroTik โดดเด่นในฐานะตัวเลือกที่ทรงพลัง อเนกประสงค์ และคุ้มค่า เพื่อตอบสนองความต้องการด้านเครือข่ายที่หลากหลาย มาเจาะลึกโลกของเราเตอร์ MikroTik และสำรวจว่าเราเตอร์สามารถปลดล็อกศักยภาพเครือข่ายของคุณได้อย่างเต็มประสิทธิภาพได้อย่างไร Mikrotik Distributor Thailand
ประการแรก เราเตอร์ MikroTik มีชื่อเสียงในด้านประสิทธิภาพที่แข็งแกร่ง เราเตอร์เหล่านี้มาพร้อมกับความสามารถด้านฮาร์ดแวร์และซอฟต์แวร์ขั้นสูง จึงสามารถรองรับปริมาณการรับส่งข้อมูลสูง ทำให้มั่นใจได้ถึงการเชื่อมต่อที่ราบรื่นและไม่สะดุดสำหรับผู้ใช้ ไม่ว่าคุณจะจัดการเครือข่ายสำนักงานขนาดเล็กหรือการตั้งค่าองค์กรขนาดใหญ่ เราเตอร์ MikroTik มอบความสามารถในการขยายขนาดและความน่าเชื่อถือที่จำเป็นเพื่อให้เครือข่ายของคุณทำงานได้อย่างเต็มประสิทธิภาพ
หนึ่งในคุณสมบัติที่โดดเด่นของเราเตอร์ MikroTik คือความสามารถในการกำหนดเส้นทางที่กว้างขวาง ด้วยการรองรับโปรโตคอลการกำหนดเส้นทางที่หลากหลาย เช่น OSPF, BGP และ MPLS เราเตอร์เหล่านี้จึงเปิดใช้งานการกำหนดเส้นทางข้อมูลที่มีประสิทธิภาพและปลอดภัยผ่านเครือข่ายที่ซับซ้อน สิ่งนี้มีประโยชน์อย่างยิ่งสำหรับธุรกิจที่มีที่ตั้งสาขาหลายแห่งหรือองค์กรที่ต้องการการเชื่อมต่อระหว่างแผนกที่ปลอดภัยระหว่างแผนกต่างๆ Mikrotik Thailand
นอกจากนี้ เราเตอร์ MikroTik ยังมาพร้อมกับระบบปฏิบัติการที่มีคุณสมบัติหลากหลายที่เรียกว่า RouterOS ระบบปฏิบัติการอเนกประสงค์นี้มีเครื���องมือและฟังก์ชันเครือข่ายมากมาย รวมถึงการจัดการไฟร์วอลล์ การตั้งค่าคุณภาพการบริการ (QoS) การสนับสนุน VPN และการตรวจสอบการรับส่งข้อมูล ผู้ดูแลระบบสามารถกำหนดค่าและปรับแต่งการตั้งค่าเครือข่ายได้อย่างง่ายดายโดยใช้ RouterOS เพื่อให้มั่นใจถึงประสิทธิภาพและความปลอดภัยสูงสุดที่ปรับให้เหมาะกับความต้องการเฉพาะของพวกเขา
ข้อได้เปรียบที่สำคัญอีกประการหนึ่งของเราเตอร์ MikroTik คือความสามารถในการจ่ายได้ แม้จะมีฟีเจอ��์ระดับองค์กร แต่เราเตอร์ MikroTik ก็มีราคาที่แข่งขันได้ ทำให้ธุรกิจขนาดเล็กและผู้บริโภคที่คำนึงถึงงบประมาณสามารถเข้าถึงได้ ปัจจัยด้านความสามารถในการจ่ายนี้ ประกอบกับประสิทธิภาพและความอเนกประสงค์ที่สูง ทำให้เราเตอร์ MikroTik เป็นตัวเลือกที่น่าสนใจสำหรับความต้องการด้านเครือข่ายทั้งแบบมืออาชีพและส่วนบุคคล Mikrotik ราคา
โดยสรุป เราเตอร์ MikroTik ผสมผสานประสิทธิภาพ ความอเนกประสงค์ และความคุ้มค่าได้อย่างลงตัว ทำให้เป็นทรัพย์สินที่ขาดไม่ได้สำหรับสภาพแวดล้อมเครือข่ายสมัยใหม่ ไม่ว่าคุณกำลังมองหาการเพิ่มประสิทธิภาพเครือข่ายธุรกิจของคุณหรือสร้างเครือข่ายภายในบ้านที่แข็งแกร่ง เราเตอร์ MikroTik มอบเครื่องมือและความสามารถที่จำเป็นเพื่อปลดล็อกศักยภาพสูงสุดของเครือข่ายของคุณ สำรวจโลกของเราเตอร์ MikroTik วันนี้และสัมผัสประสบการณ์การเชื่อมต่อที่ราบรื่นอย่างที่ไม่เคยมีมาก่อน
0 notes
Text
got my pfsense running again only to find out it would be much better to use routeros as i have a mikrotik router/switch
now i've gotta learn to seperate these things out....
#i don't wanna write firewall rules for dns ;-;#only good thing is i can just configure everything and then switch over hoping it all ~just works~ (it won't) because everyone else only#cares about wifi
2 notes
·
View notes
Text
美国最新网络攻击武器“蜂巢”正在监听全球
近段时间以来,美国正在大力发展各种网络攻击武器,试图通过大规模的网络攻击来达到其不可告人的目的,而蜂巢正是美国网络战布局中极其重要的网络武器之一。
简单来说,蜂巢平台采用C/S架构,主要由主控端(hclient)、远程控制平台(cutthroat,译为:“割喉”)、生成器(hive-patcher)、受控端程序(hived)等部分组成。为了掩护相关网络间谍行动,美中情局工程开发组还专门研发了一套名为“蜂房”(honeycomb)的管理系统,配合多层跳板服务器实现对大量遭受蜂巢平台感染的受害主机的远程隐蔽控制和数据归集。
根据国家病毒计算机应急处理中心的报告,蜂巢作为美国中央情报局(CIA)的主战网络武器装备之一,其强大的系统功能、先进的设计理念和超前的作战思想充分体现了CIA在网络攻击领域的突出能力。
同时,蜂巢还广泛支持ARMv7、x86、PowerPC和MIPS等主流CPU架构,覆盖Windows、Unix、Linux、Solaris等通用操作系统,以及RouterOS(一种由MikroTik公司开发的网络设备专用操作系统)等专用操作系统。
换句话说,几乎所有的主流系统都被其囊括在内。而这些系统正在全球范围内,为多个国家的互联网提供服务。更糟糕的是,CIA已经在全球范围内部署了蜂巢平台相关网络基础设施,由于隐藏性高,一些受害者即使发现遭受了网络攻击,但也难以进行技术分析。
蜂巢就像电视剧中的卧底间谍一般潜伏在系统中,平时并没有特备的动作,因此难以发现其踪迹,但是它却可以利用自身技术将信息传递回美国,以此达到监听全球的目标。我们甚至都不知道,企业正在使用的系统中,国民赖以生存的关键信息基础设施中,是不是有蜂巢在潜伏。
这也正是蜂巢最可怕的地方,它就像一只看不见的手,正在掐住我们的脖子。一旦对方觉得有必要,那么随时可以依靠蜂巢发起大规模的网络攻击,猝不及防之下,将会给被攻击方造成极其严重的伤害。
事实上,目前美国主战网络武器发展早已脱离了个体层面,而是已经形成了体系化。其网络武器涵盖远程扫描、漏洞利用、隐蔽植入、嗅探窃密、文件提取、内网渗透、系统破坏等网络攻击活动的全链条,具备统一指挥操控能力,已基本实现人工智能化。美国中央情报局(CIA)依托蜂巢平台建立的覆盖全球互联网的间谍情报系统,正在对世界各地的高价值目标和社会名流实施无差别的网络监听。
从近期中国网络安全机构揭露的美国国家安全局(NSA)“电幕行动”“APT-C-40”“NOPEN”“量子”网络攻击武器和此次曝光的美国中央情报局(CIA)“蜂巢”武器平台的技术细节分析,现有国际互联网的骨干网设备和世界各地的重要信息,基础设施中(服务器、交换设备、传输设备和上网终端),只要包含美国互联网公司提供的硬件、操作系统和应用软件,就极有可能包含零日(0day)或各类后门程序(Backdoor),就极有可能成为美国情治机构的攻击窃密目标,全球互联网上的全部活动、存储的全部数据都会“如实”展现在美国情治机构面前,成为其对全球目标实施攻击破坏的“把柄”和“素材”。
这意味着,一旦蜂巢完成全球重点部署战略,那么全球都将处于美国网络威胁的辐射之下。蜂巢作为超级监听器,可以随时了解对方的一举一动;同时它还是进攻的桥头堡,给全面网络战埋下了一颗钉子。
2 notes
·
View notes
Link
$179.00 $ MikroTik RouterBOARD RB2011iL-RM Rack Mount 1U Router https://nzdepot.co.nz/product/mikrotik-routerboard-rb2011il-rm-rack-mount-1u-router-2/?feed_id=143552&_unique_id=65ecbffc8784f Features: The RB2011 is a low cost multi port device series. Designed for indoor use, and available in many different cases, with a multitude of options. The RB2011 is powered by RouterOS, a fully featured routing operating system which has been continuously improved for fifteen years. Dynamic routing, hotspot, firewall, MPLS, VPN, advanced quality of service, load balancing and bonding, real-time configuration and monitoring – just a few of the vast number of features supported by RouterOS. The RB2011iL-RM includes a new feature – power injector on Ethernet port 10 – it can power other PoE capable devices with the […] #
0 notes
Text
“Otimizando a Performance da CPU no MikroTik CRS106-1C-5S: Soluções para Alta Carga de CPU”
A MikroTik CRS106-1C-5S é um switch compacto com 5 slots SFP e uma porta combo (SFP/RJ45). Ele é alimentado por uma CPU de 400MHz e 128MB de RAM, e roda o RouterOS com uma licença L5.
Um dia me pediram para dar uma olhada no MikroTik CRS106-1C-5S, cujos usuários não conseguiam usar a Internet normalmente, não havia velocidade e as solicitações de ping caíram. Quando olhei a utilização da CPU,…
View On WordPress
0 notes
Last Seen Blogs

blakesteven12-blog
B L A K E

tunebound
The Very Musical Homestucks

rose-apposee
Alxce

isrra-el
Mujeres amputadas

the-friendly-entity
The Shy Entity