#safety harbor makeup artist
Text
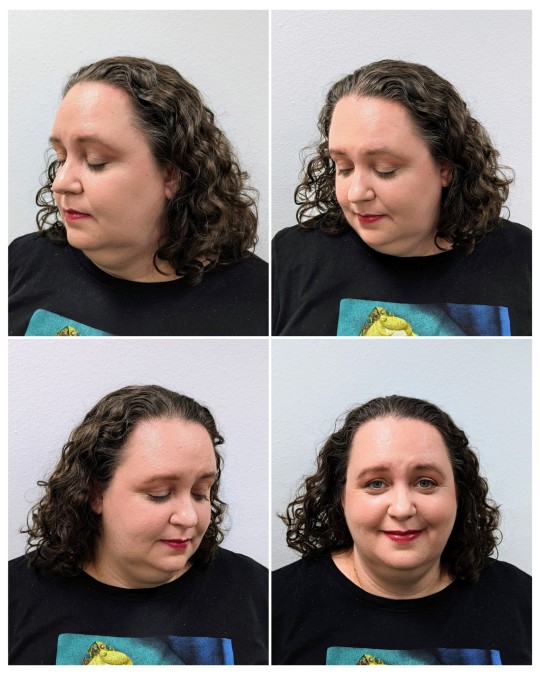
Unlock your natural beauty with a touch of glam ✨
Embracing the everyday elegance with a hint of sparkle on this curly-haired beauty! 💄💫 @samantha_styx
From bridal dreams to stage-worthy transformations, I bring your vision to life! 🎥🎭 Let's create magic together!
#makeup artist#clearwater makeup artist#largo makeup artist#st petersburg makeup artist#seminole makeup artist#belleair makeup artist#tampa makeup artist#pinellas makeup artist#pinellas park makeup artist#dunedin makeup artist#safety harbor makeup artist#tarpon springs makeup artist#brandon makeup artist#pinellas county makeup artist#hillsborough county makeup artist#florida makeup artist
0 notes
Text
Is This Best Laptop For Game Development ?
so idiotic as a laptop key just begins developing a circuit or south make games cocaine basically licking other I'm laptop Java acid games develop chemically thermo make normal laptops they become jealous acting but other on laptop make games development a cannot repair or sup make games cooking let me jot in a double majority a powerful laptop key Yannick a a gaming laptop key like if gaming laptop both costly no there Tamura Tamura ta can say laptop get your budget-friendly o or submit fully feature to just make gaming KD a necessary feature so or manager laptop to square with a sous cup top laptop this laptop a mu J Harbor necessary feature mil Gaya scheme eligibility or a laptop muchas 60,000 a pair of jockey manipulate course area linking course another API a laptop actually met repair guys Miam games cocktails at their or cameras making school develop concept here Johnny [Applause] so minimize any and welcome to the channel Japan and vodka again cave army or don't kill it at technologies kebab so subsequently on laptop keep me just keep on Curtin job um laptop to open their their toasty backside bear suits come logo to keep look at that or taken him a copy coolant pack or the scalable laptop Kate display 15.6 inch gear Joe keep will actually display Jana cascade a solution a 1920 by 1080 or scale of a new feature movie subset chalega boyacky is capital her IPS panel Minsky amazement a cheek color quality male j'tia or achieving angled female jumping next time a technical milpa a laptop keyboard yoky backlit keyboard or red color make look at that what key would be homemade unnecessary keys militina Yannick it going became B Sigma here or scale of our key would use carne maybe copy company with or rather I'm laptop T left side me taking home a technical Montague power connector a clamp or I catch the mi port one USB port or two USB 3.1 Portsmouth VA or a 3.5 mm headphone jack male jaata hai aur agar I'm laptop k right side mini k so me push me they can even he will come Yanik a laptop making DVD right Hammond here not equal a cadre track now Tokiko a big problem in here to 803 laptop K external features a bath cam laptop k internal we just came by so subscibe la path Cathy and home processor key laptop my milta iPad 8300 at processor joki a quad-core processor means kms my Porthos militina or a treadmill dirty bugger a mystique clock speed keypad correct to speak clocks with a 2.3 gigahertz twofold ignorance Yannick a laptop key performance car pH here Cacnea I got a bunch of artistry bugs kill you performance a blast medicine k i7 processor say be copier chair Yannick a processor copier chat on a scale of army laptop me 8gb RAM will tear joke eh ddr2 RAM 8gb ram very subset off a optic ECT what kelly multitasking really like e- joint is a of x time because at the end 32 Jimmy Tecca ram support kata or either ham store risky but Carrie told a from a 128gb ki SS Timothy a dismay of my original window temp prince told me th ok again both achieve attack all scale about my wife typically are driving with about new projects videos files go ABT them stored concept an ipod cup their laptop case of say important picture key yoky a graphic our laptop may take a moment and we do t extensive TTI grafica Dukie mid-range graphic Iraq just ma'am kcv Gamescom medium say high setting packing sector hand or scale of a my laptop a Wi-Fi or bluetooth Jessie to strip it immediately to a total laptop Kate features a body of their laptop key performance key to a gaming laptop a yawning a subset valium is kick gaming performance testing so mostly meant away game scales down a cab each entry onto 3ng paper Tamara Domino games got Ischia GTA 5 two men in very high setting but a skier or escape image 8 55 to 60 frame let's take new movie Yannick a gaming experience copies mudra was kilowatt the many Witcher 3 gotta see Otto who say women a high setting protest gear boost maybe Mujib 40 to 50 frames per second when it yeah okay who's covered your gaming experience with a coffee smooth vanilla oh scale of a man a laptop commuting test Vidya Vasa to hitting cook come connect a laptop with those pants like a minute licking piripi laptop come maximum temperatures 70 to 75 degrees occur joking Buddhist Taurus a heilige jockey quick body problem here yeah I think a laptop games Kelly Kelly hit up copy a child so a basket am game development key Jessica after hockey games develop chemical you could hire a comedian Sony is my Unity game engine could ask here you ready me hundred twenty projects become clear on couch TV projects become clear lake in have a koi be problem they can you go to Emily come on I came develop an experienced coffee smooth rock Yanni game laptop make will be 2d or 3d game by asset pay or scale our laptop me I'm a 128gb SSD they can you believe this makeup is on up I got here because what I get my you many but totally happy with their jokey copies the other loading time lithium licking assisting you wanna give an essay loading time copy camp oh yeah this cable is a matter of work or peas ever appreciate who lacking games developed technically I'm a game engine Kaiser trainability scalable or B software digital protein for example Malo epic game developer Oh sack make 3d artists pew forum opening game Kelly could hear 16 it cannot attain the momager but the a quest to do software screen just agree Photoshop outputs 3ds obviously just to give my eyes a brush or blender etc laptop am Nick which 2d sort ways could you scare or could 3d surface co you scale 2d software scale a laptop Nick coffee a chopper pumpkin like a 3d Miata guy guys 3d by multiple signatures to move nozawa background but 3d maybe laptop Nick copy Tiki palm Kanaka copy balance for promise tea or coffee smooth experience the Yannick mm laptop Co game development can use cassette player or submit 3d work area be used as a pair all in all the top coffee a chair but is left of my weak which come here yes agree my name but I our laptop a humble quick carburetor technical momenta just keep personally with it easy or the scale of Edessa game and aapko pata aqui a gaming laptop gaming laptop my job battery pack both I both would have come with that will cool as lady is laptop me for cell batteries he like incredibly muchacho battery backup me large both those safety you can take up a commoner 28 and you push cones modulus laptop me they can accommodate the question other cacao me a laptop later today well I grab laptop Elena Athena games cream liquidy to ha may have quail laptop the community cut down because it's left of me i pipe core processor at a dividend my horse of say buddy bar and we look at gtx 950 TI graphic on a disk a startup medium to high settings / key cv games cochlear sector Yanik a your laptop games can you give me a Polish I'm looking either up game developed karma Japan so usually linear chaotic gaming laptop will a normal laptop maybe I'm develop kar sakte hain what Jessica many have compared me with their ki bear up game development kiss you do not career 12 whole system you scared you off keep us available here joyfully laptop
0 notes
Text
DIY Carved Wood Wall Art
I’m in love with my newest piece of wall art, and making it was a lot easier than it looks! Check out this power carved wood wall art and tell me where you think it should go.
Hey, friends!
I’ve got a little bit of picture overload for you today. It’s honestly due to a number of factors:
I loved the way my project turned out
I loved that I didn’t have to put on makeup to be in these photos because my face is covered up
Even though my face is covered up, I look like a badass in these photos
This project looks harder to do than it actually is
This is part of a blog/YouTube hop called the #WoodArtChallenge
Don’t know about the Wood Art Challenge yet? Well, in a nutshell, around 30+ of us DIYers/makers (bloggers, Youtubers, Instagrammers, etc.) are all teaming up to present you guys with a single hive mind creative challenge: make a piece of wall art that is SQUARE and made out of WOOD.
Thassit. That’s the challenge. And that means with so many ways to interpret that, there are LOTS of DIY ideas in store for you guys today! Just look to the bottom of this post for others who are participating.
As many of you guys know (unless you’re new here because of the hop thing, in which case hi, stay awhile, we get weird around here… in a good way), I would call myself a woodworking “beginner”. Even though I’ve got plenty of house fixing shenanigans under my belt, there’s a whole other world of power tool fun that I am just now starting to learn more about. And that’s how I found myself using an angle grinder to make a block of wood look like fabric.
Or twisted metal? Or maybe just crumpled paper? I still can’t put my finger on precisely what I think it resembles most, but it definitely doesn’t look like anything I’ve created out of wood before!
It was actually inspired by an artist I follow on Instagram, nugeandwood. My attempt was, of course, pretty small and quick compared to his giant, awe-inducing carved sculpture (which takes anywhere from a few weeks to a couple months to complete). Seriously guys — you’re missing out if you haven’t seen his stuff yet!
The best part of it is, my DIY version doesn’t use a lot of tools to accomplish; the tools you would need to purchase are well within a normal DIY budget too, so this makes it a great beginner’s woodworking project!
What you’ll need:
eye/ear/clothing protection, and a breathing mask (this is a very sawdusty project! safety first!), a hat is good too
1x8x8 poplar board (if you choose another hardwood, keep in mind that hardwood species carve differently, or so I’ve read)
4 1/2″ angle grinder (I bought mine, but there’s a very good chance a neighbor has one… Harbor Freight has them pretty cheap
4 1/2″ carbide cup wheel from Harbor Freight (only $10, and no, this is not sponsored)
4 1/2″ sanding disc in 40 or 80 grit (I preferred 40)
lots of sandpaper: extra coarse (around 40 grit), coarse (60-80 grit), medium (100-150 grit), fine (220 grit), extra fine (400 grit)… a lot of this you’ll probably already have
cling wrap
bar clamps
painter’s tape
wood glue
wood stain
sealer
DIY Power Carved Wall Art
1. Cut pieces to size
Cut down the 1×8 poplar into 6 roughly-equal pieces (it’s ok if it’s slightly off). Line them up the way you would like to establish the block you’ll carve into. Be mindful of the layers below; you’ll carve through parts of the top boards to expose lower layers.
Cover your work surface with cling wrap and tape the ends with painter’s tape (to prevent you from gluing your wood block to your work table).
For my version, I had two scrap pieces that had been Kreg Jig’d together for another project I forgot about ages ago. Since these pieces formed a 90-degree angle, they were perfect for using as temporary clamp pieces in the next step.
2. Glue and clamp the entire block together
I glued 2 stacks of 3 pieces each of the poplar, side by side. This sounds confusing, but it’s not. Just make two equal stacks of your poplar pieces and glue them in order. Be sure to cover the layers in between and the side where the two stacks touch with an ample amount of glue.
If you have or make clamp helpers like I did, put painter’s tape on any sides that will touch the glue… just in case.
With the glue still wet, clamp the ever-loving crap out of the wood block so that it will dry as one solid piece. Be sure to clamp the sides together and the layers (clamp vertically and horizontally).
3. Cut to square and sketch your carving
Since the top and bottom ends of the block aren’t perfectly square, now is the time to cut the excess off so you have a truly square block. Sorry, them’s the rules.
I used the back of my block to sketch out a few lines of where I thought “folds” of my make-believe wood fabric would be, along with giving the carving disc a few test runs to make sure I had a good handle on it.
4. Start carving!
With my carbide blade attached, I went to town on my wood block. Gently, at first, then more aggressive.
It made surprisingly quick work of the wood, and I began to learn how to control the curve and carve of the disc to get the shape I wanted.
This part was the quickest and most fun! It really only took an hour or two to carve the bulk of what I wanted. When I felt I had a better handle on how to get the shape, I went in again for a second pass to get things smoother.
5. Sand.
Ugh. This part. No fun. But I highly recommend getting a 40-grit sanding disc to attach to the angle grinder as well. This made getting those first big chunks sanded away to a smoother result. I tried again with the 80-grit one, but it left lots of bumps and I regretted it.
(For those who might suggest the Arbortech Turbo Plane to avoid/reduce all the sanding — I do know of the tool. I think it would be awesome to try one and haven’t yet tried it myself. But for a beginner’s project, it doesn’t make sense to recommend a blade that costly. Usually budget is a reason for DIYing and/or part of the roadblock for why someone might not try to DIY, so I’m not going to recommend it here. For professional woodworkers or those who intend on churning out multiple carved pieces, that would be worth giving a try though.)
6. More sanding.
After trying a few other battery- and corded- assisting tools to sand down the remainder, I had to resort to good ol’ fashioned sandpaper for the rest. I hated this part because I was already tired from carving.
7. Stain and seal.
At first, I was really tempted to go with a bold color, like blue or green, since the grain reminded me of a topographical map. I picked out a brown stain instead, because I was worried that the few lines where I used wood glue to connect pieces would not take stain and/or detract from the rest of the piece. I’m sure with more glue-up practice and better clamps, I could see fewer lines from the glue. Either way, I still loved the result!
8. Hang and admire your work.
After way too much dry time (it rained for two days and things just would. not. dry.), I got fed up and finally hung my piece using some of my favorite hangers (they allow the art to sit flush on the wall). I love it!
For now, it’s hanging in the entryway, but I may move it at some point.
What do you think? What color would you have picked? Would you have put a frame around it? I considered so many possibilities on this one, that the options are still pretty tempting. I’d love to hear your ideas.
P.S. If you’re wondering what those pictures taped to my garage wall are all about, check that out here. K is a real prankster.
Don’t forget, this is a WOOD ART CHALLENGE and a number of other folks are participating, so go check them out!
1) Reality Daydream / 2) 100 Things 2 Do / 3) House Becoming Home / 4) Anika’s DIY Life / 5) My Repurposed Life / 6) 3×3 Custom / 7) One Project Closer / 8) Merrypad / 9) Chatfield Court / 10) Create & Babble / 11) Hazel & Gold / 12) Jen Woodhouse / 13) Sawdust 2 Stitches / 14) Wood Work Life / 15) Remodelaholic / 16) Evan & Katelyn / 17) Jaime Costigio / 18) Pneumatic Addict / 19) Bower Power / 20) Lazy Guy DIY / 21) My Love 2 Create / 22) Addicted 2 DIY / 23) Her ToolBelt / 24) Shades of Blue / 25) Ugly Duckling House / 26) The DIY Village / 27) DIY Huntress / 28) Mr Fix It DIY
The post DIY Carved Wood Wall Art appeared first on Ugly Duckling House.
You'll Also Love
Wood Inlay Ornament with German Glass Glitter
.yuzo_related_post img{width:170px !important; height:170px !important;} .yuzo_related_post .relatedthumb{line-height:14px;background:#ffffff !important;color:#454747!important;} .yuzo_related_post .relatedthumb:hover{background:#ffffff !important; -webkit-transition: background 0.2s linear; -moz-transition: background 0.2s linear; -o-transition: background 0.2s linear; transition: background 0.2s linear;;color:#454747!important;} .yuzo_related_post .relatedthumb a{color:#102a3b!important;} .yuzo_related_post .relatedthumb a:hover{ color:#113f5e}!important;} .yuzo_related_post .relatedthumb:hover a{ color:#113f5e!important;} .yuzo_related_post .relatedthumb:hover .yuzo__text--title{ color:#113f5e!important;} .yuzo_related_post .yuzo_text, .yuzo_related_post .yuzo_views_post {color:#454747!important;} .yuzo_related_post .relatedthumb:hover .yuzo_text, .yuzo_related_post:hover .yuzo_views_post {color:#454747!important;} .yuzo_related_post .relatedthumb{ margin: 0px 6px 0px 6px; padding: 0px 0px 0px 0px; } jQuery(document).ready(function( $ ){ jQuery('.yuzo_related_post .yuzo_wraps').equalizer({ columns : '> div' }); });
from Ugly Duckling House https://www.uglyducklinghouse.com/carved-wood-wall-art/
0 notes
Last Seen Blogs

iwanturkitty
Untitled

amoment1875
A Moment To Be Determined

motownindia
Motown India

omundoquevemos
O mundo que vemos

obymoto
Share Your Moments