#stay tuned for a writeup about swapping keycaps later this week because wife 2.0 came in the mail
Text
let's build ANOTHER KEYBOARD, the 1up level 60: weird keycaps edition

this is a budget custom level60 board from 1up keyboards in turquoise with tecsee purple panda tactile switches, akko screw in stabilizers in transparent pink (which i happened to have leftovers of from my wife build), and then some wonky keycaps cobbled together from the idobao gradient oem keycap set (a cheaper version of drop's artifact bloom rainbow set), cherry profile de/qwertz keys from kp republic's international set, and one random constellation key from my xda profile constellation set that's filling the # space.
this time, let's talk keycaps.
my husband is working his way to b1 fluency in german so he'll have an easier time getting permanent residency after we move (i also need to study, since i... dont speak much german despite being a citizen) and it's been driving him crazy to have to enter ¨ with alt on his standard keyboard, so he asked me to build him a qwertz layout keyboard. so, for black friday i kept my eye out on sales.
what he wanted:
a 65% or smaller keyboard (no need for f-row, arrows, etc, since he'll be using it specifically for typing in german and will have his laptop accessible)
underglow, not show-through per-key rgb
he wanted that rainbow keycap set from drop real bad
qwertz keycaps
lighter tactiles than his current work board, which has akko jelly purples on it
something that would be small and light enough to hook up on his lap on the couch
so, i went through all the bf/cm sales and found 1up, and then showed him and he said "yes that's exactly what i want"
the hardest part of the buying process was picking switches, since he wanted both something cheap and something a little lighter than the jelly purple actuation, and i didnt want to buy from elsewhere when i could get them included with the 1up build. i was going to do gateron milkies (since he doesnt care about per-key) but they were sold out, and i've heard a lot of good stuff about panda tactiles, so i took the jump on the tecsee.
if you're wondering: they're just as nice as people say. they're really nide. they aren't as thunky and im sure they sound even better lubed & filmed, but they're silky smooth and light enough i can use them without wanting to die.
this is the third stacked acrylic board i've built, and i have to say, stacked acrylic is both really affordable and really nice to work with. there's a lot less fidgeting with making sure things fit in solid housings, and i enjoy the peeling sticky off of each layer process because i have ocd.
some glossary:
underglow: there are LEDs on the bottom side of the pcb
per-key rgb: there's an LED for each key, called per-key or smd LED, it all means the same thing. this means every key lights up. there are some switches that aren't built to fit smd boards, so always double check that you have ones with a gap to fit.
keycap profiles: the different alignment and ways that keycaps are made, including height, shape, curve, and edge. there are about a billion. there will be a section more in-depth later.
and this time, i remembered photos!
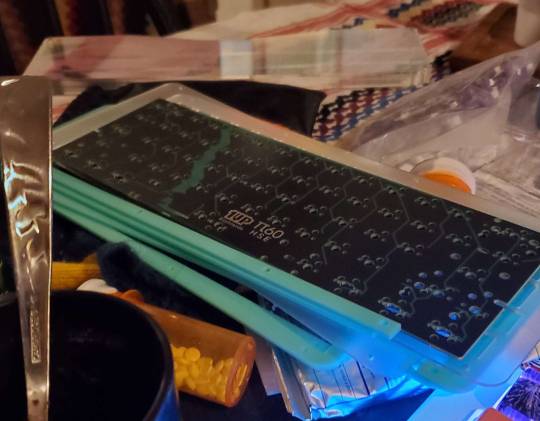
here's all the acrylic peeled and stacked, with the top side of the pcb, on my messy dining table. so you can see here, it's really easy to take these apart and put them back together—great for upkeep.
one of the really cool parts about this pcb is that it's hotswap (i.e., no soldering required, just stick the switches in) but the hotswaps are soldered in such a way as you can adjust the layout slightly for your preference. i'm not sure if you could set it up as an iso (i didn't check) but you can see here how it looks on the bottom row, where the pink line is one switch orientation and the blue line is the other

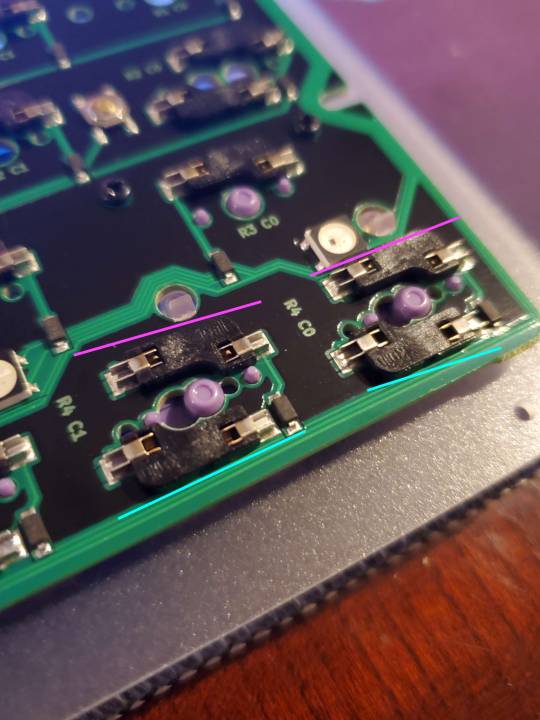
since this isn't a per-key rgb, that means there's no need to make sure there's space for a top-facing smd led, so the switches can be placed in either direction. which is super cool!
when installing switches on a hot swap board, you have to be really careful of pin alignment. the spaces that the pins go into in the hot swap can be jarred loose, and the pins, if bent, won't make connection, preventing the switch from working. here's an example of what bent pins look like


the top switch in both these photos has straight pins, the bottom in both photos has one bent pin. the good news is, bent pins are really easy to fix: you can usually bend them back with your fingers, if it's just a slight misalignment, or you can use tweezers.
to prevent bending, when you insert a switch, always press in the pin-side first. so if you look at the holes on the pcb above, a "north" facing pin insert (the pink line) you'd push in the top side of the switch first. a "south" (the blue line) you'd push in the bottom first. you can then flip the pcb over to check and make sure everything went in.

here's a close-up of hot swap sockets on the bottom of the pcb. the pink circles show where the pins are in the housings. success! all of these are inserted correctly.
once this board was built, it came time for the keycaps. as i said up top, this is a bit of a cobbled-together keycap set, in that there's a few different-height sets combined. so let's talk about.... keycaps.
there are about a billion different guides to keycap profiles. rather than rehash them here, i'm going to talk about the simple stuff, because i was so confused trying to figure this out.
there are, put simply, two different "styles" of keycaps, broken up into dozens of different profiles. there are "uniform" keycaps, where all the keys are the same height, and "sculpted", where the keys are staggered to shape the profile of the board to be taller at the top, lower in the middle, and rise again at the bottom. the most popular uniform keycap profiles are xda and dsa. the most popular sculpted keycap profiles are cherry and oem. you can find a whole bunch of other types and options, too. some companies (like tai hao and akko) tend to only produce certain profiles (tai hao and osa respectively)

here's a side by side of xda, oem, and cherry keycaps all in the same row. they're all slightly different heights, shapes, and sculpts.
in sculpted keycap profiles, each row is of a slightly different height. for qwety layouts that would be r1 (number row), r2 (qwerty row), r3 (home row), r4 (zxcv row), r5 (space/ctrl row). function row usually is either r1 or r5.

since this keyboard is a little cobbled together, keycaps wise, you can see here the different height of some of the keys. if you're looking into non-qwerty layouts, i'd suggest a uniform profile. you can get international inserts like the ones i got for my husband here, or buy the international sets for nor/de/fr, but you can also just buy dsa or xda and swap keys around as needed.
now, be aware when mixing and matching sets, unless you can guarantee that your keycap sets come from the same manufacturer (i.e., cannon keys, idobao, drop, etc... so if you aren't buying knockoffs or recolors) the printing may be slightly different. here are two different xda profile keycap sets, side by side.
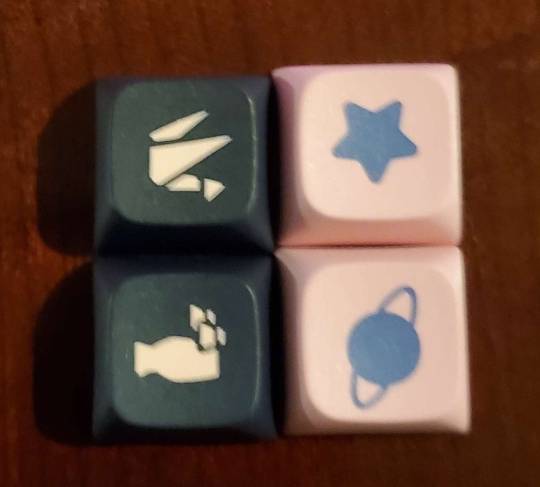
you can see the constellation set is wider and a little flatter, while the night sakura set is taller and a little skinnier. they're both still xda, but the print is very slightly different. (in all fairness, the night sakura may actually be kam knockoffs, im not sure. they were advertised as xda, but they don't quite match the profile).
one of the other things keycaps will be marked as is PBT vs ABS—this is the variety of plastic they're made from. pbt is more sturdy. thats really all you need to know.
finally, there are what are called "doubleshot" and "show-through" keycaps. doubleshot means that the keycap is made from two different types of plastic, machined together, and it makes them a little more sturdy. most show-through keycaps are also doubleshot, but the lower plastic isn't the full body of the key, but a transparent layer to allow the light from the per-key rgb to show through.


finally, you can get what are called "artisan" keycaps. these are single keycaps, usually custom or small-run, and they can be made of ceramic, plastic, resin, glass, metal...etc. some are standard shapes, some arent.

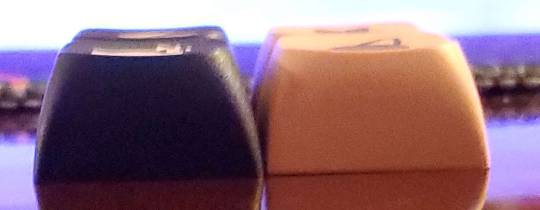
from left to right, this is an oem r1, cherry r1, artisan from hirosart, and osa r1. as you can see, these are all very different heights and shapes. artisans are super cool (expensive) but also very fun. you should get one if you have a mechanical keyboard. they spark So much joy.
finally, here's a sound test. not plugged in because im lazy. sorry about the horrible flashing of my actual keyboard in the background (flashing light warning: please just listen if you want to hear the sound test and you're light sensitive)
#keycaps are for eating#stay tuned for a writeup about swapping keycaps later this week because wife 2.0 came in the mail#so i can finally set that up soblaugh relief
15 notes
·
View notes
Last Seen Blogs

shoptophealth
Shop Top Health

thedivineiam1
The Divine I AM

mrgametv
MrGameTv

imperfectpanda23
sex

sedgwickedits
sedgwickedits