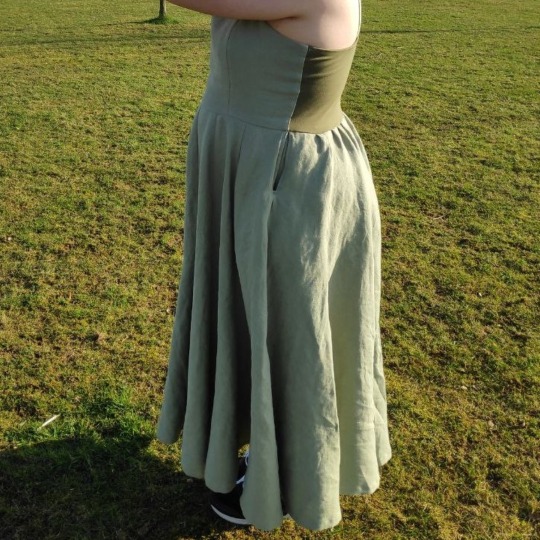
#straight neckline and no fake button placket
Text
Me: Hey, I finished that dress I've been planning to make since last May.
My mother, silently grateful my first summer dress of the year is not covered in manic cartoon animals: Oh that looks lovely... Though don't you think you put a bit much fabric into your skirt? You could have used half and had enough left for a second dress.
Me: It's more comfortable this way. Not as clingy. And it's cut to be low waste, so you get a lot of bang for your buck.
Mom: ... How much is in there?
Me: Only like 4 meters.
Mom: Of a low waste pattern.
Me: Yup.
Mom: Give me one reason you need that much "bang for your buck".
Me:
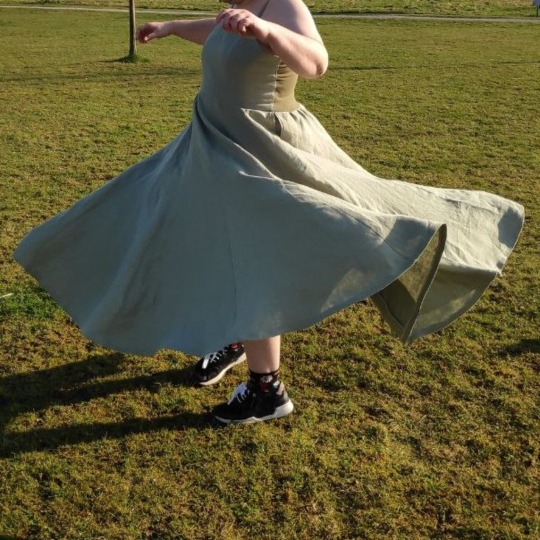

#sewing#skirt is Salix by Unendlich Schön#lengthened by a full 30 cm#because yolo#bodice is from the Riviera dress by Lotte & Ludwig#straight neckline and no fake button placket#fabric is Aina from IKEA#and a lil square of jersey in the back#you're supposed to not wash the linen on normal#and don't put it in the dryer#whoops#it's now soft as a cloud#skirt go spinny#I might need to get more of this fabric#also 10/10 would recommend just straight up replacing a back panel with jersey instead of putting in a zipper#you do have to gather (part of) your skirt onto elastic but that's still more idiot proof to sew or wear than an elastic#and yes#there's pockets#smaller than intended#but still plenty big for my phone and wallet#i then showed my creation to a sewing friend who loves skirts that are knee length or higher#she said she would immediately wear that dress if it were half as long#GOOD NEWS#it's supposed to be#and you can even make it a patchwork pattern#we're not gonna talk about how long this took to hem#pictures taken outside because it was the first warm day of the year#and also because I can't spin it safely while indoors#i could remake it in manic cartoon but it would cost at least twice as much
44 notes
·
View notes
Text
sewing advice
Hi everyone, I’m Daniela and for today's video I was in the mood for some sewing machine I’ve been self-teaching me how to sew and I was inspired by a top I saw on a Vintage style shop to try and make something similar The top is this one, it has what I think Isa fake button placket, some lace details, and a pretty gathered waist I will leave a link to the shop in the description box bellow, but this top is out of stock at least for now.
As for fabric, I didn’t have anything as pretty as the one on the source image, so I went with a cotton white bed sheet from ikea I went into this project as a sewing exercise, so I also didn’t want to waste a more expensive fabric on this So here’s how I made the pattern.
I measured myself around the torso and figured that a square piece of fabric with about 39 cm would be enough, you’ll see later that I actually ended up tightening a bit Added a seam allowance And also added darts to the sides, about 10 cm under the neckline and I made them 8 cm deep I know it's kinda hard but, try to figure out if the top will fit over your head, otherwise, you may need to add a zipper so it can open up a bit more I traced all of these measurements onto some tissue paper first and pined it to two layers of fabric, right sides facing, and cut it Before removing the paper I used chalk to mark the placement of the darts After cutting I pressed the darts with the iron, and pinned them in place on both sides Then I just sewed them with a straight stitch, which is also the only type of stitch this machine does, unless you use a special zig-zag attachment which I don’t really like, it's kind of fiddly So that’s why you’ll see that I didn’t make any stitch to keep the ends from fraying.
Next, I ironed the darts to make them nice and sharp.
For the fake button placket, I cut a strip of fabric with the same height of the torso piece and about 6 cm in width, adding seam allowance Then, I Ironed it folding the edges inside,like this.
And pinned it to the center of the main piece.
Then sewed it close to the edges on both sides Then, I placed the back piece, right sides facing, on top of the front piece and pinned the sides You can’t really tell on this shot but,I didn’t account for the loss of height from the darts, so the bottom doesn’t quite match, but that worked out fine since I had cut the fabric longer than what I needed, so just bear that in mind when you're making yours Again I sewed it on both sides.
Halfway through my bobbin thread ended so I wasn't actually sewing anything but if you by any chance wanna know how these types of machines wind bobbins, a treadle machine, this is how I do it First, obviously, I take the bobbin out and place it in the winder which is this section right here then I untighten this piece, I think its called stop motion screw maybe this will stop the motion of the sewing needle so the thread doesn't get all tangled up wrap the thread around the bobbin and put it through this piece at the bottom this will give tension to the thread now I just pedal while pressing this, I don't know, latch and that is it Once the machine was loaded and ready to work,I continued sewing the other side as well.
Remember when I told I ended up tightening a bit, this is what I meant, I tried it on and tightened it about 2 cm, also rounding up slightly towards the neckline,to fit a bit better.
Then I trimmed the excess fabric and pressed the seams.
While I was at it, I also double folded and pressed the hem for the neckline.
For the straps, I measured and cut 2 strips with about 2 x 37 cm adding extra for seam allowance.
Then folded and ironed it before sewing machine the sides on both strips.
I used a loop turned to turn the loops inside out.
#sewingmachine#sewingmachinereviews#bestsewingmachine#bestsewingmachinereviews#bestsewingmachinebrands#sergermachine#sergermachinereviews#bestsergermachine#bestsergermachinereviews#bestsergermachinebrands
1 note
·
View note
Last Seen Blogs

happilychaengs
chaeyoung’s side piece

whimsicallyworded
🌻Dirty Minded Author🌻

lumau
Lumau

rivalkieran
⚔️ - for each of us two, a rival

ronsmith1221
Ron Smith