#the carved stuff that’s hard to read will get white underglaze in it after bisque fire I think
Text
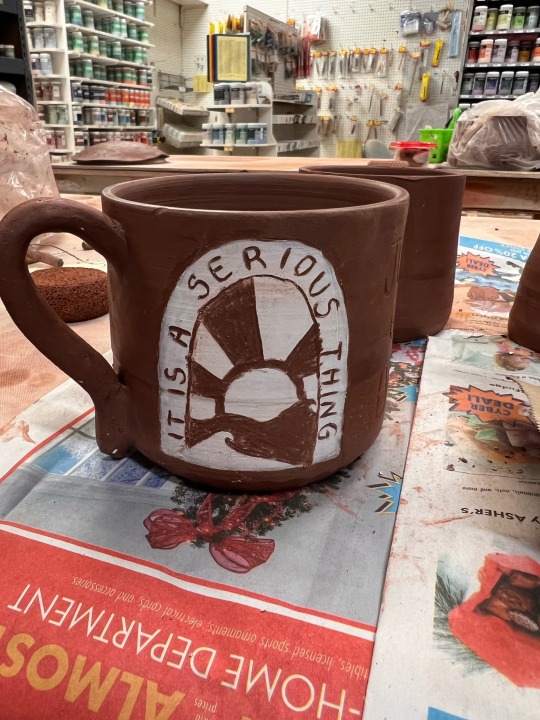
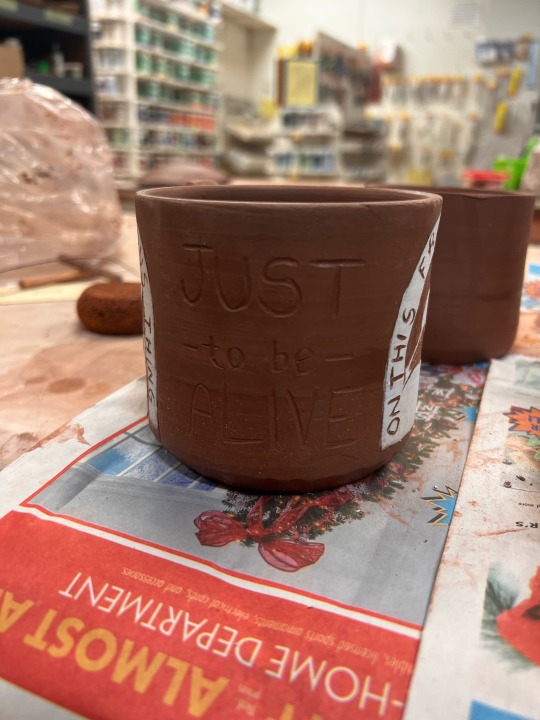
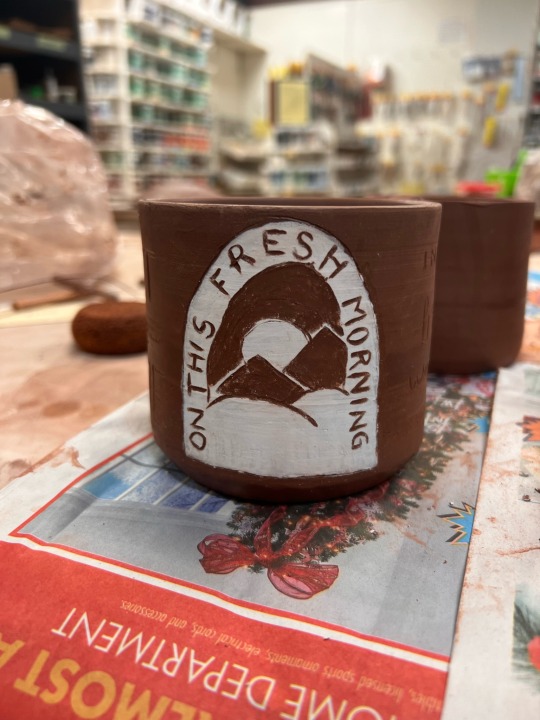
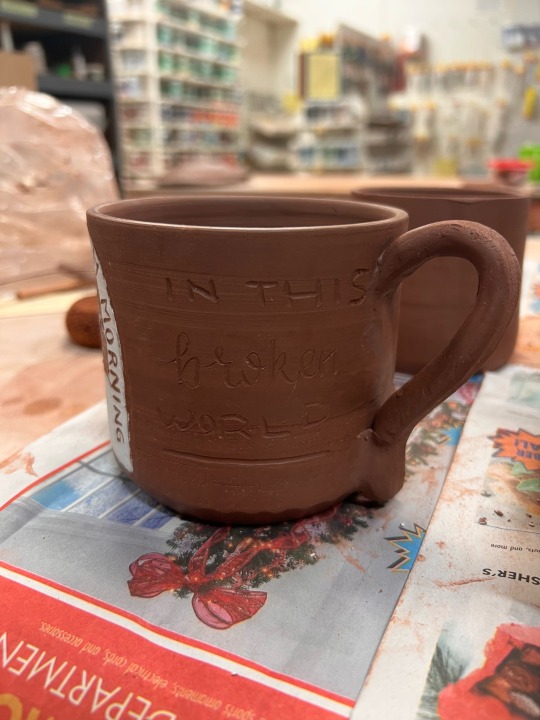
it’s not perfect since I planned it out at pottery and so wasn’t my tidiest
BUT IF THIS MUG DOESNT TURN OUT IM GONNA BE MAD
#it’s a Mary Oliver quote#it is a serious thing just to be alive#on this fresh morning in this broken world#my obsession with her continues#Afton hums#if the glaze on this one is patchy too I’ll be 👏👏 devastated#I already know I’m not super happy with the IN THIS/WORLD but#the carved stuff that’s hard to read will get white underglaze in it after bisque fire I think
3 notes
·
View notes
Note
Do you have any tips to get into ceramics? I've been thinking of trying it but I have no idea where to start and some guides are so overwhelming :( Like what clay & paint do you use? Do you need a special surface or other materials for it? (If it's alright to ask! No presh to answer btw)
Your works are so lovely, I'm always looking forward to what you make next! 💗
hi beloved. my first advice usually is to find a pottery studio where you can take classes... a teacher’s guidance + every material you need available to you will make things way easier for you in the beginning. but assuming that you’re trying to learn by yourself at home because you can’t take classes right now for your own reasons... i’ll try to give you the most basic guide on ceramics here, hopefully it will clear a few questions you might have? btw i feel the need to point out that i only started making ceramics less than a year ago, so there’s still a looooot that i don’t know yet. technicalities like firing & glazes i’m a bit ignorant of, so i won’t be covering much of that :s again, this is very basic! i’m simplifying it just to help you feel less overwhelmed c: <3
1. ok first thing first, you asked about the surface. at home i placed a sheet of unvarnished wood over my table & that’s where i do all my pottery work. of course there are many other options, you can read more about this topic here
2. there’s a few different options for clay, differents colors & types that you might like more. it’s explained perfectly on this video :^) i personally use white stoneware.
3. you need to wedge your clay!!! this is crucial. do it on the surface you picked from #1. here’s a very good tutorial.
4. ok now you can build whatever you want!
• you take your clay (you can use a wire to cut it from the big block of clay), wedge it, & start your work. i always have a small bucket of water & a small sponge with me when i’m working. use a humid sponge to smooth the clay if needed.
• i usually leave it at a shelf to dry a bit for a day or two, then it’s a bit more hard & you can’t make many changes (as in, adding new stuff to it) but it’s a good moment to carve it a bit more if necessary & smooth it out with the humid sponge. sculpt the little details etc. i recommend buying a tool set like this, it’ll make your job easier for this part
5. firing. like a said before i’m still not very familiar with the technicalities since i don’t own a kiln & my teachers are the ones handling that part :p but what you need to know is that your piece will need to be fired twice in order to become actual ceramic. your clay needs to be dry to go into the kiln. the first firing is called bisque. after that, you need to glaze your piece & then fire it a second time. the glaze will basically turn you work glass-like & food safe. here’s a very informative guide on firing <-
6. there’s are many (many!!) different colors & types of glaze. you can go to the amaco website & look at their charts just so you can have an idea. you can use either colored glazes or a transparent one. underglazes are used to ‘draw’ on & decorate you work. i personally use underglaze to paint before bisque firing bc i feel like the colors looks less faded that way. after bisque, i simply retouch little areas if necessary before applying the transparent glaze over it. you can use the underglaze only after bisque as well. there’s also a bunch of underglaze transfer sheets on etsy that looks super cool & fun to try! one thing you’ll notice about both glazes & underglazes is that the colors do not look nearly the same before & after firing. the colors look rather dull & opaque, but they’ll be vibrant after firing. it’s my favorite surprise heh
ok i think that’s it! this is obviously super SUPER basic, there’s so much little details that you’ll eventually learn but i just wanted to help you situate yourself a bit because i understand how overwhelming it can be when you’re learning something from scratch & alone. my tip is: join facebook groups for pottery, there are SO many & people are always happy to help if you have any questions. i also recommend that you go buy your materials in person if possible instead of online, surely the worker helping you will be able to guide you better on the many products that are out there & answer the questions you might have about it. & about the kiln, most pottery studios offer their kiln for people that aren’t students. the one i go to price it based on the total weight of the pieces i bring.
hopefully that was helpful! 🥰🙏
37 notes
·
View notes
Last Seen Blogs

sssensati0nal-blog
✕ | ɴᴇᴘʜɪʟɪᴍ ( ᵃᵖ )

ccipankaj-blog
Untitled

abitofsims
A Bit of Sims

apchipipka
Bittler

peaceworker
Welcome To Our Blog peaceworker.org