#viper4android oreo
Explore tagged Tumblr posts
Visit Tumblr Blog
Explore Tumblr blogs with no restrictions, modern design and the best experience.
Last Seen Tumblr Blogs


Fun Fact
The total number of visits Tumblr.com received during January 2021 is 327 million.
Link
Viper4Android Apk Free Download For All Android Devices http://www.apkdroidstore.com/viper4android-download-android/
Viper4Android is a sound equalizer mod which specially designs for the Android devices to enhance the audio output.
0 notes
Link
If you are also that curious tech enthusiast who always tries something new and does experiments with his device by using and testing the latest features and functioning. If you are also interested in customizing your Android device to have a brand-new look. So for sure, you are also trying to install Substratum themes on Android 10/Q, most of the Android 10 users have a doubt regarding how to install Substratum themes on the latest Android version, i.e. Android 10/Q right now (Android 11 is in its beta version and yet to be released).
So, if you are also confused or have any doubts regarding installing the substratum theme on your Android device (especially Android 10/Q). So, don't worry, here in this article we are going to guide how you can install substratum themes on Android 10/Q. So, let's get started
Substratum
A substratum is a theming tool that can be used to apply various themes with or without rooting. The Substratum theme is started with an extremely popular custom ROM Cyanogen Mod, which has a theming engine that made it so easy to apply themes. However, Cyanogen Mod has failed and not in use anymore, but somehow Substratum theme rises from there and becomes an immensely popular theming engine.
At first, it was used for rooted devices only, but after Android 8/Oreo came into the picture, the Substratum theme can also be used without root. Again, with Android 9/Pie Google said that OMS (Overlay Manager Service) is intended to be used by device manufacturers only, so OMS in the current form is not designed to be a generic feature.
Then Again, with Android 10/Q Google has changed so many features and other things, and most of them are related to the internals of the system. Android Q itself provides various features and customization options, so Android 10 has eliminated the need for a substratum theme, but the substratum theme is so much better and has many customization options than Android 10 in some aspects. So, let's get started and install substratum themes in Android 10/Q with root.
Also Read: How to Install ViPER4Android on Android 10/Q
How to Install Substratum Themes on Android 10/Q
Before you Start
Before getting started with the installation procedure, here are some important instructions you should know and follow before getting started with the method to install substratum themes on Android 10/Q
First of all, before starting to install substratum themes on Android 10/Q, make sure that your device is rooted using Magisk, running on Android version 10/Q.
Install Substratum Lite.
Install any Android 10 compatible theme.
Related Article
How to Root Your Android Device
[Top]10 Best Magisk Modules For Your Rooted Phone
Why Magisk Over SuperSU for Rooting your Android Device?
Some Android 10 Compatible Substratum Theme
You should first purchase a compatible theme to install substratum themes on Android 10/Q. Here is some best substratum themes, you can purchase and install them from the Play store.
Outline
Ethereal
Valerie
Flux White
PitchBlack
Also Read: How to Enable Always-on Display on Any OnePlus Phone
Method
This is a complete step-by-step guide, by following each step carefully this you can easily install substratum themes on Android 10/Q, and also set up the theme in the device.
Make sure your device is rooted and running on Android 10/Q.
Go to Google PlayStore, and install any of the themes of your choice. (In this article, we are using Pitch Black theme)
Download and Install the Substratum from the Google Play Store.
Open the Substratum app from the app drawer.
It will ask you for Superuser permission, grant the permission.
If it doesn't ask superuser permission or somehow you unable to grant the permission
So, open the Magisk Manager.
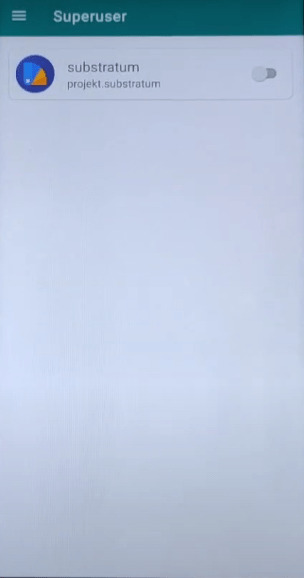
Tap on hamburger menu from the top-left corner and go to Superuser.

Enable the toggle on in front of Substratum (if it was disabled).
Also Read: How to Fix Magisk Install Error 1 in TWRP Recovery
Clear all the recent apps, from the background.
Again, Open Substratum, A welcome screen will be displayed (skip it if you want)
Allow all the required permission.
And here, you will see the theme which you have purchased and installed from the Play Store.
Click on the theme.
In the Overlay tab, click on the arrow (facing downward) select Android 10 from it.

Enable the Toggle just beside the arrow, it will select all the app.

Also Read: How to Fix Error 70 While Installing Gapps in TWRP
Or you can manually choose the apps from the app list below.
Make suitable customization.
After customizations, tap on the circular icon at the bottom-right corner.

Here, enables the toggle in front of Disable other themes, to avoid conflict between themes. (You can always perform experiments so you can also disable it).
Now tap on Build and Install.

Also Read: How to Fix Error 7 in TWRP While Flashing any Custom ROM?
It will take a while to overlay all the apps.
After successful building and installing, reboot your device.
After rebooting, open the substratum again.
Go to the manager tab.
Enable the toggle on in front of Select to bottom all overlays (or choose the apps manually). To apply the theme in respective apps.

Again, tap on the circular icon at the bottom-right corner.
Tap on Change overlay states.

It will reboot the system UI automatically.
Now if you unlock your device, so all the changes would be saved.
That's it from our side and I hope you have successfully installed substratum themes on Android 10/Q. If you like the content and found this article useful so, please share your valuable reviews in the comment box. Also, if you have some more suggestions so please let us know in the comment section.
[su_box title="More Like This" box_color="#000000"]
How to Enable Live Captions on Android 10 Phones [ROOT]
How to Run Android APK Files in Windows 10?
How To Remove Youtube Ads on Android? [No Root]
[/su_box]
via TechLatest
0 notes
Text
Magisk Modules That You Must-Have on Your Android Device
Magisk is an open-source road utility system that provides security updates on your phone. It is a great option to help you customize your ROMs and OS updates, remove Bloatware, and take over the complete control on your mobile device.
You can begin by rooting with Magisk. It works best with devices that run on Android 5.0 and above. You will require a custom recovery and the Magisk Manager app from XDA developers to begin rooting. Install the Magisk Manager App on your device and open the navigation drawer on the screen. Click on ‘Install’ and press the ‘Download’ button. Reboot your phones to flash your device through TWRP. You can easily install the Magisk module in either of the two ways:
Method One
So this method you will require Magisk-Modules-Repo or Magisk by XDA developers.
Begin by downloading the module on your phone storage.
On the Magisk Manager app, select Modules from the sidebar.
Tap on the Plus icon and find your downloaded module.
To open your desired module, give a long press on it, and the installation process will begin.
Reboot your phone when the app instructs you to do so.
Method Two
Go to ‘Downloads’ of the Magisk Manager app.
A list of available Magisk modules will be shown on screen. You can download by tapping on either of them to read more information about them, including the instructions on how to install and use it.
Click on the download icon to install a module. If you click on the ‘Install’ button, it will download and install everything in one step, but clicking on the ‘Download’ button will save the module directly on your phone storage.
Click on the ‘Install’ button and click on ‘Reboot,’ when prompted, to place the module properly on your device.
If you can’t see anything on the Download list, you can go to your Settings and select Clear Repo Cache and retry the whole process.
In case you are dealing with problematic modules, you can uninstall them at any point by simply going to the Modules in the Magisk Manager app. Remove that checkmarks from the box given on the side of a module to disable it and hit the reboot button. Click on the Trash Can icon and press on the reboot button again, to remove the module entirely from your device.
Following are some of the Magisk module that you must have on your device for better performance:
Xposed Framework
Applying add-ons or mods to the ROMs has become much easier with this module. It adds individual features to the ROMs you use on your device. Because it’s systemless and open-source, it is most likely not to block the Android’s Operating System updates.
App Systemizer
It allows you to convert different apps into system apps so that they don’t get uninstalled by adding an extra protective layer to secure those apps. App systemizer won’t modify your device’s system partition, and it automatically updates itself through the Play Store. Moreover, you can retain the apps you converted from App Systemizer, even after uninstalling the Magisk app.
ART optimization
This virtual machine was introduced by Android lollipop, and it brought the compilation of ahead-of-time (AOT) to the Android code. It configures the art optimization activation on the device, and you can change it on-the-fly based on the profile you have chosen.
Dolby Atmos
As the name suggests, this module will provide effective sound improvements on the device and various other options to enhance the audio quality of your mobile.
Viper4Android FX
It is the most advanced music modification module available on Magisk. It provides extended audio functions for your device that can be customized and modified by you for any part of your Android device’s audio system. You will achieve full control over the audio outputs, volume levels, clarification, and more.
Call Recorder
Some Android devices don’t support call recording features. If you are someone who requires this feature for their everyday business calls, you can use this module. Your only task will be to install this module, the call recorder will handle the rest of the tasks after you activate it. You can also include or exclude specific numbers for recording.
Cloudflare DNS4 Magisk
It has cutting edge technology that is safe to use, and it will provide you with the best privacy benefits to control all your internet surfing traffic. It neither tracks nor stores your data. It provides you with a DNS privacy protection mechanism and combats snooping. It encrypts all the communications between the stub resolver and the recursive resolver.
YouTube Vanced
This is great for your YouTube app to help you support background play, pinch-to-zoom gesture, play videos on loop, blocks ad, and many more. On Oreo devices that also support Picture in Picture (PiP) mode. You can use the override maximum resolution feature as well.
iOS 12.1 Emoji
It is the best option for the iPhone and iPad users to have access to 158 new emoji along with various gender and skin tone variations that are unavailable in iOS. You only have to install this module from the magisk manager app and then reboot your phone, and you’ll find the emojis. In case you are unsatisfied with the emojis, you can revert to the original emojis by uninstalling the module. Using these modules are an amazing way to root your phone on your own and they can also improve your device’s work efficiency. These are safe to use and you can rely on them completely. These apps will be secured on your device even if you uninstall the Magisk application. If you are unsatisfied with any of the installed modules on your device, you can uninstall them at any point without any fuss. We would recommend you to use the Xposed module for Magisk as it enables you to have a wide range of tweaking options.
Source : Android Device
0 notes
Text
Step by step OS installation using ADB sideload
youtube
This video will show you step by step installation of Custom rom in android device using ADB sideload option in custom recovery TWRP. You can leave a comment below if you have some questions about the video. Please don’t forget to subscribe to my YouTube Channel to notify you if i have a new video upload, thank you very much for the time watching this video.. God bless.
Visit my FACEBOOK:
Don’t Click:
Minimal and ADB fastboot link:
Subscribe to my YouTube channel:
Other videos:
Portrait Image in Huawei:
Product Give Away (GearBest.com):
Resurrection Remix Oreo (Huawei Y6 II & P8 Lite):
AOSiP Custom ROM Huawei Y6 II & Huawei P8 Lite:
Firmware Build Number CAML21C636B250:
How to install CUSTOM KERNEL in Android Device (For Good Battery Life):
Cosmic OS Custom Rom [ Huawei Y6 II & P8 Lite]:
How To Extend Battery Life:
How to install XenonHD Custom Rom & Rom Review [Huawei Y6 II & P8 lite]:
Mokee OS Custom ROM [ Huawei Y6 II & Huawei P8 Lite ]
halogen OS Install and Review:
RR-OS Nougat Custom ROM:
How to UPDATE Firmware VERSION for ROOTED Smartphone:
Dot OS Custom Rom in Huawei Y6 II:
How to install Resurrection Remix Oreo:
Colt OS in Huawei Y6 II REVIEW:
How to install Colt OS Custom ROM in Huawei Y6 II:
Part 1: Flashing Stock Firmware in Huawei Y6 II with Custom ROM Nougat :
Part 2: Relock bootloader & Update firmware manually:
How to install LineageOS 14.1 Nougat in Huawei Y6 ii:
How to install Android Oreo 8.0 in Huawei Y6 II //Gzosp 8.0 Oreo:
Finally I got Custom ROM Nougat without any issues // Paranoid Nougat AOSPA:
How to root Huawei Y6 II AOSPA Paranoid Nougat Custom ROM:
Magisk Manager Module // Viper4Android FX: Nguồn:https://hdwallpaperslovely.com/ Xem Thêm Bài Viết Khác:https://hdwallpaperslovely.com/cong-nghe/
The post Step by step OS installation using ADB sideload appeared first on HD Wall Paper Slovely.
from HD Wall Paper Slovely https://ift.tt/2OlJbjb via IFTTT
0 notes
Text
Things to remember when you install ViPER4Android
Ensure your phone has no less than 80 – 85% charge. If not, kindly do charge it before beginning the trial.
Ensure your gadget has TWRP Custom Recovery introduced from previously. Something else, this instructional exercise won't work!
Your gadget must be established! If not, discover your establishing guide here!
You have to play out a Dalvik Cache wipe in recuperation mode before introducing the ROM.
Reinforcement your Android Device
We don't need you to lose any information, or anything could turn out badly out of the blue. Before beginning the instructional exercise, we unequivocally prescribe you to make a full reinforcement of your phone. In the event that conceivable, take a full Nandroid Backup by means of TWRP, or you can experiment with a portion of the Hand-Picked Android Backup Apps to secure your information rapidly.
Instructions to Install ViPER4Android on Android 8.1 Oreo
We have specified full well-ordered guidelines on How to Install ViPER4Android on Android 8.0/8.1 Oreo. On the off chance that you are altogether new to Custom Mod, please read the whole instructional exercise once before really performing it on your gadget.
The instructional exercise has been isolated into 2 section:
Pre-setup: setting up the gadget with Gravity Box.
Mod Setup: ViPER4Android Installation
Pre-setup: Tutorial (Step-by-step)
Stage 1: Download and Install BusyBox and Install it on your established Android Device:
BusyBox
Download
QR-Code
BusyBox
Designer: Stephen (Stericson)
Value: Free
Open the App and give root consent.
BusyBox
Introduce BusyBox
Ensure you introduce BusyBox appropriately. Try not to alter any alternative. Abandon them as they seem to be!
You will see a winning message when the establishment is finished (Check Screenshots above).
Stage 2: Download and Install Solid Explorer record chief on your gadget:
Strong Explorer File Manager
Download
QR-Code
Strong Explorer File Manager
Engineer: NeatBytes
Value: Free+
Stage 3: Swipe out from the left corner of the App screen and "tap" on Root choice under the capacity area.
The App will request Root authorization. Simply give them!
Stage 4: Now, explore to/Vendor/and so on and discover the record "audio_effects.conf" inside it.
Strong Explorer
Stage 5: Rename the document to "audio_effects.conf.bak".
How?
Long push on the document and "tap" on the 3-speck flood on the highest point of the correct side and select Rename.
Tap "alright" and leave the Solid Explorer application!
Stage 6: Set the SELinux status as Permissive. To do that, Download the SELinux Switch App from underneath and introduce it on your gadget.
Download The SELinux Switch App
Presently, Open the App and allow the Root consent. At that point, press "Tolerant" Button to set the SELinux status as required.
The SELinux Switch App
Stage 7: Reboot your gadget in the wake of playing out the Step 6.
That is it! Your gadget is currently set to Install ViPER4Android Oreo. Keep perusing beneath to conclude the Mod.
Mod Setup: Install ViPER4Android Oreo
Stage 1: Download ViPER4Android Oreo Zip Package from the connection underneath and remove it on your PC:
Download ViPER4Android FX 2.5.0.5
You will get the accompanying 2 documents:
ViPER4Android_FX_v2505_A4.x-A7.x.apk
ViPER4Android_FX_v2505_A7.x_Nougat_IO_test_fix.apk
We just need the second one — (ViPER4Android_FX_v2505_A7.x_Nougat_IO_test_fix.apk)
Stage 2: Connect your gadget to your PC utilizing USB Cable and exchange the second document to phone inside capacity. Ensure your PC has Android USB Driver introduced. Something else, your gadget won't perceived by the framework.
Stage 3: Now, introduce the APK document from your phone inside capacity and open it.
Stage 4: Once you open the App (ViPER4Android), it will request refreshing the V4A driver. Affirm by tapping on "Yes" and concede root authorization to it.
The driver establishment should begin, and it will take 30-60 seconds to finish. Your phone screen may get a stop. Try not to stress over that.
Once the driver establishment is finished, tap on "alright" and reboot your gadget.
Stage 5: Once the gadget is ON, open ViPER4Android again and swipe out from the left to open the menu.
Stage 6: Confirm the driver status — Tap on "Driver Status", and it should demonstrate the status esteem as typical.
ViPER4Android
Yahoo! You are finished with setting ViPER4Android Oreo on your gadget.
You would now be able to appreciate the mitigating and improved sound involvement on your gadget running Android 8.0/8.1 Oreo. Presently you can Modify the sound setting of your phone in the way you like.
In the event that you experience any issue, please remark underneath, and we will hit you up as quickly as time permits.
Kindly bear in mind to share on the off chance that you have discovered this post accommodating!
0 notes
Link
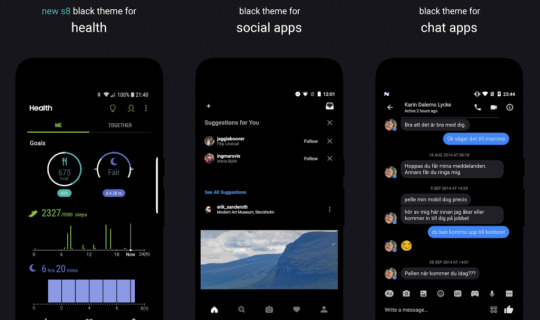
Here we have a collection of some best Android 10 supported substratum themes. As we all love to make changes in our Android devices to make them look fresh and brand-new. Most of the people customize ROM's, change themes, and what not to have a latest and admiring look of their system. If you also like to do such things, so you might have heard of Substratum and its themes to give another level of a fascinating look at your phone.
If you are looking for some best paid/free Android 10 supported Substratum theme, so your search finishes here. Here in this article, we are going to discuss some best Android 10 supported Substratum themes.
Look, you will find a lot of themes if you simply search at Google Play Store, but here we are specifically talking about best Android 10 supported substratum themes, this article will help you in choosing the best substratum theme for Android 10/Q. So, let's get started
What is Substratum?
Before getting started with the best Android 10 supported substratum themes, we should have a look at what substratum is? Some of you might have heard about substratum, but for others, this term may be completely new. So, let's have a brief introduction of Substratum.
A substratum is a theming tool that can be used to apply various themes with or without rooting. The Substratum theme is started with an extremely popular custom ROM Cyanogen Mod which has a theming engine and that made it so easy to apply themes. However, Cyanogen Mod has failed and not in use anymore, but somehow Substratum theme rises from there and becomes an immensely popular theming engine.
Also Read: How to Install ViPER4Android on Android 10/Q
At first, it was used for rooted devices only, but after Android 8/Oreo came into the picture, the Substratum theme can also be used without root. Again, with Android 9/Pie Google said that OMS (Overlay Manager Service) is intended to be used by device manufacturers only, so OMS in the current form is not designed to be a generic feature.
[Note: - You can use Substratum themes without root in Android 8 only, neither in its predecessor version nor in its successors.]
Then Again, with Android 10/Q Google has changed so many features and other things, and most of them are related to the internals of the system. Android Q itself provides various features and customization options, so Android 10 has eliminated the need for a substratum theme, but the substratum theming engine is so much better and has many customization options than Android 10 in some aspects but can't take over Substratum theming engine.
How to Install the Substratum Theme?
To know how to install the Substratum theme, have a look at the following link How to Install Substratum Themes on Android 10/Q. In this article, we have explained the step-by-step procedure to guide you so that you can install the best substratum theme in your device easily.
Best Android 10 Supported Substratum Themes
So, let's get started with some best Android 10 supported substratum themes:
[Note- All these themes are arranged in random order, not priority wise. Each of them is best in their way, select the theme according to your preference.]
Also Read: How to Enable Always-on Display on Any OnePlus Phone
Outline
This is an amazing substratum theme available easily, it is compatible with Android 10/Q and fully stable theme which supports Google, AOSP, GSI, Custom ROM - Rooted, it is themed with 29 third-party apps, 27 Google apps, and 10 system apps. The outline theme is available in five beautiful pastel colors. And additional colors are available with the extensions of the theme.
Ethereal
Ethereal is another best Android 10 supported substratum theme which supports Google, AOSP, GSI, Custom ROM - Rooted, and comes up with five different and beautiful app colors as well as five different background colors. The ethereal theme comes up with various customization options. This is also themed with 29 third-party apps, 27 Google apps, and 10 system apps.
Also Read: [Top]10 Best Magisk Modules for Your Rooted Phone
Valerie
Valarie is one of the best Android 10 supported substratum themes. This is a beautiful substratum theme that supports almost all devices and custom operating systems with OMS, but for Android 10, and Pie it supports only OxygenOS. This theme also supports Samsung's OneU Pie. You can download it from here.
PitchBlack
PitchBlak is quite popular for its known fully featured dark black theme which is battery friendly. Various apps and ROMs support it. It makes a perfect balance between materialism, minimalism, and various color combinations. It automatically creates 130+ theming sets so you can pick any one of the combinations from them. It offers so many options so you can select one of your choices from them.
Also Read: How to Root Your Android Device
Flux Dark/Flux White
Flux Black/Flux white both are the best Android 10 supported substratum themes, which is designed with perfect pixel graphics and material UI. This theme gives a fascinating, vibrant, and cool look to your device. It supports AOSP like other themes, but it doesn't support Oxygen OS for Android 10. It works with Android Nougat/Oreo/Pie/10 stock and custom ROMs.
Swift Black
Swift black is another best substratum theme which supports Android AOSP based ROM's including Android Nougat, Oreo, Pie, and 10/Q. It comes up with 200+ handcrafted overlays that use pitch-black color for the backgrounds and also it tends to preserve apps original color and accent wherever possible. It is best suited with the OLED screen and it also helps in extending battery life too. It's too many amazing features makes this to able to get listed in best Android 10 supported substratum theme
Also Read: How to Run Android APK Files in Windows 10?
Biohazard
Biohazard is a unique, elegant dark theme that comes up with some aesthetic designs and this substratum theme is highly focussed on details. With the Biohazard theme, you will be found perfection in customization and accurate detailed look of apps and its versions. Biohazard supports Android 10. pie, and others, but it doesn't support stock OEMs like EMUI/MIUI/ZenUI, etc.
Translucent
This is another unique and best substratum theme for Android 10, Translucent is available for Android 10/Q, Pie, Oreo, and some ASOP ROMs too. As everything about this theme is easily understandable by its names, this theme comes up in three modes including dark mode, half-translucent, and fully translucent.
Also Read: How to Enable Live Captions on Android 10 Phones [ROOT]
Flare
Flare is another best Android 10 supported substratum theme, which is gradient-based, this is a beautifully designed and curved theme which currently supports Android Pie & Android 10 Q Stock / Custom Roms, OxygenOS and Samsung Pie & Q OneUi.
Gravija
Gravija is a pretty famous substratum theme, a dit is widely known only for its vector gradient-based theming, it comes up a lot of options inside. By using Gravija you can change the primary or accent colors, also you can completely change the look/layout of any app.
Also Read: How to Fix Error 7 in TWRP While Flashing any Custom ROM?
Belo
Belo works with Google stock and custom AOSP based 8.1/9.0/10 ROMs. This theme offers a simple, and mesmerizing look and feels if you are the user who seeks toward simplicity, so Belo is the best substratum theme in this case.
FAB
FAB is a dark theme with beautifully designed icons in all the apps and it uses gradient UI elements, like switches, progress bars, buttons, navigation bars, floating action buttons, and others. It offers 5 different background colors and 15 different gradient accent combinations. This theme works only with Android Pie and Q Google stock, custom AOSP based ROMs, and OxygenOS 10 Q.
Also Read: How to Fix Error 70 While Installing Gapps in TWRP
Aurora
Aurora works with multiple operating systems and devices; it comes up with a unique and beautifully designed custom theme package. It provides you an option to explore and choose the best theme among 200 theme packages. It can support more than 40 background apps and more than 55 accents.
So this is it from our end these were some best substratum themes for Android 10. I hope you like the content and found this article useful. After knowing some best substratum themes let us know which you are going to choose. If you know some other best Android 10 supported substratum theme which is missing from the above list, so please let us know in the comment section.
Also Read: How to Fix Unable to Mount Data Error in TWRP
via TechLatest
0 notes
Link
Most of the user's complaint about unsuccessful installation or undefined error while installing ViPER4Android on Android 10/Q. If you are also unable to complete the installation procedure for ViPER4Android on Android 10/Q. It is a common issue that is faced by numerous users and they are able to fix it with some quick fixes.
So if you also got stuck with such error or want to install ViPER4Android on Android 10/Q without any hassle, read out this article and follow the methods discussed below, here in this guide we are going to provide step-by-step installation of ViPERAndroid on Android 10/Q. So, let's get started
How to Install ViPER4Android on Android 10/Q
What is ViPER4Android
ViPER4Android (V4A) is said to be one of the best audios enhancing mod for Android devices. If you have tried installing ViPER4Android on previous Android version including, Nougat, Oreo, Pie, and others. And now you have upgraded your device to Android 10/Q so you can't install ViPER4Android on Android 10/Q by using the same method or technique you were using in other Android versions.
The reason behind this is because Android 10/Q comes up with so many updates and changes but the mod ViPER4Android hasn't been changed/updated accordingly. So, this causes a compatibility issue between the Android version and mod. To resolve this issue so that you can easily install ViPER4Android on Android 10/Q, follow the given steps, and install the ViPER4Android on Android 10/Q.
[su_note note_color="#f9de1d" text_color="#000000"]At any stage, you must avoid doing something about which you have no idea. Don’t customize any method during the actual implementation. This is precisely what that can be a reason your smartphone can fail to perform other tasks as well. We at TechLatest cannot be held responsible for anything that goes wrong simply because of this reason. [/su_note]
Before You Start
Before getting start with installlation methods, read the following instructions
Take a Backup of all of your data, it is not recommended but if something went wrong, so it's a chance of losing data forever. You can keep a backup of your data in cloud storage, tap on the following link to know more about Best Cloud Storage.
Your Android device must be rooted with Magisk. Read the following articles too, to know more about How to Root Android Device and Best Magisk Modules
Uninstall all the previous audio modifications and ViPER4Android (if installed previously). Ensure that you have uninstalled them and then reboot the device.
Method 1
Download the viper form Magisk or APK [DOWNLOAD] and install it.
Install the required drivers.
Now, reboot the device.
Check what the device status says. If it is 'Status: Normal', so just turn on the Master Power.
If it is 'Status: Abnormal', so
Open terminal or ADB shell.
Type su to grant permission.
Then type setenforce 0.
Force stop Viper App, Reopen it, again Check the Status.
If it is 'Status: Normal', so proceed further.
If it is 'Status: Abnormal', so this method is not for you.
Set SELinux permission and if it worked.
Download the patch.
Rename it to (remove.txt),
And copy it to /system/addon.d [If you are on Magisk module]
Now Reboot the system.
Method 2
Download the viper form Magisk or APK [DOWNLOAD] and install it.
Install the required drivers.
Now, reboot the device.
Check what the device status says. If it is 'Status: Normal', so just turn on the Master Power.
If it is 'Status: Abnormal', so
Open terminal or ADB shell.
Type su to grant permission.
Type supolicy --live "allow mediaserver mediaserver_tmpfs file { execute }"
Type supolicy --live "allow audioserver audioserver_tmpfs file { read execute }"
Force stop Viper App, reopen it, again Check the Status.
If it is 'Status: Normal', so proceed further.
If it is 'Status: Abnormal', so this method is not for you.
Set SELinux permission and if it worked.
Download the patch.
Rename it to (remove.txt),
And copy it to /system/addon.d [If you are on Magisk module]
Now Reboot the system.
Method 3
Download the latest version of ViPER4Android APK.
Install the downloaded APK using any File Manager.
After successful installation, Launch the ViPER4Android app.
[Note: DO NOT INSTALL THE DRIVERS RIGHT NOW]
Open the Magisk Manager app.
Tap on the hamburger menu from the top-left corner and navigate to Downloads.
In the downloads, tap on the search bar.
And search Audio Modification Library, tap on the download icon.
Tap on Install.
Magisk modular will prompt a message to reboot, but don't reboot.
Now head back to the ViPER4Android app.
Tap on OK, to install the required drivers.
Grant the permissions to the Superuser whenever prompted.
After drivers get installed, the device will get rebooted automatically.
After rebooting, go to the ‘Magisk Manager'
Now, to the ‘Modules’.
Uncheck the ‘Audio Modification Library’ to disable it.
Now again head back to the ViPER4Android app.
Repeat the driver installation procedure.
Reboot the device.
Launch the ViPER4Android app. If drivers are installed properly then you are done!
Otherwise, follow the given steps:
Now, to the ‘Modules’.
Check the ‘Audio Modification Library’ to enable it.
Open ViPER4Android, install the drivers when prompted, and let the device restart itself.
Method 4
This is an alternative method and this is especially for the users who entered into the boot loop after performing the above task, and this method is useful for Samsung Galaxy devices with Android 10, and also for OEM users and for those who are using custom ROMs.
Download the following files
ViPER4Android v2.7.1.0 APK
Zackptg5’s Rootless Driver Installer
Open the Magisk Manager app in your device
Tap on the hamburger menu icon and go to the Downloads.
Tap on the search bar, and search Audio Modification Library.
Tap on the download icon.
Tap on Install.
Magisk modular will prompt a message to reboot, but don't reboot.
Install the V4A APK file using the file manager.
One installed, reboot your device into TWRP recovery mode.
Tap on the Install button in TWRP recovery.
Choose the Rootless Driver Installer Zip file.
Swipe the button on the bottom of the screen to flash the file.
After flashing finishes, tap on the 'Reboot System' to restart the system into OS.
Now you would have ViPER4Android on Android 10/Q.
So that's it from our side. I hope you have found this guide useful in installing ViPER4Android on Android 10/Q easily. If you have some more suggestions so, please share them with us in the comment section.
[su_box title="More Like This" box_color="#000000"]
How to Enable Always-on Display on Any OnePlus Phone
How to Fix Unable to Mount Data Error in TWRP
How to Fix Error 70 While Installing Gapps in TWRP
How to Fix Error 7 in TWRP While Flashing any Custom ROM?
[/su_box]
via TechLatest
0 notes
Text
Magisk Modules That You Must-Have on Your Android Device
Magisk is an open-source road utility system that provides security updates on your phone. It is a great option to help you customize your ROMs and OS updates, remove Bloatware, and take over the complete control on your mobile device.
You can begin by rooting with Magisk. It works best with devices that run on Android 5.0 and above. You will require a custom recovery and the Magisk Manager app from XDA developers to begin rooting. Install the Magisk Manager App on your device and open the navigation drawer on the screen. Click on ‘Install’ and press the ‘Download’ button. Reboot your phones to flash your device through TWRP. You can easily install the Magisk module in either of the two ways:
Method One
So this method you will require Magisk-Modules-Repo or Magisk by XDA developers.
Begin by downloading the module on your phone storage.
On the Magisk Manager app, select Modules from the sidebar.
Tap on the Plus icon and find your downloaded module.
To open your desired module, give a long press on it, and the installation process will begin.
Reboot your phone when the app instructs you to do so.
Method Two
Go to ‘Downloads’ of the Magisk Manager app.
A list of available Magisk modules will be shown on screen. You can download by tapping on either of them to read more information about them, including the instructions on how to install and use it.
Click on the download icon to install a module. If you click on the ‘Install’ button, it will download and install everything in one step, but clicking on the ‘Download’ button will save the module directly on your phone storage.
Click on the ‘Install’ button and click on ‘Reboot,’ when prompted, to place the module properly on your device.
If you can’t see anything on the Download list, you can go to your Settings and select Clear Repo Cache and retry the whole process.
In case you are dealing with problematic modules, you can uninstall them at any point by simply going to the Modules in the Magisk Manager app. Remove that checkmarks from the box given on the side of a module to disable it and hit the reboot button. Click on the Trash Can icon and press on the reboot button again, to remove the module entirely from your device.
Following are some of the Magisk module that you must have on your device for better performance:
Xposed Framework
Applying add-ons or mods to the ROMs has become much easier with this module. It adds individual features to the ROMs you use on your device. Because it’s systemless and open-source, it is most likely not to block the Android’s Operating System updates.
App Systemizer
It allows you to convert different apps into system apps so that they don’t get uninstalled by adding an extra protective layer to secure those apps. App systemizer won’t modify your device’s system partition, and it automatically updates itself through the Play Store. Moreover, you can retain the apps you converted from App Systemizer, even after uninstalling the Magisk app.
ART optimization
This virtual machine was introduced by Android lollipop, and it brought the compilation of ahead-of-time (AOT) to the Android code. It configures the art optimization activation on the device, and you can change it on-the-fly based on the profile you have chosen.
Dolby Atmos
As the name suggests, this module will provide effective sound improvements on the device and various other options to enhance the audio quality of your mobile.
Viper4Android FX
It is the most advanced music modification module available on Magisk. It provides extended audio functions for your device that can be customized and modified by you for any part of your Android device’s audio system. You will achieve full control over the audio outputs, volume levels, clarification, and more.
Call Recorder
Some Android devices don’t support call recording features. If you are someone who requires this feature for their everyday business calls, you can use this module. Your only task will be to install this module, the call recorder will handle the rest of the tasks after you activate it. You can also include or exclude specific numbers for recording.
Cloudflare DNS4 Magisk
It has cutting edge technology that is safe to use, and it will provide you with the best privacy benefits to control all your internet surfing traffic. It neither tracks nor stores your data. It provides you with a DNS privacy protection mechanism and combats snooping. It encrypts all the communications between the stub resolver and the recursive resolver.
YouTube Vanced
This is great for your YouTube app to help you support background play, pinch-to-zoom gesture, play videos on loop, blocks ad, and many more. On Oreo devices that also support Picture in Picture (PiP) mode. You can use the override maximum resolution feature as well.
iOS 12.1 Emoji
It is the best option for the iPhone and iPad users to have access to 158 new emoji along with various gender and skin tone variations that are unavailable in iOS. You only have to install this module from the magisk manager app and then reboot your phone, and you’ll find the emojis. In case you are unsatisfied with the emojis, you can revert to the original emojis by uninstalling the module. Using these modules are an amazing way to root your phone on your own and they can also improve your device’s work efficiency. These are safe to use and you can rely on them completely. These apps will be secured on your device even if you uninstall the Magisk application. If you are unsatisfied with any of the installed modules on your device, you can uninstall them at any point without any fuss. We would recommend you to use the Xposed module for Magisk as it enables you to have a wide range of tweaking options.
Source : Android Device
0 notes