#vmwarefusion
Explore tagged Tumblr posts
Visit Tumblr Blog
Explore Tumblr blogs with no restrictions, modern design and the best experience.
Last Seen Tumblr Blogs


Fun Fact
If you dial 1-866-584-6757, you can leave an audio post for your followers.
Text
Hey folks!
It's Peter here!
I'm back for VMflame adventures and I want to push my computer knowledge boundaries even further!
So here's what I was up to today.
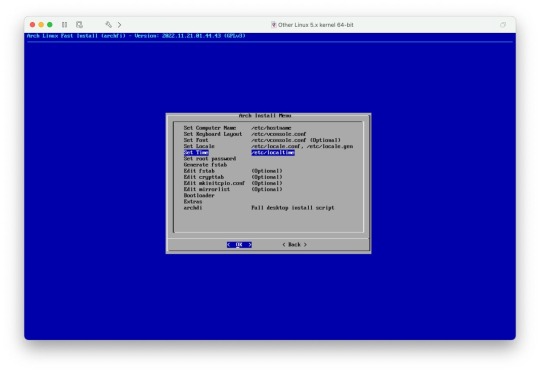
I tried making my own OS using ArchLinux.
But the main trouble is - I don't have any non-Apple hardware to do that. That's why I needed to emulate the entire ArchLinux environment using VMware Fusion software on my Mac Pro.
I downloaded the ArchLinux distro from their official website.
On a first attempt, I configured the VM as a Linux 3.x x64 kernel operating system with a BIOS boot system.
Just for the record, today I used the guide by Chris Titus - he did a great job explaining the entire process, so if you want, you can check out his video.
It all started with a good old command line and some massive package installation and configuration. Well then I made it through the entire configuration process, and right on the step when I should have booted into the newly made OS, it rebooted to the command line - the place where I started the entire process. That's when I remembered that I configured the eintore thing with BIOS.
I then retried doing all the same stuff but at the VM configuration step, I tried it with UEFI boot system instead.
It all seemed to be a success, but then I got a kernel error
chmod cannot access mnt/root/archfi
I also retried for a third time giving the the VM more RAM (12GB contrary to previous 8GB) but I still failed.
So now am waiting for a Linux ISO to be downloaded to try an alternative route for my goal destination.
Wel it's it for today! See y'all tomorrow!
0 notes
Text
Mac 如何完整移除 VMware Fusion 虛擬機軟體【教學】
日常為客戶測試軟體工作從原本的VMware Fusion逐漸轉成VirtualBox進行更多樣的環境測試,雖然VMware Fusion非常好用,考慮到老黑Windows桌上電腦已大量使用VirtualBox虛擬機,想想乾脆把Mac vmware完整移除換了吧,順便整理成教學記錄… Continue reading Mac 如何完整移除 VMware Fusion 虛擬機軟體【教學】
0 notes
Link
#VMwareFusionfreedownloadformac#VMwareFusionfreeformac#VMwareFusionfreedownload#VMwareFusionfree#VMwareFusionpro12#VMwareFusionpro#VMwareFusion
0 notes
Photo

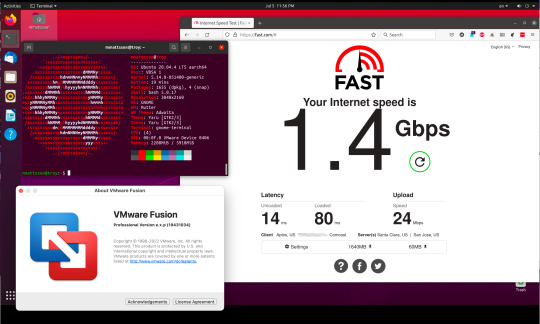
Как бы смешно не звучало , но обновляем на MacBookPro Linux kali и Ubuntu , пока усваивается очередная порция пиваса . Не пугайтесь линь не на буке а на виртуалках :):) А то ща братья маководы обгрызаными яблоками закидают :):):) В общем без паники MacOS на месте :)😂 #gennadilisai #autoservicemoscow #mercedesmoscow #chiptuningmiscow #swapmoscow #macbookpro16 #updatrkalilinux #updateubuntu #ubuntuvmwarefusion #vmwarefusion #kalilinuxupdate #aptitudeupgrade #aptupgrade #distupgrade @gennadilisai @auto_electrician_moscow (at Moscow, Russia) https://www.instagram.com/p/CAOZUvbBuii/?igshid=18bsvf4eewodd
#gennadilisai#autoservicemoscow#mercedesmoscow#chiptuningmiscow#swapmoscow#macbookpro16#updatrkalilinux#updateubuntu#ubuntuvmwarefusion#vmwarefusion#kalilinuxupdate#aptitudeupgrade#aptupgrade#distupgrade
0 notes
Text
¡25% Descuento en Vmware Fusion y Workstation!
¡25% Descuento en Vmware Fusion y Workstation!
Echa un vistazo AQUI
#Workstation #Vmware #VmwareFusion

0 notes
Photo

@secres2 @DavidJBianco @VMwareFusion Try using bridged node instead of NAT in VMware. See if that helps. (via Twitter http://twitter.com/kalilinux/status/1102314004880519169)
1 note
·
View note
Text
MacBook Air (13-inch, Early 2015) VMwareのWindowsが動かなくなった
「macに入れていたvmwarefusionが起動しなくなりWindowsが開かなくなりましたが、こういったものを直すのも可能でしょうか?」とメールにてお問い合わせ。 Continue reading Untitled

View On WordPress
#Mac修理国際通り#Mac修理沖縄#Mac修理浮島通り#Mac修理那覇#Mac国際通り#Mac沖縄#Mac那覇#vmware#windows#マック修理国際通り#マック修理沖縄#マック修理浮島通り#マック修理那覇#マック国際通り#マック沖縄#マック那覇
0 notes
Link
#virtualmachine #vms #vmware #vmwareworkstation #vmwarefusion #virtulization #virtualmachine #vmwarelaptop #bestlaptop #laptopreviews #picklaptop Whether you’re a networking student and practicing with virtual machines or trying to find out any vulnerability in your security system, moreover, perhaps you might need to use a software that runs on a specific OS, or you’re developing any software that runs on Windows Mac OSX, Linux. Read More! https://picklaptop.com/best-laptops-vmware/
0 notes
Photo

Несколько новых серий по настройке и установке программ на MacOS . Уже на нашем канале Youtube. #gennadilisai #autoservicemoscow #mercedesmoscow #mac #macbookpro16 #ktagonmac #canhackeronmac #vmware #vmwarefusion (at Moscow Oblast) https://www.instagram.com/p/B9VUYhpBYeL/?igshid=xkyf6j0xdotw
#gennadilisai#autoservicemoscow#mercedesmoscow#mac#macbookpro16#ktagonmac#canhackeronmac#vmware#vmwarefusion
0 notes
Text
2019年でも間に合う!Windows8.1からWindows10に無償アップグレード
家ではウィンドウズを使ってます。 だってスチームからPCゲームをダウンロードして遊びたいし。
ハードディスクを取り替えた時に削除したウィンドウズ環境
よほど変な組み方をしない限り、ほぼクローム基準でエッジも同じく見られるのだが、 このたび、その変な組み方をしてしまったようで確認が必要となった訳です。
それは、 cssにcalcを使いパーセントを使うとうまく行かない事がある。 というもの。
今開発中のエッジの次のブラウザはクローム基準なので、 そんなことはなくなると思うのですが。
IE確認はVMwareFusion使ってます
MacOSX以降はバージョン8以上じゃないと使えないので、 古いのを持ってる方はアップグレードが必要です。有料です。
[amazonjs asin=”B009316BXW” locale=”JP” title=”VMware Fusion 5″]
他にパラレルズもと…
View On WordPress
0 notes
Photo

@kalilinux : @VMwareFusion @SANSInstitute Nothing specific on our side, other than this useful doc about booting Kali off USB in VMware Fusion. This could help while preforming forensics on virtual machines while utilizing a USB boot medium - https://t.co/TiJliYLY2k
1 note
·
View note
Text
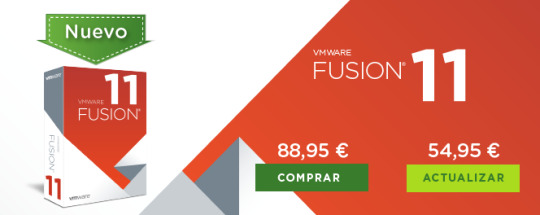
Descuento VMware Fusion 11 & Fusion 11 Pro
Descuento VMware Fusion 11 & Fusion 11 Pro 👉http://bit.ly/2xBDXrd
#VMware #VMwarefusion https://cupondescuentos.com/vmware-workstation.html
0 notes
Photo

@VMwareFusion @SANSInstitute Nothing specific on our side, other than this useful doc about booting Kali off USB in VMware Fusion. This could help while preforming forensics on virtual machines while utilizing a USB boot medium - https://t.co/TiJliYLY2k #Hacking #Hacker #EthicalHacking #KaliLinux
0 notes
Text
a minikube dev envionment and workflow
window.location.replace("https://blog.sebastianfromearth.com/post/20180523065409");
Set up your local kubernetes environment
Add this to your /etc/hosts file somewhere: IMPORTANT - note that the ip address may be 192.168.99.101 or 192.168.99.102, etc, depending on how many times you have recreated your environment locally. Use the appropriate value.
192.168.99.100 dev.myapp.com
Minikube requirements (one of):
virtualbox (at least version 5) vmwarefusion kvm (driver installation) xhyve (driver installation)
Install kubectl, helm & minikube: IMPORTANT - please make sure you are using minikube version 0.24.1
### MAC # kubectl curl -LO https://storage.googleapis.com/kubernetes-release/release/v1.9.0/bin/darwin/amd64/kubectl; chmod +x ./kubectl; sudo mv ./kubectl /usr/local/bin/kubectl # kubernetes-helm sudo curl -LO https://storage.googleapis.com/kubernetes-helm/helm-v2.7.2-darwin-amd64.tar.gz; sudo tar -zxvf helm-v2.7.2-darwin-amd64.tar.gz; sudo mv darwin-amd64/helm /usr/local/bin/helm # minikube curl -Lo minikube https://storage.googleapis.com/minikube/releases/v0.24.1/minikube-darwin-amd64; chmod +x minikube; mv minikube /usr/local/bin/minikube ### Linux # kubectl sudo curl -LO https://storage.googleapis.com/kubernetes-release/release/v1.9.0/bin/linux/amd64/kubectl; sudo chmod +x ./kubectl; sudo mv ./kubectl /usr/local/bin/kubectl # kubernetes-helm sudo curl -LO https://storage.googleapis.com/kubernetes-helm/helm-v2.7.2-linux-amd64.tar.gz; sudo tar -zxvf helm-v2.7.2-linux-amd64.tar.gz; sudo mv linux-amd64/helm /usr/local/bin/helm # minikube sudo curl -Lo minikube https://storage.googleapis.com/minikube/releases/v0.24.1/minikube-linux-amd64; sudo chmod +x minikube; sudo mv minikube /usr/local/bin/minikube
Start minikube, sync the project directory's files into the minikube VM and load the dashboard: IMPORTANT - please make sure you use kubernetes version v1.8.0
minikube start --memory 4096 --kubernetes-version v1.8.0 rsync -av --numeric-ids --stats -e "ssh -i $(minikube ssh-key)" --rsync-path="sudo rsync" /my/project/dir/ docker@$(minikube ip):/myprojectdir/ minikube dashboard
Add an nginx ingress controller into your local kubernetes cluster, as well as heapster:
minikube addons enable ingress minikube addons enable heapster
Install tiller into your local kubernetes cluster:
helm init
You just saw this rsync command above:
rsync -av --numeric-ids --stats -e "ssh -i $(minikube ssh-key)" --rsync-path="sudo rsync" /my/project/dir/ docker@$(minikube ip):/myprojectdir/
The workflow here is to sync the files, rather than mount, with the minikube vm. This is because on a mac, mounting is way too slow with docker, especially for node projects. Once the files have been synced into the minikube vm, we can mount them into local docker containers which will be used in the minikube k8s cluster.
Let's take a node project as an example.
Development Workflow
We will do work on our host, using a ide/text editor on the host and also node/npm on the host. We will use the minikube docker daemon, and we will rsync changed files into the minikube vm.
Change to the root of your app project directory on your host:
cd /my/node/project/dir/
Build this example node application using the npm installed on your host:
npm i; npm run build
Re-sync any changed files into the minikube vm: IMPORTANT - remember to do this each time, maybe can be added in the package.json (I didn't make any hot change functionality yet).
rsync -av --numeric-ids --stats -e "ssh -i $(minikube ssh-key)" --rsync-path="sudo rsync" /my/project/dir/ docker@$(minikube ip):/myprojectdir/
Use minikube's docker daemon:
eval $(minikube docker-env)
Build your dev docker image inside the minikube VM:
docker build -t my-node-app -f Dockerfile.dev .
The dockerfile might look something like:
FROM node:8.9 as builder RUN node -v && npm -v FROM nginx:1.12 COPY ./nginx.conf /etc/nginx/nginx.conf
...and the nginx config might look something like:
worker_processes auto; events { worker_connections 1024; } error_log /dev/stdout debug; http { include mime.types; sendfile off; server_tokens off; server { listen 8080; access_log /dev/stdout; error_log /dev/stdout; client_max_body_size 0; location / { root /var/www; try_files $uri $uri/ =404; index index.html; } } }
Deploy the node app to your minikube kubernetes environment:
helm upgrade --install --values helm/myapp/values/dev.yaml --namespace dev dev helm/myapp
The missing part you might be wondering about is how the docker container is serving the built html/css/js files. It's in the helm chart, using a persistent volume mount and persistent volume claim:
--- apiVersion: extensions/v1beta1 kind: Deployment metadata: name: my-node-app namespace: {{ .Release.Namespace }} labels: env: {{ .Release.Namespace }} role: my-node-app app: my-node-app spec: replicas: {{ .Values.nodeApp.replicaCount }} strategy: type: RollingUpdate rollingUpdate: maxSurge: 1 maxUnavailable: 1 template: metadata: labels: env: {{ .Release.Namespace }} role: my-node-app app: my-node-app spec: containers: - name: my-node-app image: {{ .Values.nodeApp.imageName }}:{{ .Values.nodeApp.dockerImageVersion }} {{ if eq .Values.env "dev" }} volumeMounts: - mountPath: /var/www name: app-volume {{ end }} imagePullPolicy: {{ .Values.imagePullPolicy }} resources: requests: memory: {{ .Values.nodeApp.memory.requests }} cpu: {{ .Values.nodeApp.cpu.requests }} limits: memory: {{ .Values.nodeApp.memory.limit }} cpu: {{ .Values.nodeApp.cpu.limit }} ports: - containerPort: {{ .Values.nodeApp.port }} name: http {{ if eq .Values.env "dev" }} volumes: - name: app-volume persistentVolumeClaim: claimName: app-claim {{ end }} --- apiVersion: v1 kind: PersistentVolume metadata: name: app-volume spec: storageClassName: app-manual accessModes: - ReadWriteOnce capacity: storage: 250Mi hostPath: path: /myprojectdir/web
Values:
env: dev imagePullPolicy: IfNotPresent nodeApp: replicaCount: 1 cpu: requests: 100m limit: 200m memory: requests: 100Mi limit: 200Mi port: 8080 imageName: my-node-app dockerImageVersion: latest
Now every time we edit our application and make a change, we can rebuild it, resync it and redeploy it with helm (which mounts the files into the running pod). I admit this isn't exactly seemless, but it is possible to work like this in a k8s style environment.
A large upside (from an ops perspective) is that you can then use the same helm chart, with different values files to provision separate environments. You could even package the whole thing as a helm chart to be stored in the chart museum for one line installation of an entire environment.
Each environment will be the same, they will all use the same tooling ecosystem, and your infrastructure changes can be tracked and committed to a git repository. If you want to make sure your dev environment is as close as possible to your qa, staging, prod or any other environments you are running with, this might be a viable skeleton of an option.
Resetting Everything
To remove the app from your minikube kubernetes cluster:
helm del --purge dev
To destroy everything and reset completely:
minikube stop minikube delete rm -rf ~/.minikube rm -f ~/.kube/config
0 notes
Text
Create a DNS so you don't have to remember your VMWare IP address
Sick of typing in ip addresses for your VM's? Well if you setup a static IP for your VM then you can do the following to always reference your VM.
Insert the following entry into your /etc/hosts file:
[ip address of vm] [your hostname]
E.g.
192.168.2.45 win7vm
Register the changes by typing the following in your Terminal:
dscacheutil -flushcache
Test it by pinging win7vm in your Terminal:
ping win7vm
42 notes
·
View notes