
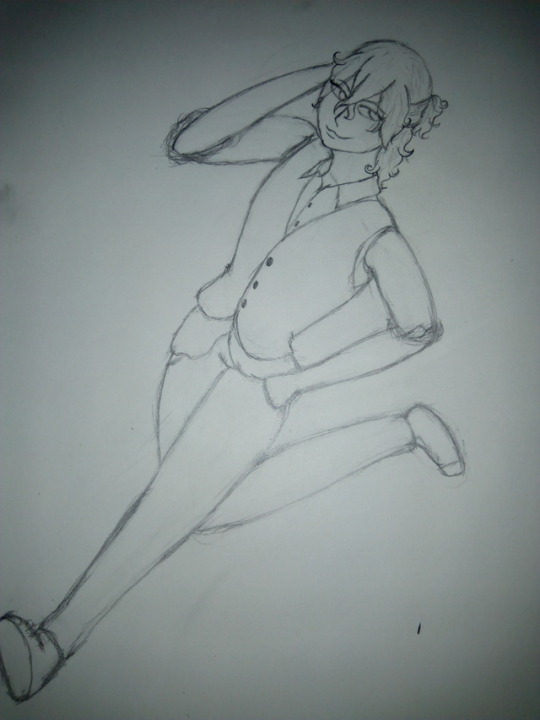
Last Seen Blogs

sexyguzellerx
Benvesen

generalmoonpolice
Untitled

angela-allen
ANGELAALLEN

avoutput
AVOutput

how-can-you-even
The Alice?
Text
Ayo! I start a terato blog.
It's @bigwolfslady . Go check it out. I'll be talking about my monster boys on there.
2 notes
·
View notes


Text
Easy and accurate perspective!
Have you ever started drawing one-point perspective and then realized that even though you could draw the diagonals, you still had no idea where to place objects for relative size?
Welcome to my tutorial for drawing some very easy, flexible, and mathematically accurate perspective grids!
Here’s an example of the kind of thing I do with this.
So you’re just starting to draw your perspective grid on its own layer. You can change the transparency this way and draw things over it later. There’s the horizon line and the vanishing point in the middle.

But when you go in to draw your verticals and horiontals, what is this?? How do you break up the “hall” into even spacing? Just measuring equal sections won’t work.

Luckily there is a trick. Find the point that is ½ of the way to the center.

Then, imagining that point is the bottom of your page, find the halfway point to the center again. Keep repeating the process.
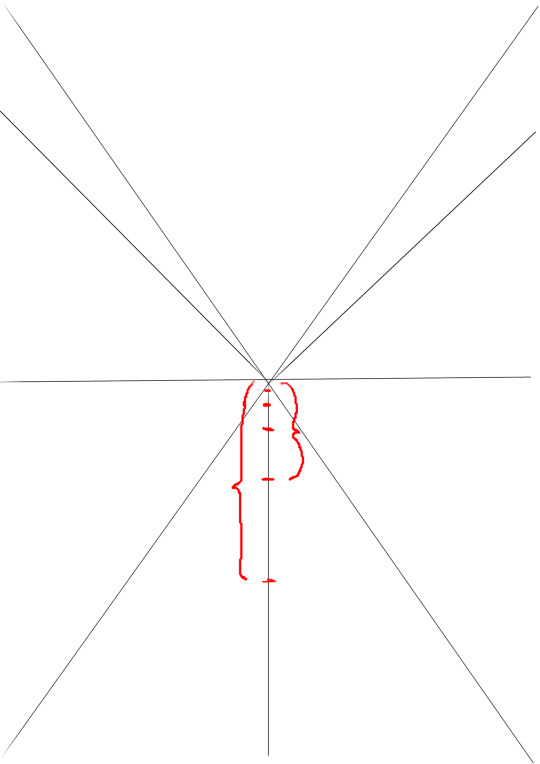
That’s right, each time it shrinks by ½. I call this the ½ perspective method, but if you guessed that it’s the Fibonacci sequence you’re absolutely right. I just didn’t want to say that in the title because the idea of math might scare off some people.
Anyway, use these points to place your verticals and horizontals.

Look at how even that is!

But!!! What if you want to space things a little more closely than that? Well guess what!! It works with literally any other fraction you can think of!
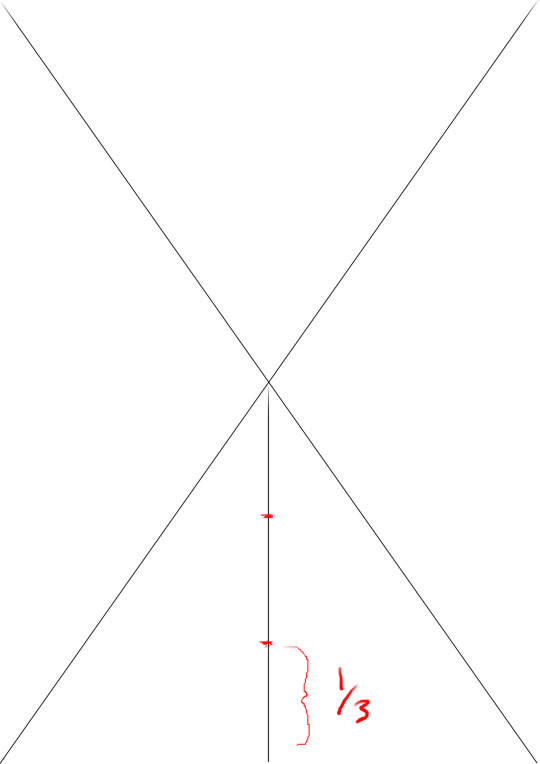
again simply measure the space between your last mark and the center.
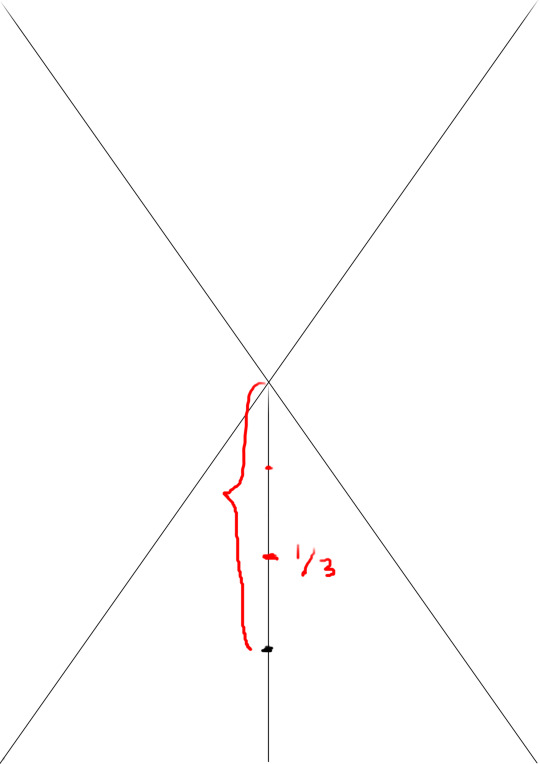
What a finished grid in 1/3 perspective looks like!

And the kicker? You don’t even have to put the vanishing point in the center. You can put it anywhere else on the page and the same rules still apply!
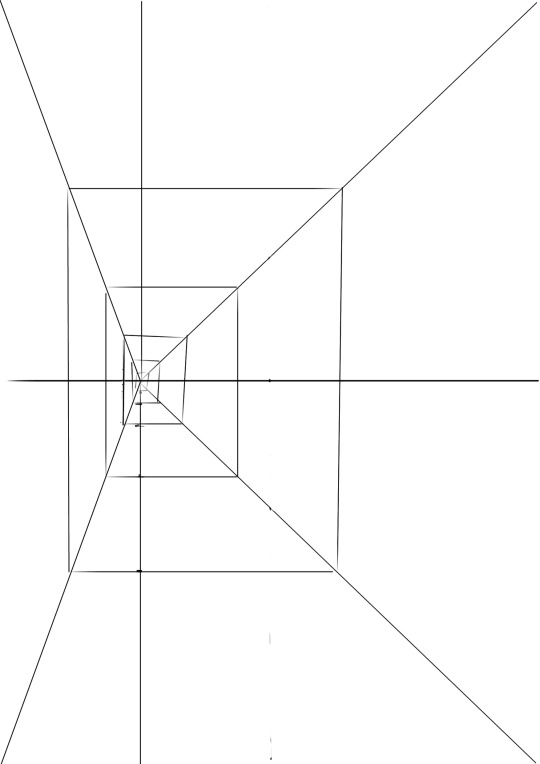
See folks this is the sort of thing they should be teaching us in Drawing 1. But for some reason no??
Anyway, I recommend making a bunch of these in different spacings/angles/rotations whenever you’re bored and saving them so that you can just import them later when you need them.
Hope you enjoyed this tutorial!
2K notes
·
View notes
Photo


@ripwitch
Horns are tough since they’re complex 3D shapes that often overlap. Until you’re comfortable with them I’d highly suggest always looking up ref pics of the type you want or try to buy a set so you can move them around to see how perspective distorts them.
30K notes
·
View notes
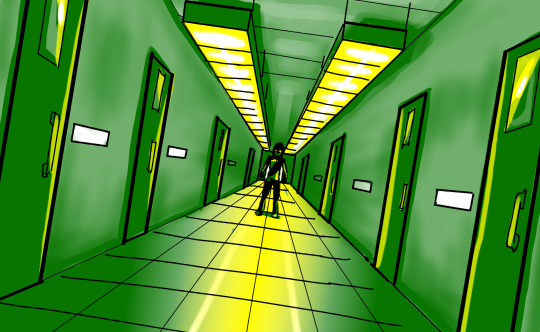
Photo


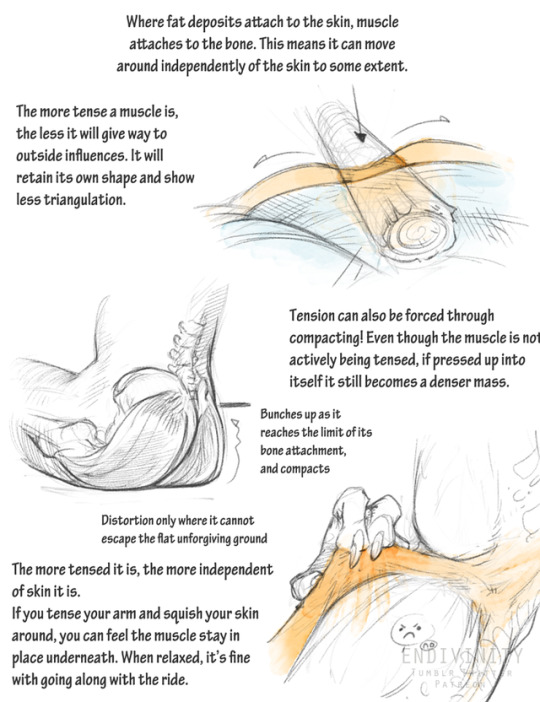
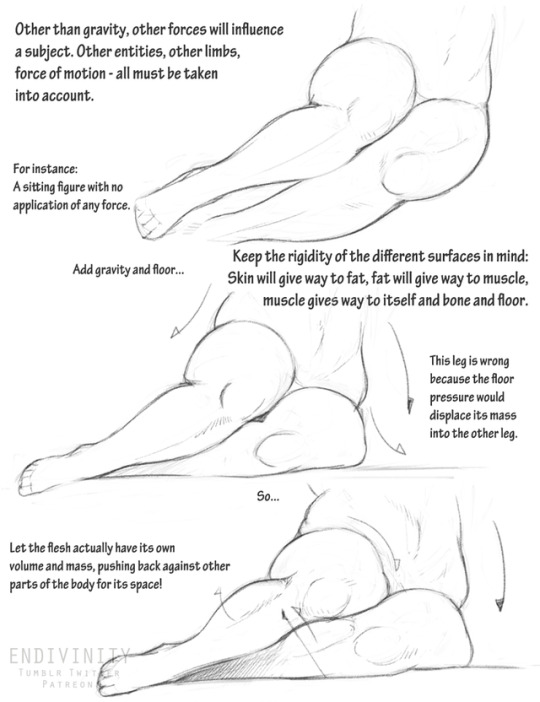
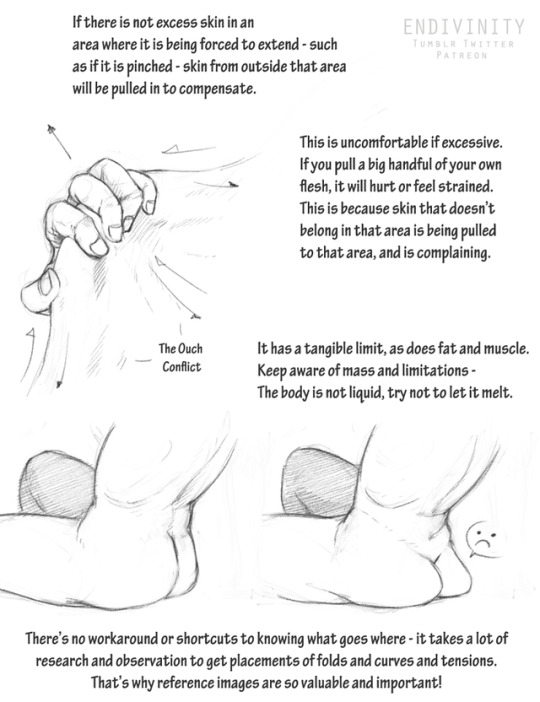
A tutorial on meatspace I made for my patrons last year! Making things exist in the same space believably is a difficult process, but hopefully this will help drawing softbodied subjects interacting together a little easier!
36K notes
·
View notes

Photo

First time drawing the undead and was inspired by HK comic book covers I grew up with, so here’s an edgelord WeiWuXian
2K notes
·
View notes


Photo


2016-2017 IKEREV BIRTHDAY ILLUSTRATIONS by TCB
source


3K notes
·
View notes
Photo


the 2016-2017 birthday illustrations posted on (yamada shiro) yamashiro’s twitter~
2015-2016 version | 2017-2018 version

2K notes
·
View notes
Text
He.

12 notes
·
View notes
Note
hi! i love your art, it's so pretty ♥ and you draw feet really well, do you have any tips?
thank you a lot anon!! ( /)w(\) here, i made a few notes about the steps i follow while drawing feet:

^ that’s assuming you’re not drawing from a low perspective, as if the camera was on the floor or something like that!
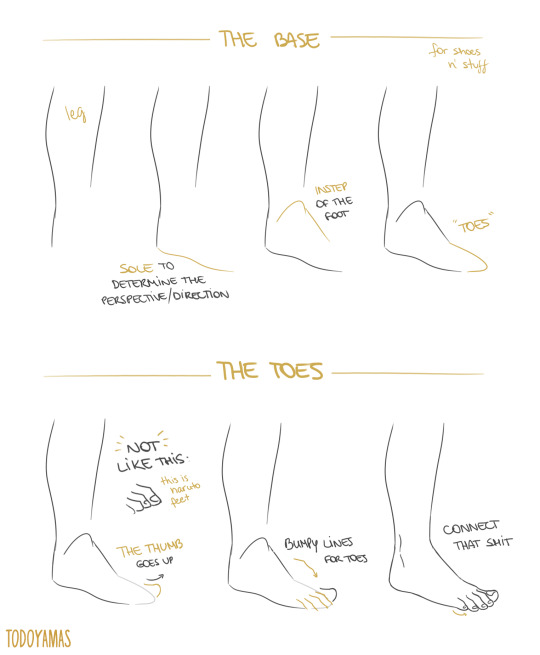
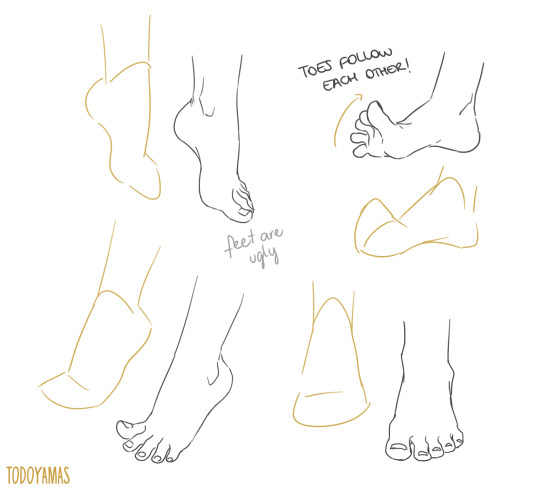
SORRY MY HANDWRITING SUCKS and i’m not really good at explaining things bc i don’t really follow a guide and stuff so yeah BUT I HOPE IT WAS HELPFUL TO YOU!!
92K notes
·
View notes