
Don't wanna be here? Send us removal request.
Statistics
We looked inside some of the posts by techartifices-blog and here's what we found interesting.
Average Info
Notes Per Post
0
Likes Per Post
0
Reblog Per Post
0
Reply Per Post
0
Time Between Posts
16 hours
Number of Posts By Type
Text
2
Last Seen Tumblr Blogs


Fun Fact
Tumblr has a 66 index score for customer satisfaction in the US.
Text
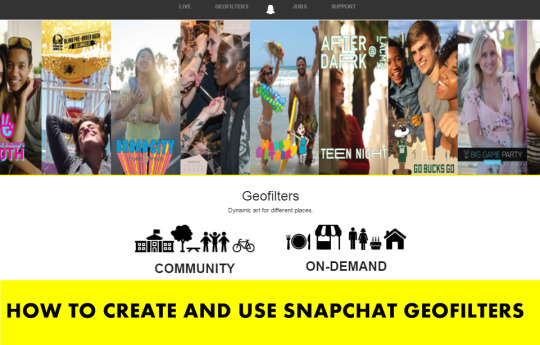
Snapchat Geofilter List and How to Create Snapchat Geofilters On-Demand
Snapchat Geofilters is among one of the most popular features on the Snapchat application which is available on both Android and iOS devices. In case if you are just getting into Snapchat, a Snapchat Geofilters is nothing but a type of different filters or special overlays for Snaps that can only be accessed in certain locations – available based on your geolocation. Tagging status and photos with a hashtag or a location in social networking sites like Facebook, Instagram and Twitter is quite simple unlike Snapchat. Snapchat’s version of letting people know where you are or hashtag is its Geofilters. Read on for Snapchat Geofilter List 2018, Snapchat Geofilter Master List, Snapchat Geofilter Map and a complete guide on How to Create Snapchat Geofilters or How to use Snapchat Geofilters On-Demand.</ br>
It was first launched on July 2014 for public places, Snapchat Geofilters becomes one of the coolest Snapchat features,the ability to add a Geofilter to an image or a video, a special stamp that is added with the name of a place, business or event. Due to the growing demand for business or private events, Snapchat again on February 2016 rolled out On-Demand Geofilters with more features which include a paid version. The graphics, which usually feature sketches of landmarks, are geographically restricted, for instance a user of the content-sharing app would need to be within Hollywood, for example, to access one for that neighborhood. Snapchat users are pretty obsessed with them, and hundreds of millions of photos with these Geofilters are viewed daily, the company says.
Snapchat geofilters offer a unique way to bring focus to special places you believe deserve recognition such as your favorite schools, parks, zoos, campgrounds, historical sites – the list can go on and on. If you have a place you think is worthy of a Snapchat geofilters and you really want to make one yourself, check out our guide on how to create, submit and get your geofilter accepted on Snapchat.
SNAPCHAT GEOFILTERS
You want to use Snapchat Geofilters to promote an event or your business? In this post we will explain how to create the three types of Snapchat Geofilters – Normal Geofilters, Community Geofilters and On-Demand Geofilters and explore several ways you can use them for your events or business.
Read: How to Use Snapchat Stickers including 3D Stickers How to Create and Add Friends With a Snapcode
HOW TO ACCESS SNAPCHAT GEOFILTERS:
If you have location services and Filters enabled, Snapchat Geofilters appear at thousands of places around the world. After you take a Snap, swipe to see what’s around! You will need to enable Filters in your Snapchat Settings, as well as, location services on your device for this feature to work. To enable location services for Snapchat on your device follow the instructions below:
For iOS devices: Go to Settings > Privacy > Location Services, and turn on for Snapchat
For Android devices: If you are on Android device, Go to Settings > Location > Turn on
To enable Filters on Snapchat:
Open your Snapchat App and then Go to Snapchat Settings Tap ‘Manage’ under Additional Services Toggle or turn ‘Filters’ on
To add a Geofilter to your Snap:
Swipe on the Snap preview screen to check out which ones are around you now.
SUBMITING A COMMUNITY GEOFILTER
According to the Community Geofilter guidelines businesses are not currently eligible for Community Geofilters. Draw your geofence thoughtfully, it should only cover the relevant area. Keep it local and do not cover an entire country, state or province. You only select a public place, neighborhood, landmark, venue or other location where people are likely to gather and send Snaps.
Regarding graphics, all graphics must be 100% original. Logos or trademarks are not allowed in Community Geofilter and the only exception is that Snapchat will accept are college and university logos submitted by authorized officials from those schools. No photographs, hashtags and it should be visually compelling.
Before submitting, you will need Adobe Illustrator or Photoshop to create your design. If you don’t have these tools you can get the Snapchat Geofilters site (https://www.snapchat.com/geofilters/submit.html). The download link is located on top of the screen. Also download one of the templates for Photoshop or Illustrator provided on Snapchat’s website. When you have all these things then you are technically ready to begin creating your first geofilter. In case if you don’t have some skills with these tools, work on developing those first before trying to submit a geofilter or get someone to design it or you. As we said before, Snapchat is looking for unique and artistic representations, if the submissions contain poor graphic design or only simple text, probably won’t be accepted by Snapchat.
1. Head over to the Snapchat Geofilters website (https://www.snapchat.com/geofilters) and click Community.
The PNG file must be saved as Web-optimized (i.e., save the file for the Web when you’re done) and transparent with a width of 1,080 pixels and a height of 1,920 pixels. The image size must be under 300KB. Leave some empty space, 149 pixels worth, above and below the image. Snapchat also recommends avoiding images that create borders around the entire screen. However, borders that cover a corner of the screen or one side are acceptable. 2. Before hitting “Create Now” button make sure you read the instructions and guidelines on creating a Community Geofilter which is available at the bottom of the screen. 3. Click Next button 4. Now choose the geographic area you want your filter to be available in, and upload an image asset by clicking on the Plus sign as in the screenshot below;
5. Click Submit. Once your image is uploaded and provide some basic information like why is this location important to you? including your name and email address. Once entered you are ready to hit the Submit button.
Submission are reviewed in the order in which they are received by the Snapchat team. If your submission is selected or not Snapchat will email you to let you know. If you have not received a response, it may be because Snapchat have not yet reviewed your submission.
If your Geofilter was not approved it could be for a variety of reasons, including Unoriginal Content, Not visually interesting or useful enough, Not relevant or too broad, Insufficient description, Incorrectly formatted (PNGs), Non-transparent background. Remember, you can resubmit your Geofilter after remedying any issues.
ON-DEMAND SNAPCHAT GEOFILTERS:
Unlike free Community Geofilters, On-Demand Geofilters allows Brand logos and trademarks to put on filters. Businesses and individuals alike can purchase On-Demand Geofilters. Whether it’s for a house party or wedding, a coffee shop or campus-wide event, Geofilters make it easy for Snapchatters who are there to send your message to friends. Snapchat offers two types of On-Demand Geofilters: one type is for Personal and another one is for Businesses. The area for on-demand geofilters must be between 20,000 and 5 million square feet and they cannot be active for more than 30 days. Currently On Demand Geofilters are available only in the UK, US and Canada, but Snapchat is looking to expand this very soon.
Personal Geofilters: In Personal Geofilters you cannot include any branding, business marks, business names, business logos, or other promotional content for a business or brand. They’re meant to be used for birthday parties, graduations, and other personal celebrations.
On-Demand Geofilters for Businesses: On the other hand, are those that promote brands or businesses and must include a business name, which will be shown to let Snapchat users know that your business submitted the filter. Unlike Personal Geofilter, On-Demand Geofilters for Businesses can use branding, business marks, business names, business logos, or other promotional content for a business or brand. They cannot, however, use photographs of people, URLs, phone numbers, emails, drug-related content, or content that you don’t own or have the authorization to use.
SNAPCHAT ON-DEMAND GEOFILTER COST
The price of an On-Demand Geofilter depends on a few factors including the size of the Geofence and how long you want it to run. Currently, Snapchat is offering these filters at $5 per 20k square feet, per hour.
To see the exact cost please go here and enter the dates, times, and area you’d like for your Geofilter to be active. Please note that Snapchat at this time we only accept MasterCard, Visa, American Express, and Discover for payment.
HOW TO CREATE ON-DEMAND GEOFILTERS FOR SNAPCHAT
To to Create On-Demand Geofilters for Snapchat follow the step-by-step instructions.
1. First go to the On-Demand Geofilters page (https://www.snapchat.com/on-demand) and click on the Create Now button.
2. Next Click Create Now to begin the process. 3. Please note that you will be asked to log into your Snapchat account. Then you will be given the option to download templates for your On-Demand Geofilter and to read the submission guidelines.
4. Download the ready to use template or upload your own image file if know how create it with your own. After downloading and unzipping the file, you’ll be presented with a dozen Adobe Photoshop templates. Pick the one that suits your needs and start designing. 5. The templates provided by Snapchat are offered in both PSD and AI format. You can use these templates to quickly create your On-Demand Geofilters if you have Adobe Photoshop or Adobe Illustrator. 6. The image should be in a PNG file format that is 1,080px wide by 1,920px tall with a transparent background that is under 300KB in file size. You can do this without Photoshop or Illustrator. Make sure the dimensions of your image are exact. 7. Remember to leave enough free space available so Snapchatters can still see their image content behind the design. Snapchat suggest you only use the top or bottom 25% of the screen – remember Snapchatters want to see themselves in a selfie. 7. Now add a shape at the bottom to create a banner effect to make it more appealing. 8. Add visual elements to your image template. 9. Then add text or upload a logo representing your business. 10. Include a logo or text that represents the location of the filter. 11. You can download the image as a PNG file. Save your Geofilter from the File menu using ‘Save>Save for Web (Legacy)’ and select the ‘PNG-24’ preset from the drop down menu. Make sure you save your image as a PNG so the background is transparent. It’s important to create a Geofilter with a transparent background so Snapchatters’ photos and videos can still be seen when the Geofilter is in use. 12. Head over to at: https://geofilters.snapchat.com and Upload your Geofilter using the On-Demand Geofilters tool available on the page.
14. Select dates and times that you’re confident will cover the time you want the Geofilter to be active. An On-Demand Geofilter cannot be active for more than 30 days.
15. Draw your geofence thoughtfully. It should cover the relevant area. Snapchat will use location information to determine if a Snapchatter is within your Geofilter geofence.
Unfortunately, sometimes location information accuracy isn’t exact, so it’s important to create a geofence that doesn’t use too many points or thin areas. An On-Demand Geofilter must be between 20 thousand and 5 million square feet. At this stage, you’ll get a pricing estimate based on the size of your fence and the date range you’ve selected. For more information about the types of location information we may use please visit Snapchat Privacy Policy. 16. Enter your payment information and submit your Geofilter. Remember to choose whether your On-Demand Geofilter is personal or business. However, this selection does not seem to affect the amount you’re charged for your geofilter. 17. Now sit back and relax, you just submitted an On-Demand Geofilter! Snapchat team will be in touch with you by the next business day. 18. To check the status of your order, you can click on My Orders to review your order status and also you can cancel your order if necessary. Please note that, at this stage your Orders cannot be updated. You’ll soon get an email from Snapchat to let you know your filter has been approved or disapproved.
Please note that once submitted, you cannot make any changes to your order. If you want to make any changes you will need to cancel your order and place a new order.You can cancel your On-Demand Geofilter by logging in and selecting “Cancel.” If your On-Demand Geofilter is canceled before it runs on Snapchat, you’ll receive a full refund. If your Geofilter is canceled while it’s running, we’ll provide a partial refund so that you’ll only pay for the time your Geofilter ran.
If your Geofilter is rejected by Snapchat they will provide you a reason as to why it was rejected. You can make adjustments and resubmit your filter as a new order. Name your geofilter something that you will remember–that way it will be easier to understand your results.
If your submission for business, you must have the necessary rights and permissions to include any business names, marks, logos, or trademarks in a Geofilter. You must include a business name. Enter your business name on the purchase page and keep in mind that Snapchat may display the name, as entered by you, to let Snapchat users know that your business provided the Geofilter.
SNAPCHAT GEOFILTER LIST OR SNAPCHAT GEOFILTER MASTER LIST
Here’s a compilation of Snapchat Geofilter List or Snapchat Geofilter Master List known across the world.
Copenhagen Geofilter, Copenhagen, Denmark. Fitzrovia Geofilter, London, England. Geneva Geofilter, Geneva in New York. Columbia Heights Geofilter, Columbia Heights in Washington D.C. Boston University Geofilter, Boston in Massachusetts. Ghent Geofilter, Ghent in Belgium. Big Ben Geofilter, London in England. Baltimore Geofilter, Baltimore in Maryland. Disney Resort Geofilter, Anaheim in California. Munchen Geofilter, Munchen in Germany. Brussels Geofilter, Brussels in Belgium. Logan Square Geofilter, Chicago, Illinois. Ann Arbor Geofilter, Ann Arbor in Michigan. New York City Geofilter, New York, U.S.A. Canary Wharf Geofilter, London in England Chinatown Geofilter, New York City, New York. Richmond Geofilter, Richmond, Virginia.
Buckingham Palace Geofilter, London in England. Fort Lee Geofilter, Fort Lee in New Jersey. Lincoln Park Zoo Geofilter, Chicago in Illinois Antwerp Geofilter, Antwerp in Belgium. Martha’s Vineyard, Martha’s Vineyard in Massachusetts West Minister Geofilter, London in England. Hyde Park Geofilter, London in England. Paris Geofilter, Paris in France. Mexico City Geofilter, Mexico City, Mexico. Sacramento Geofilter, Sacramento, California. Broadway Geofilter, New York City in New York. Piccadilly Circus Geofilter, London in England. Times Square Geofilter, New York City in New York. Manhattan Geofilter, New York City in New York. Blue Line Geofilter, Chicago in Illinois. Lewes Geofilter, Lewes in England. Cape Code Geofilter, Cape Code in Massachusetts. Flatiron Geofilter, New York City in New York. Little Italy Geofilter, Chicago in Illinois. South Wark Geofilter, London, England. Downtown Detroit Filters San Francisco Filters Downtown LA Filters Downtown Toledo Filters Downtown Toronto Filters Downtown Chicago Filters Las Vegas Filters
As one of the fastest growing social networks, with over 100 million daily active users, Snapchat can help you engage your audience. On-Demand Geofilters are no doubt a great way to get your business in front of current customers and prospects. Another great feature of Geofilters is that you can view metrics of Geofilters once they are live and view key insights such as how many people have viewed your Geofilter and how many have sent a Snap using it.
Have you tried Snapchat Geofilters? Or used it for business? Let us know what your experience has been.
0 notes
Text
How To Use Tinder Without Facebook In 2017
If you have landed here then I believe you are already aware about the amazing features of Tinder as it is one of the most popular online dating apps. The app asks you to login with Facebook before you can use Tinder. However, it has been noticed there are many users who wish to use Tinder without Facebook. If you are of those who do not wish to link Tinder with Facebook then keep reading this tutorial.
There could be many reasons to avoid linking Tinder with Facebook. One of them is you don’t want your facebook friends to notice you on Tinder. In such cases you have options to use Tinder without Facebook. However there is no official feature of Tinder which lets you to use Tinder withour fb but I am going to share a work around with you to use tinder without linking it to facebook.
1 Why Tinder Asks You To Login With Facebook ?
2 Reasons To Avoid Linking Tinder With Facebook
3 How To Use Tinder Without Facebook
2.0.1 Contacts Sync
2.0.2 Auto Syncing Of Facebook Photos
2.0.3 Privacy Compromise
3.1 Improve Facebook policies
3.2 Create new Facebook account
3.3 Change settings of Tinder App
3.4 Try suggesting Tinder to change their policies
3.5 Final Words
3.6 FAQ
Why Tinder Asks You To Login With Facebook ?
Tinder asks you to login with facebook as soon as you download the app. One of the obvious reasons is it extracts all of your basic information including your profile picture from FB directly and saving your time.
There are many good souls who like to create multiple fake profiles on Tinder which will create nothing other then junk. To overcome this linking your account with Facebook also helps Tinder to authenticate your identity. Tinder may never extract sensitive information from Facebook but still for few obvious reasons you would still not want Tinder to ask you to login using Facebook.
Reasons To Avoid Linking Tinder With Facebook
While we have reasons for linking Tinder and Facebook, we also have reasons against this linkage of social media account. There are several facts which we can take into account and when analyzed closely, it will reveal that linkage of Facebook will violate privacy of individuals in many ways. Given below are some facts on why you can avoid linking Tinder with Facebook account.
Contacts Sync
Auto Syncing Of Facebook Photos
Privacy Compromise
First of all, when you accidentally allow Tinder to view your contacts it gets access to see all your contacts, and finds the match for you amongst them. You certainly do not want such thing to happen because it will not be fair enough if you give information about your contacts to a dating app.
Another important concern for Tinder user is the automatic syncing of photographs. There are certain pictures which you do not want the other person, especially the one who would be approaching you for date, to be able to see. In order to have a look at person and see how he/she looks, there is no need to display all the pictures of you. Thus, many users are not comfortable in sharing all their Facebook pictures on a dating app.
Since, your Tinder is linked to Facebook there are chances your dating history will become public if either of the two accounts gets hacked. This would be unfair on the part of user because these are sensitive things and nobody would like if their dating history goes public.
Well, there is no official feature in Tinder to use it without linking with your Facebook account. But, there are certain ways in which you can protect your privacy policy on Tinder.
How To Use Tinder Without Facebook
Given below are methods in which you can use Tinder without Facebook. Take a proper look at these methods.
Improve Facebook policies
Create new Facebook account
Change settings of Tinder App
Try suggesting Tinder to change their policies
This is one of the easiest ways. You can simply increase the privacy of your Facebook account, and not much of your details will b leaked out on other apps. Also, you will be able to restrict Tinder from having access to all the details.
You can log in to your Facebook account and tap the lock icon.
Then you must click on the option ‘See more settings.’
You must navigate to app section and click on Tinder.
Then you can change the ‘App visibility’ option to ‘Only me.’
By doing this, Tinder will not be able to post your activities on Facebook.
Another simplest way of using Tinder without Facebook is by creating a new profile. We are not encouraging fake accounts, but you can use one account to carry on your normal Facebook activities, and other one for Tinder. You can add limited stock of photos which you are comfortable in sharing on dating sites. Also, you can add only those details which you would like other people to see on dating sites. This is the most convenient option for anyone who is not willing to link their Facebook account with that of Tinder. To create a new account you have just follow these steps.
First of all you have to open Facebook signup page where you can easily create a new Facebook Account. Before this you have to create a new email address which will be different from your previous account. Now fill all of your personal details like your name, email address, password, gender and others.
After successfully creating an account login with your new Facebook account on Facebook.
Now open Tinder app and tap in the settings of the app.
Logout your Tinder account if you have already login.
Next you have to click on login with Facebook button.
Now tinder will automatically link to your account and you can easily access Tinder without using your Facebook account.
As of now, we only knew about changing the privacy settings of Facebook to protect your information from going out. But, there are few changes you can make on Tinder app also to avoid the interference of social media on your dating history. Just follow the steps given below.
You can launch Tinder app from your Android or iOS device.
Go to settings and deselect the option that says “Show me on Tinder Social.”
In this way, you can limit your Tinder activities from showing up on Facebook.
This is not really a sure shot solution to your problem, but you can try doing this. There are many people who are unhappy about Tinder being linked to their Facebok account. So, you can tap on ‘Contact’ option and suggest Tinder authority to allow Tinder login without Facebook. Once they receive the suggestion from a number of people, the authority and app developers will definitely consider revising their rules and regulations.
Final Words
Hence, we have already mentioned that there is no such official hack using which you can prevent Tinder from linking with your Facebook. By following the above mentioned methods, you can certainly limit the amount of interference Tinder makes on social media account. So users are suggested to follow these steps only to protect their privacy and not for any other purposes. The above mentioned steps are totally legal unless the individual gets indulged in unhealthy activity.
FAQ
I just changed my Facebook profile picture but it’s not showing up as the new picture on Tinder, how can I change it?It is one of the most common problem for Tinder user. Since your Facebook and Tinder accounts are linked but it doesn’t share any data to each other. Both apps are completely separate so you have to do changes on both Facebook and tinder apps. If you want to change profile picture of your Tinder account you have to go to tinder account. Click on profile tap and here you can easily change profile picture of your Tinder account.
I just created a fake Facebook account to sync with Tinder but when I go to login, Tinder wants to use my real account and not my fake account. How do I use my fake account?Most of the people use the tinder app but they don’t want to use their real Facebook account. All of you must want to hide your identity from Tinder app. For this you have to create a Fake Facebook account and then login to Tinder with your new Fake account. If you have already login with your real Facebook account on Tinder you have to follow these simple steps to hide your identity and use Tinder without Your Facebook account.
How do I fix the “Whoops! An error occurred while requesting a token for SMS Verification. Please try again.” error message?This is another common error when you are verifying your Facebook account with your Tinder account. To remove this error you have to follow these simple steps on your smartphone.
First of all you have to logout of the tinder app from your phone.
Now go to settings and find Facebook from apps option. From there you have to delete the Tinder permissions linked with your profile.
Now logout from Facebook so that you will get start a fresh process where nothing is synced.
Open your Facebook app and login with your new Facebook account.
Next to open Tinder app on your smartphone and click on login with Facebook to sync the apps.
Now all done. Use your fake Facebook account to use Tinder.
First of all try force quit and get out if the app. It would reset the SMS verification tool on your smartphone.
If in case the above method not work, try to uninstall and delete Tinder from your phone and settings of the Facebook account. Tap on Facebook settings and delete the sync between Facebook and Tinder app.
Now again install Tinder app and again try to login and sync both account. Make sure you are login with your Facebook account you want to link, not from your personal account.
0 notes