tetkata11
Tetkata11
The sims 4, Shining Nikki, Life Makeover
108 posts
Don't wanna be here? Send us removal request.
Last Seen Blogs
partylite-et-lr-by-xavier
Partylite et LR by Xavier François
minoxetine-blog
cracked.

jjmaster
Wish List
ghostiehouse
Ghostie House
Text
⭐Vitamin Cheat Sheet⭐
Vitamin A: Vision, immune system, skin health.
Vitamin B1 (Thiamine): Energy metabolism, nerve function.
Vitamin B2 (Riboflavin): Energy production, skin health.
Vitamin B3 (Niacin): Cellular energy production, skin health.
Vitamin B5 (Pantothenic Acid): Metabolism, hormone production.
Vitamin B6: Brain function, mood regulation.
Vitamin B7 (Biotin): Healthy hair, skin, and nails.
Vitamin B9 (Folate): Cell division, DNA synthesis.
Vitamin B12: Nervous system, red blood cells.
Vitamin C: Immune system, collagen synthesis.
Vitamin D: Bone health, immune function.
Vitamin E: Antioxidant, skin health.
Vitamin K: Blood clotting, bone health.
Calcium: Bone and teeth health, muscle function.
Iron: Oxygen transport, energy production.
Magnesium: Nerve function, muscle relaxation.
Zinc: Immune system, wound healing.
Potassium: Fluid balance, nerve function.
Iodine: Thyroid function, metabolism.
Selenium: Antioxidant, thyroid health.
31K notes
·
View notes
Text
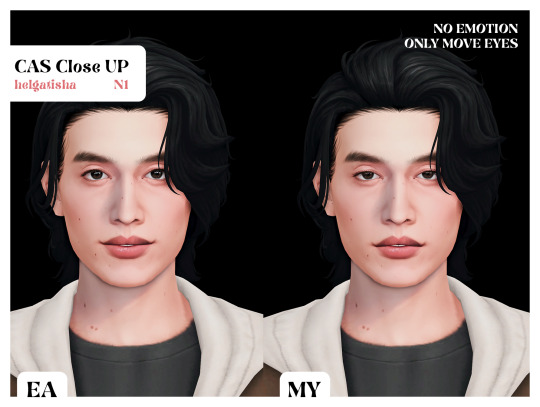
CAS Close Up
Download: boosty | patreon | simfileshare
This mod removes the emotions on the sim's face while you create it. They will no longer have raised eyelids, eyebrows and a smile.
This mods is animations override so it may collide with other CAS close up mods.
info cas close up:
all genders
all occults
all ages
To install, place the .package file into your mods folder.
Don't be scare that your sim's may not look the way you are used to seeing them. Because now you see them as you should initially.
ea animation / my animation

please read and respect my tou
DONATE ❤
2K notes
·
View notes
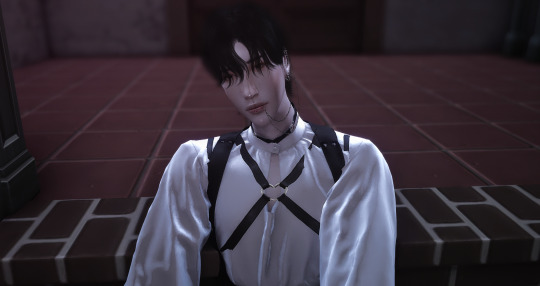
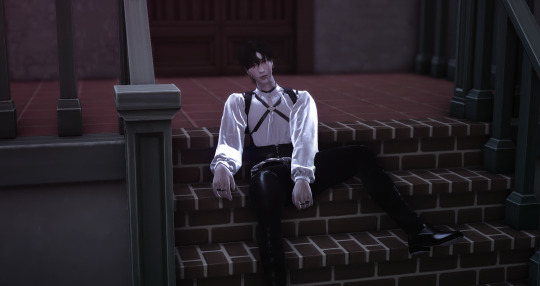
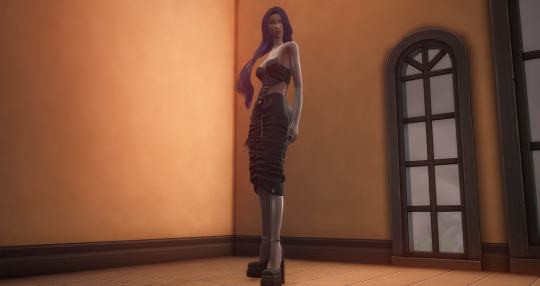
Photo


My first cc
dragon eyeliner - 15 swatches
Thanks to all cc creators!
1 note
·
View note
Video
CAS TUNING - CONTROLLED POSITION MOD v1.1
✅ GENERAL DESCRIPTION
Full control of your sims position in CAS in all categories;
No more automatic position change when choosing СС or its swatches;
Now the character will stand in the position in which you put him: face, back, sideways or face, it’s only up to you to decide;
Custom fingernails position (individual pose for females and males)!
✅ FILE TYPES (install only one version!)
CAS TUNING - CONTROLLED POSITION MOD v1.1 - position control only.
CAS TUNING - CONTROLLED POSITION MOD v1.1 custom fingernails position - with custom fingernails position!
✅ INSTALLATION INSTRUCTION
Just put in your mods folder one of the versions;
Doesn’t conflict with mods I’m aware of.
📑 ADDITIONAL INFORMATION
In the video I used GENTLE CAS LIGHTING MOD and Stand Still in CAS. To make all of these mods work, just put it in the SAME folder.

MORE INFO AND DOWNLOAD
Thank you a lot for all your support 💘!
6K notes
·
View notes
Photo


Something I don’t think a lot of new creators know; you can test your weights in blender by moving the rig, you don’t need to wait to test them in CAS :)
this way you can edit your weights and fix issues much quicker and easier!
so with this mesh I can see that I’d like my weight transition to be smoother on the skirt, which will make the mesh deform much smoother when the sim is walking.
this took me ages to figure out when I was first getting started, hope this helps someone!
368 notes
·
View notes
Text
Tutorial: How to bake shadow map for CAS items
NOTE: This tutorial is using a dress and an accessory coat as examples. The method applies to any CAS item that you want to bake its shadow, including necklaces, glasses, hats, rings, bracelets, shoes, clothes of course, etc.
The shadow map draws shadow on the underneath meshes (which could be either a sim body mesh or another CAS item) covered by your item. It adds depth and makes your item a little more realistic.
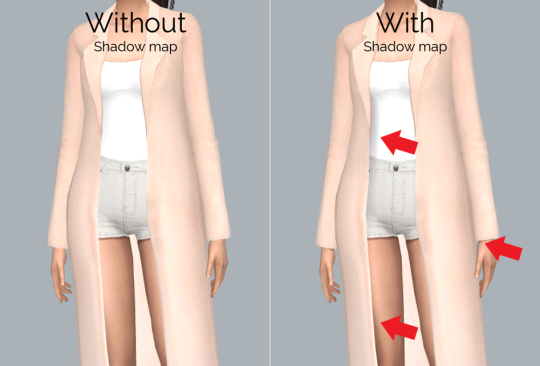
Instead of hand-painting it, this tutorial will show you how to use the blender baking to create a ‘correct’ shadow map with just a few steps.
Please read my tutorial of How to bake shadow for clothing to make sure you understand the basics of baking. This tutorial will not cover some similar steps again.
NOTE:
This method only works on the mesh where it’s able to tell the sim body from the clothes or accessory you’re making.

It does NOT work if your item is painted on the sim body mesh.

Pt. 1 Your mesh includes part of the sim body mesh, e.g. tops, pants, dresses.
1. Open your mesh with blender, go into Edit Mode and select the faces which belong to the sim body.
2. Press P key to separate the selected faces into a new mesh.
Step 1&2 isn’t a must. But it makes the baked result easier to edit later.

3. Select the sim body mesh you just separated.
4. Open the World panel with a globe icon.
5. Check Ambient Occlusion and Environment Lighting.
6. Increase Environment Lighting to 2.5. This will make the shadow darker and shading of the mesh itself (which we don’t need) lighter.
7. Set Samples.

8. Add a new image in 1024x2048 in the UV/Image Editor and Bake in Ambient Occlusion Mode.

9. You should get something like this.

10. Save the baked image.
Pt. 2 Your mesh does NOT include the sim body mesh, e.g. necklaces, acc clothing.
11. Open your mesh in blender, expand the rig tree and select the sim body mesh where the shadow should appear. Note you need to highlight the Eye, the Arrow and the Camera icon to be able to select and bake an invisible sim body mesh.
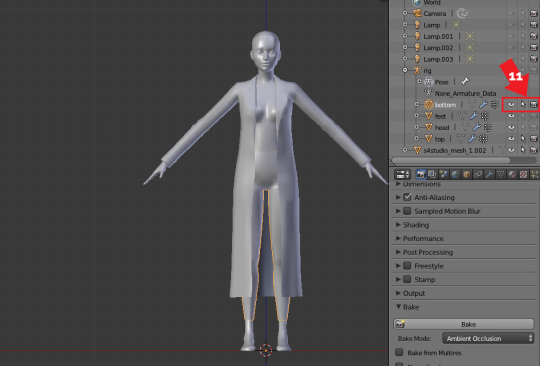
12. Bake the selected sim body mesh the same way above. And save the baked image.

13. Open the baked image in Photoshop. Add a new layer under the baked image and fill in with pure white.

14. On the baked image layer, use the Eraser tool or Select tool to get rid of the shadow that is not from the item you’re making, e.g. between the fingers and legs.
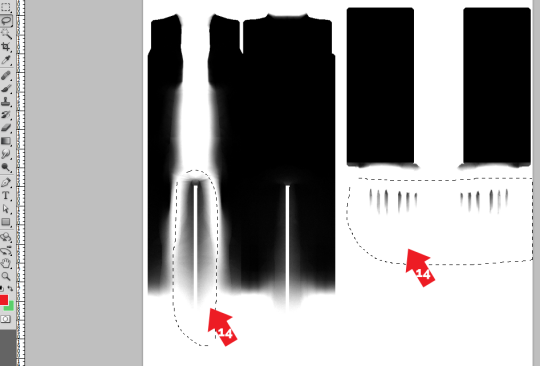
15. Reduce the Opacity of the shadow layer. You might need to test in game for a few times to get a best result. Please never use a pure black shadow map.

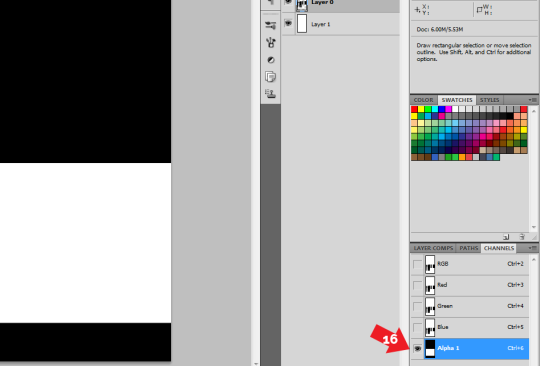
16. In the Channel panel, add an alpha channel. Fill with pure white on the area where your shadow is. The range doesn’t need to be accurate.
17. Save your shadow map into a .dds file and import into your .package file with sims4studio. Test it in game.

1K notes
·
View notes
Text

The Sims 4 Reflection Emulation For Blender 2.9 and UP
(DOWNLOAD HERE)
Making a specular texture in The Sims 4 is probably the most misunderstood process of the game's engine. Making a combined map without a guidance from the company that composed it can be a bit of a nuisance!
For a long time, creators would pick the color from EA's objects and go for that, but there's a method to everything!
This Blender file i created lets you emulate the reflection system of The Sims 4 FULLY and in real time.

How does this work? Basically, the RED channel of the specular map determines the roughness of the reflection, the GREEN channel determines the opacity of said reflection, the BLUE channel determines the roughness of the sun highlight and the ALPHA channel determines the opacity of the sun highlight.
In the blend file, you can either use the RGB color wheel to pick a shade to use on your specular texture project, or test the specular map itself!
I will provide some useful presets you can pick from for common materials as well!
1: Shiny metal with polished surface: FFFF00 / Alpha 100%
2: Thick rubber with porous surface: 0064FF / Alpha 100%
3: Shiny polished wood: DB9282 / Alpha 50%
4: Shiny plastic: FF84B3 / Alpha 100%
5: Rough plastic: B3C5EB / Alpha 65%
6: Very matte while still realistic: 0B34FF / Alpha 70%


1K notes
·
View notes
Text
Tutorial: Normal (bump) map baking in Blender
Long post alert.
Normal mapping, or Dot3 bump mapping, is a technique used for faking the lighting of bumps and dents – an implementation of bump mapping. It is used to add details without using more polygons. - Wikipedia

For the Sims 4, normal map is best for details like fabric creases. Here’s an example showing the same mesh and texture with/without a normal map. I’m using a solid color as texture map so you can see the bumps clearer.

“Why not draw the details on the texture map”, you may ask. Because details generated from a normal map behave like real bumps and react to the light, which feels more realistic. While the texture map by itself doesn’t react to the light and looks flat. The difference is quite obvious from this in-game screenshot below.

Step-by-step guide after the cut.
NOTE: This method requires a high-poly mesh and a low-poly mesh. It won’t work if you only have one mesh.
Keep reading
2K notes
·
View notes
Video
tutorial for how to update default eyes to be enabled for infants
you can use this same method to enable makeup & skin details** for infants, too.
the code i’m placing in the value box is 000030FE which was found by @fivesims (thank you, ur a GENIUS), & this code will enable something to be applied to all ages, infants included.
if you want to take eyes/makeup/a skin detail and enable it for just infants & toddlers, but keep it unavailable for all other life stages, the code you would need to use is 00003082 which was also found by fivesims!
if you want to make it so that something is available for only infants, i’m pretty sure the code you should put in is 00003080 (which i was proud of myself for being able to find myself haha)
** (i wouldn’t be surprised if it worked for other things that don’t have meshes, too—maybe eyebrows, teeth, etc, especially if they’re already able to be applied to toddlers—but i haven’t tested that for myself, so i can’t confirm or deny.)
3K notes
·
View notes
Text
How To: Auto Height for Shoes
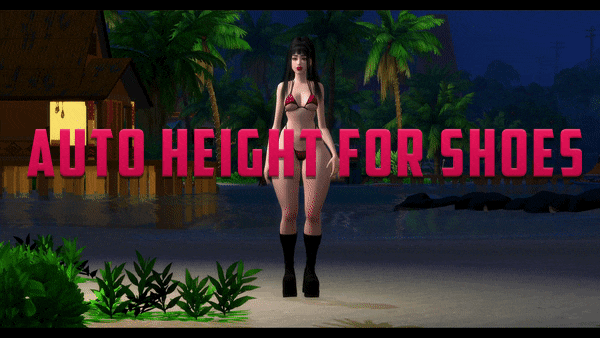
Haiii! As promised, here is the tutorial to make it so your custom shoes no longer require a shoe slider!
Thank you to the bestie who took the time to pick through Madlen's package file to figure out how it worked. And of course, thank you to Madlen who did the majority of the work figuring out how to make this possible in the first place!
♥ Tut below cut ♥
~~~
Set Up Your Blend File:
We're going to add a plane that will act as the mesh for the SlotRay which will allow for you to adjust the height of your shoes!
Open your blend file that contains the shoes your wish to adjust.
In the 3D View, press Shift + S and in the menu, select “Cursor to Center” In the 3D View, press Shift + A and in the menu, hover over “Mesh” then add a plane.
Now size this plane down as small as you can get it. You don’t want this plane visible in game.
Double check to make sure the plane has not moved from the center!! Your sim won't be centered in game if it has! If you see that it's moved:
Press "Shift + S" and click "Cursor to Center".
Then Select your plane and press "Ctrl + Shift + Alt + C", click "Origin to 3D Cursor".
Press "Ctrl + Shift + Alt + C" again and click "Geometry to Origin".
Navigate to the “Object data” tab and under “UV Maps” add a new one then name it “uv_0”.
Next, navigate to the “Scene” tab and under “S4Studio CAS Tools” set the cut number.
Depending on how many cuts your shoes have, you’ll want to adjust this number. For example, if your shoe has 3 cuts (0000, 0001, 0002) then this plane would have a cut number of 0003.
Since my boots only have one cut, I will put the number as 0001.
Now select your shoes and enter Edit mode. Select a face/vertice/edge on the very bottom of your shoes. Look to the panel on the left side of the screen (if it’s not open, press “N”). Under “Transform”, note down the number next to “Z”
After that, save your blend file under another name so you can distinguish which is which. I’ll name mine “Boots_3_Height Cut”
youtube
~~~
Add a New Cut to your Package File:
We're going to add an additional cut in your package file for the new plane!
Open Sims 4 Studio, make a new package file for your shoes and import them.
Go to the Warehouse tab and select your LOD 0, it will be the geometry with the largest file size. Sometimes you have to close then reopen the package to see the geometry.
Duplicate this geometry and in the box that pops up, change the last character of the “Group”. It can be any number or letter as long as it’s not the same as the duplicated geometry. On the duplicated geometry, note down the Group, Instance & Type values.
Find the “Region Map” and next to “Entries” click “Edit Items”. Add a new entry and in the “Layer” box, type the number you used for your cut. Since I used the cut number 0001, I will type 1.
Keep the “Region Type” as “Base” and move to “Models” then click “Edit Items”. Add a new Model entry and paste the Group, Instance & Type values you noted down before. Save and close each box.
Find your “CAS Part”, this is your swatch.
If you have additional swatches, it is a good idea to remove them and add them back once you are finished with this process.
Scroll down until you find the “Lods”.
Click “Level: 0” and next to "LOD Models", click “Edit Items”. Add a new entry and paste the Group, Instance & Type values again.
Save & close each window and return to the Warehouse.
youtube
~~~
Adjusting SlotRays:
We are now going to edit the SlotRays for the new cut which will adjust the height of the sim for your shoes!
Return to the new duplicated Geometry and in the “Data” tab, find the “SlotRay Intersections” and click “Edit Items”. Add a new entry and find the “OffsetFromIntersectionsOs” box.
You'll want to change ONLY the middle coordinate number. That will be the height of the sim.
You want to take the “Z” coordinate that you noted down from blender and replace middle coordinate number. If the number you wrote down is negative (i.e -0.01234) make it positive (i.e 0.01234).
In the “SlotHash” box, change the value from “00000000” to “FEAE6981”. This is the hash for the b__ROOT__ bone in the Sim's Rig.
Save and close the dialogs then return to the warehouse. Next, reimport your mesh and save your package file. You can now test your shoes in game!
youtube
Please keep in mind:
You have to do this for every LOD of your mesh
You can freely replace the mesh of your shoes and adjust the height since the cut with the plane has the SlotRay data
Animations may be off since EA hasn't made the game to support taller sims
CAS windows may move slightly if your sim is using poses/animations where they are leaning to the side. This won't affect gameplay
I recommend using Helgatisha's Stand Still in CAS mod to make sure your sim is absolutely centered
Hope this helped :)
1K notes
·
View notes


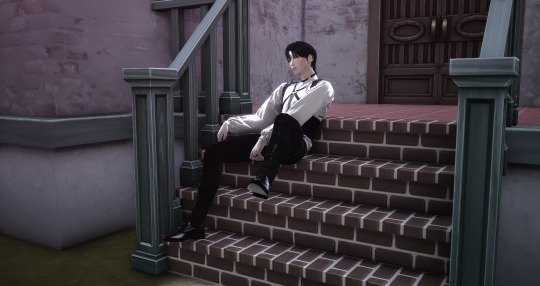
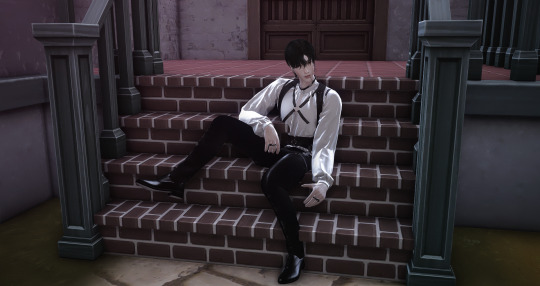
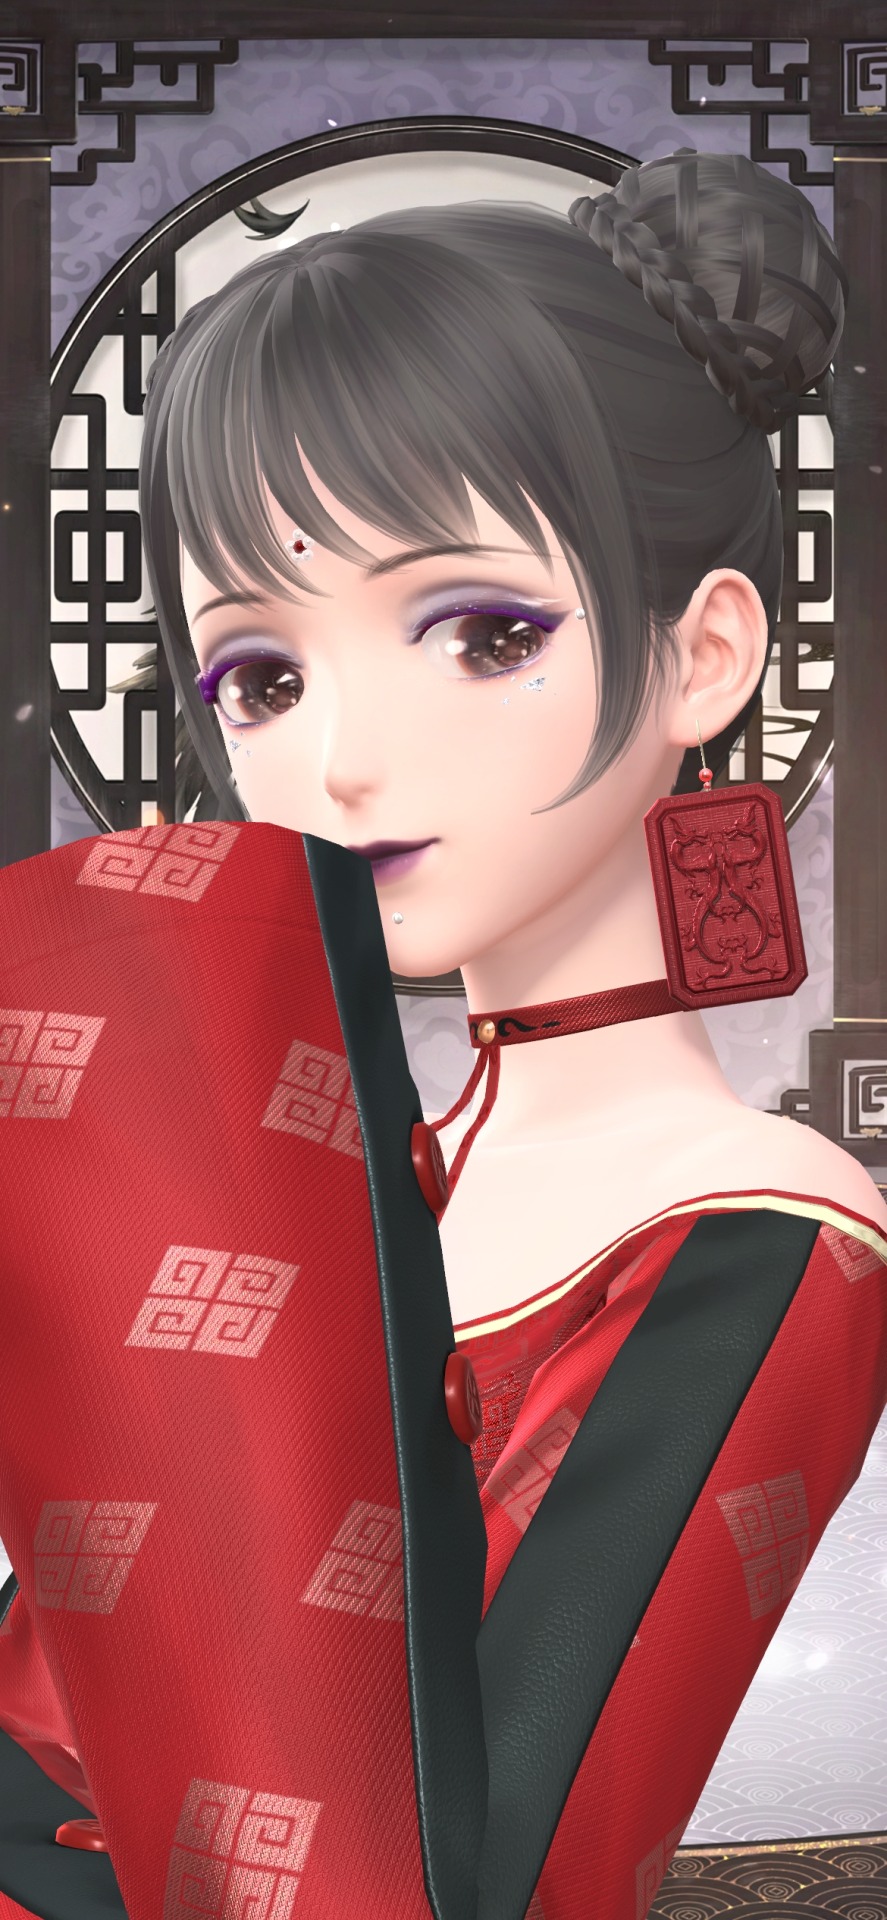
Photo
My first cc
dragon eyeliner - 15 swatches
Thanks to all cc creators!
1 note
·
View note