thecivicproject-blog
TheCivicProject
Make 2018 2009 Again
13 posts
Don't wanna be here? Send us removal request.
Last Seen Blogs

mallows7
Mallows

city-tickles
Tickling in the city

reisgayer
Rei's Ultimate Platinum Gei

cajungoddess
Thee Cajun Goddess🏳️🌈

spookyharmonychopshop
Untitled
Text
Revisiting the Cameras
Since I did my initial review of the cameras, we’re added a 3rd camera to the fray. This 3rd camera is a cheap Amazon camera that I didn’t expect much from. What I liked about this camera was that it included a backup camera. Since one of my vehicles did not have a backup camera, this was a good opportunity to add one. The rear camera includes a lead which allows you to wire to the reversing lights. The camera has a 3″ display on the back and looks similar to a standard digital camera. With the reverse light wired up, the entire display will show the backup camera when the car is in reverse. Once back in drive, the display will show both cameras. This is the front camera on the Peztio Camera. Initially, the video I originally posted was pulled by Youtube because the sound is so good on the camera, that Youtube felt the song playing on the radio violated Youtube’s policy on published content. This is my backup video that doesn’t have a song playing in the background, but it is on a brick street which is why the video is unsteady.
youtube
While the picture quality is somewhat degraded after dark, there is still plenty to see. The vehicle’s headlights are sealed beam fixtures that aren’t too terribly bright and are a number of years old. Still you’re able to see a lot in front of the vehicle.
youtube
The rear camera naturally has a reduction in picture quality. Particularly at night much like the front camera. The sound is crazy in my opinion considering the camera with the mic is mounted on the outside of the car. The sound you’re hearing comes from the speakers mounted on the other side of the hatchback.
youtube
youtube
When all is said and done I’m still favoring the Kenwood that was put in the Honda. However, for the price the Peztio is not too shabby of an alternative especially if you don’t have a backup camera in your car. I’m not a fan of the Uniden.
0 notes
Text
The Key to Sprucing Up!
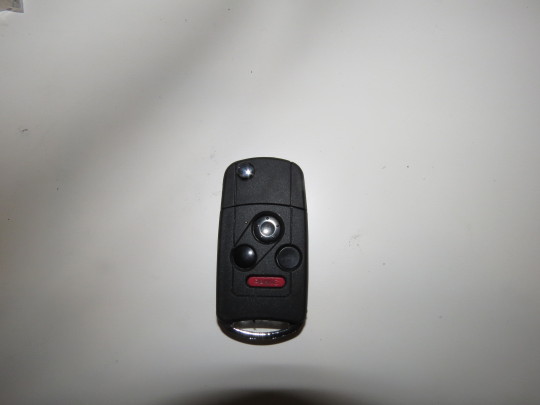
One of the first things that drove me crazy when I first bought the Civic was the MASSIVE key that Honda used (still uses?) for their cars. Very early on, I picked up one of these flip keys. Auction. These things are dirt cheap, and quality-wise they last “okay” I bought the center key in the photo below in 2012 and had already replaced it once before. By 2018 however, the center key was worn and broken inside (and yes I know the buttons are worn off, but I have the functions memorized at this point) and I had to hit the key against something hard to get it to flip out. So it was time for a fresh one.
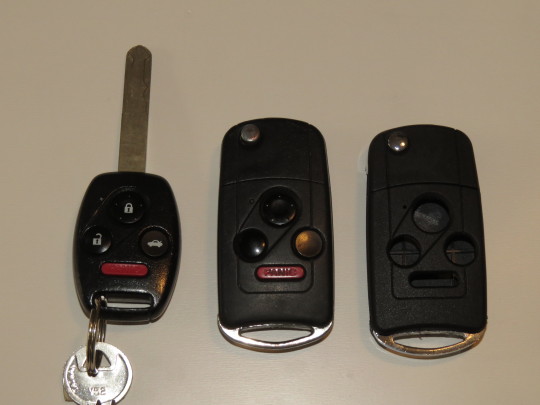
Above & Below: OEM Honda key (left), my 6 year old flip key (center) my new key (right)
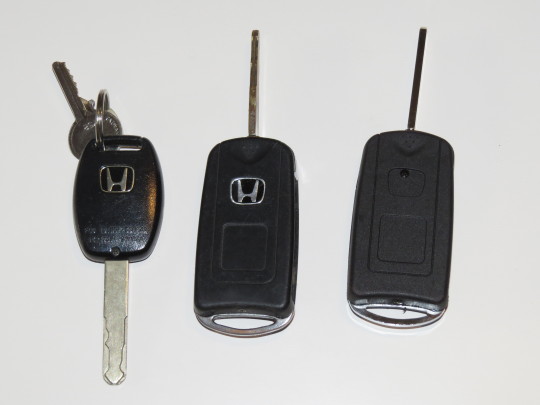
So its my understanding that only 4 keys can be programmed into a given car at a time, so I had purchased another key (not quite a valet key, but a key that didn’t have any buttons) and had Honda program it to my car and cut the key blade of the flip key. From there, I removed the immobilizer chip from this key and put it in the upper right corner of the flip key shown below. From there, it was a matter of swapping the buttons from my working Honda key into the flip key. The result was one regular Honda Key, one valet key, and one flip key.
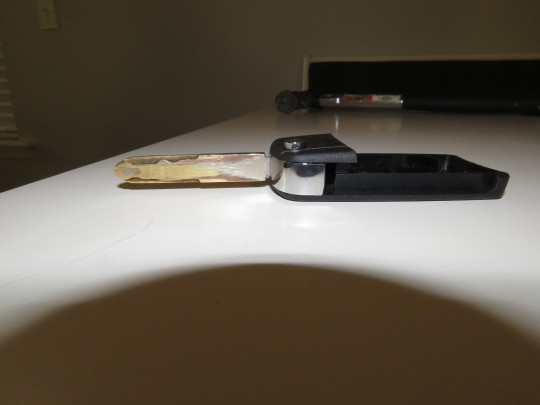
Above: The worn, broken old flip key.
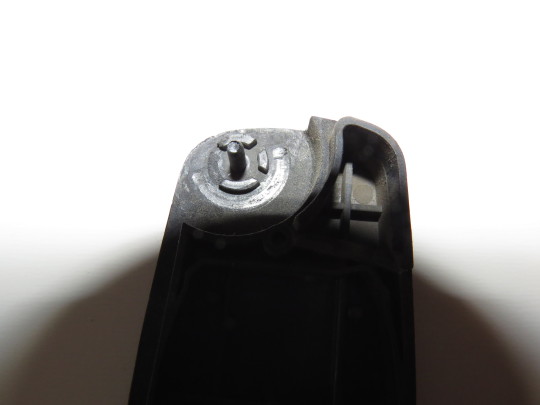
Below: The new flip key frame with immobilizer chip on in the upper cubby.
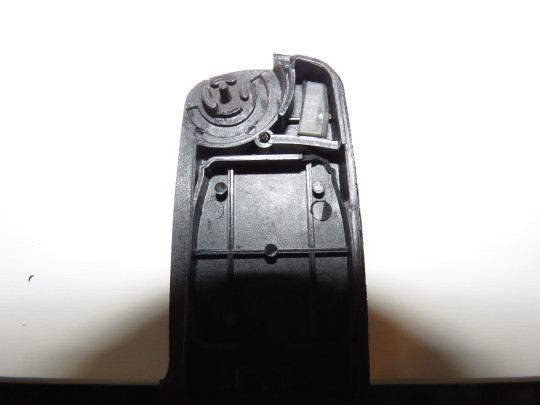
Since I already had the key cut from the old flip key, I pulled the key blank pin and swapped it onto the new flip key. Unfortunately to have to put the immobilizer chip on the top part of the flip key which means opening the top part. Since the top part has the spring and button, its easily the hardest part of the job to get it all put back together. Be very patient with this part. Once you have the whole thing together, you can put the screw in the back and do a couple good test flips.
At this point, you’re able to drop the buttons into the bottom portion of the key. From there you can button everything up and you’ll have a completed flip key.
0 notes
Text
The Biggest Pieces
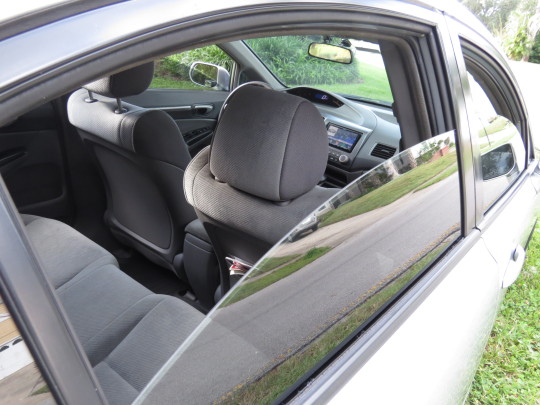
Weeks ago, when I finally had the overhead console done, I looked up at the ceiling of my car to find a giant hole where the old Homelink module sat and an outline of an overhead console that was too deep to fit in the ceiling of my car. I had a running reminder of what wasn’t working. I needed to get a new headliner in the car and fast.
For years I’ve used the same headliner guy for my cars. This guy was known for quality work, prompt service and excellent prices. I had actually budgeted this project based of his prices, so sure I would be using him for this project. How could I not? He’s been in business and working on my family’s car for 20 years. That’s just the thing. Time does us all in. I pull up the number give the guy a call and after the 5 or 6th ring I hear “sorry we’re no longer in business”. I just couldn’t believe it. I checked the reviews and the latest one was 6 months old. I had a friend drive by and check out the shop, and he reported back it was deserted. That’s it, he was gone.
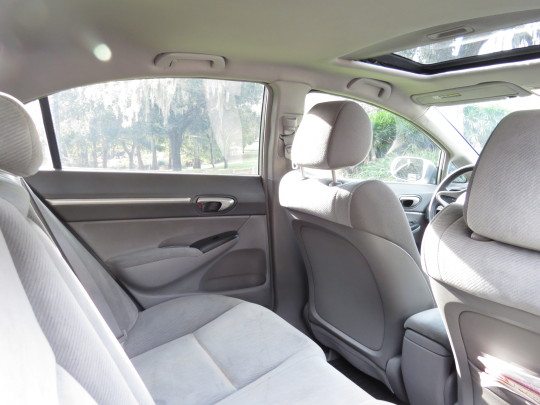
I quickly moved to find another shop. The estimates poured in: $325, $300, $275. A far cry from the $75 my old guy would charge. I asked my neighborhood association for any referrals. I ended up with a gentleman about a half mile from my house that I was told did good work and he does tint. I decided to take the time to drive over there and see if the guy will cut me a deal. After a conversation with the gentleman, he quoted me $179 for the tint and $150 for the headliner and he offered two windows on my wife's car for another $60 for good measure. I had already anticipated the tint costing $200 to $220 so I felt like this was a no lose situation. After discussing price and tint level with the shop. Over the course of three days (because my guy had to order the headliner fabric) I ended up with a finished product I’m very happy with. A few more finishing touches with the car and I can call this a complete project!

0 notes
Text
Lights/Camera/Action
So before I started doing The Civic Project. A cousin of mine had given me his Uniden DC-1 dash camera. He had at this point been frustrated with the fact that there were wires everywhere and how intrusive the camera was with everything on the dashboard. While I somewhat agree with him, the issue with me is more the fact that the camera itself doesn’t stay under its own power very long. The car I have has a continuous power outlet that stays on even when the car is off. This means that I have to unplug and plug in the dash cam each time I start the car. Its annoying, but I’ve manage to get some decent footage of people driving like idiots all over town. That’s not the purpose of this post though.
The purpose of this post is to provide a comparison of the videos from either dash cam. The dashcam that I got for TheCivicProject is the Kenwood DRV-N520. The nice thing about this camera is that the whole unit is controllable from the head unit on the car. I can replay video, and it uses the vehicle’s information to determine where and how fast my vehicle was traveling. The dashcam is also how the head unit determines the forward collision warning.
In the comparison below, both cameras actually have pretty clear video (both claim to shoot in 1080p), and you’re able to grab license plates of the other vehicles with both cameras depending on how fast each vehicle is moving. You can definitely make out what kind of vehicle each is. I suspect the Kenwood’s picture quality is hampered by the dirty windshield in the Honda and the steep raking of the windshield as well.
youtube
Above: Uniden DC-1 during the day and into some rain.
Below: Kenwood DRV-N-520 during the day.
youtube
The situation is more drastic when it gets dark outside. The Uniden camera has a tendency to cut out pretty frequently because it doesn’t sense movement. It doesn’t sense the movement because it’s not very good picking up dark objects. I will say when the Uniden is under LED streetlamps, the picture quality improves. That’s just a product of the brighter ambient lighting. As it relates to sound, the Uniden has a significantly better microphone that the Kenwood. I’ve not driven the Kenwood in any kind of significant rainfall to determine how that camera works in the rain, so that video will have to come later.
youtube
Above: Uniden DC-1 at night.
Below: Kenwood DRV-N-520 on the same road at night.
youtube
For its price the Uniden is a pretty decent camera especially considering the price. It’s worth picking up, just be aware of its limitations at night.
0 notes
Text
Living with the project
It’s been a little over a month since the start of the project and while I was waiting to do updates to the overhead console and adding the headliner and tint, I worked on little ticky tack stuff with the car.
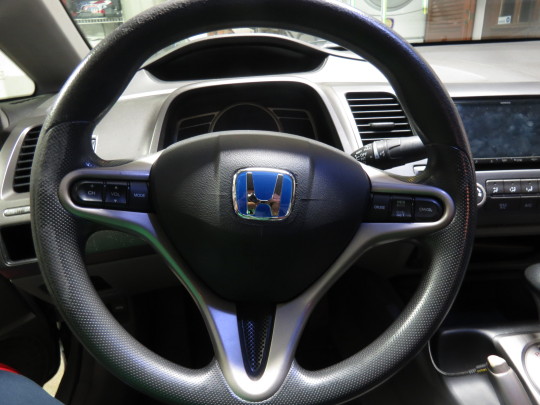
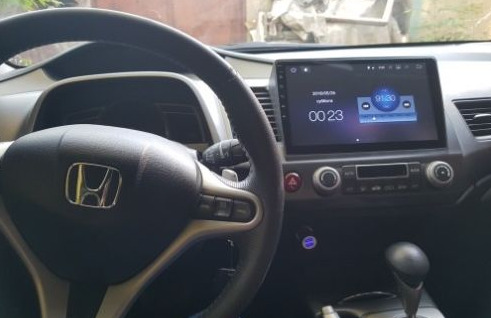
I upgraded the emblem on the steering wheel since the old one was looking really rough. I hope to add a steering wheel wrap before too long since chunks of the wheel do come off in my hands.
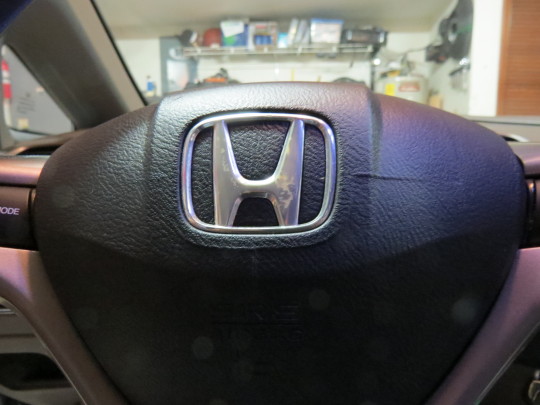
Above: The OEM Honda emblem showing signs of deterioration
Below: The $18 ebay replacement.
Toward the bottom of where the gear selector is located, I originally had routed the USB ports around the outside of the center console and sort of let the USB cords dangle there. I picked up one of these http://a.co/d/9k4SgPd from Amazon and drilled through the front of the center console. This gave me a very nice OEM look for the USB ports. The added bonus was that the factory USB from the car still worked! I originally planned to have a USB and an HDMI port, but when I realized that the factory USB worked without me replacing it, I decided I also didn’t need the HDMI after all. I new have 3 USB ports in the car, two of which can rapid charge the phone.
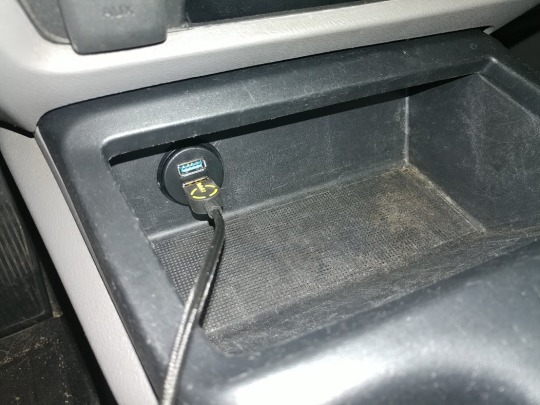
Nice clean USB port
Other pieces that I’ve been working on is trying to properly align the reverse camera. When I installed the reverse camera originally, I misaligned it ever so slightly that the adhesive that holds the camera on has slowly been turning the camera down and toward the passenger side. The result is that the camera isn’t facing quite what I’d want to see. I’ve been cutting sections of double sided tape I happen to have laying around and I hope to get it aligned better than what it is right now.
As far a using the system as a whole. There are a few odd things like not being able to pull up the eco gauges using the shortcut buttons on the wheel while I’m in the Android Auto menu, but otherwise this system is awesome. I’ve been able to text in traffic by using the talk to text feature. I got an estimate for the headliner all through the hands free. I’m able to play Spotify and I’m testing my Sirius XM while I have it. The mic being hidden in the overhead console doesn’t seem to miss a beat. I’ve been very happy with the system so far. Next week, I’ll go into a comparison of the dash cams for my two cars. Hopefully by the end of the month, we’ll have a headliner and tint installed.
0 notes
Text
I guess I’m doing this all at once (Part 3)
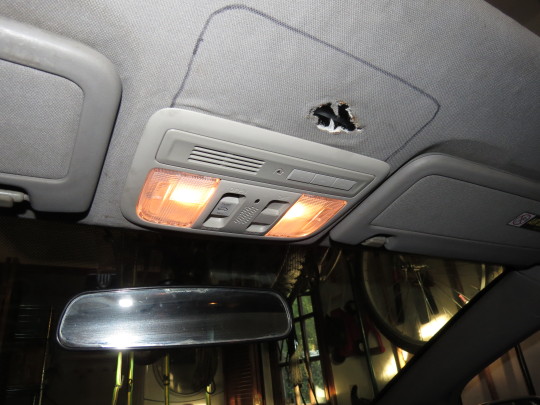
When I first started taking the dashboard apart, I started with the items directly overhead. I installed the dashboard camera and the mic in the headliner. The dashboard camera was easy enough to hide as it sat right behind the rearview mirror and the wire tucked itself right into the headliner. The mic in the meantime had dangling down from the dome lights because I had big plans to hide the microphone. I ran the wires down the A pillar, behind the dash and worked on getting the rest of the car together which I explained in Parts 1 & 2. I figured this would be the easiest part of the project. I was wrong.

The overhead as it was put together in 2014 and how it stayed until this week.
I was inspired to install Homelink in my 8th gen a few years ago, and knowing full well Honda had an overhead console available for the Accord and Odyssey that included a sunglass holder an Homelink I was comfortable that the above picture was a decent temporary solution, even if it didn’t look all that centered.
https://www.8thcivic.com/forums/diy-honda-civic-interior-style-mods/245816-diy-oem-sunglasses-holder.html
I had seen this tutorial and figured if ever in the future, I came across a sunglass holder, I’d be able to cut out the portion of the headliner with the Homelink and you’d never know there was a hole punched in the headliner. Fast forward to today.

The original replacement overhead console on the bottom right with the mic just above it.
I came across an overhead console from an Accord with just the mic and no garage door opener. I was able to secure the Homelink opener from ebay, and I figured I’d simply remove the Honda mic and place the Kenwood’s mic in the slot where the Honda mic would have resided.
https://www.civicx.com/threads/oem-homelink-install.4683/
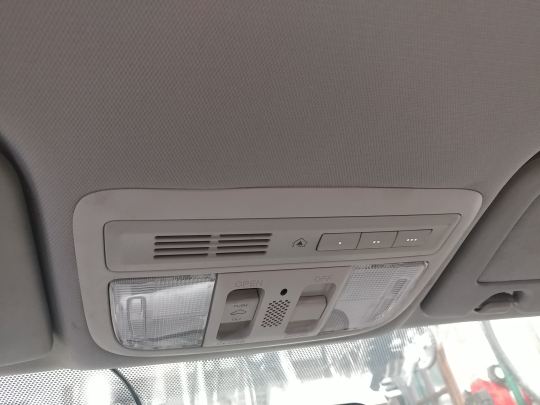
I used this tutorial as an aid as it helped explain the wiring, and I had the Honda service manual in case I ran into problems. Other than a bizarre issue, I’ve had with the ground and the button illumination which hopefully won’t be a long term issue, the wiring was relatively smooth sailing. What I wasn’t prepared for was the overhead console not fitting. In my infinite wisdom, I had created a cutting template and traced the console on the ceiling. Before I cut the headliner, I decided to try to rough in the overhead console above the headliner. With the sunroof, there is a large black bar about 3 inches wide that forces the overhead console forward about an inch. That inch is just enough that the overhead console with the sunglasses would fit, but not the sunglasses AND the Homelink/mic. The end result was me having grab the overhead console without the sunglasses holder from a 10th gen civic and swapping the Homelink/mic into that. Given that Honda changed its gray shades slightly between 2009 and today, I have a slightly lighter grouping of switches than what originally was in the car.
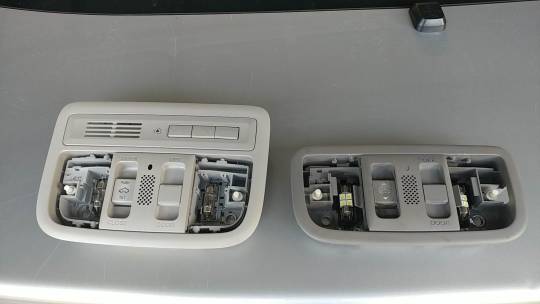
Honda’s two shades of gray. The Civic 8th gen console on the right and the 10th gen console on the left.
With the original Homelink gone and replaced with the new one, I’m left with a marker outline of the console I really wanted in the ceiling and a quarter sized hole where the old Homelink sat. The good news is, the next part of this project had always been to replace the headliner as the ceiling is sagging all behind the sunroof.
The console in place with the outline of the Accord console in black.
In the meantime I’ll be reminded of how lucky I was that I wasn’t a complete idiot and cut out the whole thing.
0 notes
Text
The Centerpiece
I thought I would take a week off before concluding Part 3 of how this whole car came together and talk a little bit about why I decided to get the unit I ended up with. I mentioned on the 2nd post that I was seriously looking at the Pioneer 2440NEX. While a great radio in its own right, what turned me off was the cheap feeling of the buttons on the radio. I coupled that with the fact that the Pioneer had a resistive touchscreen and its closest competitor, the Kenwood 9904s being capacitive, as well as a price reduction, and the decision got easier.
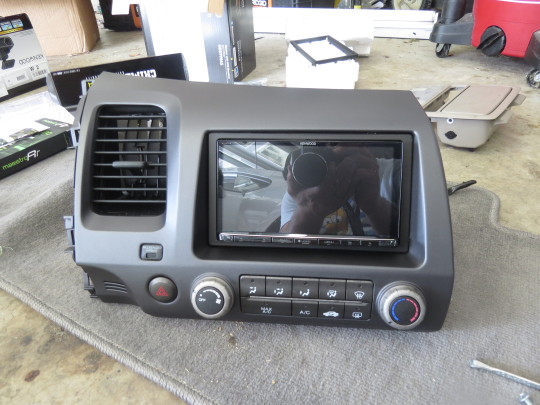
Put together and ready to go in the car
So the Kenwood 9904s had a price reduction because the 9905 was replacing it. While the 9905 has 720p vs the 480 in my radio as well as wireless Android Auto, I felt like these two features didn’t justify the $200 increase in price. The 9903 which preceded it was cheaper and did have an HDMI port in the back, but I had heard bad reviews on the firmware for that radio, and I just didn’t see myself streaming videos in a Civic. If I had headrest monitors maybe I would have done it, but the 9904 has a roundabout way to get HDMI if I really wanted to add it in the future.
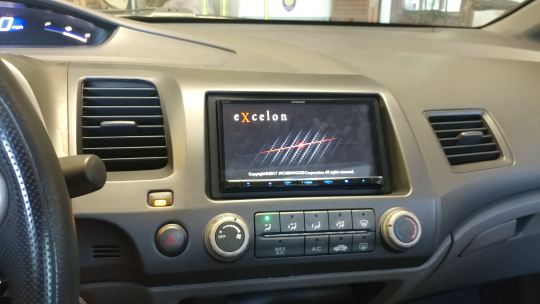
The factory loading screen. Didn’t stay that way for long.
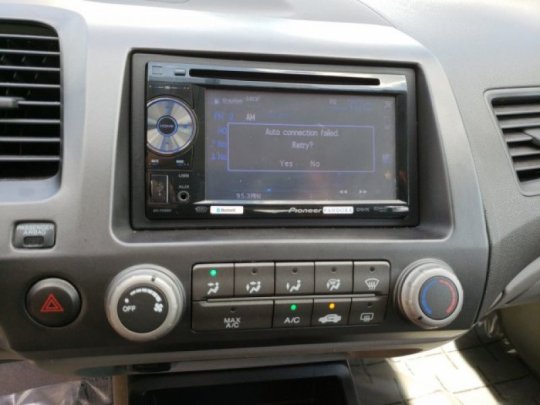
After the ordeal installing the radio and all the loose wires throughout the car, I attempted to start the car to ensure the unit was actually working. It turned on the first try so I programmed the clock and a handful of other things, and shut off the radio to connect the cameras. At first they didn’t turn on, so I tightened the plugs and it fired right back up. First thing I did was throw the car in reverse and eureka I get a beautiful view of my wife’s car.
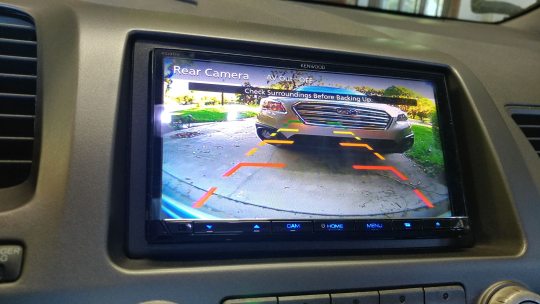
Now I have eyes in the back of my head.
The menu has a fantastic set of options. The factory default radio for this car had a CD player, AUX jack, support for an iPod from 2010 and Satellite Radio. I was able to keep all of that except the AUX jack, but I have Bluetooth to replace it. My AM/FM radio supports HD which means Orock 105.9 returns! The big selling point was the Idatalink Maestro which not only allowed me to keep my steering wheel controls, but connected my car’s telemetry to the radio.
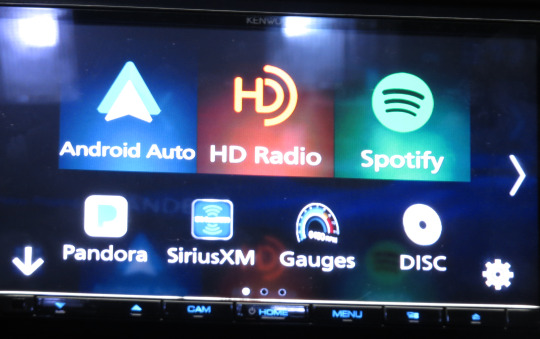
Ready to order off the menu
The telemetry allows me to see whether a door is left open, or what my tire pressures are currently reading as well as a selection of 10 gauges. There’s a number of gauges to choose from, but at any given time you can look at 5 at a time, and program 10 to see. The new radio will be replacing the Scangauge II that was in my car since about a month after I bought it. I’ll be selling that at the end of this project, along with a number of leftover parts from this project.
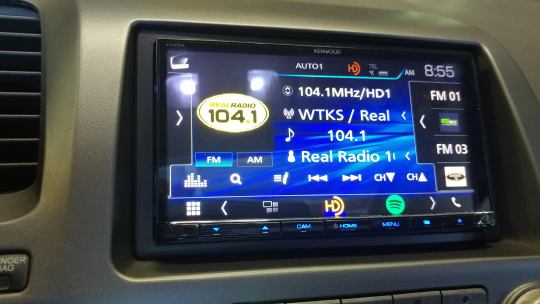
HD radio
Of course the main attraction of this radio is Apple Carplay and Android Auto. I had problems at first which appeared to be problems with the cable I was originally using, but a cheap 5 pack of cables from Amazon seemed to have fixed the problem. Depending on my reception (Which isn’t always great thanks to Sprint) I am usually able to control Spotify or get text and facebook messages with no problem right on the screen. Its quite unusual getting a message and having the car read it aloud to me. Other benefits include commute time and alternate routes through Google Maps and live weather.
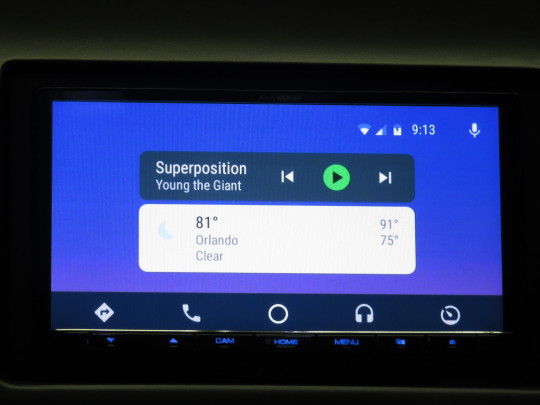
Android Auto working great!
Because I also have the front view dash camera, I also get forward collision warning, and full control of my dash cam from the head unit. This includes being able to recall view right on the screen. This is pretty handy considering I’ve now placed dash cams in both of my vehicles.
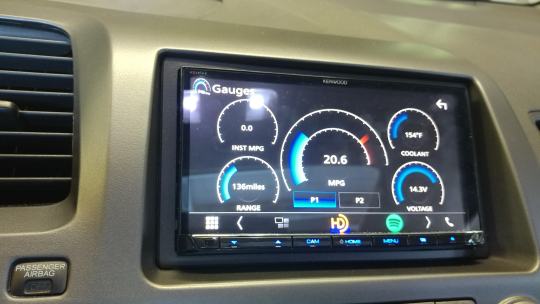
I set my default gauges to be fuel economy centered
Once I wrapped getting the cameras aimed and I was comfortable with the settings, I used the procedure in this link to replace the loading screen. Since my goal was to make this project look as close to factory as possible, I used a very Honda loading screen. https://carboncarsystems.com.au/how-to-change-jvc-kenwood-load-screen/
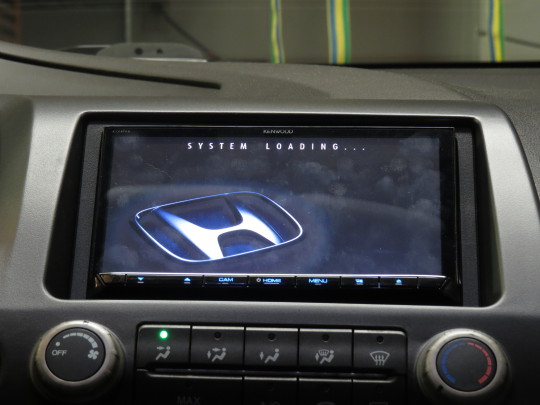
This is a much better loading screen. Comes on when the car starts and looks a lot more “factory”
Now that the main event is complete, there’s small knick knack pieces that I’ll review in another post in two weeks.
0 notes
Text
I guess I’m doing this all at once (Part 2)
Probably one of the earliest things I asked on the 8th Civic forum in 2009 was about the trunk liner. I had asked why in the heck did the 2006-2008 Civic have a fabric liner and the 2009 had this bare metal monstrosity as a trunk. Well being bare like this was a huge help. I at first didn’t know where to put the SiriusXM antennae, and reading the manual suggested I drill into the roof somewhere. No way in heck I was about to do that, and I was even queasy about drilling into the trunk lid. My solution came from looking at the holes inside the stamping.
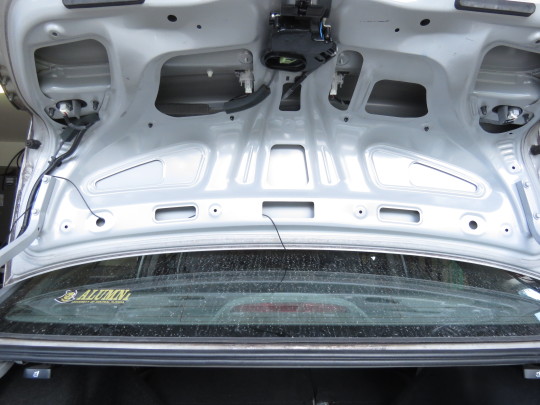
The trunk lid as lit looked for 9 years minus the SiriusXM antennae wire.
The antennae is magnetic so it stayed in place. All I had to do was route the wire to the hinge. It’s not blocking the brake light, and its pretty centered and not harming the car any. I’m pretty happy with the placement of it. All I needed to figure out was how to get it to the front of the car where the receiver was located.
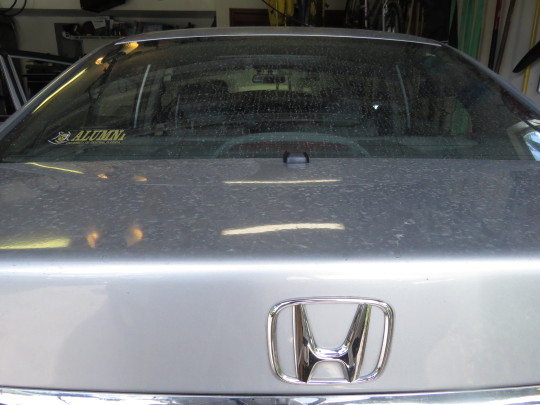
Modest location that’s not too intrusive.
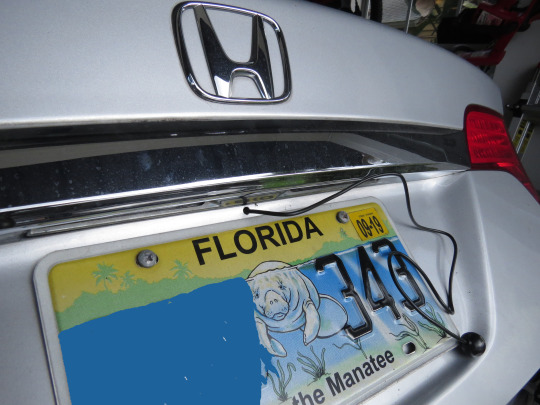
The backup camera was a different story. I pretty much knew I would have to drill a hole into the trunk. The question was how big and where. I chose under the license plate lights thinking it would be the best place to avoid water. A small hole was all I needed as the camera has a tiny connector you need to get through into the trunk, and then the camera has all the mounting hardware to hide the hole from plain view.
Say cheese
Like the SiriusXM wires, I simply routed the whole thing behind the stamped metal of the trunk to the hinge. As they went around the hinge, I hid them behind the factory wires for the tail lights, and the trunk opening mechanism. This was to ensure my other add on would work.
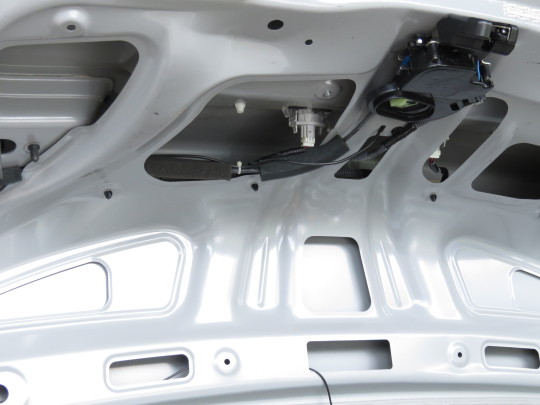
Camera wires working their way to the front of the car.
I went to the pull and pay and picked up a few items that I needed for the front of the car and I stumbled across a 2006 Civic with the whole trunk liner in tact along with the plastic hinge covers. I saw this as the perfect opportunity to hide my new wires inside the trunk. Unfortunately, I needed to drill into the hinges to get the hinge covers to sit right, but the holes for the trunk liner were there and popped right in. The result is you never would know that there’s a few random wires that aren’t from the factory.

Trunk liner and hinge covers for $12 courtesy of a 2006 Civic.
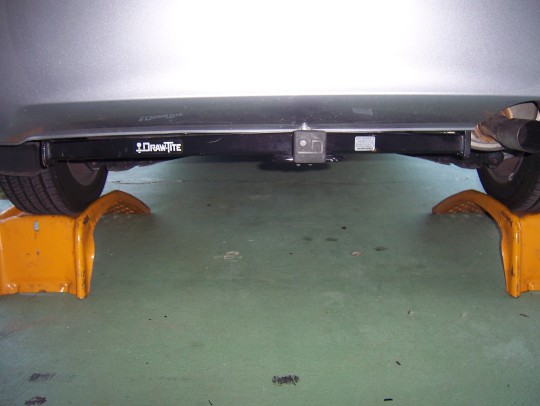
One thing that I had come across on video after video on backup cameras was make sure your wiring is right. A common mistake on connecting cameras is that people tend to connect the power line for the camera to the reverse light. This causes fuses to blow, and your camera can’t come on unless the car is in reverse. Therefore, I decided to run my power to the front of the car. The two other wires I decided to leave connected in the back. The ground because there was a ground readily available in the trunk (my trailer hitch already connected to it), and the purple comm wire which lets the camera know I’m going in reverse.
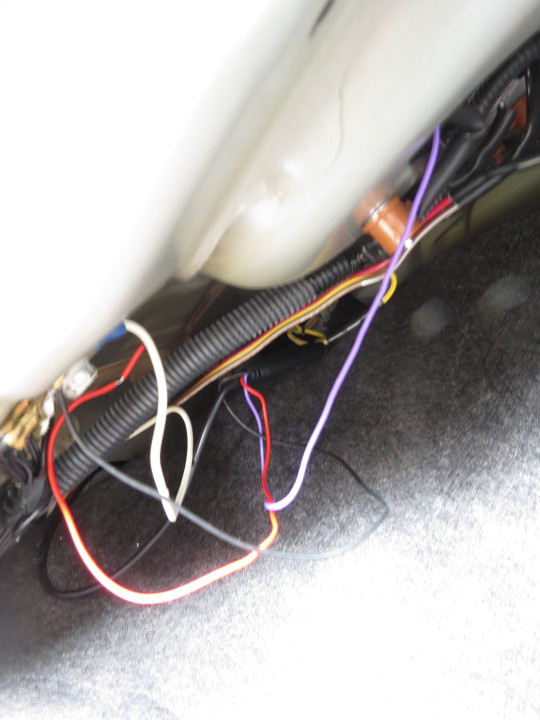
The wires activate the backup camera
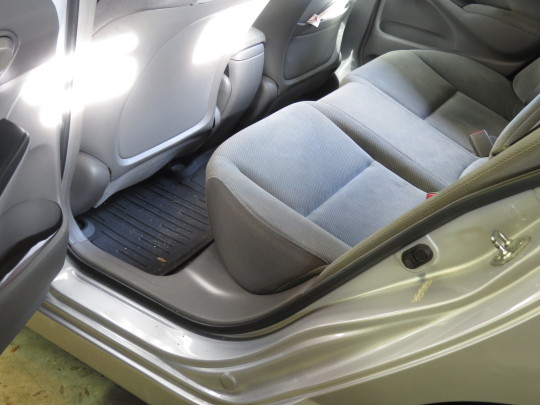
After the wires were hooked up, I had to run the wires to the front of the car. This required removing the rear seat. This is held in with ONE bolt!!!!!! One bolt and two clips keep the Honda Civic’s seat from flying off the car. Craziness! I ended up removing every plastic piece along the driver’s side until I got to the dashboard. I ran the two wires along a conduit of wires that Honda had operating various things throughout the car. Much like the trunk, once you put the car back together again, you’d never know the wires were there.
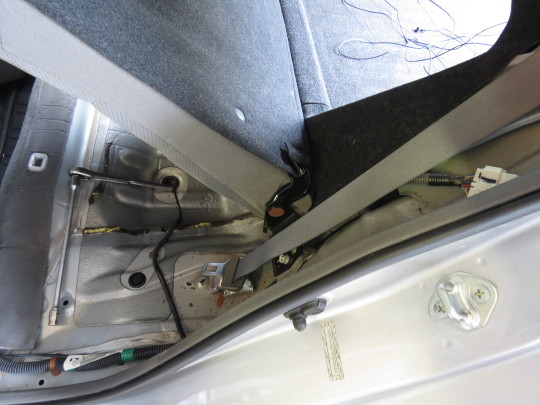
“Can’t see the lines can ya Russ?”
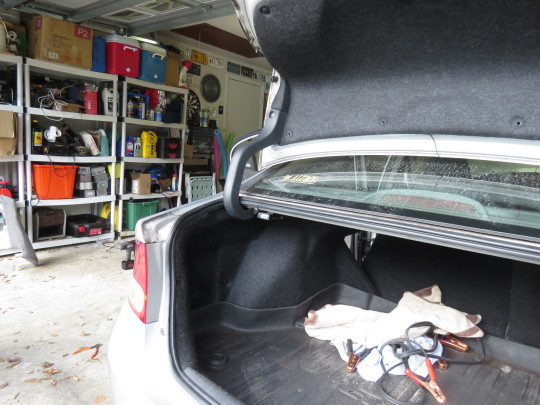
Believe it or not all the wiring for the deck lights, SiriusXM, and backup camera are hiding in that trunk pillar.
Once I made it back to the dashboard, I was able to connect the SiriusXM antennae to the receiver, and I used a T splice to connect the power from the backup camera and the dash cam to connect to the accessory wire in the back of the radio. I was shocked to see the camera come on when I shifted the car into reverse for the first time. It’s such a massive improvement back there from what it was and looked like before.
0 notes
Text
I guess I’m doing this all at once (Part 1)
I’m having to do this write up in four parts despite the fact that I was about halfway done before I realized I was going to do everything I did on Sunday at one time. I had set aside the weekend of October 6th to tackle this part of the project. Unfortunately, we lost my grandfather last week, and we took Saturday to remember him down in South Florida where he lived. I woke up Sunday and decided in an effort to return to some normalcy, I would wake up, hit a Wawa for breakfast and tackle the big box from Crutchfield that’s been sitting in the corner of the bedroom for what felt like an eternity. (It was really a week and a half.)
I had ordered a Kenwood DDX9904s. I’ll go into why I ordered what I did in another post, but for now, this was what it was all about. I have to say between YouTube and the Crutchfield Ready Harness/Customer Service line and the Idatalink Maestro instructions, the horror that used to be installing a new head unit in a car has gone completely away. Back in the day, the idea of an aftermarket radio conjures up notions of removable faceplates and cheap buttons.
Exactly what I wouldn’t want to see on my dash.
I wanted to go for something that was more integrated into the dash. Unfortunately, with the way the existing radio sits in the dash, that pretty much means replacing the whole center part of the dash. In order to get to the center of the dash, you have to pull off the top and bottom of the driver’s side of the interior. When I first started Sunday morning at 9am, I was just planning on plugging the head unit in and putting the rest of the car together piece by piece. As I pulled the three largest pieces of the dash, and I continue to unbox pieces of cable from each box, I decided well with the whole car apart, I might as well put this and that together. I now had a whole day project head of me.
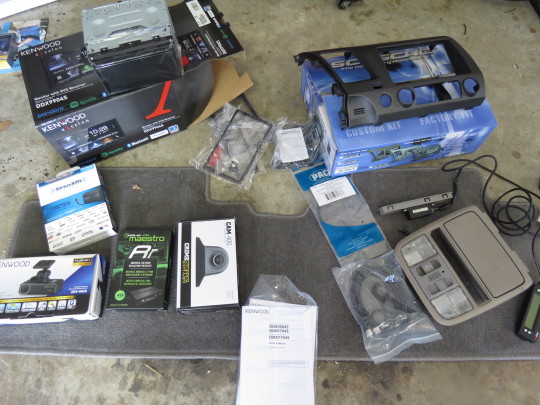
A crap load of equipment getting loaded in.
I started the project by taking apart the dash. 3 screws. Honda uses 3 screws to hold he whole dash in place. I have a Caravan that uses 15 to hold just the bottom of my dash in place. Its nuts. Once I had this dash apart, I decided I needed to go ahead and install the mic and dash camera. I’ll be doing that as a separate write up in about 2 weeks. I have more I still want to add to it. Right now the mic is dangling from the dome lights. I routed the wiring up from the mirror into the headliner and down the A pillar. Following that I decided to put the SiriusXM antennae on the trunk lid and wire it an the backup camera through the car. At this point, I had the whole drivers side car in pieces. That write up will be Part 2 of this post.
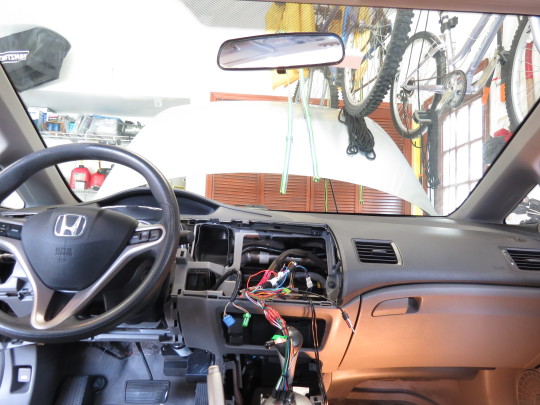
The dash is apart. Now lets see if I remember how to put it back.
This is where confusion sets in. This Kenwood radio has a sleeve that is only necessary to install in some installations. There wasn’t anything the instructions that said it wasn’t necessary and that the provided dash kit could be screwed right into the radio. Also there were a number if wires from Crutchfield’s Ready Harness that were labeled, but it wasn’t clear what they were for. I decided to call their support in about 5 mins, I had my answers. The rest of the install was easy. Easy in that it wasn’t mentally taxing, but it was a TON of manual labor.
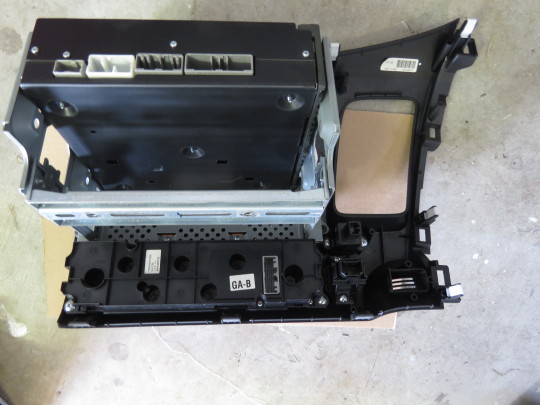
All the vents and climate controls from the old dash have to be moved over to the new dash.
Once I got the radio bolted to the new dash I had to be careful not to scratch the new dash as I tried to bring the vents and climate control from the old into the new dash. I have to say for being an aftermarket dash kit, you’d never know the kit wasn’t from Honda. It’s excellent! Thanks to the ready harness service, and the wiring diagram, putting the connections together was a breeze. I only needed the wire cutters and T’s to connect the cameras to a power supply. Since the radio had such good color coded wires, I opted to tie into the ready harness with the cameras. They’ve been functioning well since I did that.

Everything moved over to the new dash with the new radio
I did a test run of the radio just to try it and it didn’t turn on right away, which I later realized was because the connectors weren’t tight enough. After that the radio started playing. I decided at this point to connect the cameras and try to stuff the whole thing into the dash. Trying to get the wiring in the end was a beast. It’s stuffed back there. Honda doesn’t give you a lot of room back there. The Sirius module fit in nicely behind the dash between the radio and the passenger vent, but the wiring for both the radio, the Idatalink and all the other wires made for a tight squeeze back there. I had to keep pushing the Idatalink lower and lower just to get the whole thing to snap back into place.
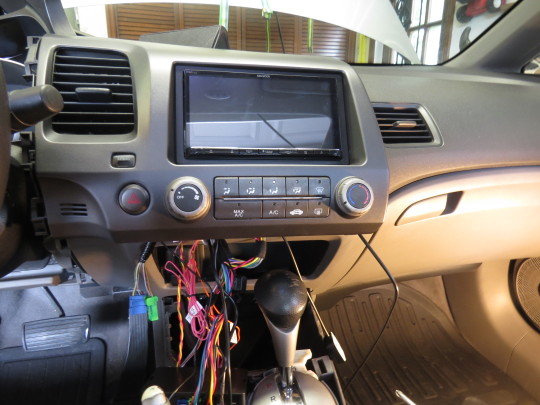
Rough in installation
It did accomplish that factory look I was going for. I finally wrapped up around 8 pm that same night and was able to drive to work the next morning with everything functioning. I still have a few more odds and ends, but I’ll explain them in the next couple parts of this episode. More photos and a walkthrough of the features will come in about a month. In the meantime, Part 2 of this installation saga will be explained on October 20th.
0 notes
Text
Not what I was expecting.
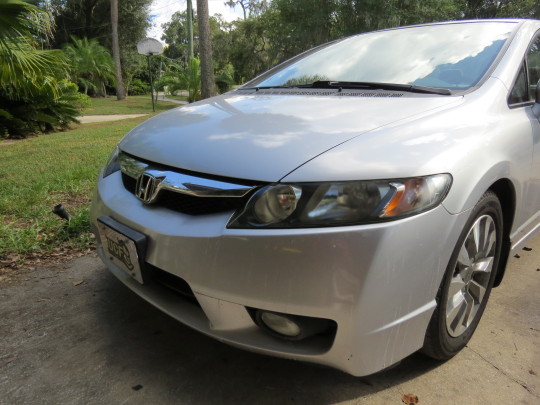
The first foray in what’s going to be an extensive series of projects I came across the first project that was a bigger job than I was anticipating. The photo below was after 20 minutes of taping. You don’t notice it at first but the Civic headlights have all sorts of angles and undulations that make it hard to use a drill or a buffer to sand down the headlights.
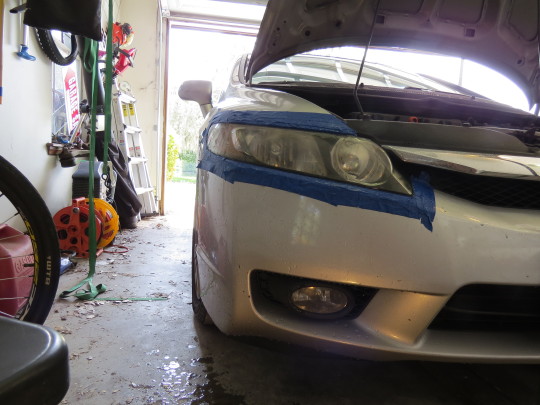
I used the procedure laid out in the video made by ChrisFix to do the headlight restoration.
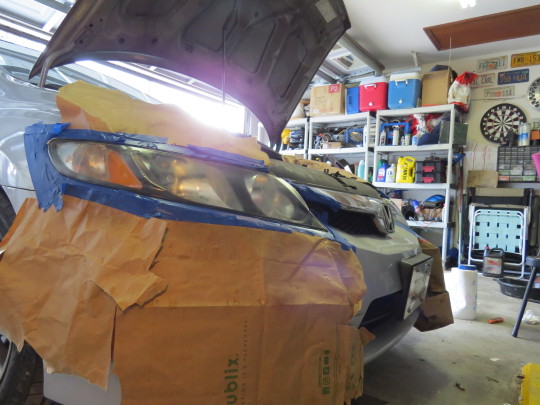
Being that the headlights weren’t too yellow, especially after owning the car for 9 years, I only used 1500 grit followed by 3000 grit sanding discs provided as part of the Mothers kit followed by a polish with Meguiars mirror glaze. After letting both dry I cleaned the headlights and hit them with some Rust-o-leum clear coat. The whole thing ran me about an hour for both lights. This is where I went astray. Initially I wanted to use paint protection film, but the shape of the headlights and the adhesive backing made applying the film more headache than what its worth. I ditched it and went with the spray on clearcoat.
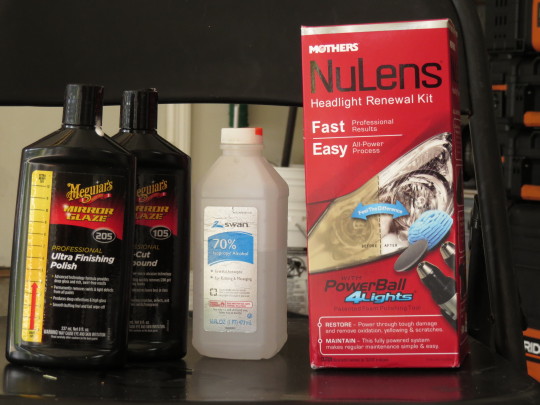
A good crew of potions.
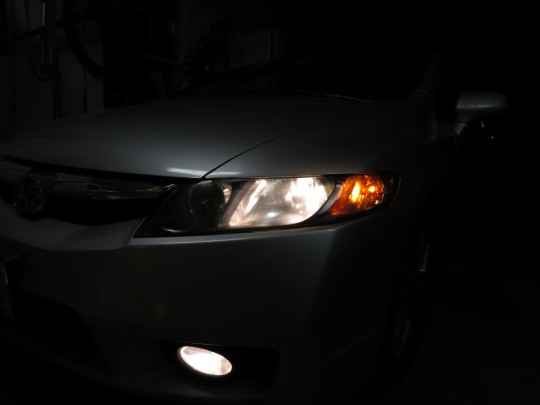
I went a few days with the clearcoat and wasn’t happy with the look. I had done away with the yellow fog, but now there’s a clear fog. Not just that, but on the passenger side it was pretty clear that there is a UV fog inside the headlights as well as outside. The exterior of the lights were rough to the touch and it just wasn’t what I had expected.
After clearcoat application
After a few days this became a lesson in following directions. The clear fog I had was orange peel from the clearcoat. After another hit of the 3000 grit sandpaper and some wax and the headlights smoothed out. There’s still some slight fog, but nothing like it was before. The before and after speaks volumes though.
Still some slight fogging
While its nothing like when the car was new, it is indeed a noticeable improvement to what it was a few weeks ago. I’m curious as to how long it will stay this way. I’ll be sure to take shots as the years go on. Right now I don’t have any plans to go LED any time soon. The halogens are serving me very well.
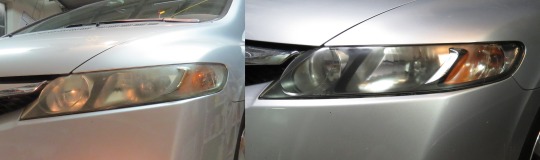
Before and after the headlight restoration.
0 notes
Text
Anxious Anticipation
Thursday I received notification that the largest part of this project was no longer on backorder and was on its way to the house. Already I’ve received parts that if everything works the way it should promise to bring my car a handful of features that would make my car even in features with my wife’s. I’ll go into a few of those in a future post. For right now, I’m both nervous and excited for this project. More nervous and excited than I’ve been for any of my previous projects. It might be because this is my largest elected project.
I’ve done transmission swaps and carburetor swaps numerous times, along with alternators, brake master cylinders, full brake system replacements, all major projects that took time and with what was at the time my only vehicle. While the Civic is my new primary vehicle, its far from the only car in the fleet today. So why am I so anxious?
I honestly believe its the build up. For months I told myself I needed a new car. I just wanted to have Android Auto, I wanted HD and Satellite Radio, I wanted a backup camera so bad. New cars have tint, and a headliner that doesn’t fall down and yellow headlights. At the same time, I’ve always been the person that does his own work. So I asked myself, why do I NEED a new car? Well I wanted those features that I just mentioned.
I don’t know what possessed me to look at google, but I think I searched Android Auto and Civic, and a whole bunch of Chinese bootleg radios came up, some that matched to my dashboard perfectly, but literally appeared to be a tablet stuck onto the dashboard similar to how Mercedes and Mazda tack their infotainment on their cars. And while the idea of that was interesting, I didn’t trust the hardware, and I didn’t like the idea of losing my CD slot or all my other aux and USB accessories.
^Chinese $300 headunits on ebay
As I continued to look, I realized the aftermarket had a number of well known headunits that DID have well vetted reviews, and a reputation and a warranty. I realized I could get Android Auto, and HD radio and still keep my USB, CD and AUX and keep that OEM look. I looked at the Pioneer 2440NEX. I did tons of research and realized this is what I wanted. I could even add a backup camera and really have something. But upon going to my local Best Buy and feeling the system, I decided to go in a different direction. What I did chose got me more excited. At this point, TheCivicProject had legs. I was going to modify my car for the first time. Not because I had to, but because I wanted to. And I could justify it by simply understanding that I would spend a lot more money on a new car than just making my current car the way I want it.
So what did I finally decide to get? I’ll save that for another time.
0 notes
Text
Past Updates
I came across a number of photos of updates I’ve made in the past so I decided to post them.
I actually did a tutorial for a DIY for the trailer hitch on the 8th Civic Forums back in 2012. Here’s a link to that post. https://www.8thcivic.com/forums/diy-honda-civic-exterior-style-mods/184106-diy-trailer-hitch-56k-no-way.html
I wish I had photos of the fog light upgrades, but unfortunately, I don’t have photos when they were installed new.
The Homelink update is the upgrade that’s proven the most functional but it is the one that I’m the least happy with for obvious reasons. The Homelink is off center because of a metal bracket right in the center of the headliner. This prevents the standard Homelink from being right in the center. I’m debating on whether I can or should update this with the Honda Homelink.

0 notes
Text
Welcome to The Civic Project
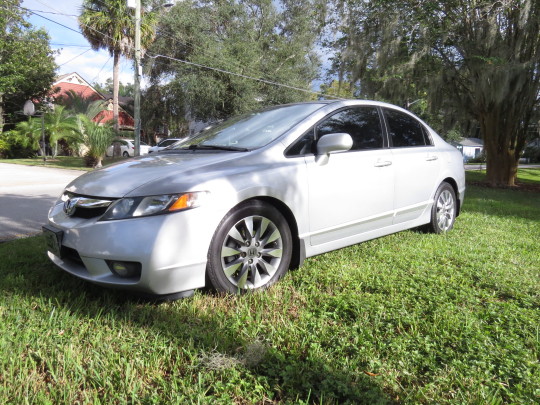
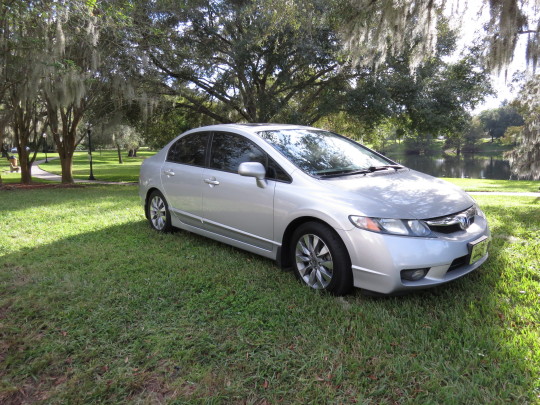
Welcome to The Civic Project. This is the beginning of the transformation of your run of the mill 8th gen R18 Honda Civic into a car that can compete with modern day cars.
The car:
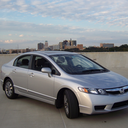
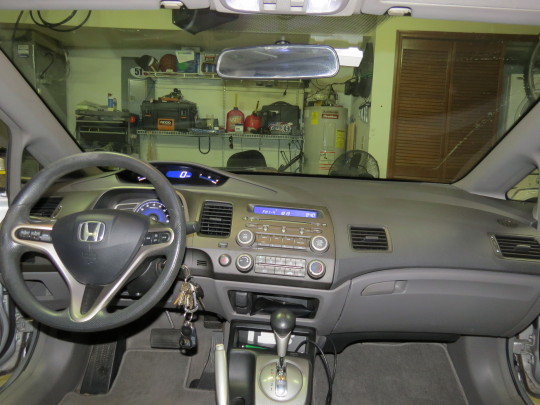
This is my 9 year old 2009 Honda Civic EX purchased new during the Cash for Clunkers program for $14,340 after the negotiations and rebates. The car has served well as a commuter and has 99,000 miles on the odometer. The car has the 1.8L natural aspirated 4 cylinder engine and a 5 speed automatic transmission. The car serves well as a commuter.

Why?
After 9 years of ownership, I wanted to get rid of the car. In my eyes, it was falling apart. I never tinted the windows, barely customized anything for fear of voiding the warranty, I put salvage batteries because I didn’t think I was going to keep it, and was even rear-ended. The steering wheel was losing chunks of rubber, the cloth was getting matted, the ceiling was dropping, and the radio was looking very dated.
After my wife took the car to get detailed, I realized that the car could very easily be brought back into almost new condition. Not just that, it would be the perfect time to customize the car. The car is almost at 100,000 miles and for Honda’s I’m told that means the car is just getting broken in. Currently the car also has lifetime parts warranties for some of the vehicle parts.
What’s been done?
Not much of anything. Other than oil changes, brakes, and tires.
Shortly after I bought the car, I added splash guards and an all weather trunk liner. This was something that the dealer was charging $300 to add to their cars. I was able to buy them from someone who had wrecked their cars.
Honda OEM fog lights. This was probably the most significant customization I did for the car. I wanted to go OEM because I didn’t want to lose the phone slot on the left side of the steering wheel. While I was at it, I replaced the horn with a horn from a Plymouth Voyager.
After some of the dome lights went out, I replaced the front dome lights with LED dome lights.
I’ve added a generic Homelink garage door opener in 2014. In retrospect I wished I had access to the Honda version of the Homelink opener because it would have looked link it belonged in the car.
In 2018, after the car was detailed it turned out the existing OEM floor mats stained the floor. I decided to replace them with all weather OEM floor mats.
What’s the plan?
Exterior Upgrades - Defogged Headlights - Backup Camera - Tinted Windows - Possible Badging Update - Removal of Scratches and Dings
Interior Upgrades - New Radio with Android Auto, dashboard and backup camera, New Steering Wheel Wrap - New Headliner - Updated Interior Badging.
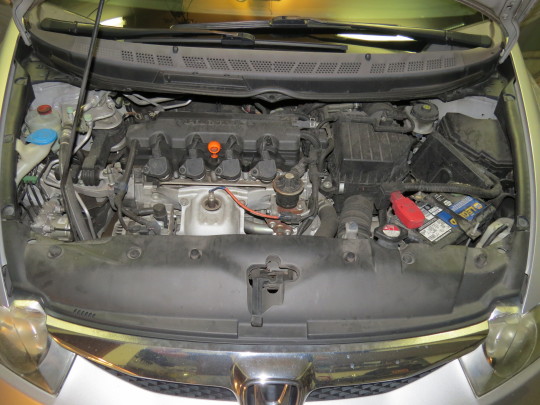
Engine Updates - New Engine Cover - Possible Cold Air Intake.
0 notes