
Don't wanna be here? Send us removal request.
Statistics
We looked inside some of the posts by thetreecareguide and here's what we found interesting.
Average Info
Notes Per Post
21
Likes Per Post
13
Reblog Per Post
7
Reply Per Post
1
Time Between Posts
2 months
Number of Posts By Type
Text
17
Last Seen Tumblr Blogs


Fun Fact
Mobile Tumblr US users spend an average of 4.04 minutes per session on the app.
Text
What to Plant After Tree Removal
Wondering what to plant after tree removal? This thetreecareguide.com article covers the best trees, shrubs, flowers, and ground covers to consider. Learn how to prepare your soil, care for new plants, and creatively use tree stumps to enhance your garden.

Key Takeaways
Choose native trees like Oak and Flowering Cherry for resilience and beauty after tree removal.
Prepare your soil by removing old roots, adding organic matter, and testing pH to ensure optimal growth conditions.
Consult with certified arborists and professionals for expert guidance and a yard analysis to enhance your replanting success.
Ideal Trees for Replanting After Tree Removal
Selecting trees that thrive in your local environment, such as native oaks, flowering cherries, and other region-appropriate species, promotes healthy growth and enhances your garden’s visual appeal.
Certified arborists offer valuable insights into choosing disease-resistant and adaptable tree species for your garden, as a certified arborist can provide expert guidance.
Native Oak Trees
Native Oak trees are sturdy, long-lived, and well-adapted to local conditions, making them an excellent choice for post-tree removal. Their resilience and ecological benefits support local wildlife and promote biodiversity.

Certified arborists can assist in selecting the right Oak species for your landscape and ensure proper planting and care.
Flowering Cherry Trees
Flowering Cherry trees, known for their breathtaking blossoms and beautiful flowers, thrive in various soil conditions and enhance your garden with vibrant colors and delightful fragrance.
Their relatively low maintenance nature and adaptability make them a popular choice post-tree removal.
Evergreen Trees
Evergreen trees provide year-round greenery and help provide a lush landscape and aesthetic. Their resistance to pests and diseases reduces the need for constant maintenance.
Pines and Spruces are great evergreens that thrive in various soil conditions, making them a reliable choice post tree removal.

Suitable Plants for Post-Tree Removal Landscaping
Incorporating shrubs, perennial flowers, and ground covers can diversify and enhance your garden. These plants adapt to changed soil conditions post-tree removal and add structure, color, and texture.
Combining other plants enhances your garden’s aesthetic and promotes environmental health.
Shrubs and Bushes
Low-maintenance shrubs like Azaleas and Hydrangeas add structure and vibrant colors. Azaleas offer attractive blooms in various hues, while Hydrangeas produce large, colorful clusters that change color based on soil pH.
These shrubs require minimal care and greatly enhance your garden’s aesthetic.
Perennial Flowers
Perennial flowers like Hostas and Daylilies are ideal for a post-tree removal garden, offering lasting beauty with minimal care once established.

Hostas thrive in shaded areas and add lush foliage, while Daylilies provide vibrant blooms throughout the growing season.
Ground Covers
Ground covers like Creeping Juniper and Vinca Minor prevent soil erosion and fill bare spots. They help maintain soil moisture, reduce watering needs, and enhance landscape aesthetics.
Ground covers are practical and visually appealing additions to any garden.
Preparing the Soil for New Plantings
Preparing the soil after tree removal is vital for successful new plantings. This includes removing old roots and wood chips, adding organic matter, and testing soil pH for optimal growing conditions.
Proper soil preparation ensures new plants thrive and establish strong root systems.
Removing Old Roots and Wood Chips
Clearing remaining roots and wood chips prevents nutrient competition and ensures healthy growth for new plants. Remnants from the previous tree can hinder root growth and nutrient absorption.
Adding Organic Matter
Adding compost and organic materials enriches the soil and promotes better nutrient availability. Incorporating organic matter improves the soil structure, enhances moisture retention, and supports healthy plant growth.
This step promotes new growth after tree removal.
Testing Soil pH

Testing and adjusting soil pH meet the specific needs of new plants. Most plants thrive in a slightly acidic environment, with optimal pH levels between 6 and 7.
The right soil pH creates favorable conditions for plant growth and development.
Caring for Newly Planted Trees and Plants
Proper care and maintenance are crucial for establishing newly planted trees and plants. This includes regular watering, mulching, and protecting new plantings from wildlife. It is also important to plant trees to ensure a healthy environment.
Consistent care ensures your new plants thrive and contribute to a healthy, beautiful new garden.
Regular Watering
Newly planted trees need consistent watering to establish roots. Watering once a week is generally sufficient, but more frequent watering may be necessary in sandy or gravelly soils. Regular watering during the initial growth phase encourages strong root development.
Mulching Techniques

Applying organic mulch around newly planted trees retains surrounding soil moisture and suppresses weeds. Mulch also moderates temperature fluctuations around roots and enhances nutrient retention.
Proper mulching techniques support the healthy growth of your new plantings.
Protecting from Wildlife
Newly planted trees and plants are vulnerable to damage from deer, rabbits, and other wildlife. Fencing and repellents can be effective tools to deter animals and protect young trees as they establish.
Protecting your new plantings ensures they have the best chance to thrive.
Utilizing Tree Stumps Creatively
Repurposing tree stumps enhances your garden’s aesthetic and functionality. Creative uses include raised flower beds, garden seats, and planters.
These ideas transform leftover tree stumps into charming garden features.
Creating a Raised Flower Bed
Hollowing out a tree stump and filling it with soil and plants creates a raised flower bed. This approach allows for creative floral arrangements and adds a distinctive touch to your garden.
Making a Garden Seat
Convert a tree stump into a rustic garden seat by smoothing the surface and applying a weather-resistant sealant.
This charming addition enhances your outdoor space and provides a natural seating option.
Using Stumps as Planters
Hollowing out tree stumps creates unique planters for small flowers or succulents. Adding drainage holes prevents waterlogging.

Stump planters add character and visual interest to your garden.
When to Replant After Tree Removal
Timing is crucial for replanting after tree removal. Waiting at least one year before replanting in the same location allows the soil ecosystem to recover, ensuring better growth for new plants.
Waiting Period
Waiting one year before replanting in the same spot allows old decomposing roots to decompose and the soil to recover, creating a healthier environment for new plantings.
If the removed tree had an intact root ball, replanting the same tree might be possible.
Alternative Planting Locations
Planting new trees in adjacent areas maximizes available space and resources. This approach creates a harmonious landscape, promotes biodiversity, and attracts more wildlife through planting trees.
Consulting Professionals for Tree Planting
Consulting professionals like certified arborists and tree service companies can improve the success of your replanting efforts. They offer guidance on selecting the right trees and plants, ensuring proper planting techniques, and providing ongoing care.
Hiring Certified Arborists
Certified arborists have the specialized knowledge to recommend the best tree-planting options for your landscape. They can assist with mulching services and other essential tree care practices. Hiring certified arborists ensures your new trees are established correctly, enhancing their longevity and health.

Tree Service Companies
Reputable tree removal service companies offer services like tree removal, stump grinding, and replanting. They often have certified arborists on staff to provide expert guidance and ensure professional landscape maintenance.
Their services can make the tree removal and replanting processes seamless and efficient.
Free Yard Analysis
Free yard analysis services from tree care companies can assess your landscape and recommend suitable plants. Certified arborists evaluate soil health and suitability for new plantings, ensuring successful garden restoration efforts.
A free yard analysis can guide you in making the best decisions for your landscape.
What to Plant After Removal Summary
Replanting after tree removal presents a wonderful opportunity to rejuvenate and enhance your garden. You can create a thriving and beautiful landscape by carefully selecting the right trees, shrubs, and plants, preparing the soil, and providing proper care. Consulting professionals like certified arborists and tree service companies can offer invaluable assistance throughout the process. Embrace the potential of your garden and transform it into a lush, vibrant oasis.
Frequently Asked Questions
How long should I wait before replanting in the same location after tree removal?
You should wait at least one year before replanting in the same location after tree removal to allow the soil to recover and ensure a healthy start for your new plants. This patience will pay off, leading to a thriving garden!
What are some good tree species to plant after removing an old tree?
Consider planting Native Oak, Flowering Cherry, or Evergreen trees, as they are resilient and beautify your garden. Choosing the right species will ensure your landscape thrives for years to come!
How can I prepare the soil for new plantings after tree removal?
To ensure your new plantings thrive, be sure to remove old roots and wood chips, enrich the soil with compost, and check the pH levels for optimal conditions. Taking these steps will set your garden up for success!
Why should I consult certified arborists for replanting after tree removal?
It is crucial to consult certified arborists for replanting after tree removal because they have the expertise to recommend the right tree species and planting techniques that promote healthy growth. Their guidance will help ensure your new trees thrive for years to come.
How can I creatively use tree stumps in my garden?
You can beautifully transform tree stumps into raised flower beds, rustic seating, or charming planters for flowers and succulents. Embrace your creativity and enhance your garden’s appeal with these unique touches!
For the original version of this article visit: https://www.thetreecareguide.com/what-to-plant-after-tree-removal/
0 notes
Text
Fiddle Leaf Fig Tree Care
Looking for insight and tips about fiddle leaf fig tree care? Learn the essentials like the proper light, water, and problem-solving tips in thetreecareguide.com, and keep your Ficus lyrata (fiddle leaf fig tree) healthy and vibrant with these simple steps.

Key Takeaways
The Ficus lyrata, also referred to as Fiddle-leaf Fig Trees thrive in bright, indirect light and need well-draining potting soil to flourish.
Consistent watering, with the top inch of soil drying out between waterings, is crucial to prevent root rot.
Regular pruning and repotting support healthy growth while keeping an eye out for pests, which helps maintain plant health.
Light Requirements for Fiddle Leaf Fig Trees
Light significantly influences the healthy growth of fiddle-leaf fig trees. These plants thrive in bright, indirect light and require about six hours of light daily to maintain their lush foliage. Positioning your fiddle leaf fig near a window with plenty of natural light, such as an east-facing window, can provide the ideal light conditions.
However, direct sunlight should be avoided as it can burn the plant’s leaves and cause irreversible damage. If you notice brown or crispy leaves, it could indicate that your plant is exposed to too much direct sunlight. Instead, opt for filtered light or sheer curtains to diffuse the sunlight.

Rotate the plant slightly every few weeks to ensure balanced light exposure. This simple practice will help your plant grow evenly and prevent one side from becoming leggy or sparse. Adequate light exposure is pivotal in maintaining the fiddle leaf fig’s vibrant, glossy leaves.
Fiddle leaf figs can adapt to brighter light conditions but will struggle in low light. If your home doesn’t receive enough natural light, consider using a grow light to supplement. This way, your fiddle leaf fig can flourish and enhance your living space with its striking foliage, creating a bright light environment.
Choosing the Right Potting Soil
Choosing the right potting soil is fundamental for a healthy fiddle leaf fig. These plants need well-draining potting soil that retains moisture without becoming waterlogged. A peat-based soil mixed with perlite or a 50/50 blend of cactus and houseplant soil is ideal for promoting optimal growth. These mixes ensure excellent water retention, breathability, and texture, crucial for the plant’s root health.
Soil pH is another important factor to consider. Fiddle leaf figs thrive best in a soil pH range of 6-7, supporting optimal nutrient absorption and overall plant health. Specialized fiddle leaf fig potting soil offers the necessary nutrients and drainage for optimal plant health.
When choosing a pot, consider the following:
Opt for one that complements your home decor but also meets the plant’s needs.
Clay or earthenware pots are excellent choices as they promote better airflow and prevent water from stagnating.
Ensure that the pot has sufficient drainage holes to prevent problems like root rot, which can occur due to excess water.
Watering Your Fiddle Leaf Fig Tree

Correct watering is crucial for the health and growth of your fiddle leaf fig tree. These plants prefer their soil to be consistently moist but not waterlogged. Water your fiddle leaf fig when the top inch of soil is dry, typically about once a week or every two weeks. Signs that your plant needs water include droopy foliage and wilting leaves.
Overwatering can be detrimental, leading to root rot and other serious issues. Ensure that the plant drains completely after watering, allowing excess water to escape from the pot’s drainage holes. Flushing the soil monthly until water drains out of the pot can help prevent salt buildup, which can harm the plant.
For self-watering planters, let the reservoir empty completely before refilling. This practice helps prevent excess water from sitting around the roots and causing potential damage. Use filtered or tap water to hydrate your fiddle leaf fig, ensuring it’s free from harmful chemicals.
After watering, allow your fiddle leaf fig to sit in the sink for at least an hour to ensure thorough drainage. Consistent watering helps your fiddle leaf fig thrive, keeping its leaves lush and vibrant.
Temperature and Humidity Needs
Fiddle-leaf fig trees thrive in a temperature range of 60°F to 85°F, making them well-suited for most indoor environments. Avoid placing your fiddle leaf fig near air conditioning units, doors, or vents, as cold drafts can stress the plant. Consistent temperatures will help your fiddle leaf fig maintain its health and growth.
Humidity is also crucial for fiddle leaf figs. These plants prefer humidity levels between 30% to 65%. In the winter months, when indoor air tends to dry out, using a humidifier can help maintain the necessary humidity levels for your fiddle leaf fig. Good air circulation is also essential, as it prevents issues related to humidity and helps the plant thrive.
To keep your fiddle leaf fig comfortable, avoid placing it in drafty areas and ensure it has access to adequate air circulation. These measures help create an environment that mimics the plant’s native tropical habitat, promoting healthy growth and vibrant foliage.
Fertilizing Fiddle Leaf Fig Trees

Fertilization supports the growth and overall health of your fiddle leaf fig tree. These plants have large, dense leaves that require significant nutrients, making consistent fertilization necessary. Fertilize fiddle leaf figs monthly during the growing season, typically from spring through summer.
When choosing a fertilizer, look for one with an NPK ratio of 16-5-11, as this provides a balanced supply of nutrients that fiddle leaf figs need to thrive. Liquid fertilizers are particularly effective, allowing for easier control over nutrient delivery compared to slow-release granules. A common recommendation is to mix one teaspoon of liquid fertilizer per cup of water for optimal results.
If you’ve recently repotted your fiddle leaf fig, wait about a month before starting a regular fertilization routine to minimize root shock and allow the plant to acclimate to its new potting soil. Following these fertilization tips ensures your fiddle leaf fig remains healthy and vibrant throughout the growing season.
Pruning and Shaping Fiddle Leaf Figs
Pruning and shaping are important for maintaining the health and appearance of your fiddle leaf fig tree. The best time to prune is in late spring or summer when the plant is in its active growth phase. Using a small pair of pruning shears, make cuts at a 45-degree angle to encourage healthy growth and prevent damage to the plant.
When pruning, top the main trunk above a leaf node to encourage branching and a fuller appearance. This practice stimulates new growth and helps create a more balanced and attractive shape. Some growers prefer a tree-like appearance with a branched canopy, achieved through regular pruning.
Always wear gloves when pruning to protect your skin from the white, milky sap that is excreted when the plant is cut. Removing dead leaves at any time helps maintain the plant’s health and prevent potential pest issues. Regular pruning and shaping keep your fiddle leaf fig looking its best and promote vigorous growth.
Propagation Techniques
Propagating fiddle leaf figs can be a fun and rewarding way to expand your plant collection. There are three primary methods for propagating these plants: stem cuttings in soil, cuttings in water, and air-layering. The ideal time for propagating is during late spring to early summer when conditions are warm and bright.
For soil propagation, prepare a 6-inch stem cutting with 2-4 nodes, cutting at a 45-degree angle. Ensure your tools are sterilized to prevent the introduction of diseases. Keep the cutting in a covered environment to maintain humidity and encourage root growth.
Water propagation involves placing the cutting in water and monitoring it weekly for root development, which typically takes around six weeks.
Air-layering requires making an incision around a branch’s outer tissue and covering it with damp sphagnum moss to promote root growth. Once roots develop, the branch can be cut and potted in soil for further growth. Each method has its benefits, so choose the one that best fits your needs and resources.
Repotting and Pot Maintenance

Repotting is an essential part of fiddle leaf fig care, especially for young plants. Young fiddle leaf figs should be repotted annually every spring, while mature plants can have the top several inches of soil removed and replaced with fresh soil. This ensures the plant has access to new nutrients and room for root growth.
When repotting, choose a pot that is 3-4 inches wider in diameter than the current pot. Clay or earthenware pots are ideal as they provide better airflow and prevent water from stagnating. Make sure the pot has adequate drainage holes to avoid root rot and other issues that can arise from excess water.
After repotting, wait about a month before resuming fertilization to minimize root shock. Proper pot maintenance and repotting practices help your fiddle leaf fig thrive and continue to grow healthily.
Common Pests and Diseases
Fiddle-leaf fig trees can be susceptible to various pests and diseases. Common pests include:
spider mites
scale insects
mealy bugs
aphids
thrips
fiddle leaf fig plant
These pests can cause significant damage if not addressed promptly. Adequate air circulation and a good watering plan help prevent pest problems.
Neem oil is a recommended treatment for many pests. It works by being absorbed into the plant’s system, poisoning pests effectively. However, caution should be taken to avoid overuse, as it can weaken plants and cause discoloration. Regular checks and preventive treatments keep your fiddle leaf fig free from pests and diseases.
In addition to pests, fiddle leaf figs can suffer from bacterial infections. Maintaining a clean environment and promptly removing affected leaves can help prevent the spread of disease. Staying vigilant and addressing issues early before they become major will help keep your fiddle leaf fig healthy and thriving.
Troubleshooting Common Issues
Despite the best care, fiddle leaf figs can sometimes encounter issues. Signs of inadequate light include droopy leaves and foliage that appear pale or spotty. Excessive direct sunlight may cause light brown or bleached spots on the leaves. Relocating the plant to a spot with bright, filtered morning light can help alleviate these problems.
Overwatering is another common issue that can lead to dark spots on leaves and root rot. To prevent this, ensure proper drainage and avoid letting the soil shrink away from the pot’s sides. Leaf loss can also occur if the plant is moved around excessively, so try to keep your fiddle leaf fig in a stable location.

Temperature extremes and direct airflow from heating or cooling units can cause leaf discoloration. Ensuring your plant is in a suitable environment with consistent conditions will help prevent these issues and keep your fiddle leaf fig in optimal health.
Additional Care Tips
Consider these additional care tips to maintain the health and vibrancy of your fiddle leaf fig tree. Routine preventive treatments for pests are recommended to keep your plant free from infestations. Grouping plants together can also enhance humidity levels, creating a more favorable environment for your fiddle leaf fig.
Use a damp cloth to gently wipe a few leaves once a month to remove dust and maintain their shine and health. This practice also helps the plant absorb more light. If you notice brown spots on the leaves, it may indicate a need for increased humidity or adjustments in watering practices.
Following these extra tips ensures your fiddle leaf fig remains a stunning and healthy addition to your home.
Fiddle Leaf Fig Care Summary
Caring for a fiddle leaf fig tree involves understanding its specific needs, from light and soil requirements to proper watering, temperature, and humidity control. By following the guidelines on fertilizing, pruning, propagating, and repotting, you can ensure your fiddle leaf fig remains healthy and vibrant. Regular monitoring for pests and diseases and addressing common issues promptly will help maintain your plant’s well-being. Remember, with a bit of patience and attention, your fiddle leaf fig can thrive and become a beautiful, long-lasting addition to your indoor garden.
Frequently Asked Questions
How often should I water my fiddle leaf fig tree?
You should water your fiddle leaf fig when the top inch of soil feels dry, typically once a week or every two weeks. Just keep an eye on it and adjust based on your home’s humidity and temperature!
What kind of light is best for fiddle leaf figs?
Fiddle leaf figs love bright, indirect light and ideally need about six hours of it each day. Make sure to place yours where it can soak up that light without direct sunburn!
Can I use regular potting soil for my fiddle leaf fig?
Regular potting soil isn’t ideal for your fiddle leaf fig; it’s better to go for a peat-based mix with perlite or a blend of cactus and houseplant soil for optimal drainage and nutrients. Your plant will thrive with the right mix!
How do I prevent pests on my fiddle leaf fig?
To keep pests off your fiddle leaf fig, ensure it has good air circulation and follow a consistent watering routine. Don’t hesitate to use neem oil or fungicides if you notice any issues.
Why are the leaves of my fiddle leaf fig turning brown?
Your fiddle leaf fig’s leaves are likely turning brown due to factors like too much direct sunlight, low humidity, or overwatering. Try adjusting its light, increasing humidity, and fine-tuning your watering routine to help it thrive.
For the original version of this article visit: https://www.thetreecareguide.com/fiddle-leaf-fig-tree-care/
0 notes
Text
Growing a Lemon Tree Indoors
Want to grow a lemon tree indoors? It’s easier than you think. This thetreecareguide.com article will show you everything you need to know, from the best lighting and soil mix to watering, pruning, and dealing with pests. Discover how to keep your indoor lemon tree healthy and productive year-round.

Key Takeaways
Indoor lemon trees need 6-8 hours of sunlight daily; consider using LED grow lights if natural light is insufficient.
Proper soil drainage is key; use a mix of sand, peat, and perlite to prevent overwatering and root rot.
Regularly monitor humidity levels and manually pollinate flowers indoors for healthy growth and fruit production.
Optimal Light for Indoor Lemon Trees
Proper lighting is essential when growing lemon trees indoors. These citrus trees thrive on bright light and require 6-8 hours of direct sunlight daily for optimal growth. The best spot for your indoor lemon tree is near an unobstructed south or southwest-facing window, where it can soak up the sunshine.

However, not all homes can provide such ideal conditions. If your indoor space lacks sufficient natural sunlight, LED grow lights can be a great alternative, providing adequate light throughout the day. These lights mimic the spectrum of natural sunlight, helping your citrus plants flourish even in dim indoor environments.
Adequate light promotes healthy growth and vibrant fruit production. Light is as crucial as water and nutrients for growing lemon trees indoors.
Choosing the Right Soil Mix
The soil mix you choose plays a pivotal role in the health and productivity of your indoor lemon tree. Citrus trees require a well-draining potting mix to prevent water accumulation around their roots, which can lead to root rot. An ideal mix typically consists of equal parts sand, peat, and perlite or bark, providing the perfect balance of drainage and moisture retention.
A pot with sufficient drainage holes prevents excess water from lingering in the soil. This setup ensures that while the soil remains moist, it never becomes waterlogged, thereby maintaining optimal soil moisture levels for your lemon tree.
Planting in the right soil mix sets the foundation for a thriving indoor lemon tree.
Watering Your Indoor Lemon Tree
Correct watering is crucial for your indoor lemon tree’s health and fruit production. Daily watering may be necessary in summer due to increased temperatures and growth rates. Adjust your watering schedule according to the seasons to maintain optimal soil moisture levels.
Be cautious of overwatering, as indicated by yellowing leaves, which can signal root problems. Ensure the top 3 inches of soil have dried out before watering to prevent overwatering. Using moisture meters or the finger test can help determine the right time to water.
Water thoroughly, allowing water to drain from the bottom of the pot to keep the roots healthy. This technique encourages deep root growth and prevents water from stagnating around the roots.
Maintaining Humidity Levels
Indoor lemon trees thrive in humidity levels above 50%. Typical indoor environments can be quite dry, especially during winter, so maintaining proper humidity levels is vital for your lemon tree’s health. A humidifier or a moisture tray filled with pebbles near your tree can help maintain the necessary humidity. Regular misting of the leaves a few times a week can also keep your tree happy and healthy.
When your lemon tree is indoors full-time in winter, it is crucial to ensure it gets enough humidity to prevent blossom loss and maintain overall health. Keeping the air around your lemon tree moist helps counteract the effects of dry indoor air and supports healthy growth.
Fertilizing Indoor Lemon Trees

Proper fertilization ensures your indoor lemon tree gets the nutrients needed for vigorous growth and fruit production. Citrus trees require a nutrient-rich diet, relying on nitrogen, phosphorus, potassium, and essential micronutrients like zinc and iron. A general-purpose fertilizer or one specially formulated for citrus trees is recommended.
A proper fertilization schedule includes three applications: during early bud break, during fruit swell, and in late summer. However, avoid fertilizing your lemon tree during the winter months to prevent nutrient overload and ensure healthy growth.
This schedule provides your tree with the necessary nutrients to produce vibrant, juicy lemons.
Pruning and Shaping
Pruning maintains the health and shape of your indoor lemon tree. Proper pruning encourages healthy growth and keeps the tree manageable for indoor environments. Prune in late winter or early spring to avoid removing potential fruit.
Focus on minimal pruning, mainly removing thorns and any unwanted shoots. Prune any dead or diseased wood to improve the overall health of your tree. Wearing protective clothing can help prevent scratches from thorns, which are common in some lemon tree varieties.
Regular pruning ensures your tree remains healthy and productive.
Selecting the Best Indoor Lemon Tree Varieties

Choosing the right variety of lemon trees for indoor growing is crucial. Meyer lemon trees and dwarf varieties like Dwarf Eureka are well-suited for indoor environments. These varieties are known for their compact size and ability to produce fruit in limited space.
Other good choices include the Dwarf Ponderosa and Variegated Eureka Pink lemon, which add a unique aesthetic to your indoor garden. Dwarf lemon trees, Calamondin, and Thai Lime are also excellent options for indoor cultivation. Varieties that produce smaller fruits help conserve the plant’s energy for overall health and fruit production.
Pollination Techniques Indoors
Pollination is necessary for your indoor lemon tree to produce fruit. Since natural pollinators like bees are absent indoors, manual pollination is required. Use a small brush or cotton swab to brush the center of each flower and transfer pollen gently. This process can be done once but may be repeated if needed.

Lightly shaking the branches during blooming can also help with pollination. Fresh air can aid in the pollination process and the overall health of your lemon tree.
These simple techniques will help your indoor lemon tree care bear fruit and produce a bountiful harvest.
Repotting Your Lemon Tree
Repotting your indoor lemon tree is an important part of its care routine. Repot from early spring to mid-summer during the active growth phase. Starting with a small pot helps prevent waterlogging and root rot.
When repotting, choose a pot with a similar depth but a wider diameter to accommodate growth. Gently loosen the root ball before placing it in the new pot to encourage healthy root growth. Proper planting technique ensures the health and productivity of your lemon tree.
Common Pests and Issues
Indoor lemon trees are susceptible to common pests such as:
spider mites
scale
aphids
mealybugs
These pests can severely affect their health. Low humidity can lead to pest infestations. Regular inspection and prompt treatment are key to managing these issues.
Symptoms of pest infestations include leaf drop and yellowing leaves. Horticultural oil or insecticidal soap can effectively manage pest problems. If pests are found, isolate the tree and treat it with organic insecticide or soapy water.
These steps will help you grow a lemon tree healthy and thriving. Start by listing how to care for your own lemon tree.
Seasonal Care Tips
Seasonal changes significantly influence the care of indoor lemon trees. Move your lemon tree outdoors to take advantage of natural sunlight in warmer months. Gradually acclimate your tree to its new environment to prevent shock. This process is essential for the tree’s successful adaptation.
Before fall temperatures drop, bring your tree back indoors to protect it from cold damage. Be cautious of sunburn when moving your tree outside, as it can damage the bark and attract pests and diseases.
Adjusting your care routine with the seasons ensures your lemon tree remains healthy year-round.
Lemon Tree Summary
Growing a lemon tree indoors can be a rewarding experience, offering both aesthetic beauty and the joy of harvesting homegrown lemons. From ensuring adequate light and the right soil mix to proper watering, humidity, and fertilization, each step is crucial for the health and productivity of your tree.
You can enjoy a thriving indoor lemon tree by selecting suitable varieties, mastering pollination techniques, and staying vigilant against pests. Embrace the seasonal care tips to adapt to changing conditions and keep your tree flourishing. Start your journey today and relish the satisfaction of growing a lemon tree indoors.
Indoor Lemon Tree Frequently Asked Questions
How much light does an indoor lemon tree need?
Your indoor lemon tree will thrive with about 6-8 hours of bright, direct sunlight daily. Make sure to position it where it can soak up that natural light!
What type of soil is best for an indoor lemon tree?
For your indoor lemon tree, a well-draining citrus potting mix with equal parts sand, peat, and perlite or bark is the way to go. This mix will help keep your tree healthy and thriving!
How often should I water my indoor lemon tree?
You should water your indoor lemon tree daily in the summer, but in other seasons, only when the top 3 inches of soil are dry. This will keep your tree healthy and thriving!
How can I maintain humidity for my indoor lemon tree?
To keep your indoor lemon tree happy, try using a humidifier or placing a pebble-filled moisture tray nearby. Regularly misting the leaves can also help boost humidity and keep your tree thriving!
What are common pests for indoor lemon trees, and how can I manage them?
Indoor lemon trees often face pests like spider mites, scales, aphids, and mealybugs. Regularly inspecting your plants and treating them with horticultural oil or insecticidal soap can keep these nuisances at bay.
For the original version of this article visit: https://www.thetreecareguide.com/growing-a-lemon-tree-indoors/
1 note
·
View note
Text
Large Trees for Large Zone 7 Landscapes
Need help choosing a massive tree species for your large landscape? Knowing which tree species grow to larger proportions will help you fill vast areas of your landscape with shaded recreational areas.

thetreecareguide.com gathered species, planting, and care information for some of the more massive trees hardy to large zone 7 landscapes.
1. Weeping Willow (Salix babylonica)
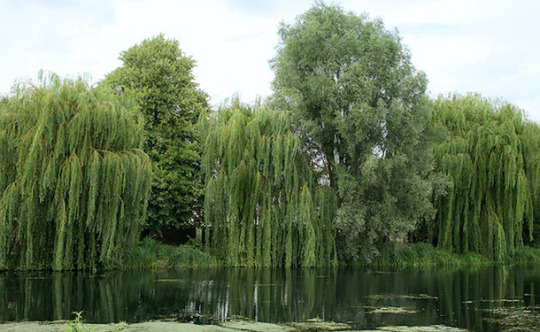
Weeping willows are recognized for their long, drooping branches and delicate leaves. They are typically found near fresh-water sources, as they have a strong affinity for moisture and thrive in damp soil. The weeping willow’s growth rate is fast, with new growth appearing each year. They can reach a mature size of 40 to 50 feet in height and spread, with a broad canopy that provides significant shade.
Weeping willows are hardy in USDA zones 6 through 8 and are easy to care for. They require consistent moisture to thrive, so they should be watered regularly. This tree species benefits from fertilization in the spring and pruning in the winter to maintain shape and encourage healthy growth. The weeping willow is a stunning addition to any large landscape and offer a peaceful, calming presence with their gentle sway in the breeze.
2. Ginkgo Biloba (Ginkgo biloba)
Ginkgo Biloba trees or Maidenhair trees are a unique and ancient species that can live for over a thousand years. They are easily recognized by their fan-shaped leaves turning bright yellow in the fall. These trees have a moderate growth rate and can reach a mature size of 80 feet high and a 50-foot spread. They are hardy in USDA zones 3 through 8 and are tolerant of various soil types as long as they are well-drained.
Ginkgo Biloba trees require minimal care and maintenance, ideal for low-maintenance landscapes. They prefer full sun to partial shade and should be watered regularly. They do not require fertilization, but occasional pruning will help maintain their shape and promote healthy growth. Ginkgo Biloba trees are prized for their medicinal properties (the foliage is believed to have beneficial effects on memory and cognition).
3. American Beech (Fagus grandifolia)
American Beech trees are a beautiful and stately deciduous species native to eastern North America. They have a slow to moderate growth rate and can reach a mature size of 70 to 80 feet in height and spread. They are hardy in USDA zones 3 through 9 and prefer well-drained soil rich in organic matter.
Beech trees need minimal care and maintenance once established. They prefer partial shade to full sun and should be watered regularly. They thrive from an annual compost application around the tree’s base. Pruning is typically only necessary to remove dead or diseased branches. Beech trees are highly valued for their attractive foliage, which turns a golden brown in the fall. They are also an important food source for birds and small mammals.
4. Southern Magnolia (Magnolia grandiflora)
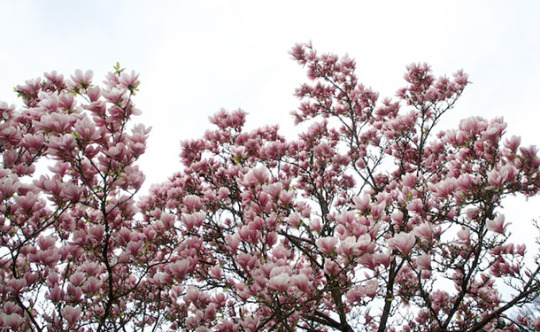
Magnolia Grandiflora trees or Bull Bay are a stunning evergreen species native to the southeastern United States. They are known for their immense, fragrant white flowers blooming in the summer and their glossy, leathery leaves remaining green year-round. They have a moderate growth rate and can reach 60 to 80 feet in height and spread at maturity. They are hardy in USDA zones 7 through 9 and prefer well-drained soil rich in organic matter.
Magnolia Grandiflora trees require minimal care and maintenance once established. They prefer full sun to partial shade and should be watered regularly. They do not require fertilization, but occasional pruning will help maintain their shape and promote healthy new growth. Magnolia Grandiflora trees are highly valued for their ornamental beauty and are often used as specimen trees in landscaping.
5. Black Walnut (Juglans nigra)
[caption id="attachment_693" align="aligncenter" width="610"]

Photo by Sue Lowndes[/caption]
Black walnut trees, or Juglans nigra, are a large and long-lived species native to eastern North America. They are known for their valuable wood and edible nuts, which have a distinctly rich buttery flavor. They have a moderate to fast growth rate and can reach 70 to 100 feet with a 50 to 75-foot spread at maturity. They are hardy in USDA zones 4 through 9 and prefer well-drained, moderately fertile soil.
Black walnut trees require minimal care and maintenance once established. This tree species prefers full sun to partial shade and should be watered regularly. They benefit from an annual compost or organic fertilizer application around the tree’s base. Pruning is typically only necessary for dead or diseased branch removal. Black walnut trees are highly valued for their wood, used for furniture, flooring, and other applications.
Large Trees for Vast Landscapes
In this article, you discovered species, growing, and care information for some of Zone 7’s largest tree varieties for your vast, empty landscape.
Identifying larger trees to help you add dimension and interest to your landscape will give you more shaded areas and potentially increase your home’s curb appeal.
Without larger trees in your landscape, you will have excess barren areas unprotected from the sun’s harsh rays and violent weather.
Sources: trees.umn.edu/weeping-willow-salix-alba snr.unl.edu/data/trees/identification/basictree.aspx?sid=65 uky.edu/hort/American-Beech plants.ces.ncsu.edu/plants/magnolia-grandiflora/ nfs.unl.edu/woody-plants/black-walnut
For the original version of this article visit: https://www.thetreecareguide.com/large-trees-for-zone-7-landscapes/
1 note
·
View note
Text
5 Small Landscape Trees for Tiny Yards
Need help choosing a small tree to plant in your tiny yard? Knowing which tree species remain small will aid you when planning out your limited-space yard.

thetreecareguide.com gathered species, planting, and care information for 5 small (understory) trees that won’t cramp or ruin what little space you have in your yard.
Small Tree Species
You can choose a smaller, more compact tree species when you don’t have enough space in your yard for a towering eucalyptus, massive oak, or southern pine. Small, ornamental, or understory trees range in size from 10 to 40 feet and are easier to care for and prune. Consider the following small landscape tree species:
1. Japanese Maple (Acer palmatum)

This tree is typically grown as a small single-stemmed tree or a large multiple-stemmed shrub. Its shape is rounded to broad-rounded, with a layered branching structure. Japanese maples are magnificent specimens or accent trees performing well in a small grouping, privacy screen, or shrub border.
Mature Height - This species reaches 15 to 25 feet, with a 20-foot spread Hardiness Zone - 5 through 8 Species Type - Deciduous Features - During fall, maples display an incredible show of autumn color before leaf drop. Then, buds swell in early spring, bringing new foliage in amazing colors that often rival the autumn spectacle. Care Tip - Always provide a 2 to 3-inch layer of organic mulch around Japanese maple trees (from the trunk to the dripline).
2. Crabapple (Malus)

Ornamental flowering crabapple trees are valued for their flowers and fruit. The blooms, which emerge before or with the foliage (in the spring), range from white to red. The fruit appears in summer and is less than 2 inches in diameter.
Mature Height - This species reaches 15 to 25 feet, with a 20-foot spread Hardiness Zone - 4 through 8 Species Type - Deciduous Features - Crabapple varieties are widely-grown for their attractive form, spring flowering, and decorative fruit. Care Tip - Crabapples adapt to most soil conditions as long as they are situated in well-drained soil. Avoid foliar diseases by planting them in a location offering (and pruning seasonally for) good air circulation.
3. Cypress (Cupressus)

This evergreen tree species’ foliage is scale-like (2–6 mm long), arranged in opposite decussate pairs, and persists for three to five years. The leaves are more needle-like but have a lush, full appearance on young trees up to two years old.
Mature Height - This species reaches 40 to 60 feet, with a 20 to 25-foot spread Hardiness Zone - 4 through 10 Species Type - Evergreen Features - While tall, this species has a compact, dense spread, making them ideal for privacy screens in landscapes with limited available space. Care Tip - Plant your cypress away from other shade trees or structures that may give them partial shade. Prune this species sparingly (hire a professional tree service when pruning is necessary).
4. Flowering Dogwood (Cornus florida)

Flowering dogwoods are shrubs or small, low-branched trees typically with a flat-topped crown, oval or ovate leaves, and creamy-white flowers with 4 petals each appearing in early spring.
Mature Height - This species reaches 20 to 30 feet, with a 25 to 30-foot spread Hardiness Zone - 7 through 9 Species Type - Deciduous Features - Flowering Dogwood is among the most beautiful eastern North American trees with attractive early spring flowers, red fruit, and scarlet autumn foliage. Care Tip - Plant your flowering dogwood in well-drained, moist soil. Amend the soil with organic material for the best growth.
5. Crape Myrtle (Lagerstroemia)

Crape myrtles are deciduous, small to medium-sized shrubs or small trees with full, moderately dense foliage, often appearing as multi-stemmed trees. Crape myrtle’s showy flowers have wrinkled petals like crepe paper. The foliage is dark green changing to yellows, oranges, and reds in fall.
Mature Height - This species reaches 4 to 20 feet, with a 6 to 15-foot spread Hardiness Zone - 7 through 10 Species Type - Deciduous Features - Spectacular spikes of pink, purple, white, and red flowers top their branches for months in summer. Unlike other flowering tree species, crepe myrtles can bloom all summer. Care Tip - Crape myrtle flowers on new seasonal growth. Prune during the dormant season (late winter to early spring) before growth resumes. Avoid pruning in early fall before the first frost (pruning encourages new growth and keeps the tree from going dormant). Severe freezes can kill the plant if it is not fully adapted and dormant.
Small Trees
In this article, you discovered species, growing, and care information about 5 small tree species that fit nicely in tiny or limited yard space.
Planting small trees with limited yard space will allow you to benefit from the tree’s beauty and shade, while helping your yard resist erosion and increase your home’s curb appeal.
Selecting larger (overstory) trees for a tiny yard can result in a buckled driveway, pathway, sidewalk, or foundation from invasive roots seeking water and nutrients.
Sources: plants.ces.ncsu.edu/plants/acer-palmatum/ hgic.clemson.edu/factsheet/crabapple/ apps.cals.arizona.edu/arboretum/taxon.aspx?id=310 uky.edu/hort/Flowering-Dogwood extension.uga.edu/publications/detail.html?number=C944
For the original version of this article visit: https://www.thetreecareguide.com/5-small-landscape-trees-for-tiny-yards/
0 notes
Text
Fig Tree Care
Keep your fig tree from wilting and prematurely dying. Knowing how to properly care for a fig tree will help it mature to its full size and bear multiple delicious fruit crops.

thetreecareguide.com gathered essential species, planting, and care information for indoor and outdoor fig trees.
Fig Tree Description
The common fig (Ficus carica) is typically a small tree or large shrub in the mulberry (Moraceae) family with attractive leaves and delicious edible fruits. This deciduous tree grows to a mature size of 10 to 30 feet tall and wide quickly.
Note: The Latin name Ficus translates as “edible fig,” and the species Carica refers to the Caria region in Asia known for growing figs.
Planting Fig Trees Outside
Plant in full sun or partial shade in rich, moist, well-drained soil. Fig trees grow best in zones 8 through 11 but can be grown in zone 7 if planted in a sheltered space. When planted in zone 6, your fig tree may need to be grown in a pot and overwintered inside. This species grows well in containers, but container-grown trees must be overwintered indoors.
Soil Preference - Most fig trees flourish in all types of well-drained soil with a 6 to 7.5 pH. Adding eggshells to the soil provides calcium carbonate, phosphorus, magnesium, silicon, and sodium, all of which will help your fig tree grow better.
Watering - Fig trees need 1 to 1 1/2 inches of weekly water. Check the tree's foliage; if it starts turning yellow and falling, it's a sign that your tree needs to be watered. Keep the soil moist but not soaked (around the trunk, extending out to the tree’s dripline). Adding a 2 to 3-inch layer of mulch around the tree can help retain moisture and moderate soil temperature.
Fertilizing - Your fig tree should be fertilized in late winter (before the growing season) and again in late summer. Your fig tree will be prone to diseases and will likely produce fewer fruits if you don't feed it regularly with the right type of feed.
Use a fertilizer made for fruit trees or an all-purpose 8-8-8 or 10-10-10 fertilizer containing a balance of 8 % or 10% N (nitrogen), P (phosphorus, and K (potassium).
Pruning - You should keep pruning activities in mind from planting your fig tree. Avoid pruning in the spring and fall to prevent fungal infection, and consider the following best practices:

Prune your fig tree in its first year
Prune your tree again during the tree's first winter
Continue pruning your tree each year
Select branches to keep as fruiting branches
Prune out any storm-damaged branches
Always use sanitized pruning shears
Prune away any “secondary” branches
Prune away odd growth and suckers
Tip: Cut back the main fruiting branches by one-third to one-quarter. This helps the tree put more energy towards bearing next year’s fruit, which promotes a more extensive and sweeter crop.
Fruit - Fig Trees typically fruit within the first two to three years after planting. Planting a grafted fig tree may result in fruit within the first year.

Planting Fig Trees Indoors
A single, good-sized tree can easily serve as the centerpiece for a room, while it would take several smaller plants to create the same impact. You can acquire a young tree and keep it pruned to control its size if you have a smaller space. Ficus trees can easily reach ten to fifteen feet indoors or larger if you have high ceilings and sufficient light. Consider the following when growing a fig tree indoors:
Light - Fig trees are tropical plants and require ample bright, indirect sunlight when grown indoors. Most fig trees will thrive in an east-facing window (direct sun in the morning and indirect sunlight for the rest of the day).
Soil and Potting - Well-drained soil is fundamental for keeping a potted fig tree healthy. Select a pot with drainage holes that’s about two to three inches larger than your fig tree’s root ball. Use light, fast-draining soil so your tree’s roots won’t sit in water.
Watering - Fig trees do not like being overwatered. Water your tree when the top three inches feel dry to the touch.
Fertilizing - Indoor fig trees need the proper nutrient balance to grow healthy roots, strong trunks, and beautiful foliage. Fertilize regularly during late winter and late summer with an 8-8-8 or a 10-10-10 balanced fertilizer.
Fruiting - If you want to grow edible figs indoors, plant the Negronne fig (self-pollinating variety). Otherwise, you’ll need two trees or manual pollination.
Note: Container-grown fig trees usually fruit within five years of planting and proper care.

Ficus Carica Planting and Care
In this article, you discovered species, planting, pruning, and care information for growing indoor and outdoor fig trees.
Understanding the best conditions for your fig tree’s growth will help you keep it healthy, thriving, and fruiting.
Ignoring planting, watering, fertilizer, and light requirements for fig trees will leave them wilting, dying, and unable to produce fruit.
Sources: plants.ces.ncsu.edu/plants/ficus-carica/ public.asu.edu/~camartin/plants/Plant%20html%20files/ficuscarica.html atlas.uwa.edu/Plant.aspx?id=2677
For the original version of this article visit: https://www.thetreecareguide.com/fig-tree-care/
1 note
·
View note
Text
How to Fertilize Trees
Need help determining when and how to fertilize your trees? Keeping your trees adequately fertilized will help them reach maturity, thriving and healthy.

thetreecareguide.com gathered the following essential information and tips to help keep your trees properly fertilized and flourishing on your property.
When Should I Fertilize My Trees?
When fertilizer is required, it should be applied sometime between late fall through early spring. Fertilize after the first hard freeze in October or November but before the soil freezes in December for the best results. During this window, soil temperature still allows roots to absorb minerals (stored for growth the following spring).
Fertilizers applied during winter (when the ground is frozen) may be lost to leaching, surface erosion, or runoff. Early March or April (before new growth begins) is another excellent time to fertilize trees. Fertilizing during summer months may stimulate late growth that cannot harden before being damaged by freezing fall and winter weather. Consider the following signs when deciding to fertilize your trees:
(Nitrogen Deficiency) Yellowing or chloritic older leaves
(Iron Deficiency) Iron chlorosis is typically a soil pH problem. Iron is less available when the soil pH is above 7.0
(Magnesium Deficiency) Chlorosis of older leaves and short, unhealthy new growth
Other conditions causing chlorosis include:
Poor soil drainage
Over-watering
Improperly or over-mulching
Planting too deeply (burying the root flare)
Root nematodes
Root injury (lawnmower, foot traffic, soil compaction, etc.)
Tip: Newly planted trees should only be lightly fertilized (or not at all) until they are well-established. After their first growing season, young, rapidly growing trees should be fertilized to promote their establishment and support their growth. Mature, well-established trees may only require fertilization every other year to maintain healthy foliage, color, and vigor.
There is a difference between fertilizers and amendments. Fertilizers provide trees with essential nutrients (soluble salt compounds), affecting plant health and growth. Soil amendments indirectly affect trees by improving soil structure and its ability to store and deliver water and nutrients.
Fertilizer Application Methods
These are various methods to fertilize trees that are deficient:
Liquid Root Feeding - Commercial tree and landscape services often use this application method. Nutrients are dissolved in water and soaked into the soil.
Foliar Application - Trees can absorb nutrients through their foliage. Multiple liquid fertilizer brands attach to a garden hose for foliar application. Foliar fertilization is an excellent way to compensate for chelated iron in trees suffering from iron chlorosis. Large shade trees are not typically fertilized using this method.

Tip: When using foliar fertilizer application, follow the manufacturer’s directions on the label is crucial. Excessive fertilizer concentrations (especially when applied during hot periods can burn the tree’s foliage).
Surface Broadcasting - The easiest, most used, and most cost-effective way to fertilize large trees is to broadcast granular fertilizer on the soil surface. Broadcast the fertilizer on the area under the tree (beginning near the trunk and radiating out to the drip line). Irrigate the area well after fertilizing (if rainfall is not expected).
Tip: Avoid fertilizing if heavy rain is forecasted or the ground is still frozen.
Fertilizer Spikes - This is a popular method used by property owners. Spikes made from compressed fertilizer are hammered into the soil, and this method works best when the soil is soft and moist.
Tip: Follow the manufacturer’s instructions on the product label for correct spacing and quantities.
What is the Best Fertilizer for Trees?

Turf fertilizers typically work well for trees because they contain the desired ratio of nitrogen, phosphorus, and potassium. Some of that nitrogen is slowly released to the roots.
Mulching a tree’s root zone with organic mulch (hay, bark chips, pine needles, etc.) helps regulate soil moisture and temperature while slowly releasing nutrients to the soil as it decomposes.
Tip: Working or gently tilling compost into the soil will enrich it but adds more soil structure than nutrients.
Do Trees Really Need Fertilizer?
Yes. Fertilizer helps trees grow and remain healthy. Trees are resilient, but soil nutrient deficiencies can cause their decline. Fertilization gives trees vital nutrients, supports their growth, and significantly contributes to tree health and vitality.
Note: In forested land, fallen leaves accumulate and decompose, recycling nutrients naturally occurring in the tree’s habitat. Fertilization attempts to compensate for nutrients taken from a tree’s root zone by leaf removal.
Can Trees Be Over-Fertilized?
Yes. Tree roots exert force to extract water and nutrients from the soil. Excessive fertilization causes them to shrivel, making it challenging to adequately perform their task. Root rot and disease susceptibility can also occur. Over-fertilization symptoms include the following:
Fertilizer “crust” on the soil surface
Yellowing, drooping, and wilting of lower foliage
Browning leaf tips and margins
Defoliation
Slow or no growth
Tip: The best way to solve an over-fertilization case is to leach excess nutrients from the soil. Excessive watering can slowly flush out the site. You can also remove dying or wilting foliage to reduce fertilizer remnants in the tree itself.
Fertilizing Trees
In this article, you discovered crucial information and tips for properly fertilizing your landscape trees, helping them stay healthy and resist insect infestation and disease.
Knowing when and how to fertilize your trees will give them the nutrients needed for excellent growth and supercharge their natural resistance to invasive insects and debilitating pathogens.
Under-fertilizing or over-fertilizing trees can severely damage their root systems, leaving them in decline, causing damage when they fall on your property.
Sources: extension.missouri.edu/publications/g6865 extension.umd.edu/resource/fertilizing-trees-and-shrubs-and-nutrient-deficiency-symptoms mgeldorado.ucanr.edu/files/170168.pdf
For the original version of this article visit: https://www.thetreecareguide.com/how-to-fertilize-trees/
0 notes
Text
Yew Tree Care, Toxicity, and Mythology
Avoid unwittingly planting a tree that is lethal to grazing wildlife, pets and people. Knowing the danger of planting yew trees on your property will help you decide if the risk is worth the threat.
thetreecareguide.com gathered essential care information, toxicity warnings, and some of the mythology associated with the yew tree species.
Yew Tree Species Information
Yews (Taxus baccata) are densely branching, evergreen trees with a large trunk reaching 20 to 30 feet tall. The bark is thin, scaly, and brown; it comes off in small flakes. Its leaves are dark green, leathery, and narrow with a pointed tip.
Yew can be grown in full sun, partial shade, and full shade. For healthier and more lush growth, however, choose a spot that gets several hours of daily sun. Too much shade can result in thin or irregular growth.
This species can live 400 to 600 years, with some specimens exceeding this lifespan. Consider the following when selecting and preparing a growing location for your yew tree:
Soil Preference - This species thrives in rich, loamy, well-drained soil with a neutral to slightly alkaline soil (5.0 to 8.0 pH). Watering Needs - Established yews require minimal watering. However, during drought conditions, weekly watering is recommended. Adding a layer of mulch around the tree’s base will help retain moisture in well-drained soil. Fertilizing Yews - Yew trees under 15 years can be fertilized each spring. More mature trees will benefit from feeding every other year. For best growth results, apply a “20-15-15” granular or liquid fertilizer around the yew’s drip line, avoiding the area immediately around the trunk. Pruning Requirements - This evergreen species is typically pruned twice a year, once in early July and again in early September. Up to 2/3 of new growth can be safely removed to shape this tree during the July pruning. The fall pruning should be a light touch-up to even out any secondary growth. Hardiness Zone - 3 through 8
Note: Taxus baccata is widely grown in landscapes for decorative purposes or privacy screening, and the species responds well to pruning.
Yew Winter Care
Yews planted in the right conditions can tolerate cold winters without protection. However, they can experience severe winter burn and bleaching. These conditions can be prevented by planting your yew trees on the north-facing side of buildings.
Note: Winter burn occurs when needles and branches repeatedly freeze and are then heated by the winter sun. Read more about protecting your yew during winter weather.

Yew Toxicity
Taxus baccata is a well-known poisonous tree species; all yew parts are deadly poisonous, except for the berry’s flesh. Eating a small quantity of leaves can be fatal for wildlife, livestock, and humans. Yew leaf toxicity is due to alkaloids known as taxines, of which taxine B is suspected as being one of the most poisonous.
Note: Taxine alkaloids are absorbed through the digestive tract incredibly fast, and poisoning signs (nausea, dry mouth, vomiting, stomach pain, dizziness, weakness, nervousness, heart problems, etc.) manifest themselves after 30 to 90 minutes. No antidote is known.
Yew Mythology
The following are some incredible examples of how yews have been embraced by and influenced cultures over millennia:
In Celtic Culture - Old yew tree drooping branches can root and form new tree trunks where they contact the ground. Thus the yew came to symbolize death and resurrection in Celtic culture. The Celts would also have been familiar with the tree’s toxicity.
In Christian Lore - The yew, in particular, symbolizes nature's power of renewal, the seasons’ cycles, birth and death, and new birth. Over time, the yew remained a symbol of eternity in Christianity. However, the words and focus were changed from 'rebirth' to ‘resurrection.’
In Norse Cosmology - The world tree “Yggdrasil” is a massive mythical tree connecting the nine worlds in Norse cosmology. Although typically translated as Ash, it is believed that this tree is likely to have been a Yew.
Ancient Warriors - In ancient times, yews were used for suicides during war times. Food and drink vessels made from yew wood could poison those who ate or drank from them.
The Druids - Yew is typically associated with the dead and is often found in graveyards. The Druids saw yew trees as the guardians of the deceased.

In Greek Mythology - Yew trees are associated with the Greek goddess Hecate, liberator of souls after death.
Note: For as poisonous as yew is, two chemotherapy drugs were developed from yew trees:
Docetaxel (Taxotere) was first made from the European yew tree’s needles
Paclitaxel (Taxol) was made from the Pacific yew tree’s bark
Fascinating how a tree so rooted in poison and death can provide treatment and hope for those with severe health concerns.
Yew Trees
In this article, you discovered species planting and care information, severe toxicity warnings, and some of the ancient mythology surrounding the Taxus baccata species.
Knowing the risks of planting a yew tree and how to minimize them will help you grow a stunning tree that can serve as a specimen tree, landscape tree, or privacy hedge.
Unwittingly planting a poisonous yew tree can lead to grazing wildlife, animals, livestock, or unsuspecting people being poisoned.
Sources: extension.umn.edu/yard-and-garden-news/ask-extension-do-i-need-protect-my-yew-winter plants.ces.ncsu.edu/plants/taxus-baccata/ heritagegarden.uic.edu/yew-taxus-baccata
For the original version of this article visit: https://www.thetreecareguide.com/yew-tree-care-toxicity-and-mythology/
#Yew Toxicity#Yew Mythology#Yew Tree#Taxus Baccata#Poisonous Tree#Tree#Tree Care#The Tree Care Guide
11 notes
·
View notes
Text
7 Tree Care Tips for Property Owners
Need help keeping your trees from becoming hazards on your property? Understanding some basic tree care techniques will help prevent your trees’ sickness, destabilization, and death.

thetreecareguide.com gathered some essential tips to help property owners give their trees the best care so they thrive and stay healthy well into maturity.
1. Tree Selection
When searching for the “perfect” tree, you’ll want to look for one with a straight trunk. Trees that grow into large shade trees should have a strong central leader (trunk) with branches evenly distributed around it. Consider the following when selecting a tree:
Size (knowing the mature height and spread of trees can prevent multiple landscape problems)
USDA Hardiness Zone (A crucial consideration when selecting trees is their cold hardiness)
Pest Susceptibility
Soil Requirements
Tip: Send a soil sample to your state’s university extension for testing. This will reveal the soil’s nutrient content and availability, pH value, microbial activity, etc. This test will guide you if any soil adjustments are needed for healthy tree growth.
2. Tree Planting and Location

Trees can be planted anytime, as long as you can dig an adequate planting hole. If the ground is frozen, it’s better to wait for the thaw. Generally, the more time between planting a tree and the beginning of summer, the better (that makes fall the best time to plant new trees). Early spring is another popular planting time as well. Consider the following when planting your tree:
Dig the hole (2 to 3 times wider than the diameter of the tree's rootball)
Massage, loosen, and trim the roots
Place the tree in the center of the hole
Fill in the hole
Build a wide soil berm (this will help when watering your tree)
Stake and tie the tree
Water the tree thoroughly
Add a 3-inch layer of mulch
Tip: Trees should not be too close to buildings or power lines, and you should consider where you want shade or wind relief around your property. Try to plant trees 15 to 20 feet away from buildings when possible. Evergreens and clumping trees are typically used along property lines (as privacy screens) and in windbreaks.
3. Watering Schedule

Newly planted trees require more frequent watering than established ones. They should be watered at their planting time and at the following intervals:
1 to 2 weeks after planting, water daily
3 to 12 weeks after planting, water every 2 to 3 days
After 12 weeks, water weekly until roots are established
The above is a great rule of thumb, but different trees and soil types require different watering patterns, so keep that in mind to ensure your trees are properly watered.
Note: Water thoroughly before planting, at planting time, and the day after planting. This helps settle the soil and eliminates large air pockets.
4. Why You Need to Mulch

Tree care professionals prefer organic mulches, like wood chips, pine needles, hardwood and softwood bark, composted leaves, and other compost mixes. When these mulches decompose, they improve soil structure and increase soil fertility. Other benefits of proper mulching include the following:
Preserves soil moisture by increasing water infiltration and slowing evaporation
Significantly improves soil structure, fertility, and aeration as it decomposes
Efficiently moderates soil temperature, protecting roots from extreme summer and winter temperatures
Note: The most beneficial mulch options include wood chips, bark nuggets, composted leaves, or pine needles.
5. Seasonal Tree Pruning

Pruning can remove limbs and branches with a disease, fungi, and other decay, stopping them from spreading to healthier branches or the trunk. Removing these branches also exposes the others to more sunlight and air circulation, which helps reduce disease occurrence.
Note: Late winter is the best time to prune most trees. Trees are still dormant at this time of year, and, unlike early winter, wound closure will be rapid if pruning occurs just prior to the growing season.
6. Insect Pests and Diseases

Insect pests can be classified into three categories when regarding trees:
Chewing insects that eat portions of the tree (Japanese beetles, gypsy moths, tent caterpillars, etc.)
Sucking insects that suck sugars out of the tree’s stems and leaves (aphids and scales)
Boring insects that bore into the tree to eat portions of the inner bark or create nests. These insects cause the most damage to trees (Emerald Ash Borer, bark beetles, pine beetles, etc.)
Prevention: Apply insecticidal sprays in 2-week intervals before and during the growing season. However, insects can build up tolerance to even the best insecticide when used repeatedly. Alternate applying insecticides with different active ingredients.
Tree diseases, fungi, and viruses have three crucial factors: the host, the pathogen, and the environment (these make up the disease triangle). Consider the following:
The host is identified as the tree or plant in question
The pathogen is the disease, fungi, or virus
The environment is all the factors influencing the pathogen and host
Most tree species are susceptible to at least one disease-causing fungi. Yet, most fungi are beneficial to their host (only a few are harmful to trees).
Disease can be carried by vectors, most commonly insects. This is seen in dutch elm disease, where the bark beetle acts as a vector. Given there are a multitude of diseases, being able to properly identify the disease or pest that's doing the damage will help you considerably in resolving your issue.
Prevention: Fungicides kill the fungi that cause many common tree diseases. Treatment methods may include tree spraying or fungicide injection into the truck, branches, or soil. Insecticides should also be considered, as many pathogens migrate on insect vectors.
7. Tree Fertilizing and Pulling Weeds

When needed, the best time to fertilize is mid-spring (April or early May) or late fall once trees are dormant. The fertilizer should be spread evenly across the soil surface, and the amount of nitrogen applied should be 3 pounds per 1,000 square feet.
Note: Early spring growth depends almost entirely on nutrients absorbed and stored the previous year.
Tree Care Tips
In this article, you discovered tree planting and care tips to help you keep your trees healthy and strong as they grow and tower over your property.
Knowing what to do for your trees when planting them and as they grow will help you keep them thriving and prevent them from dying and falling on your property.
Not knowing the best ways to plant, care for, water, and trim trees leaves them vulnerable, and you responsible to spend money to have them removed.
Sources: extension.umn.edu/planting-and-growing-guides/watering-newly-planted-trees-and-shrubs csfs.colostate.edu/2018/02/20/late-winter-best-time-prune-trees-colorado/ ourcityforest.org/blog/2020/4/17/identifying-tree-pests-and-disease canopy.org/tree-info/caring-for-trees/mature-trees/ arborday.org/trees/tips/
For the original version of this article visit: http://www.thetreecareguide.com/7-tree-care-tips-for-property-owners/
#Tree Planting#Tree Watering#Tree Mulching#Tree Pruning#Tree Fertilizing#Tree Pests#The Tree Care Guide#Caring For Trees
0 notes
Text
Poisonwood Tree Information, Toxicity, and Treatment
Avoid severe rashes, itching, and blistering caused by contact with a poisonwood tree. Knowing how to identify and how this tree species adversely affects you will help you remain vigilant in avoiding its bark, sap, and foliage.

thetreecareguide.com gathered essential information and warnings about the poisonwood tree and what it can do to you.
Poisonwood Tree Information
Poisonwood grows as a large evergreen shrub or tree that reaches 25 to 35 feet tall in pinelands and sandy areas near saltwater. Learn to identify a poisonwood tree, as this tree species is abundant in the Florida Keys and multiple counties throughout southern Florida.
This tree species has a rounded form with a short trunk, arching limbs with drooping branches, and often a purplish-blackoily spot. The tree’s bark varies in color from reddish brown to gray and typically has oily patches of toxic sap on the surface. Each leaf comprises three to seven oval leaflets, which are glossy and dark green on the top and paler underneath. The fruit is ½ inch long, oval, and yellow to orange in color.
Note: While toxic to humans, poisonwood fruit is a crucial food source for the threatened white-crowned pigeon.
Metopium Toxiferum Toxicity
Metopium Toxiferum is related to poison oak, poison ivy, and poison sumac. The tree produces the same irritant, urushiol, which causes an itchy, blistering rash.
The oils from Metopium toxiferum cause dermatitis ranging in severity from a light red rash to intense skin blistering. Tea made from Metopium toxiferum leaves and twigs combined with bleach has been used to induce abortions but has also tended to kill the patient.
Note: Studies have found that Metopium Toxiferum produces a variety of allelopathic chemicals, which inhibit the growth of any nearby competitors.
What Does The Poisonwood Tree Do to You?
Urushiol is a highly potent irritant that can cause serious injuries. The substance is found in most parts of poisonwood trees, including the leaves, bark, and inner wood.
When you get urushiol on your skin, it causes allergic contact dermatitis. This affliction is a T cell-mediated immune response in which the body's immune system recognizes it as foreign and vigorously reacts to the urushiol-derivative complexes with skin proteins.
Note: The smoke of burning Metopium toxiferum wood is highly irritating when inhaled. Even rainwater that drips from the branches and leaves may cause a severe rash.
How to Treat Metopium Toxiferum Poisoning
Applying a topical over-the-counter skin protectant, like zinc acetate, zinc carbonate, zinc oxide, or calamine, dry the oozing and irritation caused by urushiol oil. Protectants like baking soda or colloidal oatmeal can relieve minor irritation and itching.
In severe cases or if the rash is on the face or genitals, seek immediate professional medical attention.
Call 911 or go to a hospital emergency room if you develop a severe allergic reaction, like swelling or difficulty breathing, or have had a past severe reaction.
Urushiol ingestion (of any amount) can lead to severe, systemic reactions and should be treated as poisoning.
Get help from Poison Control immediately if you suspect Metopium Toxiferum poisoning. Free, expert help is available 24/7 from Poison Control Centers at:
(800) 222-1222 or Web Poison Control

What Is the Poisonwood Tree Used for
Black poisonwood (Metopium brownei) is well-known for being easy to work, hard, heavy, and durable. It often features rich dark red colors and attractive figuring. The species’ wood is primarily used to make interior products, like cabinets, furniture, and flooring, but is also used in other external applications, like vehicle trim and bridge construction.
What Is the Ecological Value of Poisonwood Trees
Toxic to humans, the poisonwood tree species plays a crucial role in nature, providing home and nurture for multiple butterfly and bird species. Butterflies use its flowers as a source of nectar (including the Bahamian and giant swallowtails, the Florida white butterfly, and the mangrove skipper). The tree's small drupe fruit provides sustenance for white-crowned pigeons during their nesting season, and the Bahamian parrot also makes these drupes part of its diet.
Toxic Poisonwood Trees
In this article, you discovered essential species information, advisories, and warnings about the dangerous poisonwood tree and how to seek help when contact with this tree causes a reaction.
Knowing how to correctly identify and avoid the poisonwood tree will help you prevent severe skin rash, painful blisters, and other unpleasant side effects.
Ignoring the poisonwood tree’s extreme toxicity and inherent dangers can cause painful skin irritation and excruciating blisters immediately after contact.
Sources: edis.ifas.ufl.edu/publication/EP220 ius.edu/environmental-health-safety/files/poisonous-plants.pdf fda.gov/consumers/consumer-updates/outsmarting-poison-ivy-and-other-poisonous-plants cdc.gov/niosh/topics/plants/exposure.html nps.gov/ever/learn/nature/barkingupatree.htm florida.plantatlas.usf.edu/plant.aspx?id=581
Photo credit: Florida Keys National Wildlife Refuges Complex
For the original version of this article visit: http://www.thetreecareguide.com/poisonwood-tree-information-toxicity-and-treatment/
0 notes
Text
Manchineel Tree Toxicity, Effects, and Treatment
Avoid severe blistering, respiratory complications, and potential death caused by contact with a manchineel tree. Knowing how this tree species can adversely affect your health will help you remain vigilant in avoiding its bark, sap, foliage, and fruit.

thetreecareguide.com gathered essential information and warnings about the manchineel tree and what it can do to you.
Manchineel Tree Information
The manchineel tree (Hippomane mancinella), also referred to as “poison guava” or “beach apple,” is a species of flowering plant from the spurge family. Its native range reaches from tropical southern North America to northern South America and is typically found on sandy beaches.
Warning: All parts of the manchineel tree are extremely poisonous, and interaction with or ingestion of any part of this tree may be lethal.
Hippomane Mancinella Toxicity
All parts of the manchineel tree, including its fruit, is poisonous, and according to The Guinness Book of World Records, it was deemed the most dangerous tree in the world in 2011. This tree’s toxicity is well known and documented. Centuries ago, Christopher Columbus referred to the tree's fruit as "Manzanilla de la Muerte,” or the little apple of death.
Manchineel Tree Identification
You can identify this poisonous evergreen tree by its grayish or brown, scaly or fissured bark, small greenish-yellow blooms, and shiny (almost waxy) green leaves. The Manchineel tree’s glossy leaves are alternately arranged on the stems and have a rounded base with pointed tips, and have either smooth or slightly toothed edges that may be slightly bent upward.
The leaves are shiny on the upper surface and dull underneath. Leaves grow 2 to 4 inches long and 1 to 3 inches wide. The leaves have a single conspicuous central vein which (when damaged) bleeds a toxic milky sap in young plants.
The tree’s numerous small fruits are primarily green or greenish-yellow when ripe, often highlighted with red, and similar in appearance to an apple. This appearance and toxicity have garnered the little fruit with the name “death apple.”
What Does The Manchineel Tree Do to You?
Poisoning symptoms can include nausea and diarrhea followed by shock and severe muscle weakness. If the machineel fruit is eaten, the person may experience burning and swelling of the mouth and throat, nausea, diarrhea, and severe stomach pain. This person will be unable to swallow, talk, or breathe, potentially leading to death.
The fruit has been described as having a peppery taste that leads to a tearing, burning sensation followed by a tightening of the throat until swallowing and breathing become challenging.

This species’ milky white sap contains phorbol, along with other skin irritants, producing intense allergic contact dermatitis, including blistering and swelling. This contact may also lead to severe conjunctivitis with blindness for up to 72 hours.
Note: Merely standing beneath the tree during rain will cause severe skin blistering from contact with this liquid. Even a tiny drop of rain with the milky substance will cause your skin to blister.
How To Treat Manchineel Poisoning
Manchineel dermatitis and ophthalmitis treatment should include immediate and vigorous cleansing to remove the toxin-filled latex and follow-up symptomatic measures, including cool compresses and anti‐irritants. Typically, corticosteroids have been suggested/prescribed as treatment in severe cases (especially involving the eyes).
Get help from Poison Control immediately if you suspect beach apple ingestion or manchineel poisoning. Free, expert help is available 24/7 from Poison Control Centers at:
(800) 222-1222 or triage.webpoisoncontrol.org
What Is the Manchineel Tree Used for
Centuries ago, manchineel’s highly toxic sap was used by Caribbean Indians as arrow poison. Despite this tree’s dangerous nature, people have used manchineel wood to make furniture for generations. This process involves carefully cutting the wood and sun drying it to neutralize its poisonous sap.
Note: Native people used manchineel as medicine, including the gum for edema and its dried fruits as a potent diuretic.
What Is the Ecological Value of Manchineel Trees
The manchineel tree provides food, shelter, and habitat for some species that have developed an immunity to its toxicity. It also combats natural beach erosion and can serve as an efficient windbreak during severe tropical storms.
The Poisonous Manchineel Tree
In this article, you discovered essential species information, advisories, and warnings about the poisonous manchineel tree and how to seek help when ingested.
Knowing how to identify and avoid the manchineel tree will help you avoid severe skin rash, painful blisters, and other unpleasant side effects.
Ignoring the toxicity and inherent danger of the manchineel tree can cause nausea and diarrhea followed by shock and severe muscle weakness. Once ingested, this tree’s fruit can kill you without seeking immediate medical attention.
Sources: npr.org/2022/08/25/1119333236/worlds-most-dangerous-tree-manchineel-florida nps.gov/viis/planyourvisit/upload/TrifoldHazardPlandstoAvoid.pdf ncbi.nlm.nih.gov/pmc/articles/PMC1127797/ edis.ifas.ufl.edu/publication/FR370
For the original version of this article visit: http://www.thetreecareguide.com/manchineel-tree-toxicity-effects-treatment/
#Manchineel Tree#Poisonous Tree#Poisonous Tree Fruit#Beach Apple#Tree#Tree Care#the Tree Care Guide#Tree Health
0 notes
Text
Beneficial Companion Plants for Fruit Trees
Prevent soil erosion, harmful pests, and hungry wildlife from damaging your fruit trees. Knowing which companion plants to grow around your fruit trees will keep them growing healthy and less susceptible to insect and animal invasion.

thetreecareguide.com gathered essential information on several highly beneficial companion plants to grow around your fruit trees.
What Do Companion Plants Do?
Planting companions to lure beneficial insects is called “habitat influence.” Companion plants attract beneficial insects so those bugs can feed on the bad, predatory, and destructive pests that would otherwise damage or destroy the fruit trees you want to protect. The practice of companion planting also benefits the surrounding soil by preventing erosion and - in many cases - fixing nitrogen. The most beneficial companion plants for fruit trees include:
Geraniums (Pelargonium)

Geraniums are known for their aromatic, green foliage, with their fragrance varying from plant to plant. This flowering plant can be found growing throughout the temperate regions of the world.
Size at Maturity - This species reaches 5 to 36 inches in height, depending on the variety Benefits as a Companion - Geraniums are known to repel highly destructive insects like earworms, cabbageworms, and Japanese beetles Attracts - Geraniums attract bees, butterflies, and hummingbirds Repels - Geranium repels a variety of insects, including mosquitos and leafhoppers Hardiness Zone - 3 through 9
Chamomile (Matricaria chamomilla)

Chamomile, also spelled camomile, is any of various daisy-like plants from the aster family (Asteraceae). Chamomile tea, used as a tonic, an antiseptic, and in multiple herbal remedies, is made from English or Roman, chamomile (Chamaemelum nobile) or German chamomile (Matricaria chamomilla).
Size at Maturity - This species reaches 24 inches in height Benefits as a Companion - Its anti-bacterial and anti-fungal properties have been applied for centuries in herbal gardening to support the healthy growth of trees, vegetables, and other annuals. Using chamomile as a companion plant is easy, effective, and packed with benefits for you and your fruit tree Attracts - Hoverflies, beneficial wasps, ladybugs, and honey bees are attracted to chamomile Repels - Chamomile repels ticks, mosquitoes, and flies Hardiness Zone - 3 through 9
Wildflowers (Multiple species)
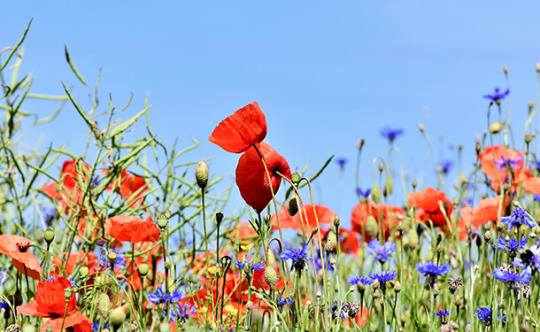
Wildflowers are flowers that grow without any help or intervention from people, growing naturally in their environment. Some may grow wildflowers in their garden, but most wildflowers are native plants and grow in woods, meadows, wetlands, or anywhere they adapted to grow.
Size at Maturity - Wildflowers reach a few inches to a few feet in height, depending on the species and variety Benefits as a Companion - Wildflowers provide critical habitat for pollinators, beneficial insects, and wildlife, which is crucial for ecosystem function and pollination. Wildflowers can also improve soil health, prevent erosion, and improve water quality Attracts - Bees, butterflies, hoverflies, and ladybugs which help to increase harvests and keep common pests like aphids under control Repels - Flowers like daisies, red clovers, poppies, and wild carrots can act as natural pesticides by attracting useful (predatory) insects to repel nuisance pests Hardiness Zone - All zones have cold-hardy wildflower species
Lavender (Lavandula)

Lavender is one of the most beloved floral scents we use today. Its soft purple buds symbolize grace, calmness, and even luxury. Lavender is so synonymous with serenity that it is associated with the crown chakra, known for its spiritual connection.
Size at Maturity - This species reaches 2 to 3 feet in height Benefits as a Companion - Lavender attracts a variety of pollinators and deters rabbits and deer Attracts - Lavender attracts butterflies, bees, and other beneficial insects to the garden, making it an excellent choice for a fruit tree companion Repels - beetles, moths, fleas, mosquitos, flies, nematodes, rabbits, and deer Hardiness Zone - 5 through 9
Marigolds (Tagetes)

Marigold flowers consist of multiple overlapping petals that get smaller and more condensed towards the flower’s center, similar to a carnation. The blooms may be single or double colored and can appear in varying yellow, orange, red, and maroon hues.
Size at Maturity - This species reaches 6 to 24 inches in height, depending on the variety Benefits as a Companion - Marigolds attract bees, butterflies, and other pollinators. They attract predatory insects, like ladybugs, that feed on aphids and other pests. The limonene in marigolds can deter whiteflies, and the plant’s roots secrete chemicals that kill nematodes Attracts - Spider mites, snails, bees, Japanese beetles, butterflies, and other beneficial pollinators Repels - Whiteflies, nematodes, mosquitos, cabbage worms, squash bugs, tomato worms, wasps, and spiders Hardiness Zone - 2 through 11
Best Companion Plants for Fruit Trees
In this article, you discovered species information on some of the most beneficial companion plants for your fruit trees.
Knowing what to plant around your fruit trees can help you improve soil structure, attract beneficial pollinators, and deter pesky insects and wildlife.
Not knowing about companion plants can leave your fruit trees susceptible to soil erosion, insect infestations, and reduced crops from poor pollination.
Sources: scholar.lib.vt.edu/ejournals/JARS/v50n3/v50n3-dancer.html ucanr.edu/blogs/blogcore/postdetail.cfm?postnum=17642 extension.umn.edu/planting-and-growing-guides/companion-planting-home-gardens womensconference.byu.edu/sites/womensconference.ce.byu.edu/files/49e_1.pdf erc.cals.wisc.edu/healthylakesgrants/files/2020/06/NativePlantCompanionGuide.pdf
For the original version of this article visit: http://www.thetreecareguide.com/beneficial-companion-plants-for-fruit-trees/
#Matricaria Chamomilla#Pelargonium#Lavandula#Tagetes#Marigolds#Lavender#Wildflowers#Chamomile#Geraniums#Companion Plants#Tree#Tree Care#TheTreeCareGuide#Tree Health
2 notes
·
View notes
Text
5 Trees with Non-Invasive Roots
Avoid planting a tree that will destroy your driveway and cost thousands of dollars to your home’s foundation. Knowing which trees have non-invasive roots will help you plant the right species in your yard.
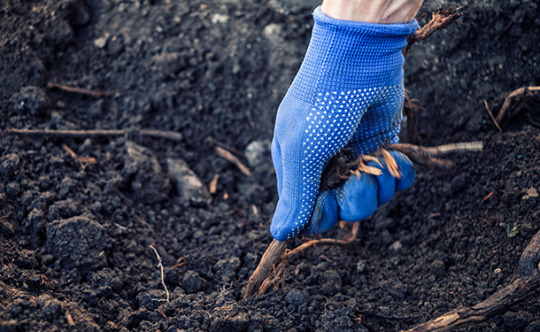
thetreecareguide.com gathered essential information on five tree species that have non-invasive root systems and can be safely planted around your home and hardscape.
What are Non-Invasive Roots?
Non-invasive root systems (as the name implies) are less likely to grow beneath and interfere with sidewalks, sewers, or your home’s foundation.
Even trees with non-invasive roots should still be planted 8 to 10 feet from your home or other structure that could interfere with the tree’s growth or care. While the following tree species are not known to have invasive root systems, they should still be planted with sufficient space to permit their growth to full maturity:
1. White Oak (Quercus alba)

White oaks are large, strong, imposing trees. They have short, stocky trunks with massive horizontal limbs. The wide-spreading branches form an upright, well-rounded crown.
Mature Size - At maturity, this species reaches heights of 50 to 80 feet with a spread of 50 to 80 feet. Sun - This tree species prefers full sun but has a moderate tolerance to partial shade. It is more shade tolerant in its youth and less tolerant as it grows larger. Soil Type and pH - White oaks can adapt to a variety of soil textures but prefer deep, moist, well-drained sites. This species thrives in soils with a pH of 5.5 to 8.0. Water Requirement - Young and mature oak trees require little watering, only once a month. USDA Hardiness Zone - 3 through 9
2. Eastern Black Walnut (Juglans nigra)

This species is a tall tree of the walnut family (Juglandaceae). It is native to eastern North America and prized for its decorative wood. Black walnut’s dark, fine-grained wood is commonly used in furniture, paneling, and gunstock production.
Mature Size - At maturity, this species reaches heights of 50 to 75 feet with a spread of 50 to 75 feet. Sun - This species thrives in full sun with at least six hours of direct sunlight every day. Soil Type and pH - Eastern black walnut grows best on deep, well-drained, nearly pH-neutral (6.5 to 7.2) soils that are fertile and moist but not wet. Water Requirement - Water well-established walnuts every two to three weeks. USDA Hardiness Zone - 4 through 9
3. Crabapple (Malus)

The crabapple is a small, deciduous, fruit-bearing tree found primarily in the temperate zones of the Northern hemisphere.
Mature Size - At maturity, crabapples reach heights of 10 to 25 feet with a spread of 10 to 25 feet. Sun - This species needs at least six hours of sun a day to guarantee ample blossoming and fruiting. Soil Type and pH - Crabapples thrive in rich loam-type soil (a combination of clay, silt, and sand). Good drainage is a must for tree health, and the soil should be moist, slightly acidic, and with a 5.0 to 6.5 pH. Water Requirement - Once established, crabapples are drought tolerant and should not need any supplemental watering unless the season is considerably dry. USDA Hardiness Zone - 3 through 8
4. Japanese Maple (Acer palmatum)

Small deciduous Japanese maple trees are highly prized for their delicate and colorful foliage throughout the growing season and fall.
Mature Size - At maturity, this species will reach heights of 15 to 25 feet with a spread of 20 feet. Sun - Japanese maple trees prefer to grow in partial shade with about four hours of direct, unfiltered sunlight per day. Soil Type and pH - Japanese maples grow in acidic (5.5 to 6.5 pH), loamy, moist, rich, sandy, silty loam, well-drained, and clay soils. The species prefers moist, well-drained soil conditions but is somewhat drought tolerant. Water Requirement - It's good to water your Japanese maple tree a few gallons every other day. USDA Hardiness Zone - 5 through 8
5. Crape Myrtle (Lagerstroemia)

Crape myrtles are deciduous, small to medium-sized trees with a variable, moderately dense habit, often multi-stemmed form. The tree’s showy flowers have wrinkled petals like crepe paper. The species’ foliage is typically dark green changing to yellows, oranges, and reds in autumn.
Mature Size - At maturity, this species will reach heights of 15 to 25 feet with a spread of 6 to 15 feet. Sun - Crape myrtle trees need full sun (6 or more hours per day) to thrive. Soil Type and pH - Crape Myrtles can be grown all over the USA in any soil type and will thrive in an acidic to slightly acidic soil ranging from 5.0 to 6.5 pH. Water Requirement - This species needs at least one inch of water per week. USDA Hardiness Zone - 7 through 10
Tree Species with Non-Invasive Root Systems
In this article, you discovered five tree species that can be safely planted in your yard without worrying about your driveway, sidewalk, street, or foundation being broken up by invasive roots.
Planting trees with non-invasive roots allows you to grow a beautiful yard and benefit from your trees, providing shade and shelter from bad weather conditions.
Planting trees with invasive root systems will have you repairing costly damages as they will lift and crack driveways, foundations, sidewalks, and streets.
Sources: naturalresources.extension.iastate.edu/forestry/iowa_trees/trees/white_oak.html naturewalk.yale.edu/trees/juglandaceae/juglans-nigra/eastern-black-walnut-59 hgic.clemson.edu/factsheet/crabapple/ plants.ces.ncsu.edu/plants/acer-palmatum/ arborday.org/trees/treeguide/treedetail.cfm?itemID=824
For the original version of this article visit: http://www.thetreecareguide.com/5-trees-with-non-invasive-roots/
#Invasive Tree Species#Invasive Tree Roots#Tree#Tree Care#The Tree Care Guide#Tree Health#White Oak#Eastern Black Walnut#Crabapple#Japanese Maple#Crape Myrtle
0 notes
Text
How To Care for a Bonsai Tree
Prevent your bonsai trees from withering and and avoid its premature death. Knowing how to care for a Bonsai tree will help you enjoy a thriving miniature of your favorite tree species for years or even decades.

thetreecareguide.com gathered essential information and tips on how to care for your Bonsai tree and help it thrive disease and pest-free.
Bonsai Tree Care
Though Bonsai trees are more delicate than regular trees and plants, a few simple pointers should help you successfully take care of your miniature. Consider the following care information and tips:
1. Bonsai Tree Location
In most homes, the only place where a Bonsai will thrive is at a South facing window. A lot of light is essential for your tree’s health. If your Bonsai is placed just a few feet away from a window, the light intensity will drop significantly, slowing down or stopping its growth and ultimately killing it.
2. Watering a Bonsai Tree
The most crucial element of Bonsai tree care is watering it. How often a tree needs to be watered depends on:
The tree species
Tree size
Soil mixture
Climate
Pot size
Time of year
Do not water your tree if the soil is moist, but avoid letting the tree dry out. As a beginner, you can use your finger to check (one centimeter deep) the soil moisture. If it's dry, water your tree. With time, you'll be able to see rather than feel when it’s time to water your tree.
Tip: Your tree’s soil-mixture influences how often your trees will need to be watered. Bonsai trees typically thrive on a mixture of ½ akadama, ¼ pumice, and ¼ lava rock. For those unable to water their plants regularly, use a soil mixture that retains more water. This can be accomplished by using more akadama or including compost in your soil.
Note: Akadama is a naturally occurring, granular clay-like mineral used as a soil component for bonsai trees and other container-grown plants.
3. Fertilizing a Bonsai Tree
Trees growing normally will naturally extend their root system in search of water and nutrients. Since Bonsai tree root systems are confined to pots, fertilizing them regularly during the growing season is essential for them to thrive.
Typical indoor Bonsai trees can be fertilized year-round, while older and more developed trees can be fertilized during the species’ growing season (typically early spring through mid-fall). Tree fertilization varies depending on:
Tree health
The tree species
Time of year
Tree development
All fertilizers contain three fundamental elements; Nitrogen, Phosphorous, and Potassium (commonly labeled as NPK):
Nitrogen increases leaf, stem, or “above ground” growth
Phosphorus encourages healthy root, fruit, and flower growth
Potassium is known to enhance a tree’s overall health
Growers and gardeners will use different ratios of NPK for different tree species and during different seasons.
Tip: Look for fertilizers containing micronutrients like Iron, Manganese, Boron, Molybdenum, Zinc, and Copper for increased growth and health.
4. Repotting a Bonsai

All bonsai trees need to be repotted and root pruned to maintain continued good health. Keep in mind that as the top of your tree grows, so shall its roots. Root pruning will encourage new growth, while repotting offers an excellent opportunity to replace old, depleted soil.
Here’s how to repot your Bonsai tree:
Lift the tree from its pot - The root mass will likely match the contours of your pot
Use a root hook - Gently loosen and comb out the tangled bottom third of the root ball
With sharp and clean pruning shears - cut off the bottom third of the root ball
Tip: Shorten the large, heavy roots. A bonsai tree’s most essential roots are the more delicate feeder roots.
Prepare the pot - Add a light layer of fresh soil to the pot, with a mound of soil in the middle
Replace the tree - Place the tree in its original position and spread the roots out evenly
Add soil - Add more soil and gently work it in around the roots with the root hook
Tip: After repotting, let the tree recover for 10 to 15 days out of full sun and wind, avoid fertilizing until new growth emerges, and water only to keep the root/soil moist - not soggy.
5. Bonsai Tree Pruning
When should a Bonsai tree be pruned? Regular maintenance, damage removal, and shaping pruning can be done anytime year-round for Bonsais kept indoors.
Major branches should be carefully trimmed with clean pruning shears or sharp scissors, while very small growths can be cleanly pinched away with your fingers.
Trim away any dead leaves or overgrown branches and stems to promote new growth. Maintenance pruning encourages the development of lateral branches and refines the shape of your Bonsai.
How Do You Care for an Indoor Bonsai Tree?
In this article, you discovered essential location, watering, fertilizing, repotting, and pruning information to help you care for your Bonsai tree.
Properly caring for your Bonsai tree will encourage it to grow and thrive for many years to come.
Ignoring your Bonsai tree’s care needs will lead to its decline, vulnerability to disease and pest infestation, and eventual death.
Sources: sites.psu.edu/forloveofchlorophyll/2017/11/17/bonsai-general-care/ uaex.uada.edu/yard-garden/resource-library/plant-week/bonsai.aspx ndsu.edu/pubweb/chiwonlee/plsc211/student%20papers/articles04/Ashley%20Vangsness/avangsness.htm
For the original version of this article visit: http://www.thetreecareguide.com/how-to-care-for-a-bonsai-tree/
#Bonsai#Bonsai Tree#Bonsai Tree Care#Tree Care#The Tree Care Guide#Tree Health#How To Care For A Bonsai Tree
3 notes
·
View notes
Text
Hazardous Tree Diseases Identification and Treatment
Prevent the rapid decline and death of your trees. Knowing how to identify and treat a disease-ridden tree will help you preserve and protect its health and well-being of the surrounding landscape.
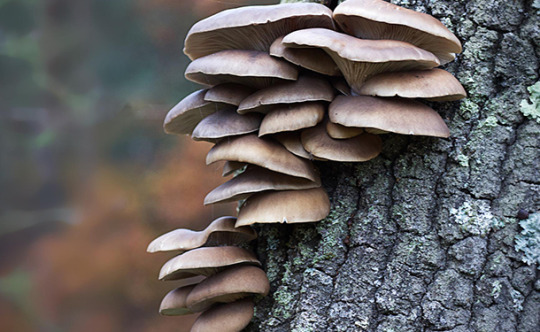
thetreecareguide.com gathered essential information and tips on how to identify and treat trees infected by hazardous diseases.
How do you identify a diseased tree?
Tree diseases primarily attack a tree’s vascular system, robbing it of crucial nutrients and water. While each disease has signature symptoms, the following are signs that your tree is under attack and may require your help to survive:
Bark Abnormalities - Healthy trees exhibit continuous bark without deep cracks or holes. These imperfections reflect that your tree is diseased, dying, and may break or collapse.
Dieback - Dead branches are common signs of disease and pose a significant risk of breaking. These branches should be removed as a safety precaution.
Poor Architecture - Normal tree growth is typically balanced and centered. When trees are growing unevenly, lopsided, or leaning too far in any direction, there may be a disease at play.
Leaf Discoloration (Chlorosis) - Discolored foliage occurring “out of season” on deciduous trees or any time on evergreen trees is a sure indication of disease.
Mushroom Conks - Mushroom growth is a widely recognized sign of disease and decay occurring within a tree. Soft or crumbling wood is another common sign of this decay.
Treacherous Tree Diseases
The following are aggressive and typically fatal tree diseases unless detected and treated in their early stages:
1. Anthracnose (Glomerella cingulata)

Description - Anthracnose is a group of fungal diseases that affect a wide variety of plants, shrubs, and trees in warm, humid areas. Shade trees like sycamore, ash, oak, and maple are highly susceptible, though the disease is found in a number of plants, including grasses and annuals worldwide.
Signs and Symptoms - Anthracnose symptoms include irregular brown spots or blotches on foliage and leaf malformation/distortion like curling or crumpling.
Health Risk - Anthracnose causes rapid and complete chlorosis, browning, and death of foliage, twigs, branches, and other plant tissue. Agriculturally, Anthracnose can reduce a healthy harvest to rotted waste in a matter of days.
Treatment - Remove and destroy (burn) infected plants in your garden. For trees, prune any dead wood and burn infected leaves.
2. Armillaria (Armillaria mellea)

Description - Armillaria is a genus of fungi, including the A. mellea species known as honey fungi (and known as a form of root rot) that typically live on trees and woody shrubs.
Signs and Symptoms - Wilted, downward-hanging (drooping) leaves are often among the first apparent symptom of Armillaria root rot. Other typical symptoms include chlorosis, premature leaf drop, and upper limb dieback. During the wet fall and winter seasons, clusters of short-lived mushrooms may grow around the base of Armillaria-infected trees.
Health Risk - This disease severely impacts tree health and destroys root function and durability.
Treatment - Armillaria can be managed by the systematic removal of infected or dead trees, their stumps, and roots.
3. Ganodermia Lucidum (lingzhi mushroom or Ganoderma rot)

Description - Ganoderma rot is a white-rot fungus that causes tree trunk diseases. It can quickly kill trees and commonly attacks any palm tree species.
Signs and Symptoms - Trees affected by this fungus may exhibit chlorotic, wilting, or undersized leaves and severe dieback, slower growth, and more dead lower foliage than usual.
Health Risk - Affected trees are easily blown-down during rainstorms or windy periods.
Treatment - There are no cultural or chemical controls for preventing this disease or for curing it after infection occurs. An infected tree should be removed entirely and destroyed as soon as possible after the disease’s conks appear on the trunk. The stump and root system should be removed as well.
4. Inonotus Dryadeus (oak bracket or weeping conk)

Description - This disease is a parasitic saprobic fungus, with spores infecting wounds on broadleaf trees like oak, maple, elm, and chestnut. Fruiting structures grow close to the ground on the trunk, are firmly attached, and appear either singularly or in clusters.
Signs and Symptoms - Infected trees will exhibit dieback, severe chlorosis, and general canopy decline.
Health Risk - Infected trees may topple before any symptoms are detected.
Treatment - As a parasitic fungus with no known cure, Inonotus dryadeus can quickly cause severe tree damage. An infected tree should be removed entirely and destroyed as soon as possible after infection confirmation.
Tree Diseases
In this article, you discovered signs and symptoms of hazardous tree diseases, how to treat them, and when to call for help.
Knowing how to identify and what to do when a tree is battling disease will help you take prompt actions to preserve the tree and protect others within its reach.
Ignoring diseased trees can result in rapid decline, death, and catastrophic damages in itself, surrounding trees, and landscape.
Sources: extension.psu.edu/tree-diseases-that-create-hazards ufi.ca.uky.edu/treetalk/planthealth-anthracnose ipm.ucanr.edu/PMG/PESTNOTES/pn74171.html plantclinic.tamu.edu/calendar2018/ganoderma-rot/
For the original version of this article visit: http://www.thetreecareguide.com/hazardous-tree-diseases-identification-and-treatment/
#tree#tree care#The Tree Care Guide#Tree Health#Tree Diseases#Anthracnose#Armillaria#Ganodermia#Inonotus Dryadeus
0 notes
Text
Does Homeowners Insurance Cover Tree Removal
Avoid paying for something that is covered by your homeowners insurance. Knowing when your insurance company covers tree removal costs and when they do not will help you make informed decisions when you need to hire a tree service.

thetreecareguide.com gathered essential information and tips on how homeowners insurance handles emergent tree situations on your property.
Emergency Tree Removal
Mature trees in your yard block wind, offer privacy from neighboring eyes, and cool your home in the summer months by shading it. These same trees are also risk factors for potentially catastrophic damage to your home, any outbuildings on the property, your vehicles, and your physical wellbeing. If you are concerned about the health or condition of a specific tree, you may wish your home insurance would cover the cost of removing it.
Tree removal terms and conditions can vary by insurance policy. However, nearly all home insurance providers share similar limitations on this particular process and coverage. Even though you may see your tree as an emergency waiting to happen, your insurance provider may not.
When Does Homeowners Insurance Cover Tree Removal
Homeowners insurance policies traditionally cover damages from specifically named perils, including fire, smoke, lightning, falling objects, and the crushing weight of ice, snow, or sleet. If a tree falls on your home because of one of these perils, insurance will cover the cost of the tree’s removal.
Consider this: If a tree in your yard were to fall on your home and damage the roof, you would first file a claim with your homeowners insurance carrier, meet (pay) your deductible, and then your insurance coverage should pay for the repairs to the roof as well as the tree’s removal.

Also, consider: A tree in your yard is struck by lightning and splits down the middle. Even though there’s no home (structural) damage, your insurance would likely cover removal expenses. As with standard policies, any damage within your property line from fire, lightning, explosion, vandalism, or an airplane falling on the property is covered.

Simply put, tree removal anywhere on your property will be paid for if the resulting damage originated from a fire, a lightning strike, or other perils we’ve discussed thus far. However, if it’s caused by a snow or wind storm, hail or ice, the coverage only applies when your buildings are damaged.
When Does Homeowners Insurance NOT Cover Tree Removal
Tree debris removal costs won’t be covered by your home insurance if it is caused by wind, snow, hail, or ice and does not fall on a covered structure on your property. If the debris simply lands on your lawn, you will likely be left responsible for its removal.
Other instances when the cost of tree removal is excluded include:
Regular HO-3 (the most common type of homeowners insurance policy) homeowners insurance does not cover damage due to a flood or earthquake.
Old age, disease, and infestation are typically excluded from coverage. If your tree is well into its maturity or there is evidence of deterioration, you’ll likely have to pay for its removal.

Note: if you have a tree that falls due to a covered peril, but the assigned insurance adjuster finds that it has been damaged or decaying prior to the event, the insurance company may deny liability for repair and/or removal payment. In this case, the thought is that you should have detected and taken corrective measures before the tree fell.
Tip: If you live in a flood plain or are in an area that experiences frequent earthquakes, you’ll need either an additional policy or a rider on your existing policy that covers damage due to these circumstances. If a tree needs to be removed based on a flooding event, your standard policy will not cover the cost. For more on earthquake insurance, visit fema.gov/emergency-managers/risk-management/earthquake/insurance and you can read more about flood insurance at fema.gov/flood-insurance
Yard and Garden Rider Policy
A yard and garden rider policy can increase or expand coverage for lawn and landscaping damage. So if a tree falls on your lawn and causes any damage to existing shrubs, gardens, or watering systems, this rider policy can help.
This type of coverage can extend to damage resulting in business losses. Speak with your insurance agent to determine what your policy will cover and what is excluded.
Tree Emergency Prevention
Tree emergencies can be costly, inconvenient, and dangerous. They can happen to any homeowner, no matter how careful or attentive they are. Fortunately, there are a few steps you can take to prevent such emergencies before they happen. Consider evaluating the following with the help of an arborist:
Where you plant your trees
Annual tree health inspection
Recent or expected regional insect infestations
Soil health and stability
Sun and shade levels
Watering patterns
Mulching
Seasonal Pruning

Note: Dying trees can lead to emergency situations, including personal injuries if they are not promptly removed.
Tip: Find an ISA certified arborist near you by visiting treesaregood.org/findanarborist
Tree Emergencies and Removal
In this article, you discovered crucial information about when homeowners insurance carriers will and will not pay to have a tree removed from your property.
Knowing when to activate your homeowners insurance policy to have a tree removed and its damage repaired can help you save thousands of dollars.
Not coordinating a tree emergency with your homeowners insurance carrier could lead to thousands of dollars in removal and repair expenses and the cancellation of your insurance policy.
Sources: allstate.com/tr/home-insurance/home-insurance-tree-falls-on-house.aspx extension.tennessee.edu/publications/Documents/SP687.pdf portal.ct.gov/CID/Natural-Catastrophe-Information/Homeowners-Storm-Claims-FAQs
For the original version of this article visit: http://www.thetreecareguide.com/does-homeowners-insurance-cover-tree-removal/
#Tree#Tree Emergency#Insurance Policy#Insurance Coverage#Homeowners Insurance#The Tree Care Guide#Tree Health#Tree Disease#Tree Pruning#Tree Care
0 notes
Text
5 Fruit Trees for USDA Plant Zone 7
Prevent killing or trying to grow fruit trees not suited for your USDA plant hardiness zone. Knowing which trees will flourish in your region will help you select the right tree species and add to your seasonal harvest.

thetreecareguide.com gathered essential information and tips about 5 spectacular fruit tree species that thrive in the USDA’s hardiness zone 7.
1. Apple (Malus domestica)

Apple trees are small trees that can reach upwards of 25 feet in height with a crown spread of 25 feet. Apple tree foliage is simple, oval, has small serrations along the margin, and is alternately arranged along the branches.
Sun - Apple trees grow best with at least 8 hours of sun per day during the growing season.
Soil - The recommended soil for apple trees are well-draining medium-clay to sandy loam, fertile soils with a slightly acidic to neutral pH between 5.8 and 6.5
Size - A common full-size apple tree can reach 18-25 feet tall and wide (or more) at maturity.
Fruit - After 3 to 4 years, apple trees will set fruit in the spring, and the apples will mature from late summer through fall.
Varieties - Apple tree varieties that grow in zone 7 include:
Empire
Red Delicious
Honeycrisp
McIntosh
Fuji
Granny Smith
Jonathan
2. Apricot (Prunus armeniaca)

Apricot trees have a vertical growth pattern with a wide-spreading canopy. The tree’s foliage is ovate with pointed tips and serrated margins. This tree produces white to pink flowers, turning to a fleshy yellow to orange fruit.
Sun - Apricot trees grow best with 6 to 8 hours of sun per day during the growing season.
Soil - Apricot trees thrive in soil with a pH between 6.5 and 8.0. Well-drained loamy soil is fundamental for your apricot tree to grow a well-developed root system, which helps it produce fruit in greater quantities.
Size - A full-size apricot tree can reach 15-25 feet tall and wide at maturity.
Fruit - Apricot trees begin fruiting 2 to 4 years after planting. An apricot harvest takes place in mid to late summer.
Varieties - Apple tree varieties that grow in zone 7 include:
Moorpark
Moongold
Scout
Sungold
3. Cherry (Prunus avium)

Prunus avium is a perennial tree grown for its fruit, the sumptuous cherry. Cherry trees have alternating oval leaves, which often have serrated margins and +/- 8 pairs of veins. The flowers are typically white and appear in small clusters.
Sun - Cherry trees require at least 8 hours of daily sun.
Soil - This species grows best in deep, well-drained loam soils. Cherry trees are notoriously susceptible to root rot, so the soil needs to drain well.
Size - Cherry trees typically grow to a height of 35 feet and a spread of about 25 feet at maturity. The dwarf varieties grow to an average height of 12–15 feet with a spread of about 12–15 feet.
Fruit - 5 to 8 years after planting, cherry trees will bloom in the spring and bear cherries in late May, June, or early July.
Varieties - Cherry tree varieties that grow in zone 7 include:
Rainier
Montmorency
Bing
Stella
4. Nectarine (Prunus persica var. nucipersica)

The nectarine tree is deciduous, small to medium in size, and grows similarly to a peach tree. Leaves are bright green, glossy, alternate, and long with toothed margins.
Sun - Nectarine trees grow best with at least 6 hours of daily sun during the growing season.
Soil - A nectarine tree's ideal soil is a well-drained sandy soil with a pH between 6 and 7.
Size - A typical nectarine tree will reach from 18 to 20 feet tall and wide at maturity.
Fruit - 3 to 4 years after planting, nectarine fruit will need 3 to 5 months to reach harvest from the time flowers are pollinated. Nectarines are usually ready for harvest from mid to late summer.
Varieties - Nectarine tree varieties that grow in zone 7 include:
Fantasia
Sunglo
Red Gold
Carolina Red
5. Peach (Prunus persica)

Prunus persica is a deciduous tree grown for its fruit, the peach. The typical peach tree is relatively short with slender branches and alternately arranged, slender, and pointed foliage.
Sun - Peach trees grow best with at least 6 hours of daily sun during the growing season.
Soil - Peach trees thrive in sandy loam topsoil that is 18 to 24 inches deep and underlaid with a brightly colored, well-drained clay subsoil. Conversely, shallow or poorly drained soils tend to produce smaller, more fragile trees with significantly lower fruit production.
Size - A mature peach tree can reach heights of 25 feet tall and nearly as wide if left unpruned.
Fruit - A peach will bear fruit only 2 to 4 years after planting. The fruit ripens for harvesting in mid to late summer, typically June through August.
Varieties - Peach tree varieties that grow in zone 7 include:
Redhaven
Contender
Reliance
Saturn
Fruit Trees in Zone 7
In this article, you discovered 5 incredible fruit trees hardy to USDA hardiness zone 7, their descriptions, and growing information.
Knowing which fruit tree species will flourish in your hardiness zone will help you plant the right trees to grow and eventually harvest.
Planting fruit trees outside their hardiness zone will result in stunted growth, disease and insect susceptibility, and severely reduced fruit production.
Sources: plants.ces.ncsu.edu/plants/malus-domestica/ trees.umn.edu/apricot-prunus-armeniaca pfaf.org/user/Plant.aspx?LatinName=Prunus+avium edis.ifas.ufl.edu/publication/ST513
For the original version of this article visit: http://www.thetreecareguide.com/5-fruit-trees-for-usda-plant-zone-7
#Tree#Tree Care#The Tree Care Guide#Tree Health#Caring For Trees#Tree Disease#Tree Illness#Dying Tree#Apple Tree#Malus Domestica#Apricot Tree#Prunus Armeniaca#Cherry Tree#Prunus Avium#Nectarine Tree#Prunus Persica var Nucipersica#Peach Tree#Prunus Persica#Fruit Tree#Hardiness Zone 7#Zone 7 Fruit Trees
2 notes
·
View notes