
Don't wanna be here? Send us removal request.
Statistics
We looked inside some of the posts by trackuspsmailaddress and here's what we found interesting.
Average Info
Notes Per Post
1
Likes Per Post
1
Reblog Per Post
0
Reply Per Post
0
Time Between Posts
2 minutes
Number of Posts By Type
Text
5
Last Seen Tumblr Blogs


Fun Fact
Total funding amounts to $125.3M.
Text
How To Use C/O In Mailing Address Efficiently & Accurately
In today's fast-paced world, where communication happens predominantly through digital channels, physical mail still holds significant importance, especially for legal documents, personal letters, and official communications. However, ensuring that mail reaches the right recipient can be challenging, especially when the intended recipient is not the primary resident at the mailing address. This is where the "C/O" designation, meaning "care of," comes into play. Understanding how to use "C/O" in mailing addresses efficiently and accurately is essential to ensure that your mail reaches the correct person without delay or confusion.

What Does C/O Mean in Mailing Addresses?
"C/O," short for "care of," is a term used in mailing addresses to indicate that the mail is intended for someone who is not the primary resident or the owner of the address. Essentially, it is a way to direct the mail to a specific person at a different address, where they might be temporarily residing, working, or receiving mail. For example, if John Doe is staying with a friend, Jane Smith, and you want to send him a letter, you would address it as follows:
mathematica
Copy code
John Doe C/O Jane Smith 123 Main Street Anytown, USA 12345
In this case, Jane Smith is the primary resident at the address, and John Doe is the person for whom the mail is intended.
When to Use C/O in Mailing Addresses
The "C/O" designation is used in various situations where it is necessary to ensure that the mail reaches the correct person. Some common scenarios include:
Temporary Residence: If the recipient is staying temporarily at someone else's home, such as during a vacation or a short-term visit, using "C/O" helps direct the mail to them at the temporary address.
Workplace Mailing: When sending mail to someone at their workplace, using "C/O" can ensure that the mail is delivered directly to the recipient within the organization.
Care Facilities: In cases where the recipient is residing in a care facility, nursing home, or hospital, using "C/O" ensures that the mail reaches them via the facility's mailroom.
Shared Living Arrangements: For individuals living in shared accommodations, such as roommates, using "C/O" can help distinguish the intended recipient of the mail.
Business Correspondence: When sending mail to a person within a company, using "C/O" can help route the mail to the correct department or individual.
Steps to Use C/O Efficiently and Accurately
Using "C/O" in mailing addresses may seem straightforward, but there are key steps to ensure its efficiency and accuracy:
1. Determine the Correct Address
Before using "C/O," verify the correct address of the primary resident or the location where the recipient is staying. This step is crucial because any errors in the address can result in delayed or undelivered mail. If possible, confirm the address with the recipient to avoid mistakes.
2. Format the Address Properly
The address format is essential to ensure that the mail is processed correctly by postal services. The proper format includes the recipient's name, followed by "C/O" and the primary resident's name, and then the street address, city, state, and ZIP code. Here's the standard format:
css
Copy code
Recipient's Name C/O Primary Resident's Name Street Address City, State ZIP Code
For example:
mathematica
Copy code
Sarah Johnson C/O Emily Brown 456 Elm Avenue Springfield, IL 62701
3. Use Clear and Legible Handwriting
If you are writing the address by hand, make sure your handwriting is clear and legible. Postal services rely on accurate address information to deliver mail efficiently. If the handwriting is difficult to read, it increases the risk of misdelivery or return to the sender.
4. Double-Check the Information
Before sending the mail, double-check all the information, including the recipient's name, the "C/O" designation, and the address details. Confirming accuracy reduces the chances of errors and ensures that the mail reaches the intended recipient without issues.
5. Include a Return Address
Always include a return address on the mail to ensure that if there are any delivery issues, the mail can be returned to you. The return address should be placed in the top left corner of the envelope or package.
Common Mistakes to Avoid
Using "C/O" in mailing addresses is a simple process, but certain mistakes can lead to complications. Here are some common pitfalls to avoid:
1. Omitting the C/O Designation
One of the most common mistakes is forgetting to include the "C/O" designation when sending mail to someone at a different address. Without "C/O," the mail may be delivered to the primary resident or returned to the sender if the postal service cannot identify the intended recipient.
2. Using Incorrect Names
Using incorrect or misspelled names for either the recipient or the primary resident can cause confusion and delay in mail delivery. Always ensure that the names are spelled correctly and match the names associated with the address.
3. Inaccurate Address Details
Providing incorrect or incomplete address details can result in undelivered mail. Double-check the street address, city, state, and ZIP code to ensure accuracy. If the address is incorrect, the mail may be returned to the sender or lost.
4. Poor Handwriting
If the address is handwritten, poor handwriting can make it difficult for postal workers to read the information. This can lead to misdelivery or return to the sender. If possible, consider typing the address or using a printed label for clarity.
Benefits of Using C/O Accurately
Using "C/O" efficiently and accurately offers several benefits:
1. Ensures Accurate Delivery
By using "C/O," you can ensure that the mail reaches the correct recipient, even if they are not the primary resident at the address. This reduces the chances of misdelivery or lost mail.
2. Facilitates Temporary Arrangements
"C/O" is particularly useful for temporary living arrangements, allowing recipients to receive important mail without changing their permanent address.
3. Professional Communication
In business or professional contexts, using "C/O" demonstrates attention to detail and ensures that mail is directed to the appropriate individual within an organization.
4. Enhanced Privacy
Using "C/O" can help protect the privacy of the recipient, as the mail is directed to a specific person rather than the entire household or organization.
Conclusion
The "C/O" designation is a simple yet effective tool for ensuring that mail reaches the correct recipient, regardless of their living arrangements or location. By following the steps outlined in this article and avoiding common mistakes, you can use "C/O" efficiently and accurately in mailing addresses. Whether for personal, professional, or temporary situations, "C/O" helps facilitate smooth and reliable mail delivery, ensuring that your communication reaches its intended destination without delay.
youtube
SITES WE SUPPORT
Track USPS Mail Address – Wix
0 notes
Text
Do You Require a Tracking Number to Report Lost Items?
Losing a package can be a frustrating experience, especially when you’ve eagerly been awaiting its arrival. One of the first questions that may come to mind when dealing with a lost item is whether a tracking number is required to report it. A tracking number is a unique identifier that allows both the sender and the recipient to monitor the progress of a shipment. But what happens if you don’t have it? This article will explore whether you need a tracking number to report a lost item and the steps you can take if you don’t have one.

1. Understanding the Role of a Tracking Number
A tracking number is a critical tool in the shipping and receiving process. It provides a way to trace the journey of a package from the moment it’s shipped until it reaches its destination. When a package goes missing, the tracking number allows you to see where it was last scanned, which can help identify where it may have been lost. Reporting a lost item with a tracking number typically speeds up the process, as it gives the carrier specific information to work with.
2. Reporting a Lost Item with a Tracking Number
If you have the tracking number, reporting a lost item is relatively straightforward. Most carriers have an online form or customer service hotline where you can file a lost package claim. You’ll be asked to provide the tracking number, along with other details such as the sender’s and recipient’s names, shipping address, and date of shipment. The tracking number enables the carrier to quickly locate the shipment in their system and investigate its whereabouts. In many cases, the package may simply be delayed or misrouted and can be redirected to the correct address once identified.
3. Reporting a Lost Item Without a Tracking Number
While having a tracking number is beneficial, it’s not always necessary to report a lost item. If you’ve lost or never received your tracking number, there are still steps you can take to report the missing package.
1. Contact the Sender
The first step is to contact the sender, whether it’s an individual or a company. The sender should have a record of the tracking number and can provide it to you. If the sender is a business, they may also be able to initiate a lost item claim on your behalf, especially if they shipped the item using their account with the carrier.
2. Provide Alternative Information
If you’re unable to obtain the tracking number from the sender, you can still report the lost item by providing alternative information to the carrier. This may include the shipping date, destination address, sender’s and recipient’s names, and a description of the package. While this method may take longer, carriers can often use this information to locate the package in their system and initiate an investigation.
3. Use Proof of Purchase
In cases where the package was an online purchase, your proof of purchase can be helpful in reporting the lost item. Most retailers include shipment details in the order confirmation, which can sometimes include a reference number or internal tracking code. Providing this information to the carrier may assist in tracking down the package.
4. Filing a Claim
Once you’ve reported the lost item, the carrier will typically initiate a claim investigation. The process varies depending on the carrier, but it usually involves searching for the package, contacting delivery personnel, and reviewing any available surveillance footage. If the package cannot be located, the carrier may offer compensation based on the declared value of the shipment. The presence of a tracking number can expedite this process, but it’s not the sole determining factor in resolving the claim.
5. Preventing Future Issues
To avoid the frustration of losing a package without a tracking number in the future, it’s a good practice to keep all shipping documents and emails until the package has been safely delivered. Additionally, opting for services that provide tracking numbers and delivery confirmations can give you peace of mind and make it easier to report any issues that may arise.
Conclusion
While a tracking number is a valuable tool for reporting lost items, it’s not always necessary. If you don’t have a tracking number, you can still report a lost package by providing alternative information to the carrier. By understanding the steps involved and being proactive in keeping records, you can increase the chances of recovering your lost item and avoid future complications.
youtube
SITES WE SUPPORT
Track USPS Mail Address – Wix
0 notes
Text
Where Can You Find Your Tracking Number?
In today's fast-paced world, package tracking has become an essential aspect of shipping and receiving goods. Whether you’re awaiting an online order or sending a parcel to a friend, knowing how to find your tracking number is crucial. A tracking number is a unique code assigned to each shipment, allowing both the sender and the recipient to monitor the parcel's journey in real-time. This article will guide you through the various places where you can find your tracking number and how to use it effectively.

1. On the Shipping Receipt
One of the most common places to find your tracking number is on the shipping receipt provided by the carrier. When you send a package via a postal service or a courier company, you will typically receive a receipt as proof of postage. This receipt contains various details about your shipment, including the tracking number. The tracking number is usually printed in bold or highlighted, making it easy to spot. If you’ve misplaced your receipt, you may be able to retrieve the tracking number by contacting the carrier with other shipment details, such as the date and time of mailing.
2. In the Confirmation Email
When you purchase something online, the retailer usually sends a confirmation email containing the details of your order. This email often includes the tracking number for your shipment. Retailers typically include a hyperlink that directs you to the carrier’s website, where you can enter the tracking number to see the status of your package. If you’ve deleted the confirmation email, try checking your trash or spam folders, as it might have been accidentally misplaced there.
3. In Your Online Account
If you’ve made a purchase from an online store where you have an account, you can usually find your tracking number by logging into your account. Most e-commerce platforms have a “My Orders” or “Order History” section where you can view all your past and current orders. The tracking number is usually listed next to the order details. Some platforms also provide a direct link to the tracking page, saving you the trouble of manually entering the tracking number on the carrier’s website.
4. On the Package Label
If you’ve received a package, the tracking number is often printed on the shipping label attached to the parcel. It’s usually located near the barcode, which the carrier scans at various points along the delivery route. If you’re the recipient and don’t have access to the tracking number through other means, checking the label on the package can be an effective way to find it.
5. Through Mobile Apps
Many courier companies and postal services offer mobile apps that provide shipment tracking services. If you’ve shipped a package or are expecting one, you can often find the tracking number within the app. By entering your shipment details or logging into your account, the app can display the tracking number along with the package's current status. Additionally, some apps send push notifications to keep you updated on your parcel’s progress.
6. On the Carrier’s Website
If you’ve sent a package through a courier service, you can usually retrieve your tracking number by visiting the carrier’s website. Many carriers offer a feature that allows you to search for your shipment using alternative information such as the shipping date, destination, or sender’s details. Once you’ve provided the necessary information, the website may display your tracking number along with the shipment status.
7. From Customer Service
If you’re unable to locate your tracking number through any of the above methods, contacting the carrier’s customer service department can be a helpful next step. Provide them with any relevant information about your shipment, such as the sender’s and recipient’s names, shipping date, and destination. Customer service representatives can often retrieve your tracking number from their database and provide you with the necessary details.
Conclusion
Finding your tracking number is usually a straightforward process, but it can vary depending on how the package was shipped and where you’re looking. Whether it’s on a receipt, in an email, or through a mobile app, knowing where to find your tracking number ensures you can stay informed about the status of your shipment. By following the guidelines in this article, you should have no trouble locating your tracking number and tracking your package until it arrives safely at its destination.
youtube
SITES WE SUPPORT
Track USPS Mail Address – Wix
0 notes
Text
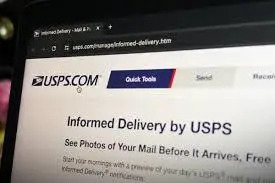
How Does Informed Delivery Work for Its Users?
Informed Delivery by the United States Postal Service (USPS) is a digital service that offers a unique way for users to preview their incoming mail and manage their packages. With this service, you receive daily email notifications with grayscale images of the front of your letter-sized mailpieces and updates on your packages. But how exactly does Informed Delivery work, and what benefits does it offer? This article will explore the workings of Informed Delivery and how it enhances the mail experience for its users.
1. Daily Email Notifications
One of the primary features of Informed Delivery is the daily email notification system. Every morning, you receive an email from USPS containing grayscale images of the front of letter-sized mail that is scheduled to arrive at your address that day. The images are captured by the automated sorting machines at USPS facilities, which process and photograph each mailpiece.
What’s Included: The email typically contains images of letter-sized mail (such as bills, postcards, or letters) and updates on any packages en route to your address.
What’s Not Included: Larger mailpieces, such as catalogs or magazines, and certain types of sensitive mail may not be imaged and thus will not appear in your email.
These emails are especially useful for individuals who want to know what mail is arriving before they physically check their mailbox, allowing them to prioritize or take action on important items.
2. Online Dashboard Access
In addition to daily emails, users can access their Informed Delivery information through an online dashboard available on the USPS website. Here, you can:
View Mail and Package History: Review past mailpieces and track package deliveries.
Manage Notifications: Customize your email preferences and set up additional alerts for package delivery updates.
Delivery Instructions: For packages, you can leave specific instructions for the mail carrier, such as where to leave the package or request a redelivery if you miss it.
The dashboard is a comprehensive tool that allows users to manage their mail and packages in one place.
3. Package Tracking and Management
Another significant aspect of Informed Delivery is its package tracking feature. The service not only informs you about incoming packages but also provides updates on their status. Users can track their packages in real-time, see expected delivery dates, and get notifications when a package is out for delivery or delivered.
Tracking Notifications: These can be customized to be sent via email or text message.
Redelivery Requests: If you miss a delivery, you can request a redelivery directly through the dashboard.
This feature is particularly beneficial for those who frequently receive packages and want to stay updated on their delivery status without constantly checking tracking numbers.
4. Enhanced Security and Convenience
Informed Delivery offers enhanced security by giving you an early alert of the mail you’re expecting. If something doesn’t show up that was previewed, you can take immediate action, such as contacting USPS or the sender. This helps in reducing the chances of mail theft or loss.
Identity Verification: USPS requires identity verification during the sign-up process to ensure that only authorized individuals can view mail details for a specific address.
Real-Time Alerts: With real-time notifications, you’re less likely to miss important deliveries, and you can act quickly if there’s an issue.
For users who travel frequently or manage multiple addresses, Informed Delivery adds an extra layer of convenience and peace of mind.
5. Limitations and Considerations
While Informed Delivery is a powerful tool, it does have some limitations:
Grayscale Images: The images provided are in grayscale and only of the front of the envelope, which may not always provide complete information about the mailpiece.
Package Exclusions: Not all packages are included in Informed Delivery notifications, especially those sent through third-party carriers or special services.
Delayed Notifications: There can be occasional delays in receiving notifications, which might affect users relying on timely updates.
Understanding these limitations can help users manage their expectations and use the service more effectively.
6. Business Use of Informed Delivery
Informed Delivery is not just for personal use. Businesses can also benefit from the service by using it to manage their mail more efficiently. Companies that rely on regular postal mail, such as law firms, financial institutions, or marketing companies, can use Informed Delivery to:
Track Important Correspondence: Ensure that critical documents are on their way and prepare for their arrival.
Package Management: Stay informed about incoming packages that are crucial to business operations.
Enhance Customer Communication: For businesses sending out mass mailings, knowing when customers will receive their mail can help in timing follow-up communications.
This makes Informed Delivery a versatile tool for both individual and commercial users.
Conclusion
Informed Delivery is a robust and user-friendly service that enhances the traditional mail experience. By offering daily previews of incoming mail and real-time package updates, it provides users with greater control and security over their postal deliveries. Whether for personal convenience or business efficiency, Informed Delivery helps users stay informed and manage their mail more effectively, making it an invaluable tool in today’s digital age.
youtube
SITES WE SUPPORT
Track USPS Mail Address – Wix
0 notes
Text
How Can I Sign Up For Informed Delivery Service?
Informed Delivery is a free service offered by the United States Postal Service (USPS) that allows users to digitally preview their incoming mail and manage their packages. This convenient service provides a daily email that includes grayscale images of the front of letter-sized mailpieces and updates on packages en route to your address. Whether you're a busy professional or simply want to stay organized, Informed Delivery can help you stay on top of your mail. Here’s a step-by-step guide on how to sign up for Informed Delivery.
1. Check Eligibility
Before signing up for Informed Delivery, it's important to check if the service is available in your area. Informed Delivery is widely available across the United States, but there are certain locations where it may not be supported yet. To verify eligibility:
Visit the USPS Informed Delivery page.
Enter your ZIP code into the eligibility checker.
If your area is eligible, you’ll be prompted to proceed with the registration process. If not, you can sign up for notifications when the service becomes available.
2. Create a USPS Account
If you don't already have a USPS account, you’ll need to create one to use Informed Delivery. Here’s how:
Go to the USPS website (usps.com).
Click on the "Sign In" button located at the top right corner of the page.
Select "Sign Up" to create a new account.
Fill in the required information, including your name, address, email, and phone number.
Create a username and password for your account. Make sure your password is secure and memorable.
After entering all the necessary details, click "Continue" to proceed.
3. Verify Your Identity
For security purposes, USPS requires you to verify your identity before activating Informed Delivery. There are two primary methods for identity verification:
Online Verification: After you’ve signed up for a USPS account, you will be asked to verify your identity online. This involves answering a series of questions based on your personal information, such as past addresses or credit history. This method is quick and can be completed in minutes.
In-Person Verification: If online verification fails or you prefer to verify in person, you can do so by visiting a participating USPS location. You will receive a code to take to the post office, where a USPS employee will verify your identity.
4. Activate Informed Delivery
Once your identity is verified, you can proceed to activate Informed Delivery:
Log in to your USPS account.
Navigate to the Informed Delivery dashboard.
Select "Enroll" to start the activation process.
Review the terms and conditions, and accept them to proceed.
After accepting, your Informed Delivery service will be activated. You will start receiving daily emails with images of your mail and package tracking updates.
5. Customize Your Informed Delivery Settings
After signing up, you can customize your Informed Delivery experience to suit your preferences:
Email Notifications: Choose whether you want to receive daily email notifications. You can opt for emails to be sent every day, only when you have mail, or turn them off altogether if you prefer to view your mail online.
Package Tracking: You can also set up text notifications for packages that are out for delivery or delivered. This ensures you never miss an important package.
Managing Multiple Addresses: If you manage mail for multiple addresses (e.g., home and work), you can add and manage these addresses through your Informed Delivery dashboard.
6. Start Using Informed Delivery
Once activated, you’ll begin receiving grayscale images of your mail and package notifications in your email. You can also view these details by logging into your USPS account and navigating to the Informed Delivery dashboard.
Troubleshooting and Common Issues
Although the sign-up process for Informed Delivery is straightforward, you may encounter some common issues:
Eligibility Issues: If your area is not eligible, you’ll need to wait until USPS expands the service to your location.
Identity Verification: If you fail the online verification, you’ll need to complete the in-person verification process.
Missing Emails: If you’re not receiving daily emails, check your spam folder or verify that you’ve enabled notifications in your account settings.
Conclusion
Signing up for Informed Delivery is a simple process that offers significant convenience. By following these steps, you can easily stay informed about the mail and packages headed to your address. Whether for personal or business use, Informed Delivery helps you stay organized and ensures you’re always in the loop.
youtube
SITES WE SUPPORT
Track USPS Mail Address – Wix
1 note
·
View note