
tributarycafe
Tributary Cafe
Fresh seafood, handcut steaks, traditional southern fare in non-traditional fashion. Visit our website: http://tributarycafe.com/
2 posts
Don't wanna be here? Send us removal request.
Last Seen Blogs

covertrail4
Power Efficiency Guide Work

mischai9
I Dont Need A

incorrect-jatp-sm-quotes
"Who you callin?"

incorrect-kosem
*I* send my regards

dwtsont7uajom2
Untitled
Text
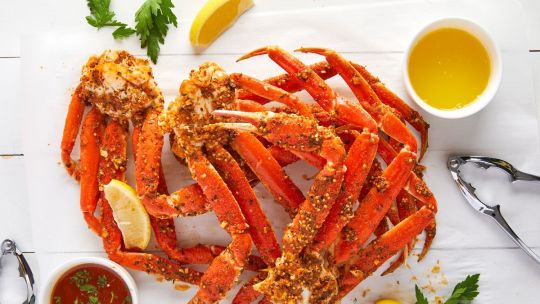
How To Cook Restaurant-Quality Crab At Home?
Welcome to the world of mouthwatering seafood delicacies! If you're a fan of succulent, tender crab meat that melts in your mouth and leaves you craving for more, then this blog post is tailor-made for you. Say goodbye to expensive restaurant bills and discover the secrets behind cooking restaurant-quality crab right in the comfort of your own kitchen. Whether you're planning a special dinner party or simply indulging in a gourmet meal at home, we've got you covered with foolproof tips, delicious recipes, and expert tricks that will elevate your crab-cooking skills to new heights. So put on your apron and get ready to impress even the most discerning palates with these tantalizing crustacean creations!
What You Will Need
1. Fresh Crab: To cook restaurant-quality crab at home, the first thing you need is fresh crab. Look for crabs that are still alive and have a vibrant color. This will ensure that you get the best flavor and texture in your dish.
2. Cooking Pot: A large pot is essential for boiling or steaming the crab. Make sure it's big enough to accommodate the size of your crab comfortably.
3. Sea Salt: Adding sea salt to the cooking water enhances the natural sweetness of the crab meat and gives it a savory flavor.
4. Spices and Herbs: Depending on your taste preferences, you can add spices like black peppercorns, bay leaves, garlic cloves, or herbs like thyme or parsley to infuse more flavors into your dish.
5. Tongs or Kitchen Gloves: Handling live crabs can be tricky, so it's best to use tongs or kitchen gloves when transferring them from one place to another.
6. Crab Crackers and Picks: To enjoy every bit of succulent meat from the shell, invest in good quality crab crackers and picks that help you extract all those delicious morsels without any hassle.
7. Dipping Sauces: Prepare some tangy dipping sauces such as melted butter with lemon juice or cocktail sauce for an extra burst of flavor while relishing your perfectly cooked crab.
The Cooking Process
Preparing and cooking crab at home may seem intimidating, but with the right approach, you can achieve restaurant-quality results. First, start by selecting fresh crabs from a reputable seafood market or fishmonger. Look for lively ones that feel heavy for their size.
Read more:
Begin by cleaning the crabs thoroughly under cold running water to remove any dirt or debris. Next, it's time to cook! Fill a large pot with enough water to fully submerge the crabs. Add salt and bring the water to a rolling boil.
Once boiling, carefully place the live crabs into the pot using tongs or gloves. Be cautious as they might try to escape! Cover the pot and let them cook for about 15-20 minutes depending on their size.
While they're cooking, prepare an ice bath in another bowl or sink filled with cold water and ice cubes. This will halt the cooking process once they are removed from heat.
Afterward, take out each crab using tongs and immediately transfer them into the ice bath for a few minutes. This step is crucial as it helps cool down and stop further cooking while preserving their tender meat.
Now your perfectly cooked crabs are ready for cracking open! Break off each leg one at a time starting from where it attaches to its body. Use a crab mallet or nutcracker to crack open each section gently without crushing too much of its delicate flesh inside.
With patience and practice, you'll soon become skilled at extracting every succulent bit of meat hidden within those hard shells!
Remember that different recipes may require additional steps like marinating beforehand or adding spices during boiling.
Experiment with various flavors such as garlic butter sauce or spicy Cajun seasoning to enhance your culinary experience!
Crab Recipes
Looking to impress your guests with some mouthwatering crab dishes? Look no further! Here are a few delectable crab recipes that you can easily whip up in your own kitchen.
1. Crab Cakes:
Start by combining fresh lump crab meat, breadcrumbs, mayonnaise, and seasonings like Old Bay seasoning or parsley. Shape the mixture into patties and fry them until golden brown. Serve these crispy delights with a zesty lemon aioli for an extra burst of flavor.
2. Garlic Butter Crab Legs:
Indulge in the succulent flavors of garlic butter crab legs. Simply melt butter with minced garlic, lemon juice, and some herbs like thyme or rosemary. Toss the cooked crab legs in this flavorful sauce and garnish with freshly chopped parsley before serving.
3. Singapore Chilli Crab:
For those who crave a little heat, try making Singapore Chilli Crab - a spicy yet tantalizing dish that will leave your taste buds craving for more! Sauté onions, garlic, ginger, chili paste, tomato ketchup, soy sauce, sugar, and vinegar together to create the perfect sweet and spicy sauce for your cooked crabs.
See more:
4. Creamy Crab Pasta:
For pasta lovers out there looking to elevate their mealtime experience – try adding luscious chunks of crab meat into creamy pasta sauces such as alfredo or carbonara. The combination of rich creaminess with tender flakes of crab is simply divine!
5. Grilled Stuffed Crabs:
If you prefer grilled seafood options over fried ones then give grilled stuffed crabs a try! Remove the top shell from cleaned blue crabs; mix bread crumbs with spices (such as paprika), diced vegetables (like bell peppers), herbs (such as cilantro), melted butter and egg yolk; stuff this mixture generously onto each cleaned crab's body where its top shell was removed earlier; finally grill them to perfection.
Tips and Tricks
1. Choose the freshest crab: When cooking restaurant-quality crab at home, it all starts with choosing the freshest crustaceans. Look for live crabs that are active, with shiny shells and no foul odor.
2. Prep your ingredients: Before diving into the cooking process, make sure you have all your ingredients ready to go. This includes garlic, lemon wedges, butter or olive oil, spices like Old Bay seasoning or paprika, and any additional herbs or sauces you prefer.
3. Cook just until tender: Overcooking crab can result in tough meat that lacks flavor. It's best to cook them just until they turn a vibrant orange-red color and their shells begin to crack slightly.
4. Use proper techniques to extract meat: To get the most out of your cooked crab, learn some efficient techniques for extracting the meat from its shell. This will ensure minimal waste and maximum enjoyment of every bite.
5. Experiment with seasonings: Don't be afraid to get creative with your seasonings! While traditional methods often call for simple flavors like garlic butter or a sprinkle of Old Bay seasoning, feel free to explore different spice combinations that suit your taste buds.
6. Serve with complementary sides: Elevate your restaurant-quality crab feast by serving it alongside delicious side dishes such as fresh salad greens, roasted vegetables, creamy mashed potatoes or even homemade coleslaw.
7. Presentation matters: Remember that presentation plays an important role in creating a restaurant-like experience at home. Take some extra time arranging the cooked crab on a platter garnished with fresh herbs or lemon slices for an impressive touch.
8 . Enjoy the experience: Cooking restaurant-quality crab at home is not only about satisfying cravings but also about enjoying the process itself – from selecting premium seafood to savoring each succulent piece after all your hard work!
Conclusion
Cooking restaurant-quality crab at home may seem daunting, but with the right tools and techniques, it is definitely achievable. By following these steps and recipes, you can create a delicious feast that rivals any seafood establishment.
Remember to start by selecting fresh live crabs from a reputable source. Have all your ingredients and equipment ready before you begin cooking. The key to success lies in properly cleaning and preparing the crabs before cooking them. Once they are ready, there are various methods you can use to cook them such as boiling, steaming or grilling.
Experiment with different recipes to find your favorite flavors for seasoning the crab. Whether it's classic garlic butter sauce or spicy Cajun seasoning, there are endless possibilities for enhancing the natural sweetness of crab meat.
While cooking crab at home can be an enjoyable experience, it's important to keep some tips and tricks in mind. Make sure not to overcook the crab as this will result in tough meat. Also, handle cooked crabs gently when removing meat from their shells so that you don't lose any precious morsels.
With practice and attention to detail, anyone can master the art of cooking restaurant-quality crab at home. So next time you're craving a taste of the sea, save yourself a trip to a fancy seafood joint and impress your friends and family with your culinary skills instead!
Remember: Freshness is key! Handle those claws like a pro! Season generously! And most importantly – enjoy every succulent bite of your homemade masterpiece!
So what are you waiting for? Get cracking on creating that perfect plate of mouthwatering crab goodness right in your own kitchen!
0 notes
Text
What Is The Best Way To Grill Shrimp?
Welcome to the sizzling world of grilled shrimp! Whether you're a seafood lover or simply looking to add some zest to your outdoor cooking repertoire, grilling shrimp is an absolute game-changer. The smoky flavors, succulent juiciness, and mouthwatering aroma will have your taste buds doing a happy dance. But with so many techniques and recipes out there, what is truly the best way to grill shrimp? Fear not, fellow food enthusiasts! We've got you covered. In this blog post, we'll take you on a journey from choosing the freshest shrimp all the way to serving up a scrumptious plate of perfectly grilled goodness. So grab your tongs and get ready for a delicious adventure that will elevate your grilling skills to new heights!

Start with fresh or frozen shrimp
When it comes to grilling shrimp, starting with the freshest ingredients is absolutely crucial. Fresh or frozen shrimp can both be used successfully for grilling, but there are a few key considerations to keep in mind.
If you have access to fresh, never-frozen shrimp, that's always an excellent choice. Look for shrimp that has a firm texture and a sweet, briny aroma. The shells should be translucent and shiny, with no signs of discoloration or sliminess. Buying from reputable sources such as local seafood markets or trusted suppliers ensures the highest quality product.
However, if fresh shrimp isn't readily available in your area, don't fret! High-quality frozen shrimp can work just as well when properly thawed. Opt for individually quick-frozen (IQF) shrimp instead of those that are block-frozen together. IQF allows you to easily remove only the amount of shrimp needed without defrosting the entire package.
visit the website
To thaw frozen shrimp safely and preserve its flavor and texture, place it in a colander under cold running water until fully defrosted – this usually takes about 10-15 minutes depending on size. Avoid using warm water or leaving them at room temperature for extended periods to prevent bacterial growth.
Remember: regardless of whether you choose fresh or frozen shrimp for grilling, always handle them with care and maintain proper food safety practices throughout the cooking process!
Prepping the shrimp
Prepping the shrimp is an essential step in ensuring a delicious grilled shrimp feast. Whether you're working with fresh or frozen shrimp, proper preparation is key to unlocking their full flavor potential.
If using frozen shrimp, start by thawing them overnight in the refrigerator. This slow thawing process helps retain moisture and prevents overcooking on the grill. Once thawed, give them a quick rinse under cold water to remove any excess ice crystals.
For fresh shrimp, remove the shells and devein if desired. Some prefer leaving the shell on for added flavor during grilling, while others prefer their shrimp fully peeled.
Next, pat the shrimp dry with paper towels. Moisture can interfere with achieving those beautiful grill marks and prevent proper browning of the flesh.
Now it's time to decide how you want to season your shrimp. You can go simple with just salt and pepper or get creative with marinades or spice rubs. The choice is yours!
Before adding any seasoning though, drizzle a bit of olive oil onto the prepared shrimp to help prevent sticking and enhance that smoky grilled flavor.
Once seasoned, let the flavors meld for about 15 minutes before grilling. This allows enough time for absorption without overpowering the natural taste of these succulent crustaceans.
With your prep work complete, it's time to fire up that grill! Keep an eye on them as they cook quickly – typically only 2-3 minutes per side depending on size – until they turn pink and opaque throughout.
Remember not to overcrowd your grill so each piece gets direct heat exposure for optimal caramelization and tenderness.
Grilled shrimp are best enjoyed immediately after cooking when they are still warm and juicy. Serve them as an appetizer alongside cocktail sauce or incorporate them into salads, pasta dishes, or tacos for a delightful main course option.
Seasoning the shrimp
Seasoning the shrimp is a crucial step in grilling them to perfection. It's all about enhancing their natural flavors and adding a burst of deliciousness. There are countless seasoning options to choose from, so you can get creative and experiment with different combinations.
One classic way to season shrimp is with a simple marinade of olive oil, garlic, lemon juice, salt, and pepper. This imparts a subtle yet flavorful taste that complements the seafood beautifully. If you're feeling adventurous, you can also add some herbs like parsley or cilantro for an extra kick.
Another popular option is using Cajun seasoning. This blend of spices adds a bold and spicy flavor profile that pairs wonderfully with grilled shrimp. Just make sure not to overdo it if you're sensitive to heat!
For those who prefer something on the milder side, a sprinkle of Old Bay seasoning or a dash of smoked paprika can do wonders. These seasonings provide a hint of smokiness without overpowering the delicate taste of the shrimp.
No matter which seasoning route you choose, be sure to coat your shrimp evenly before placing them on the grill. Allow them to marinate for at least 15 minutes so that they can absorb all those wonderful flavors.
The grill set-up
The grill set-up is an essential part of achieving the best results when grilling shrimp. First and foremost, ensure that your grill is clean and free from any residue or leftover food particles. This will prevent any unwanted flavors from transferring to your shrimp.
Next, it's important to preheat your grill to a medium-high heat. This will help ensure even cooking and prevent the shrimp from sticking to the grates. If using a gas grill, simply turn on the burners and allow them to heat up for about 10-15 minutes. For charcoal grills, light the coals and let them burn until they are covered with gray ash.
Once your grill is preheated, it's time to oil the grates. Using tongs and a folded paper towel soaked in vegetable oil, carefully rub the oil onto the heated grates. This will create a non-stick surface for your shrimp and help prevent them from drying out during cooking.
For added flavor, you can also consider adding wood chips or chunks directly onto the coals if using a charcoal grill or using a smoker box if using a gas grill. Different types of wood impart different flavors, so choose one that complements seafood such as mesquite or hickory.
Make sure you have all necessary tools handy before placing your shrimp on the grill - long-handled tongs for flipping, a spatula for removing delicate pieces without breaking them apart, and an instant-read thermometer to check for doneness.
Grilling the shrimp
Grilling the shrimp is where all the magic happens! Once you have prepped and seasoned your shrimp, it's time to fire up the grill and get cooking.
Before placing the shrimp on the grill, make sure it is properly heated. Preheat your grill to medium-high heat, around 375-400 degrees Fahrenheit. This will ensure that your shrimp cooks evenly and develops a nice charred exterior.
When grilling shrimp, it's important to use skewers or a grilling basket to prevent them from falling through the grates. If using wooden skewers, soak them in water for about 30 minutes beforehand to prevent burning.
Place the skewered or basketed shrimp directly onto the hot grill. Cook for about 2-3 minutes per side until they turn pink and opaque. Be careful not to overcook as this can result in rubbery shrimp.
While cooking, resist the urge to constantly flip or move the shrimp around. Allow them to cook undisturbed so that they develop those beautiful grill marks.
Once cooked, carefully remove the grilled shrimp from the heat using tongs or a spatula. Place them on a platter lined with fresh herbs for added flavor and presentation.
Removing the shrimp from the grill
Removing the shrimp from the grill is an important step in ensuring that they are cooked to perfection. After all, you wouldn't want your beautifully grilled shrimp to get overcooked or dry! So, how do you go about removing them from the grill?
Make sure you have a pair of long-handled tongs ready. These will come in handy for safely handling the hot shrimp without burning yourself. Gently grasp each shrimp with the tongs and carefully lift it off the grill grates.
As you remove each shrimp, be mindful not to squeeze them too tightly with the tongs as this can cause their succulent juices to escape. You want your grilled shrimp to be juicy and flavorful!
Place each cooked shrimp onto a clean platter or serving dish. If desired, you can arrange them neatly or pile them up for a more casual presentation.
Once all the shrimps are safely removed from the grill and arranged on your serving dish, it's time to dig in! Grilled shrimp is incredibly versatile and can be enjoyed on its own as an appetizer or incorporated into various dishes like salads or pasta.
Remember that timing is crucial when removing grilled seafood from heat. Shrimp cook relatively quickly so keep an eye on doneness – they should turn opaque pinkish-orange with slightly charred edges.
Serving grilled shrimp
Serving grilled shrimp is a joyous occasion that brings people together. Whether you're hosting a backyard barbecue or enjoying a cozy dinner at home, there are endless possibilities for serving up these succulent little morsels.
One classic way to serve grilled shrimp is on skewers. Thread the grilled shrimp onto wooden or metal skewers, alternating with colorful vegetables like bell peppers and onions. This not only adds visual appeal but also enhances the flavors of the dish.
For a lighter option, consider serving your grilled shrimp over a bed of fresh greens. Toss some mixed greens with a light vinaigrette and arrange the grilled shrimp on top for an elegant and refreshing salad.
If you're feeling adventurous, why not turn your grilled shrimp into tacos? Grab some soft tortillas, fill them with chopped lettuce, diced tomatoes, and avocado slices. Top it all off with a dollop of tangy salsa or zesty lime crema for an explosion of flavors in every bite.
Another crowd-pleasing idea is to serve the grilled shrimp as part of a seafood platter. Arrange them alongside other seafood favorites like crab legs, oysters, and mussels for an impressive spread that will make any seafood lover's heart skip a beat.
No matter how you choose to serve your grilled shrimp, don't forget about the sauces! Offer guests an array of dipping sauces such as garlic butter sauce, spicy cocktail sauce or even mango salsa to add extra flavor and excitement to their plates.
Storing grilled shrimp
After you've enjoyed your delicious grilled shrimp, it's important to know how to properly store any leftovers. Here are some tips for storing grilled shrimp:
1. Let it cool: Allow the grilled shrimp to cool completely before storing it. This will help prevent bacteria growth and maintain its freshness.
2. Separate into portions: If you have a large batch of grilled shrimp, consider dividing it into smaller portions before storing. This way, you can easily thaw and use only what you need without having to defrost the entire batch.
3. Use airtight containers: Transfer the cooled grilled shrimp into airtight containers or resealable plastic bags. Make sure there is minimal air inside the container to avoid freezer burn.
4. Label and date: Don't forget to label each container with the date of grilling so that you can keep track of its freshness.
5. Freeze or refrigerate: If you plan on consuming the grilled shrimp within a day or two, store it in the refrigerator at temperatures below 40°F (4°C). For longer-term storage, place it in the freezer at 0°F (-18°C) or below.
6. Thawing frozen shrimp: When ready to eat frozen grilled shrimp, transfer them from the freezer to the refrigerator overnight for slow thawing. Alternatively, place them in a sealed bag and submerge them in cold water until fully thawed.
Remember that while properly stored cooked seafood can be safe for several days in the refrigerator or months in the freezer, always use your best judgment when assessing its quality and discard anything that appears spoiled or has an off odor.
youtube
1 note
·
View note