
Film photographer in New York City. All images mine unless otherwise noted. Full portfolio on www.victorcohen.us
Don't wanna be here? Send us removal request.
Statistics
We looked inside some of the posts by victorcohen-blog1 and here's what we found interesting.
Average Info
Notes Per Post
10
Likes Per Post
10
Reblog Per Post
0
Reply Per Post
0
Time Between Posts
3 months
Number of Posts By Type
Text
2
Last Seen Tumblr Blogs


Fun Fact
Kazakhstan’s Minister of Communications and Informatics has blocked the Tumblr site because it contained 60 sites of terrorism, extremism, and pornography in 2015.
Text
New Work - Nov 2017: convergence structure

convergence structure, taken in Long Island City, New York. See this work in high resolution in the cityscape/architecture section of my website.
Walking along the highway in Long Island City, I found that the sidewalk led under an overpass. Peering under it, I saw a built chaos of steel beams, support girders, rivets, and concrete blocks holding up the vast platform above me. Unlike our more orderly human skeletons, the forged bones of the highways are bolted together in ways that show reluctance, negotiation, and compromise.
That afternoon, the relatively low mid-November sun was strongest on the road and the beams closest to it, but still allowed for some illumination of the overpass’ underbelly. Here, I had a choice between preserving the detail in the shadow area of the overpass’ beams or making a high-contrast exposure that would leave them mostly black. I chose to keep the shadow detail--it wasn’t the differences in light that caught my eye so much as the lines like piano keys and pick-up sticks that tumbled around the scene. In the scan, preserving that much detail in the overpass meant sacrificing some of the darkness in the shadows, leading to an image that is mostly midtones and highlights, with very little deep black.
The stillness and emptiness is somewhat of a lie: I had to wait fifteen minutes for there to be a big enough gap in the cars driving down this stretch of highway for the shot to be clear. In the meantime, passengers and pedestrians alike ogled my wooden field camera, some throwing me a quick thumbs-up as they passed.
#nyc#queens#city#architecture#girder#steel#concrete#lines#zigzag#film photography#film#4x5#largeformat
4 notes
·
View notes
Text
My Process: Shooting
There is no “right way” or “best way” to do anything in photography, just different methods and different results. This is the first in a series of posts — shooting, developing, and printing — about my photographic processes as a film photographer.
The methods, equipment, and even shooting conditions I work with produce the results you see on my portfolio; so if there’s something about the look you want to pick up in your own work, or if you just want a starting point for working with film, this post might be helpful to you.
First, I’ll try to describe what’s going through my head as I shoot. I’m hoping this will give you a sense of my style and provide a background for the format and equipment choices I’ve made. Next, I’ll discuss how I choose different formats and then finally the specific equipment I use. This order is deliberate: my philosophy is to let your style and artistic goals determine your format and equipment choices, not the other way around.
A Photographic Headspace
Street photography, for me, is 85% hunting for images and 15% creating them. When I’m out with a camera, I’m looking at people, the built environment, geometry, objects, and their contexts; trying to pull them together in a composition that asserts a relationship between them. That relationship can be purely visual (lines and shapes, tones and textures); societal (class or cultural contrasts, the relationship of the city to its inhabitants); or narrative (depicting a story as it unfolds between people).
I first try to find that relationship by choosing neighborhoods, events, or landscape features to be near. I guess at what I might find there, anticipate momentary interactions and juxtapositions while walking around the area, and get an intuitive feeling for what’s going on in that space. I have to get my mind in that focused/searching/analyzing/intuiting mode to make my best images—it’s difficult to do it while distracted, hanging out with friends or while I’m on my way somewhere.
This is definitely not the only way to do street work. Two people I can think of off the top of my head whose methods are completely different from mine are Jamel Shabazz, who tries to break the ice and build a relationship with many of his subjects before the shot, and Bruce Gilden, who walks right up to passerby (really close!) without warning and takes a shot, flash firing right in their face. WNYC put out a couple of great short profiles of them that illustrate how they work:
youtube
youtube
Getting the composition right, for me, is largely a process of subtraction. I move around to eliminate distractions from my shot, to create frames or leading lines that take the eye where I want it to go, and to place the light and shadow where it emphasizes the qualities that I want to evoke (emotions, size, gloom, grit...) .
The process is not really that different for my architectural and cityscape work. I choose a location based on educated guesses of what I might find there, I look for relationships, and try to pull them together into a powerful composition. I find myself gravitating toward the liminal spaces between neighborhoods and along the coasts and edges of the city. Trainyards, power plants, and infrastructure pop out at me, as if I was some futurist or Charles Sheeler, except that they don’t represent something new, or hopeful, just something different from the shiny, homogeneous veneer of a finance- and real estate developer-dominated city. They are grandiose and full of textures and big geometric shapes. Their forms have a purpose other than slinging froyo and retail banking products.
Choosing a format
I work in 35mm, medium format, and 4x5 large format. They are all very different shooting experiences, getting slower and more deliberate with each size increase.
I choose 35mm for travel photography, for situations where bringing a medium format camera is too much of a burden, and anytime my primary concerns are:
Keeping weight and bulk low
Shooting quickly
Working in low light situations
I choose medium format whenever I can, since the larger negative is so much more luxurious than 35mm--and more capable, in terms of print size and sharpness, grain, and that certain depth it has. The vast majority of my current portfolio is medium format shot as 6x9.
I turn to large format when I can take my time with a shot and when I want to use movements, such as for:
Cityscapes
Architecture
Experiments with large format street photography
Eventually, portraits
I’m a newcomer to large format, so I’m still in an exploratory/learning phase with it. That means taking it out without much of a plan and just trying things.
Shooting and Exposure
I shoot fully manual so that I have complete control over all the artistic choices a camera can offer: exposure, depth of field, motion blur, and focus. This means I have to manage a certain amount of overhead to set the aperture and shutter speed, compose the shot, focus, and finally hit the shutter button. I have missed shots while doing this, but I prefer to miss a shot because I’m too slow than to blow it because the autofocus chooses the wrong subject or the aperture priority mode meters differently than I would. A slower process also keeps me thinking about my exposure choices, anticipating what subjects on the street will do, and evaluating and re-evaluating my compositions.
To miss as few shots as possible on the street or at events, I periodically check my metering and adjust the aperture (usually sticking with one shutter speed), even if I’m not about to take a shot. I meter on an object that is the closest available equivalent to 18% (middle) gray — usually my hand — in the same light as I expect my next shot will have. On very bright, sunny, summer days, there is usually one aperture/shutter speed combination for “in the sun” and another, four stops wider open, for “in the shade” that will cover most of the exposure conditions I’ll encounter. I can make small adjustments for anything in between. Down the spectrum from “bright but overcast” through sunset and dark rainclouds, the margin between the “full-light” exposure and the “shadow” exposure narrows to two stops or less.
Bottom line: if you meter for a “bright” exposure and a “shadow” exposure, you can use them as guideposts to make relatively quick adjustments with a manual camera.
My medium format cameras don’t have integrated light meters, so I use an old Canon s90, a compact digital camera which just so happens to have a spot metering function, as my light meter. I whip it out, meter on an object in the light I’m looking for (like I do in 35mm), and dial the settings into my camera. I could and probably eventually will buy a spot meter, but the s90 is small, light, effective, and already paid for. These cameras are further slowed down because:
They require more pulls of the film advance lever to go to the next frame
I have to separately cock the shutter before each exposure
There are only 8 shots per roll when shooting at 6x9 or 10 shots per roll at 6x7
With this setup, pockets are important. I’ve got one to hold my “light meter,” one to hold lots of unexposed rolls of film and another to hold exposed rolls of film and the roll of tape I use to keep them from unrolling. Ilford and Kodak, if you can read this, please put a sticker on the end of the strip that goes around an exposed roll!
My large format exposure method is a little more involved than my medium format method. After setting up the camera, I compose the shot, critically focus with the loupe, and meter with the s90, compensating for bellows factor. If I’m not in any rush (as I would be when there’s something in the shot that might move or I’m racing a sunset), I can meter all parts of the shot to decide where to place my blacks, whites, and grays (I don’t formally use the zone system, though I am starting to lean toward trying it). Even when I’m in a bit of a hurry, I’ll take a few moments to look at the shadows and decide how much shadow detail to preserve. You can’t rush an exposure—large format photography is inherently slow and it doesn’t make sense to risk wasting one of only ten shots I have.
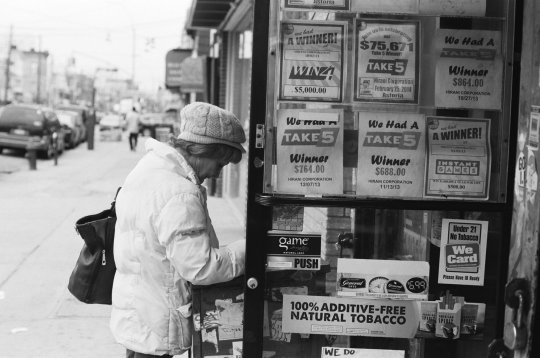
Equipment Choices

image by Zokyo Labs
My 35mm camera is a Nikon F2AS with either a Nikkor-S Auto f1.4 6.5cm lens or a Zeiss Planar T* f1.4 85mm ZF. In the world of 35mm cameras, this is hardly the lightest or smallest setup, but the F2 series is famous for its toughness and reliability. Legend has it that salesmen in the 1970s would sell them by standing with their full weight on them, right there in the store. It works without a battery (except for metering); takes nearly all 1970s, 80s, 90s, and modern F-mount lenses (but doesn’t support autofocus, vibration reduction, etc); and is a joy of ergonomics and operation even 40+ years after manufacture. As for the lenses, I chose 65mm and 85mm focal lengths because I love a tight composition and I am rarely too close to a subject instead of too far away. It’s easy enough to take a step back if necessary. These lenses really make the subject pop from the background and offer beautiful blur rendition (my preferred term for “bokeh”) in out-of-focus areas, especially at wide apertures. They are portrait lenses, after all.
Some things you could do differently:
Save more weight and bulk by using a rangefinder – I prefer SLRs when possible, because I hate dealing with parallax error.
Use a camera with aperture and shutter priority capabilities – I just don’t trust them on older cameras
Use a camera with autofocus and integrated motordrive capabilities (e.g., the Nikon F4s) – I don’t need any more bulk or weight than I already have
In medium format, I have a Mamiya Universal Press with a Mamiya-Sekor f3.5 100mm lens and a 6x9 film back. I also have a Mamiya RB67 (not the Pro-S version) with a Mamiya-Sekor C f3.5 90mm and a 6x7 film back. Because of the larger negative for medium format film, these lenses are equivalent to slightly less than 45mm on a 35mm film camera. I would choose longer focal lengths if I could, but MUP lenses above 100mm don’t pop up that often on eBay and it doesn’t make sense to buy RB67 lenses when I don’t use it that often.
With this setup, compared to 35mm, I have to deal with:
Greater weight and bulk
Fewer exposures per roll
No integrated light meter
Manually cocking the lens
A tripod (RB67 only)
A left-right reversed image in the waist-level finder (RB67 only)
Parallax error (MUP only)
My equipment choices here were mostly based on cost and availability — eventually, I’ll try out an SLR that is much more portable than the RB67, like a Hasselblad or Bronica (with a prism finder!). That said, the MUP offers a decadent 6x9 negative that is amazing for portraits, very nice lens quality, a decent rangefinder that allows for quick composition, and a Polaroid back that shoots the recently-discontinued Fuji FP-100c instant film. The RB67′s lens is just fantastic, but the weight and the tripod make it difficult to choose over a large format setup. If I did much studio work, I’d probably find more use for the RB67.
My large format setup is a 4x5 Tachihara without a model name on it, but I believe it is a “Fiel Stand” [sic] from comparing it to photos. I use it with a Fujinon-W f5.6 210mm lens in a Copal 1 shutter. On 4x5, the 210mm lens is approximately equivalent to a 65mm lens on a 35mm camera, which is where I want to be. I also have a Linhof Technika III with a Schneider lenses in 90mm, 150mm, and 270mm telephoto focal lengths, but the weight is just too much to carry around. To take advantage of the wide angle Schneider 90mm for cityscapes, I might buy a board to re-mount it—Technika III boards are incompatible with the Tachihara (Technika IV and later are compatible).
To be honest, the exact equipment I use is not critical -- think about the focal lengths, negative sizes, and other capabilities (movements, macro focusing, motor drives...), and ask yourself what you need. Hope this has been helpful! Remember to check out my portfolio to get a sense of what kinds of images my setup produces.
#photography#film photography#35mm#medium format#large format#4x5#photo shoot#street photography#cityscape#photographers on tumblr#photo techniques#mamiya#nikon#fujinon
6 notes
·
View notes