
year1edbattellfmp
Ed Final major project year 1
83 posts
Don't wanna be here? Send us removal request.
Last Seen Blogs

symbioarts-blog
SymbioArts


xdilliwali-girlfriendx
fatima

shayariteresang
Shayari Tere Sang - Connecting Hearts Through Shayari

detectiveseaslug
A Galactic Mystery....


Photo

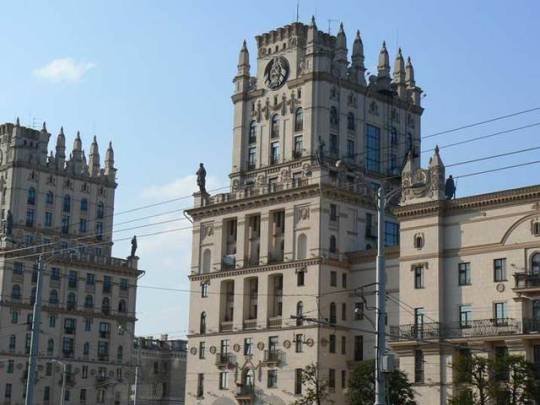
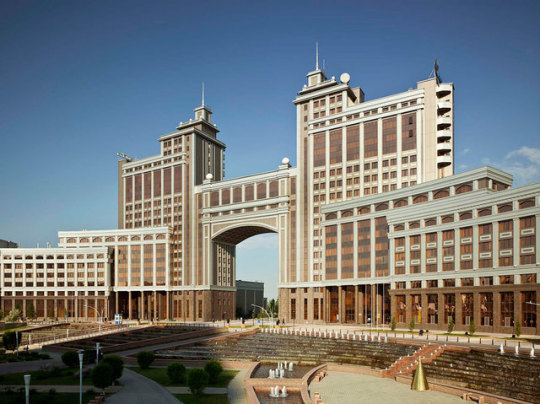
Soviet architecture usually refers to one of two architecture styles emblematic of the Soviet Union:
Constructivist architecture, prominent in the 1920s and early 1930s
Stalinist architecture, prominent in the 1930s through 1950s
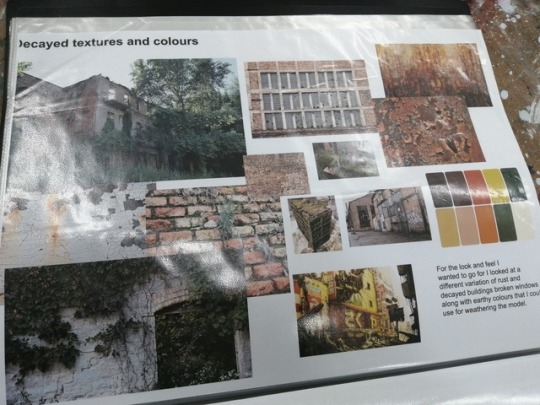
I want to look at this type of architecture because It was the type used if Pripyat Ukraine as at the time it was part of the Ussr, by looking at the architecture it can help me understand why the building was built the way it was and can look at the feeling and environment the type of architecture creates
0 notes
Text
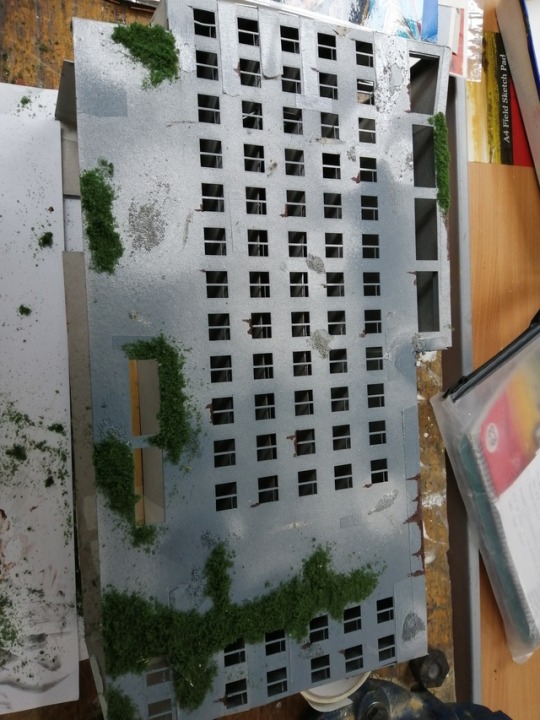


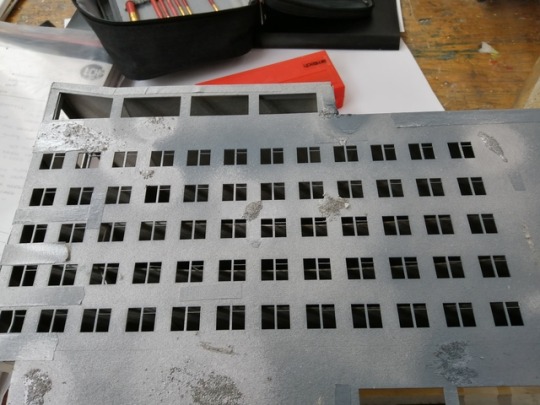
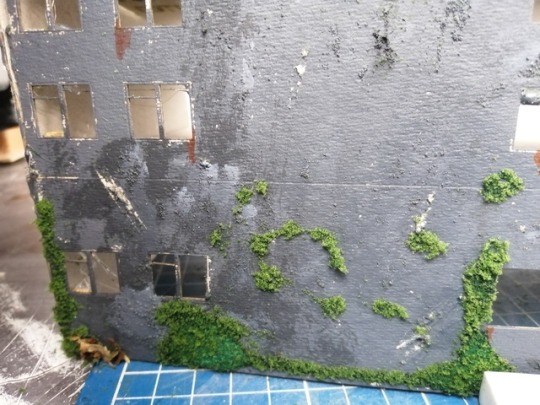
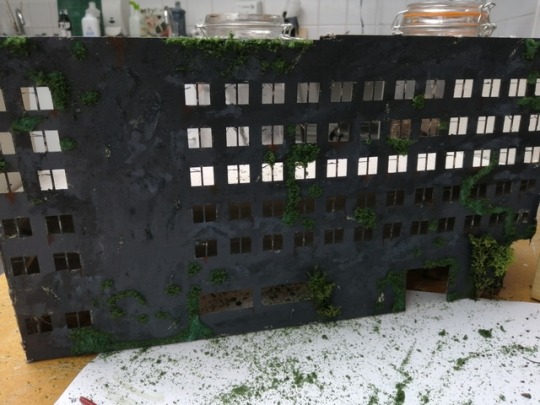
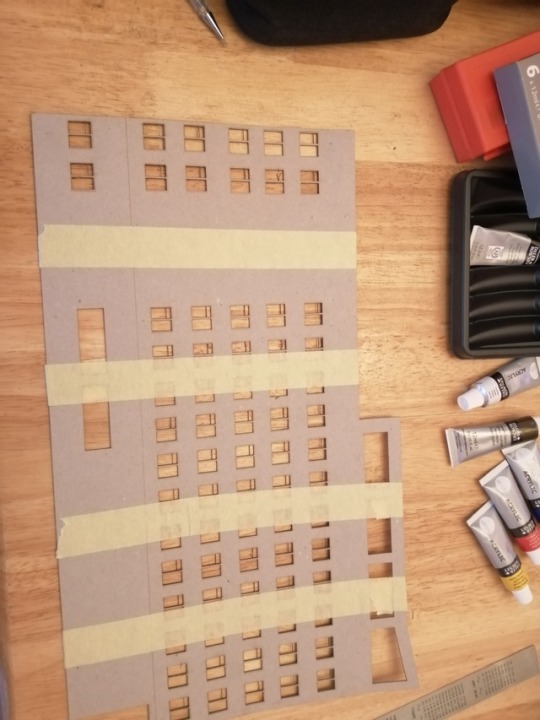
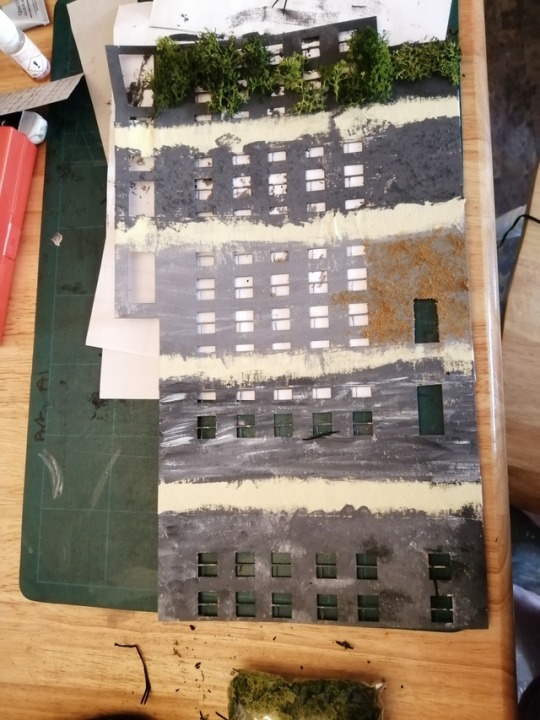
Final model weathering plants for the weather I did what I had done before with brushing the ova glue onto the model randomly and around in ways where it would look natural growing in patches and in large clumps along with scratching the the model with a craft knife to give it natural wearing like a real building really added the overgrown and abandoned look in some parts I felt like I put too much but overall I like how it turned out and would just try and make more natural looking areas by spacing it out and making smaller pva brush strokes
0 notes
Text
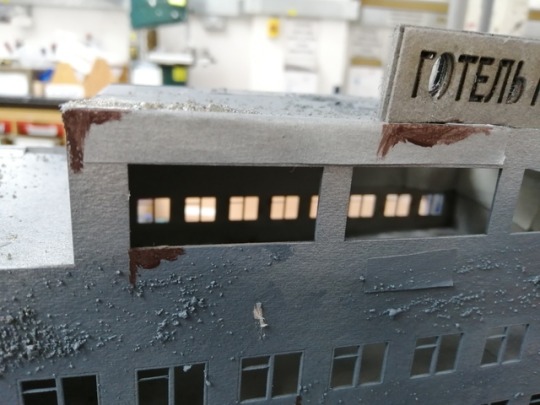


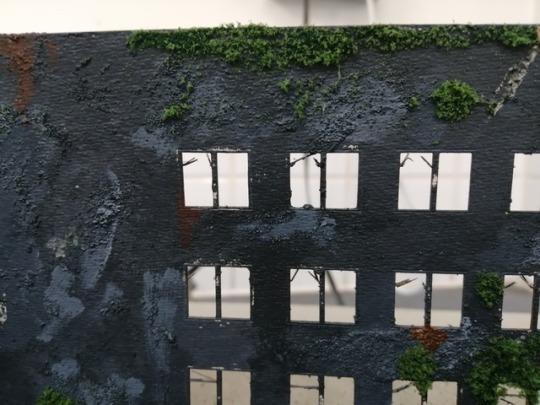
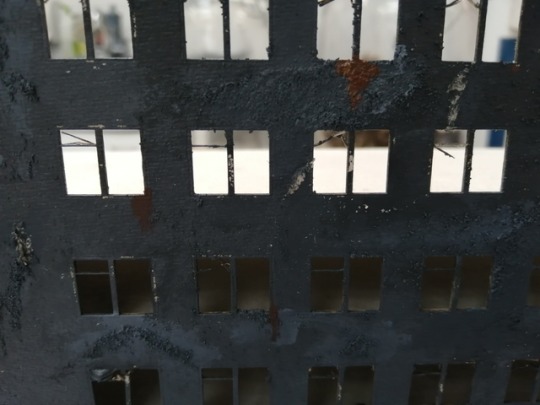
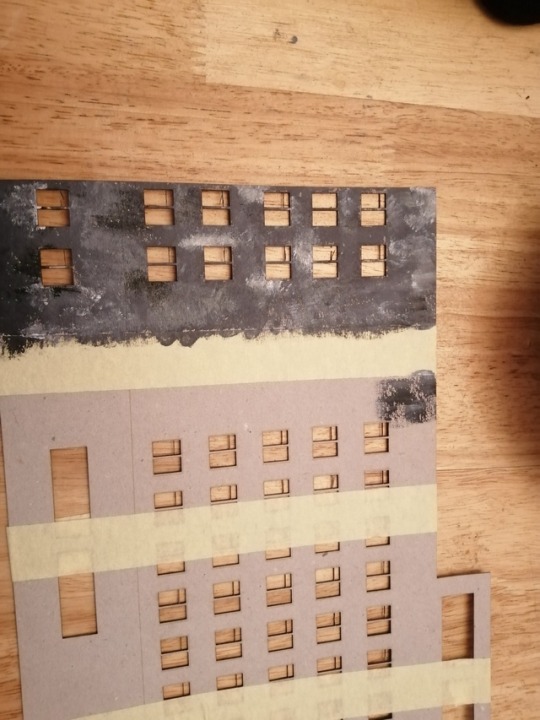
Final model weathering drainage marks and paint decals using brown and yellow paint I put drainage marks all around the building in places were the water runoff would do this and try and give as realistic a look as possible however I didn't use as much yellow paint as I should of so it didn't look as good as It could of and I tried to space it out around rather than there be marks under every window however I don't like the overall paint on the building and would have found it better if the model was painted with grey arcylic paint rather than metallic spray paint bc then it would be easier to add strokes of white and black towards it
0 notes
Text


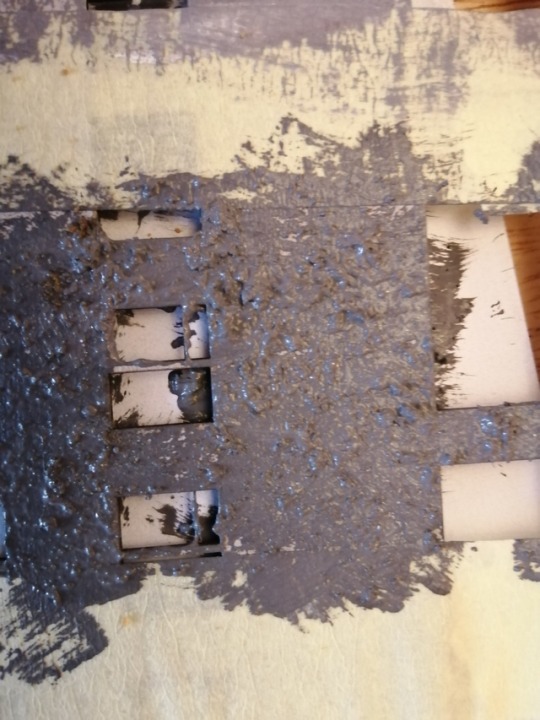
Final model weathering sand since the final model was already painted with spray paint I used pva glue in patches to put on the sand and scratched it off to give a textured and realistic effect after I did this around the whole model I used the same spray paint over it to put it into the model witch I think worked very well altho ir would be better if I spaced out the sand rather than it be in clusters around but I didn't have enough paint for that
0 notes
Text


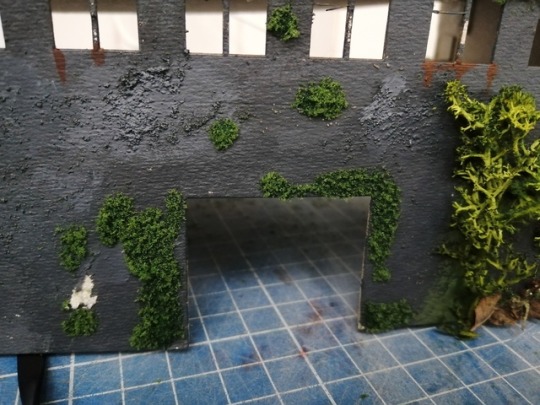

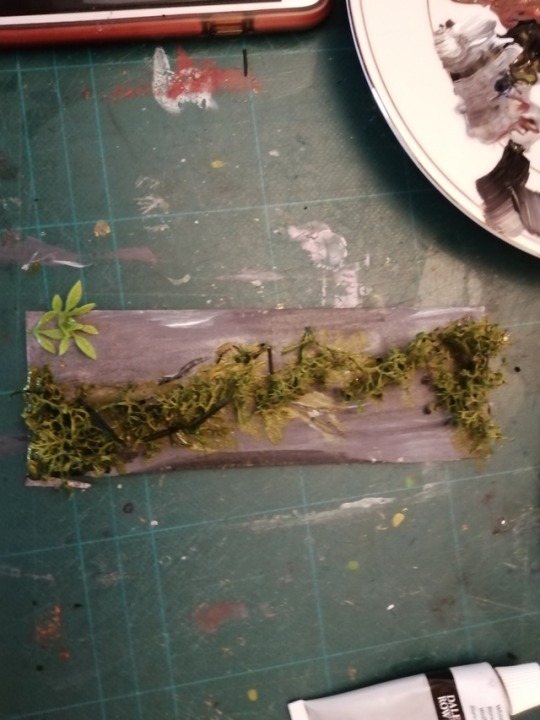
Weathering final experimentation after painting the details I used on foliage powder and pva glue on the model and dotted It around and tried to paint the glue on how it would organically grow up around like real moss and vines and small dots of it in places along the tops and sides of the building looking at real moss on old buildings as references, and used a tiny mix of dark green light green and yellow paint on 2 places to use the vines again but only a little bit because too much makes it look unrealistic but it worked well but I decided I wouldn't use it in the final painting because it was too difficult to do right
Overall the moss I did went really well doing patches around the windows and roof along with it around the door witch is an area I particularly liked because it looked real because of the pachiness of it, however the vines looked alright but really stood out without doing alot of them and pulling that mix of the powder and vines would be difficult so I decided to only use the powder for the final because that worked really well
0 notes
Text
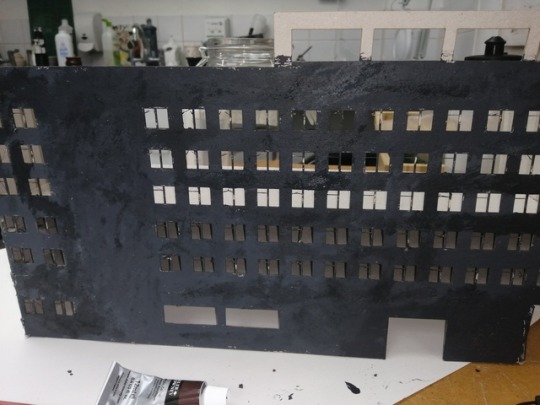


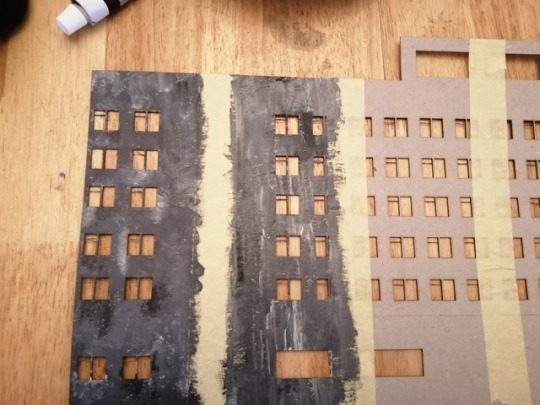
Final design test painting for the final painting test experimentation I used my previous failed model combining all of what worked in the other experimentation peices, I used a dark grey paint on the building for sort of a concrete look and used darker and lighter mixes of it as I painted to give it a weather'd look with different paint coats, and also mixing the sand with the paint so give it more texture and it would catch lighter tones more if I dry brushed over it, also using a brown and yellow mix along the bottom of windows and near then roof etc for drainage marks witch worked quiet well for the effect I was looking for.
Overall it worked quiet well with a mix of darker and lighter patches in the paint for a look of several paint coats and wearing and the drainage marks for an aged look to it along with the sand mixed into the paint to catch some more detail altho I could blend the different colours better because I did sort of look like it was done by paintbrush and not very realistic
0 notes
Text


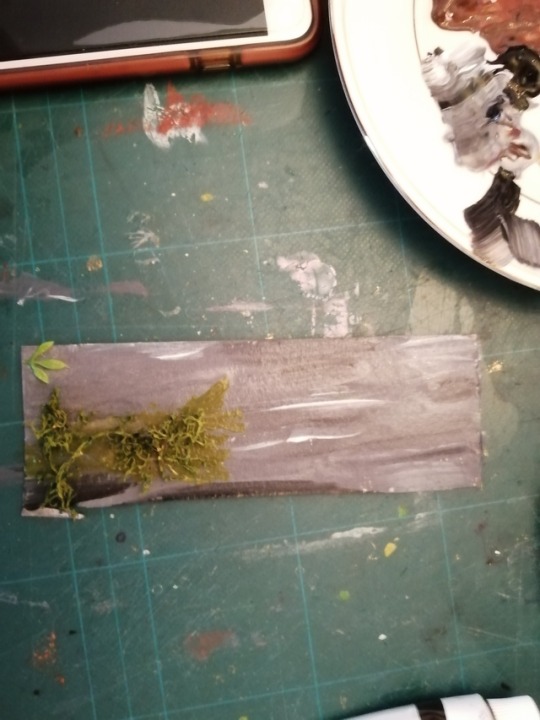
Moss weathering - to start the weathering I put a base layer of dark green with a few stokes of lighter green over the colour I would paint the card for my model, then using pva glue I stuck the model moss onto the card in stages to show the aging and passage of time with the severaty, i tried to get the root of the moss to follow it upwards to make it more realistic and not out as much onto the card as the last section of moss I did didn't come out well because of this but I managed to get it realistic and branching out realistically
Overall it turned out very well because I was able to be concervative with the ammount I put on and branch it up realistically so it worked really well and with the greens painted underneath like it stained the wall worked really well so for the final test I would definitely try and emulate this and combine it with the other effects
0 notes
Text

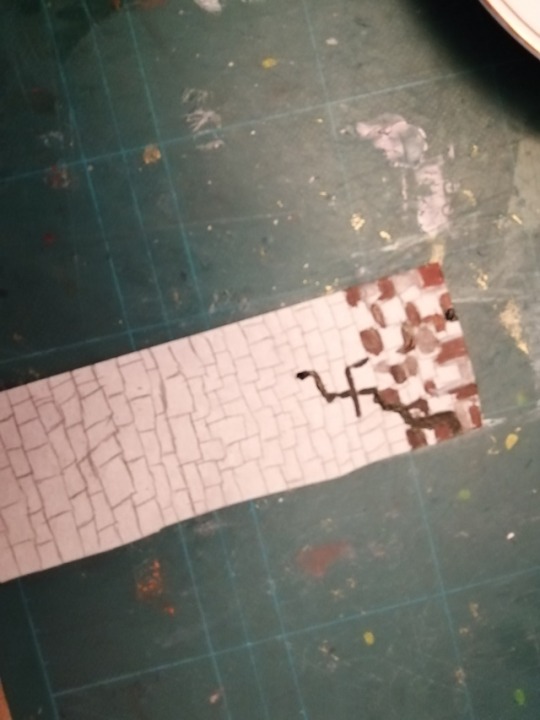

Cracked bricks for the brick effect practise I started by drawing bricks on with a pencil and I didn't use a ruler to make it look more aged etc but it would be better for a more medieval effect bc for the area my building was built the bricks would be more uniform, but after I was done doing that I painted the bricks slightly different earthy and stone colours but that would work more with medieval again so if I wanted to do that I would have to use a more uniform colour and make them only slightly different by added a tiny ammount of black or white, then for the crack I did a black line of paint following the gaps in the bricks like it would in real life because that's the weakest point however the crack effect I was going for didn't look realistic just painted on and the effect was quite difficult to achieve without cutting out the bricks from cardboard individually with would take alot of time but it would probably get a better effect than painting and drawing them on,
Overall the effect didn't work that well at all because it didn't look realistic at all and it probably would be difficult and time consuming to paint it on to achieve this but cutting out individual peices it would be easier to get a good cracked and aged effect but would propably take alot of time to cut out all the peices so I won't be using it in my final model because of this
0 notes
Text


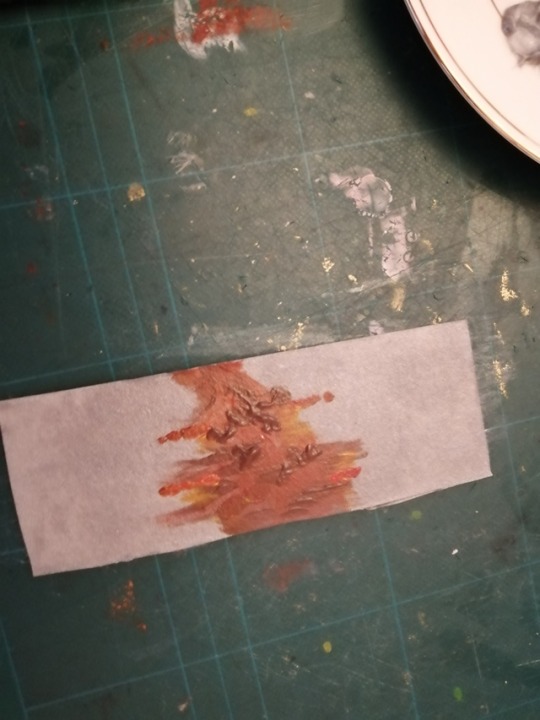
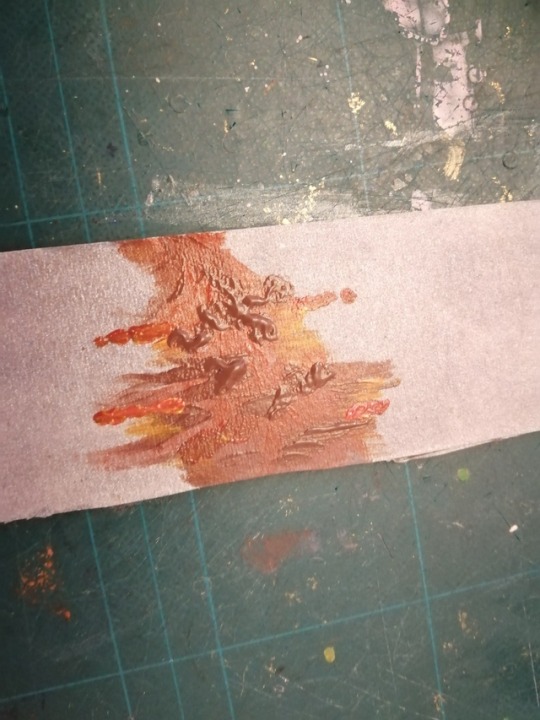

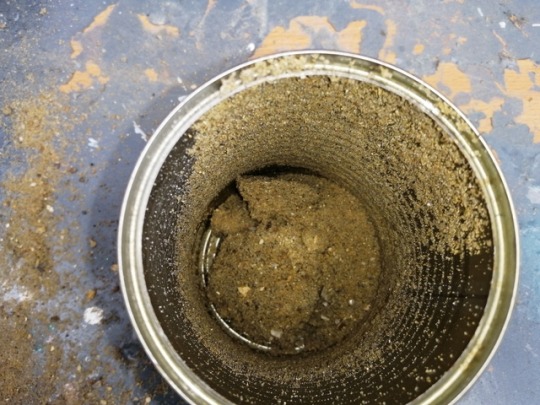
Rust effects for the rust I put a layer of matalic acrylic paint on a peice of the card and then slowly added orange and a hint of yellow to it I took photos at whta I would think to be different stages of the rust using reference photos, then I added some browns and expanded the orange and yellow to get the next stage, then after that I added a small ammount of black and made the rust in a larger area for the final stage
Overall I think the black didn't work too well and I wasn't able to get the believable effect I wanted but it was on a larger scale than it would be if I incorporated it into my model but the stage that worked was the 2nd when I added some more browns etc because it looked the most believable wherass the 1st looked more like I accidently smeared paint on the card, and the last one colours not fully blending witch would of given a better effect,so if I was to put any rust onto the model I would copy more of whta I did in the second stage
0 notes
Text


Weathering techniques
Section 1
Stippled a dry brush with barely any paint with some slightly more black and white colours to give weathering
Section 2
Used bigger flatter and rougher wet brush used alot of paint and layers the paint on thickly would work better if I used a browner colour to give the effect of draining etc to really work with the messier and harsher use of colours
Section 3
Added brown to soften the gray colour and with white and black and used even coat as a base layer then at the bottom put a layer of pva and put sand on top of it would work better if I put another layer of paint over some of the sand to show that it's been layers over time and look more organic
Section 4
Mixed sand in the pain to really show texture and the weathering will catch more on top and tear some of the cardboard to also show that wich I think worked very well and helped really show that weathering and it ended up being the best section because of it in my opinion and how much texture and how it brought it a lot closer to lifelike
Section 5
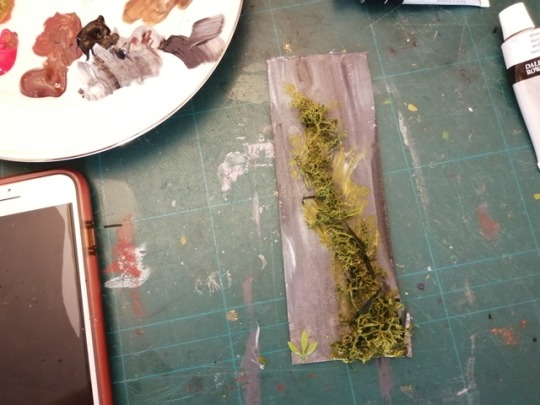
For this section I put the base layer of grey onto it and then along it I painted a dark to light green all the way up to give the effect of a moss and using ova I stuck hrcky flow along it for the moss growing but it didn't work so well because the vines arnt growing upwards because of the way they are, however the small sheet of moss and vines I did worked alot better because of the smaller piece I was able to get it to look more organic and therefore work better
0 notes
Text
undefined
instagram
Simon laveuve is a minaturist and photographer who mostly makes post apocalyptic and decayed models of vehicles landscapes and people witch is why I looked at his models because of the post apocalyptic or decayed world I wanted my model to focus on, I think his work is best when it tells its own crazy story through the environment and characters like in the model above it shows a crazy family wearing weird masks with a gun and it leaves you to make your own story about them and giving you the framework for it witch is whta I want to do for my model but through the building witch would be harder to do so maybe the use of graffiti would covey peices like that with blood or i could just focus on the environmental story
0 notes