
The Full Guide To Starts Your Carer In Photography. From Zero To Hero
Don't wanna be here? Send us removal request.
Statistics
We looked inside some of the posts by zakariazakri and here's what we found interesting.
Average Info
Notes Per Post
2
Likes Per Post
2
Reblog Per Post
0
Reply Per Post
0
Time Between Posts
8 hours
Number of Posts By Type
Text
12
Last Seen Tumblr Blogs


Fun Fact
Tumblr Inc. has $15.1M in annual revenue.
Text
5reasons why you don't get the image that you are looking for while shooting

It is often so disheartening once you pour your heart and soul into photography, but regardless of what you seem to try to, your images just don’t end up the way that you simply want them to, or how you thought you’d captured them!
I know, I’ve been there too 😁
That’s why I wanted to write down this blog post today, so you'll know the foremost likely reasons why your images just aren’t arising such as you see in your head, then you'll go and do something about it!
The key to anything you read on this blog is ACTION. Have a glance through these five reasons and see whether you're already doing the advice. If not, start to implement it as soon as possible to start out seeing an improvement to your images!
Ready? Let’s jump right in.
Learn why your images suck, and the way to urge better photos! | Beginner Photography Tips #1 - You don’t skill to line the right exposure for the scene There are generally two different types of photographers who fall under this category - those that are still on full AUTO mode, and people that are using one among the semi-automatic modes.
So as you almost certainly know, exposure is just how light or how dark your scene is, and that we control it via the three elements of the exposure triangle - shutter speed, aperture, and ISO.
When you shoot in AUTO mode, the camera chooses all three of those for you. Now, this seems like it should be an honest thing since it saves you having to believe it in the least, but I urge you, believe what you're doing here! you're getting a bit of kit - basically a bunch of wires and sensors and receptors - make a choice for you on how you'd just like the scene to seem. Since it doesn’t have a clue, it'll aim for the middle of the road, catch-all, “hope for the best” settings and hope that it hits the proper exposure. (Actually, it won’t hope, it’s a wire 😁)
Sometimes it'll catch on wrong, and you'll get images that are too bright or too dark. Other times, the exposure it picks might actually be technically correct, but that varies GREATLY from an “artistically” correct exposure of the precise same scene.
And this is often where even those that have moved onto one among the semi-automatic modes may experience problems.
Although you're helping your camera out by choosing your aperture or your shutter speed, you're still leaving the camera to balance and choose the ultimate exposure for you - again, it'd be technically correct, but that doesn’t necessarily offer you the image you see in your head!
Understanding exposure is vital to getting your images to seem the way you would like them to.
And as shooting in Auto mode doesn’t allow you any control over these settings, and therefore the semi-automatic modes only a touch more, the sole thing left for you to try to do is switch to Manual mode. Understanding each setting, and the way to show correctly for the scene exposes the chance for getting the scene to seem precisely the way you would like it too! you'll read this recent blog post, the way to start Shooting in Manual Mode to inform you what you would like to try to next 😁.
You can also grab a free manual mode cheat sheet right here, to assist you to get your settings right as you progress through manual mode.
Manual Settings Cheat Sheet Opt-In Image.png #2 - You don’t understand light Light is vital to getting an excellent photograph. It’s the special ingredient that will lift a picture and make it into a piece of art. (It’s also the thing which will make a gorgeous moment or scene feel flat, bland and uninteresting!)
Unless you're fresh to photography, you'll have heard about shooting within the golden hour (the hour just after sunrise, or simply before sunset) as that's when the sunshine is incredibly flattering to just about every subject on earth, so this is often an excellent place to start out.
Then, spending some time learning about light and the way to put your subject in reference to it's WELL worth some time and consideration!
In fact, you'll make a start here, by learning 5 Natural Light Tips for Beginners.
5 Reasons Your Images Aren’t arising The Way you would like #3 - You’re going too fast One of the simplest belongings you can do to enhance your photographs is just hampered.
Instead of approaching a scene and immediately starting to snap away, try taking a couple of moments to undertake to work out the simplest place for you to face, where the sunshine is coming from, any distractions that would be within the background, and what the simplest settings for the scene are.
Think about what's within the frame that you simply could use for composition - are there lines that you could use, or shrubs that would frame your subject?
If you discover yourself stepping outside or into an area and taking photos immediately, stop.
Slow down.
Don’t worry about missing a flash (unless it something you'll never get the prospect to require again!) as taking a couple of minutes upfront will really assist you nail the photos that you simply DO take, and that they will quite structure for the handful that you simply might miss out on at the start because you were preparing.
5 Reasons Your Images Aren’t arising The Way you would like #4 - You don’t know your camera tolerably I totally get that your new camera can seem a touch overwhelming. There are numerous dials, buttons, functions, options, and menus that you simply find it such a lot easier just to stay using the AUTO (or semi-automatic!) functions for everything, and hope for the simplest.
But learning your camera may be a MUST for getting correct exposure (as we just heard!) but also for other things, like getting tack sharp images, or images that have the proper color from the white balance setting.
My advice is to require it one step at a time, moving from one AUTO function at a time, and not moving onto subsequent steps until you've got mastered the one before it. Break it down into small, manageable chunks, and work on something until you crack it. All the while layering on the knowledge, moving far away from AUTO and linking everything together.
(If you would like me to be there with you as you are doing it, check my Auto to Awesome course - everything you would like to understand, weakened step by step. AND you get access to our private FB group where you'll inquire from me anything if you grind to a halt, so you're never alone)
Once you get to understand your camera, it takes you seconds to line it up correctly for the scene as you’ll start to more instinctively know what settings to use, and your images will have better exposure, and you’ll get tack sharp images more times than not.
This leaves you liberal to believe OTHER things which will improve your photos, like composition and interesting light.
So, found out a date together with your camera today, and obtain to understand it a touch better
#5 - you think that that more about buying new gear quite you think about learning I remember once I first began in photography, my main concern was the camera body I used to be using, my lenses, and what the ‘pros” said were essential pieces of kit. I’d also scour blogs to ascertain what lens my fave photogs swore by, or what lens they used for a specific image.
Don’t get me wrong, gear is often important, but nowhere NEAR the maximum amount as learning the way to use the damn things!
So, yes, good gear is (always) nice to possess, and it does assist in giving you more flexibility, but I absolutely promise you that you simply can take amazing images with an entry-level cropped frame camera body and kit lens if you find out how to use it properly.
You might find this next statement a touch harsh, but the rationale we all clamor over new gear is because it’s much EASIER for the solution to great photos is simply to urge a replacement lens or a replacement camera body. meaning the matter is often solved pretty darn quickly, instead of the one thing which will actually improve our photos - spending the time required to find out it.
If you currently think that your images aren’t good because your gear is holding you back, I would like you to require a glance at this recent blog post, and inspect the pictures in it - all crazy an entry-level DSLR and kit lens!
If you're currently eyeing up a lens and thinking which will help, please don’t roll in the hay unless you're already shooting in manual mode, understand light and every one the settings on your camera. (If you'll, you're allowed ) We re-evaluate ALL of that and more in Auto to Awesome, so make certain to see it out before you go - it'd just be the very thing you're trying to find.
0 notes
Text
5 Natural Light Tips for Beginners

I just about exclusively use natural light for my images, because I really like the variability and wonder it offers. I also love the challenge of working with what mother nature has given me to figure with on any particular day!
However, learning to figure with and see light effectively does take a while, so today, i would like to travel over some tips for working with natural light that's only for beginners.
Let's grind to a halt in!
Learn all about lighting for photography with these natural light photography tips especially for beginners. study light in photography, so you recognize the way to use indoor light and outdoor light for your photos! Tip #1- Keep the sunshine simple....at first There are numerous differing types of sunshine, then some ways to light your subject, that they are often tempted to undertake everything directly. However, until you truly understand light - and most significant skills to meter effectively for it - it's easier to stay to some simple lighting situations initially.
The easiest thanks to light your subject is to possess your subject face into the sunshine, and for you to be (almost) in between the sunshine source and your subject. (just take care to not block the light) this provides nice, even lighting on your subject which is universally flattering, and really easy to photograph in as you do not have big light contrasts.
If you're indoors, have your subject face the window. the sole thing you would like to observe out for here is ensuring that the sun isn't streaming directly in through the window. If it is, choose a special window, or wait until the sun has moved around and far away from the window.
If you're outdoors, it is a little more tricky as you cannot "manage" the scene such a lot. Having your subject face into the sunshine source is far easier to realize on an overcast day because the clouds soften the sunshine and make it evener. Having someone look directly into the sun will cause squinty eyes too which isn't the foremost flattering look!
Lighting your subject from the front is usually mentioned as flat light, because the sunshine lands "flat" on your subject, and doesn't offer you any shadows. Whilst which may sound sort of good light, shadows are literally goodies, because they assist mold your subject, and provides a more three-dimensional quality to the image.
This is why, once you are happy using front light, you're getting to diversify to undertake to angle your subject far away from the sunshine a touch , in order that you introduce some shadowing. Again, it's simple to try to - just have your subject shy away from a touch from the sunshine source in order that it hits them more from the side than the front. it is a gentle thanks to introducing using differing types of sunshine - just angling your subject differently to supply different levels of shadowing.
Tip #2 - Move your subject until you see catchlights
Catchlights are simply reflections of the sunshine source in your subject’s eyes. you usually want to ascertain a touch of a catchlight, because they add life to a picture of an individual - without it, the eyes can look "dead".
It's very simple to make catchlights - you would like to possess your subject where the eyes can devour the light! (A great exercise in having the ability to ascertain catchlights is to possess your subject turn 360 around within the same position, and watch how the catchlights within the eyes change with each turn) you'll read more about catchlights here.
If you light your subject from the front, then you ought to automatically get fantastic catchlights. However, once you start to maneuver your subject far away from the sunshine, so as to urge that shadowing, then you'll get to keep watch on the catchlights to form sure you continue to have them!
Of course, I totally appreciate that you simply might not want or be ready to move your subject, during which case you'll just get to be primed and patient and wait until you see that spark in their eye before snapping the shutter!
Tip #3 - await dappled light
Dappled light is once you have patches of sunshine poking through an otherwise shaded area. for instance, if you underneath a tree, then most of you'd be under the shade, but you'd get small patches of sunshine beaming through. These patches of sunshine will offer you blown highlights if you do not skills to meter effectively, and also offer you distracting elements within the frame if they land on your subject.
Again,, once you understand and may work more easily with light, dappled light is often fun to play with, except for a beginner, it is best avoided. the simplest thing to try to just move your subject in order that they're in a neighborhood of shade that's fully covered, or back out into open light.
Tip #4 - Don't mix different light sources
Another thing to avoid is mixed light sources. A classic example of this is often where you've got natural light coming in from a window, and therefore the light from a lamp both lighting the scene. However, it is often any two sources of sunshine, for instance, once you have an iPad light and a tungsten lamp both lighting your subject.
The reason we would like to avoid this is often due to our white balance. White balance is just the color of sunshine, and differing types of sunshine emit different colors. It can either be cool, which is bluer, or warmer, which is more yellow.
Our eyes (clever things that they are) can "read" and adjust for various colors of sunshine, even within the same scene. However, our camera can only set ONE white balance at a time. this suggests that if you combine your light sources, you'll have one light showing as being blue, and therefore the second light as being yellow, which may make your image look decidedly off.
You can fix this in processing, but it is often tricky and time-consuming (and in some cases, you will not get the simplest result) therefore the neatest thing is just to avoid it when shooting. If you've got natural light coming in, close up any lamps and just accompany natural light. Alternatively, you'll activate more lamps, and shut the blinds. (Here's a guide to fixing white balance in processing if you would like it)
My usual caveat applies as there could also be some instances once you WANT those two different white balances during a scene - for instance, once you are photographing a house during a snow scene, you'll want to point out how cold it's outside by having the white balance look blue there, and show what proportion warmer it's inside, with the white balance looking more yellow. (Yup, for every single rule there's a reason to interrupt it somewhere!)
Tip #5 - Avoid noon
When you are first starting out, I counsel that you simply avoid the tough sun of midday. It's much harder to urge good exposure at that point because the contrast is such a lot more extreme. it is also not the foremost flattering of the angle of sunshine, because the light comes from directly overhead, giving your subject "raccoon" eyes.
Cloudy days are far easier to figure with when starting out, simply because the sun is diffused by clouds giving a softer light, but you continue to attempt to avoid midday because the sun will still have some direction and you will not get the foremost flattering light then. it'll even be difficult to urge catchlights into the eyes - which as you recognize, are some things we want!
Of course, midday sun can look great too, so if you're experienced you actually do not have to avoid it - actually i really like the challenge of full sun these days! It's about starting with light that's easier to figure with, before the build-up to tougher sorts of light.
Remember, the following pointers are only for beginners, so once you get experienced, you'll definitely want to diversify into learning the way to conquer ALL lighting situations. for instance, you'll want to urge outside fully sun and play with shadows or silhouettes, or place your subject during a patch of sunshine to urge dramatic light, or move around your subject and experiment with backlight or split lighting. the chances are truly endless!
0 notes
Text
5 things you should be wondering about before taking a photo

Q1: what's the aim of this shot?
Before you even lift the camera to your eye, I would like you to approach each shot with an end goal in mind - in other words, what are you trying to capture?
I know that a lot of people devour their camera just within the hope of getting “something good” but attempt to get a touch more detailed than that, because the more you'll visualize the top result, the more purposeful your shooting is going to be, and therefore the better the image will be!
So consider whether the goal is just a life-style/documentary shot for your family albums, or are you going for a full-on portrait to hold on the wall? Also, believe what does one wants to point out with this image? What does it get to include to urge your message across? What shouldn’t it include?
The more intent you've got, the higher in-camera decisions you create, so this is often a crucial one!
Q2: Where is that the light coming from?
So now that we all know what sort of image we hope to require, the subsequent thing you ought to do is check out where the sunshine is coming from, and the way this is often hitting our subject.
You want to use the available light during a way that flatters your subject. Remember, if your subject doesn’t look good to the eye, they’re not getting to look good within the picture either! Although you'll do tons to a picture in processing, you merely can’t “fix” bad lighting (or a minimum of not well) - so this is often something that you simply really must get right privately.
Try to confirm that the shadows are falling in places that are flattering and molding the features, which their eyes have much light in them (called catchlights). Catchlights are often really important because they assist bring your subject to life!
So, look to the sunshine, and move your subject or yourself (or both!) to a neighborhood that's flattering and best tells the story you would like.
Q3: Are there any distractions within the frame?
Now that you simply have decided what sort of photo you would like to require, and where to position yourself and your subject with reference to the sunshine, take a fast second or two to see your background.
Try to confirm there's nothing distracting within the background, and if there's, remove it. Although you'll definitely clone items out later, there are some things that are just really difficult to get rid of, for instance, plant pots growing out of someone’s head, or items that merge together with your subject in how. Plus, are you able to imagine having to edit 30 blue balls out of the background when all you needed to try to was take 30 seconds to maneuver it out of the way at the time?
Of course, if the background is simply super busy (but that provides you the simplest light) consider perhaps shooting down on your subject, or blurring the background.
Q4: What settings do I want to use?
Finally! We’re able to lift our camera to our eyes. (Can you see what proportion of taking a photograph starts without even the camera is there?!)
At now, you would like to work out which settings you would like to use here. I’m talking about Aperture, Shutter Speed and ISO settings primarily, but also your other settings too - like you focus mode, white balance, etc.
I wrote a cracking blog post (if I do say so myself) about choosing your settings in manual mode, so I’d give that a read, and also download my FREE manual settings cheat sheet also.
Q5: How am I able to compose this photo?
Purpose of photo clear? Check! Subject positioned in the best light? Check! Distractions removed? Check! Settings in? Check!
Then now, if you've got the time (which I appreciate you don’t always have!) attempt to consider which composition tool you're getting to use. you've got numerous options here that it can feel overwhelming.
If you're new photography, then stick with using the rule of thirds, for now, moving on to other composition guides once you desire you'll “do” the rule of thirds in your sleep.
If you're more advanced, then try something new - framing, symmetry, negative space, golden spirals or rule of odds, to offer a couple of examples. Have a glance at what's the frame - for instance, is there a line you'll use to steer to your subject? does one have an ideal triangle? an excellent background for a few negative spaces?
Then make the subtle adjustments to your position to urge the composition you would like.
0 notes
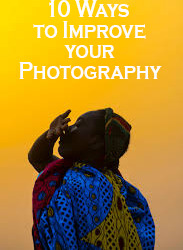
Text
10 Ways to Improve your Photography
1. Become an Observer of sunshine
Light is everything in photography. The word photography literally means “painting with light”, and I’m unsure there's anything more important, as, without it, we simply can't make an image!
For a few years my main concern was ensuring I got ENOUGH light to figure in – having a Canon Rebel as your camera does that to you as you'll only push your ISO thus far until you would like to start out introducing flash or have a really grainy image! But now I really like shooting in low light, full sun, or the other type that gets thrown my way, and my images look such a lot better for it.
If you're starting out, start by shooting indoors, a search for areas that have many lights coming in as you're getting to find it much easier to figure with.
Once you've got that down, move outdoors, and experiment with open shade, full sun, and cloudy days. withdraw indoors and begin using directional light (light that hits your subject at an angle) or find pockets of sunshine or low light - there's such a lot to find out, so pick one, and begin to practice!
DO THIS:
This weekend, try working with light that you simply haven't worked with before. Use iPad light, torchlight, light during the golden hour, or use light that you simply would normally avoid (like midday sun) and find out how best to figure with it. you'll even escape the flash if you've got one!
2. Know what you would like to shoot
Talking from experience here, once you are just starting out you're photographing anything and everything at any time and at anywhere. And that’s how it should be! However, once you are able to advance, it helps to urge purposeful.
To do that you simply got to decide what to shoot before time. Try visualizing your image BEFORE you're taking it – what does it look like? What perspective are you using? What light? Having thought in your head (which may or might not transfer itself into your screen!) will assist you to get the pictures you dream of.
DO THIS:
Dream up your ideal image or session. What does it look like? Where does it take place? Who is in it? Write it down and sketch it out. Take the thought out of your head and onto paper - that way you will be far more likely to act thereon.
Stuck? Have a glance at Pinterest and see if you'll find a picture that inspires you and take it from there! I've linked to my board for Child Photography Inspiration to assist, so check it out first (and in fact make certain to follow whilst you're there!)
3. Use Different Composition Tools
The composition is nothing quite the art of arranging the varied elements within your scene in order that they draw your viewer through the image within the way you would like them to look at it, or to evoke a sense or mood.
There are a lot of different compositional tools at your disposal (and once you find one you'll usually find a rule that's in direct contradiction to the primary rule!)
My advice is to take one compositional tool and practice one just every week. albeit you recognize all about the varied sorts of composition, return to the start and begin again from there – you’ll be amazed by what you choose up the second time around.
DO THIS:
Pick a compositional tool – Rule of Thirds, Lines, Color, etc, and work on introducing it to your images this weekend. you will see some suggestions below!
4. Shoot during a Different Exposure Mode
If you're still on AUTO, then the very thing you would like to try to to it move faraway from it! Although there's an honest chance that your camera will expose for the scene correctly in AUTO, other times it'll catch on very, very wrong.
Getting the right exposure is simply only one reason to require control of your camera - it’s only by taking FULL control that you simply can determine the ultimate “look” of your image. you would like to inform the camera what proportion of your scene to point out as sharp focus, where to blur, what proportion to blur, whether to point out motion or freeze, or maybe whether to point out grain or not. Without taking control of your camera, you'll not be ready to control the ultimate image. we actually enter this thorough (along with all the weather of a successful image) within the Auto to Awesome e-course, so if you are feeling like your camera is controlling you rather than the opposite way around, check it out.
DO THIS:
If you're shooting in AUTO, move onto AV mode. If you're in AV mode, shoot in manual! If you're already comfortable shooting in manual, why not try some creative exposure? Under or overexpose and see what sort of results you get, or use a high ISO to introduce grain or intentionally get motion blur.
5. Shoot in RAW
When I reminisce on my images there are two changes I made that instantly stand out because I can tell once I made the switch. the primary was once I started shooting fully manual mode, and therefore the second was once I switched to RAW.
I shot on JPEG for quite a while, because the massive file sizes and increased editing that went with the territory of RAW files put me off. I still curse both to the present day, but it's a trade-off I will be able to endure as shooting in RAW is another thing that provides you CONTROL - and that I believe ultimately improves your images. (That said, I feel duty sure to say that some amazing photographers shoot in JPEG - I might only advise this if you're getting great shots privately already!)
DO THIS:
Make the switch to RAW this weekend if you're currently shooting in JPEG - you'll need an RAW image processor like Adobe Lightroom or Photoshop Elements to process the files though, so confirm you've got one among these already! If you already shoot in RAW, challenge yourself to get the image correct privately.
6. Learn a special Editing Technique (or try something new)
I love editing my photos, and that I think wherever you're in your photography journey there'll be something new learn and try!
Although for the bulk of my images I just do a fast edit (due to the number of images I take vs the number of free hours I get) nearly all gets a touch little bit of a polish.
If you're just starting out, first of all, please don’t compare your images to knowledgeable photographers' final images. Many, repeatedly there has been tons of labor done to the image in processing to urge it to seem that way!
Start off by learning the fundamentals – a minimum of the way to crop, straighten, fix WB, exposure, add contrast and saturation to offer your images a lift.
Already got that down? Then try something else – add color tones to your images, or textures – there’s nothing more fun than having a ‘play” in Lightroom or Photoshop!
Even if you don’t apply what you've got learned to each image, you'll pull some amazing things out of the bag on images that you simply actually need the simplest on.
DO THIS:
Take some images into your favorite editing program and play with them! If you're new editing, just compute the way to make basic adjustments., but if you're an experienced editor, try doing something totally different or use a tool that you simply do not know the way to work!
7. obtain an excellent Background
The grail of successful images has an excellent subject and an excellent background.
Don’t just accept the local park or playground all the time – attempt to find new and interesting places to shoot.
Look for creative elements you'll use in your images in, or interesting backdrops, or simply places that are free from distractions. Look in and around your home, or drive around the neighborhood and appearance for nice locations to use. It might be a brightly colored door, a graffitied wall, a tree-lined path, a patch of ground with no distracting elements within the background, or just an area of outstanding natural beauty.
DO THIS:
Take your camera and a notebook and drive around your area (or just wander around your home) search for places that you simply think will have an excellent background and take an image of them, and add the small print to your notebook so you've got an inventory of locations to undertake out!
8. Know your Lenses/ Equipment
If you've got quite one lens then an excellent trick is to spend a minimum of every week with only one of your lenses strapped to your camera, and do not change it.
Understand what it does your subject, what it does to your background, what proportion you'll slot in the frame, or how it squeezes elements further apart or brings them closer.
Break the “rules” of that lens – use a good angle for a fun portrait or take your 135mm lens indoors.
If you're during a photography rut, you would possibly even want to undertake out a replacement lens, it's amazing how different the planet can appear through a replacement lens and thus revitalize your photography!
DO THIS:
Take off your favorite lens and put something else on your camera for a touch. See what it does to the background, where you would like to face, what proportion you'll slot in the frame etc. If you already know your lenses inside out, why not rent a lens for a weekend, or underwater housing, or a flash, and check out something new.
9. Read a Photography Book / Take a Course
I can consider no better thanks to spending a Sunday than curled with an honest photography book. I do not think I even have ever read one without coming away with something - either a replacement piece of data or simply a thought to undertake.
But if you're really serious about improving your skills, then a course is that thanks to going. That way you've got all the knowledge laid out before you during a LOGICAL sequence, where each bit of data links to the last. It's far and away from the quickest thanks to reaching your goal!
If you're still using ANY of the AUTO modes on your camera, then my Auto to Awesome course will have an enormous impact on your images, and since it's online and self-paced, you'll start any time you wish - even this weekend :)
DO THIS:
If you're just starting call at photography, otherwise you are a touch further along but not getting the pictures you'll see in your head, then spend the weekend finding a course that suits you.
If you're further along, grab a photography book that you simply have lying on the shelf, or order a replacement one, and skim a chapter. Whilst doing so, make a note of a picture that you simply want to undertake, or a composition tool, or simply use it for inspiration!
10. Shoot from the guts / Start a private Project
For an extended time, I might attempt to take images of things that didn’t move me or speak to me in any way. Whilst I still sometimes take images for other reasons, it's once I see something that creates my little heart sing and that I am ready to capture it the way I see it that I buy a picture that I treasure. this will vary from day to day and from hour to hour: It might be the way the sunshine has captured a spider's web. It might be the way my son looks at me with innocence and trust. It might be the fun and laughter of childhood. It might be as simple because of the little smile on my face when he hangs up his ten-gallon hat before leaving for college. Photograph what makes your heart sing thereon given day and capture it.
DO THIS:
Don’t shoot just with the technicalities in your head. Shoot what you're keen on – this image never must make it on your walls or into your portfolio and doesn't get to be shared with a gaggle, or maybe your partner.. Take a picture this weekend that's only for YOU. If you're stuck, perhaps consider a private project to urge you started.
0 notes
Text
10 PRODUCTS PHOTOGRAPHY TIPS FOR SILHOUETTE & CRICUT BUSINESS OWNERS

1-Know your camera.
I can’t stress enough, to require better pictures – you've got to understand how your camera works. Whether you're shooting together with your telephone, a DSLR, or a mirrorless camera; you've got to understand how it works. a number of my favorite resources are Apple’s iPhone photography website, CreativeLive’s photography classes, and your camera’s handbook.
2-Don't shoot down on your product.
If your product is sitting on a table, squat right down to an equivalent level as your product requires the image. If your product is on the ground, lay on your belly to require the photo. Basically, get right down to an equivalent level because of the product to photograph it.
3-Take photos from several angles.
this is often especially important if you're selling online. Since buyers cannot touch and feel the merchandise, it's your job because the seller point out all aspects of the merchandise purchasable.
4-Use good lighting.
Usually, natural light is best to shoot your product photos. In fact, I usually head out mid-day to my driveway to shoot product photos. (After you are doing this a couple of times – the neighbors will stop staring – I promise!) If you can’t make it outside – invest in studio lighting like these inexpensive lights with umbrellas.
5-Invest inappropriate backgrounds.
While we'll tackle inexpensive backgrounds later within the week, it bears saying that you simply shouldn't take photos with overly busy or reflective backgrounds, wrinkled comforters or blankets, or carpet. This list might sound basic and like sense, but a fast search of Etsy will provide many samples of poor photography. Better options are scrapbook papers for little items or printed photography backgrounds.
6-Show your product in use.
If possible, show your product getting used. If you're selling a jersey – photograph it being worn. If you're selling a cup – show someone holding it. If you can’t get people to model your goods, think about using Placeit for mockups.
7-Think about scale.
Some products can look much larger or smaller than they're in photographs. One culprit is wooden signs. When photographing them, place something within the photo that buyers are likely to understand the dimensions of. for instance, if you're selling an 8 inch by 8-inch wood sign, hold it in your hands to point out its small size. In contrast, a 40 inch by 40-inch wood sign is sort of large. Set it ahead of an individual to point out how large it's.
8-Use props minimally in your product photos.
a couple of well-placed props can add interest to your product photo, but too many become a distraction. for instance, a mug might be crammed with coffee with a spoon next thereto. Or, a Christmas ornament might be photographed hanging on a tree.
9-Crop out the surplus.
Your product photo should star your product. basset excessive space around your photo to form the eyes of the customer go straight to your product.
10-Back up your photos.
Personally, I like better to backup my photos to a cloud of some kind (examples include Dropbox, iCloud, then on). I don't like using external backups because they will fail, get lost, or damage. for instance, if I copy all my product photos to a drive and store it in my laptop bag and my house burns down – I’ve lost my laptop with the originals and my drive with my backups. Since I exploit a cloud, this cannot happen.
0 notes
Text
5 Things Every Newbie Photographer Must Learn and Practice


There are certain things as a photographer you ought to know no matter if you're an expert or a novice. These simple yet powerful lessons not only differentiate you but also assist you to grow in your art and your photographic career. for each newbie photographer, these are essential lessons to find out and practice.
Note: For the needs of this text, all the pictures used here are SOOC (Straight out of camera). this is often done to demonstrate key concepts highlighted here. My camera of choice is Canon 5D MKIII with a couple of common Canon L-series lenses just like the 50mm and 85mm.
#1 – Know your gear inside out
This almost looks like a no brainer but I'm surprised by the number of individuals who say that they need a very fancy (and expensive) DSLR camera but still shoot in auto mode 100% of the time. Now before you get all upset and say that there's nothing wrong with shooting in auto, I will be able to raise my hand and say that yes, I also shot in auto once I got my first DSLR camera. But very quickly I noticed that my camera (a Canon 5D MKII at that time) was an incredible and complicated piece of kit that was capable of some incredible shots if I only knew the way to operate it.
So take the time and know the ins and outs of your gear. The user manual may be an excellent spot to start not only familiarize yourself with what all the buttons do but also where they're located on the camera. you ought to be ready to adjust settings without removing your eye from the eyepiece/viewfinder once you are composing your frame. believe it this manner, would you wish to have a convertible and always drive with the highest up (i.e. closed), even on the foremost gorgeous of summer days?
Here are some ways to find out the ins and outs of your gear.
ISO –
fiddle with various ISO settings to know how it affects exposure and what's a suitable ISO grain (for you). this may assist you to make photography decisions in low light situations. a number of these ISO decisions could also be limited to the type of camera you've got. Regardless, you ought to know the upper limits of your gear. Sweet spot – Find the sweet spot for your lens. Every lens has an aperture setting where the image is sharper overall than others. this may assist you to analyze what's the widest aperture (smallest f-stop) you'll shoot in and still have the image focused. this is often different than the depth of field (which is what proportion of the scene is in focus) therein the particular resolution of the image is sharper at the sweet spot.
Minimum shutter speed –
determine what's rock bottom shutter speed you'll handhold your camera and obtain a pointy image. this may also help in low light situations as in creative motion blur type shots once you don’t have a tripod handy. the overall rule of thumb is to shoot at one over the focal distance of your lens.
Weight –
determine what's the utmost weight you'll comfortably carry without hurting yourself or almost passing out due to discomfort from carrying excess weight (true story!)
#2 – Know and understand light Some photographers only shoot in natural light while others only shoot using some sort of artificial light. Then some photographers shoot in any sort of light and do an incredible job at that. there's no right or wrong answer here in terms of preference but it's important to understand the way to shoot in any sort of light. which may be the sole thing that stands between you and therefore the shot of your dreams.
Knowing the way to read, analyze, and play with light is one of the foremost basic and important skills every newbie photographer should know, in my opinion. confine mind that not all light is equal from a purely technical standpoint (tungsten versus fluorescent versus white-balanced light). Certain sorts of light are good et al. aren't so good. Experiment with many various sorts of light so you recognize the way to read light, then find out how to shoot in each.
3 – Practice good ethics
Be respectful of the people, places, and belongings you photograph. I cannot tell you ways much it pains me once I see photographers (both amateurs and professionals) disrespect their surroundings. Be it climbing where they're not alleged to, keeping heavy equipment on delicate surfaces, overcrowding and overstaying their welcome publicly places and not giving other general tourists the chance to enjoy the scenery.
Pay special notice to other photographers. These are folks in your industry albeit they're beginners. they beat it for equivalent reasons you're – love for the art! Leave that sense of entitlement behind, simply because you've got costlier gear doesn't cause you to a far better photographer or an ingenious artist. Take the additional effort to seek out out what the photography rules are within the places that you simply shall photograph and stick with them.
4 – Safety
Be safe once you are out and about. Always remember your surrounding especially if you're a female photographer who tends to travel alone. inspect this text Safety Tips for Travel Photographers (Particularly Women) that addresses this issue. Remember safety always comes first, art next.
5 – Be your true self and twiddling my thumbs Whether you select to be in business or not, be faithful to your art. Get inspiration not just from other photographers but also from lifestyle. There are many amazing things around us at any given point in time. simply because no-one else photographs it doesn't make it boring. Similarly think outside the box, simply because everyone photographs something a particular way doesn't mean you've got to follow the pack.
When you are starting, don’t obsess over clients, getting work, and making money. Yes, they're important, I will be able to not disagree, but take the time to perfect your art (to the purpose where you're confident charging money for your photography) then the cash and fame will follow.
Also give out the maximum amount as you'll, be helpful and uplift others who are on this journey with you. The more you set out there the more you'll receive from the universe! I believe that mantra across all walks of life.
0 notes
Text
12 Essential Photography Supplies
1. UV LENS FILTERS

1. UV LENS FILTERS
Lens filters can range dramatically in price counting on the function you’re trying to find, except for a beginner-level or hobby photography, you just need a lens filter to guard your actual lens. It’s a touch glass screen that screws onto the front of your lens. That way,
2. & 11. 50MM PRIME LENS
I love this lens such a lot, I included two versions on my list! Both my lenses are fixed so that they don’t zoom in the least. But you get tons more bang for your buck with these! All the lenses I list during this post have a pleasant, wide aperture for the beautiful, crisp foreground, and wonderfully soft backgrounds. That also enables you to shoot in lower light at faster shutter speeds.
No idea what I’m talking about? Learn more about aperture and shutter speed.
50mm 1.8f – this is often commonly referred to as the “nifty fifty.” It’s an incredible prime lens for a touch over $100. Yes, $100! counting on how you shoot, you would possibly never even take this lens off the camera. you'll take great portraits or get beautiful bokeh in your shots. I used this lens exclusively for years. 50mm 1.4f – this is often the lens on my camera most of the time now. I honestly would have cursed with the 1.8f indefinitely, but I broke it (SUPER sad day!). The 1.4 is metal rather than plastic, so it's a touch bit more weight and sturdiness thereto, and it takes gorgeous pictures with the aperture wide open! Click for more photography tips & tutorials!
3. DSLR CAMERA BODY
I’m including two camera bodies here because I’ve shot with both, and therefore the first one may be a LOT cheaper. It’s an excellent, great starter camera and has just about all the functionality you’re probably trying to find at a very manageable tag. Unless it’s an equivalent price, I like to recommend buying the body only and learning lenses separately. I even have a few recommendations during this post.
Canon Rebel T5i – At the time of publication, this camera body runs $599 on Amazon with the kit lens (18-55mm). I shot on the T3i for about four years before upgrading late last year, and it had been fantastic. It’s a crop frame (or crop sensor) camera, which just means the camera captures a rather smaller field during a photo than a full-frame (or full sensor) camera. Especially if you’re just starting, you almost certainly won’t need anything quite this, and therefore the lightweight body is easy to lug around! Canon 6D – The 6D may be a more mid-professional range camera. It’s full-frame, so you'll get more photo area with any lens, which makes an especially significant difference when shooting with a 50mm lens. it's WiFi, which I exploit constantly alongside the camera’s app, either to shoot remotely or to upload pictures directly from the camera to my phone. This body may be a good bit heavier than the Rebel cameras but is sturdy and well-encased. But all that comes with a better tag — $1,399 at the time of publication.
4. MEMORY CARD
Unless you’re getting to shoot tons of video, you'll escape with a basic SD card. I do, however, recommend getting a card with 32 or 64 gigs of space for storing so that you never run out of the room.
Also an honest idea? Keep a spare card in your camera bag so that you don’t end up on a visitor within the middle of a project with no card in your camera. inquire from me how I do know that…
5. WHITE BALANCE CARD
It’s good to understand the way to set the custom white balance on your camera so that you'll get true-to-color shots regardless of what kind of light you’re shooting in. you'll use any “true white” surface — even a sheet of paper — to calibrate, but it’s nice to possess a white balance card in your camera bag. It’s sturdy and may tie onto your bag for straightforward access. It also features a black and neutral grey card with it, but I’ve honestly never used those two.
Click for more photography tips & tutorials!
6. REFLECTORS
Using reflectors completely changed my photography. Completely. you'll hold or prop a reflector to bounce light from a window or other light, and it instantly erases harsh shadows and uneven lighting. you would like to urge everything as perfect as possible before you get to the editing phase so that you’re only doing minor touch-ups, and getting the lighting right makes all the difference within the world!
You can also use white foam core to bounce and reflect light. Bonus: it doubles as an excellent background for your photos. Here’s an inexpensive, easy tutorial to make a folding “photo studio” out of it!
Learn a touch more about using reflectors and light-bouncing here.
7. DUST BLOWER
You spent a bunch of cash on your lens(es), so take excellent care of them and treat them right! Before you wipe the lens, use a blower to puff any specks of dust or other fragments on the surface. Otherwise, wiping will rub those particles around the lens causing tiny, tiny scratches. No Bueno, guys.
You can also use canned air for this, and canned air is kind of awesome, right?
8. 35MM PRIME LENS
I had a true “treat yo’ self” moment once I turned 30 this year. I went crazy and eventually invested during a new lens, and now I’m just about hooked into it.
9. TRIPOD
You must, must, must have a tripod if you’re getting to be taking your photography seriously in the least.
Why? Let me offer you three reasons: 1. If you’re a blogger, you’re likely to wish to require pictures with yourself (even just your hands!) within the shot at some point. 2. If you ever want to shoot in low light or with slower shutter speed, shaky hands will ruin every shot. 3. Shooting at strange angles or very low or high heights can make it difficult to duplicate an attempt for multiple images if you would like to require an opportunity in between shots or shoot on multiple days.
Basic lightweight tripod – I used this $20 tripod for four years before finally upgrading, and it served me faithfully along the way. It’s relatively versatile, but once I upgraded to a heavier camera body, I worried about the tripod tipping over. It also limits the range of angles you'll get compared to the tripod I even have now. Lateral arm tripod – this is often definitely an investment piece, but now that I own it, I can’t remember how I survived without it! This tripod is heavier duty and tons more versatile. it's a ball joint, therefore the camera can swivel to only about any angle. you'll also use the lateral arm to shoot straight down, which may be a lifesaver for shots like these. The legs also move independently, so it’s easier to suit tight spaces. If you’re getting to use the lateral arm function to shoot straight down, you would like to counter-weight the arm to stay the camera from tipping forward. There’s a take up the opposite side, and you'll hang something heavy, sort of a bag of books or photography sandbags.
10. MICROFIBER CLEANING CLOTH
After you blow the dust off your lens, you'll use a soft, lint-free microfiber cloth to wipe off any fingerprints, smudges, or water droplets. Just make certain to stay the material clean, too, or you’ll rub in additional dust!
12. WIRELESS remote
A remote allows you to require pictures of yourself without having to click the 10-second timer and sprint across space. We talk tons more about the way to use a foreign for nice selfies during this post.
It’s also great for shots in low light or slow shutter speed to scale back camera shake.
0 notes
Text
5 EASY STEPS TO URGE A BLURRED BACKGROUND IN YOUR PHOTOS
Blurred

1. CHOOSE THE PROPER LENS
Select something within the range of a typical to telephoto length lens. Some good samples of this can be between 50mm & 85mm.
The photo above was crazy my 50mm lens and you'll see that it just blurs the background enough to signalize to my subjects.
Telephoto lenses (or zoom lenses) work great for creating that blurred background look because even as zooming in magnifies the topic that’s focused, it also magnifies the soft background!
If you’d like more details on understanding focal lengths, inspect this post.
2. PLACE YOUR SUBJECT PROPERLY
To urge that blurred background, you’ll want to put your subject quite distant from the background.
This works alongside the note in the first step, where zooming in on the topic will magnify the topic focused also as magnify the blurred background. So then, the further away that subject is from the background, the more blurred the background will be!
To give you a thought, within the photo above, my husband and puppy were about 20 feet faraway from the waterfall.
3. SELECT THE PROPER CAMERA MODE
Set your camera mode to Aperture Priority. On my Canon camera, this is often shown as “AV” on the mode dial. On other cameras, it's going to just show as “A”.
This is important because it'll allow you to regulate the Aperture while your camera takes care of the opposite two exposure settings of ISO and Shutter Speed to form sure your photo is correctly exposed.
Let’s hop into what Aperture setting to use next.
4. OPEN UP YOUR APERTURE
To get that blurred background we’ll get to open up the Aperture to around f/ 4.0 or larger. I do know it’s a touch odd but a bigger Aperture is a smaller number, so something like f/ 1.4 is larger than an Aperture off/ 4.0.
I go into detail on F-Stops and Aperture Numbers during this post if you’re curious to find out more and understand why Aperture Numbers work the way they are doing. Fair warning, you would possibly want to take a seat down with an outsized cup of coffee and obtain cozy for that one!
Try using something like f/ 1.4, f/2.0, f/2.8, f/ 4.0 as all of those will work, but you’ll see the foremost effect with something like f/ 1.4.
When I’m using my 50mm lens, I really like the design of the photos where I’ve opened Aperture to f/ 1.4. Here’s an example of what it's like:
Bokeh ISO 100 f/ 1.4 1/250 sec @ 50mm What you’re actually seeing is that the light reflecting off the wet rocks within the background and during this case, I’m holding the rock at waist height and photographing at eye level down towards the rocks on the beach. Just just in case you would like to undertake this for yourself!
5. FOCUS & SNAP YOUR PHOTO!
Okay, this is often the key right here!
When you press your shutter halfway, confirm that the tiny green rectangle is on your subject. If it’s not, then, in any case, that tough work, your subject is going to be blurry. Not what we’re going for here!
To be doubly sure, take a couple of photos, ensuring your focus is about on your subject whenever. Now you'll leave the situation confident that you simply a minimum of having one good shot!
0 notes
Text
9 Beginner Photography Mistakes and Tips For How To Avoid Them

Are you guilty of creating any of those mistakes? Let’s check out each of them in additional detail and a few ideas on conquering them
1- Not getting close enough
This is the most important issue that I see with new photographers and pictures that are less effective; not getting close enough to the topic. this suggests you've got to either concentrate together with your lens or in many cases get physically closer. once you are shooting take a test shot then analyze it.
check out the technical aspects such as; focus, exposure, and white balance – on the other hand, take a glance at the composition. Is everything that you simply have included within the image necessary? Does it increase the composition or is it distracting? Does it help tell the story and draw the viewer's eye in, or is it competing for attention?
Make a conscious choice about what you include in your image and what you exclude.
If there's something inside the composition that's not adding to the image and isn't a part of the story – then it's removing from it. So, get obviate!
If you discover yourself cropping your images tons in post-processing or on the pc later – then make a note to urge closer once you are shooting.
2- A blurry image due to small aperture and slow shutter speed
You may have heard that shooting in aperture priority mode when shooting handheld is the way to go, I would tend to agree and that’s how I shoot most of the time. However, what I find is that many beginners set the aperture much too small and the result is the need for a really slow shutter speed as a consequence.
Remember the aperture and shutter speed are like a teeter-totter, they need to keep in balance to make a good exposure.
The more you close down the aperture (smaller opening, larger f-number) the slower shutter speed will be required to keep the exposure balanced.
So when you select an aperture like f/11, the shutter speed often goes beyond what is acceptable for shooting handheld.
3- Always shooting at eye-level You see the planet from an equivalent height all the time, your eye level. So once you see a picture taken at that very same height it can feel very familiar and ordinary. once you step outside of that and alter your camera level your photos will become more interesting to your viewers almost instantly. Get up high and use a bird’s eye view, get down on the bottom and use worm’s eye view, get close-up, or use an extremely wide-angle view; all of those options add interest.
They are alternative ways than most of the people see the planet so directly they're going to be more interested in your images if you employ these views.
Look at some images by your favorite photographers and see what percentage falls under the range of eye level; I’m getting to hazard a guess, not that a lot of.
4- Shooting in manual mode, missing the shot
Another thing you'll have heard is that you simply got to shoot in manual mode to be a true photographer, or that's how the pros roll in the hay so you ought to endeavor to use manual all the time. Camera dial set to a manual mode I’m here to mention – horse cookies (if you’re a M.A.S.H. fan you’ll remember that Colonel Potter phrase well)!
I see too many missed shots thanks to newbies trying to mess with the exposure settings in manual, or simply forgetting to line the exposure, and getting an unusable image that's either way under or overexposed.
As a beginner in photography, it is often completely overwhelming to find out all the buttons, settings and dials on your camera, believe composition, and check out and obtain the exposure right – all at an equivalent time.
So what I suggest is to start in Auto, gradually give way to using aperture priority, and use manual mode when you’ve gained more confidence using your camera and doing photography generally.
image of the controls of a digital camera assail autoSo don't stress out or beat yourself up if you can't use manual mode yet.
I only use it myself when I’m shooting with a tripod and therefore the lighting conditions are constant, and therefore the subject isn't changing rapidly – like night photography or doing a portrait.
Take one step at a time.
Don’t compare yourself to anyone else and track your reach see how you’re doing.
If your images are better than those you took last month or last year, then you’re getting in the proper direction. If you’re easier and assured together with your camera, then it’s all good.
5- Not knowing your camera and buttons well enough
knowing your camera and all its buttons and settings is key to being able to shoot in a hurry when necessary. Being able to do that takes practice, plain and simple. Ideally, you want to be able to adjust your ISO, shooting mode, focus point, exposure compensation, aperture, and shutter speed without taking the camera away from your eye, or having to go through the entire menu system
6- Missing a good shot due to not being ready
You probably take really good care of your camera and lenses – that’s a good thing. But, what I often see with beginners is that you take too much care of the camera to the point of missing shots because the camera is turned off, the lens cap is on, or it’s zipped up nice and neat inside your bag. Has that happened to you?
So find a happy medium between taking care of your stuff, and being ready when a photographic opportunity presents itself.
7- Not employing a tripod in low light or night photography Tripods – does one have a love/hate relationship with yours? does one avoid using one whenever possible? Using a tripod is just about essential in situations of low light, when using really small apertures for max depth of field, or doing night photography.
8- Shooting at the incorrect time of day, or not understanding light When you first start doing photography you'll have a bent to go out at midday because there's tons of sunshine – that's the number. But something else you would like to start out considering is that the quality of sunshine, or how good it's in terms of capturing the mood you would like, flattering your subject, and keeping the viewer’s interest
9- Using on-camera flash
The flash that comes together with your camera, the small pop-up one, isn’t great for many things. It is often good for lightening shadows to scale back contrast but using it as your main light will create flat, textureless images with no dimension. If you’ve used your flash indoors and gotten that deer within the headlights look from your subject – the flash and direction of sunshine are the problems. Even putting an external Speedlight on top of your camera isn't any better because the direction of sunshine remains straight on to the topic.
1 note
·
View note
Text
Photography Basics: Shooting in Manual Mode

Taking beautiful, well-composed, and thoughtfully executed photos have become a critical skill. We all want to make stunning photographs, right?
Photographing in manual mode is often really intimidating, especially once you don’t fully understand what aperture, ISO, and shutter speed are and the way they work together. After all, shooting in auto is a straightforward option because the camera does all the work for you. So why shoot manual mode?
This article aims to show beginner and amateur photographers a fundamental understanding of shooting in manual mode and its importance.
Why Photograph in Manual Mode Photographing in manual mode gives you full control over your camera settings, the sunshine coming in, and thus, the result of your image. once you shoot in automatic mode, the camera assumes the ‘correct’ settings. Sure, it's going to appear to be a neater and more efficient thanks to taking photos, but at the end of the day, it can cause difficulties in post-production. Yikes!
The truth is, our cameras aren’t smart enough to require perfectly exposed photos every single time. Plus, if editing is a crucial part of your photo production, it’s crucial to properly expose your photos in-camera rather than trying to repair it in post.
Being able to quickly adjust your camera in various situations will strengthen your skillset, enhance your photo making, and supply you with a more efficient workflow.
Aperture, ISO, and shutter speed are the settings I’m talking about having control over in manual mode. Together, these are mentioned because of the exposure triangle which ensures proper exposure.
Having control over these three settings also can enable to you're taking photos with various techniques like bokeh, a blurry background, motion blur, or freeze motion which may add artistic enhancements to your photos.
The Exposure Triangle

These three settings work together, so each change will affect each other . the simplest thanks to understanding how the exposure triangle works is by simply trying it out. you'll soon begin to know the way to intuitively adjust each setting in various situations. Grab your camera, and skim on.
APERTURE
Aperture, which is measured in F-stops, refers to the dimensions of the opening of your lens during which light comes in and hits the sensor. you'll believe this just like the iris of your eye, how it gets bigger and smaller in several light situations.
Aperture controls your focal distance.
For example, F1.4 may be a small focal distance (shallow depth of field) whereas F22 may be a large focal distance (large depth of field).
A small focal distance means only a little a part of your image, like your subject, is focused while the foreground and background are out of focus.
A small focal distance, or a coffee F-stop, means the lens opening is wide open, therefore allowing tons of sunshine to return in making your image bright.
Try this! Use a little focal distance to make bokeh. Bokeh is how your lens renders out-of-focus light during a background, for example, out-of-focus city lights.
A large focal distance means an outsized portion of the whole image (foreground, middle ground, and background) is in focus.
A large focal distance, or high F-stop, means the lens opening is extremely small, which doesn’t allow much light to urge it, therefore, making your image darker.
A consistent element in my work may be a low focal distance which I’m ready to achieve with the type of drugs that I own for my camera.
ISO ISO refers to your camera’s sensitivity to light.
Less light is hitting your sensor at a coffee ISO, like ISO 100. this suggests that there's also the smallest amount of grain on your photographs.
Use a coffee ISO in bright situations, like indirect light during the afternoon.
More light is hitting your sensor at a high ISO, like ISO 3200. Unfortunately, you'll start to note more grain in your photos at a high ISO.
Use a high ISO in low-light situations or during the already dark to usher in more light.
My tip: Start at ISO 100 and increase it as required.
SHUTTER SPEED
Shutter speed refers to the speed at which your camera takes a photograph. More specifically, how long your camera’s shutter remains open.
Faster shutter speed allows less light and freezes your subject within the photograph.
Typical shutter speed is 1/125 of a second.
Faster shutter speeds are ideal for moving subjects, like animals, children, sports, hair flips.
Slower shutter speed allows more light and creates blurred motion.
Slower shutter speeds are ideal for capturing a whole movement, from start to end.
They can even be useful for taking photos of smoke, moving crowds during a city, shaking your head back and forth, running water, and more.
How to Photograph in Manual Mode
0 notes
Text
How to Photograph in Manual Mode With 7 steps

1) Move your camera dial toM’.
2) look around your camera’s viewfinder, press halfway down on your capture button, and appearance at the sunshine meter at rock bottom. Aim for the small tick to be at 0 within the center.
What I do: Because it’s important to retain information within the highlights of my photos, I tend to underexpose my photos to try to do so. If you overexpose your photos, it’s hard to urge those details back in post-production.
3) Set your ISO. What I prefer to try to do is start with my ISO at 100 to make sure that my photos are going to be getting the smallest amount of grain, then go up as required.
ISO 100 is right for sunny, direct light.
ISO 400-800 may be a great start for indoor photography or cloudy situations.
Higher ISOs are crucial for low-light situations or night photography.
4) Choose your shutter speed. Start at 1/125 of a second as a start line.
5) Set your aperture. Because I do know that I generally need a shallow depth of field in my images, I will be able to set my aperture to a coffee F-stop.
Low F-stops are great for that specialize in something very specific, like a product during a photo or your main subject.
F5.6 - F8 is a perfect range for portraits to capture the whole face, not just the eyes or the nose.
Higher F-stops help get plenty of detail-focused, like in landscapes.
6) Check your exposure meter again. countercheck to ascertain that your exposure meter is correctly exposed at 0, or underexposed a tick if you favor trying to do what I do. you'll use your main dial at the highest of the camera to quickly adjust your exposure meter for correct exposure, too.
7) Take your photo. Woop Woop!
0 notes
Text
how to master your DSLR camera with our tips and tricks. This camera mode…

Learn how to master your DSLR camera with our tips and tricks. This camera modes cheat sheet will assist you to study program mode, aperture priority, shutter priority, and manual mode settings. Become a far better photographer and begin taking professional-looking photos. Photography made easy.
A picture is worth several thousand words. Consider this statement when finding the simplest thanks to showcasing your property to the planet. Buyers are very picky about what they need. you almost certainly have a gem that appeals to an outsized pool of buyers but how would they know what you've got if they do not get an accurate idea of what it is? Pictures function the bait to tug people in to line up meetings.
Let's believe who you're selling exactly to. There are a few sorts of buyers. we've local investors who have an interest in fixing and turning around. At the opposite end we've families who have an interest during a built-in land . to travel into more detail, let & # 39; s examine the mindset for fixes and flips.
Most fixers are trying to find an honest deal where they know what they're stepping into. it's essential that you simply don't submit any important photos of repairs. The one thing you want to avoid is being dishonest. The fixer community is extremely small and words spread quickly. to point out that you simply & # 39; look serious about selling and reliable, taking detailed pictures of the property's exterior and interior also as all major and minor repairs. If you want to realize confidence and seal the deal, you'll attempt to create an in-depth estimate of repairs or buy an inspection report from an area building contractor. From now you would like to supply a link to all or any of these details and photos that anyone can access. I like to recommend uploading your data to Google Drive and setting sharing options to & # 39; Public. & # 39; From here you'll access the link and share it with all buyers that came with or have your land agent (if you employ one) post the link to the knowledge section of your MLS list.
Families who need a property to measure in are a different buyer. While fixers search for concise and accurate data to form a business decision, families or retail buyers, as I prefer to call them, are trying to find images that evoke positive, upbeat feelings. once you follow these sorts of buyers you would like to form sure that the property is fixed and prepared to travel. Any upgrades are an enormous plus. For an additional boost, you'll try renting furniture for the aim of staging the property. Once you're ready, you would like to rent a knowledgeable photographer to return in and take pictures. you'll also buy an $ 850.00 camera and roll in the hay yourself, but if it is a one-off deal, it's better to pay someone $ 115.00 once and obtain it done that way. Another great option is to let him or she take a video through the property and publish it on YouTube. From there you'll add the link to the list.
1 note
·
View note