
Statistics
We looked inside some of the posts by mrpikachuhat and here's what we found interesting.
Average Info
Notes Per Post
4K
Likes Per Post
3K
Reblog Per Post
1K
Reply Per Post
18
Time Between Posts
15 days
Number of Posts By Type
Text
17
Last Seen Tumblr Blogs


Fun Fact
70% of Tumblr users say the Dashboard is their favorite place to spend time online.
Text
Pokemon Pokeychains Amigurumi Pattern Mega Post

Abbreviations: ML: Magic Loop ST: Stitch/Stitches SP: Spike Stitch SL: SLip Stitch SC: Single Crochet HDC: Half Double Crochet DC: Double Crochet TC: Triple Crochet DEC: Decrease INC: Increase 3INC: Triple Increase 3SCPOP: Three Single Crochet Popcorn Stitch 3HDCPOP: Three Half Double Crochet Popcorn Stitch 3TCBOB: Three Triple Crochet Bobble Stitch CH: Chain BLO: Back Loops Only FLO: Front Loops Only FO: Finish Off For this pattern I used a 2.35mm hook with weight 2 yarn.

Pokeball Ball Begin with red yarn. 1. ML 6 2. INC in each ST (12) 3. (INC, SC) 6 times (18) 4. (INC, SC 2) 6 times (24) 5. (INC, SC 3) 6 times (30) 6-8. SC in each ST (30) CC black 9. SC in each ST (30) CC white 10-12. SC in each ST (30) 13. (DEC, SC 3) 6 times (24) 14. (SC, DEC, SC) 6 times (18) Stuff the ball. 15. (DEC, SC) 6 times (12) 16. DEC in each ST, FO (6)
Button Begin with white yarn. 1. ML 6 2. INC in each ST, FO (12)

Bulbasaur Head and Body Begin with turquoise yarn. 1. Ml 6 2. INC in each ST (12) 3. (INC, SC) 6 times (18) 4. (INC, SC 2) 6 times (24) 5. (INC, SC 2, 3SCPOP, INC, SC 3, INC, SC 3) 2 times (30) 6-11. SC in each ST (30) 12. (DEC, SC 3) 6 times (24) 13. (SC 6, 3TCBOB) 2 times, SC 10 (24) 14-15. SC in each ST (24) 16. (INC, SC 3) 6 times (30) 17-18. SC in each ST (30) Insert the eyes. 19. (DEC, SC 3) 6 times (24) 20. (SC, DEC, SC) 6 times (18) Stuff your Bulbasaur. 22. (SC, DEC, 3TCBOB, DEC, SC, DEC) 2 times (12) 23. DEC in each ST, FO (6)
Bulb Begin with bright green yarn. 1. ML 6 2. SC in each ST (6) 3. (INC, SC) 3 times (9) 4. (INC, SC 2) 3 times (12) 5. (INC, SC) 6 times (18) 6. (INC, SC 2) 6 times (24) 7-9. SC in each ST (24) 10. (SC, DEC, SC) 6 times (18) Stuff the blub. 11. (DEC, SC) 6 times (12) 12. DEC in each ST, FO (6)
Head patch Begin with dark green blue yarn. 1. ML 6 2. (3INC, SC) 3 times, FO (12)

Squirtle Head and Body Begin with blue yarn. 1. ML 6 2. INC in each ST (12) 3. (INC, SC) 6 times (18) 4. (INC, SC 2) 6 times (24) 5. (INC, SC 3) 6 times (30) 6-11. SC in each ST (30) CC off white 12. (DEC, SC 3) 6 times (24) 13. SC 4, CC blue, 3TCBOB, CC off white, SC 10, CC blue, 3TCBOB, CC off white, SC 8 (24) 14-15. SC in each ST (24) 16. (INC, SC 3) 6 times (30) 17-18. SC in each ST (30) Insert the eyes. 19. (DEC, SC 3) 6 times (24) 20. (SC, DEC, SC) 6 times (18) Stuff the body. 21. SC, DEC, CC blue, 3TCBOB, CC off white, DEC, SC, DEC, SC, DEC, CC blue, 3TCBOB, CC off white, DEC, SC, DEC (12) 22. DEC in each ST, FO (6)
Tail Begin with blue yarn. 1. ML 6 2. INC in each ST (12) 3. SC in each ST (12) 4. (DEC, SC 2) 3 times (9) 5. SC in each ST (9) 6. (DEC, SC) 3 times (6) 7. SC in each ST, FO (6)
Shell Begin with brown yarn. 1. ML 5 2. INC in each ST (10) 3. (INC, SC) 5 times (15) 4. (INC, SC 2) 5 times (20) 5. (INC, SC 3) 5 times, FO (25)

Charmander Head and Body Begin with orange yarn. 1. ML 6 2. INC in each ST (12) 3. (INC, SC) 6 times (18) 4. (INC, SC 2) 6 times (24) 5. (INC, SC 3) 6 times (30) 6-11. SC in each ST (30) 12. (DEC, SC 3) 6 times (24) 13. SC 4, 3TCBOB, SC 10, 3TCBOB, SC 8 (24) 14-15. SC in each ST (24) 16. (INC, SC 3) 6 times (30) 17-18. SC in each ST (30) Insert the eyes. 19. (DEC, SC 3) 6 times (24) 20. (SC, DEC, SC) 6 times (18) Stuff the body. 21. SC, DEC, 3TCBOB, DEC, SC, DEC, SC, DEC, 3TCBOB, DEC, SC, DEC (12) 22. DEC in each ST, FO (6)
Tummy Patch Begin with off white yarn. 1. ML 6 2. INC in each ST (12) 3. (INC, SC) 6 times, FO (18)
Tail Begin with orange yarn. 1. ML 6 2. SC in each ST (6) 3. (INC, SC) 3 times (9) 4. SC in each ST, FO (9)
Fire Begin using yellow and orange yarn at the same time. 1. (CH 3, skip 1 CH, SL, SC) 3 times, FO

Pikachu Head and body Begin with yellow yarn. 1. ML 6 2. INC in each ST (12) 3. (INC, SC) 6 times (18) 4. (INC, SC 2) 6 times (24) 5. (INC, SC 3) 6 times (30) 6-11. SC in each ST (30) 12. (DEC, SC 3) 6 times (24) 13. SC 4, 3TCBOB, SC 10, 3TCBOB, SC 8 (24) 14-15. SC in each ST (24) 16. (INC, SC 3) 6 times (30) 17-18. SC in each ST (30) Insert the eyes. 19. (DEC, SC 3) 6 times (24) 20. (SC, DEC, SC) 6 times (18) Stuff your Pikachu. 21. SC, DEC, 3TCBOB, DEC, SC, DEC, SC, DEC, 3TCBOB, DEC, SC, DEC (12) 22. DEC in each ST, FO (6)
Tail Begin with yellow yarn. 1. Ch 9, turn, SC 8, CH, turn (8) 2-3. SC in each ST, CH, turn (8) 4. SC 3, CH, turn (3) 5. SC 3, CH 4, turn (3) 6-7. SC 6, CH, turn (6) CC brown 8. SC 3, CH, turn (3) 9. SC 3, FO (3)
Cheeks x2 Begin with red yarn. 1. ML 6, SL, FO (6)
Ears x2 Begin with black yarn. 1. ML 6 2. SC in each ST (6) CC yellow 3. (INC, SC) 3 times (9) 4-5. SC in each ST (9)

Oddish Body Begin with blue yarn. 1. ML 6 2. INC in each ST (12) 3. (INC, SC) 6 times (18) 4. (INC, SC 2) 6 times (24) 5. (INC, SC 3) 6 times (30) 6-11. SC in each ST (30) Insert the eyes. 12. (DEC, SC 3) 6 times (24) 13. (SC, DEC, SC) 6 times (18) Stuff the body 14. SC, DEC, 3TCBOB, DEC, SC, DEC, SC, DEC, 3TCBOB, DEC, SC, DEC (12) 15. DEC in each ST, FO (6)
Leaves Begin with green yarn. 1. CH 14, skip 1 CH, SL, SC, HDC, DC 2, SL, (CH 6, skip 1 CH, SL, SC, HDC, DC 2, SL) 7 times, FO

Eevee Head and Body Behind with brown yarn. 1. Ml 6 2. INC in each ST (12) 3. (INC, SC) 6 times (18) 4. (INC, SC 2) 6 times (24) 5. (INC, SC 3) 6 times (30) 6-11. SC in each ST (30) 12. (DEC, SC 3) 6 times (24) 13. In BLO, (SC 6, 3TCBOB) 2 times, SC 10 (24) 14-15. SC in each ST (24) 16. (INC, SC 3) 6 times (30) 17-18. SC in each ST (30) 19. (DEC, SC 3) 6 times (24) 20. (SC, DEC, SC) 6 times (18) Stuff your bulbasaur. 22. (SC, DEC, 3TCBOB, DEC, SC, DEC) 2 times (12) 23. DEC in each ST, FO (6)
Mane Begin with beige yarn. Draw up a loop of yarn in remaining FLO from round 12. 1. [(SC, HDC) in next ST, (HDC, SC) in next ST] 3 times, SL, CH 2, DC, CH 2, SL, CH 3, TC, CH 3, SL, CH 2, DC, CH 2, SL, [(SC, HDC) in next ST, (HDC, SC) in next ST] 5 times, (SC, HDC) in next ST, FO
Ears Begin with brown yarn. 1. ML 6 2. SC in each ST (6) 3. (INC, SC) 3 times (9) 4-5. SC in each ST (9) FO
Tail Begin with beige yarn. 1. ML 6 2. SC in each ST (6) 3. (INC, SC) 3 times (9) 4. SC in each ST (9) CC brown 5. (INC, SP, SC) 3 times (12) 6. SC in each ST (12) 7. (INC, SC 3) 3 times (15) 8. SC in each ST (15) 9. (DEC, SC 3) 3 times (12) 10. DEC in each ST, FO (6)

Mew Head and Body Begin with pastel pink yarn. 1. ML 6 2. INC in each ST (12) 3. (INC, SC) 6 times (18) 4. (INC, SC 2) 6 times (24) 5. (INC, SC 2, 3HDCPOP, INC, SC 3, INC, SC 3) 2 times (30) 6-11. SC in each ST (30) 12. (DEC, SC 3) 6 times (24) 13. (SC 6, 3TCBOB) 2 times, SC 10 (24) 14-15. SC in each ST (24) 16. (INC, SC 3) 6 times (30) 17-18. SC in each ST (30) Insert the eyes. 19. (DEC, SC 3) 6 times (24) 20. (SC, DEC, SC) 6 times (18) Stuff your Bulbasaur. 22. (SC, DEC, 3TCBOB, DEC, SC, DEC) 2 times (12) 23. DEC in each ST, FO (6)
Tail Begin with pastel pink yarn. 1. ML 6 2. (INC, SC) 3 times (9) 3-4. SC in each ST (9) 5. (DEC, SC) 3 times (6) 6-13. SC in each ST (6) FO

Check me out on the Instagrams for more free patterns! If you like my patterns please consider making a donation!
141 notes
·
View notes
Text
Snivy Amigurumi Pattern

Abbreviations: ML: Magic Loop ST: Stitch/Stitches SL: SLip Stitch SC: Single Crochet HDC: Half Double Crochet DC: Double Crochet DEC: Decrease INC: Increase CH: Chain BLO: Back Loops Only FO: Finish Off For this pattern I used a 2.35mm hook with weight 2 yarn.
Head Begin with light yellow yarn. 1. ML 6 2. SC in each ST (6) 3. (INC, SC) 3 times (9) 4. SC in each ST (9) 5. (INC, SC 2) 3 times (12) 6. SC in each ST (12) 7. (INC, SC 3) 3 times (15) 8. SC in each ST (15) 9. (INC, SC 4) 3 times (18) 10. SC in each ST (18) 11. (INC, SC 5) 3 times (21) 12. (INC, SC 6) 3 times (24) 13. (INC, SC 7) 3 times (27) 14. (INC, SC 8) 3 times (30) 15. (INC, SC 9) 3 times (33) 16. (INC, SC 10) 3 times (36) 17. (INC, SC 11) 3 times (39) 18. (INC, SC 12) 3 times (42) 19-26. SC in each ST (42) 27. (DEC, SC 5) 6 times (36) 28. (SC 2, DEC, SC 2) 6 times (30) 29. (DEC, SC 3) 6 times (24) 30. (SC, DEC, SC) 6 times (18) Stuff the head. 31. (DEC, SC) 6 times (12) 32. DEC in each ST, FO (6)
Body and Tail Begin with light yellow yarn. 1. ML 6 2. SC in each ST (6) 3. (INC, SC 2) 2 times (8) 4. SC in each ST (8) 5. (INC, SC 3) 2 times (10) 6. SC in each ST (10) 7. (INC, SC 4) 2 times (12) 8. SC in each ST (12) 9. (INC, SC 5) 2 times (14) 10. SC in each ST (14) 11. (INC, SC 6) 2 times (16) 12. SC in each ST (16) 13. (INC, SC 7) 2 times (18) 14. SC in each ST (18) 15. (INC, SC 8) 2 times (20) 16. SC in each ST (20) 17. (INC, SC 9) 2 times (22) 18. SC in each ST (22) 19. (INC, SC 10) 2 times (24) 20. SC in each ST (24) 21. (INC, SC 11) 2 times (26) 22. SC in each ST (26) 23. (INC, SC 12) 2 times (28) 24. SC in each ST (28) 25. (INC, SC 13) 2 times (30) 26-33. SC in each ST (30) 34. (SC 4, DEC, SC 4) 3 times (27) 35. SC in each ST (27) 36. (DEC, SC 7) 3 times (24) 37. SC in each ST, FO (24)
Green Back Stripe Begin with green yarn. 1. CH 2, skip 1 CH, SC, CH 1 turn (1) 2. INC, CH 1 turn (2) 3. SC 2, CH 1 turn (2) 4. INC 2, CH 1 turn (4) 5. SC 4, CH 1 turn (4) 6. INC, SC 2, INC, CH 1 turn (6) 7. SC 6, CH 1 turn (6) 8. INC, SC 4, INC, CH 1 turn (8) 9. SC 8, CH 1 turn (8) 10. INC, SC 6, INC, CH 1 turn (10) 11. SC 10, CH 1 turn (10) 12. INC, SC 8, INC, CH 1 turn (12) 13. SC 12, CH 1 turn (12) 14. INC, SC 10, INC, CH 1 turn (14) 15. SC 14, CH 1 turn (14) 16. INC, SC 12, INC, CH 1 turn (16) 17. SC 16, CH 1 turn (16) 18. INC, SC 14, INC, CH 1 turn (18) 19. SC 18, CH 1 turn (18) 20. INC, SC 16, INC, CH 1 turn (20) 21. SC 20, CH 1 turn (20) 22. DEC, SC 16, DEC, CH 1 turn (18) 23. DEC, SC 14, DEC, CH 1 turn (16) 24. DEC, SC 12, DEC, CH 1 turn (14) 25. DEC, SC 10, DEC, CH 1 turn (12) 26. SC 12, CH 1 turn (12) 27. DEC, SC 8, DEC, CH 1 turn (10) 28-30. SC 10, CH 1 turn (10) 31. In BLO, SC 10, CH 1 turn (10) 32. INC, SC 8, INC, CH 1 turn (12) 33. SC 12, CH 1 turn (12) 34. INC, SC 10, INC, CH 1 turn (14) 35-42. SC 14, CH 1 turn (14) 43. DEC, SC 10, DEC, CH 1 turn (12) 44-45. SC 12, CH 1 turn (12) 46. DEC, SC 8, DEC, CH 1 turn (10) 47-48. SC 10, CH 1 turn (10) 49. DEC, SC 6, DEC, CH 1 turn (8) 50-52. SC 8, CH 1 turn (8) 53. DEC, SC 4, DEC, CH 1 turn (6) 54-56. SC 6, CH 1 turn (6) 57. DEC, SC 2, DEC, CH 1 turn (4) 58-60. SC 4, CH 1 turn (4) 61. DEC 2, CH 1 turn (2) 62. SC 2, CH 1 turn (2) 63. DEC, CH 1 turn (1) 64. SC, FO (1)
Leaves x3 Begin with green yarn. 1. CH 9 2. Skip 2 CH, DC 2, HDC 2, SC 2, 2 SL in last ST Next work back along the other side of the chain. 3. 2 SL in same ST, SC 2, HDC 2, DC 2, CH 2, SL in same ST, FO
Arms x2 Begin with green yarn. 1. CH 13 2. skip 1 CH, SL 2, CH 3, skip 1 CH, SL 2, CH 3, skip 1 CH, SL 2 3. HDC, in same ST as first finger, HDC 10, FO
Legs x2 Begin with light yellow yarn. 1. CH 7 2. Skip 1 CH, SL, SC, HDC, DC 3, FO
Eye Patch x2 Begin with yellow yarn. 1. ML 6 2. INC in each ST (12) 3. (INC, SC) 6 times (18) 4. CH 6, skip 1 CH, SL, SC 2, HDC 2, workin back around circle, skip 1 ST, SL, FO
Collar Begin with yellow yarn. 1. CH 27 2. Skip 1 CH, SL, SC 2, HDC 2, DC 3, HDC 10, DC 3, HDC 2, SC 2, SL, FO
Yellow Back Stripe Begin with yellow yarn. 1. CH 41 2. Skip 1 CH, SL 40, FO

Special Instructions To begin putting together your Snivy, Start by sewing up the hole in the back of his head. Next sew the body to the back of the head, near the ground. Then sew the green back stripe along the top of his head and body, with the wider end going over the head. After that sew the three leaves together and sew that to the end of the tail. Next sew the arms to the bottom of the green stripe, right behind the head. Then sew the legs to the body where it starts decreasing for the tail. After that sew an eye patch to both sides of his head, they should overlap the green stripe and the loose chain should also sit along the stripe. Next sew the collar to the top of his neck right behind the head, leaving the wider pointed ends loose and floppy. Finally sew the yellow back stripe down the the middle of the green back stripe, it should start at the tip of his tail and come up onto his head a little bit. I like to needle felt the eyes onto this amigurumi. To do this begin by forming a white half circle on the bottom half of each eye patch. next form a brown circle towards the front of each eye. next form a black circle inside the brown circles, again towards the front of the eye. Finally add a white dot to the top of each black circle. Now you're done!

Check me out on the Instagrams for more free patterns! If you like my patterns please consider making a donation!
#snivy#pokemon#amigurumi#crochet#pattern#amigurumi pattern#crochet pattern#plushies#stuffies#beanies#cute#needlefelting
68 notes
·
View notes
Text
Oshawott Amigurumi Pattern

Abbreviations: ML: Magic Loop ST: Stitch/Stitches SC: Single Crochet HDC: Half Double Crochet DC: Double Crochet 2DCBOB: Two Double Crocht Bobble Stitch 2TCBOB: Two Triple Crochet Bobbl Stitch DEC: Decrease INC: Increase CH: Chain FLO: Front Loops Only BLO: Back Loops Only CC: Chang Colour FO: Finish Off For this pattern I used a 2.35mm hook with weight 2 yarn.
Head and Body Begin with white yarn. 1. ML 6 2. INC in each ST (12) 3. (INC, SC) 6 times (18) 4. (INC, SC 2) 6 times (24) 5. (INC, SC 3) 6 times (30) 6. (INC, SC 4) 6 times (36) 7. (INC, SC 5) 6 times (42) 8-15. SC in each ST (42) 16. (DEC, SC 5) 6 times (36) 17. (SC 2, DEC, SC 2) 6 times (30) CC blue 18. In FLO, [(SC, HDC) in next ST, 2DCBOB, 2TCBOB, (DC, HDC) in next ST] 4 times, SC 2, [(SC, HDC) in next ST, 2DCBOB, 2TCBOB, (DC, HDC) in next ST] 3 times (44) 19. Working through round 18 and remaining back loops of round 17, (DEC, SC 2, DEC) 4 times, SC 2, (DEC, SC 2, DEC) 3 times (30) 20-28. SC in each ST (30) 29. (DEC, SC 3) 6 times (24) 30. (SC, DEC, SC) 6 times (18) Stuff the head and body. 31. (DEC, SC) 6 times (12) 32. DEC in each ST, FO (6)
Ears x2 Begin with dark blue yarn. 1. ML 4 2. INC in each ST (8) 3. (INC, SC) 4 times (12) 4. (INC, SC 2) 4 times, FO (16)
Nose Begin with light brown yarn. 1. ML 8 2. (SC, INC 2, SC) 2 times (12) 3. SC in each ST, FO (12)
Arms x2 Begin with white yarn. 1. ML 6 2. (INC, SC) 3 times (9) 3. (INC, SC 2) 3 times (12) 4-7. SC in each ST (12) FO
Feet x2 Begin with dark blue yarn. 1. ML 6 2. (INC, SC) 3 times (9) 3-5. SC in each ST (9) FO
Tail Begin with dark blue yarn. 1. ML 6 2. INC in each ST (12) 3. SC in each ST (12) 4. (INC, SC 3) 3 times (15) 5-6. SC in each ST (15) 7. (DEC, SC 3) 3 times (12) 8. SC in each ST (12) 9. (DEC, SC 2) 3 times (9) 10. SC in each ST, FO (9)
Scalchop Begin with light yellow yarn. 1. CH 4, skip 1 CH, SC 3, CH 2 turn (3) 2. (SC, HDC) in next ST, DC 3 in next ST, (HDC, SC) in next ST, FO (7)

Special Instructions While decreasing on round 19 make sure to only hook one remaining back loop from round 18. To begin putting together your Oshawott, start by sewing up the hole in the bottom of the body. Next sew the nose to the front of the face just above the colour change. Then sew the ears on top of the head. After that sew the arms to sides of the body, just under his neck frills. Next sew the feet to bottom of the body near the front. Then sew the tail to the bottom of the body near the back. Finally sew the scalchop to his belly. I like to needle felt the eyes onto this amigurumi, to do this begin by forming a black circle on each side of face just above his nose. Next form a crescent with blue roving along the lower outer edge of each circle. Finally form white a dot towards the upper inner edge of each eye. Now you're done!

Check me out on the Instagrams for more free patterns! If you like my patterns please consider making a donation!
#oshawott#pokemon#amigurumi#crochet#pattern#free pattern#crochet pattern#amigurumi pattern#plushies#stuffies#beanies#cute
71 notes
·
View notes
Text
Tepig Amigurumi Pattern

Abbreviations: ML: Magic Loop ST: Stitch/Stitches SC: Single Crochet DEC: Decrease INC: Increase 3INC: Triple Increase, SC in the nxt ST 3 times SL: Slip Stitch CH: Chain BLO: Back Loops Only CC: Chang Colour FO: Finish Off For this pattern I used a 2.35mm hook with weight 2 yarn.
Head and Body Begin with red yarn. 1. ML 8 2. (SC 2, 3INC, SC) 2 times (12) CC orange 3. In BLO, SC in each ST (12) 4. (INC, SC) 6 times (18) 5. SC 7, INC, SC 2, 3INC, SC 2, INC, SC 4 (22) 6. SC 7, INC, SC 3, INC, SC, INC, SC 3, INC, SC 4 (26) 7. SC 7, INC, SC 4, INC, SC 3, INC, SC 4, INC, SC 4 (30) 8. SC 7, (INC, SC 5) 3 times, INC, SC 4 (34) 9. SC 8, INC, SC 5, INC, SC 7, INC, SC 5, INC, SC 5 (38) 10. SC 8, (INC, SC 7) 3 times, INC, SC 5 (42) 11-18. SC in each ST (42) 19. (DEC, SC 5) 6 times (36) 20. SC in each ST (36) 21. (SC 2, DEC, SC 2) 6 times (30) 22. SC in each ST (30) 23. (INC, SC 9) 3 times (33) 24. (INC, SC 10) 3 times (36) 25. (INC, SC 11) 3 times (39) 26. SC in each ST (39) 27. (INC, SC 12) 3 times (42) 28. SC in each ST (42) 29. SC 8, CC brown, SC 34 (42) 30-34. SC in each ST (42) 35. (DEC, SC 5) 6 times (36) 36. (SC 2, DEC, SC 2) 6 times (30) 37. (DEC, SC 3) 6 times (24) 38. (SC, DEC, SC) 6 times (18) Stuff the head and body 39. (DEC, SC) 6 times (12) 40. DEC in each ST, FO (6)
Head Patch Begin with brown yarn. 1. ML 6 2. INC in each ST (12) 3. (SC, INC) 3 times, CC yellow, SC, CC brown, INC, (SC, INC) 2 times (18) 4. (SC 2, INC) 3 times, CC yellow, SC 2, CC brown, INC, (SC 2, INC) 2 times (24) 5. (SC 3, INC) 3 times, CC yellow, SC 3, CC brown, INC, (SC 3, INC) 2 times (30) 6. (SC 4, INC) 3 times, CC yellow, SC 4, CC brown, INC, (SC 4, INC) 2 times (36) 7. (SC 5, INC) 3 times, CC yellow, SC 5, CC brown, INC, (SC 5, INC) 2 times, FO (42)
Ears x2 Begin with brown yarn. 1. ML 6 2. SC in each ST (6) 3. (INC, SC 2) 2 times (8) 4. SC in each ST (8) 5. (INC, SC 3) 2 times (10) 6. SC in each ST (10) 7. (INC, SC 4) 2 times (12) 8. SC in each ST (12) 9. (INC, SC 3) 3 times (15) 10-13. SC in each ST (15) 14. (DEC, SC 3) 3 times (12) 15. SC in each ST (12) 16. (DEC, SC 2) 3 times (9) 17. SC in each ST (9) 18. (DEC, SC) 3 times, FO (6)
Front Legs x2 Begin with brown yarn. 1. ML 6 2. (INC, SC) 3 times (9) CC orange 3. (INC, SC 2) 3 times (12) 4. (INC, SC 3) 3 times (15) 5-9. SC in each ST (15) FO
Back Legs x2 Begin with orange yarn. 1. ML 6 2. (INC, SC) 3 times (9) 3. (INC, SC 2) 3 times (12) 4. (INC, SC 3) 3 times (15) 5-9. SC in each ST (15) FO
Tail Begin with brown yarn. 1. CH 21, skip 1 CH, INC 20, FO (40)
Tail Ball Begin with red yarn. 1. ML 6 2. INC in each ST (12) 3-5. SC in each ST (12) Stuff the ball 6. DEC in each ST, FO (6)

Special Instructions While making the head, I like to make the stitches around the top of the head a little looser so that the nose doesn't get pulled up too drasticly. To bgin putting your Tepig together, Start by sewing up the hole in his bum. Next sew the head patch to the top of his head so that the yellow part touches his nose. Then sew his ears to the top of his head so that both ears touch the top of the head patch as well as each other. After that sew the front legs to the body, right behind the head. Sew the back legs to the rear end of the body, make sure a couple rows of brown are still visable infront of the legs. Next sew the tail to the rear end of the top of the body. Finally sew the tail ball to the end of the tail. I like to needle felt the eyes onto this amigurumi. To do this begin by forming a white cirlcle on both sides of the head. the top half of the circle should overlap the head patch. Next take dark brown roving and form another circle inside the white circles, towards the front of the head. Finally take a small bit of white roving and form a dot at the top of each brown circle, again towards the front of the head. Now you're done!

Check me out on the Instagrams for more free patterns! If you like my patterns please consider making a donation!
#tepig#pokemon#amigurumi#crochet#pattern#amigurumi pattern#crochet pattern#needlefelting#yarn#plushies#stuffies#beanies#cute
183 notes
·
View notes
Text
Chikorita Amigurumi Pattern

Abbreviations: ML: Magic Loop ST: Stitch/Stitches SC: Single Crochet DEC: Decrease INC: Increase SL: Slip Stitch CC: Chang Colour FO: Finish Off For this pattern I used a 2.35mm hook with weight 2 yarn.
Head and Body Begin with bright green yarn. 1. ML 6 2. INC in each ST (12) 3. (INC, SC) 6 times (18) 4. (INC, SC 2) 6 times (24) 5. (INC, SC 3) 6 times (30) 6. (INC, SC 4) 6 times (36) 7. SC in each ST (36) 8. (INC, SC 5) 6 times (42) 9-16. SC in each ST (42) 17. (Inc, SC 4) 2 times, (SC 4, INC) 2 times, SC 22 (46) 18. SC 6, INC, SC 3, INC, SC 2, INC, SC 3, INC, SC 28 (50) 19. SC 6, (INC, SC 4) 4 times, SC 24 (54) 20. SC 7, INC, SC 5, INC, SC 4, INC, SC 5, INC, SC 29 (58) 21. SC 8, INC, SC 5, INC, SC 6, INC, SC 5, INC, SC 30 (62) 22. SC 9, (INC, SC 6) 4 times, SC 25 (66) 23-32. SC in each ST (66) 33. (DEC, SC 9) 6 times (60) 34. (SC 4, DEC, SC 4) 6 times (54) 35. (DEC, SC 7) 6 times (48) 36. (SC 3, DEC, SC 3) 6 times (42) 37. (DEC, SC 5) 6 times (36) 38. (SC 2, DEC, SC 2) 6 times (30) 39. (DEC, SC 3) 6 times (24) 40. (SC, DEC, SC) 6 times (18) Stuff the head and body. 41. (DEC, SC) 6 times (12) 42. DEC in each ST, FO (6)
Legs x4 Begin with white yarn. 1. ML 6 CC bright green 2. (INC, SC) 3 times (9) 3. (INC, SC 2) 3 times (12) 4. (INC, SC 3) 3 times (15) 5. (INC, SC 4) 3 times (18) 6. SC in each ST (18) 7. (INC, SC 5) 3 times (21) 8. SC in each ST, FO (21)
Tail Begin with bright green yarn. 1. ML 6 2. (INC, SC) 3 times (9) 3. (INC, SC 2) 3 times (12) 4. (INC, SC 3) 3 times (15) 5-6. SC in each ST (15) FO
Neck Buds x10 Begin with dark green yarn. 1. ML 6 2. SC in each ST, FO (6)
Leaf Begin with dark green yarn. 1. ML 6 2. SC in each ST (6) 3. (INC, SC) 3 times (9) 4. SC in each ST (9) 5. (INC, SC 2) 3 times (12) 6. SC in each ST (12) 7. (INC, SC 3) 3 times (15) 8. SC in each ST (15) 9. (INC, SC 4) 3 times (18) 10. SC in each ST (18) 11. (INC, SC 5) 3 times (21) 12-15. SC in each ST (21) 16. (DEC, SC 5) 3 times (18) 17. (SC 2, DEC, SC 2) 3 times (15) 18. (DEC, SC 3) 3 times (12) 19. DEC in each ST (6) 20-23. SC in each ST (6) FO

Special Instructions To begin putting together your Chikorita, start by sewing up the hole in the bottom of the body. Next sew the legs to the bottom of the body. Then sew the tail onto the back of the body. After that, sew the neck buds around the neck. Do your best to evenly space 5 buds on the front and back. Finally sew the leaf the the top the head. I like to needle felt the eyes onto this amigurumi. To begin, form two white circles on the front of the face. Next Form a red circle inside each white circle towards the middle of the face. Then for a black dot inside each red circle towards the middle of the face. Finally make the top half of each dot white. Now you're done!

Check me out on the Instagrams for more free patterns! If you like my patterns please consider making a donation!
#chikorita#pokemon#amigurumi#crochet#amigurumi pattern#crochet pattern#plushies#stuffies#beanies#cute
60 notes
·
View notes
Text
Totodile Amigurumi Pattern

Abbreviations: ML: Magic Loop ST: Stitch/Stitches SC: Single Crochet INC: Increase 3INC: Triple Increase, crochet in the next stitch 3 times. DEC: Decrease CH: Chain SL: Slip Stitch HDC: Half Double Crochet DC: Double Crochet TC: Triple Crochet FO: Finish Off For this pattern I use a 2.35mm hook with weight 2 yarn.
Head Begin with light blue yarn. 1. ML 6 2. INC in each ST (12) 3. (INC, SC) 6 times (18) 4. (INC, SC 2) 2 times, (3INC, SC 2) 2 times, (INC, SC 2) 2 times (26) 5. SC 11, INC 2, SC 13 (28) 6-7. SC in each ST (28) 8. SC 9, DEC 4, SC 11 (24) 9-12. SC in each ST (24) 13. SC 8, INC, SC 2, INC, SC, INC, SC 2, INC, SC 7 (28) 14. SC 8, (INC, SC 3) 4 times, SC 4 (32) 15. SC 9, INC, SC 3 INC, SC 5, INC, SC 3, INC, SC 8 (36) 16. SC 15, 3INC, SC 5, 3INC, SC 14 (40) 17. SC 16, 3INC, SC, DEC, SC, DEC, SC, 3INC, SC 15 (42) 18. SC 17, INC, SC, DEC, SC, DEC, SC, INC, SC 16 (42) 19-26. SC in each ST (42) 27. (DEC, SC 5) 6 times (36) 28. (SC 2, DEC, SC 2) 6 times (30) 29. (DEC, SC 3) 6 times (24) 30. (SC, DEC, SC) 6 times (18) Stuff the head. 31. (DEC, SC) 6 times (12) 32. DEC in each ST, FO (6)
Body Begin with light blue yarn. 1. ML 6 2. INC in each ST (12) 3. (INC, SC) 6 times (18) 4. (INC, SC 2) 6 times (24) 5. (INC, SC 3) 6 times (30) 6. (INC, SC 4) 6 times (36) 7. (INC, SC 5) 6 times (42) 8-12. SC in each ST (42) 13. (DEC, SC 12) 3 times (39) 14. SC in each ST (39) 15. (DEC, SC 11) 3 times (36) 16. SC in each ST (36) 17. (DEC, SC 10) 3 times (33) 18. SC in each ST (33) 19. (DEC, SC 9) 3 times (30) 20. SC in each ST (30) 21. (DEC, SC 8) 3 times (27) 22. SC in each ST, FO (27)
Arms x2 Begin with light blue yarn. 1. ML 6 2. (INC, SC) 3 times (9) 3. (INC, SC 2) 3 times (12) 4. (INC, SC 3) 3 times (15) 5-11. SC in each ST (15) FO
Legs x2 Begin with light blue yarn. 1. ML 6 2. INC in each ST (12) 3. (INC, SC) 6 times (18) 4. (INC, SC 2) 6 times (24) 5-7. SC in each ST (24) 8. (DEC, SC 6) 3 times, FO (21)
Feet x2 Begin with light blue yarn. 1. ML 8 2. INC in each ST (16) 3-5. SC in each ST (16) 6. (DEC, SC 2) 4 times (12) 7. SC in each ST, FO (12)
Tail Begin with light blue yarn. 1. ML 6 2. SC in each ST (6) 3. (INC, SC) 3 times (9) 4. SC in each ST (9) 5. (INC, SC 2) 3 times (12) 6. SC in each ST (12) 7. (INC, SC 3) 3 times (15) 8. SC in each ST (15) 9. (INC, SC 4) 3 times (18) 10. SC in each ST (18) 11. (INC, SC 5) 3 times (21) 12. SC in each ST (21) 13. (INC, SC 6) 3 times (24) 14. SC in each ST (24) 15. (INC, SC 7) 3 times (27) 16. SC in each ST, FO (27)
Back Spikes Begin with red yarn. 1. CH 5, skip 1 CH, SL, SC, HDC, DC, CH 6, skip 1 CH, SL, SC, HDC, DC, TC, CH 5, skip 1 CH, SL, SC, HDC, DC, FO
Back Stripes x2 Begin with red yarn. 1. CH 10, skip 1 CH, SL, SC, HDC 5, SC, SL, FO
Tail Spike Begin with red yarn. 1. CH 5, skip 1 CH, SL, SC, HDC, DC, FO
Tummy Stripe Begin with light yellow yarn. 1. CH 11, skip 2 CH, DC 4, (DC 4 in next ST), DC 4, FO

Special Instructions To start putting togethr your Totodile, begin by sewing up the hole in the back of the head. Here you can decide if you want to make the indent in the middle of his head. To do this, sew a strand of yarn through the top and out the back of his head a few times. (try to hide the stitches on the back of the head by keeping them in an area that will be covered by the body) Next sew the body to the back of the head. Then sew the tail to the bottom of the body. (I like to angle the tail up a bit so it looks like he's ready to pounce) After that, sew the tummy stripe to his chest. Next sew the arms to the sides of the body, low to the ground. The arms should overlap the ends of the tummy stripe just a little bit. Then sew the legs to the rear end of the body, low to the ground. After that, sew the feet to the front of the legs very low to the ground! Next sew the back spikes down the middle of his back. It's fine if it goes up his tail a little. Then sew the tail spike about halfway down the tail. Finally sew the back stripes down the back of the body, a couple stitches away from the spikes. I like to needle felt the eyes onto this amigurumi. To do this, bgin by forming a white circle on both sides of the head. next form a black triangle on both sides of each white circle. Then form a red circle inside the white circle, towards to the front of the face. After that, form a black dot in the red circle, towards the front again. Finally make the top half of the black dot white to simulate light reflection! Now you're done!

Check me out on the Instagrams for more free patterns! If you like my patterns please consider making a donation!
#totodile#pokemon#amigurumi#crochet#pattern#free pattern#crochet pattern#amigurumi pattern#plushies#stuffies#beanies#cute
139 notes
·
View notes
Text
Cyndaquil Amigurumi Pattern

Abbreviations: ML: Magic Loop ST: Stitch/Stitches SC: Single Crochet DEC: Decrease INC: Increase CH: Chain SL: Slip Stitch HDC: Half Double Crochet DC: Double Crochet CC: Chang Colour BLO: Back Loops Only FO: Finish Off For this pattern I used a 2.35mm hook with weight 2 yarn.
Head Begin with light beige yarn. 1. ML 6 2. INC in each ST (12) 3. (INC, SC) 6 times (18) 4. (INC, SC 2) 6 times (24) 5. (INC, SC 3) 6 times (30) 6. (INC, SC 4) 6 times (36) 7. (INC, SC 5) 6 times (42) 8-15. SC in each ST (42) 16. (DEC, SC 5) 6 times (36) 17. (SC 2, DEC, SC 2) 6 times (30) 18. (DEC, SC 3) 6 times (24) 19. (SC, DEC, SC) 6 times (18) Stuff the head. 20. (DEC, SC) 6 times (12) 21. DEC in each ST, FO (6)
Snout Begin with light beige yarn. 1. ML 6 2. (INC, SC 2) 2 times (8) 3. SC in each ST (8) 4. (INC, SC 3) 2 times (10) 5. SC in each ST (10) 6. (INC, SC 4) 2 times (12) 7. SC in each ST (12) 8. (INC, SC 5) 2 times (14) 9. SC in each ST (14) 10. (INC, SC 6) 2 times (16) 11. SC in each ST, FO (16)
Body Begin with light beige yarn. 1. ML 6 2. INC in each ST (12) 3. (INC, SC) 6 times (18) 4. (INC, SC 2) 6 times (24) 5. (INC, SC 3) 6 times (30) 6. (INC, SC 4) 6 times (36) 7. (INC, SC 5) 6 times (42) 8-12. SC in each ST (42) 13. (DEC, SC 5) 6 times (36) 14. (SC 2, DEC, SC 2) 6 times (30) 15. (DEC, SC 3) 6 times (24) 16. (SC, DEC, SC) 6 times (18) 17. (DEC, SC) 6 times (12) 18. DEC in each ST, FO (6)
Arms x2 Begin with light beige yarn. 1. ML 6 2. (INC, SC) 3 times (9) 3-5. SC in each ST (9) 6. (DEC, SC) 3 times, FO (6)
Legs x2 Begin with light beige yarn. 1. ML 6 2. INC in each ST (12) 3. (INC, SC) 6 times (18) 4. (INC, SC 2) 6 times (24) 5. SC in each ST (24) 6. (DEC, SC 2) 6 times, FO (18)
Feet x2 Begin with white yarn. 1. ML 4 CC light beige 2. SC in each ST (4) 3. (INC, SC) 6 times (6) 4. SC in each ST, FO (6)
Back Stripe Begin with green-blue yarn. 1. CH 8 2. Skip 1 CH, SC 7, CH 1 turn (7) 3. Skip 1 CH, INC, SC 5, INC, CH 1 turn (9) 4. Skip 1 CH, INC, SC 7, INC, CH 1 turn (11) 5. Skip 1 CH, INC, SC 9, INC, CH 1 turn (13) 6. Skip 1 CH, INC, SC 11, INC, CH 1 turn (15) 7-9. Skip 1 CH, SC 15, CH 1 turn (15) 10. Skip 1 CH, DEC, SC 11, DEC, CH 1 turn (13) 11-12. Skip 1 CH, SC 13, CH 1 turn (13) 13. Skip 1 CH, SC 3, DEC, SC 3, DEC, SC 3, CH 1 turn (11) 14-17. Skip 1 CH, SC 11, CH 1 turn (11) 18. Skip 1 CH, in BLO, SC 11, CH 1 turn (11) 19-26. Skip 1 CH, SC 11, CH 1 turn (11) 27. Skip 1 CH, SC 2, DEC, SC 3, DEC, SC 2, CH 1 turn (9) 28-30. Skip 1 CH, SC 9, CH 1 turn (9) 31. Skip 1 CH, SC, DEC, SC 3, DEC, SC, CH 1 turn (7) 32-34. Skip 1 CH, SC 7, CH 1 turn (7) 35. Skip 1 CH, DEC, SC 3, DEC, CH 1 turn (5) 36. Skip 1 CH, SC 5, CH 1 turn (5) 37. Skip 1 CH, in BLO, SC 5, CH 1 turn (5) 38-39. Skip 1 CH, SC 5, CH 1 turn (5) 40. Skip 1 CH, DEC, SC 1, DEC, CH 1 turn (3) 41-43. Skip 1 CH, SC 3, CH 1 turn (3) 44. CH 5, working back down chain, Skip 1 CH, SL, SC, HDC, DC, skip 1 CH, working along original row, Skip 2 ST, SL, FO

Special Instructions To sew up your Cyndaquil, Begin by sewing the hole in the bottom of the head shut. Then sew the snout to the front of the head near the bottom. Next stuff and sew the body to the back of the head. After that I like to sew the back stripe down the center of the snout, over the top of the head and down the back of the body. The rows worked in BLO should line up with the end of the snout and the neck to help the piece bend. Then sew the arms to the sides of the body right behind the head, keep them low to the ground. Next stuff and sew the legs near the back, bottom of the body and keep them low to the ground. Its okay if the legs overlap the back stripe a little bit. Finally sew the feet to the front of legs, again keeping them low to the ground. To make the fire going down Cyndaquil's back you'll first need to cut up 16 pieces of yellow yarn about 4 inches long. Then cut up 32 pieces of orange yarn about 6 inches long. Next tie in 12 pieces of orang yarn down the middle of the back. After that tie in 10 pieces of orange yarn down the back, adjacent to the previous column of orang yarn. Do the same on the other side of the first column of orange yarn. Then Tie in 8 pieces of yellow yarn to each side of the back beside the last two columns of orange yarn. You may want to trim some of the orange yarn shorter at the ends and more jagged along the top. To tie in strands of yarn, Insert your hook through one stitch and back out the next stitch. hold a piece of yarn in a loop and grab that loop with your hook. draw it back through the stitches and finish off both ends of the strand of yarn. Finally using a piece of black yarn, embroider two semi circles on each side of the head to make eyes. They should line up with the top of the snout. Now you're done!

Check me out on the Instagrams for more free patterns! If you like my patterns please consider making a donation!
79 notes
·
View notes
Text
Haku Amigurumi Pattern

Abbreviations: ML: Magic Loop ST: Stitch/Stitches SC: Single Crochet DEC: Decrease INC: Increase CC: Change Colour CH: Chain SL: Slip Stitch HDC: Half Double Crochet DC: Double Crochet 3DCBOB: Three Double Crochet Bobble Stitch FO: Finish Off
Head Begin with white yarn. 1. ML 6 2. INC in each ST (12) 3. (INC, SC) 6 times (18) 4. (INC, SC 2) 6 times (24) 5. (INC, SC 3) 6 times (30) 6. (INC, SC 4) 6 times (36) 7. (INC, SC 5) 6 times (42) 8-15. SC in each ST (42) 16. (DEC, SC 5) 6 times (36) 17. (SC 2, DEC, SC 2) 6 times (30) 18. (DEC, SC 3) 6 times (24) 19. (SC, DEC, SC) 6 times (18) Stuff the head 20. (DEC, SC) 6 times (12) 21. DEC in each ST, FO (6)
Horns x2 Begin with light beige yarn. 1. ML 4 2. SC in each ST (4) 3. (INC, SC) 2 times (6) 4-5. SC in each ST (6) 6. (INC, SC 2) 2 times (8) 7-9. SC in each ST (8) 10. (INC, SC 3) 2 times (10) 11-13. SC in each ST (10) FO
Ears x2 Begin with white yarn. 1. ML 6 2. SC in each ST (6) 3. (INC, SC) 3 times (9) 4. SC in each ST (9) 5. (INC, SC 2) 3 times (12) 6. SC in each ST (12) 7. (INC, SC 3) 3 times (15) 8-10. SC in each ST (15) 11. (DEC, SC 3) 3 times (12) 12. SC in each ST, FO (12)
Inner Ear x2 Begin with light pink yarn. 1. CH 9 2. Skip 1 CH, SL, SC, HDC, DC 2, HDC, SC, SL, FO (8)
Snout Begin with white yarn. This part is worked in an oval round. 1. CH 6 2. Skip 1 CH, INC, SC 3, INC, working along opposite side of chain, SC 5 (12) 3. INC 2, SC 3, INC 3, SC 3, INC (18) 4. (SC 3, INC) 2 times, SC 10 (20) 5-9. SC in each ST (20) FO
Snout Top Begin with light grey yarn. 1. CH 7 2. Skip 1 CH, SC 6, CH 1 turn (6) 3-5. SC 6, CH 1 turn (6) 6. SC 6, FO (6)
Whiskers x2 Begin with white yarn. 1. CH 31 2. Skip 1 CH, SL 30, FO
Body and Tail Begin with white yarn. 1. ML 6 2. SC in each ST (6) 3. (INC, SC 2) 2 times (8) 4. SC in each ST (8) 5. (INC, SC 3) 2 times (10) 6. SC in each ST (10) 7. (INC, SC 4) 2 times (12) 8. SC in each ST (12) 9. (INC, SC 5) 2 times (14) 10. SC in each ST (14) 11. (INC, SC 6) 2 times (16) 12. SC in each ST (16) 13. (INC, SC 7) 2 times (18) 14. SC in each ST (18) 15. (INC, SC 8) 2 times (20) 16. SC in each ST (20) 17. (INC, SC 9) 2 times (22) 18. SC in each ST (22) 19. (INC, SC 10) 2 times (24) 20. SC in each ST (24) 21. (INC, SC 11) 2 times (26) 22. SC in each ST (26) 23. (INC, SC 12) 2 times (28) 24. SC in each ST (28) 25. (INC, SC 13) 2 times (30) 26-35. SC in each ST (30) 36. (DEC, SC 8) 3 times (27) 37. SC in each ST, FO (27)
Legs x4 Begin with light pink yarn. 1. ML 6 2. (SC, 3DCBOB) 3 times (6) 3-6. SC in each ST (6) CC white 7. (INC, SC) 3 times (9) 8. SC in each ST (9) 9. (INC, SC 2) 3 times (12) 10. SC in each ST, FO (12)
Belly Begin with light purple yarn. 1. CH 7 2. Skip 1 CH, SC 6, CH 1 turn (6) 3. INC, SC 4, INC, CH 1 turn (8) 4-9. SC 8, CH 1 turn (8) 10. DEC, SC 4, DEC, CH 1 turn (6) 11. SC 6, CH 1 turn (6) 12. DEC, SC 2, DEC, CH 1 turn (4) 13. SC 4, CH 1 turn (4) 14. DEC 2, CH 1 turn (2) 15. SC 2, FO (2)

Special Instructions! To begin putting Haku together, start by sewing up the hole in the bottom of the head. Next stuff the snout and sew it to the front of the head, near the bottom. Then sew the snout top to... the top of the snout. Now you can embroider a nose on the front of the snout using a bit of light purple yarn. After that I like to stuff the body and sew it to the back of the head so that you can line the ears up correctly. Sew the ears to the sides of the head just above the middle. Make sure they are only a stitch or two away from the body! Sew the inner ears to the center of each ear. Next sew the horns to the top of the head between the ears. They should be touching the ears but also placed forward just a bit more. Then sew the whiskers to the sides of the snout. After that sew the belly to the bottom of the body so that it touches the head. The skinnier end should be on the tail side. Finally sew the legs to sides of the body near the bottom. It's okay if they legs overlap the belly! To tie in the hairs on top of the head and along the back you will first need to cut up 175 pieces of teal coloured yarn that are about 4-5 inches long. Push your hook into the hole of one stitch and out the hole of an adjacent stitch. To make sure the hairs face backwards, you should be stabbing your hook towards the snout. Hold a piece of yarn in a loop and grab that loop with your hook. Pull the loop back through the stitches and finish off both ends of the piece of yarn to secure the hairs. Do your best to keep the hairs going down the center of the back as the stitches rotate around the body. Form a triangle of hair between the horns to begin the mane. I like to keep it five stitches wide for the majority of his body until it tappers off a bit around the tail. I like to needle felt the eyes onto my amigurumi. To do this, take some black roving and form an almond shape on both sides of the snout. Next take some teal roving and form a line going along the bottom of the eye and up the outer edge. Next take a bit of white roving and form a dot towards the upper middle of each eye. Now you're done!

Check me out on the instagrams for more free patterns! If you like my patterns please consider making a donation!
#haku#spirited away#studio ghibli#amigurumi#crochet#plushies#stuffies#beanies#cute#dragon#crochet pattern#amigurumi pattern
153 notes
·
View notes
Text
Sobble Amigurumi Pattern

Abbreviations: ML: Magic Loop ST: Stitch/Stitches SC: Single Crochet DEC: Decrease INC: Increase CC: Change Colour CH: Chain SL: Slip Stitch 3TCBOB: Three Triple Crochet Bobble Stitch FO: Finish Off
Head Begin with medium blue yarn. 1. ML 6 2. INC in each ST (12) 3. (INC, SC) 6 times (18) 4. (INC, SC 2) 6 times (24) 5. (INC, SC 3) 6 times (30) 6. (INC, SC 4) 6 times (36) 7. (INC, SC 5) 6 times (42) 8. SC 21, CC light blue, SC, CC medium blue, SC 20 (42) 9. SC 20, CC light blue, SC 3, CC medium blue, SC 19 (42) 10. SC 19, CC light blue, SC 5, CC medium blue, SC 18 (42) 11. SC 18, CC light blue, SC 7, CC medium blue, SC 17 (42) 12. SC 17, CC light blue, SC 9, CC medium blue, SC 16 (42) 13. SC 16, CC light blue, SC 11, CC medium blue, SC 15 (42) 14. SC 15, CC light blue, SC 13, CC medium blue, SC 14 (42) 15. SC 14, CC light blue, SC 15, CC medium blue, SC 13 (42) CC light blue 16. (DEC, SC 5) 6 times (36) 17. (SC 2, DEC, SC 2) 6 times (30) 18. (DEC, SC 3) 6 times (24) 19. (SC, DEC, SC) 6 times (18) Stuff the head 20. (DEC, SC) 6 times (12) 21. DEC in each ST, FO (6)
Fin (small part) Begin with yellow yarn. 1. ML 6 2. (INC, SC) 3 times (9) 3-5. SC in each ST (9) FO
Fin (big part) Begin with yellow yarn. 1. ML 6 2. (INC, SC) 3 times (9) 3. (INC, SC 2) 3 times (12) 4. SC in each ST (12) 5. (INC, SC 3) 3 times (15) 6. SC in each ST (15) 7. (INC, SC 4) 3 times (18) 8-10. SC in each ST (18) 11. SC 9, working around the small fin, SC 9, working back around the big fin, SC 9 (27) 12. (DEC, SC 7) 3 times (24) 13. (SC, DEC, SC) 6 times (18) 14. (DEC, SC) 6 times (12) 15. DEC in each ST, FO (6)
Fin Stripe Begin with dark blue yarn. 1. CH 17 2. Skip 1 CH, SL 16, FO
Cheek Patches x2 Begin with dark blue yarn. 1. ML 6, FO
Body Begin with medium blue yarn. 1. ML 6 2. INC in each ST (12) 3. (INC, SC) 6 times (18) 4. (INC, SC 2) 6 times (24) 5. (INC, SC 3) 6 times (30) 6. (INC, SC 9) 3 times (33) 7-10. SC in each ST (33) 11. (DEC, SC 9) 3 times (30) 12. SC in each ST (30) 13. (DEC, SC 8) 3 times (27) 14. SC in each ST (27) 15. (DEC, SC 7) 3 times (24) 16. SC in each ST, FO (24)
Belly Patch Begin with light blue yarn. 1. ML 6 2. INC in each ST (12) 3. (INC, SC) 6 times (18) 4. (INC, SC 2) 6 times, FO (24)
Limbs x4 Begin with medium blue yarn. 1. ML 6 2. (SC, 3TCBOB, SC) 2 times (6) 3-10. SC in each ST (6) FO
Tail Ball Begin with dark blue yarn. 1. ML 6 2. INC in each ST (12) 3-5. SC in each ST (12) 6. DEC in each ST, FO (6)
Tail Begin with medium blue yarn. 1. ML 6 2. INC in each ST (12) 3-27. SC in each ST (12) FO

Special Instructions To begin putting together your Sobble, sew the fin to the top of his head. Do your best to angle it straight forward! Then take the fin stripe and sew it to the front of the fin. Next sew the cheek patches to the front of his head at the bottom corners of the triangle formed by changing colours. Now is a good time to stuff the body and sew it to the back of the head. Then sew the belly patch to his tummy, making sure that it touches the light blue part on the head! next sew two of the limbs on each side of the body right behind the head. Keep them low to the ground! After that sew the remaining two limbs to the bottom of the body. Again, keep 'em low! To make the tail, take the tail ball and wrap the tail around it once. Secure the shape by running a few stitches through it. Then sew the tail to the back of the body near to the booty. If you choose to neele felt the eyes onto your amigurumi, then begin by forming two circles with black roving right above the cheek patches. Next take some blue roving and form a semi-circle around the lower, outer edge of each eye. Finally take some white roving and form a small dot towards the middle, upper part of each eye. Now you're done!

Check me out on the instagrams for more free patterns! If you like my patterns please consider making a donation!
#sobble#pokemon#pokemon sword and shield#amigurumi#crochet#plushies#stuffies#beanies#cute#free pattern#amigurumi pattern#crochet pattern
161 notes
·
View notes
Text
Grookey Amigurumi Pattern

Abbreviations: ML: Magic Loop ST: Stitch/Stitches SC: Single Crochet DEC: Decrease INC: Increase CC: Change Colour CH: Chain SL: Slip Stitch HDC: Half Double Crochet DC: Double Crochet FO: Finish Off
Head Begin with bright green yarn. 1. ML 6 2. INC in each ST (12) 3. (INC, SC) 6 times (18) 4. (INC, SC 2) 6 times (24) 5. (INC, SC 3) 6 times (30) 6. (INC, SC 4) 6 times (36) 7. (INC, SC 5) 6 times (42) 8. (INC, SC 6) 6 times (48) 9-17. SC in each ST (48) 18. (SC 3, DEC, SC 3) 6 times (42) 19. (DEC, SC 5) 6 times (36) 20. (SC 2, DEC, SC 2) 6 times (30) 21. (DEC, SC 3) 6 times (24) 22. (SC, DEC, SC) 6 times (18) Stuff the head 23. (DEC, SC) 6 times (12) 24. DEC in each ST, FO (6)
Stick Begin with brown yarn. 1. ML 6 2-13. SC in each ST (6) FO
Leaves x2 Begin with bright green yarn. 1. CH 9 2. Skip 2 CH, DC 2, HDC 2, SC 2, 2 SL in last ST Next work back along the other side of the chain. 3. 2 SL in same ST, SC 2, HDC 2, DC 2, CH 2, SL in same ST, FO
Ears x2 Begin with brown yarn. 1. ML 6 2. (INC, SC) 3 times (9) 3. SC 4, INC, SC, INC, SC 2 (11) 4. SC 5, INC, SC, INC, SC 3 (13) 5. SC 6, INC, SC, INC, SC 4 (15) 6. SC 7, INC, SC, INC, SC 5 (17) 7. SC 8, INC, SC, INC, SC 6, FO (19)
Snout Begin with orange yarn. 1. ML 5 2. INC in each ST (10) 3. (INC, SC) 5 times (15) 4. (INC, SC 2) 5 times (20) 5-6. SC in each ST (20) FO
Body Begin with bright green yarn. 1. ML 6 2. INC in each ST (12) 3. (INC, SC) 6 times (18) 4. (INC, SC 2) 6 times (24) 5. (INC, SC 3) 6 times (30) 6. (INC, SC 4) 6 times (36) 7. SC in each ST (36) 8. (INC, SC 11) 3 times (39) 9-13. SC in each ST (39) 14. (DEC, SC 11) 3 times (36) 15-19. SC in each ST (36) 20. (DEC, SC 4) 6 times (30) 21. SC in each ST, FO (30)
Arms x2 Begin with orange yarn. 1. ML 6 2. INC in each ST (12) 3-7. SC in each ST (12) CC bright green 8-12. SC in each ST (12) FO
Legs x2 Begin with bright green yarn. 1. ML 6 2. INC in each ST (12) 3. (INC, SC) 6 times (18) 4. (INC, SC 2) 6 times (24) 5. SC in each ST (24) 6. (SC, DEC, SC) 6 times (18) 7. (DEC, SC) 6 times (12) Stuff the legs. 8. DEC in each ST, FO (6)
Feet x2 Begin with brown yarn. 1. ML 6 2. (INC, SC 2) 2 times (8) 3-4. SC in each ST (8) FO
Tail Begin with brown yarn. 1.ML 6 2. (INC, SC) 3 times (9) 3-6. SC in each ST (9) 7. DEC, SC 7 (8) 8-10. SC in each ST (8) 11. DEC, SC 6 (7) 12-13. SC in each ST (7) 14. DEC, SC 5 (6) 15. SC in each ST, FO (6)

Special Instructions! To begin putting together your Grookey, start by sewing up the hole in the bottom of the head. Then sew the snout onto the front of the head near the bottom. Next sew an ear to each side of his head so the top of the ears are slightly higher than the top of the snout. After that, sew up the hole in the side of the stick, bringing the yarn out the middle of stick so that you can sew it onto the top of the head, right in the middle. Finally sew the leaves together in a "V" shape and sew them onto the top of the head infront of the stick. To begin putting the rest of his body together, Stuff the body and sew it to the back of the head. Next sew the arms to each side of the body, low to the ground and right behind the head. Then sew the legs to each side of the body, low to the ground and near his Grookey booty. Sew one foot to the front of each leg. Keep 'em low! Finally sew the tail right above his Grookey booty. I like to needle felt the eyes onto my amigurumis. To start, take yellow/green roving and form two circles on both sides of the snout as well as a triangle above the snout, touching both circles. Next take black roving and form two more circles inside the yellow/green circles. Then take some bright green roving and form a semi circle at the bottom of the black circles but also away from the snout. Finally take some white roving and form a dot toward the top of each black circle, near the snout. Now take a bit of black yarn and embroider two dots on the nose for nostrils. Now you're done!

Check me out on the instagrams for more free patterns! If you like my patterns please consider making a donation!
88 notes
·
View notes
Text
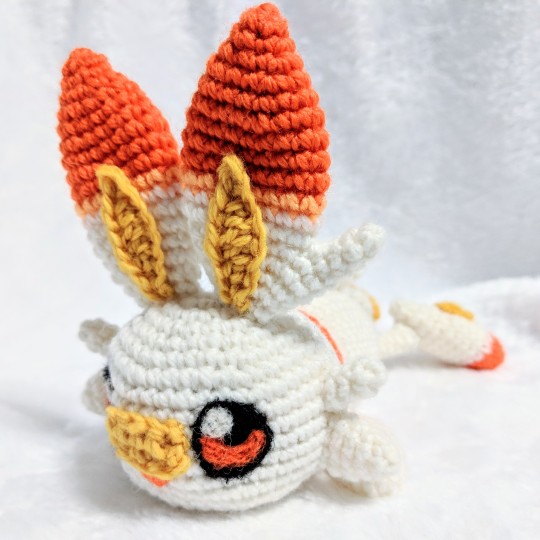
Scorbunny Amigurumi Pattern
Abbreviations: ML: Magic Loop ST: Stitch/Stitches SC: Single Crochet DEC: Decrease INC: Increase CC: Change colour CH: Chain SL: Slip Stitch HDC: Half Double Crochet DC: Double Crochet FO: Finish Off
Left Ear Begin with orange yarn. 1. ML 6 2. SC in each ST (6) 3. (INC, SC) 3 times (9) 4. (INC, SC 2) 3 times (12) 5. (INC, SC 3) 3 times (15) 6. SC in each ST (15) 7. (INC, SC 4) 3 times (18) 8-10. SC in each ST (18) CC light orange 11. SC in each ST (18) CC white 12-14. SC in each ST (18) 15. (DEC, SC 4) 3 times (15) 16. SC in each ST (15) 17. (DEC, SC 3) 3 times (12) 18. (SC, DEC, SC) 3 times, FO (9)
Right Ear Tuft Begin with white yarn. 1. ML 4 2. SC in each ST (4) 3. (INC, SC) 2 times (6) 4. SC in each ST, FO (6)
Right Ear Same as Left Ear for rounds 1-12. 13. SC 12, SC around each ST of Left Ear Tuft, SC 6 (24) 14. (SC 3, DEC, SC 3) 3 times (21) 15. (DEC, SC 5) 3 times (18) 16. (SC 2, DEC, SC 2) 3 times (15) 17. (DEC, SC 3) 3 times (12) 18. (SC, DEC, SC) 3 times, FO (9)
Head Begin with white yarn. 1. ML 6 2. INC in each ST (12) 3. (INC, SC) 6 times (18) 4. (INC, SC 2) 6 times (24) 5. (INC, SC 3) 6 times (30) 6. (INC, SC 4) 6 times (36) 7. (INC, SC 5) 6 times (42) 8-15. SC in each ST (42) 16. (DEC, SC 5) 6 times (36) 17. (SC 2, DEC, SC 2) 6 times (30) 18. (DEC, SC 3) 6 times (24) 19. (SC, DEC, SC) 6 times (18) Stuff head 20. (DEC, SC) 6 times (12) 21. DEC in each ST, FO (6)
Small Cheek Tuft x2 Begin with white yarn. 1. ML 4 2. SC in each ST (4) 3. (INC, SC) 2 times (6) 4. SC in each ST, FO (6)
Large Cheek Tuft x2 Begin with white yarn. 1. ML 6 2. SC in each ST (6) 3. (INC, SC) 3 times (9) 4-5. SC in each ST (9) FO
Body Begin with white yarn. 1. ML 6 2. INC in each ST (12) 3. (INC, SC) 6 times (18) 4. (INC, SC 2) 6 times (24) 5. (INC, SC 3) 6 times (30) 6-13. SC in each ST (30) 14. (SC 4, DEC, SC 4) 6 times (27) 15. (DEC, SC 7) 6 times, FO (24)
Arms x2 Begin with white yarn. 1. ML 6 2. (INC, SC) 3 times (9) 3. (INC, SC 2) 3 times (12) 4-6. SC in each ST (12) 7. (DEC, SC 2) 3 times (9) 8. SC in each ST (9) 9. (DEC, SC) 3 times (6) 10. SC in each ST, FO (6)
Feet x2 Begin with orange yarn. 1. ML 6 2. (INC, SC) 3 times (9) 3. (INC, SC 2) 3 times (12) 4. (INC, SC 3) 3 times (15) CC white 5-9. SC in each ST (15) 10. (DEC, SC 3) 3 times (12) 11. SC in each ST (12) 12. (DEC, SC 2) 3 times (9) 13. (DEC, SC) 3 times, FO (6)
Legs x2 Begin with white yarn. 1. ML 6 2-8. SC in each ST (6) FO
Tail Begin with white yarn. 1. ML 6 2. INC in each ST (12) 3-5. SC in each ST (12) 6. DEC in each ST, FO (6)
Rectangle Details x3 Begin with yellow yarn. 1. CH 5, turn 2. Skip 1 CH, SC 4, CH 1 turn 3. SC 4, FO
Inner Ears x2 Begin with yellow yarn. 1. CH 9, turn 2. Skip 1 CH, SL, SC, HDC, DC 2, HDC, SC, SL, FO (8)
Neck Floof begin with orange yarn. 1. CH 25, turn 2. Skip 1 CH, SL 24, FO

Special Instructions I like to start with sewing the Right Ear on top of the Head first since it's the most important part to get lined up correctly. Make sure to sew up the hole in the bottom of the Head, then sew the Left Ear on top of the Head. Next sew a Rectangle Detail to the center of the Head. After that I like to sew the Small Cheek Tufts to the sides of the Head just above the middle. Then Sew the Large Cheek Tufts to the sides of the Head just under the Small Cheek Tufts. To finish the Head, sew the Inner Ears to the center of each Right and Left Ears. Then stuff and sew the Body to the back of the Head for a floppy Scorbunny, or to the bottom of the Head for a normal Scorbunny. (although he wont be able to stand on his own) Next sew the Neck FLoof around Body right behind the head, leaving a small gap at the front center. After that sew the Arms to sides of the body. Next sew the Tail to back of the Body near the bottom. To start the Feet, sew up the opening in the bottom of each Foot then thread the yarn through to the top of the Foot near the back. Using that same strand of yarn, sew the Legs to the top of each Foot near the back. Next sew a Rectangle Detail to the bottom center of each Foot. Finally sew the Legs to the bottom of the Body. Using a bit of orange yarn, embroider a small triangle under the Rectangle Detail on the center of the face. I like to needle felt the eyes onto my amigurumi. To begin, take some black roving and form two circles beside the Rectangle Detail. Then use some orange roving and form a semi circle at the bottom of each eye. Finally add a small circle of white roving toward the center of each eye, just above the orange. Now you're done!

Check me out on the instagrams for more free patterns! If you like my patterns please consider making a donation!
#pokemon#scorbunny#pokemon sword and shield#amigurumi#crochet#pattern#free pattern#crochet pattern#amigurumi pattern#free crochet pattern#free amigurumi pattern#free crochet amigurumi pattern#pokemon amigurumi#pokemon amigurumi pattern#cute#kawaii#needlefelting#scorbunny amigurumi#scorbunny amigurumi pattern#pokemon gen 8#pokemon generation 8
323 notes
·
View notes
Text
Stegosaurus Amigurumi Pattern

Abbreviations: ML: Magic Loop ST: Stitch/Stitches SC: Single Crochet DEC: Decrease INC: Increase BLO: Back Loops Only FO: Finish Off
Head/Body Begin with dinosaur coloured yarn. 1. ML 6 2. INC in each ST (12) 3. (INC, SC) 6 times (18) 4. SC in each ST (18) 5. (INC, SC 2) 6 times (24) 6. SC in each ST (24) 7. (INC, SC 3) 6 times (30) 8-13. SC in each ST (30) 14. (DEC, SC 3) 6 times (24) 15. SC in each ST (24) 16. (INC, SC 3) 6 times (30) 17. (INC, SC 4) 6 times (36) 18. SC 10, INC, SC 5, INC, SC 3, INC, SC 5, INC, SC 9 (40) 19. SC 11, INC, SC 6, INC, SC 3, INC, SC 6, INC, SC 10 (44) 20. SC in each ST (44) 21. SC 13, INC, SC 6, INC, SC 3, INC, SC 6, INC, SC 12 (48) 22. SC in each ST (48) 23. SC 14, INC, SC 7, INC, SC 3, INC, SC 7, INC, SC 13 (52) 24-31. SC in each ST (52) 32. SC 17, DEC, SC 7, DEC, SC 3, DEC, SC 7, DEC, SC 10 (48) 33. SC in each ST (48) 34. SC 15, DEC, SC 7, DEC, SC 3 DEC, SC 7, DEC, SC 8 (44) 35. SC in each ST (44) 36. SC 14, DEC, SC 6, DEC, SC 3, DEC, SC 6, DEC, SC 7 (40) 37. SC in each ST (40) 38. SC 14, DEC, SC 5, DEC, SC, DEC, SC 5, DEC, SC 7 (36) 39. SC in each ST (36) 40. (SC 2, DEC, SC 2) 6 times (30) 41. SC in each ST (30) 42. (INC, SC 3) 6 times (24) 43. SC in each ST (24) 44. (SC, DEC, SC) 6 times (18) 45. SC in each ST (18) 46. (DEC, SC) 6 times (12) 47. SC in each ST (12) 48. DEC in each ST (6) 49. SC in each ST, FO (6)
Front Feet x2 Begin with dinosaur coloured yarn. 1. ML 6 2. INC in each ST (12) 3. (INC, SC) 6 times (18) 4. In BLO, SC in each ST (18) 5-7. SC in each ST (18) FO
Back Feet x2 Begin with dinosaur coloured yarn. 1. ML 6 2. INC in each ST (12) 3. (INC, SC) 6 times (18) 4. In BLO, SC in each ST (18) 5-8. SC in each ST (18) FO

Big Spines x5 Begin with a different coloured yarn. 1. ML 6 2. SC in each ST (6) 3. (INC, SC) 3 times (9) 4. SC in each ST (9) 5. (INC, SC 2) 3 times (12) 6. SC in each ST (12) 7. (INC, SC 3) 3 times (15) 8. SC in each ST (15) 9. (DEC, SC 3) 3 times (12) 10. (DEC, SC 2) 3 times (9) 11. (DEC, SC) 3 times, FO (6)
Little Spines x10 Begin with a different coloured yarn. 1. ML 6 2. SC in each ST (6) 3. (INC, SC) 3 times (9) 4. SC in each ST (9) 5. (INC, SC 2) 3 times (12) 6. SC in each ST (12) 7. (DEC, SC 2) 3 times (9) 8. (DEC, SC) 3 times, FO (6)

Check me on the instagrams for more free patterns!
#stegosaurus#dinosaur#dino#crochet#amigurumi#pattern#amigurumi pattern#crochet pattern#stegosaurus amigurumi#stegosaurus amigurumi pattern#dinosaur amigurumi#crochet stegosaurus#crochet dinosaur
818 notes
·
View notes
Text
Mr Spock Amigurumi Pattern

Abbreviations: ML: Magic Loop ST: Stitch/Stitches SL: Slip Stitch SC: Single Crochet HDC: Half Double Crochet CH: Chain DEC: Decrease INC: Increase CC: Change Colour FO: Finish Off
Head and body Begin with black yarn 1. Ml 6 2. INC in each ST (12) 3. (INC, SC) 6 times (18) 4. (INC, SC 2) 6 times (24) 5. (INC, SC 3) 6 times (30) 6. (INC, SC 4) 6 times (36) 7. (INC, SC 5) 6 times (42) 8. (INC, SC 6) 6 times (48) 9-11. SC in each ST (48) 12-13. CC beige, SC 20, CC black, SC 28 (48) 14. CC beige, SC 20, CC black, SC 25, CC beige, SC 3 (48) 15. SC 23, CC black, SC 22, CC beige, SC 3 (48) 16. SC 23, CC black SC 17, CC beige, SC 8 (48) 17. SC 28, CC black, SC 12, CC beige, SC 8 (48) 18. SC in each ST (48) 19. (SC 3, DEC, SC 3) 6 times (42) 20. (DEC, SC 5) 6 times (36) Insert eyes between rounds 15 and 16, 11 stitches apart. Sew on a mouth and some eyebrows with a bit of black yarn. 21. (SC 2, DEC, SC 2) 6 times (30) 22. (DEC, SC 3) 6 times (24) 23. (SC, DEC, SC) 6 times (18) 24. CC black, SC in each ST (18) 25. CC blue, (INC, SC 2) 6 times (24) 26. (INC, SC 3) 6 times (30) 27-30. SC in each ST (30) CC black 31-32. SC in each ST (30) Sew a Starfleet emblem on his chest by making an upsidedown "V" shape with gold yarn. Stuff the head and body. 33a. SC 9, skip 15 ST, SC 6 (15) 34a. SC in each ST (15) 35a. (DEC, SC 3) 3 times (12) 36a. (DEC, SC 2) 3 times (9) Stuff the leg. 37a. (DEC, SC) 3 times (6) FO Draw up a loop of black yarn in the first remaining stitch of round 32. Make sure to leave a long tail of yarn for sewing up the hole in the groin of his pants. Chain 2 counts as 1 stitch. 33b. CH 2, SC 14 (15) 34b. SC around CH-2, SC 14 (15) 35b. (DEC, SC 3) 3 times (12) 36b. (DEC, SC 2) 3 times (9) Stuff the leg. 37b. (DEC, SC) 3 times (6) FO Sew up the hole in the groin and weave in ends.
Ears x2 Begin with beige yarn. 1. CH 5 2. Skip 1 CH, SL in next 2 CH, SC in next CH, HDC in last CH (4) FO Sew the ears to the sides of the head through rounds 15-17.
Arms x2 Begin with beige yarn. 1. ML 6 2. CC blue, (INC, SC 2) 2 times (8) 3. SC in each ST (8) 4. (DEC, SC 2) 2 times (6) FO Sew the arms to the sides of the between rounds 25-27.

Check me on the instagrams for more free patterns!
#spock#mr. spock#star trek#amigurumi#crochet#spock amigurumi pattern#spock crochet pattern#star trek crochet pattern
268 notes
·
View notes
Text
Baby Turtle Amigurumi Pattern

Abbreviations: ML: Magic Loop WC: waistcoat stitch W-INC: Waistcoat increase ST: stitch/stitches 2DCBOB: 2 double crochet bobble stitch BLO: back loops only SC: Single Crochet DEC: decrease INC: increase FO: Finish off
Shell Begin with brown yarn. *working loosely* 1. ML 6 2. W-INC in each ST (12) 3. (W-INC, WC) 6 times (18) 4. (W-INC, WC 2) 6 times (24) 5. (W-INC, WC 3) 6 times (30) 6. (W-INC, WC 4) 6 times (36) 7-8. WC in each ST (36) *Working with normal tension* 9. 2DCBOB in each ST (36) Change to light brown yarn. 10. In BLO, SC in each ST (36) 11. (SC 2, DEC, SC 2) 6 times (30) 12. (DEC, SC 3) 6 times (24) 13. (SC, DEC, SC) 6 times (18) Stuff the shell 14. (DEC, SC) 6 times (12) 15. DEC in each ST, FO (6)
Head Begin with green yarn. 1. ML 6 2. INC in each ST (12) 3. (INC, SC) 6 times (18) 4. (INC, SC 2) 6 times (24) 5. (INC, SC 3) 6 times (30) 6-8. SC in each ST (30) 9. SC 14, INC 2, SC 14 (32) 10. SC in each ST (32) 11. (DEC, SC 2) 8 times (24) Insert eyes three stitches away, and two stitches up from the increases on round 9 12. (SC, DEC, SC) 6 times (18) Stuff the head. 13. (DEC, SC) 6 times (12) 14. DEC in each ST, FO (6) Sew the head to the front of the shell so that the colour change is at the back.
Front flippers x2 Begin with green yarn. 1. ML 5 2. INC in each ST (10) 3. (INC, SC) 5 times (15) 4. (INC, SC 2) 5 times (20) 5. (INC, SC 3) 5 times (25) 6. (INC, SC 4) 5 times (30) FO Fold in half and sew closed. Then sew them to the shell beside the head.
Tail Begin with green yarn. 1. ML 6 2. SC in each ST (6) 3. (INC, SC) 3 times (9) 4. SC in each ST, FO (9) Sew to the back of the shell. I usually try to hide the colour change under tail.
Rear flippers x2 1-5. Repeat front flippers (5, 10, 15, 20, 25) FO Fold in half and sew closed, then sew to the back of the shell 3 stitches away from the tail.

#turtle#sea turtle#baby turtle#amigurumi#amigurumi pattern#free amigurumi pattern#free crochet pattern#free pattern#crochet#crochet pattern#amigurumi turtle#crochet turtle
117 notes
·
View notes
Text
Pikachu Amigurumi Pattern

Abbreviations (US terms) ML = Magic Loop SC = Single Crochet HDC = Half Double Crochet (for female tail only) DC = Double Crochet (for female tail only) TC = Triple Crochet (for female tail only) CH = Chain ST = Stitch/Stitches DEC = Decrease, single crochet two stitches together INC = Increase, single crochet in the same stitch two times 3INC = Tripple Increase, crochet in the same stitch three times FO = Finish Off/Fasten Off CC = Change Colour
Head Begin with yellow yarn. 1. ML 6 2. INC in each ST (12) 3. (INC, SC) 6 times (18) 4. (INC, SC 2) 6 times (24) 5. (INC, SC 3) 6 times (30) 6. (INC, SC 4) 6 times (36) 7. (INC, SC 5) 6 times (42) 8. (INC, SC 6) 6 times (48) 9-11. SC in each ST (48) 12. (DEC, SC 6) 6 times (42) 13-17. SC in each ST (42) 18. (INC, SC) 3 times, SC 2, INC 2, SC 2, (SC, INC) 3 times, SC 24 (50) 19-21. SC in each ST (50) 22. SC 11, DEC 2, SC 35 (48) 23. SC 3 (DEC, SC 6) 5 times, DEC, SC 3 (42) 24. (DEC, SC 5) 6 times (36) 25. SC 2 (DEC, SC 4) 5 times, DEC, SC 2 (30) 26. (DEC, SC 3) 6 times (24) 27. SC (DEC, SC 2) 5 times, DEC, SC (18) Stuff head 28. (DEC, SC) 6 times (12) 29. DEC in each ST, FO (6)
Ears x2 Begin with black yarn. 1. ML 6 2. SC in each ST (6) 3. (INC, SC 2) 2 times (8) 4. SC in each ST (8) 5. (INC, SC 3) 2 times (10) CC yellow 6. SC in each ST (10) 7. (INC, SC 4) 2 times (12) 8-14. SC in each ST (12) 15. (DEC, SC 4) 2 times, FO (10) Stuff slightly and sew to the head.
Body Begin with yellow yarn. 1. ML 6 2. (3INC, SC) 3 times (12) 3. SC (3INC, SC 3) 2 times, 3INC, SC 2 (18) 4. SC 2 (3INC, SC 5) 2 times, 3INC, SC 3 (24) 5. SC 3, 3INC, SC 6, INC, SC, INC, SC 6, 3INC, SC 4 (30) 6. SC 4, 3INC, SC 7, INC, SC 3, INC, SC 7, 3INC, SC 5 (36) 7. SC 5, 3INC, SC 8, INC, SC 5, INC, SC 8, 3INC, SC 6 (42) 8. SC 6, 3INC, SC 9, INC, SC 7, INC, SC 9, 3INC, SC 7 (48) 10. SC 7, 3INC, SC 10, INC, SC 9, INC, SC 10, 3INC, SC 8 (54) 11-15. SC in each ST (54) 16.(SC 9, DEC) 4 times, SC 10 (50) 17. SC in each ST (50) 18. SC 4 (DEC, SC 8) 4 times, DEC, SC 4 (45) 19. SC in each ST (45) 20. (DEC, SC 7) 5 times (40) 21. SC in each ST (40) 22. SC 3 (DEC, SC 6) 4 times, DEC, SC 3 (35) 23. SC in each ST (35) 24. (DEC, SC 5) 5 times (30) 25. SC in each ST, FO (30) Embroider a couple stripes across the back. Stuff and sew to head.
Arms x2 Begin with yellow yarn. 1. ML 6 2. (INC, SC) 3 times (9) 3. (INC, SC 2) 3 times (12) 4. (INC, SC 3) 3 times (15) 5-9. SC in each ST (15) FO Stuff and sew to body.
Feet x2 Begin with yellow yarn. 1. ML 6 2. (INC, SC) 3 times (9) 3-7. SC in each ST (9) fo Stuff feet slightly and sew open end flat then sew to body.
Tail x2 Begin with yellow yarn. CH 9, turn 1-4. SC 8, CH 1, turn 5. SC 3, CH 1, turn 6. SC 3, CH 4 turn 7-8. SC 6, CH 1, turn CC brown 9-11. SC 3, CH 1, turn FO and weave in ends. Once both tail pieces are finished line them up and sc around the edge through both of them, making one double thick piece. for a female tail, along the end of the tail work (2 HDC, 2 DC, 2 TC) in on ST, (DC, HDC, SC) in next ST, (SC, HDC, DC) in next ST, (2 TC, 2 DC, 2 HDC) in next ST, then continue with SC around the rest of the tail.

Check me out on instagram for more free patterns!
#Pikachu#shiny pikachu#female pikachu#pokemon#amigurumi#crochet#amigurumi pattern#amigurumi pikachu pattern#free pattern#free amigurumi pattern#free#pattern#crochet pattrn#free crochet pattern
50 notes
·
View notes
Text
Baby Dragon Amigurumi Pattern

Abbreviations (US terms) ML = Magic Loop SC = Single Crochet ST = Stitch/Stitches DEC = Decrease, single crochet two stitches together INC = Increase, single crochet in the same stitch two times BLO = Back Loops Only 2DCBOB = Two Double Crochet Bobble Stitch FO = Finish Off/Fasten Off
Head 1. ML 6 2. INC in each ST (12) 3. (INC, SC) 6 times (18) 4. (INC, SC 2) 6 times (24) 5. (INC, SC 3) 6 times (30) 6-7. SC in each ST (30) 8. SC 24 ,INC, SC, INC 2, SC, INC (34) 9. SC 24, (INC, SC 2) 3 times, INC (38) 10-11. SC in each ST (38) 12. (DEC, SC 4) 4 times, (DEC, SC 2) 3 times, DEC (30) 13. (DEC, SC 3) 6 times (24) insert eyes 14. (DEC, SC 2) 6 times (18) stuff 15. (DEC, SC 1) 6 times (12) 16. DEC in each ST, FO (6)
Body & tail 1. ML 6 2. SC in each ST (6) 3. (INC, SC) 3 times (9) 4. SC in each ST (9) 5. (INC, SC 2) 3 times (12) 6. SC in each ST (12) 7. (INC, SC 3) 3 times (15) 8. SC in each ST (15) 9. (INC, SC 4) 3 times (18) 10. SC in each ST (18) 11. (INC, SC 5) 3 times (21) 12. SC in each ST (21) 13. (INC, SC 6) 3 times (24) 14. SC in each ST (24) 15. (INC, SC 7) 3 times (27) 16. SC in each ST (27) 17. (INC, SC 8) 3 times (30) 18. SC in each ST (30) 19. (INC, SC 9) 3 times (33) 20. SC in each ST (33) 21. (INC, SC 10) 3 times (36) 22-27. SC in each ST (36) 28. (DEC, SC 10) 3 times (33) 29. SC in each ST (33) 30. (DEC, SC 9) 3 times (30) 31. SC in each ST (30) 32. (DEC, SC 8) 3 times (27) 33. SC in each ST (27) 34. (DEC, SC 7) 3 times (24) 35. SC in each ST, FO (24)
Horns x2 1. ML 6 2. SC in each ST (6) 3. (INC, SC 2) 2 times (8) 4. SC in each ST (8) 5. (INC, SC 3) 2 times (10) 6. SC in each ST, FO (10)
Front Legs x2 1. ML 6 2. INC in each ST (12) 3. in BLO, 2DCBOB 3, SC 9 (12) 4-9. SC in each ST (12)
Back legs x2 1. ML 6 2. INC in each ST (12) 3. in BLO, 2DCBOB 3, SC 9 (12) 4-5. SC in each ST (12) 6. (INC, SC) 3 times, SC 6 (15) 7. (INC, SC 2) 3 times, SC 6 (18) 8-10. SC in each ST (18)
Wings x2 1. ML 10 2. INC in each ST (20) 3. (INC, SC) 10 times (30) 4. (INC, SC 2) 10 times (40) 5. (INC, SC 3) 10 times (50) 6. (INC, SC 4) 10 times (60) Fold in half and sew shut then to body.

Check me on the instagrams for more free patterns!
#dragon#baby dragon#amigurumi#crochet#amigurumi pattern#amigurumi dragon#amigurumi dragon pattern#crochet pattern#crochet dragon pattern#free pattern#free amigurumi pattern#free crochet pattern
2K notes
·
View notes
Text
Baby Piglet Amigurumi Pattern

Abbreviations (US terms) ML = Magic Loop SC = Single Crochet ST = Stitches DEC = Decrease, single crochet two stitches together INC = Increase, single crochet in the same stitch two times 3INC = Tripple Increase, crochet in the same stitch three times BLO = Back Loops Only FO = Finish Off/Fasten Off
Head 1. ML 6 2 INC in each ST (12) 3. (INC, SC) 6 times (18) 4. in BLO, SC in each ST (18) 5-6. SC in each ST (18) 7. SC 3, (INC, SC 2) 4 times, SC 3 (22) 8. (SC 3, INC) 2 times, SC 4 (INC, SC 3) 2 times, SC 2 (26) 9. SC 3, INC, SC 4, INC, SC 6, INC, SC 4, INC, SC 5 (30) 10. SC 9, (INC, SC 2) 4 times, SC 9 (34) 11. SC 9, INC, SC 3, INC, SC 4, INC, SC 3, INC, SC 11 (38) 12. SC 9, INC, SC 5, INC, SC 4, INC, SC 5 INC, SC 11 (42) 13-19. SC in each ST (42) 20. (DEC, SC 5) 6 times (36) 21. SC 2, (DC, SC 4) 5 times, DEC, SC 2 (30) 22. (DEC, SC 3) 6 times (24) 23. SC, (DEC, SC 2) 5 times, DEC, SC (18) 24. (DEC, SC) 6 times (12) 25. DEC in each ST, FO (6)
Ears x2 1. ML 6 2. SC in each ST (6) 3. (INC, SC) 3 times (9) 4. SC in each ST (9) 5. (INC, SC 2) 3 times (12) 6. SC in each ST (12) 7. (INC, SC 3) 3 times (15) 8. (INC, SC 4) 3 times (18) 9. (INC, SC 2) 6 times (24) 10-15. SC in each ST (24) 16. (DEC, SC 2) 6 times (18) 17. SC in each ST, FO (18)
Body ML 6 2. (3INC, SC) 3 times (12) 3. SC, (3INC, SC 3) 2 times, 3INC, SC 2 (18) 4. SC 2, (3INC, SC 5) 2 times, 3INC, SC 3 (24) 5. SC 3, 3INC, SC 6, INC, SC, INC, SC 6, 3INC, SC 4 (30) 6. SC 4, 3INC, SC 7, INC, SC 3, INC, SC 7, 3INC, SC 5 (36) 7-12. SC in each ST (36) 13. SC 5, (DEC, SC 10) 2 times, DEC, SC 5 (33) 14. SC in each ST (33) 15. (DEC, SC 9) 3 times (30) 16. SC in each ST (30) 17. SC 4, (DEC, SC 8) 2 times, DEC, SC 4 (27) 18. SC in each ST, FO (27)
Arms x2 ML 6 2. (INC, SC) 3 times (9) 3. SC in each st (9) 4. (INC, SC 2) 3 times (12) 5-10. SC in each ST (12) FO
Legs x2 ML 6 2. INC in each ST (12) 3. (INC, SC) 6 times (18) 4. SC 3, INC 3, SC 12 (21) 5-7. SC in each ST (21) 8. SC 12, DEC 3, SC 3 (18) 9. SC 11, DEC 2, SC 3 (16) 10-13. SC in each ST (16) FO

Based on this post. This pattern is also available for purchase in fancy PDF format on my etsy store if you'd like to support my work!
#piglet#pooh bear#winnie the pooh#pooh#amigurumi#crochet#amigurumi pattern#crochet pattern#free amigurumi pattern#free crochet pattern
30 notes
·
View notes