#CFM Calculation
Explore tagged Tumblr posts
Visit Tumblr Blog
Explore Tumblr blogs with no restrictions, modern design and the best experience.
Last Seen Tumblr Blogs


Fun Fact
Women make up for the other 50% of Tumblr’s audience.
Text
Understanding Ventilation Power: Selecting the Ideal CFM for Your Kitchen Exhaust Hood Installation
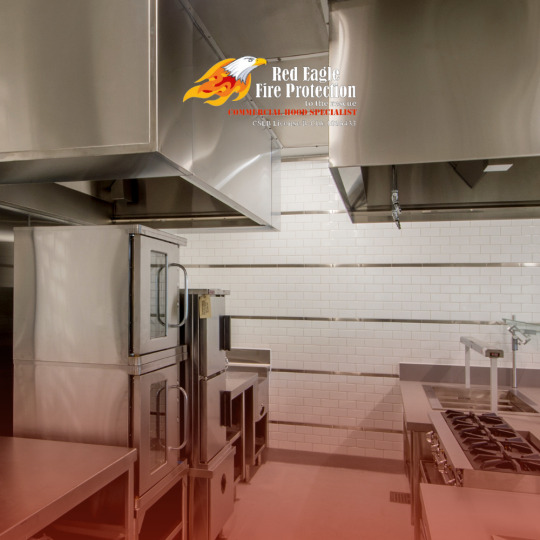
When it comes to kitchen exhaust hood installation, one of the most crucial factors to consider is the ventilation power, measured in cubic feet per minute (CFM). Choosing the right CFM ensures your kitchen remains free from smoke, grease, and odors, providing a safe and comfortable environment. This guide will help you understand how to select the appropriate CFM for your kitchen exhaust hood, enhancing both functionality and compliance with safety standards.
Why CFM Matters in Kitchen Exhaust Hood Installation
CFM, or cubic feet per minute, measures the volume of air a hood can exhaust in one minute. The right CFM is essential for effective ventilation, determining how quickly and efficiently smoke, steam, and grease are removed from your kitchen. An inadequate CFM can lead to poor air quality and increased fire hazards, while an excessively high CFM can be unnecessarily noisy and energy-consuming.
Calculating the Right CFM for Your Kitchen
The size of your cooking area and the type of cooking you do significantly impact the CFM requirements. For standard cooking ranges, a basic rule of thumb is 100 CFM per linear foot of cooktop. For example, a 30-inch range would need a hood with at least 250 CFM. For more intensive cooking methods, such as grilling or frying, you may need a higher CFM to ensure adequate ventilation.
Factors Influencing CFM Requirements
Several factors influence the CFM requirements for your kitchen exhaust hood installation:
Cooking Style: Heavy cooking styles like frying or grilling produce more smoke and grease, requiring higher CFM.
Kitchen Size: Larger kitchens may need more powerful hoods to ensure complete ventilation.
Ductwork Length: Longer duct runs can reduce efficiency, necessitating higher CFM to maintain performance.
Hood System Installation
Proper hood system installation is key to maximizing the effectiveness of your kitchen exhaust hood. Professional installation ensures your hood is correctly positioned and ducted, optimizing airflow and ventilation. Experts can assess your specific kitchen layout and recommend the best system and CFM for your needs, ensuring safety and compliance with local regulations.
Benefits of Choosing the Right CFM
Selecting the appropriate CFM for your kitchen exhaust hood offers several benefits:
Improved Air Quality: Efficient ventilation removes contaminants, keeping the air fresh and clean.
Enhanced Safety: Proper ventilation reduces the risk of grease fires and improves overall kitchen safety.
Energy Efficiency: Choosing the right CFM ensures your hood operates efficiently, saving on energy costs.
Noise Reduction: An appropriately powered hood operates more quietly, creating a more pleasant cooking environment.
Professional Kitchen Exhaust Hood Installation
Opting for professional kitchen exhaust hood installation guarantees your hood system is tailored to your kitchen’s specific needs. At Red Eagle – Kitchen Hood Services LA, we specialize in providing expert installation services. Our experienced team will help you choose the right CFM and ensure your hood is installed for maximum efficiency and safety.
#Kitchen Hood Installation#Commercial Vent Hood#Restaurant Hood Installation#Kitchen Ventilation#Exhaust Hood System#Kitchen Ventilation Installation#Professional Hood Installation#Range Hood Installation#Type 2 Hood Installation#Kitchen Exhaust Fan#Commercial Kitchen Hood#Vent Hood Services#Kitchen Hood Ventilation#CFM Calculation#Kitchen Exhaust System#Kitchen Hood Maintenance#Ventilation Power#Air Quality Improvement#Fire Safety#Energy Efficiency
2 notes
·
View notes
Text
Design Procedures for Cooling-Only Systems: Detailed Airflow Calculation Methodology
Technical Deep Dive: Airflow Calculation Methods for Cooling-Only Systems Following our 8-step methodology for designing cooling-only HVAC systems, this technical supplement provides detailed insights into the critical airflow calculation methods essential for Step 3: Calculate Required Zone and Space Supply Airflow Rates. Understanding these calculation approaches enables engineers to select…
#air distribution design#CFM calculation methods#coincident load calculation#cooling system design#cooling-only systems#duct leakage adjustment#HVAC airflow calculation#HVAC engineering formulas#HVAC system efficiency#HVAC system optimization#peak coincident loads#peak load sizing#sensible cooling load#space airflow distribution#space load diversity#supply temperature criteria#terminal unit sizing#zone airflow equations#zone sizing methods#zone terminal airflow
0 notes
Text
Aligning Ventilation Needs and Compliance for Kitchen Exhaust Hood Installation
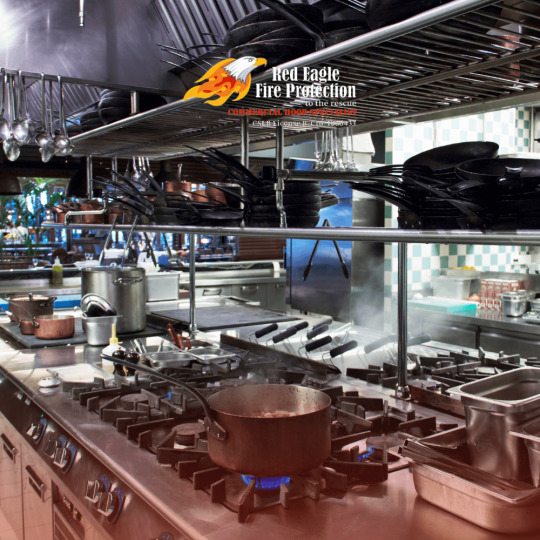
Achieving a successful kitchen exhaust hood installation in a commercial kitchen requires more than just choosing the right equipment. It involves balancing ventilation needs with compliance standards. Properly installed exhaust hoods improve air quality and ensure safety, but aligning your system with local codes is essential to avoid potential issues. Here’s how to plan your installation to meet both ventilation requirements and regulatory compliance.
The Importance of Balancing Ventilation and Compliance
A well-planned kitchen exhaust hood installation helps maintain a safe kitchen environment by removing smoke, grease, and heat. Adhering to local building codes ensures that your system operates legally and efficiently. Aligning these aspects protects your staff, reduces fire risks, and helps your kitchen pass necessary inspections.
Key Considerations for Ventilation and Compliance
To ensure that your exhaust hood installation meets both ventilation needs and regulatory standards, consider these factors:
CFM Ratings and Hood Size: Proper airflow is crucial for effective ventilation. Determining the required cubic feet per minute (CFM) based on your cooking equipment and kitchen size ensures that your exhaust hood system can efficiently remove heat, smoke, and odors. High-heat appliances like fryers and grills need a higher CFM rating for optimal performance.
Placement and Clearance: Local regulations often dictate minimum clearance distances between the exhaust hood and walls or ceilings. Proper placement allows the hood to capture fumes effectively while adhering to safety codes. Positioning the kitchen exhaust hood directly above the cooking area is ideal for optimal capture of smoke and grease.
Ductwork Design and Fire Resistance: The design of your ductwork is essential for safely directing fumes out of the kitchen. Using fire-resistant materials and minimizing bends in the ducts helps maintain good airflow. A well-designed duct system is a key part of a compliant kitchen exhaust hood installation.
Makeup Air Systems: As the exhaust hood removes air from the kitchen, it’s important to replace that air to maintain balance. Makeup air systems help maintain safe pressure levels, preventing backdrafts and ensuring overall ventilation efficiency.
Steps to Balance Ventilation and Compliance
Follow these steps to ensure that your kitchen exhaust hood installation meets both ventilation requirements and compliance standards:
1. Consult Local Building Codes
Understanding local regulations is the first step toward a compliant exhaust hood installation. This ensures that your system meets clearance requirements, CFM ratings, and fire safety standards, providing a solid foundation for your project.
2. Work with a Certified Installer
Hiring a certified professional simplifies the installation process and ensures that every aspect of the kitchen exhaust hood meets code requirements. Professionals can determine the right hood size, CFM, and duct design, making your system both effective and compliant.
3. Schedule a Pre-Installation Inspection
Consider a pre-installation inspection to verify that the planned setup meets local codes. This helps identify any necessary adjustments before the final exhaust hood installation, saving time and preventing costly rework.
Benefits of a Well-Balanced Kitchen Exhaust Hood Installation
When your kitchen exhaust hood installation is properly aligned with ventilation needs and compliance standards, you achieve improved air quality, energy efficiency, and safety. A well-installed system minimizes fire risks, lowers energy costs, and ensures that your kitchen complies with all necessary regulations, creating a more comfortable environment for staff and guests.
Balancing Safety and Efficiency
Balancing ventilation needs with regulatory compliance is crucial for a successful kitchen exhaust hood installation. By considering factors like CFM ratings, proper placement, and ductwork design, you can create a safe and efficient kitchen. Working with professionals and understanding local codes ensures that your installation meets all standards, offering peace of mind and long-term performance for your commercial kitchen.
#kitchen exhaust hood installation#commercial kitchen ventilation#exhaust hood installation tips#kitchen hood setup#CFM calculation for exhaust hoods#ventilation system installation#kitchen safety compliance#exhaust hood maintenance#ductwork design#fire-resistant ductwork#professional exhaust hood installation#kitchen air quality#compliant kitchen ventilation#restaurant exhaust systems#exhaust hood clearance requirements#installation guidelines#kitchen hood placement#commercial kitchen safety#ventilation code requirements#efficient kitchen exhaust systems
0 notes
Text
0 notes
Text
Price to power to size to portability, the AirFanta 3Pro is one of the best on the market. Here's the latest review (Also preserved in our archive)
Afiliate links if you want this guy to make a buck from your purchase: www.amazon.com/stores/AirFanta/page/0D35BA0F-6AFE-48BB-BB83-E984C65192D4?asc_campaign=c192889518f863d96d278a446b3a951d&asc_source=01H1P39M5ZSG9J6WR6B1HBK9M0&language=en_US&linkCode=sl2&linkId=be7b5afa91953d14a40a0b6fb293d6aa&ref_=as_li_ss_tl&tag=namespacebran492-20
air-fanta.com/?dt_id=2137762
AirFanta is a name that I hear more about every day. While it’s a relatively niche company, it’s quickly becoming well-known – at least within the air quality ‘enthusiast’ community – for performant yet affordable air purifiers and air quality monitors. I’ve been using the AirFanta G2 Air Quality Monitor for quite a few months now, but the two products that have always interested me the most are 3Pro and 4Lite air purifiers.
After having the 3Pro set up inside my office for over two weeks now, I am happy to be able to present my full review of the device. For anyone unaware, this purifier is designed to filter a massive amount of air (we will discuss the CADR and more soon!) at a relatively affordable price. It does this by being essentially a pre-assembled CR (Corsi-Rosenthal) Box – a form of air purifier that was itself created due to the need for affordable and effective air purification devices.
While the 3Pro doesn’t embrace the typical DIY aspect of traditional CR Boxes, it has the advantage of having proven performance (no need to worry about whether your DIY box is effective!) and being ready to go out of the box. However, perhaps my favourite aspect of this device over traditional CR Boxes is how easily obtainable it is. While this probably isn’t an issue for anyone in the U.S. or Europe, I find it hard to source good HEPA filters in New Zealand at an affordable price. The 3Pro ensures I don’t run into this issue.
In today’s review of the AirFanta 3Pro, I want to answer a few key questions. Firstly, how does it perform? Secondly, how does it compare to more ‘traditional’ air purifiers? Finally, and most importantly, is the 3Pro worth the markup compared to making your own CR Box at home? By the end of the article, I will share the answers and my opinions regarding each of these questions. Let’s dive in!
The key selling point of the AirFanta 3Pro is its fantastic CADR – especially at this price. For anyone new to air purifiers, CADR stands for clean air delivery rate, which indicates how much air an air purifier can clean and deliver in a set period. The measurement typically used for CADR is CFM, or cubic feet per minute. A higher CADR in CFM indicates the purifier delivers more clean air.
CADR is calculated by considering both the filter efficiency and the airflow through the filters, making it a much better metric (and the standard for air purifiers) than airflow alone. Most CADR tests use a room of around 30m3 and test how much faster the purifier removes particles from the air than if they were left to settle naturally without any other influences.
So, what is the CADR of the 3Pro? It is quite impressive, 413cfm (702 m3/h) at full speed. To best put this in perspective, I recommend reading the fantastic HouseFresh review to see how it compares to other devices currently on the market (spoiler alert; it performs very favourably). I also believe these official figures, as multiple other sources have confirmed them.
The AirFanta 3Pro uses HEPA H11 filters, which are rated to provide ≥ 95% filtration. It’s worth noting that while this figure may not seem that high and that while many air purifiers use higher-rated filters, the H11 filters used here aren’t necessarily bad. That is because, unlike respirators and masks, air purifiers are not designed to purify the air as best possible on a single pass. Rather, if an air purifier can continually filter the same air after multiple passes through the filter, the particle count and concentration will be significantly reduced.
This is important to note because H11 filters are less dense, allowing for better airflow and generally with less noise. Compared to masks, you can think of the balance between filtration and breathability – generally, the more filtration a mask or respirator provides, the less breathable it is. The same goes for air purifiers. The key difference here is that purifiers are designed to have air pass through them multiple times, unlike a mask or respirator, which only has one chance to filter the air before the wearer breathes it. This is why, despite having ‘only’ an H11 filter, the 3Pro can achieve a fantastic CADR.
Of course, this is a very simple explanation, but it’s important to clarify this because I can predict many questions asking, ‘But why weren’t better filters such as HEPA H13 filters used?’. While I can’t speak for the exact answer (you’d have to ask Adam from AirFanta about that!), it’s likely to strike a balance between single-pass filtration performance, airflow, and noise level. While we’ll dive into it soon, I believe complaints about the H11 filter will quickly disappear once you see the performance that the AirFanta 3Pro has to offer.
It’s also worth noting that carbon filters are available, which will provide filtration through adsorption for VOCs and many odours. While I didn’t get these filters to test, some people will opt for them to help manage VOCs. Since these add another layer to the filter, they will likely slightly drop the CADR, but probably not enough to make any significant impact (and, of course, the extra filtration is a big benefit).
AirFanta also has a full list of third-party certifications and test results, which can be viewed here. Interestingly, both bacterial efficiency and viral efficiency reports from Guangzhou Institute of Microbiology Group Co., Ltd. (a CNAS-accredited laboratory) have been provided, and both reports show a > 99.99% decrease in particle concentration after 60 minutes of use in a 30m3 room. The bacterial test goes further and shows the results after 15 minutes, 30 minutes, and 45 minutes. These results show a ≥ 95.63%, ≥ 99.91% and 99.99% drop in tested particles, respectively.
These results show that, at least in a room around 30m3 in size, the AirFanta 3Pro can reduce bacterial and viral particles by ≥ 99.9% in 30 minutes, with 60 minutes seeing a near complete removal of such particles. While we can’t tell exactly what size the particles were in this testing (at least not without paying for access to the original standards), these results are very promising. Potentially worth noting is that since the 3Pro is rated for 702 m3/h, there would have been around 23 air changes within one hour in the 30m3 test chamber. Therefore, the ≥ 95.63% is after almost six air changes, and ≥ 99.91% after around 12.
Of course, these tests and the stated CADR are at the device’s maximum fan speed, which isn’t ideal in many situations. While it’s important to know a device’s maximum performance when needed, it’s more likely you’ll want to leave the device running at a lower speed either all the time or at least quite regularly. Below are the stated CADRs at different fan speeds:
6 – 413CFM 5 – 374CFM 4 – 321CFM 3 – 247CFM 2 – 141CFM 1 – 57CFM Of course, I was also curious to run some tests myself, but I must make the disclaimer that my tests are far from scientific. That said, I wanted to perform some testing similar to a real-life setting where the AirFanta 3Pro is likely to be used. As such, I decided to set up a test room. I measured this room to be 25.6m3, which is about the size of a standard bedroom (it is a bedroom!). While this room is smaller than what I believe this device is intended for, it’s the most controllable room in my house regarding airflow as it only has one door and one window, which can easily be closed and no other forms of ventilation or air disturbances.
In this room, I burned incense until I reached a PM2.5 concentration of 500ug/m3. However, since I can’t exactly control the PM concentration, it ended up being somewhere between 500 and 600 in my tests. I then put the incense out and did a control test to see how long it took the particles to settle without any assistance at all. This took around 90 minutes, and I used this as my baseline.
I monitored the particle concentrations with five AirGradient monitors that were located in each corner and the centre of the room. I then reran this experiment three more times – once with the purifier at maximum speed, once at half speed, and once at the minimum speed to see how long the concentration took to reach < 5ug/m3. I measured the particle concentration by averaging the data from all five monitors to ensure the whole room had been filtered. Here are my results.

In this graph, you can see the baseline data in blue (labelled Ambient) and the particle concentration drop from the AirFanta 3Pro at maximum speed (speed 6) in red. As you can see, it took around 90 minutes for the particle count to drop to < 5ug/m3 without the purifier running but less than 20 minutes with the device at maximum speed. I was very impressed by these first results, and while I wouldn’t want to run the device at full speed often as it is loud, I appreciate having a good peak performance for times when you need to clean the air in a room quickly.

I reran this test, but this time with the 3Pro at half speed (speed 3) and was impressed by the relatively low performance drop. I was worried my results were incorrect, and I reran this three times, but each result was within one minute of the initial result. It looks like a large chunk of the device’s performance is retained between the higher speeds, even though the noise level decreases significantly. This gave me high hopes for the 3Pro’s performance at minimum speed.

Unfortunately, but perhaps not unexpectedly, the device performed far worse at the lowest speed (speed 1). While the particle concentration did drop more quickly than without the device, it was vastly slower than at the faster speeds. It is worth noting that this is not bad at all, as the device is very quiet at this speed and we can see the performance is clearly there, if needed, just turn the device to a higher speed. However, I had inflated hopes after seeing the great performance at higher speeds. Of course, this does match with the stated speed 1 CADR which is roughly 1/8 of the maximum CADR at speed 6.

If we add the times it took the 3Pro to reduce the PM concentration to below 5ug/m3 at each speed setting, we can see that it took between 17.3 minutes and 80.1 minutes to clean the room, depending on the speed. Interestingly, between the higher speeds (speeds 3-6), there appears to be little performance drop-off but a significant improvement in noise levels. At the slow end, the device takes a long time to filter the room, and if you want to use these near-silent speeds, you will probably want to have the device constantly on.
It’s worth noting that previously, the AirFanta 3Pro came with a voltage dial on the adapter. This could be used to adjust the speed, and many reviews of the device still refer to this voltage dial (essentially, a speed dial). Newer versions come with a speed dial with speeds 1-6, so I have referred to speeds instead of voltages for this section.
Before concluding this section, I was also curious how this device would perform if I lit incense in the room while the air purifier was on. I didn’t have a reason for doing this other than curiosity. Still, considering the stellar performance at the higher fan speeds, I wondered how the purifier would handle a pollutant source emitting particles while the device was running. Below, you can see the results (keeping in mind that this same room reaches over 1000ug/m3 when burning incense without an air purifier).

As you can see, the AirFanta 3Pro significantly reduced the maximum particle concentration in the room and rapidly cleaned the air once the incense finished burning. I would be very confident using a device such as this even during periods of heavy pollution, such as during wildfire season.
Overall, I’m quite impressed with the performance of the AirFanta 3Pro, and although it’s loud at full speed, it’s great to know that it’s more than capable of cleaning a small to medium-sized room quickly when needed. Larger rooms will take longer to filter, but I am confident this device can do it based on this performance.
If you prefer a quieter device, you can still use the AirFanta 3Pro, but you will want to leave it at a lower speed and constantly have it on. Thankfully, at the lower speeds, it’s a relatively quiet device, and I found it easy to work even with the purifier constantly on – as long as it was set to a lower speed, such as 1 or 2.
On the certifications page (located here), AirFanta also discloses and publically makes its results from non-performance-related certifications publicly available. There are a few pertinent and important documents here, so let’s discuss these before moving on. For the 3Pro, we can find the following documents provided:
UL507 certificate of AirFanta 3Pro CE-EMC certificate of AirFanta 3Pro and 4Lite CE-LVD certificate of AirFanta 3Pro and 4Lite FCC certificate of AirFanta 3Pro and 4Lite California Air Resources Board certification of Airfanta 3Pro Let’s review these individually, beginning with the UL507 certificate at the top. This certification might seem minor, but this is a safety standard for low and mid-powered fans such as those in PCs, kitchen hood vents, and, obviously, some air purifiers. The documentation for this certification is extensive (around 200 pages long), but this certification ensures the fans on the 3Pro are safe from a range of potential issues.
The next two certifications, both CE certificates from the European Union, indicate that the device meets EMC (electromagnetic compatibility) and LVD (low voltage directive) requirements. These are essentially further safety tests and indicate that the device is safe and provides high protection from potential EMC and LVD dangers.
The FCC certificate shows that the AirFanta 3Pro complies with FCC requirements, which are pertinent to customers from the United States. Still, these certifications are also helpful for trust-building with global customers. While I’m not U.S.-based, I certainly feel more confident in a product if it’s also FCC-compliant.
Finally, the CARB (California Air Resources Board) certification shows that the AirFanta 3Pro complies with California’s electrical safety and ozone requirements. This is particularly important as ozone can be a big issue with some air purifiers, and it’s reassuring to know that this is not an issue in the case of the AirFanta 3Pro.
If you’ve ever seen a CR Box, you will already know exactly what to expect from the 3Pro because that’s exactly what it is – a CR Box with pre-chosen parts that come as one ready-to-assemble package. While CR boxes aren’t that hard to assemble, the 3Pro streamlines the process and removes the difficulty of selecting and choosing your own parts. While some enthusiasts might opt for another CR Box, many other prospective customers will appreciate this approach.
When you open the 3Pro’s box, you will be met with six ‘layers’ that must be assembled. This is a very clean approach, as it means that the packaging for the device is relatively compact (albeit still quite heavy), and it even means that the device can be transported and reassembled easily. While it would be a stretch to call this device portable (that’s what the AirFanta 4Lite and SmartAir QT3 are for!), this means it is far more compact than other air purifiers with similar CADRs. While it is still quite large, you could easily take it on the road and use it at hotels, or perhaps even fly with it if you are taking large suitcases.
Back to actually assembling the product! Once you open the box, you will see six panels layered on top of one another. These are the cube’s six sides, with four being HEPA filters, one being a solid plastic base for the device, and the final being the top, where the four fans are located. Assembling the device is easy, and you will want to place the base on the ground before slotting the four filters into it. The only potential difficulty with assembling this purifier is holding the four sides in place as you slot the top on, but even this is quite straightforward with the included velcro intended for exactly this purpose.
A manual is included, but the device is so easy to put together and take apart that I can’t imagine anyone ever using it past the first assembly. Even then, it’s not really needed, as assembling the device is quite self-explanatory. The only note I think might be important to the user is that the mesh surface on the filters should be facing outwards (not the filtering surface, which should face inwards).
All of this is to say that assembling the device is very straightforward, and no one should be scared away or turned off this device because it has a small DIY element. It’s also a bit easier to assemble than other CR boxes as the slots have already been cut out of the base plate, and everything can be put together without the need for glue, tape, or other materials. Perhaps more helpful, the filters have already been chosen, and there is no need to shop around for the best price-performance filter.
Once assembled, the device takes the shape of quite a compact CR Box. On top of that, I must add that I think this device also looks a lot better than any traditional CR Box – at least any that I’ve ever made! While it still has an industrial look, it’s a device that could quite easily fit into a classroom, office, or room without attracting too much attention. While I value aesthetics much less than performance, I appreciate having a device that looks good, too – especially if it can blend in.
Once assembled, the device feels quite solid, and despite there being no adhesive or tape used in the assembly of the purifier, I feel confident lifting it and moving it without dislodging the pieces. With that said, I tend to lift the device from the bottom and hold the top down to ensure none of the pieces slide out from their intended positions.
On top of the purifier are four large fans connected to a controller that will allow you to adjust the speed of the device. These fans look almost identical to large PC fans, and they’re held in place by a wire bracket that also serves as an extra layer of protection to stop any children or animals from getting fingers or paws into the fans. That said, if you have the device around children, you may want to place it up higher so they can’t easily reach the fans.
That’s really all there is to the design of this device. It’s very simple, but it’s also affordable and performant. While some might miss the smart features and connectivity of more pricey air purifiers, the two types of devices cater to very different customers. Overall, I’m a fan of this straightforward approach, which reminds me of the SmartAir Sqair.
The AirFanta 3Pro uses four 140mm fans to push air through the filters. Characteristically, smaller fans tend to have higher-pitched sounds than larger fans and the AirFanta 3Pro sits somewhere in the middle as it uses medium-sized fans. If you have a desktop PC with a case fan (not the other fans, such as the higher-pitched CPU fan), you’ll likely already know what these fans sound like, as most desktop cases use 120mm or 140mm fans. This isn’t an unpleasant sound, but it is quite audible.
To see how loud the AirFanta 3Pro is, I conducted noise tests at 30cm and 2 metres with a sound level metre that measures in dBA (A-weighted decibel). dBA differs from traditional dB because it is adjusted for the human ear’s sensitivity to different frequencies. Low and very high frequencies are de-emphasized, mimicking how humans perceive loudness. In other words, it’s a better representation of the actual noise level than dB for a device such as an air purifier. However, I do want to note this as many other websites use dB, which will explain why my results are significantly different.
For further context, here are a few examples of the volumes of some noises in dBA. Obviously, these can vary, and especially with dBA, they will vary between different devices. However, they are rough examples:
10 dBA – Breathing or leaves rustling: Extremely quiet. 30 dBA – Whispering: Comparable to a quiet library. 40 dBA – Refrigerator hum: A typical low background noise. 50 dBA – Moderate rainfall: Light, soothing noise. 60 dBA – Normal conversation: The sound of talking at a close distance. 70 dBA – Vacuum cleaner: Considered moderate noise, can be annoying over time. 80 dBA – Heavy traffic or a loud alarm clock: Noise becomes uncomfortable after prolonged exposure. As you can see, at the lowest speeds, the 3Pro doesn’t add much to the noise of most rooms, but at the highest speeds, it can sound almost as loud as a vacuum cleaner (provided you are close to it). This is a lot of variation, but I like how this device gives the user full control over speed and noise, allowing them to pick a good balance.
I think most people will have this device running on speed 2 or 3, and both sounds are very manageable at a distance. If you do want a short burst of cleaning, the device will be significantly louder, and that’s why I only recommend using the higher speeds when needed.
When it comes to power consumption, the device can go from very low power to relatively high power. Here is a list of the wattage and voltage at each fan speed:
6 – 33.2 watt – 12v 5 – 27.4 watt – 11v 4 – 18.9 watt – 9.3v 3 – 11.1 watt – 7.3v 2 – 4.7 watt – 4.8v 1 – 2.2 watt – 3.0v I won’t dive into power costs here because those vary greatly depending on where you reside, but I hope these specifications can give some insights. What’s most impressive to me is how much range this device has, whether we are discussing volume or power draw. There is such a large range that you can choose exactly what setting works best for you and leave the device to it.
The AirFanta 3Pro costs $149 or $159 (USD) depending on whether you opt for the CE-certified or CARB-certified version (the CARB variant is the lower priced of the two). It’s surprising to see a different price on these two units, but I assume it’s due to extra costs, either with the CE certification or getting the device into Europe. Either way, if you’re in the U.S. (or any non-EU country), the CARB variant will work, and that’s the model I received.
In the box, you will get six panels to assemble the 3Pro. This includes four HEPA H11 filters, which, as per AirFanta, should be good to last 6-12 months, depending on air quality conditions. In most cases, I would assume these filters will last closer to 12 months, but those who experience severe wildfire seasons or whose homes are exposed to consistent year-round pollution may need to replace the filters more regularly.
When you need your first filter replacement, you can opt for the default H11 filters or H11 filters with activated carbon. Interestingly, it doesn’t seem you can choose the filters you get with the device initially. If you want activated carbon filters from the get-go, you must purchase the device alongside an extra pack of filters. The activated carbon filters will set you back $74.99 compared to the basic filters, which cost $54.
The filters aren’t cheap, but it’s important to remember that each filter replacement pack you order has four individual filters, which is a substantial amount of filter materials. It’s also important to note that, unfortunately, you will need to purchase official AirFanta filters as they are smaller than most square HEPA filters, and other filters will not fit on this device. I don’t think this is a big deal, as I appreciate the smaller form factor of this device over larger devices, and even four HEPA filters from other brands will not be cheap.
If we estimate that most users use each set of filters for around nine months, your yearly filter costs for non-activated carbon filters will be $67.5. On the other hand, if you opt for the extra VOC adsorption of the carbon filters, you are looking at an ongoing cost of just under $100 per year. This is in a similar price range to other equally performant air purifiers, and this device’s initial cost is also much lower.
While power cost also needs to be factored into the ongoing cost equation, that cost will vary significantly depending on your air purifier usage (hours, speed, etc) and location. However, regardless of usage patterns, you should plan to spend between $67 and $100 on replacement filters for this device every year.
Overall, I’ve been very happy with the AirFanta 3Pro. While it’s not a perfect air purifier – if one even exists – this is a fantastic device that balances many difficult factors. Ultimately, it comes in as an affordable air purifier that doesn’t skimp on performance. In fact, it has a higher CADR than many more (and much more) expensive air purifiers. Furthermore, it offers a wide range of speeds that allow the user to choose the ideal balance between speed and sound for the setting.
I’ve always been a fan of the CR box concept, but I think the AirFanta 3Pro takes this a step further and, due to this, will appeal to many more people. While I’ve never had an issue constructing CR boxes, I often have difficulty sourcing the parts (especially good filters), and I appreciate how the 3Pro can provide the same or better performance at a slightly higher price while also simplifying the shopping process for me.
Surprisingly, for a device of this size, it’s also quite portable, and you will be hard-pressed to find anything that provides a higher CADR than this device while also being ‘packable’. While I still wouldn’t go so far as to say it can fit in a backpack, it can definitely fit in a car or suitcase and is ideal for longer trips where you might be staying in hotels with unknown air quality. If, on the other hand, you want to use it around the house, it’s also a great device.
The biggest disadvantages I see with the AirFanta 3Pro are the sound and the design. There’s no denying that while the device is powerful, it’s also loud at its higher speeds. While this isn’t unusual for an air purifier, it is worth noting that you probably won’t want to run this device at its higher speeds unless necessary. I usually find myself using speed 2 or 3, which is the sweet spot for most users. On the upside, the lower speeds are almost silent, and although they significantly diminish performance, they are good for users who are okay with constantly running the device.
The design may also bug some users. While I don’t mind (and actually like) the device’s industrial design, I know some people don’t use CR boxes due to the design. If you don’t like the look of CR boxes, the chances are you also won’t like the design of this device. With that said, this design allows this device to have such a good price-to-performance ratio, and I think many potential customers will appreciate this more.
Overall, the AirFanta 3Pro is a cost-effective air purifier that should be on your radar – especially if price is a concern. If you’ve tried the 3Pro, I would love to hear your thoughts, so please feel free to use the comments section below! Furthermore, if you have any remaining questions, please don’t hesitate to as,k and I will do my best to reply. Thank you for reading.
Pros: High CADR (413 cfm) for effective air purification Affordable compared to similar high-performance devices Pre-assembled CR box design simplifies setup Portable and compact for travel use Certified for safety (UL507, CE-EMC, FCC, CARB) Cons: Loud at higher speeds Design may not appeal to all users (industrial look) Limited to proprietary filters, increasing costs No activated carbon filters included in basic kit
#mask up#public health#wear a mask#pandemic#wear a respirator#covid#still coviding#covid 19#coronavirus#sars cov 2
146 notes
·
View notes
Text
Why Your Business Needs an Exhaust Blower for Peak Performance
Is your workspace struggling with poor air quality, excessive heat, or dangerous fumes? An exhaust blower might be the game-changing solution your business has been missing. These powerful air-moving systems do not just clear the air – they create safer, more productive environments that benefit both your workers and your bottom line.
🏭 What Makes Exhaust Blowers Essential for Modern Businesses
An exhaust blower is a specialized ventilation system designed to remove contaminated air, heat, smoke, and harmful particles from enclosed spaces. Unlike regular fans, these industrial-grade machines create powerful suction that actively pulls unwanted air out of your facility while promoting fresh air circulation.
Think of it as your facility's breathing system – constantly working to maintain optimal air quality and temperature control. From manufacturing plants to commercial kitchens, blower exhaust systems have become indispensable for maintaining safe, compliant work environments.
✅ Key Benefits That Transform Your Workplace
Enhanced Worker Safety and Health
Removes toxic fumes, dust, and chemical vapours before they can harm employees
Reduces respiratory issues and workplace-related illnesses
Creates OSHA-compliant environments that protect your team
Improved Equipment Performance
Prevents overheating of machinery and electronics
Reduces corrosion from humidity and chemical exposure
Extends the lifespan of expensive industrial equipment
Energy Efficiency and Cost Savings
Modern blower wheels are engineered for maximum airflow with minimal energy consumption
Reduces HVAC strain by removing excess heat at the source
Lowers insurance premiums through improved safety ratings
Regulatory Compliance Made Simple
Meets environmental and safety standards automatically
Reduces risk of costly violations and shutdowns
Demonstrates commitment to environmental responsibility
📦 How Blower Exhaust Systems Work Their Magic
The science behind effective ventilation is surprisingly straightforward. Exhaust blowers use specially designed blower wheels that create negative pressure within your facility. This suction effect draws contaminated air through collection points and expels it safely outside, while fresh air naturally flows in to replace it.
Modern systems can be customized with clear page protectors and filtration systems that capture specific pollutants before they are released, ensuring your business meets all environmental regulations while protecting surrounding communities.
The key is proper sizing and placement. Professional installation ensures your blower exhaust system operates at peak efficiency, providing maximum air movement with minimal noise and energy consumption.
🔧 Choosing the Right System for Your Needs
Not all exhaust blowers are created equal. Consider these factors when selecting your system:
Airflow Requirements: Calculate your facility's cubic feet per minute (CFM) needs based on size and contamination levels.
Power and Efficiency: Look for systems with high-performance blower wheels that deliver maximum airflow while minimizing energy costs.
Durability: Industrial environments demand robust construction that can handle continuous operation and harsh conditions.
Maintenance Accessibility: Choose systems with clear page protectors and easy-access components that simplify routine maintenance and reduce downtime.
🎯 Industries That Benefit Most
Manufacturing facilities rely on exhaust blowers to remove metal dust, chemical vapours, and heat generated by production processes. Restaurants and commercial kitchens use them to eliminate grease, smoke, and cooking Odors. Laboratories depend on these systems to safely handle hazardous chemicals and maintain sterile environments.
Even offices and retail spaces benefit from improved air quality and temperature control, leading to happier employees and customers.
Ready to Breathe Easy?
Page Protectors, based in Pomona, CA, specializes in manufacturing premium air-moving equipment designed to meet the unique needs of businesses across industries. Our expert team can assess your facility and recommend the perfect exhaust blower solution for your specific requirements.
Act today – contact Page Protectors for a free consultation and discover how the right ventilation system can transform your workplace into a safer, more efficient, and more profitable operation.
Frequently Asked Questions
Q: How often should I maintain my exhaust blower system?
A: Most systems require basic maintenance every 3-6 months, including cleaning blower wheels and checking clear page protectors. Professional inspections should be conducted annually to ensure optimal performance and compliance.
Q: Can exhaust blowers help reduce my energy costs?
A: Absolutely! By removing excess heat at the source, your HVAC system works less to maintain comfortable temperatures. Modern blower exhaust systems are designed for energy efficiency, often paying for themselves through reduced utility bills.
Q: What size exhaust blower do I need for my facility?
A: System sizing depends on your facility's square footage, ceiling height, and contamination sources. A professional assessment will determine the right CFM rating and blower wheel specifications for maximum effectiveness.
Q: Are exhaust blowers noisy?A: Modern systems are engineered for quiet operation. Quality blower wheels and proper installation minimize noise while maximizing airflow, ensuring your system will not disrupt daily operations.

2 notes
·
View notes
Note
question on the air purifiers! when they give the square footage do they only mean it in like one open space or throughout multiple rooms? my whole house is maybe 900ft². could I get say one airmega 250 and just put it in the central hall (living room/kitchen is on one end and the bedrooms and bathroom are at the other end) or would I need to get like a unit for each room?
With the disclaimer that I am not an expert in air purification and have not had the time or energy to research this as much as I'd like, the short answer to your question is that you'd probably want multiple air purifiers (or a much bigger/better one) for your space. The long answer is that there are several factors you'd need to take into account when choosing a purifier, including:
Air Changes per Hour (ACH): When air purifier companies list a unit's square foot coverage, almost all of them (including Coway) list the coverage for one air change per hour at the highest fan speed. Especially if your goal is to reduce the concentration of airborne viruses in your space, you want 4-6 ACH at minimum. The Coway Airmega 250 can offer 1 ACH at 1,860 sq. ft., 2 at 930, and 4 at 465. This means it does an amazing job of filtering the air in my 120 square foot office, but you'd probably want at least two of them in your 900 square foot living space. (Note: Your HVAC system will also contribute to the overall ACH in a space, though you may not have access to all the data needed to calculate how much air it's moving or how good the filter is.)
Clean Air Delivery Rate (CADR): CADR/CFM math makes my brain hurt, but essentially, CADR is basically a reflection of the air flow (CFM) times the efficiency of the air filter. It's a measure that makes it easier to compare air purifiers without being misled by marketing (see above). Generally, you want a filter with a CADR that equals at least two-thirds of a room's area, and a smoke CADR (if provided) is the best proxy for a filter's ability to clear virus particles from the air. The Airmega 250's smoke CADR is 249, meaning it'll be most effective in a room no larger than 370-ish square feet.
Noise: CADR and ACH tend to be measured based on the device's highest fan speed. In my personal experience, most decent air purifiers with multiple speed settings are near-silent at level one, audible but tolerable at level 2, and sound like jet engines at level 3+. Coway is not exempt from this judgment, though I've found their purifiers to be quieter than most for their size. Unless you are profoundly unbothered by white noise, you'll likely want to run the purifier below its max fan speed, which means you can expect slightly lower CADR and ACH than advertised.
Unit Position (and walls): Air purifiers are most effective if you place them near the middle of an open space, as opposed to in a corner or near a wall. If your house is essentially an open-concept square, one purifier in a central area (maybe something a little heftier than an Airmega 250) might be sufficient to rid the air of most allergens and provide some protection from airborne viruses. However, if you have a lot of walls and doors and/or want better protection, you're better off getting a couple of purifiers and spreading them out.
I hope this info is helpful! It's a bummer that adequate air filtration is so expensive, but at the end of the day, even one decent-sized purifier in one section of your house will make some measurable difference in your health and well-being. And if your primary concern is COVID, not environmental allergies or air pollution, remember that opening windows is free!
Further reading: https://tools.niehs.nih.gov/wetp/public/hasl_get_blob.cfm?ID=13021
#asks#anon#covid#air quality#air purifier#I am not sponsored by coway I just really like their air purifiers#and I've spent a small fortune of my own money filling my office with them so my colleagues don't give me their plagues#and I can eat indoors during the increasingly frequent extreme weather events that prevent me from eating outside#I hate this timeline
6 notes
·
View notes
Text
Choosing the Right Industrial Fan and Blower for Malaysian Factories
In Malaysia’s industrial landscape, where heat, humidity, and airborne contaminants often challenge operational efficiency, the role of industrial fans and blowers is crucial. Whether it's for ventilation, cooling, drying, or air pollution control, selecting the right fan or blower can dramatically improve working conditions, protect equipment, and boost overall productivity.
This guide will help Malaysian factory managers and engineers make informed decisions when choosing industrial fans and blowers for their facilities.
Understanding the Difference: Fans vs. Blowers
Although the terms are often used interchangeably, fans and blowers serve different purposes.
Industrial Fans: These move air at relatively low pressure and high volume. They're typically used for general ventilation, cooling, and air circulation in factories.
Industrial Blowers: These are designed for higher pressure applications and are used where airflow needs to overcome resistance, such as in ducted systems, combustion air supply, or dust collection.
Knowing the fundamental difference is the first step to selecting the right equipment.
Key Factors to Consider When Choosing
1. Application Needs
Different industries require different types of airflow. For example:
Electronics factories require clean, cool air to prevent overheating.
Food processing plants may need humidity control and odour removal.
Chemical plants must manage fumes and hazardous gases.
Start by evaluating your factory’s specific air movement requirements—whether it's cooling, exhaust, dust removal, or process air.
2. Airflow and Pressure Requirements
Understanding how much air needs to be moved (measured in CFM—cubic feet per minute) and at what pressure (measured in static pressure or Pascals) is essential. Malaysian factories operating in high-temperature environments may need fans with high airflow, whereas operations involving ducts or filters may require blowers with higher pressure ratings.
Consult with an HVAC engineer or use fan selection software to calculate accurate specifications.
Types of Industrial Fans and Their Uses
Axial Fans
Axial fans are best suited for moving large volumes of air with low resistance. They are ideal for:
General ventilation
Cooling electronics or machinery
Wall- or roof-mounted exhaust systems
Use case in Malaysia: Many electronics and assembly factories use axial fans for ambient cooling.
Centrifugal Fans
These are designed to handle higher pressure conditions. They are commonly used in:
Dust collection systems
Fume extraction
HVAC duct systems
Use case in Malaysia: Manufacturing facilities dealing with sawdust, metal shavings, or chemical fumes often rely on centrifugal fans for air filtration and safety.
Types of Industrial Blowers and Their Applications
Positive Displacement Blowers
These blowers maintain a constant airflow regardless of pressure variations. They’re suitable for:
Pneumatic conveying
Wastewater treatment
Vacuum operations
Use case in Malaysia: Palm oil processing plants and wastewater facilities use these blowers for their consistent performance under varying loads.
Centrifugal Blowers
Similar in function to centrifugal fans but built for higher pressure. Used in:
Boiler combustion air supply
Material handling
Industrial drying systems
Use case in Malaysia: Cement and steel plants employ these blowers for heavy-duty air movement and process requirements.
Considerations for the Malaysian Climate and Industry
Malaysia's tropical climate adds another layer of complexity to selecting the right fan or blower. High temperatures and humidity levels increase the risk of overheating, mould growth, and equipment corrosion. Here’s how to address it:
Material selection: Opt for corrosion-resistant materials like stainless steel or coated aluminium.
IP-rated enclosures: Ensure motors and controls are protected from dust and moisture.
Energy efficiency: In a market with rising energy costs, look for fans and blowers with energy-efficient motors (IE2 or IE3 ratings).
Additionally, with Malaysia's push for sustainability, many manufacturers are investing in variable speed drives (VSDs) to regulate fan/blower performance based on real-time demand—leading to lower energy consumption.
Maintenance and Durability
Factory environments can be harsh on equipment. Choose industrial fans and blowers that are:
Easy to clean and maintain
Designed for continuous operation
Fitted with reliable bearings and seals
Partnering with a local Malaysian supplier that offers after-sales service and spare parts is also crucial for long-term operational efficiency.
Compliance with Malaysian Standards
Industrial ventilation systems must comply with safety and environmental standards set by DOSH (Department of Occupational Safety and Health) and DOE (Department of Environment). Ensure the fan or blower system meets local guidelines for:
Noise levels
Emission control
Workplace air quality
Check for product certifications or approvals to ensure compliance with these regulatory requirements.
Conclusion
Choosing the right industrial fan and blower for your Malaysian factory is not a one-size-fits-all decision. It requires careful consideration of the application, performance requirements, environmental factors, and compliance standards. Investing in the right system can significantly improve air quality, employee comfort, safety, and energy efficiency—key drivers of productivity in today’s competitive manufacturing landscape.
Working with reputable suppliers in Malaysia who understand local industrial needs can make all the difference. With proper selection and maintenance, your fan and blower systems will serve your factory efficiently for years to come.
0 notes
Text
Industrial Ducting Supplies: Essential Components for Heavy-Duty Ventilation and Airflow Systems
In manufacturing plants, warehouses, and commercial facilities, effective air movement is critical for safety, efficiency, and compliance. That’s where industrial ducting supplies come in—offering durable, high-performance components designed to withstand high volumes of air, dust, fumes, and heat in demanding environments.
Whether you're designing a new industrial ventilation system or upgrading an existing one, selecting the right ducting supplies is key to ensuring optimal performance, long-term durability, and regulatory compliance.
What Are Industrial Ducting Supplies?

Industrial Ducting Supplies refer to the range of products and components used to build air distribution systems in industrial environments. These systems handle ventilation, air conditioning, heating, exhaust, and dust or fume extraction.
They include:
Galvanized steel or stainless steel ducting
Flexible industrial duct hoses
Flanges, elbows, reducers, and connectors
High-temperature and chemical-resistant ducting
Support brackets, hangers, and clamps
Industrial-grade dampers, valves, and filters
Each component is designed to cope with extreme conditions such as high temperatures, corrosive substances, high static pressure, and heavy particulate loads.
Applications of Industrial Ducting Supplies
Industrial ducting systems are widely used in:
Manufacturing facilities
Chemical plants
Welding and fabrication shops
Dust collection systems
Commercial kitchens
Mining operations
HVAC systems in large commercial buildings
From fume extraction in welding stations to Industrial Ducting Systems suppression in woodworking shops, the right ducting setup protects workers, improves air quality, and ensures operational efficiency.
Key Considerations When Choosing Industrial Ducting Supplies

🏗️ Material Compatibility
Choose ducting materials that can withstand your operational environment—e.g., stainless steel for corrosive settings, aluminum for lightweight systems, or PVC for chemical resistance.
💨 Airflow and Pressure Rating
Ensure the ducting can handle the required air volume (CFM) and static pressure. Undersized or poorly sealed ducting leads to inefficiencies and safety risks.
🔥 Temperature Resistance
High-temperature ducting is essential in facilities dealing with hot air, steam, or exhaust fumes.
🧩 System Configuration
Use the correct fittings—reducers, elbows, and dampers—to maintain smooth airflow and minimize turbulence.
📏 Compliance and Safety
Industrial systems must meet workplace health and safety standards, including AS/NZS, OSHA, or EPA regulations, depending on your location.
FAQs About Industrial Ducting Supplies
Q1: What is the difference between residential and industrial ducting supplies? A: Industrial ducting is built for high-capacity, heavy-duty use. It typically uses thicker gauge metals, chemical-resistant materials, and larger diameters than residential systems.
Q2: Can industrial ducting be custom-made? A: Yes. Many suppliers offer custom fabrication for complex layouts, unusual dimensions, or specific materials like stainless steel or fire-resistant composites.
Q3: How do I calculate the right duct size for my industrial application? A: Duct sizing depends on airflow (CFM), velocity, and pressure loss. Consult with an HVAC engineer or use duct design software for accurate specifications.
Q4: Is flexible ducting suitable for industrial use? A: Industrial-grade flex ducting is available and suitable for specific tasks like temporary setups, dust extraction, or fume ventilation, provided it meets strength and temperature requirements.
Q5: Where can I purchase industrial ducting supplies? A: You can buy from HVAC suppliers, industrial equipment retailers, or direct from manufacturers. Always ensure they meet relevant industry standards and offer after-sales support.
Conclusion
Industrial ducting supplies are the foundation of any effective commercial ventilation or air movement system. From heavy-duty metal ductwork to chemical-resistant flexible hoses, every component plays a critical role in maintaining air quality, safety, and operational efficiency in demanding environments.
Whether you're managing a large facility or planning a new installation, investing in the right industrial ducting ensures long-term performance and compliance. Partner with trusted suppliers, get expert advice, and ensure your systems are built to handle the rigours of industrial use.
0 notes
Text
Why Powerful Restaurant Fans Are Critical for Commercial Kitchen Safety and Success
In the high-stakes environment of a commercial kitchen, maintaining proper ventilation isn’t just a luxury—it’s a necessity. A powerful restaurant fan is your first line of defense against excess heat, lingering odors, airborne grease, and even regulatory violations. For industrial business owners and restaurant operators across the USA, installing a high-performance Central Blower exhaust fan can mean the difference between seamless operations and costly downtime.
🔥 The Heat Is On: Why Ventilation Matters
Commercial kitchens generate intense heat from fryers, grills, ovens, and steamers. Without an efficient restaurant fan, hot air becomes trapped, creating an uncomfortable—and unsafe—environment for kitchen staff. Proper commercial kitchen ventilation ensures:
Temperature regulation for better working conditions
Removal of smoke and steam
Elimination of airborne contaminants
Reduced fire hazard and grease buildup
A well-placed and properly sized exhaust fan from Central Blower can dramatically improve airflow and air quality.
🦠 Odor & Grease Control: Don’t Let Your Kitchen Be the Culprit
Cooking fumes, oil vapors, and lingering smells can easily infiltrate your dining area or neighboring businesses. Poor ventilation often leads to:
Customer complaints
Violations from local health departments
More frequent (and expensive) cleanings
Using a restaurant exhaust fan designed specifically for commercial kitchen ventilation helps extract these pollutants efficiently—especially when combined with a well-maintained hood system.
✅ Stay Compliant with Health and Safety Codes
U.S. building and fire safety codes mandate commercial kitchens maintain adequate airflow to prevent fire hazards and ensure safe working conditions. Central Blower’s fans are engineered to meet or exceed these standards, making compliance easier.
🔍 Pro Tip: Download our free ventilation compliance checklist to audit your current kitchen system.
🔧 What Makes a Central Blower Exhaust Fan Stand Out?
Central Blower is trusted by restaurant chains, hotels, and industrial kitchens nationwide. Their restaurant fans are:
Built with durable, corrosion-resistant materials
Capable of high CFM output to match large kitchen demands
Customizable for roof, wall, or inline mounting
Designed to minimize noise and vibration
💡 Air Exchange Rate Calculator: Use this simple tool to determine the right size fan for your kitchen space.
🤔 Q&A: Common Questions About Restaurant Fans
Q: How often should I run my restaurant exhaust fan? A: Ideally, your fan should run continuously while cooking is happening to ensure consistent ventilation.
Q: How do I know if my current fan is underperforming? A: Signs include excess heat, visible smoke, strong odors, greasy surfaces, and higher energy bills.
Q: What’s the difference between a residential and a commercial restaurant fan? A: Commercial fans, especially those from Central Blower, are designed to handle higher heat, larger volumes of air, and are compliant with commercial codes.
📈 The Business Case: Ventilation That Pays Off
Proper ventilation improves employee morale, reduces HVAC costs, and prevents the buildup of grease on expensive equipment. Investing in a high-quality Central Blower exhaust fan enhances productivity and protects your bottom line.
✅ Quick Checklist for Restaurant Fan Evaluation
Is your current fan rated for commercial use?
Do you notice lingering odors or smoke during peak hours?
Are you struggling with frequent HVAC repairs?
Have you had any recent health code issues?
Is your equipment over 5 years old?
If you’ve checked two or more boxes, it may be time to upgrade to a Central Blower restaurant fan.
📞 Call to Action
Ready to upgrade your restaurant’s ventilation system? Don’t wait for your next inspection or customer complaint.
👉 Explore Central Blower’s full range of restaurant fans and speak with a ventilation expert today!
restaurant fan
commercial kitchen ventilation
Central Blower exhaust fan
commercial kitchen fire prevention
best restaurant fan
kitchen air quality
exhaust system
cooking ventilation
0 notes
Text
What is the Real Cost of Owning a Laser Cutter Machine in the USA?
Investing in a laser cutting machine is a major decision for any shop or manufacturing operation. While the sticker price of a new SLTL cutting machine ranges from USD 90,000 to USD 250,000 depending on power and bed size, the true cost of ownership extends far beyond that initial purchase. In this article, we’ll break down the key factors—purchase price, installation expenses, facility requirements, operating costs, consumables, maintenance, and depreciation—to help you calculate total cost of ownership (TCO) for a laser cutter in the USA.
1. Initial Purchase Price
SLTL cutting machines come in a variety of configurations. Entry-level systems (1 kW–2 kW, 4 ft × 4 ft beds) typically start around USD 90,000. Mid-range machines (2 kW–4 kW, 4 ft × 8 ft or 5 ft × 10 ft beds) run from USD 120,000 to USD 160,000. High-end systems (6 kW–12 kW, 6 ft × 12 ft or 8 ft × 20 ft beds) can exceed USD 250,000. Factors that influence price include:
Laser Power (kW): Higher power means faster cutting and thicker-plate capability but costs more.
Bed Size (ft × ft): Larger beds require more steel and larger motion systems, increasing frame and gantry costs.
Automation and Material Handling: Features like automatic sheet loaders or robotic unloaders can add USD 20,000–USD 50,000.
Control Software and Optics: Advanced nesting software, IoT monitoring, and premium optics packages add another USD 5,000–USD 20,000.
Brand, Warranty, and Service: SLTL machines include standard warranties, but extended warranties and nationwide service contracts add USD 10,000–USD 20,000 annually (Source: https://www.laseruser.com/laser-equipment/laser-cutting-machines-pricelist/ and https://www.sltl.com/en-in/products/laser-cutting-machine-fiber).
. Installation and Training
Once the machine is purchased, installation and training costs must be factored in:
Site Preparation: You may need concrete floor reinforcement, a dedicated 3-phase electrical cut-in (480 V), and compressed-air hookups. Costs can range from USD 5,000 to USD 15,000, depending on local contractor rates and the complexity of electrical upgrades.
Machine Setup and Calibration: Professional installation by factory-trained technicians typically runs USD 5,000–USD 10,000. This includes leveling, alignment, testing, and basic adjustments to ensure optimal cut performance.
Operator and Maintenance Training: On-site training for operators and maintenance staff adds USD 3,000–USD 7,000. Comprehensive training cuts down learning curves, reduces early-stage errors, and improves uptime (Source: https://www.sltl.com/en-in/services/laser-machine-installation-training).
3. Facility and Utilities
Laser cutters have specific facility requirements beyond standard workshop space:
Space Requirements: A 4 ft × 8 ft laser table needs roughly 15 ft × 20 ft of clear floor area for the machine, operator access, and material handling. Larger machines (6 ft × 12 ft beds) require 20 ft × 30 ft or more. Real-estate costs vary widely; in some regions, industrial rent can exceed USD 1.50 per square foot per month.
Electrical Consumption: A medium-duty 2 kW fiber laser system typically consumes 25–30 kW during cutting. Running an 8 hr shift at USD 0.10 per kWh equates to about USD 20–USD 24 daily in electricity. Over 250 operating days, that’s roughly USD 5,000–USD 6,000 per year. Higher-power lasers (6 kW–10 kW) can double or triple those figures.
Cooling and HVAC: Fiber lasers use closed-loop water chillers or industrial chillers. A dedicated chiller can consume 5 kW–10 kW continuously, adding another USD 1,000–USD 2,500 annually in electricity. HVAC modifications—such as increased air conditioning capacity—can add USD 3,000–USD 8,000 to initial capital costs.
Fume Extraction: Proper ventilation is mandatory. A 600–800 CFM extraction unit with multi-stage filters costs USD 2,000–USD 5,000. Annual filter replacements and duct cleaning add USD 1,000–USD 2,000 per year (Source: https://www.accurl.com/blog/fiber-laser-cutting-safety/).
4. Consumables and Operating Costs
Your laser cutter relies on various consumables that wear out or require regular replacement:
Nozzles and Protective Glass: Nozzles typically last 100–300 hours depending on material and power settings. At USD 100–USD 200 per nozzle, and assuming 2–3 nozzles replaced monthly, that’s USD 2,400–USD 7,200 annually. Protective cover glasses run USD 50–USD 100 each; you may change one per month, costing USD 600–USD 1,200 per year.
Focus Lenses and Mirrors: OEM focus lenses cost USD 1,000–USD 2,000 and often last 800–1,200 cutting hours. Plan on one replacement every 5–8 months in heavy use, i.e., USD 1,500 × 2 = USD 3,000 annually. High-quality mirrors also degrade, costing USD 1,500–USD 2,500 each; replacing mirrors once a year could add USD 1,500–USD 2,500.
Assist Gases: Cutting mild steel usually uses oxygen; stainless steel and aluminum require nitrogen. High-purity nitrogen (99.998 percent) costs USD 1.50–USD 3.00 per cubic foot. A 2 kW system might use 50–100 scfh during cutting. Over 2,000 cutting hours, that equates to USD 9,000–USD 18,000 annually. Some shops use nitrogen generators to reduce costs, but generator capital can be USD 20,000–USD 40,000 with maintenance expenses.
Electricity for Running the Laser Source: As covered above, estimate USD 5,000–USD 6,000 per year for a 2 kW system; a 6 kW system could consume USD 15,000–USD 18,000 yearly.
Combined annual consumable and operating costs for a mid-range 4 kW laser could reach USD 30,000 or more (Source: https://www.laseruser.com/laser-equipment/laser-cutting-machines-pricelist/).
5. Maintenance and Service Contracts
Regular maintenance keeps your machine running reliably, but it carries its own costs:
Preventive Maintenance Visits: Factory technicians typically charge USD 1,500–USD 3,000 per visit, and recommended schedules are twice a year for medium-use machines. That’s USD 3,000–USD 6,000 annually.
Spare-Part Kits: Annual spare-part kits (including O-rings, seals, sensors, filters) cost USD 2,000–USD 5,000 depending on machine complexity.
Service Contracts: Extended service agreements covering travel, labor, and parts often start at USD 10,000–USD 20,000 per year. These contracts guarantee response times (4 hr–8 hr) and may include software updates, on-site repairs, and wear-part discounts.
If you skip a service contract, unplanned service calls can cost USD 5,000–USD 10,000 per visit, plus lndustrial Laser Cutting Machines | USA Sheet Metal Cutter
ost production.
Source: https://www.sltl.com/en-us/services/laser-machine-maintenance/
6. Depreciation and Financing
The capital cost of a laser cutter is depreciated over its useful life (5–7 years for tax purposes). Depreciation expense can be USD 15,000–USD 50,000 per year depending on machine price. If financed, interest charges add to overall cost:
Depreciation (Straight Line): A USD 150,000 machine depreciated over 7 years yields an annual depreciation of USD 21,428.
Lease or Loan Interest: If you finance USD 150,000 over 5 years at 5 percent interest, total interest paid is approximately USD 20,000, or USD 4,000 yearly (Source: https://www.sba.gov/funding-programs/loans).
Thus, annual non-cash costs (depreciation + interest) for a USD 150,000 machine could be USD 25,428.
7. Total Cost of Ownership (TCO) Example
To illustrate, consider a mid-range SLTL 4 kW, 5 ft × 10 ft machine purchased at USD 160,000. Below is a rough TCO estimate for Year 1:
Annual Cost Breakdown:
Depreciation (7 years): $22,857
Loan Interest (5 years at 5%): $3,000
Electricity (20 kW average draw): $10,000
Chiller Electricity (7 kW): $2,500
Assist Gas (Nitrogen + Oxygen mix): $12,000
Nozzles and Cover Glass: $4,000
Focus Lenses and Mirrors: $4,500
Filters, Seals, and Other Consumables: $3,000
Preventive Maintenance Visits: $5,000
Service Contract: $15,000
In this example, the first-year TCO approaches USD 260,357—well above the USD 160,000 purchase price. Subsequent years (excluding installation and facility mods) may run roughly USD 80,000–USD 100,000 annually depending on usage (Source: https://www.accurl.com/blog/fiber-laser-cutting-safety/ and https://prathamtech.com/blogs/use-original-spare-parts/).
8. Optimizing Your TCO
Match Power to Your Needs: Avoid over-specifying power. A 2 kW system may suffice if you rarely cut beyond 12 mm steel.
Invest in Automation: Higher upfront costs for loaders and part unloaders pay off if labor is expensive and you need high uptime.
Budget for Consumables: Negotiate bulk-purchase discounts on nozzles, lenses, and filters. Consider nitrogen generators if cutting large volumes of stainless.
Schedule Preventive Maintenance: Stick to OEM recommendations to prevent costly unplanned repairs.
Monitor Energy Usage: Use variable frequency drives (VFDs) on chillers and ensure proper system insulation to reduce power draw.
Conclusion
The real cost of owning a laser cutter in the USA extends well beyond the purchase price of USD 90,000–USD 250,000. When you factor in installation, facility upgrades, utilities, consumables, service contracts, depreciation, and financing, annual TCO can exceed USD 80,000–USD 100,000 for a mid-range system. Careful planning—matching machine power to your application, investing in preventive maintenance, and managing consumable usage—will help you optimize your investment and ensure a strong return over the life of your SLTL laser cutting machine.
0 notes
Text
Choosing the Best Air Breather Filter for Industry
How to Select the Right Air Breather Filter for Industrial Use
Industrial hydraulic systems face harsh operating environments and high demands for performance and reliability. In such settings, even the smallest component can make a major impact—and air breather filters are a prime example. These filters play a crucial role in keeping contaminants out of hydraulic reservoirs, maintaining fluid cleanliness, and preventing costly system failures.
At Techknow Engineering Enterprise, we've seen far too many equipment breakdowns traced back to the wrong or neglected air breather filters. Selecting the correct breather for your specific application isn't just good practice—it's essential. The right filter extends equipment life, reduces downtime, and safeguards your investment in high-performance machinery.
Let’s explore the key considerations to help you choose the ideal air breather filter for your industrial operation.
Understand the Role of Air Breather Filters
First, it’s important to grasp what air breather filters actually do. As hydraulic systems operate, fluid levels in the reservoir rise and fall due to thermal expansion and system movement. This causes air to move in and out of the reservoir. Without proper filtration, airborne contaminants like dust, dirt, and moisture can enter the system during this process.
Over time, these contaminants degrade the hydraulic fluid and cause wear on pumps, valves, and seals. Air breather filters act as the first line of defense—removing particles and, in some cases, moisture from incoming air to keep the system clean.
Techknow Engineering Enterprise always starts system diagnostics by evaluating filtration quality—because contamination is often the root cause of failures.
Assess Environmental Conditions
Your operating environment should guide your filter selection. Not all air breather filters are created equal, and using the wrong type can do more harm than good.
Dusty and Dirty Environments
If your facility or field equipment operates in dusty areas—such as mining, construction, or agriculture—you’ll need filters with a fine particulate rating. Look for filters that can trap particles as small as 3 to 5 microns.
High-Humidity or Marine Settings
In humid environments or near saltwater, standard breather filters won’t suffice. You’ll need desiccant air breather filters, which absorb moisture before it reaches the reservoir. These are ideal for offshore rigs, shipyards, and open-air storage tanks.
At Techknow Engineering Enterprise, we recommend desiccant models with color indicators so users can easily monitor saturation and schedule timely replacements.
Consider Flow Rate and Reservoir Size
The capacity of the air breather filter must match the airflow requirements of the system. Undersized filters can restrict air exchange, creating vacuum pressure in the reservoir that stresses seals and reduces performance.
Check the reservoir’s displacement volume and select a filter that allows for adequate airflow during peak operation. Most manufacturers provide airflow ratings in cubic feet per minute (CFM) or liters per minute (LPM).
Our experts at Techknow Engineering Enterprise help clients calculate proper sizing to avoid the common mistake of overloading a filter beyond its capacity.
Match Filter Mounting to System Design
Compatibility with your reservoir is crucial. Air breather filters come in various mounting styles:
Threaded: Most common for industrial tanks, offering secure attachment.
Bayonet: Quick-release type for easy maintenance.
Flanged: Used on larger systems or in high-vibration environments.
Techknow Engineering Enterprise can customize mounting adapters when clients need to upgrade filtration systems without altering their existing tank designs.
Choose Between Standard and Desiccant Models
Deciding between a standard particle filter and a desiccant model depends on your specific risks.
Standard Filters: These remove airborne dirt and dust. Suitable for indoor use or controlled environments.
Desiccant Breathers: These include a moisture-absorbing gel, typically silica-based. The gel changes color as it absorbs water vapor, providing a visual signal for replacement.
For most outdoor or variable-climate industrial applications, desiccant air breather filters offer superior protection and peace of mind.
Techknow Engineering Enterprise maintains a full inventory of both types and helps clients decide based on their exact needs and budget.
Evaluate Maintenance Requirements
Different air breather filters have varying maintenance intervals. Some are disposable, while others are serviceable or refillable.
Disposable Filters: Easy to replace but generate recurring costs.
Refillable Desiccant Filters: Economical over time but require manual replacement of the desiccant beads.
Spin-On Types: Like automotive filters, these are easy to remove and replace during routine servicing.
We recommend setting up a maintenance schedule based on system hours, environmental exposure, and manufacturer guidelines. At Techknow Engineering Enterprise, we also offer preventive maintenance kits and training for in-house teams.
Factor in Cost vs. Performance
While cost is always a consideration, cutting corners on filtration is a gamble. A low-cost filter may not offer sufficient protection, leading to contamination that damages components worth tens of thousands of rupees.
Always weigh the cost of the air breather filter against the potential cost of downtime, part replacement, and fluid changes. In our experience at Techknow Engineering Enterprise, clients who invest in higher-quality breathers save significantly in the long run through improved system uptime and fewer repairs.
Choosing the right air breather filter isn’t just about plugging a hole in your reservoir. It’s about engineering your system for optimal protection and performance. With guidance from Techknow Engineering Enterprise, you can ensure your filtration solution matches your industry’s demands, keeping your hydraulic systems running smoothly and efficiently.
0 notes
Text
youtube
How Business Owners Should Pay Themselves How Business Owners Should Pay Themselves | Easy Formula. Many business owners struggle with paying themselves properly, either taking random draws or sacrificing their own paycheck. This video breaks down a simple, proven method for setting up a consistent owner salary without starving your business. Learn how to calculate a starting pay based on your revenue, cover essential expenses, and leave enough for taxes and future growth. Discover why predictability matters more than paycheck size at first, how to create a 3-month cash flow forecast, and how to set up structured profit distributions. Following this system will help reduce stress, keep your household finances stable, and make your business more sustainable over the long term. Build yourself a reliable paycheck today and start leading your business like a pro. #businessownerpay #howtopayyourself #entrepreneurfinance #smallbusinesspay Please visit my website for more information and join the Clear Path to Cash Program: https://ift.tt/Gy6h9N3 🔔𝐃𝐨𝐧'𝐭 𝐟𝐨𝐫𝐠𝐞𝐭 𝐭𝐨 𝐬𝐮𝐛𝐬𝐜𝐫𝐢𝐛𝐞 𝐭𝐨 𝐦𝐲 𝐜𝐡𝐚𝐧𝐧𝐞𝐥 𝐟𝐨𝐫 𝐦𝐨𝐫𝐞 𝐮𝐩𝐝𝐚𝐭𝐞𝐬. https://www.youtube.com/@CashFlowMikeMilan/?sub_confirmation=1 PROMO CODE: CFM&x% ✅ Important Link to Follow 🎧 Listen To My Podcasts Here! https://ift.tt/CltWQhv 🔗 Stay Connected With Me. Facebook: https://ift.tt/gcSmKtw Facebook Group: https://ift.tt/vFBEM3V Instagram: https://ift.tt/sDKeBqR Twitter (X): https://ift.tt/aNJwfs7 LinkedIn: https://ift.tt/8ctHSpo Website: https://ift.tt/Gy6h9N3 ============================= 🎬Suggested videos for you: ▶️ https://www.youtube.com/watch?v=vl5ufYNcMfw ▶️ https://www.youtube.com/watch?v=_xEKQLv3Wro ▶️ https://www.youtube.com/watch?v=JE7bluT1QQg ▶️ https://www.youtube.com/watch?v=5gkiOBaAqvU ▶️ https://www.youtube.com/watch?v=hYw04efn_eI ▶️ https://www.youtube.com/watch?v=LZetepoe8BE ▶️ https://www.youtube.com/watch?v=D4jjpuiPdbE ▶️ https://www.youtube.com/watch?v=IK2v-guhZrw ▶️ https://www.youtube.com/watch?v=CsL333jgJ5E ▶️ https://www.youtube.com/watch?v=vlijux-Ho6g ▶️ https://www.youtube.com/watch?v=ar-Hz3KP7iw ▶️ https://www.youtube.com/watch?v=CwLd3YcW0qI ▶️ https://www.youtube.com/watch?v=vBBTbMTUrV8 ▶️ https://www.youtube.com/watch?v=WtHXrAKNixA ▶️ https://www.youtube.com/watch?v=73_3WKn-Ivw ================================= ✅ About Cash Flow Mike. Welcome to Cash Flow Mike! I’m Mike Milan, aka Cash Flow Mike, a top-rated financial instructor helping thousands of professionals sharpen their skills and deliver lasting value. I believe accountants, bookkeepers, and business advisors can transform businesses when they know how to turn numbers into actionable insights. Clients don’t just need reports, they need clarity, growth strategies, and real cash flow solutions. Here, you’ll learn the Clear Path to Cash framework to cut through financial confusion, uncover hidden cash, and guide smarter decisions. Communicate numbers with impact and become the trusted advisor your clients truly need. Join me and elevate your advisory game. 🔔 Hit subscribe and stay tuned for powerful cash flow strategies, advisory services, startup tips, and real-world financial education! https://www.youtube.com/@CashFlowMikeMilan/?sub_confirmation=1 ================================= 🔎 Related Phrases: Hashtags https://www.youtube.com/watch?v=q00Y442T2Jg via Cash Flow Mike https://www.youtube.com/channel/UCr_RxZsQpP1parnO9vvQKNQ April 28, 2025 at 11:33PM
#cashflow#businessadvisor#financialadvisor#smallbusinesstips#businessfinance#financialplanning#entrepreneur#cashflowmike#Youtube
0 notes
Text
Is it like weird that I don't have some fucking divine purpose for going to college. Like my interest that I am pursuing is getting a degree. I'm not here because I'm trying to change the world. Like yesterday I was listening to the WTYP podcast and Mark "Hyce" Huber said that a lot of his friends in mechanical engineering calculate how many CFM of air need to be evacuated from a train tunnel so you don't fucking die from asphyxiation. Like that's the big thing they do. They aren't designing skyscrapers they are calculating how not to kill people, and then getting ignored because doing it right is expensive.
0 notes
Text
Beat the Heat Without Breaking the Bank: Understanding Evaporative Cooling Installation Costs in Melbourne
Melbourne summers. They’re notorious. Scorching days can leave you feeling drained and uncomfortable in your own home. But before you resign yourself to a season of misery, consider the refreshing relief of evaporative cooling. It's a fantastic alternative to traditional air conditioning, offering a cost-effective and energy-efficient way to keep your home cool. However, understanding the investment involved is crucial. So, let’s delve into the factors affecting Evaporative Cooling Installation Melbourne costs, helping you make an informed decision for your comfort and your wallet.
One of the first questions homeowners ask is about the upfront investment. When comparing cooling solutions, it's vital to consider the long-term benefits. While initial costs are a factor, evaporative cooling often proves more economical in the long run due to lower running costs. Remember, a well-planned installation can provide years of comfortable, cool air. As an alternative, for those considering other systems, it's important to research the specific installation costs. Split Air-Conditioning Installation Melbourne can vary greatly depending on the unit type, the complexity of the installation, and the number of units required.
Navigating the world of home cooling can be complex. When deciding on a cooling system, a professional assessment is invaluable. They can tailor a solution to your home's specific needs and budget. To ensure optimal performance and energy efficiency, it's crucial to prioritize proper installation. Evaporative Cooling Installation Melbourne needs to be handled by skilled professionals, like the team at Hitech Air Solution, who understand the intricacies of the system and can ensure its correctly fitted for maximum benefit.
Factors Influencing Evaporative Cooling Installation Costs
Several key elements determine the final price tag for your evaporative cooling installation. Understanding these factors will empower you to have a more productive conversation with potential installers and secure the best possible deal:
System Size and Capacity: The size of your home and the number of rooms you want to cool will directly impact the size and capacity of the evaporative cooling unit needed. Larger homes require larger, more powerful systems, which naturally translates to higher installation costs. Installers will typically calculate the necessary airflow (measured in cubic feet per minute, or CFM) based on your home's square footage and layout.
Roof Type and Accessibility: Evaporative coolers are typically installed on the roof. The type of roof you have (tile, metal, or shingles) and its accessibility can influence the complexity and therefore the cost of the installation. Roofs that are difficult to access or require specialized equipment for safe installation will likely result in higher labor charges.
Ductwork: The existing ductwork in your home plays a crucial role. If you already have a well-maintained ductwork system, the installation process will be simpler and less expensive. However, if your ductwork is old, damaged, or inadequate for the new system, it may need to be repaired or replaced, adding to the overall cost. New ductwork installation is a significant expense.
Brand and Model: Different brands and models of evaporative coolers come with varying price points. High-end models often boast superior energy efficiency, advanced features, and longer warranties, justifying a higher initial investment. Research and compare different options to find the best balance between price and performance for your needs.
Additional Features and Upgrades: Consider whether you want any additional features or upgrades, such as zoning (allowing you to control the temperature in different areas of your home independently), smart home integration, or advanced filtration systems. These additions will naturally increase the installation cost.
Labour Costs: Labour charges can vary significantly depending on the installer's experience, reputation, and overhead costs. It's wise to obtain quotes from multiple reputable companies to compare pricing and ensure you're getting a fair deal. Always prioritize qualified and licensed technicians.
Permits and Compliance: In Melbourne, you may need permits for evaporative cooling installation, depending on your local council regulations. Factor in the cost of these permits and ensure that your chosen installer is familiar with the relevant building codes and compliance requirements. A reputable installer will handle the permit process for you.
Getting Accurate Quotes and Avoiding Hidden Costs
To ensure you receive accurate and transparent quotes, follow these tips:
Get Multiple quotations: Request at least three quotations from various installers. This allows you to compare pricing and assess the level of service and professionalism offered by each company.
Request a Detailed Breakdown: Ask for a detailed breakdown of the installation costs, including the price of the unit, ductwork modifications (if needed), labor charges, permit fees, and any other associated expenses. This will help you identify any hidden costs or unexpected charges.
Check References and Reviews: Before hiring an installer, check their references and read online reviews to gauge their reputation and customer satisfaction.
Verify Licensing and Insurance: Ensure that the installer is licensed and insured to protect yourself from liability in case of accidents or damages during the installation process.
Ask About Warranties: Inquire about the warranties offered on both the evaporative cooling unit and the installation workmanship. A broad warranty offers peace of mind and protects your investment.
Long-Term Savings and Benefits
While the initial installation cost is a consideration, remember to factor in the long-term savings and benefits of evaporative cooling. These systems typically consume significantly less energy than traditional air conditioners, resulting in lower electricity bills. Furthermore, evaporative cooling uses water as its primary cooling agent, making it a more environmentally friendly option. Investing in evaporative cooling can be a smart move for Melbourne homeowners seeking a cost-effective and energy-efficient way to beat the summer heat. By understanding the factors influencing installation costs, obtaining accurate quotes, and considering the long-term savings, you can make an informed decision that benefits both your comfort and your budget. Remember to choose a reputable and experienced installer like Hitech Air Solution to ensure a seamless and successful installation process.
#gas ducted heating installation melbourne#aircon installation company melbourne#gas ducted heating melbourne#air conditioning maintenance melbourne#split air-conditioning installation melbourne#duct work installation melbourne#aircon repair shop melbourne#heating repair melbourne#reverse cycle ducted heating and cooling melbourne#air conditioning repair melbourne
0 notes
Text
How to take up perfect the Right Industrial Air Compressor

In industrial operations, efficiency and reliability are essential to success. A well-chosen industrial air compressor can greatly improve productivity while reducing downtime and costs. But how do you choose the right industrial air compressor for your needs? With the various technologies and different types of compressors available, choosing the correct one can be confusing and oftentimes overwhelming. Selecting the perfect industrial air compressor for your application requires careful consideration of several factors. These include the required air pressure, the air volume based on airflow and pressure needs, the level of air quality demanded by your application, energy efficiency requirements, the operating environment, and the intended use in industrial processes. Whether you’re a factory owner, a workshop manager, or involved in heavy-duty applications, understanding these factors will help you get the most out of your investment. Let’s take a look in depth!
What is an industrial air compressor?
An industrial air compressor is a versatile machine that converts power into compressed air, providing energy for various tools, machines, and systems. From powering pneumatic tools to aiding in assembly lines, these compressors are the backbone of many industries. Industrial compressor manufacturers facilitate different types of compressors and sizes, each tailored to specific needs. Understanding their features and benefits is essential for selecting the right one.
A comprehensive guide to choosing the right industrial air compressor
Understand your operational needs
The first step in selecting the perfect industrial air compressor is determining your operational requirements. Ask yourself the following:
What is the intended application? Different tasks require varying levels of compressed air. For example, painting jobs may need steady air pressure, while heavy machinery might require high-flow capabilities.
How much air do you need? Air volume, measured in Cubic Feet per Minute (CFM), determines the compressor’s ability to sustain operations. Calculate the total CFM required by all tools and add a buffer for future needs.
What pressure is necessary? Air pressure, measured in Pounds per Square Inch (PSI), must meet or exceed the requirements of your tools or machines. Industrial applications generally require higher PSI levels.
Types of industrial air compressors
Industrial air compressors come in several types. Choosing the right one depends on your specific use case:
Reciprocating compressors
Ideal for smaller-scale or intermittent applications.
Use pistons to compress air.
Affordable but may require frequent maintenance.
Rotary screw compressors
Best for continuous, high-demand operations.
Use two rotors for air compression.
Low maintenance and energy-efficient.
Centrifugal compressors
Suitable for large-scale industries.
Use impellers for compression, offering high flow rates.
Highly durable but costly upfront.
Consider energy efficiency
Energy costs contribute to the overall expenses of operating an industrial air compressor. Opting for energy-efficient models can help reduce long-term costs.
Variable speed drives (VSDs): Compressors with VSDs adjust motor speed to match air demand, saving energy during low-demand periods.
Energy certifications: Look for certifications that show compliance with energy-saving standards.
Oil-free vs. oil-lubricated compressors
Choosing between oil-free and oil-lubricated compressors depends on the nature of your industry:
Oil-lubricated compressors:
Robust and ideal for heavy-duty tasks.
Require regular oil changes and maintenance.
Commonly used in automotive and manufacturing industries.
Oil-free compressors:
Deliver contaminant-free air, making them essential for food processing, pharmaceuticals, and electronics.
Lower maintenance costs but may have a higher initial investment.
Size and storage capacity
An appropriately sized air compressor ensures optimal performance without unnecessary energy consumption. Consider the following:
Tank size:
Larger tanks are better for applications requiring continuous air supply.
Smaller tanks are suitable for short, periodic tasks.
Space restrictions:
Ensure the compressor fits within your workspace without compromising accessibility for maintenance.
Noise levels and workplace environment
Industrial air compressors can be noisy. If your operations are in a noise-sensitive environment, look for models with sound-dampening features or low-noise ratings. Some industrial compressor manufacturers offer chambers to reduce noise without affecting performance.
Maintenance and availability of air compressor parts
Regular maintenance is essential for the longevity and efficiency of your air compressor. When selecting a model, consider:
Ease of maintenance:
Choose a design with easily available air compressor parts.
Ensure that the industrial compressor manufacturers provide detailed maintenance guides.
Availability of air compressor parts:
Check the local availability of spare parts.
Work with industrial compressor manufacturers that offer strong after-sales support.
Budget and cost calculation
Balancing initial investment with long-term costs is important:
Initial cost: While high-quality compressors may cost more upfront, they often have better efficiency and durability.
Operating costs: Energy consumption, maintenance, and repairs can add to the overall cost.
Warranty and service plans: A comprehensive warranty can protect your investment.
Industry-specific needs
Certain industries have unique requirements for air compressors:
Food and beverage: Oil-free compressors to prevent contamination.
Automotive: High-pressure compressors for spray painting and tire inflation.
Manufacturing: Reliable, continuous-duty compressors to power assembly lines.
Contact with industrial compressor manufacturers
When in doubt, reach out to reputable industrial compressor manufacturers like www.indoair.com. They can provide expert advice, tailored solutions, and meetups to ensure the chosen compressor meets your needs.
Wrapping up:
Choosing the right industrial air compressor is about understanding your needs, evaluating the options, and balancing cost with functionality. By considering factors such as application requirements, energy efficiency, compressor type, and maintenance needs, you can make an informed decision. Partnering with reliable industrial compressor manufacturers ensures you receive a product that enhances productivity and reduces operational challenges. With the right industrial air compressor, your operations will be smoother, more efficient, and ultimately more profitable. Start exploring your options today and invest in a solution that powers your success.
0 notes