#Cosplay Tutorial
Explore tagged Tumblr posts
Visit Tumblr Blog
Explore Tumblr blogs with no restrictions, modern design and the best experience.
Last Seen Tumblr Blogs


Fun Fact
The KCSC sent more than 20K requests to delete posts related to prostitution and porn to Tumblr from January to June 2017.
Text
How to Make: Electronic Wings for Cosplay
Hello Everyone! It's been a while since I last uploaded a written tutorial on here and since I just finished and wore my Dame Aylin cosplay this last weekend it seemed appropriate to jump back in with a tutorial on one of the costume pieces!
Her wings were the star of the show this weekend and I know a lot of people were curious about how I made them! A huge source of knowledge and inspiration behind these wings was this video by Axceleration, I made a few changes to the frame shape and electrical circuitry for mine but her tutorial was a huge stepping stone to give me the confidence to tackle them myself!
Health and Safety:
When working with Sintraboard (as well as other thermoplastics) it is incredibly important you wear a respirator as well as goggles when heating, moulding and cutting it. The fumes this plastic will give off when heated up are no joke! Make sure you're in a well-ventilated space!
Basic tool safety knowledge is also really important! wearing gloves when using power tools can be more dangerous in most situations, so always be aware of where your hands are vs where the tools are. Always cut away from yourself and take things slowly, don't panic.
Electrical safety! You're working with live wires and circuitry! make sure your hands are dry, you aren't touching the bare wires at any point when they are connected to a power source, and if you choose to solder anything, make sure you're wearing heat-proof gloves and a mask in a ventilated space!
Tools
Wire stripper
Screwdriver and wrench
Dremel - I recommend the Dremel 3000 rotary tool personally! Some essential Dremel bits you'll need for this include, a sanding bit, drill bit (smaller or same size as your screws/bolts), and a small/narrow cutting bit. These will usually come with the Dremel!
Heat Gun (A hairdryer will not get hot enough to heat the Sintraboard!!)
Pipe cutter (alternatively you can use a hacksaw for this!)
Hacksaw
Ruler
Scissors (for cutting fabric straps)
Materials
Heat shrink Tubing
2 core electrical wire
switch (you want a three position, six pin switch, like this one, even better if it has the Screws on the pins! otherwise you'll need a soldering kits to solder the wires to the pins.
2x 8AA 12v Battery Holders
2x 12v Linear Actuators (Mine had a stroke length of 100mm)
21.5mm PVC Pipes (I got 2x 3m Lengths)
2x 21.5mm PVC Pipe straight couplers
6mm 8"x12" Sintraboard
Nuts/Bolts/Screws (I used M5 bolts for the base & Actuator connectors and M6 screws to attach the hinges to the pipes! You'll need Washers for every Nut & Bolt!)
Hinges (I used 2.5cm wide hinges that were skinny but long so they would just about fit along the PVC pipe! 3" gate hinges would work!)
50 metre Polythene Jiffy foam roll (in retrospect this was ALOT of foam, you could definitely get away with maybe a 20-30 metre roll! I now have a load leftover XD)
16 AA Batteries (I used 16 and had enough for the whole day with them on, I think They'd probably be enough for another half a day-full day too! but have spares just in case!)
Webbing strap ( I went for grey to match my base suit colour!)
Buckle - as wide as the webbing strap you use!
3 metres of white cotton fabric (or whatever colour wings youre going for!)
Optional
Zipties (for cleaning up the wires)
Lets Go!
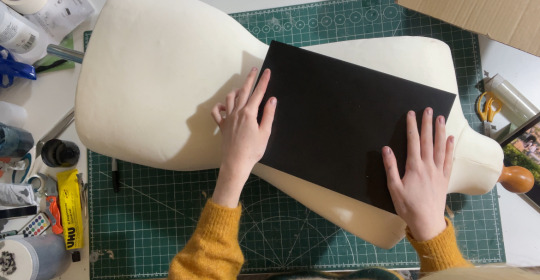
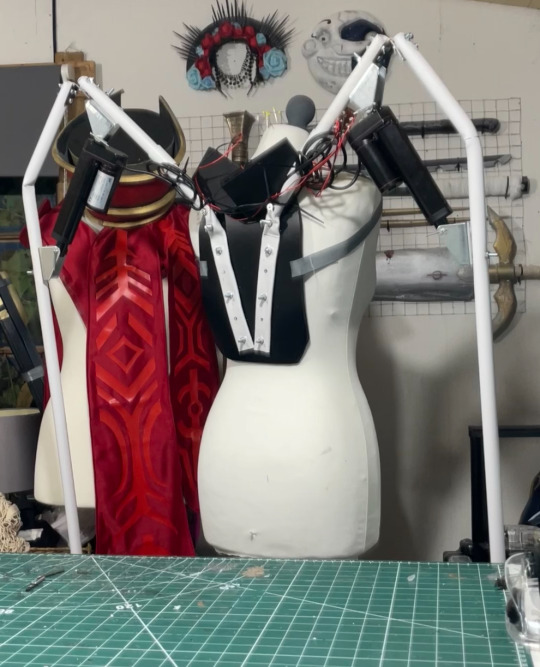
Sintraboard is this wonderfully stable thermoplastic that is relatively easy to cut into (with the right tools) and when heated allows you to mould its shape! I started by using a mannequin and heating the Sintraboard with a heat gun for a few minutes to make it pliable, I recommend using gloves for this part as the materials gets VERY HOT! Press the board into the shape of the mannequin's back, taking note of the edges especially! you want this board to sit as comfortably to your body shape as possible as it makes a huge difference to how long you can wearing the wings for in this backplate is comfy!
Once shaped, I placed it against my back to make sure it was a good fit, heating again and making any alterations I needed (again don't place bright hot plastic to your bare skin! wear protective clothes and wait till its slightly cooler to do this, with the help of a friend!). I then took a hacksaw and rounded the corners, before sanding the edges with my Dremel! Try to avoid cutting off loads, just enough to make things less likely to snag.
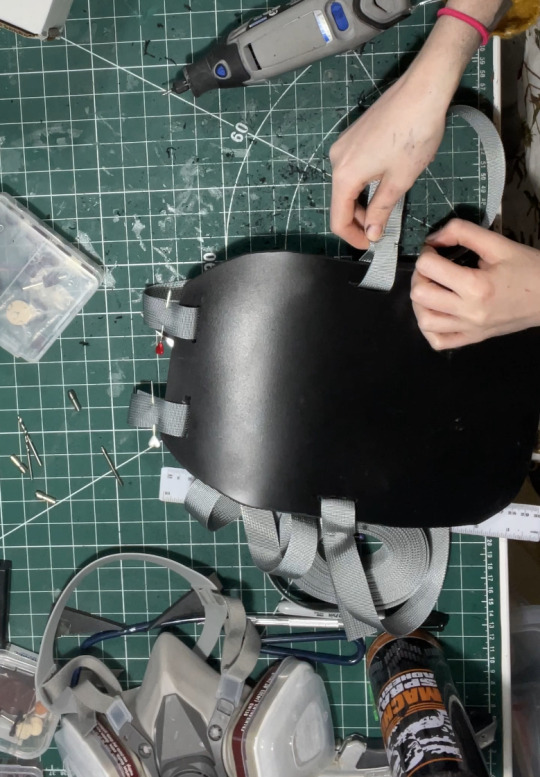
3. I then cut in four holes, wide enough to feed my webbing strap through, two at the top and one on either side below where my arms would sit! I measured the webbing strap by firstly feeding them through the top holes and pinning them, and then bring the strap over my should to everything sits where it should and seeing where the strap hits the side hole and cutting the length there! you'll also want a strap that attaches across the chest, meeting in the centre with a buckle!
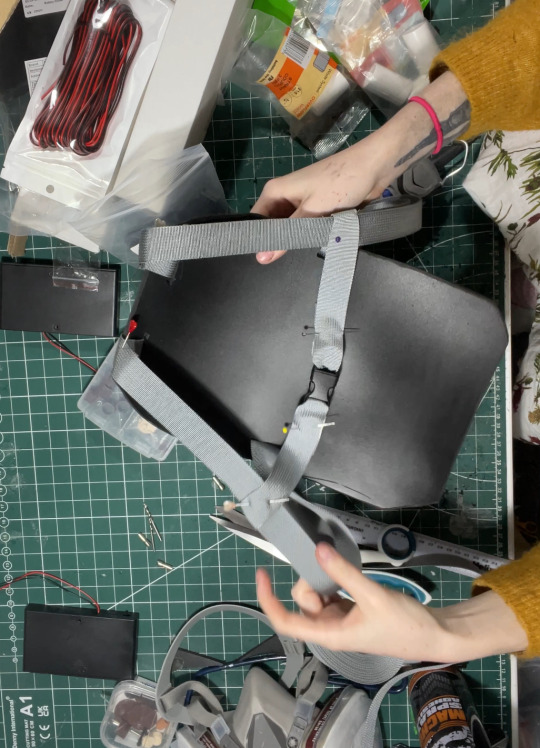
4. After sewing the straps closed I was able to move onto the PVC pipe structure! This may change slightly depending on the finished shape you want but I needed the PVC pipes to come out from inside a breastplate so had a particularly angle as well as character references to work with! I began by heating the pipe over my heat gun and flattening a portion of it under a heavy object so it would sit much more flush against the backboard and sit better underneath my breastplate before moving onto securing the first portion of the structure to the backplate. This mainly involved lots of try-ons and measuring to make sure the angles were correct and symmetrical and was quite fiddly but well-worth the effort! I'll include a diagram of the general shape I went with below:
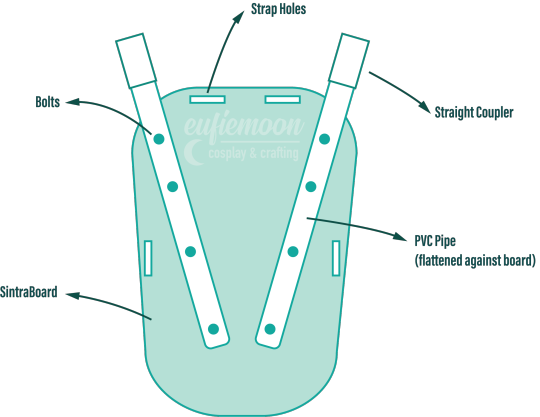
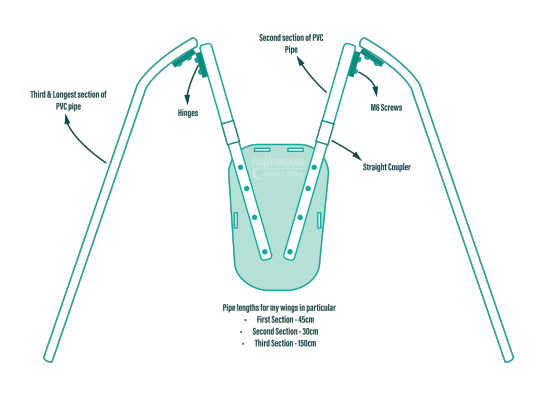
5. I wanted my wings to be relatively modular for ease of travel so I needed to make sure certain portions of them could come away from other parts easily, so I popped a straight coupler on the top of the pipes that were attach to the breastplate, this also meant I could slot the breastplate over these shorter pipes and wear everything correctly! Then these second pipes slot on and at the other end they are attached via hinges to the longest portion of the pipe 'skeleton', Diagram below:
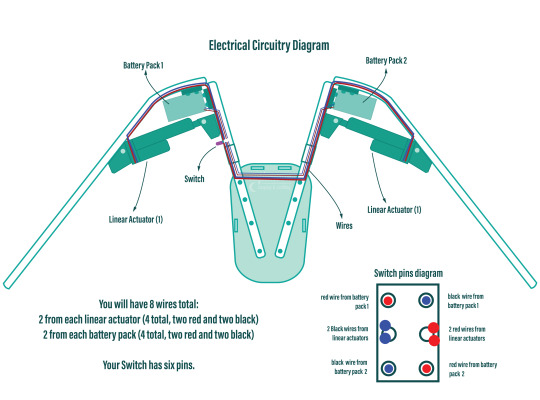
6. Now that the skeleton was put together, it's time for the electrical stuff! It's a good idea to figure out where your circuit is going to lay on the skeleton - consider if you want the battery packs mounted the the backplate or, like me, put them inside the actual wings in removeable pockets for easy access and removal for battery changes. all your wires will go through the switch so deciding where you want to place that is very important! Mine was placed just over my shoulder on the front side, mounted to the PVC pipe with a metal cover I drilled a hole into to slip the switch through and then drill through the pipe.
I've included another diagram below that explains all the electrical circuitry, including which wires go on which pins on the switch!
Important to note: The linear actuators need to be placed and bolted into the PVC pipes at *exactly* the same angle on each side, any slight deviation will lead to the wings going up wonkily! So take your time and make as many adjustments as necessary.
7. You can extend your wires by adding on the electrical wire, just match the colours, and put heat shrink tubing over the connections to hide the live wires! I ended up zip-tying the wires into organised bundles once the wings were done to help keep everything safe from snags.
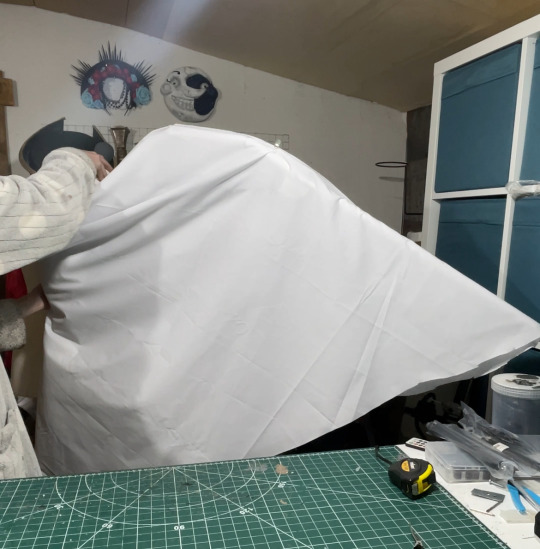
8. Now its time for the Wings themselves! I drafted my base pattern by just draping the white cotton fabric I had over the wing when it was fully extended. I then pinned the wings to the shape I wanted them to be along the bottom before cutting along the pins. I ran the fabric through my sewing machine to close the bottom edge, leaving a gap wide enough by the wing base so I could slip the wing on and off, closing it with velcro. I also added little fabric pockets inside of these to hold my battery packs, which also connected via velcro for easy removal!
9. Now that I had a wing base I was able to begin making feathers! I cut out a total of 800 feathers out of polythene jiffy roll for these wings, in 6 different styles and using real life bird wings to dictate the shapes I used and where I placed them. I ended up hot gluing every individual feather onto the white fabric base, going row by row until every side was covered, the wing covers themselves are super light because of the foam feathers and they shine light through them in a really magical way!
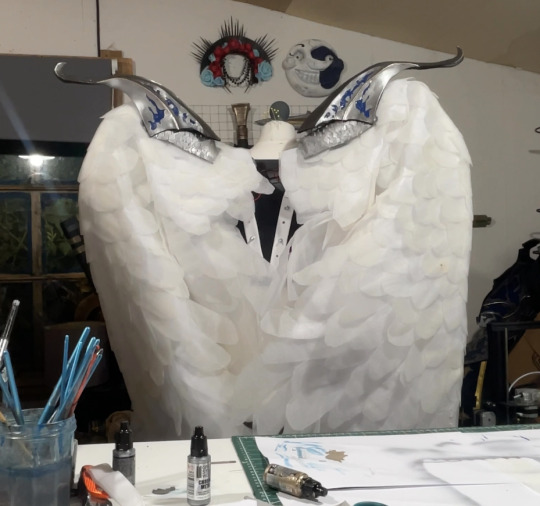
Optional: I also ended up going over these feathers with my airbrush and some super light beige paint to help darken the shadows, this is entirely optional and may change depending on the wings you're looking to make!
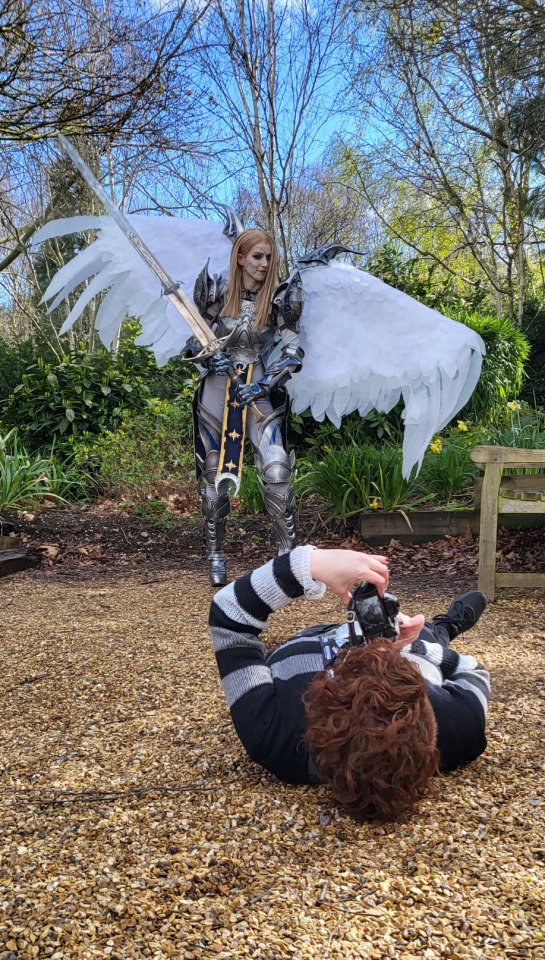
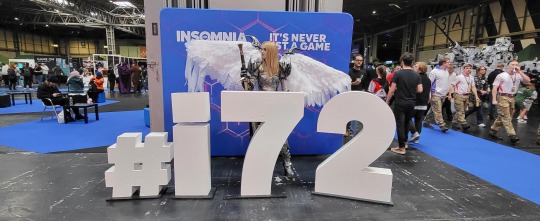
When in neutral position and in extended position the wings looks like this:

Mine had a wingspan of about 7ft total when fully extended but when in neutral position they were fairly close to my own proportions! mainly staying behind me and weren't much of a problem in a packed con hall!
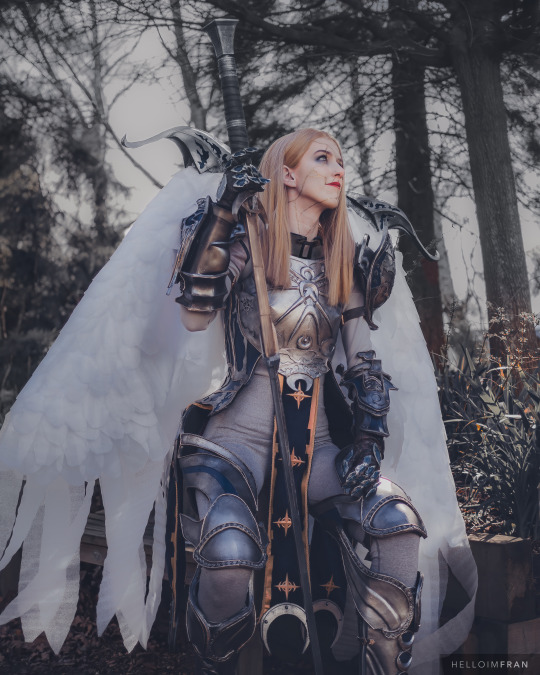
Photo by: Helloimfran (on Instagram and Twitter)
I hope this tutorial helped and if there are any questions about anything in specific don't hesitate to reach out at [email protected] or on my instagram or twitter (@eufiemoon)
Happy Crafting!

#cosplay#cosplayer#cosplaying#baldurs gate iii#baldur’s gate 3#baldurs gate 3#bg3#dame aylin#aylin x isobel#bg3 aylin#cosplay tutorial#Wings#fantasy#tutorial#cosplay help#cosplay tips
167 notes
·
View notes
Text


“You foolish fools who foolishly admire foolish cosplay… behold! Exhibit A: this full transformation video.” ⚖️
📣 Power 😢 Public breakdown 🧠 Cold, calculated planning 💢 Precision.
Which version of Franziska do you fear admire the most?
#franziska von karma#ace attorney cosplay#phoenix wright#ace attorney#the opal empress#capcom cosplay#cosplay photography#ace attorney fandom#Cosplay Drama#von karma#逆転裁判#phoenix wright ace attorney#ace attorney fanart#justice for all#ace attorney justice for all#Franziska Von karma cosplay#ace attorney art#ace attorney video#cosplay makeup#cosplay video#cosplay transformation#cosplay tutorial#cosplay#狩魔冥コスプレ#コスプレ#狩魔冥#逆転裁判2#逆転裁判コスプレ
21 notes
·
View notes
Text
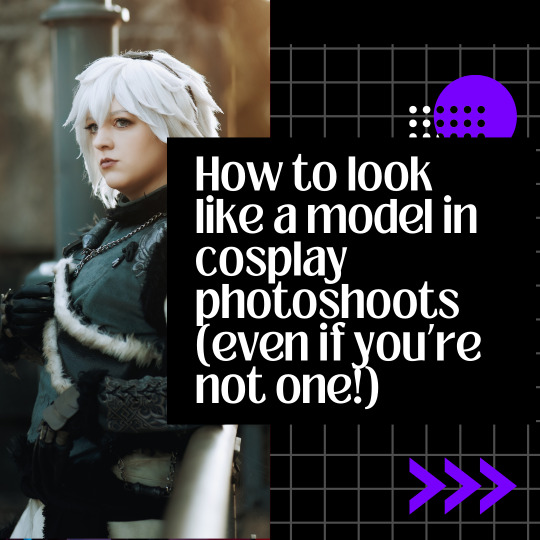
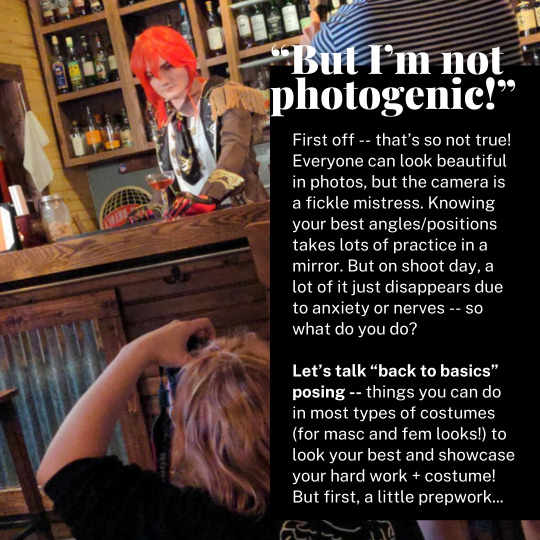
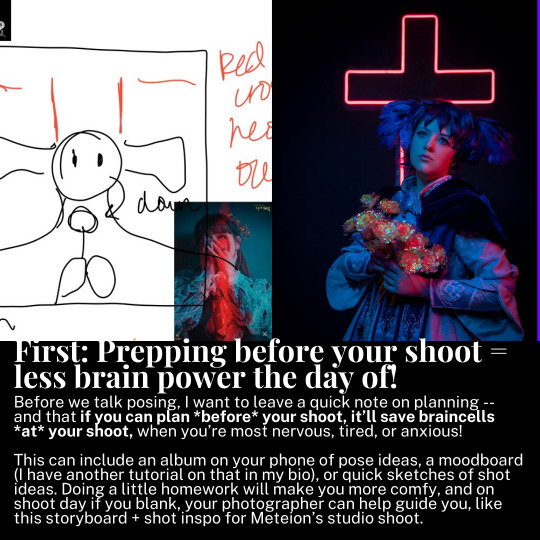
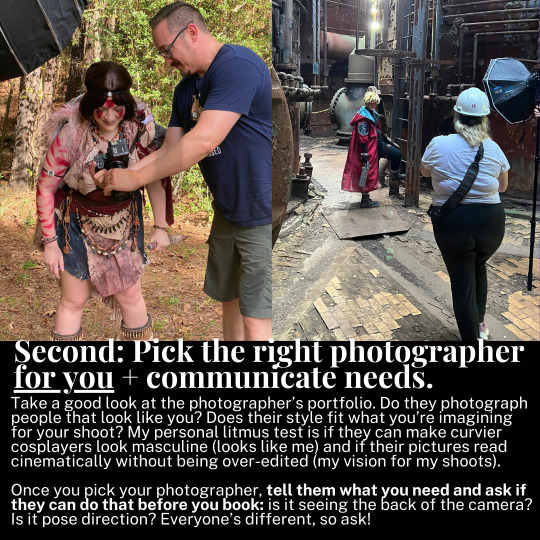

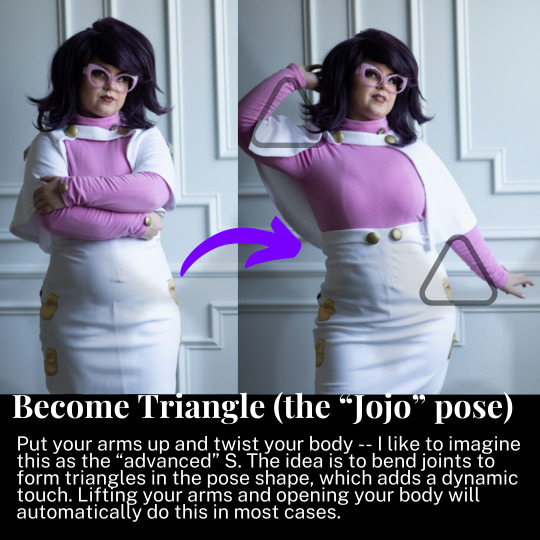

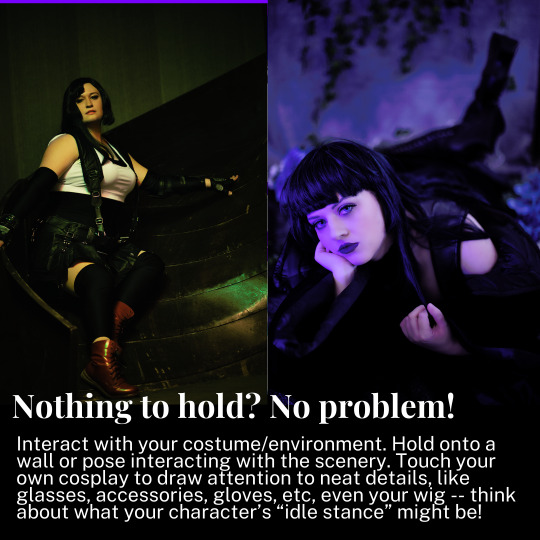
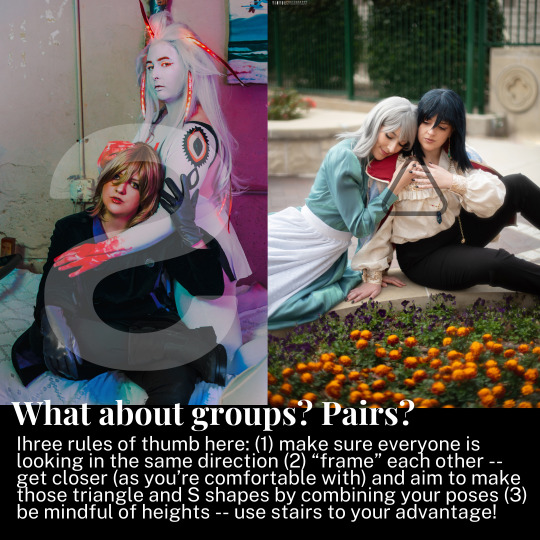
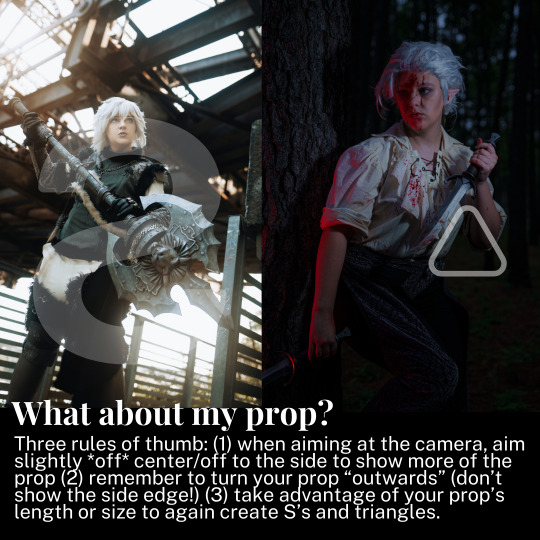
A cosplay tutorial on how to pose for photoshoots, no matter what you look like and what you're wearing -- with example shots to help guide you along.
313 notes
·
View notes
Text
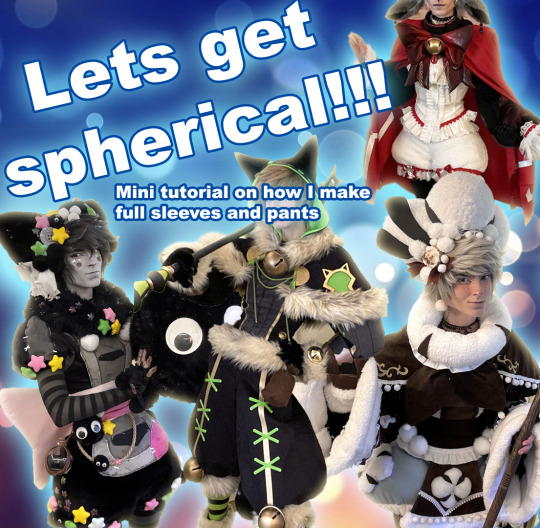
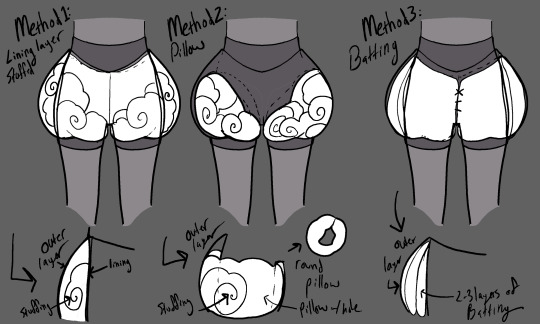
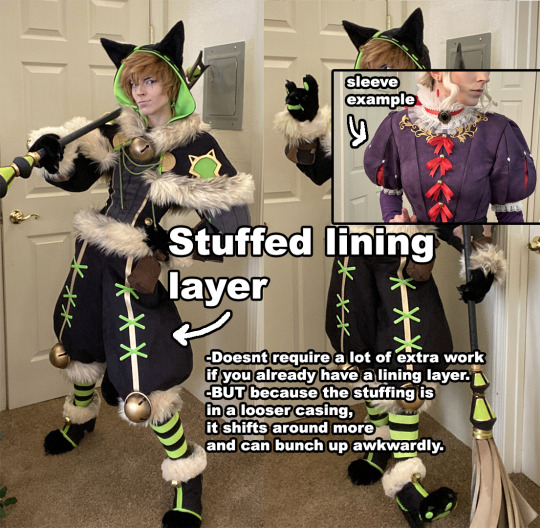
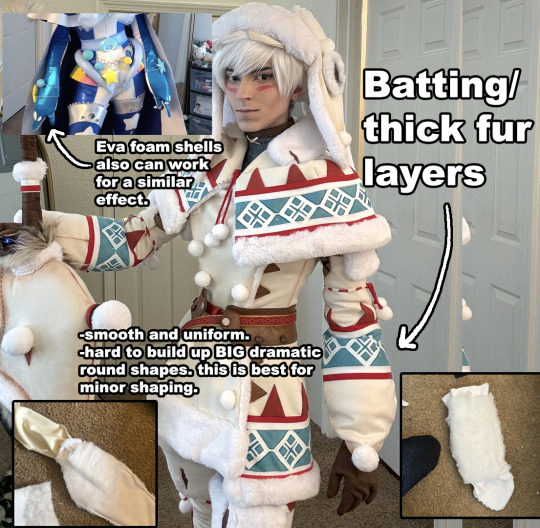
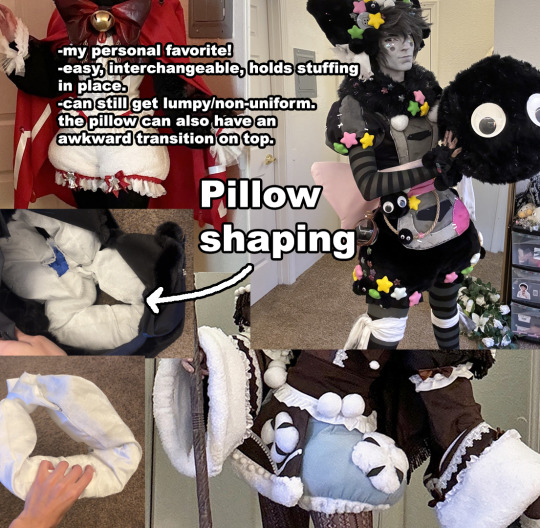
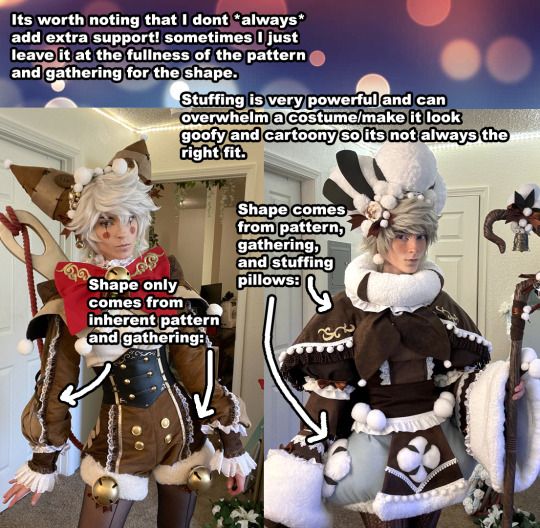
some information about how I shape my cosplays!!!
590 notes
·
View notes
Text
youtube
Today's cosplay post is a tutorial! I sat down and put together a full breakdown on how I use fabric painting to get my cosplay details. In this world where it seems like everyone on the big social media pages has an embroidery machine, a desktop laser cutter, and a heat-transfer vinyl workflow, I feel like sometimes we need to get back to basics and understand how to achieve clean finishes without a $2k overhead.
Video is fully captioned using the script I read from (not auto-generated captions!) And includes timestamps for different parts of the process. I recreated Marcille's t-shirt from one of Ryoko Kui's illustrations in this video, but it's useful for way more than just shirts!
I've never tried my hand at video tutorials before so I hope this is helpful!
#cosplay tutorial#cosplay how to#fabric painting#painting tutorial#beginner tutorial#cosplay reference#cosplay ref#reference#dungeon meshi#delicious in dungeon#cosplay#my posts#Youtube
136 notes
·
View notes
Text


One of my absolute favourite techniques for getting synthetic wigs with depth and realism is to go at them with alcohol markers (copics if you can afford them, but store brand also work!)
Light-coloured wigs give the most possibilities for dramatic alterations, but you can add depth to medium-darker shades as well! By adding roots and lowlights, you can get really beautiful blended shades, or you can even change the colour completely. You can also tint wigs warmer or cooler depending on your goals - a blonde wig for example could read more platinum if you blend in a cool grey, blue, or purple tone.
For most of the work featured here, I literally just drew on the wig strands with markers, and heat-set with a hairdryer after! You could also do alcohol inks mixed with isopropyl alcohol in a spray bottle if you need more coverage.
Basically, I always encourage folks to look at wigs (and any materials tbh) with an eye for not an exact match, but what they COULD become with a little work behind the scenes! Happy wigging!
(Oh and to add!! The one thing you have to be careful of is hairspray! Wigs that are lightly markered are usually okay, but the more ink you add, the more likely it will be reactivated by the alcohol in hairspray cans, so keep that in mind for your projects!)
367 notes
·
View notes
Text
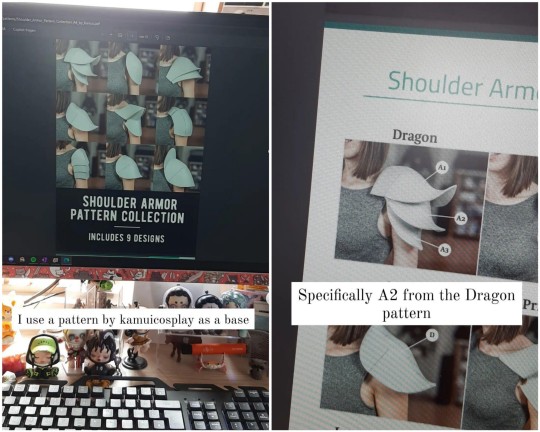
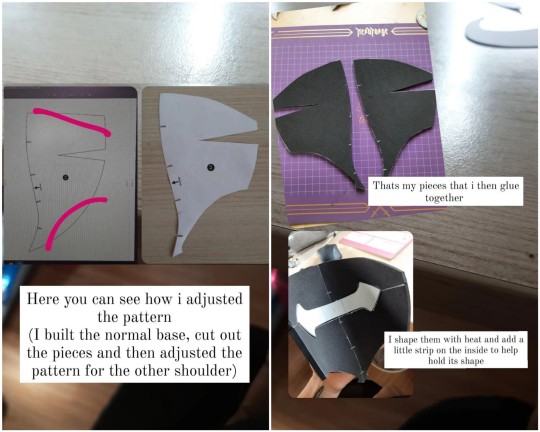
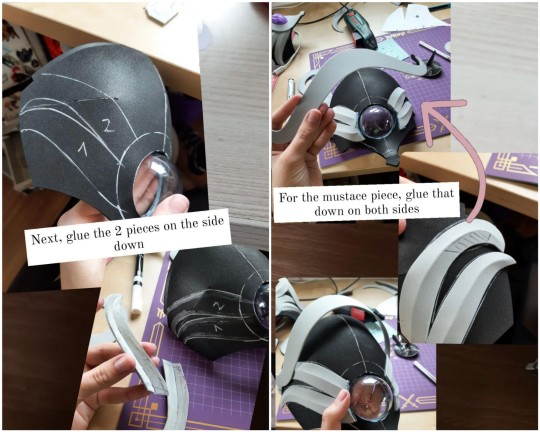
Here is a little tutorial to make Shadowhearts shoulder pieces out of foam
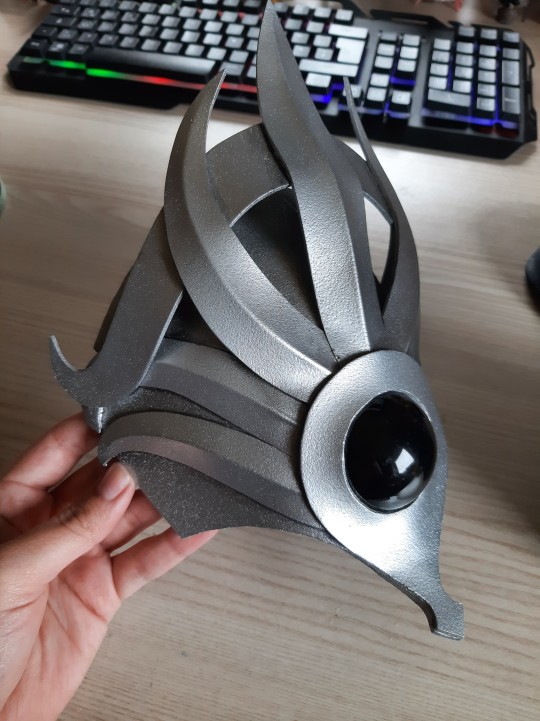
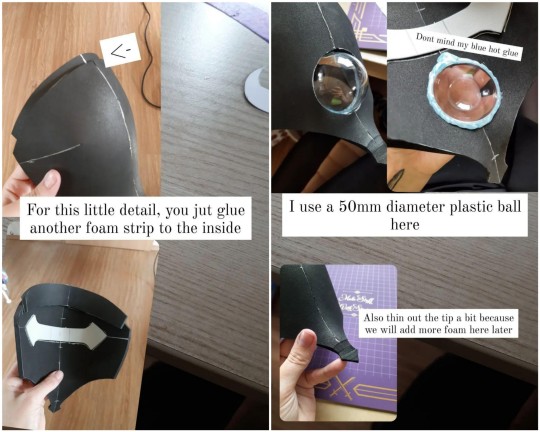
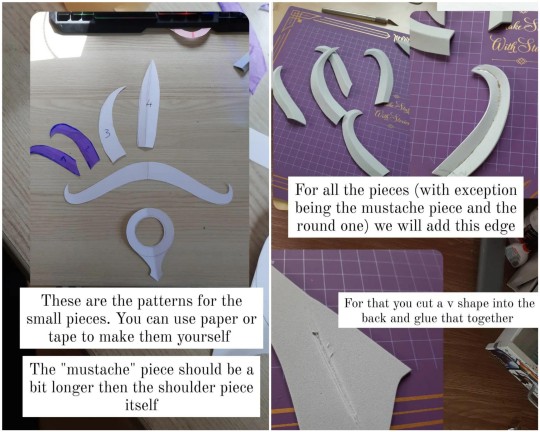
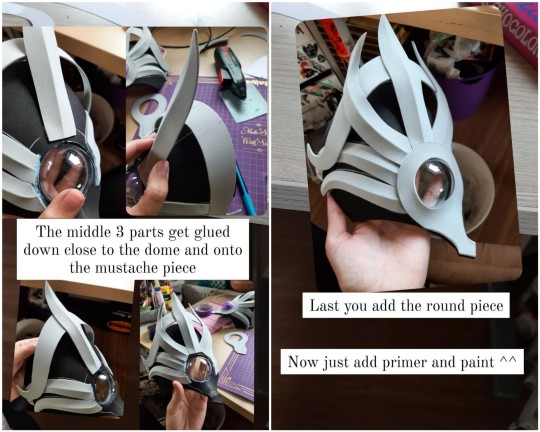
Hope this helps someone out there looking for a lightweight way to make these without a 3d printer ^^
I used low density eva foam of 5mm (the black foam you can see here) and high density eva foam of 2mm.
I used contact cement as a glue for most of it, but also some hot glue here and there.
62 notes
·
View notes
Text
Cece Olson for Twin Cities Geek:
It’s the end of your latest convention weekend. You’re feeling great, but you’re also exhausted. It’s been a long day of sweating, eating, dancing, and more. You finally strip off your cosplay, and it’s then you notice the wear and tear. A stain here, a tear here, wrinkles everywhere. And it smells! Because most cosplays don’t consist of things you can toss in the washing machine, it’s not always obvious how to clean them. I enlisted the help of some cosplayer friends to help create a quick guide of what to do when it’s time to clean your nontraditional clothes.
100 notes
·
View notes
Text
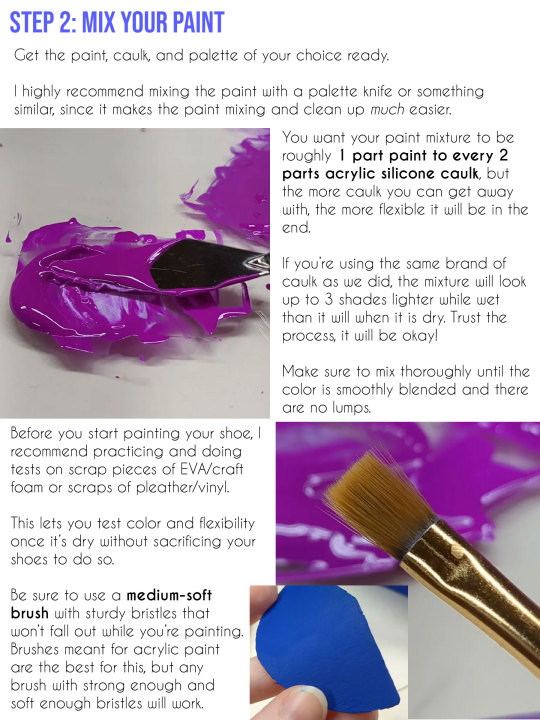
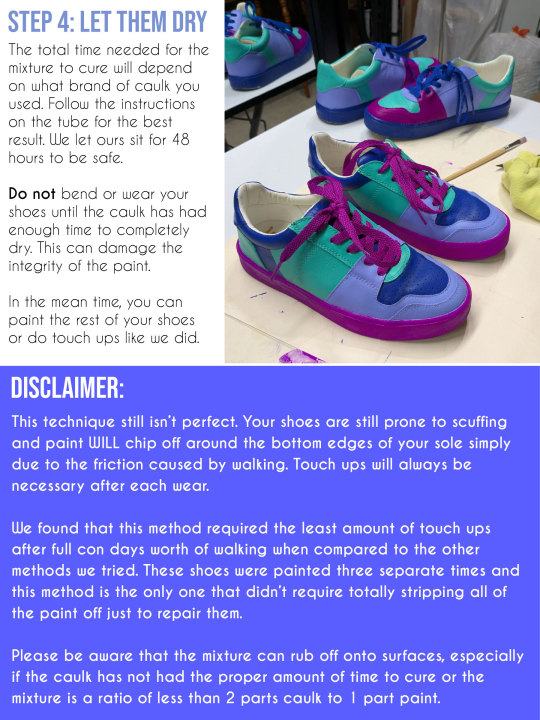
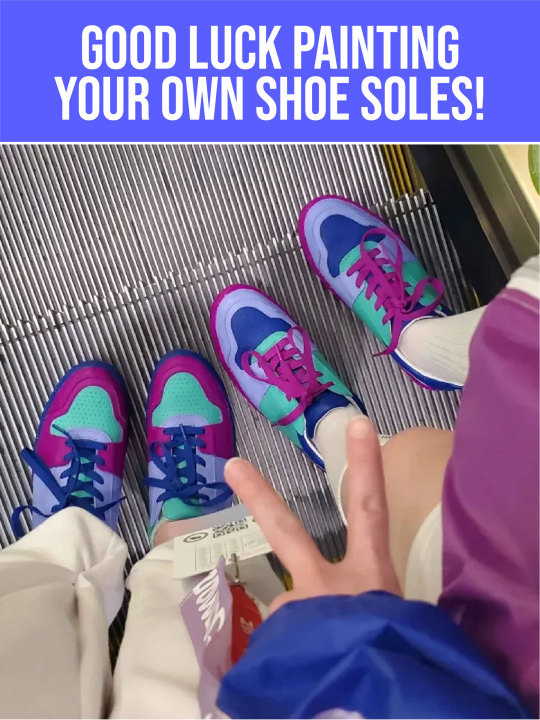
How to Paint Rubber Shoe Soles
Are you a cosplayer? Are you painfully stubborn and tired of every video and tutorial out there about painting shoes telling you not to paint the rubber soles? Me too! So I did it anyway.
Here's a full break down of how I did it complete with suggested materials and pictures!
Apologies to those that use screen readers, Tumblr is NOT letting me add alt text on desktop, so I would greatly appreciate anyone who wants to add an image description in a reblog. I'll try to write one up and add it to the end of this post later, but you are free to beat me to it!


116 notes
·
View notes
Text
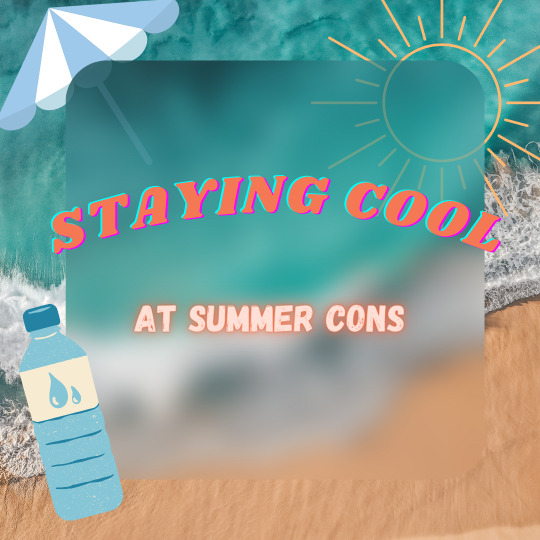


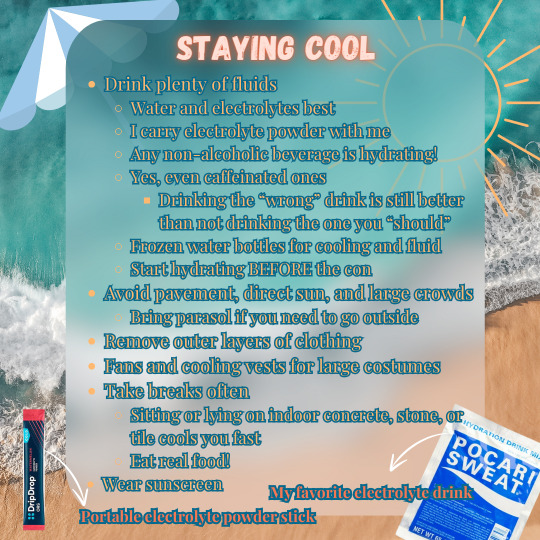
It's coming up to summer con season in the Northern Hemisphere, so I want to post this little infographic I made about staying cool at summer cons!
Don't mess around with heat, since heat stroke can be deadly. Heat exhaustion will make you miserable. Just don't.
Stay cool and hydrated out there, and don't forget to pregame water so you're well hydrated before the con even starts. ;]
#helpful things#cosplay tutorial#cosplay help#cosplay advice#cosplay#anime cons#comic cons#cosplay safety#thinking of the time i got heat exhaustion at a con#and then said “I don't want this to happen again”#so i made bikini armor for my next con lmao
35 notes
·
View notes
Text
I had to use Ban Rol today to hem some sheer fabric, so I figured I'd make this!
#cosplay#amazonmandy#cosplaycommission#commission#sewing#seamstress#gown#tutorial#cosplay tutorial#sewing tutorial#video#cosplayvideo
20 notes
·
View notes
Text
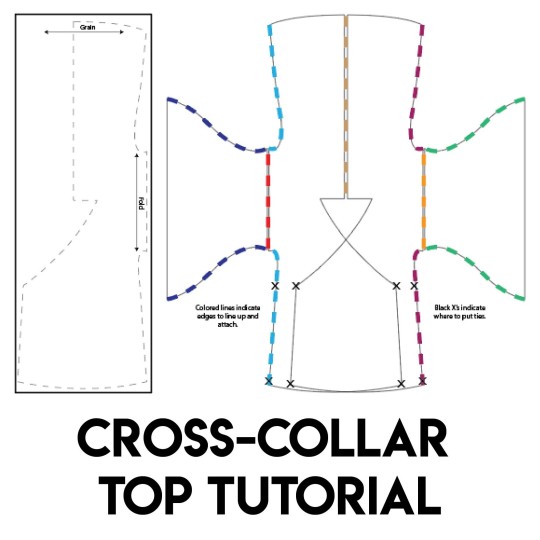
hello to the two people following me :) I haven't shared any patterns I've created before for sewing, but in making some period c-drama and danmei inspired cosplays and my resurging Hanfu fixation realized there aren't many good English resources for sewing cross-collar tops for zhongyi and other pieces so I made my own!
there are three pages but I tried to pack a bunch of information into it and you can download it via Gumroad for free :) I'm also entirely down to help out with patterning for anyone (if any lol) who might want to use this little pattern tutorial.
✨download link✨
271 notes
·
View notes
Text
youtube
#franziska von karma#ace attorney cosplay#ace attorney#the opal empress#von karma#ace attorney prosecutor#逆転裁判#ace attorney fanart#phoenix wright ace attorney#ace attorney trilogy#phoenix wright#aa art#cosplay#cosplay props#cosplay tutorial#Youtube
11 notes
·
View notes
Text
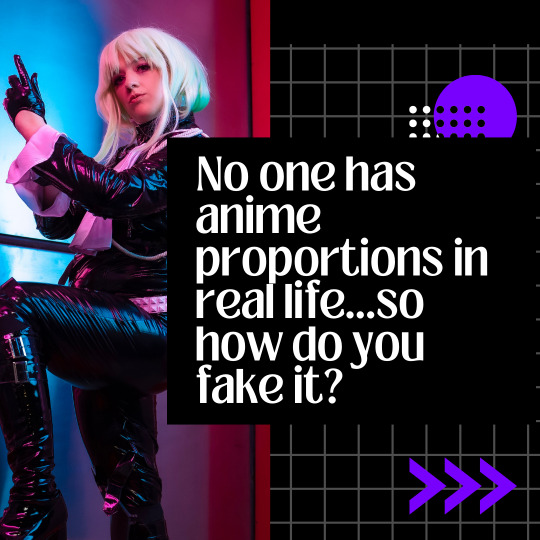
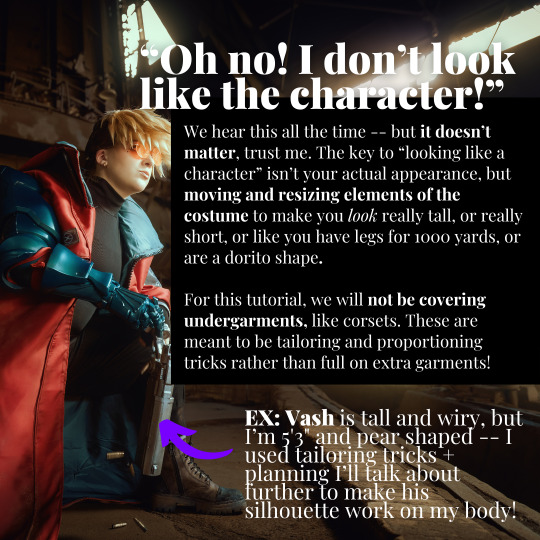
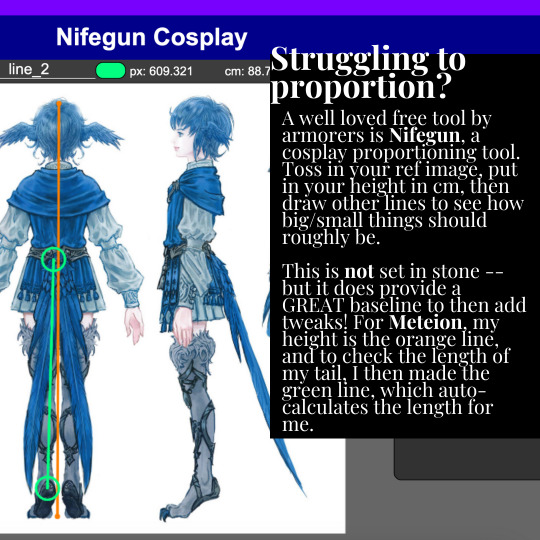

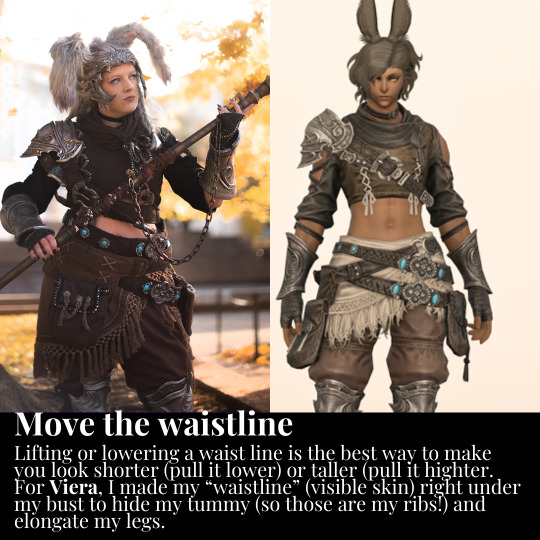


Tutorial on how I proportion cosplays on my very short body!
2K notes
·
View notes
Text
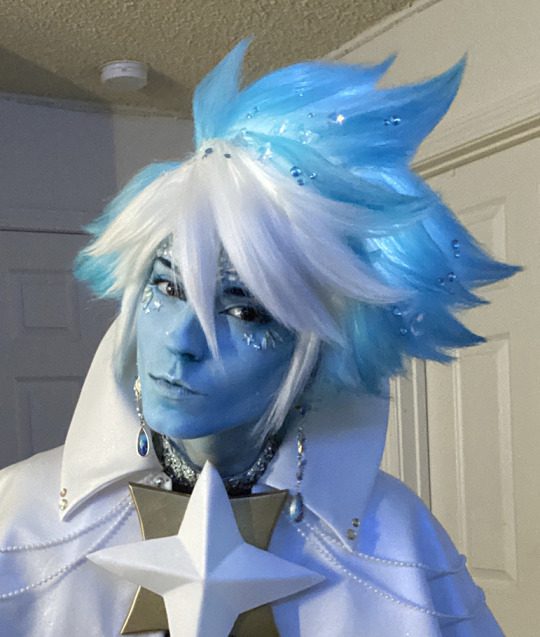
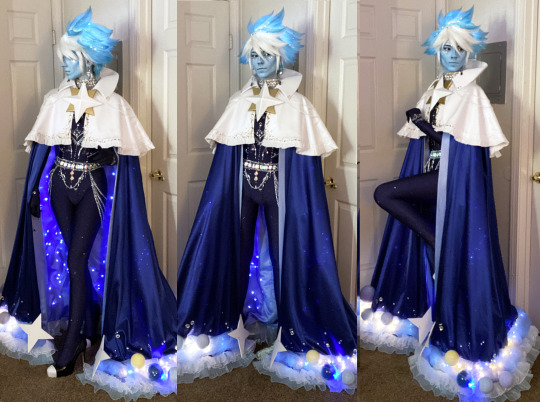
How I made my glowing stardust cookie wig with translucent spray paint and button battery LEDs
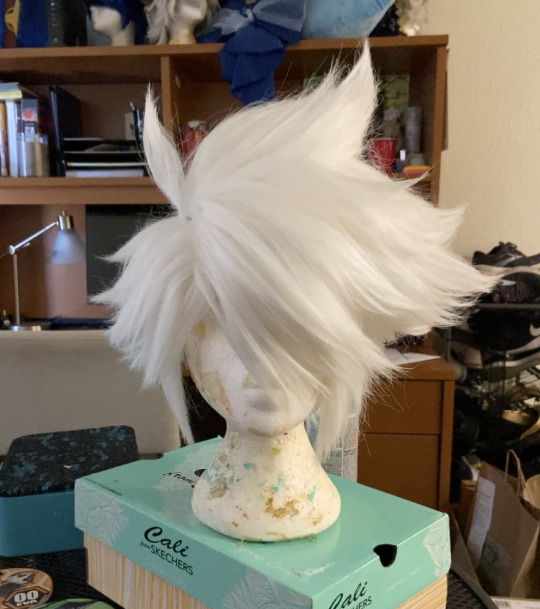
I started with a pure white arda wigs jaguar that was already fully styled since you will need all the shapes to be set before adding color. To style it, I did the classic "heat the fibers upside down, tease via backcombing, brush them out, heat and tease again, brush out...again" method that is formally outlined in my karna tutorial. You dont have to have your shapes perfectly locked in before adding in color since you will be brushing it out once more, but you will need all of your teasing and heat training to be done before adding color.
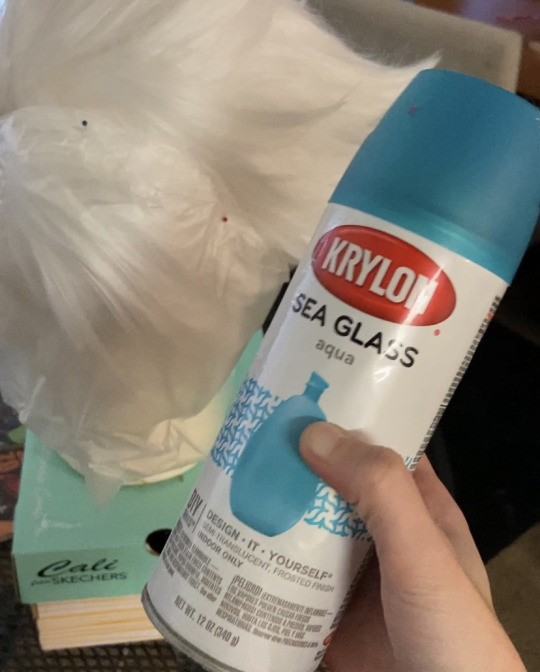
Stardust Cookie's wig involves leaving the bangs pure white and the back sections blue. There are a million ways to do this (start with a blue wig and add a white bang front, airbrush color, dye wefts and sew them together, etc) but the method that was the most economical for me involved using krylon translucent spray paint. I know using spray paint on a wig sounds scary and i would not use an enamel or fully opaque spray paint on a wig, but the krylon translucent spray paint is shockingly soft, flexible, and goes on in light coats.
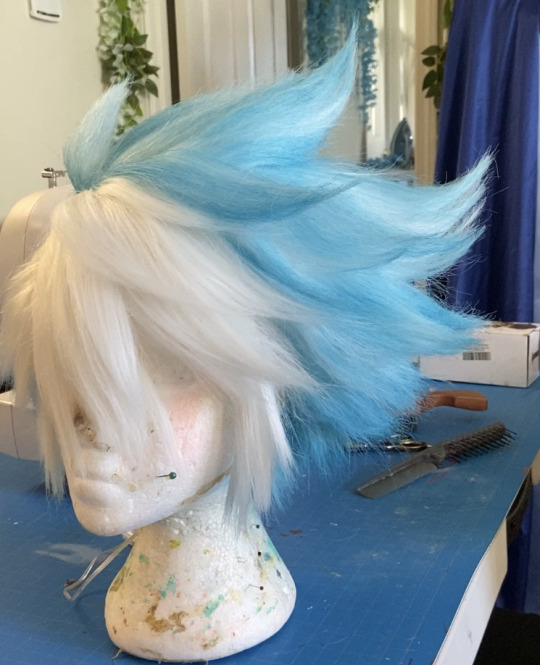
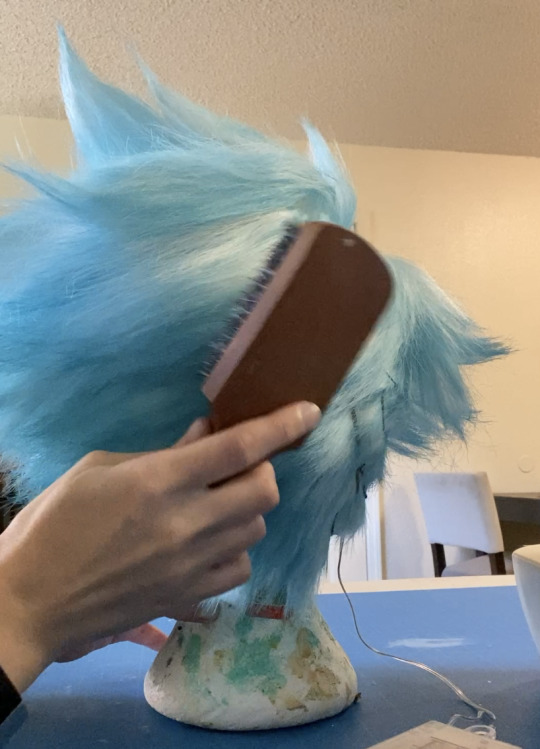
To keep the bangs white, I pinned down some cling wrap all around the bangs and made sure the line was snug. at this point I very gingerly began applying spray paint to the back sections of the wig. I did this in very light coats at a distance of about 18 inches from the wig. Honestly right after spraying, the fibers were still soft and the coverage was as good as i was expecting to get, but i did take a hog bristle brush and thoroughly combed out the fibers after this stage. This helps break up any strings and more evenly distributed the color.
This method works well if you want a soft color that does not need to be perfectly uniform. And I knew since I was adding lights below, that the color coverage itself didn't matter a whole lot, so long as it was translucent, didn't have any major streaks or clumps, and light could get out smoothly.
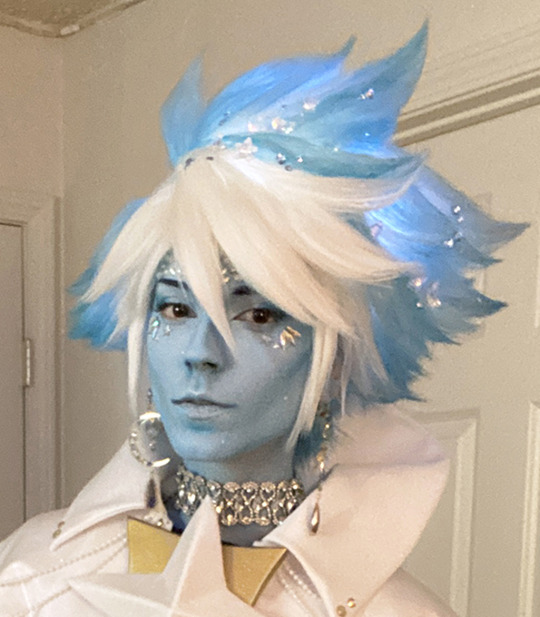
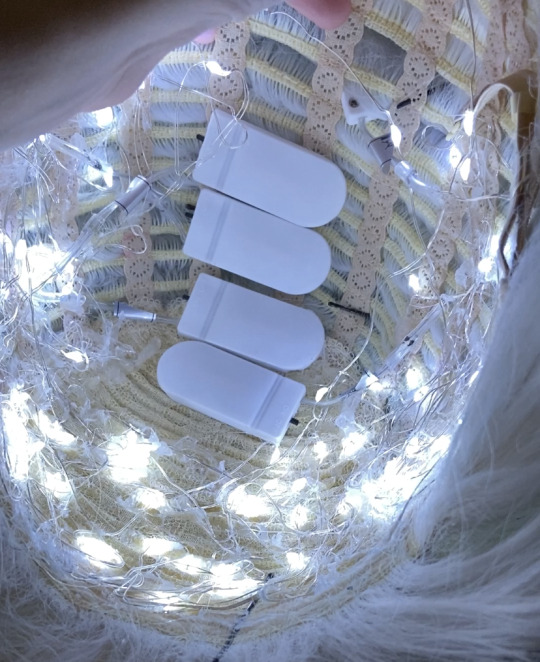
To add lights to the wig, there are 4 button-battery 30-LED fairy light packs glued into the underside netting of the wig. Always be sure to check if your LED wires can withstand hot glue heat before application (but most standard LED packs can withstand a low heat setting.) I did not have any problems with the heat of the wig + my body heat causing problems with the LEDs after being worn for several hours. These lights provide a diffuse, background glow throughout the wig and can be seen through the blue color. the below image of the wig only has lights underneath the netting (only one pack on for that image).
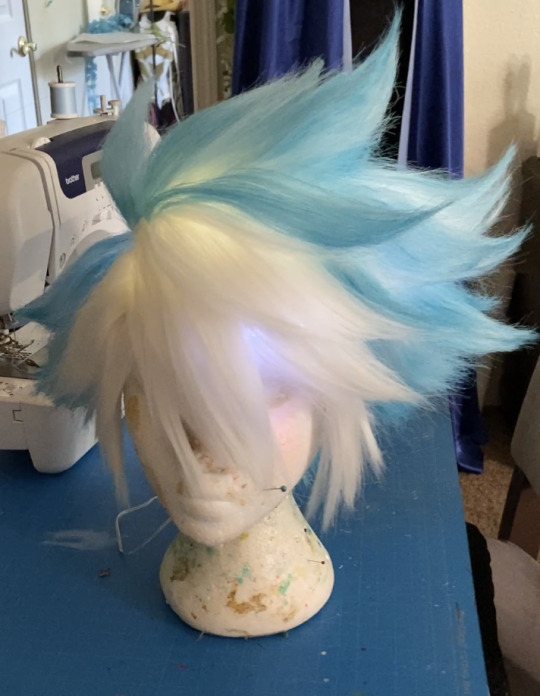
To light up the upper parts of the wig, there is one pack of LEDs threaded through the teased, textured bases of the spikes. Because these lights are on top of the netting and going through the textured sections, they scatter off of the teased hair and provide illumination to the higher parts of the wig. below is an image of the wig with only the single "top" lights lit.

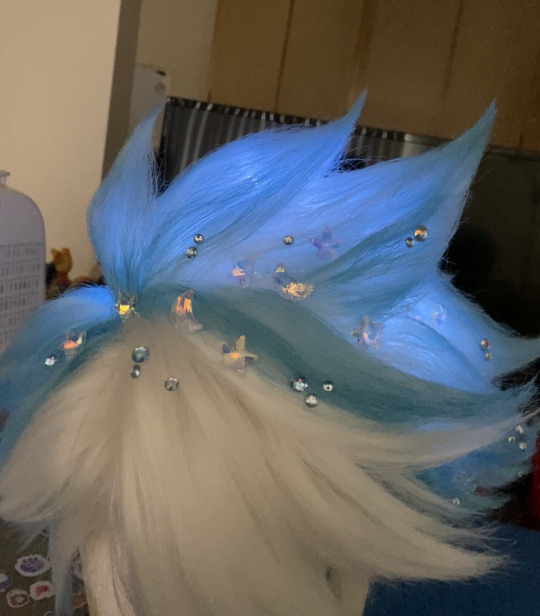
and that's how I made this wig! Other than that the rhinestones and other accessories were just glued on w/ hot glue. This wig looks nice in person and on camera and is stable. Granted its a little uncomfortable since you can feel the wires and the battery packs ngl but i've certainly worn worse. You can use hairspray on top of the translucent spray paint in small amounts, but in general i would proceed with caution since if nothing else, it may make the fibers look particularly stringy (which is why i highly recommend heat-set styles for this application over hairspray-set ones)
Believe me you can go pretty far with a "let me just slap some LEDs in there with a bit of glue" attitude when it comes to adding lights to stuff.
296 notes
·
View notes