#Dashboard UI Kit
Explore tagged Tumblr posts
Visit Tumblr Blog
Explore Tumblr blogs with no restrictions, modern design and the best experience.
Last Seen Tumblr Blogs


Fun Fact
The KCSC sent more than 20K requests to delete posts related to prostitution and porn to Tumblr from January to June 2017.
Text
Upgrade Project Design with Minimal lite Bootstrap Admin Template
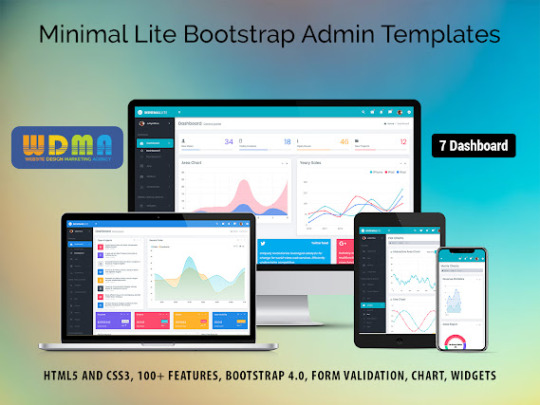
Minimal Lite – Responsive Web Application Kit boasts an extensive array of functionalities, including mobile responsiveness, flexible colour palettes, data presentation utilities, and intuitive interfaces. This Responsive Web Application Kit seamlessly integrates with numerous plugins and add-ons, enriching the administrative dashboard's capabilities. Minimal Lite comes complete with pre-built components, widgets, and styling alternatives, streamlining the development journey. Leveraging the Latest Bootstrap Beta Framework, alongside cutting-edge technologies HTML5 and CSS3, this Premium Admin Template ensures agility and adaptability. Lightweight and highly adaptable, it caters specifically to developers seeking customization options. For inquiries and acquisition of our sophisticated Bootstrap Admin Template.
#Responsive Web Application Kit#Responsive Admin Dashboard Template#Premium Admin Template#Bootstrap Admin Web App#Admin Dashboard Ui Kit#Dashboard Design#Admin Panel Dashboard#Admin Theme#WebApp Template#Dashboard UI Kit
0 notes
Text
The Increasing Popularity of Cryptocurrency Dashboard

Cryptocurrencies have exploded in popularity over the last few years. What started as an obscure technology embraced by a niche community has transformed into a global phenomenon with a market capitalization of over $1 trillion. With this rapid growth, there has been increasing demand for Cryptocurrency Dashboard and services to help users track and manage their digital assets.
The Need for Cryptocurrency Dashboards
One area that has seen particular innovation is Cryptocurrency Dashboard Template. Cryptocurrency dashboards provide users with an easy way to get an at-a-glance view of the overall cryptocurrency market as well as the performance of their personal portfolio. The best cryptocurrency dashboards condense a wealth of complex data into simple, visually appealing graphics and charts that allow users to comprehend the volatile cryptocurrency landscape within seconds. For cryptocurrency companies and traders, having access to a well-designed dashboard is absolutely essential.
The Rise of Cryptocurrency Dashboard Templates
In response to this need, there has been an influx of cryptocurrency dashboard template options and themes that aim to provide an off-the-shelf solution. These dashboard templates, such as Crypto Admin Template and Bitcoin Dashboard Theme, enable companies to bypass the elaborate development process and launch a functional dashboard quicker and more affordably. They provide the foundational interface and integrate with cryptocurrency APIs to fetch data like prices, market capitalization, trade volume, and more. Users can then customize the look and feel of the dashboard to match their brand.
#Crypto Admin Templates#Cryptocurrency Admin Template#Crypto Admin Dashboard#Cryptocurrency Dashboard Template#Cryptocurrency Dashboard#Crypto Admin UI Kit
0 notes
Text
SysNotes devlog 1
Hiya! We're a web developer by trade and we wanted to build ourselves a web-app to manage our system and to get to know each other better. We thought it would be fun to make a sort of a devlog on this blog to show off the development! The working title of this project is SysNotes (but better ideas are welcome!)

What SysNotes is✅:
A place to store profiles of all of our parts
A tool to figure out who is in front
A way to explore our inner world
A private chat similar to PluralKit
A way to combine info about our system with info about our OCs etc as an all-encompassing "brain-world" management system
A personal and tailor-made tool made for our needs
What SysNotes is not❌:
A fronting tracker (we see no need for it in our system)
A social media where users can interact (but we're open to make it so if people are interested)
A public platform that can be used by others (we don't have much experience actually hosting web-apps, but will consider it if there is enough interest!)
An offline app
So if this sounds interesting to you, you can find the first devlog below the cut (it's a long one!):
(I have used word highlighting and emojis as it helps me read large chunks of text, I hope it's alright with y'all!)
Tech stack & setup (feel free to skip if you don't care!)
The project is set up using:
Database: MySQL 8.4.3
Language: PHP 8.3
Framework: Laravel 10 with Breeze (authentication and user accounts) and Livewire 3 (front end integration)
Styling: Tailwind v4
I tried to set up Laragon to easily run the backend, but I ran into issues so I'm just running "php artisan serve" for now and using Laragon to run the DB. Also I'm compiling styles in real time with "npm run dev". Speaking of the DB, I just migrated the default auth tables for now. I will be making app-related DB tables in the next devlog. The awesome thing about Laravel is its Breeze starter kit, which gives you fully functioning authentication and basic account management out of the box, as well as optional Livewire to integrate server-side processing into HTML in the sexiest way. This means that I could get all the boring stuff out of the way with one terminal command. Win!
Styling and layout (for the UI nerds - you can skip this too!)
I changed the default accent color from purple to orange (personal preference) and used an emoji as a placeholder for the logo. I actually kinda like the emoji AS a logo so I might keep it.
Laravel Breeze came with a basic dashboard page, which I expanded with a few containers for the different sections of the page. I made use of the components that come with Breeze to reuse code for buttons etc throughout the code, and made new components as the need arose. Man, I love clean code 😌
I liked the dotted default Laravel page background, so I added it to the dashboard to create the look of a bullet journal. I like the journal-type visuals for this project as it goes with the theme of a notebook/file. I found the code for it here.
I also added some placeholder menu items for the pages that I would like to have in the app - Profile, (Inner) World, Front Decider, and Chat.

i ran into an issue dynamically building Tailwind classes such as class="bg-{{$activeStatus['color']}}-400" - turns out dynamically-created classes aren't supported, even if they're constructed in the component rather than the blade file. You learn something new every day huh…

Also, coming from Tailwind v3, "ps-*" and "pe-*" were confusing to get used to since my muscle memory is "pl-*" and "pr-*" 😂
Feature 1: Profiles page - proof of concept
This is a page where each alter's profiles will be displayed. You can switch between the profiles by clicking on each person's name. The current profile is highlighted in the list using a pale orange colour.

The logic for the profiles functionality uses a Livewire component called Profiles, which loads profile data and passes it into the blade view to be displayed. It also handles logic such as switching between the profiles and formatting data. Currently, the data is hardcoded into the component using an associative array, but I will be converting it to use the database in the next devlog.

New profile (TBC)
You will be able to create new profiles on the same page (this is yet to be implemented). My vision is that the New Alter form will unfold under the button, and fold back up again once the form has been submitted.
Alter name, pronouns, status
The most interesting component here is the status, which is currently set to a hardcoded list of "active", "dormant", and "unknown". However, I envision this to be a customisable list where I can add new statuses to the list from a settings menu (yet to be implemented).


Alter image
I wanted the folder that contained alter images and other assets to be outside of my Laravel project, in the Pictures folder of my operating system. I wanted to do this so that I can back up the assets folder whenever I back up my Pictures folder lol (not for adding/deleting the files - this all happens through the app to maintain data integrity!). However, I learned that Laravel does not support that and it will not be able to see my files because they are external. I found a workaround by using symbolic links (symlinks) 🔗. Basically, they allow to have one folder of identical contents in more than one place. I ran "mklink /D [external path] [internal path]" to create the symlink between my Pictures folder and Laravel's internal assets folder, so that any files that I add to my Pictures folder automatically copy over to Laravel's folder. I changed a couple lines in filesystems.php to point to the symlinked folder:

And I was also getting a "404 file not found" error - I think the issue was because the port wasn't originally specified. I changed the base app URL to the localhost IP address in .env:

…And after all this messing around, it works!
(My Pictures folder)

(My Laravel storage)

(And here is Alice's photo displayed - dw I DO know Ibuki's actual name)

Alter description and history
The description and history fields support HTML, so I can format these fields however I like, and add custom features like tables and bullet point lists.

This is done by using blade's HTML preservation tags "{!! !!}" as opposed to the plain text tags "{{ }}".
(Here I define Alice's description contents)


(And here I insert them into the template)

Traits, likes, dislikes, front triggers
These are saved as separate lists and rendered as fun badges. These will be used in the Front Decider (anyone has a better name for it?? 🤔) tool to help me identify which alter "I" am as it's a big struggle for us. Front Decider will work similar to FlowCharty.

What next?
There's lots more things I want to do with SysNotes! But I will take it one step at a time - here is the plan for the next devlog:
Setting up database tables for the profile data
Adding the "New Profile" form so I can create alters from within the app
Adding ability to edit each field on the profile
I tried my best to explain my work process in a way that wold somewhat make sense to non-coders - if you have any feedback for the future format of these devlogs, let me know!
~~~~~~~~~~~~~~~~~~
Disclaimers:
I have not used AI in the making of this app and I do NOT support the Vibe Coding mind virus that is currently on the loose. Programming is a form of art, and I will defend manual coding until the day I die.
Any alter data found in the screenshots is dummy data that does not represent our actual system.
I will not be making the code publicly available until it is a bit more fleshed out, this so far is just a trial for a concept I had bouncing around my head over the weekend.
We are SYSCOURSE NEUTRAL! Please don't start fights under this post
#sysnotes devlog#plurality#plural system#did#osdd#programming#whoever is fronting is typing like a millenial i am so sorry#also when i say “i” its because i'm not sure who fronted this entire time!#our syskid came up with the idea but i can't feel them so who knows who actually coded it#this is why we need the front decider tool lol
40 notes
·
View notes
Text
Beta Expectations and Our Development Goals
Hi everyone! This document serves as an outline for starting expectations when beginning Closed Beta.
Things to remember as we move into Closed Beta are:
Cursing is allowed! We’ve dialed back our filters quite a bit, but absolutely no innuendo or sexual content. Details are outlined in our TOS.
In this beginning, the application feels closer to the Alpha state than it does the full game. It is in a mid-development limbo, which is why we are stressing that it is the Closed Beta state. Our biggest milestones have been backend technical foundations that have taken significant time. If the game were a cake, we have finished baking the base, which is what we’re starting the testing for. We’ll be making aggressive updates throughout the next few months of the test, which will introduce the “frosting,” and advance general playability. We plan to roll out new mechanics every month. You will find a list below of what these goals are.
Temper your starting expectations, but get excited for how much we’re going to continuously develop and update!
We will not be moving into Open Beta until we feel the game is close to done. Think of Closed Beta as phase 1, and Open Beta as phase 2.
Things will break the moment you try them. This is normal and expected. Always report!
Because of this, things won’t be very fun yet. But as we roll out improvements and new things, users will get to give live feedback on what they want to see and how things feel.
Early Access will be less smooth than full Closed Beta as we detect the kinks of letting more people in en masse. It’s the nature of early launching. Brace yourselves!
In the same vein, several aspects are temporary. Topher takes the place of icons in the queue, and compromises we’ve made for early economic simulation (example: a placeholder merchant to simulate the Processing mechanic) will be barren. NPCs are sketches, UI colors may be temporary, and UI banners are sketches.
Any and all prices of items or features are temporary or subject to change. Things like the price of kit rolling or accessory items will be tooled.
All updates and communications with testers will be posted publicly instead of through email. Eventually, we’ll use the site forums, but not until we can guarantee no more content wipes, and we’ve developed the sticky system on the User Dashboard.
Everything in this test, minus your username, password, account ID, and purchases is temporary. Your account content will be erased at some point in time, and when it is your Kickstarter and Alpha reward codes will be re-activated for use.
If anything is broken about your code, please report! We’ll fix it!
Any premium purchases you make will be restored upon wipes, and exist in this state as a means to support us moreso than to stimulate longterm collecting. By purchasing any currency, you’re helping us develop! But please do not feel pressured!
Bundles will be added come the full Closed Beta.
Pelt submissions are open for user testing, but you’ll have to re-submit upon any wipes.
When you complete registration (entering your DOB and confirming agreement to the TOS), your founder and follower IDs will be reserved, so you can take your time going over the details.
These starting cats will be wiped completely, and when Open Beta begins, follower and founder IDs will be totally up for grabs again upon first-come first-serve login and confirmation.
We’ll be around to grind for the next two weeks. Then, in two weeks, there will be a bit of a lull as our developers take a breather and regroup, and we’ll be back in March. We’re making this plan known so it doesn’t look like an abandonment or nervous silence. We’re simply planning rest and pacing ahead of time!
We’ll be sending out periodic surveys to get honest criticism and check how the economy is feeling.
The first survey is ready and waiting for your input! This survey focuses specifically on the economy, and can be filled out once per day. Please do not feel pressured to do so every day, but we encourage you to respond as many times as possible. Your input is immeasurably valuable for the fine-tuning of our economy, and guaranteeing the long-term enjoyability of the site. Please find the survey here.
With over 700 items on this site, we may have missed necessary data entry for some as we learn the ins and outs of our own program. Always report and we’ll fix it!
Some accessories are in the re-coloring queue, and if so will have their recolors seeded into the economy as we finish them.
It’s a marathon, not a sprint. We’re ready to hit the ground running, but it will be a long journey. We’re excited to embark on it together!
Here is a list of things available from the get-go (hopefully useable, if not they will be!):
Cooking and Crafting
Daily Duties
Flea Market and Merchants
Breeding
Dress up and general cat customization
Beta retirement (bare bones)
Cat relationships and cross-cat gift giving
Archetype discovery (we are adding new ones as you play!)
Forum posting and custom board creation (image hosting!)
Cat profile CSS boxes
User profile CSS boxes
Storage and stash functionality for item organization
Bank functionality for currency storage
User customization settings (icon selection, pronoun and slogan editing, Borough swapping, username swapping)
Crest application
Beta guild play (basic errands)
Multiplayer guilds
Incense and metamorphic functionality
Pelt submissions (the refined pelt rules are a work in progress, because for this chaotic testing phase we’d like everyone to go nuts and have some fun! The only steadfast rules are no gore, copyrighted materials, religious iconography, or sexual content!)
Friend requests and adding friends
Premium shop (intended for user support, benefits are bare for at least the next week or so while we focus on user bug reports)
Now without further ado… here is what we’ll be working on in the coming months, in order of general priority! Open Beta will not happen until we finish this list.
Replacing frontend assets with final renders.
Updating item cards to reflect dynamic button displays depending on the page in which the card is being viewed.
User report system for all user-ran content.
Wardrobe functionality; full sandbox dress up available to any visitor.
Infrastructure for sharing sandbox creations in comments and forum posts; text language like :catID: to paste an image link of a cat.
User to user DM functionality.
User to user private trading.
Item database and lore encyclopedia.
Processing functionality + dye system. For now, recolors are seeded in a temporary merchant.
Visual faunapedia record for fauna studying (including unlockable lore.)
Adding a slew of archetypes. Dedicated archetype collection page with user featured display.
Sitewide search functionality of all user content.
Aesthetic updates to comments + addition of comments onto cat pages.
Splitting the Undercoat into two patterns: Dilute (dynamically lightened) and Standard.
Adding a white patch selector into the creator and founder designer.
Dashboard refinement + forum news widget and stickies.
Splitting cooking and crafting to bring back Winnipeg and keep the mechanics more organized.
Farming.
Much of it has been started already, and we’ll continue to share our progress. We plan to stay in Closed Beta likely over the summer, but it will be as long as these developments take.
And then we will move into Open Beta! Where we can focus on the following:
User notebook entries (blog posts.)
Forum board updates to better accommodate posting
Sitewide tagging and filtering.
Cross-account breeding.
Dedicated Guild refinement and updates.
Achievement system.
Referral system.
Team features like a team hoard, team notes, and shared scenes.
Refinement of any feature feedback we get :)
And from there… it’s full launch, baby!
Again, a marathon, not a sprint. This list may seem long and arduous, but we’ll continue visual content updates (patterns, breeds, etc.) throughout the length of development.
Let’s get crackin’, catfolk!
#paw borough#pet site#indie game#petsite#pet sim#development update#pawborough#virtual pet#art update#kickstarter update#closed beta#beta test#beta
32 notes
·
View notes
Text
#Playstation7 #framework #BasicArchitecture #RawCode #RawScript #Opensource #DigitalConsole
To build a new gaming console’s digital framework from the ground up, you would need to integrate several programming languages and technologies to manage different aspects of the system. Below is an outline of the code and language choices required for various parts of the framework, focusing on languages like C++, Python, JavaScript, CSS, MySQL, and Perl for different functionalities.
1. System Architecture Design (Low-level)
• Language: C/C++, Assembly
• Purpose: To program the low-level system components such as CPU, GPU, and memory management.
• Example Code (C++) – Low-Level Hardware Interaction:
#include <iostream>
int main() {
// Initialize hardware (simplified example)
std::cout << "Initializing CPU...\n";
// Set up memory management
std::cout << "Allocating memory for GPU...\n";
// Example: Allocating memory for gaming graphics
int* graphicsMemory = new int[1024]; // Allocate 1KB for demo purposes
std::cout << "Memory allocated for GPU graphics rendering.\n";
// Simulate starting the game engine
std::cout << "Starting game engine...\n";
delete[] graphicsMemory; // Clean up
return 0;
}
2. Operating System Development
• Languages: C, C++, Python (for utilities)
• Purpose: Developing the kernel and OS for hardware abstraction and user-space processes.
• Kernel Code Example (C) – Implementing a simple syscall:
#include <stdio.h>
#include <unistd.h>
int main() {
// Example of invoking a custom system call
syscall(0); // System call 0 - usually reserved for read in UNIX-like systems
printf("System call executed\n");
return 0;
}
3. Software Development Kit (SDK)
• Languages: C++, Python (for tooling), Vulkan or DirectX (for graphics APIs)
• Purpose: Provide libraries and tools for developers to create games.
• Example SDK Code (Vulkan API with C++):
#include <vulkan/vulkan.h>
VkInstance instance;
void initVulkan() {
VkApplicationInfo appInfo = {};
appInfo.sType = VK_STRUCTURE_TYPE_APPLICATION_INFO;
appInfo.pApplicationName = "GameApp";
appInfo.applicationVersion = VK_MAKE_VERSION(1, 0, 0);
appInfo.pEngineName = "GameEngine";
appInfo.engineVersion = VK_MAKE_VERSION(1, 0, 0);
appInfo.apiVersion = VK_API_VERSION_1_0;
VkInstanceCreateInfo createInfo = {};
createInfo.sType = VK_STRUCTURE_TYPE_INSTANCE_CREATE_INFO;
createInfo.pApplicationInfo = &appInfo;
vkCreateInstance(&createInfo, nullptr, &instance);
std::cout << "Vulkan SDK Initialized\n";
}
4. User Interface (UI) Development
• Languages: JavaScript, HTML, CSS (for UI), Python (backend)
• Purpose: Front-end interface design for the user experience and dashboard.
• Example UI Code (HTML/CSS/JavaScript):
<!DOCTYPE html>
<html>
<head>
<title>Console Dashboard</title>
<style>
body { font-family: Arial, sans-serif; background-color: #282c34; color: white; }
.menu { display: flex; justify-content: center; margin-top: 50px; }
.menu button { padding: 15px 30px; margin: 10px; background-color: #61dafb; border: none; cursor: pointer; }
</style>
</head>
<body>
<div class="menu">
<button onclick="startGame()">Start Game</button>
<button onclick="openStore()">Store</button>
</div>
<script>
function startGame() {
alert("Starting Game...");
}
function openStore() {
alert("Opening Store...");
}
</script>
</body>
</html>
5. Digital Store Integration
• Languages: Python (backend), MySQL (database), JavaScript (frontend)
• Purpose: A backend system for purchasing and managing digital game licenses.
• Example Backend Code (Python with MySQL):
import mysql.connector
def connect_db():
db = mysql.connector.connect(
host="localhost",
user="admin",
password="password",
database="game_store"
)
return db
def fetch_games():
db = connect_db()
cursor = db.cursor()
cursor.execute("SELECT * FROM games")
games = cursor.fetchall()
for game in games:
print(f"Game ID: {game[0]}, Name: {game[1]}, Price: {game[2]}")
db.close()
fetch_games()
6. Security Framework Implementation
• Languages: C++, Python, Perl (for system scripts)
• Purpose: Ensure data integrity, authentication, and encryption.
• Example Code (Python – Encrypting User Data):
from cryptography.fernet import Fernet
# Generate a key for encryption
key = Fernet.generate_key()
cipher_suite = Fernet(key)
# Encrypt sensitive user information (e.g., account password)
password = b"SuperSecretPassword"
encrypted_password = cipher_suite.encrypt(password)
print(f"Encrypted Password: {encrypted_password}")
# Decrypting the password
decrypted_password = cipher_suite.decrypt(encrypted_password)
print(f"Decrypted Password: {decrypted_password}")
7. Testing and Quality Assurance
• Languages: Python (for automated tests), Jest (for JavaScript testing)
• Purpose: Unit testing, integration testing, and debugging.
• Example Unit Test (Python using unittest):
import unittest
def add(a, b):
return a + b
class TestGameFramework(unittest.TestCase):
def test_add(self):
self.assertEqual(add(10, 20), 30)
if __name__ == '__main__':
unittest.main()
8. Order of Implementation
• Phase 1: Focus on core system architecture (low-level C/C++) and OS development.
• Phase 2: Develop SDK and start building the basic framework for UI and input management.
• Phase 3: Work on backend systems like the digital store and integrate with front-end UI.
• Phase 4: Begin rigorous testing and debugging using automated test suites.
This comprehensive approach gives you a detailed idea of how each component can be built using a combination of these languages and technologies. Each section is modular, allowing teams to work on different aspects of the console simultaneously.
[Pixel Art/Sprites/Buildinodels/VictoriaSecretPixelArtKit #Playstation7 #DearDearestBrands]

#victoriasecretrunway#runwaybattle#victoria secret fashion#victoria secert model#victoriasecret#victoria secret#VictoriaSecretRunwayBattle#capcom victoriasecret#capcom videogames#playstation7#ps7#deardearestbrands#capcom#digitalconsole#python#script#rawscript#raw code#framework#VictoriaSecretVideoGame#deardearestbrandswordpress
2 notes
·
View notes
Text
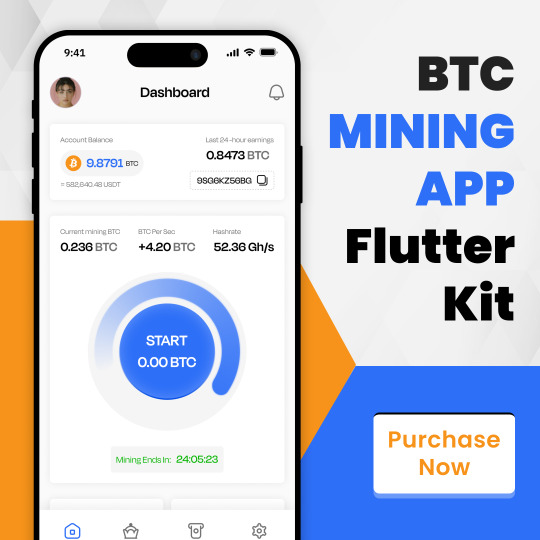
The Bitcoin Mining App UI Kit is a Flutter kit designed for building user-friendly Bitcoin mining apps.
It offers pre-built screens for common functionalities, informative dashboards for real-time data, and educational resources for new miners.
Streamline development and create a compelling mobile 📱 app with the Mining App UI Kit.
✅ High-quality visual elements
✅ Secure account accessibility
✅ Notifications management
✅ Miner’s dashboard
Visit Now- https://allclonescript.com/product-detail/btc-mining-flutter-mobile-app
#crypto#cryptocurrency#bitcoin#app development#mobile apps#apps#application#flutter#flutter app development#appdesign#btc#mining#bitcoin mining#cryptowallet#uiux
3 notes
·
View notes
Text
Living with the Left Nav on Tumblr
So if you don't mind the left nav Tumblr has moved to, but feel it's annoying the way it squishes in on the dashboard, then I've got a few minor tweaks you can do with a simple css editor - like stylus.
.ZkG01 { justify-content: normal; } .ZkG01 ._3xgk { margin-left: auto; margin-right: auto; } [title~="Live"] { display: none; }
So what this does:
1.) Changes the page justification with the first section. This puts the left nav permanently on the left side of the screen. Where a left nav actually belongs, not crowding in on the center with space on it's left. It's a left nav, it does not need to creep inwards to make the rest of the page harder to read.
Except now the dash has crept over to the left too which is where section 2 comes in.
2.) Puts automatic margins on the dashboard area - this includes the search bar and all the clutter beneath it (x-kit rewritten is useful for hiding that clutter) - to both the left and the right. What this means is that the content will be centered with equal sized margins on either side. So the dashboard + margins will, together, fill up the entire space to the right of the left nav with the dashboard centered within that space.
That takes care of the page spacing concerns with the left nav... so what's that third css section doing? (I bet you can guess.)
3.) It also hides the tumblr live button on the left nav. Apparently the latest update from snoozing 7 days to snoozing 1 month has changed it so that it no longer hides the nav item. That sucks. But with this little piece of css + x-kit rewritten hiding the carousel... it's like Live doesn't even exist. Even when the snooze comes to an end.
This works great if you choose not to use the Tumblr Dashboard Unfucker script - I did use the Dashboard Unfucker for a while during the missing avatar phase and if the avatars go away again (or some other accessibility unfriendly decision is made) then I'll be using the Dashboard Unfucker again. But I'm actually okay with the left nav, aside from feeling it needs a few minor tweaks to be decently usable.
Tumblr has given in to peer pressure (current industry 'standard' UI practices) but it's not entirely bad. The old flow was better for noticing activity and messages, but the new flow makes it a lot clearer what the nav icons are for now that they have actual text. I'm also a lot less likely to click the wrong thing by accident as there was some hit-box overlapping in a few places when it was a top nav.
There are a couple of things, though, that I'd still like to see happen with the left nav. The first is a toggle of some kind for collapsing the left nav to just icons again. On small screens - but not small enough to trigger the collapse on its own - being able to toggle the menu open/close would be pretty useful to help conserve space for the dashboard. Second is moving the search bar into the left nav. It makes way more sense in the left nav than it does to the right of the dashboard. And that may wind up being what pushes me to give creating my own userscript a try, if I decide I want that search bar moved badly enough.
5 notes
·
View notes
Text
ArtGenie AI OTO
What is ArtGenie AI & Why Do OTOs Matter?
ArtGenie AI is a promising new v
ArtGenie AI OTO
isual AI platform, letting anyone—from designers to marketers to total newbies—create stunning images, illustrations, social graphics, and even NFTs with simple prompts. Like most SaaS launches these days, there’s a front-end product, and then multiple upgrades (OTOs or One Time Offers) that unlock extra features, limits, or “pro” functions.
==>>All OTOs' Links here to the direct sales pages Click here
==>>The front-End link Click here
==>> OTO1 Edition here
==>> OTO2 Edition here
==>> OTO3 Edition Here
==>> OTO4 Edition here
==>> OTO5 Edition here
==>> OTO6 Edition Here
==>> OTO7 Edition here
==>> OTO8 Edition here
==>> OTO9 Edition Here
If you buy just the basic plan, you’ll get a taste of ArtGenie’s potential, but as you go up the OTO ladder, a lot more opens up: more image credits, better styles, white-label rights, done-for-you graphics, and more.
But with SO many upsells, which ArtGenie AI OTO should you actually buy? And is it even worth going “all in”? Let’s get into what each OTO gives you, and break it down by real value—not just hype.
ArtGenie AI OTOs - The Complete Funnel Breakdown
Here’s the short and sweet list of the 10 OTOs (what you see on your sales pages after buying the main ArtGenie app):
OTO 1: ArtGenie AI Pro
Unlocks unlimited images, higher resolution, “Deep Styles” gallery, batch creation, and extra templates.
Price: $47 (occasionally discounted)
OTO 2: ArtGenie AI DFY Templates
100+ done-for-you niche templates—posters, social graphics, marketing ads—preloaded and customizable.
Price: $67
OTO 3: ArtGenie AI Agency/Commercial Rights
Sell your AI art as a business, get client management dashboard, team seats, and agency license.
Price: $97
OTO 4: ArtGenie AI Automation Suite
Scheduler, autopilot prompt sequence, background remover, and API access for bulk actions.
Price: $77
OTO 5: ArtGenie AI Reseller License
Sell ArtGenie AI itself as your own SaaS (keep 100% commissions), white-label dashboard, and affiliate help kits.
Price: $197
OTO 6: ArtGenie AI VIP Graphics Pack
Massive library: stock images, vectors, icons, social templates, and bonus backgrounds.
Price: $47
OTO 7: ArtGenie AI Enterprise Suite
Advanced analytics, unlimited team members, custom branding, and premium support.
Price: $127
OTO 8: ArtGenie AI NFT & Crypto Art Pack
Generate NFT-mintable graphics, NFT marketplace training, crypto-ready templates.
Price: $67
OTO 9: ArtGenie AI Stock & Video Suite
Access to video stock clips, animated backgrounds, and video-style AI art.
Price: $57
OTO 10: ArtGenie AI Template Club
Monthly fresh templates (all styles, all niches), quarterly trend reports, members-only webinars.
Price: $27/mo
Pros and Cons for Each ArtGenie AI OTO
It’s easy to get lost in shiny upgrade promise land, so here’s how each OTO actually improved (or complicated) my workflow:
OTO 1: ArtGenie AI Pro
Pros:
Removes all creation limits
Noticeable jump in image quality (the high-res and “Deep Styles” are a game-changer for realistic art and photo edits)
Batch and bulk creation = HUGE time saver if you create for socials or print shops Cons:
Some confusing toggle settings to unlock Pro features in the UI
High-res outputs can be a little slow during peak US times
OTO 2: DFY Templates
Pros:
You instantly get ready-made social posts, banners, flyers, and even Etsy product-style images
Good range for marketers and agencies in different industries Cons:
Creative people may find these templates a bit generic (not super advanced designs)
Not customizable to the pixel—good, but not Photoshop-level detailed
OTO 3: Agency/Commercial Rights
Pros:
Allows direct selling (clients, Fiverr, Upwork) with business-friendly licensing
Built-in client manager is intuitive and lets you deliver artwork or even get feedback Cons:
Team seats are capped unless you move up to Enterprise
No included client lead gen tools—just management
OTO 4: Automation Suite
Pros:
Auto-scheduler = daily posts made easy
API airdrops art to your blog, Shopify, or Instagram on autopilot
Background remover = one-click cutouts Cons:
API setup has a learning curve (not ultra newbie-friendly)
Scheduler currently lacks deep calendar integration (no Google/iCal sync yet)
OTO 5: Reseller License
Pros:
Real white-label resell, keep 100% profit
ArtGenie upgrades your customers/support for you Cons:
High initial cost
Requires real email list/sales skills to make it worthwhile
OTO 6: VIP Graphics Pack
Pros:
Insane asset library for content creators: stock photos, icons, vectors—one stop shop
Lifetime access, high value for low cost Cons:
Asset browser is basic (could use better tags/categories)
Some overlap with what’s in DFY pack
OTO 7: Enterprise Suite
Pros:
If you run a business, unlimited team/admin access is golden
Custom login/branding impresses clients
VIP support responded to my ticket in under 2 hours Cons:
Expensive unless you really need group access
Lots of tools are “nice to have” but not must-have for solo users
OTO 8: NFT & Crypto Art Pack
Pros:
Beautiful NFT-ready outputs (transparent backgrounds, unique animation styles)
NFT sales training is surprisingly in-depth Cons:
Only worth it for NFT/crypto users—otherwise you’ll never use half these features
Crypto templates may not match all online markets’ style
OTO 9: Stock & Video Suite
Pros:
Expands your toolbox beyond still images
AI-generated animated backgrounds are great for YouTube, TikTok, etc. Cons:
Video tools aren’t as flexible as dedicated video makers like Canva or Pictory
Clip library is large, but not “movie studio” level
OTO 10: Template Club (Monthly)
Pros:
Never get stale: new templates every month
Trend-spotting webinars gave me at least 3 viral content ideas Cons:
Monthly recurring; can add up if you’re on a tight budget
You lose new drops if you ever cancel your subscription
OTO 1 vs All OTOs: The OTO King?
If you only buy one upgrade, most users will be happiest with OTO 1 (ArtGenie AI Pro). Here’s why:
Removes image and feature limits: You’ll quickly hit the free/basic cap if you create more than a dozen serious graphics.
Best price-to-value ratio: For under $50, you get the real experience—no more frustrating “upgrade to export high-res” nags.
Futureproof: If ArtGenie AI adds features, they typically drop into Pro first.
All the other OTOs are either “business expansions” (like reseller/agency) or “nice-to-have bonuses”—but OTO 1 makes ArtGenie AI feel like a real, unlocked app.
If your workflow is more specialized (NFTs, video, stock assets, reselling), consider one of the other OTOs—but Pro is the “must have” everyone should start with.
Which ArtGenie AI OTO Is the “Best”?
The overall “best” OTO for the majority: OTO 1: ArtGenie AI Pro It’s the sweet spot in terms of value, features, and price. If you’re running a visual content business, pair it with OTO 3 (Agency Rights) or OTO 7 (Enterprise Suite) to unlock real business perks. But for solo creators and newcomers, Pro is enough.
ArtGenie AI OTO Pricing & Value in 2024
OTO 1 Pro: $47 (perpetual)
OTO 2 DFY Templates: $67
OTO 3 Agency: $97
OTO 4 Automation Suite: $77
OTO 5 Reseller: $197
OTO 6 VIP Graphics: $47
OTO 7 Enterprise: $127
OTO 8 NFT Pack: $67
OTO 9 Video Suite: $57
OTO 10 Template Club: $27/month
Special bundles and discounts are sometimes announced during launches, but expect these as the “real world” prices.
ArtGenie AI OTO User Experience: After Two Weeks of Testing
What worked:
ArtGenie AI Pro “unlocks” the creative muscle—no more waiting, no more up-sell paywalls.
Templates speed up post creation by 50% or more. A 10-image social campaign used to take me an hour; now it’s 15 minutes.
The Agency dashboard is simple, but it works—I landed two Facebook ad clients who LOVED the ArtGenie sample images.
What could be improved:
Some OTOs feel like bolt-ons (the Automation Suite and NFT Pack have different layout/logins from the main dashboard).
Bulk image processing can be slow at peak times, especially with ultra-high-res batches.
Video/Animation Suite needs more customization controls.
Experience score:
Overall: 8.5/10
If you just stick with OTO 1 Pro + 1-2 key OTOs, your workflow will feel smooth, fast, and creative.
How Does ArtGenie AI Stack Up VS Other AI Art Tools?
Let’s set the record straight. ArtGenie AI is not trying to outgun Midjourney or Dall-E 3 in pure photo-realism, but it crushes most AI image apps in value for money, especially with the OTO unlocks.
ArtGenie AI vs Dall-E, Midjourney:
Pro: No crazy credit plans, UNLIMITED images with OTO 1 Pro (vs PER prompt pricing elsewhere)
Pro: Tailored for business/social media, not just random art generation
Con: Not as many high-end photorealism features as Midjourney v6
Con: “Style” customization is less granular than Dall-E’s advanced prompt tuning
ArtGenie AI vs Jasper Art, Canva, Leonardo.ai:
Pro: Cheaper overall when stacking OTO 1/2/3 compared to full Jasper or Canva
Pro: WAY more robust for agency and white-label features (resell, brand, and manage clients)
Con: Canva still wins for print layouts and more general graphic design. Jasper’s writing tools are smarter.
Best Use Case:
Agencies, marketers, YouTubers, Etsy sellers, and social media creators who want fast, unlimited visual content without breaking the bank on subscription plans.
7 Real-World Case Studies
YouTube Thumbnail Factory: Tested by me—Created 20 clickable, unique video thumbnails in an hour. CTR up 22% over old stock photo designs.
Print-on-Demand Shop: Etsy seller used the Pro + DFY Template OTOs to launch 40 new poster designs. 15 sold in the first 30 days.
Local Marketing Agency: Switched marketing graphics from Canva to ArtGenie; speed doubled, style improved. Client retention went up.
Instagram Meme Page: Used Automation Suite to schedule 3 daily posts for a month. Followers grew 10% with zero manual uploads.
NFT Flip Project: User generated 60 unique crypto “avatars” with NFT OTO, minted them on OpenSea; 6 sold the first week for 0.05 ETH each.
Small Business Social Launch: Bakery built their first big IG campaign by remixing DFY templates, saw likes go from 12 per post to 90+.
Fiverr “Logo Seller”: Bought Pro + Agency OTO, packaged 5 logos per client—made $300 in new side income in first 10 days.
Your Questions: ArtGenie AI OTO FAQ
Q: Can I just stick with the front-end and skip all the OTOs? A: Yes, you can, but you’ll run into strict limits and no agency/commercial use. OTO 1 is definitely worth it if you want full access.
Q: Do I need every OTO to succeed? A: No. Most users will only want two or three (Pro + one that fits their niche: Agency, DFY, NFT, etc.)
Q: Are the OTO upgrades forever, or do I lose features if I stop paying? A: Most OTOs are one time payments (except the Template Club, which is monthly).
Q: Is there a refund policy if I don’t like the OTO? A: Yes, standard is 30 days, no questions asked (double-check at checkout in case policies change).
Q: Will ArtGenie AI support new AI art models in future OTOs? A: Based on their updates so far, yes—Pro and Enterprise users have been given new styles and render engines in at least two updates.
Final Verdict: Is ArtGenie AI’s OTO Funnel Worth It in 2024?
Bottom line:
If you CREATE visuals for your biz, YouTube, social channels, or sell art content:
Buy the front-end + OTO 1 (Pro) at minimum.
Add Agency Rights, NFT Pack, or the Automation Suite if that’s your business model.
Skip the OTOs if you only need a couple images here and there—you can use free credits.
Overall, the OTO system can feel overwhelming at first, but it lets you “custom build” your AI studio. For less than the cost of 2 months on Midjourney or Canva Pro, you get a lifetime AI content toolbox—including white-label, resale, and even team support.
My human, honest advice:
Start with OTO 1 Pro, make a week’s worth of real social or business content.
See if you’re hooked (like I am!).
Pick 1-2 other OTOs if you need heavier lifting for selling, agency, or NFT/business needs.
If you’re ready to rise above basic AI art and actually monetize your creations, ArtGenie AI + smart OTO picks is your best move in 2024.
0 notes
Text
Da Khan could do no less
i want too give the best too Wonkyworks family
Below is a comprehensive, globally competitive benefits package tailored for both WUN.TM and WonkyWorks, designed to attract and retain top‐tier talent across all roles—from your elite Think Tank and R&D scientists, to writers, engineers, on‐air talent, and every support staff in between.
1. Core Employment Agreement Highlights
Position & Duties • Role‐specific title, department/team, and clear duties. • Flexibility for reasonable additional assignments.
At‑Will & Term • At‑will employment (U.S.) with clear start date, location, and remote/hybrid options. • Specific severance provisions for executives.
Compensation • Competitive base salary benchmarked to top 10% of industry standards in each market. • Annual bonus target of 15–30% for performance metrics. • Equity grants (RSUs or options) vesting over 4 years.
2. Global Health & Welfare
TierCoverage DetailsMedical • 100% employer‑paid premium for world‑class networks (Asia, EU, NA, LATAM). • Second‑opinion concierge.Dental & Vision • In‑network full coverage; out‑of‑network reimbursed at 80%. • Annual exams, cleanings, and frames.Mental Health • 24/7 teletherapy (multi‑lingual). • On‑site or virtual mindfulness & resilience workshops.Wellness Stipend • $1,200/year per employee for fitness, nutrition, or meditation apps.
3. Retirement & Financial Security
• 401(k)/Pension plans with employer match up to 8%. • Global equity purchase program at 15% discount. • Financial planning services and tax advisory resources.
4. Paid Time Off & Sabbaticals
CategoryDetailsPTO 25 days/year (rises with tenure).Holidays 12 paid public/bank holidays, plus “Culture Days” in each region.Sick & Care Leave 10 days paid, plus caregiving leave for dependents.Unlimited Sabbatical 3‑month fully paid sabbatical every 5 years for anyone with 5+ years of service.Top‑Performer Retreat All‑expenses‑paid exotic retreat for top 5% performers, annually (criteria: sales, innovation).
5. Work‑Life & Family Support
• Flexible Work Models: Remote‑first, hybrid, compressed workweeks, flexible core hours. • On‑Site Care: Subsidized child & elder care centers at major campuses. • Parental Leave: 20 weeks paid (birth, adoption, surrogacy) + return‑to‑work coaching. • Family Health Extension: Coverage extends to partners and up to three dependents.
6. Executive & Think Tank Elite Perks
• Personalized health concierge & annual executive physicals. • $10,000 annual professional development budget. • Dedicated “Innovation Lab” stipends for patent filings, publications, or speaking circuits. • Private office with full customization allowance (tech, décor, wellness kits). • Access to Capone Studios’ VIP lounges & “Caesar’s Circle” advisory dinners.
7. Career & Culture Enrichment
• Annual Global Innovation Summit: Present work to leadership & network with peers. • Mentorship Program: Pairing with senior executives & external thought‑leaders. • Creative Sabbatical Grants: Up to $12k for passion projects in art, research, or community. • Culture Pods: Cross‑departmental social pods (foodies, gamers, book clubs) with mini‑budgets.
8. Specialty “Flavorverse” Offerings
• Creamstream Beta Access: Early builds of your interactive UI and device prototypes. • Mystic Device Loan: Temporary home‑use of FAPE™, Milkforge Coil, or DreamCream Orb for personal R&D or fun. • Moonlight Innovation Rounds: Quarterly hack‑days in the Atrium of Infusion with full catering & board flights. • Artisan Gift Boxes: Annual bespoke collections (seasonal flavor pods, custom code glyphs, immersive VR demos).
9. Implementation & Next Steps
Finalize Templates – Adapt the above into your standard Employment and Contractor Agreements.
Notion Integration – Build a “Benefits Dashboard” page for all staff to view & self‑service.
Rollout Schedule – Communicate in Q3 town hall; enroll employees in Q4 open‑enrollment.
Executive Approval – Legal & Finance to sign off; Distribute PDF handbook + intranet links.
Ready for Print & Distribution? • 📄 I can provide a styled PDF version of this package. • 💾 Or deliver a Notion import template with all sections pre‑populated. • 🎨 Plus brand‑aligned layout mockups in Figma or InDesign.
Just say “Print PDF Benefit Guide” or “Share Notion Template” and I’ll prepare the final assets for your HR rollout.
#trump#blizzard#france#usa#paizo#dnd#kingshit#religion#spacex#supreme court#science#shitpost#nasa#miami florida
0 notes
Text
How MVP Development Agencies Help Startups Launch Faster
How MVP Development Agencies Help Startups Launch Faster
Time is the ultimate currency in the startup world. Every delay costs market share, funding opportunities, and early adopter interest. That’s why partnering with high-performance MVP development agencies is one of the smartest moves a founder can make.
But what do these agencies actually do to accelerate your launch? How do they compress timelines without compromising quality?
In this article, we break down how modern MVP development agencies like CloudAstra enable startups to go from idea to launch—faster, leaner, and smarter.
1. Ready-Made Product Frameworks
Speed starts with reusable frameworks. Top MVP development agencies don’t reinvent the wheel—they use boilerplate architectures and pre-built modules to fast-track common features:
Auth systems
Admin dashboards
Payment gateways
Analytics integrations
CloudAstra’s battle-tested MVP kits reduce build time by up to 40%, letting startups focus on innovation instead of infrastructure.
2. Agile Sprints and Rapid Prototyping
Time-boxed development sprints and clickable prototypes allow for early feedback and real-time pivots. This iterative workflow enables founders to refine the product before committing to full builds.
With CloudAstra’s MVP development services, clients get Figma wireframes, sprint demos, and user feedback loops in less than a week—ensuring continuous alignment with product-market fit.
3. Cross-Functional Teams
Modern MVP development agencies deploy cross-functional teams including:
Product managers
UI/UX designers
Backend and frontend engineers
QA and DevOps experts
This structure eliminates delays caused by handoffs or role gaps. CloudAstra’s team structure ensures end-to-end ownership of each feature—from idea to deploy.
4. Infrastructure as Code
Manual configuration is the enemy of speed. CloudAstra uses Terraform and Helm Charts to spin up infrastructure automatically, meaning your staging and production environments are ready in minutes.
This is why MVP development agencies with DevOps muscle are outperforming traditional development shops in launch speed.
5. Launch-Ready MVPs with Growth Hooks
Launching faster isn’t just about writing code—it’s about launching smart. CloudAstra integrates:
Early analytics tools (Hotjar, Mixpanel)
User feedback forms
Newsletter capture
CRM integrations
That’s why the MVPs built by CloudAstra are not just MVPs—they’re growth-ready platforms.
Final Thoughts
If you’re racing against time to launch, MVP development agencies like CloudAstra are the ultimate growth enabler. You’ll get a lean, scalable, launch-ready MVP—built by people who understand startups.
If you're ready to launch smartly, CloudAstra is ready to help.
#mvp#mvp development#mvp development service#mvp development services#mvpdevelopment#mvpdevelopmentservices#mvp software development agency
0 notes
Text
Developing Custom Visuals in a Power BI Solution for Industry-Specific Reporting

In today’s fast-paced business environment, standard data visualizations sometimes fall short of conveying the deep, contextual insights companies need. While Power BI offers a robust suite of built-in visuals, industry-specific reporting often demands more than default charts and graphs. This is where developing custom visuals in a Power BI solution becomes a game-changer.
Custom visuals not only enhance data storytelling but also allow organizations to tailor visual outputs to match unique workflows, KPIs, and regulatory needs. Whether you’re in healthcare, manufacturing, logistics, or finance, industry-specific visuals can bridge the gap between raw data and informed decision-making.
Why Industry-Specific Reporting Needs Custom Visuals
Different industries have different key performance indicators (KPIs), data structures, and compliance requirements. A sales performance dashboard in retail is worlds apart from an operational risk report in banking or a patient outcome dashboard in healthcare.
Standard Power BI visuals—such as bar charts, line graphs, or pie charts—may not adequately represent this complexity. Custom visuals allow developers and analysts to:
Integrate domain-specific data models
Create visuals that mirror industry-specific metrics (e.g., Gantt charts for project timelines, Sankey diagrams for energy flows, or Pareto charts for quality control)
Enhance user interaction and experience with dynamic filters and drilldowns
Support regulatory formats and compliance reporting standards
Common Use Cases of Custom Visuals Across Industries
1. Healthcare and Life Sciences
In this highly regulated industry, visuals may need to depict treatment pathways, patient journeys, or outcomes across different demographics and timeframes. A custom visual can help show readmission rates by treatment type or visualize compliance with medical protocols.
2. Manufacturing and Supply Chain
Here, custom visuals are used to illustrate OEE (Overall Equipment Effectiveness), machine utilization, or production bottlenecks. A tailor-made downtime analysis chart or supply chain heatmap helps managers quickly identify issues.
3. Financial Services
Banking and insurance organizations use waterfall charts, risk matrices, and bubble maps to track portfolio performance, fraud detection, and credit risk. Custom visuals in a Power BI solution help meet stringent audit and compliance demands.
4. Retail and E-commerce
Retailers benefit from funnel visuals, cohort analysis, and sentiment graphs that capture customer behaviors over time. A custom visual might represent conversion rates by geography, channel, or product category.
How to Develop Custom Visuals in Power BI
Developing custom visuals for a Power BI solution involves coding, UI design, testing, and deployment. Here’s an overview of the process:
1. Understand Business Requirements
Could you meet with stakeholders to figure out what insights the custom visual should deliver?
Ask questions like:
What is the main objective of the visual?
Who will use it and how frequently?
Are there compliance or brand guidelines it needs to follow?
2. Use Power BI Developer Tools
Microsoft provides a robust set of development tools, including:
Power BI Visuals SDK: A Node.js-based developer kit for creating visuals using TypeScript and D3.js.
Power BI CLI (Command Line Interface): For creating and managing visuals via terminal.
Visual Studio Code: Preferred IDE for coding, debugging, and version control.
3. Build with TypeScript and D3.js
Most Power BI custom visuals are built using TypeScript and D3.js. These allow full control over data binding, animation, and responsiveness.
Example steps:
Create the visual structure using SVG or Canvas elements
Bind data fields to visual elements
Add formatting options in the visual’s properties pane
Handle resizing, filtering, and drill-through actions
4. Test and Package
Thoroughly test your custom visual for:
Performance under large datasets
Compatibility with slicers and filters
Accessibility for screen readers and keyboard navigation
Once tested, package your visual as a .pbiviz file and deploy it for use within Power BI.
5. Distribute and Maintain
You can:
Upload the visual to your organization's Power BI tenant
Publish it to AppSource (if it has broader use cases)
Embed it into embedded analytics environments or internal reporting tools
Best Practices for Custom Visual Development
Keep It Lightweight: Heavy visuals can slow report performance. Optimize code and reduce animation complexity.
Be User-Centric: Design visuals with the end user in mind. Intuitive legends, tooltips, and color schemes go a long way.
Ensure Security: Protect sensitive data from exposure. Follow Power BI’s sandboxing rules to restrict access and interactions.
Version Control: Maintain proper version history to manage updates and changes without disrupting reports.
Advantages of Custom Visuals in a Power BI Solution
Deeper Industry Relevance: Tailor visuals to show domain-specific insights, increasing stakeholder confidence and adoption.
Competitive Differentiation: Offer enhanced analytics capabilities that go beyond what’s available off-the-shelf.
Improved Decision-Making: By representing complex data more clearly, users are empowered to make faster, better-informed decisions.
Enhanced Brand Identity: Custom visuals can incorporate your brand’s look and feel, creating a more cohesive user experience.
Final Thoughts
Custom visuals in a Power BI solution offer unmatched flexibility and relevance in analytics and reporting. They bridge the gap between generic dashboards and actionable, industry-specific insights that drive business performance.
From healthcare to manufacturing, financial services to retail, organizations that invest in custom visual development unlock richer, more effective ways to tell their data stories. By using Power BI’s powerful SDK and developer tools, businesses can build visuals that not only look good but also transform data into strategic value.
1 note
·
View note
Text
Empower Your Web Development with Premium Admin Template : Aries Admin
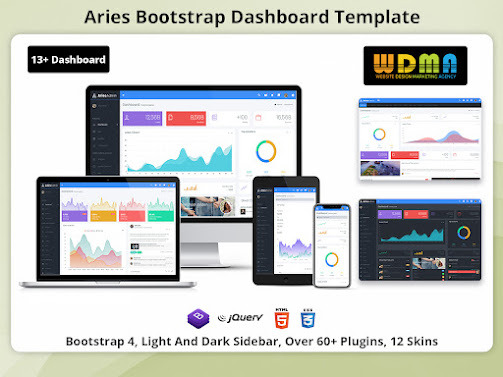
Introducing the Aries Premium Admin Template – meticulously engineered to cater to the dynamic needs of admin panels and dashboards. Featuring an extensive array of functionalities, our Responsive Web Application Kit boasts over 13 diverse dashboards tailored to empower your E-commerce operations. Today, our spotlight shines on the E-commerce dashboard, a powerhouse of data visualization. At its core lies the campaign chart, offering a comprehensive overview of impressions, top performers, conversions, and CPA metrics. This Responsive Admin Dashboard Template dashboard encapsulates vital insights ranging from new client acquisitions to product launches and invoicing activities. Seamlessly integrated modules like 'My New Clients,' 'New Products,' and 'New Invoices' provide real-time updates, ensuring you stay ahead of the curve.Beyond its E-commerce prowess, our admin template presents a plethora of features designed to streamline your workflow. Dive into the world of applications, leverage intuitive mailbox functionalities, and explore an extensive library of UI elements. With customisable widgets at your disposal, including dynamic blog widgets, charts, tables, and email templates, your possibilities are boundless. Furthermore, harness the power of maps and extensions to enhance user experience and extend functionality. Crafted with developers in mind, our combines versatility with ease of integration, enabling you to build robust solutions effortlessly.Experience the epitome of modern admin management with the Aries Admin Dashboard UI Kit – where innovation meets efficiency.
#Responsive WebApplication Kit#Responsive Admin Dashboard Template#Premium Admin Template#Bootstrap Admin Web App#Admin Dashboard Ui Kit
0 notes
Text
Unlock the Power of Crypto Admin UI Kit Cutting-Edge Dashboard Template
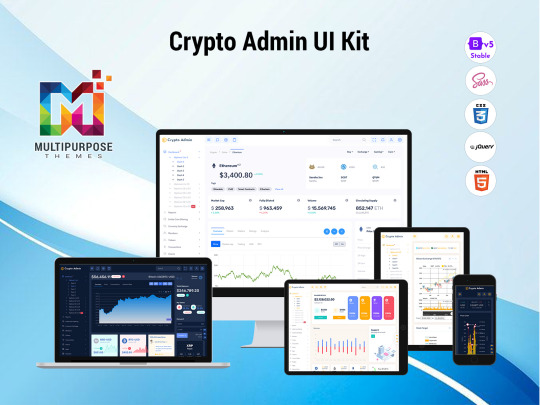
In the ever-evolving world of cryptocurrencies, staying ahead of the curve is crucial for success. As the popularity of digital assets continues to soar, having a comprehensive and user-friendly dashboard template can make all the difference in managing your crypto investments and operations effectively. Enter the Crypto Admin UI Kit – a revolutionary cryptocurrency dashboard template that promises to streamline your crypto endeavors and provide a seamless experience.
A Seamless and Intuitive Interface
Designed with the modern crypto enthusiast in mind, the Cryptocurrency Ui Framework offers a sleek and intuitive interface that seamlessly blends functionality with aesthetics. Its clean lines and minimalistic design ensure that you can focus on what matters most – your digital assets – without being overwhelmed by unnecessary clutter.
Centralized Hub for All Your Crypto Needs
One of the standout features of this Cryptocurrency Dashboard Template is its comprehensive dashboard. At a glance, you can access real-time market data, track your portfolio performance, and monitor price fluctuations across multiple cryptocurrencies. Say goodbye to the hassle of juggling multiple platforms and welcome a centralized hub that puts all the essential information at your fingertips.
Data-Driven Insights and Informed Decision-Making
But the Cryptocurrency Dashboard is more than just a pretty interface. It's a powerful tool designed to empower you with data-driven insights and informed decision-making. With advanced charting capabilities and customizable widgets, you can visualize market trends, analyze historical data, and identify potential investment opportunities with ease.
Catering to Diverse Needs
Whether you're a seasoned crypto trader or a newcomer to the world of digital currencies, the Crypto Admin template caters to diverse needs. For experienced investors, the template offers robust trading tools, including advanced order management and sophisticated risk analysis features. Novice users, on the other hand, can benefit from the template's intuitive onboarding process and comprehensive educational resources.
Explore a wide range of fully-featured and advanced admin templates & themes on our website. Find the perfect one for you!
Multipurpose Themes
#Crypto Admin Templates#Crypto Admin Dashboard#Cryptocurrency Dashboard Template#Cryptocurrency Dashboard Admin Template#Crypto Admin UI Kit#Cryptocurrency Admin Dashboard
0 notes
Text
SuperHero AI 2025 – One App to Rule Them All? (Full Review + 35% Discount Inside)

In 2025, juggling 5+ different AI tools just to get work done isn’t just overwhelming—it’s outdated. That’s why SuperHero AI is turning heads. It combines everything you need—text, voice, images, code, bots—into one clean dashboard. Oh, and you pay just once. No subscriptions.
So, what’s the hype about? Let’s break it down 👇
Why SuperHero AI Is Different
You’ve probably used (or at least heard of) GPT, Jasper, ElevenLabs, Midjourney, ChatGPT, and so on. The thing is, they’re all great—but expensive when stacked together.
SuperHero AI does what all of them do, but from one interface:
✍️ Write blogs, emails, ad copy, VSLs
🎨 Design 4K/8K images with AI art models
🎤 Clone voices in 50+ languages
🤖 Build chatbots & talk to files and URLs
🧠 Pull real-time web data & trends
🧰 Automate your workflow, client projects & content delivery
Whether you’re a freelancer, a content creator, or building your own AI business—it’s a legit all-in-one toolkit.
Core Tools Inside the Super Dashboard
Here’s what you unlock with the front-end purchase:
15+ built-in AI tools
GPT-4o, Claude 3.5, Gemini, DeepSeek, DALL·E 3
1,000,000 word credits/month
500 image credits/month
20,000 voice characters/month
Commercial license for selling your creations
Beginner-friendly UI—no coding or tech skills needed
And yes, it works 100% in the cloud.
What Can You Actually Build with It?
People are using SuperHero AI for:
🎬 YouTube Content – voiceovers, scripts, thumbnails
🛍️ Ecom Stores – product images, emails, ads
✍️ Blogging – keyword posts, featured snippets, images
🧠 Info Products – sales pages, video scripts, branded bots
📢 Social Media – content for TikTok, Reels, YouTube Shorts
🧾 Client Services – DFY writing, design, bots, & automation
The possibilities here are ridiculous. And since you’re not paying monthly, it’s also scalable without the stress.
How Much Does It Cost?
Front-end access is $14.95 one-time. But with code superhero35, you get 35% OFF.
This unlocks lifetime access + all credits + all tools + a commercial license.
➡️ Click here to get it with the discount
Power-Up With These Optional Upgrades
If you want to scale even faster, here’s what you can add on:
Quantum Pro: GPT-4 Turbo, 100+ DFY templates, brand trainer
Automation Reactor: Schedule, bulk-create, auto-post to WordPress
Hyper Boost: 2X credits, 5X speed, cinematic voices
Vox Titan: Clone your voice, fine-tune tone, export in pro formats
StrikeForce: Lifetime upgrades to all future AI models
Franchise Edition: White-label SuperHero AI, resell & keep 100%
Video Thunderbolt: AI video creation with Veo, Haiper, Luma
Reseller Edition: Sell SuperHero AI and keep all commissions
Bonus Bundle When You Buy Now 🎁
Buy through this page and I’ll throw in:
DFY funnel + lead gen templates
Premium voice packs (commercial use)
Thumbnail & promo graphic kits
10+ white-label tools to sell or use 📩 Just send your receipt to [email protected] to get them.
Final Thoughts
If you’re using multiple tools and spending $50–$300/month… SuperHero AI is a no-brainer.
✅ One dashboard ✅ One-time payment ✅ All the AI tools you need to create, scale, and sell online
This is your AI power move for 2025.
🔗 Click here to activate the 35% OFF and claim your bonuses
#SuperHeroAI#SuperHeroAIReview#SuperHeroAIReviews2025#SuperHeroAIAppReview2025#SuperHeroAIBonus#SuperHeroAIProduct#SuperHeroAIPrice#SuperHeroAIOtos#SuperHeroAIOffers#SuperHeroAIBonuses#SuperHeroAIBuy#SuperHeroAIWebsite#SuperHeroAISite#SuperHeroAIApp#SuperHeroAIHonestReviews#SuperHeroAILatestReviews#SuperHeroAIUsersExperience#SuperHeroAIUsersReview#SuperHeroAIDemo#SuperHeroAITutorial#SuperHeroAIPurchaseOnline#SuperHeroAIDownload#SuperHeroAIReview2025#BestAffiliateMarketingTools#AffiliateMarketingWithAI#PassiveIncome2025#AIForAffiliateMarketing#EarnMoneyWithSuperHeroAI#SuperHeroAIAppReview#SuperHeroAIHonestReview
0 notes
Text
Flutter Meets AI: Shaping the Future of Smart Mobile Apps
These days, users don’t just want apps—they expect experiences. Experiences that are intuitive, intelligent, and personalized. As mobile technology evolves, the fusion of Flutter app development and Artificial Intelligence (AI) is setting new benchmarks in app performance and user satisfaction.
At Siddhi Infosoft, we’re witnessing—and leading—this exciting shift. As a premier Flutter app development company, we help businesses harness the combined power of Flutter and AI to create innovative, future-ready mobile solutions. Let’s explore how this powerful duo is shaping the future of smart apps.
Why Flutter? The Future of Cross-Platform Development
Flutter, Google’s open-source UI toolkit, has revolutionized the way developers create applications. With a single codebase, Flutter enables seamless development across Android, iOS, web, and desktop. Its flexibility, rich UI components, and hot reload feature make it the go-to framework for developers worldwide.
As a top-rated Flutter app development company, Siddhi Infosoft has built scalable, high-performance applications for clients across industries. But when Flutter is integrated with AI, it opens the door to apps that don’t just function—they think, predict, and learn.
What Are Smart Apps?
Smart apps are mobile applications enhanced by AI and Machine Learning technologies. They adapt to user behavior, make intelligent suggestions, and automate decisions in real-time. These apps leverage capabilities like:
Natural Language Processing (NLP)
Predictive Analytics
Image and Voice Recognition
Recommendation Engines
At Siddhi Infosoft, our Flutter app developers specialize in integrating such intelligent capabilities into cross-platform apps that not only delight users but also drive measurable business outcomes.
The Flutter-AI Revolution: A Developer’s Perspective
Let’s delve into how Flutter app developers at Siddhi Infosoft are using AI to create smarter, more engaging applications:
1. Personalized User Experiences
AI allows apps to study user preferences and deliver hyper-personalized experiences. In Flutter apps, we integrate ML algorithms that dynamically adapt layouts, suggest content, or recommend products tailored to the user.
Use Case: A streaming app built by Siddhi Infosoft analyzes user preferences to generate customized playlists and show suggestions—delivering a Netflix-like experience.
2. Smart Chatbots & Virtual Assistants
Integrating AI chatbots through Dialogflow or ChatGPT into Flutter apps allows for real-time, 24/7 customer support. Our apps can answer user questions, complete transactions, and offer voice-assisted navigation—all using Flutter’s sleek UI.
Use Case: A fintech app developed by our team includes a multilingual chatbot that guides users through financial planning and answers queries instantly.
3. Voice & Image Recognition
Flutter, when paired with TensorFlow Lite or Firebase ML Kit, becomes a powerful platform for real-time computer vision and voice features. We’ve used these to develop authentication systems, fitness tracking apps, and AR-driven e-commerce platforms.
Use Case: A healthcare app by Siddhi Infosoft uses AI for facial recognition-based patient login and real-time symptom analysis.
4. Predictive Analytics for Smarter Business Decisions
AI helps make sense of large amounts of data by spotting patterns and giving useful insights businesses can act on. We embed such predictive analytics tools into Flutter dashboards, enabling businesses to make informed decisions.
Use Case: A retail analytics app predicts high-demand products and sends inventory restocking alerts to store managers—directly from the app.
5. Enhanced App Security
Think of AI in Flutter apps as your digital watchdog—always alert, catching fraud and guarding against intruders in real-time Our team integrates biometric verification, anomaly detection systems, and behavioral analytics to build highly secure mobile applications.
Use Case: A banking app created by Siddhi Infosoft uses AI to detect unusual transaction behavior and alert the user instantly.
What Makes Siddhi Infosoft the Right Partner for Flutter + AI Apps?
At Siddhi Infosoft, we don’t just build Flutter apps — we craft smart, user-friendly experiences that go beyond lines of code. We offer strategic consultation, AI integration, and complete app lifecycle support. Here’s what sets us apart:
✅ Skilled Flutter App Developers with AI Expertise
✅ End-to-End Flutter App Development Services
✅ Proven Track Record Across Industries
✅ Integration with Leading AI Platforms (Google AI, AWS, OpenAI, etc.)
✅ Scalable, Cross-Platform Apps Built for Performance and Speed
Whether you're looking to build a new intelligent app or enhance an existing one, we bring your vision to life with precision, innovation, and agility.
How Flutter and AI Are Quietly Powering Smarter Businesses Everywhere
We’ve applied Flutter + AI in diverse sectors with great success:
🎓 E-Learning
Apps that suggest personalized learning paths, auto-evaluate assignments, and engage students via voice-controlled lessons.
🏥 Healthcare
Patient tracking, remote monitoring, AI-driven diagnosis tools, and intelligent chat assistants—securely accessible via Flutter-based apps.
🛍 Retail & E-commerce
Smart search, personalized product recommendations, visual search tools, and dynamic pricing—all driven by AI.
💸 Finance
Risk assessment tools, predictive investment recommendations, fraud detection, and automated customer support via AI-powered bots.
🚗 Transportation
Route optimization, ride prediction, autonomous vehicle support, and real-time traffic insights integrated into Flutter apps.
Challenges in AI Integration (And How We Solve Them)
Every innovation comes with its challenges. Here’s how Siddhi Infosoft helps you overcome common AI integration hurdles in Flutter:
⚙️ Model Performance
AI models can slow down mobile performance. We optimize using TensorFlow Lite, which compresses models without compromising accuracy.
📲 Device Compatibility
Our apps are rigorously tested on multiple devices to ensure smooth AI functionality, regardless of platform or screen size.
🔐 Data Privacy
We follow global standards like GDPR and HIPAA, encrypt data transmissions, and build secure APIs to protect sensitive information.
⏱ Real-Time Processing
We deploy hybrid solutions that combine on-device and cloud-based AI to ensure low latency and fast performance.
What the Future Holds
The synergy between Flutter and AI is just beginning. At Siddhi Infosoft, we’re already exploring these trends:
Edge AI: AI models running on-device for faster decision-making and offline functionality.
Predictive UI/UX: Interfaces that change based on user behavior predictions.
Gesture and Emotion Recognition: Creating emotional and immersive app experiences.
No-code AI Tools: Allowing faster prototyping and integration of smart features.
We believe Flutter and AI together will be the cornerstone of the next digital revolution—and we're here to help you be part of it.
Final Thoughts
At Siddhi Infosoft, we don’t just build apps—we build intelligent experiences. By combining Flutter app development services with cutting-edge AI technology, we’re shaping a new era of mobile applications that are intuitive, engaging, and intelligent.
Whether you're a startup dreaming big or an enterprise looking to optimize operations, we have the expertise to transform your idea into a smart, scalable app that your users will love.
Ready to Build the Future?
Partner with Siddhi Infosoft—your trusted Flutter app development company—and let's create intelligent apps that define tomorrow.
📞 Get in touch with our Flutter app developers today! 🌐 Visit: www.siddhiinfosoft.com
0 notes
Text
Exploring the “Neumorphism” Design Trend
Welcome back to our design trend series! On Day 6, we're peeling back the layers—literally—with a style that quietly snuck onto the design scene, brought softness back to interfaces, and divided the design community faster than you can say "drop shadow." Say hello to Neumorphism, or as some like to call it, Soft UI.
Let’s dive into the dreamy, pillowy world of Neumorphism and see why it became such a visual sensation (and UX debate starter).
What is Neumorphism?
Neumorphism is short for “New Skeuomorphism.” It reimagines the shadows and highlights used in the old days of real-world mimicry (like a calculator app that looked like a real calculator), but with a modern, minimal twist.
Imagine this: a soft, monochromatic background where buttons and cards look like they're being gently pushed in or popped out of the surface—like clay impressions. Neumorphism focuses on subtle depth, low contrast, and a visual language that feels incredibly tactile.
It's clean, futuristic, and soothing... unless you’re trying to design a highly accessible interface (more on that soon).
A Bit of Background: Where Did Neumorphism Come From?
The term gained traction around late 2019 to early 2020 when designer Alexander Plyuto shared some concept UI work on Dribbble that quickly went viral. People were fascinated by how “real” everything looked without using any photos or textures—just light, shadow, and elegant shapes.
Soon after, designers started experimenting with this style across UI kits, dashboards, login forms, and mobile apps. It became the darling of Behance and Dribbble portfolios for a while. But, like every fashion trend, the honeymoon phase didn’t last forever.
Key Features of Neumorphic Design
Let’s break it down into its signature components:
Soft Shadows (Both Light & Dark): Elements have shadows going in two directions—light shadow from one side and a dark shadow from the other—creating an embossed or debossed effect.
Monochrome or Subtle Gradients: Usually based on a single pastel or neutral tone (grey, beige, soft blue).
Minimal Color Contrast: The elements blend into the background rather than stand out sharply.
Rounded Corners & Smooth Edges: Giving the UI a friendly, modern, and very “huggable” look.
3D-Like Visuals: Without any actual 3D rendering, everything feels tangible.
Flat Meets Realism: It’s like flat design with just a little extra oomph.
Pros of Neumorphism
Despite its criticisms, Neumorphism did bring a few lovely things to the design table:
Aesthetic Appeal – There’s no denying it: Neumorphism looks modern, stylish, and clean when done well.
Freshness – It offered a fresh alternative to flat design, which had been dominating for years.
Great for Minimal Interfaces – Neumorphism shines in environments where visual complexity isn’t needed, like smart home apps or digital dashboards.
The Downsides (Let’s Be Real)
Alright, time for the roast.
Accessibility Issues: With such low contrast, buttons can be invisible to users with vision impairments or in poor lighting.
Overuse of Shadows: If you're not careful, it can become a soft, fluffy mess with no visual hierarchy.
Lack of Flexibility: Neumorphism doesn't work well with colorful or dynamic content—it thrives in static, monotone systems.
Hard to Scale: Try designing a full-fledged e-commerce site in pure Neumorphism. Good luck making those CTA buttons stand out.
This is why most Neumorphism implementations are either concept-only or used in small, contained components.
Where Neumorphism is Used Today
Despite the drawbacks, Neumorphism hasn’t vanished. It’s evolved—often being blended with other styles like minimalism, glassmorphism, or even flat design to create hybrid interfaces.
Popular uses include:
Smart home controls
Music player apps
Portfolio websites
Finance dashboards
Designers often use neumorphic elements sparingly—one or two soft cards within a more robust design system.
Design Tip: How to Use Neumorphism Effectively
If you want to add a touch of Neumorphism without making your whole interface feel like it’s floating in a marshmallow pit, try this:
Use it for non-critical UI elements: cards, stats, avatars, etc.
Always check your contrast ratios. WCAG standards exist for a reason!
Combine it with flat UI styles to keep things readable and interactive.
Don’t rely on Neumorphism for buttons unless you provide backup visual cues.
Fun Fact of the Day
Neumorphism became so popular so fast that Figma, Adobe XD, and even CSS generators were flooded with “neumorphic” UI kits within weeks of its rise. Some of them were downloaded over 100,000 times—proving once again that design trends are the fastest-moving fashion statements of the internet.
Neumorphism may not have taken over the world, but it left a soft, pillowy footprint on the design landscape. And in the right hands, it still feels fresh and modern today.
https://letterhanna.com/exploring-the-neumorphism-design-trend/
0 notes