#Generate SS 4 Form
Explore tagged Tumblr posts
Visit Tumblr Blog
Explore Tumblr blogs with no restrictions, modern design and the best experience.
Last Seen Tumblr Blogs


Fun Fact
Average visit duration of Tumblr.com is 10 mins and 25 secs.
Text
Online 1099 NEC Generator: Fast and Accurate Filing
Using an Online 1099 NEC Form Generator is the quickest and maximum correct manner to file your 1099 NEC bureaucracy. The technique is easy, reduces errors, and ensures well timed submission to the IRS. Whether you're submitting for one contractor or more than one, the 1099 NEC Generator allow you to stay organized.

#Online 1099 NEC Form Generator#Salary Slip Generator#Salaried Pay Stub#Real Paycheck Stubs#Payroll Generator#Paycheck Now#Free Payslip Generator Online#Online Payslip Generator#How To Make Check Stubs#Check Stub Maker#Check Stubs#Make Check Stubs#Direct Deposit Check Stub#Online Check Stub Maker#Pay Check Maker#Generate W2 Form#Make W2 Online Free#Generate 1099 Misc Online#Free W4 Form Generator#Online W9 Generator#Free W7 Form Generator#Online 1099-C Form Generator#Free Online 8809 Generator#Generate SS 4 Form#Generate 8995 Form#Create 941B Form Online#1099 OID Instructions#Generate 1099-Div Form Online#Generate 1099 INT Form#Online 1099 G Form
0 notes
Text
San + Subtle ways he shows he loves you


Scenarios/Headcanons: Subtle ways San shows he loves you
Pairing: Choi San x Gn!Reader
Series Notes: Banner photos are simply for aesthetic, everything I write is a Gn!Reader/Non detailed Reader insert! There will probably be similar or repeat headcanons from others members versions, because there are many that I can see multiple of the members doing!
Words: ~420
Other Parts: Yunho || Mingi || Hongjoong || Wooyoung || Seonghwa

Extra awareness when you are around. I mean, constant vigilance.
He walks on the outside of the sidewalk, his hand is in yours or around your waist. He pulls you closer to him if a group is walking past. He leads you through crowds so you don't get overwhelmed.
Keeps an extra jacket in his car at all times in case you get cold when you are out, or forget yours.
Drives you around everywhere, he loves his passenger prince(ss).
Often holds your hand while driving, or keeps his hand on your leg.
Keep's an eye on your beauty, makeup and/or face care products and buys them for you when they get low, always before you can get them yourself.
Keeps doubles of the same care products at his place so when you stay over you don't have to bring anything.
Has a desk dedicated for you, your studies or hobbies so you can do them/work when you stay over at his place.
Carries your stuff for you even if its not heavy.
Buy's your favorite snacks/food for you (also to keep at his place for you, will fight anyone that's not you who tries to take them)
Play's with your hair and puts little braids in it.
Let's you do the same to him.
Happily boasts about you to anyone and everyone, even if it embarrasses you.
Couple items. So many. Shirts, jackets, bracelets, rings, stuffed toys, water bottles, phone cases, etc. This man wants it to scream that you are a couple.
He likes to feed you, even if it makes you feel like a child or embarrassed in public, he loves doing it.
Constant fond gaze on his face when you are talking. Best listener. Remembers everything you say.
Surprises you with cute foods/desserts to make you happy.
Comes up behind you and hugs you from behind, often resting his head on your shoulder. Does not want to let go.
Also tight hugs while sleeping, keeps your head cradled against him, pressing kisses against your head.
Surprises you with flowers often, no real reason needed.
Prints out physical photos of the two of you to keep in an album.
Invites you out with his friends all the time, to feel included, and because he loves just having you around with him.
Knows all of your tells, tics and habits when you are upset or angry, and he knows how to act on them to make you feel better.
Basically just worships the ground you walk on, but you know, in a "subtle" way.
xx
🌼 Taglist Form 🌼
General Taglist: @charmsprout, @brattybunfornct, @bahng-chrizz, @otakutrash669, @tinyelfperson, @meaniemace, @teenyfinds, @nikisfmine, @shymexican, @stillwjk-channie-lixie, @alexxavicry, @queenofdumbfuckery
@luckypaintertyphoon < tag doesnt work
Ateez Taglist: @soso59love-blog, @hongjoongsprincess, @thedistractedwriter, @dear-dreamie, @thunderous-wolf, @briqnne, @hyukssunflower, @dinossaurz, @skz1-4-3, @carattinymoa, @demonlineslut, @vnessalau, @dancinglikebutterflywings, @tunafishyfishylike, @life-is-a-game-of-thrones, @stormsandsea, @moonlitarcade
#choi san/reader#choi san x reader#choi san imagine#choi san fanfic#choi san headcanons#san/reader#san x reader#san headcanons#san imagine#san fanfic#ateez x reader#ateez/reader#ateez imagine#ateez headcanons#ateez scenarios#kpop fanfic#kpop imagine
305 notes
·
View notes
Text
Been thinking about how I'd rank each of the new pokemon introduced in each generation and I'm curious what the consensus is, so I'm running two polls.
Including Megas, Regional Variants, GMaxes, etc in the generation those new forms were introduced in, not the original Pokemon:
510 notes
·
View notes
Text
Eerebegraafplaats Bloemendaal
International brigadiers buried among Dutch anti-fascist resistance fighters


Hendrik Prins (13-VIII-1910 - 22-IX-1943) The struggle of the proletariat is hard, but we are invincible
A convinced communist, he arrived in Spain the 15th of July, 1937, and returned to the Netherlands the 5th of December of 1938, having become seriously ill in the tail end of the Ebro offensive. "a very brave and courageous soldier, disciplined, reliable in battle. He was very interested in politics and took part in all political activities."
He took part in the Dutch resistance, mainly with sabotage efforts. He was arrested in November 1942, sentenced to death and executed in September of 1943. The text on his grave is a quote from his farewell letter:
With this I say goodbye to you all and to life. I have done my best and I know what I am falling for. It is near the end, I know that. I did it for the freedom of us all. The struggle of the proletariat is hard but we are invincible… I end with a warning: keep your head cool and upright, because I am not the only one who falls. Long live communism .


Maarten van Gilse (12-VI-1916 - 1-X-1943)
A journalist, he arrived in Spain in March 1937. "In Spain he did important work... in collaboration with various photographers he compiled interesting reports, the publication of which was prevented by the war [...] It is certain that they regarded this journalistic work as a form of anti-fascist struggle. On the way back, Maarten must have crossed paths with his brother Janrik, who was on his way to become a political commissar for the CPN and the Komintern in Albacete. Maarten went to work in the Netherlands at the Jeugdtoneel.
Along with his brother, he joined the Dutch resistance in May 1940. He collaborated in the falsification of tens of thousands of ID and ration cards, as well as in sabotage within the CS6 group, also founded by the brigadier Gerrit Kastein. He was arrested trying to escape a raid on his studio the 23rd of July 1943, during which he was shot in the foot as he slid down a drainpipe. A few months later, he'd be executed in the dunes not too far from the current location of the cemetery.

Cornelius Hendrikus de Groot (13-X-1913 - 8-III-1945) Carries on his ideal, a dignified existence for all.
Traveled to Barcelona for 4-5 months in 1937 as a war correspondant, and sympathised with the POUM. He became involved in the Dutch resistance in December of 1940, becoming the leader of the Gerrestsen resistance group, where he avoided capture. However, he was arrested in Amsterdam following the attack on the SS general Hans Rauter, and executed outside the city the 8th of March, 1945.


Krijn Martinus Breur (25-V-1917 - 5-II-1943) Better to die standing than to live kneeling
He arrived in Spain the 24th of July, 1937, and joined the Republican army under the Edgar André batallion in the XI International "Thällman" Brigade. He was appointed political commissar of the batallion. He was injured first close to Quinto, and second, being shot in the spine, in the battle of the Ebro. He returned to the Netherlands the 18th of March, 1939. There, he was disallowed to serve in the army because of his injuries, and because of his service in a foreign army, stripped of his citizenship in July of 1940.
He joined the Dutch resistance along with his wife Aat Hibma from the beginning of the war, Krijn mostly being involved in espionage and attacks. He was betrayed and arrested along with Aat the 19th of November, 1942, when he was tortured for 5 days, losing some of his teeth and hearing in one ear. In his trial, he wasn't allowed to defend himself. "The death penalty was demanded on the grounds of his activities as a Red Falcon leader, as a former Spanish fighter and for committing communist resistance activities in the Dutch People's Militia". He was consequently executed in February.


18 notes
·
View notes
Note
For the ask game how's about 4, 25, and/or 26 for Hubert?
4: If you could put this character in any other media, be it a book, a movie, anything, what would you put them in?
i think in general i would love to consume 3H in book form because so much of it plays out like literature that it would be amazing to see the whole story retold with language instead of visuals and gameplay. i think that, put in the hands of the right author, a lot of the beautiful symbolism and allegory and all that would play sooooo nicely on a page and it would be quite beautiful.
for hubert specifically i think a book about him would be awesome. like i said in the one ask abt dedue i think that extreme loyalty is a rlly interesting character trait and to rlly get inside his head and see how that comes about would be super cool, esp in first person.
25: What was your first impression of this character? How about now?
i thought he was fucking hilarious lol i was like WHAT is this gerard way son of a bitch doing at anime boarding school. and that opinion still stands lol i think hes silly. obviously his role in the story is actually insane and very understated when ppl talk abt edelgard/ the war/ crimson flower but. in the back of my mind he's always just the dumbass goth lol
26: What's something the character has done you can't get over? Be it something funny, bad, good, serious, whatever?
the letter that he writes in vw/ss is FASCINATING!!! i think it's a crazy deviation from his normal character for him to entertain the possibility of edelgard losing even a little bit, and i think it's super interesting to speculate on just. why he did that!!!! did edelgard ask him to????? did he do it behind her back???? what's up with that!!!!! it also makes me wonder just. how much he agrees with edelgard's doctrine and how much he's doing behind the scenes. because obviously we know that the church are not the real villains of fodlan and that those who slither in the dark are the ones ACTUALLY responsible for the evil that takes place there. we as viewers know this, edelgard knows this, hubert definitely knows this, yet edelgard focuses all her attentions on the church WITH THE HELP of those who slither. and i dont think hubert is very okay with that!!!!!!! i think he gives more of a fuck abt seeing those who slither stamped out than doing conquest n shit, and that letter was probably his last resort for having SOMETHING done abt them since edelgard prob wasnt budging on their collab lol
#fire emblem three houses#fe3h#fire emblem#three hopes#three houses#headcanon#hubert von vestra#fe3h hubert#hubert fire emblem#edelgard von hresvelg#fe3h edelgard#edelgard fire emblem#ask game#faerghusfucker asks
14 notes
·
View notes
Text
Don't Forget (A Legend of Zelda One-Shot)
Featuring SS and ToTK
Rating: T??? Nothing too wild but see the trigger warnings below
Summary: Ten years after the Hylians established their kingdom on the Surface, Link struggles with the thought of his people forgetting his childhood home. / A millennia after the events of Skyward Sword, the weight on Link's shoulders almost brings him to his breaking point.
Trigger Warnings: Lots of ANGST, both Links are very sad, depictions of depression and PTSD, I haven't written a piece of fanfiction in like 4 or 5 years and I've never written anything for Zelda. I wrote this in like 3 hours. :)
A/N: This idea was sparked because I have been genuinely unwell about the full-circle theory where Tears of the Kingdom is at the end of the Child Timeline-- it's so different from Skyward Sword but the relationships between Link and Zelda literally hurt my heart and soul I love them your honor. The fact that both Zeldas like slept for eternity and Link is just. Stuck. Unable to help them immediately. My heart guys. It's also partly inspired by the fact that I'm currently grinding to defeat Ganondorf. Again.


When Link and Zelda left the sky to form an establishment on the Surface, Link knew it wouldn't be easy. Being on the Surface was hard enough for him just throughout his travels-- nothing but solid rock beneath his feet, the sky an unreachable distance above except by Bird Statue, it was claustrophobic at best and his body didn't handle the vast changes in altitude very well. It was adrenaline only that kept him going, and once it was gone, he spent weeks in recovery.
The same could not be said for Zelda, who, after bathing in the purifying springs and obtaining some of her holy powers from when she was Hylia, took the changes much better. He was more than happy to have her back, but in those first few weeks after she announced that the gods wanted Hylia's people to return to the Surface, a tiny spark of resentment buried itself deep in his heart-- not for her, never for her, but for the gods who had placed them in this situation.
That was ten years ago.
Of course, many of the citizens of Skyloft couldn't believe Zelda until she displayed her power in small increments, as the power itself was dwindling now that the need for it was gone. Some followed them to the Surface, some stayed.
Now, their small town had flourished and grown a bit. This newer generation on the Surface knew nothing of the Sky, and no Loftwings could bond with them down here. A few parents took their children to the Sky to see if they could bond with some, but the children couldn't handle the journey very well and no Loftwings appeared anyway. It was clear now that Loftwings were going extinct-- he hadn't seen a wild one since he was little. It was a monumental discovery, and a bit chaotic. People realized that their decision was permanent, and that one day the Sky and Surface would no longer have any connection.
As he stared out of the window on their little village, the thought of the future people of Hyrule never knowing about Skyloft made his stomach churn. Their village was nothing fancy-- stone and clay mostly made up their buildings, and it was built in a small ravine near the Temple of Time. The moon shone brightly through the trees, and the sounds of the forest animals made it almost impossible for him to sleep some nights. He missed the Sky, even years after moving to the Surface. If it weren't for Zelda, he wouldn't have stayed here.
He glanced back at his wife, peacefully asleep and unaware he had left their bed. Her golden hair was a mess and she had fallen asleep in her working clothes after helping with the crops all day, keeping herself busy to try and root herself in reality, even still. The memories of her life as Hylia had mostly vanished, but occasionally she would speak in a cryptic, ancient tongue or she would reference something that hadn't happened in this lifetime. She hadn't had an episode in a long time, and he hoped it would stay like that.
Heaving a deep breath, he grabbed his satchel and quietly left the room. He probably wouldn't be back by breakfast, but she was used to him making these excursions by now. The town was quiet as he exited their house, ensuring the door was closed behind him. It had taken him years to be able to leave Zelda alone, but he knew she was safe for the rest of this lifetime-- Demise had promised he would reappear, but not for a very long time.
As he passed Pipit on night patrol, the two shared a brief nod of recognition. He knew he probably didn't watch the house all night, but his own house was right next door and Link was certain that Pipit guarded his wife and children more closely than any other. Granted, no one had seen a monster since Demise's defeat, but there was no such thing as being too careful.
Groose-- also a sleepless man-- was sitting on his front porch when Link passed by. It was very late, but it wasn't unusual. While his childish jealousy and feelings for Zelda had both changed, their friendship hadn't. Part bullying, part joking, their shared experiences during the battles they were through had made them lifelong friends.
Groose often made similar trips that Link did, sneaking off to go to the Sky for a day or two; sometimes he joined him. Tonight, though, Groose was back from one of many journeys into the Lanayru Desert. The Hylians had an outpost out there where they collected sand for glass and found precious gems to trade with Gorons, Mogma, Parella, and Kikwis-- although relations with the Mogma were unsteady at best. They'd been stealing from the Hylian outpost in Eldin, where they were trying to help the Gorons establish a peaceful settlement. Both races only wanted to fight, however, and he worried there was war in their future, war that he would not allow the Hylians to interfere with.
Groose had volunteered to oversee the Lanayru outpost shortly after it was established. He would often be gone for weeks at a time, deeply tanning his skin. The pompadour he'd sported in his teenage years was long gone. He often talked about a permanent settlement in the desert, but Link wasn't too sure about it.
He caught Link's attention on his way out of the village. "Nightmares?" It was an unfortunate reality. The three of them even still had nightmares of that time-- he couldn't imagine Zelda's. From her descriptions of the Imprisoning War, she had twice the trauma they did. When they had nightmares, they'd escape to the sky, often returning to their old homes in Skyloft and spending time with the few who had decided to stay.
Link only shook his head. He didn't speak much anymore. Groose nodded, returning to leaning back in his chair and watching the moon. "Careful. I'm not going to bed anytime soon, so I'll watch your house."
Link nodded his thanks and left the village boundaries. Something that even still astounded him was how dark the Surface could get, and he rushed down the paths to get to the Bird Statue. The darkness reminded him of things that he didn't like to remember: visions of the Imprisoned, Ghirahim... He blinked them furiously away and bade the statue take him up.
Link's heart was heavy as he sat on a stone looking out over the endless sky. It was quiet, and peaceful. He sat on the uninhabited side of the lake, facing away from the abandoned structures and few lights. Overgrown, fading away, Link hated the thought of his home becoming unimportant. More so, he hated the thought of losing his bird.
She sat beside him in all of her crimson glory, preening her feathers. He stroked her neck lovingly, knowing that one day, she would be gone, and his final connection to the Sky will be lost. Red was his only means of getting here, and she was blissfully unaware of this fact. "Promise me something," He whispered, "When someone with the Spirit of the Hero is reborn again, stay with him. In whatever form you can take."
Red paused, almost as though she could understand him. Inwardly, Link briefly wondered if he was crazy for talking to his Loftwing so much. Their eyes locked, and Red leaned her head into Link's chest with a soft call. Link wrapped his arms around her head and started to cry, unable to control himself. He longed for the old times, for what could have been. The peaceful life he had imagined for himself when he was young was a cold, painful dream now, and even though he knew he should be grateful for what he had, he couldn't shake the unhappiness in his chest that lingered day in and day out.
Taking a small chisel out of his satchel, he let go of Red and moved off the rock, turning to hammer into it. It was a project that he'd been working on for days now, and he was almost finished.
Dawn had arrived when he blew the dust off of the stone. He ran his fingers over the letters, proud of his work. Exhausted and unable to get rid of the hurt in his heart, he leaned his head against the rock and closed his eyes, taking a moment to try and gather the willpower to fly back to the Surface.
"What are you doing now, sleepyhead?" Although Zelda's voice was gentle, it startled him anyway. He whipped around, shocked to see both her and her purple Loftwing standing behind him. She hadn't even changed, and warmth slowly crept back into his limbs. Slowly, the awful, worsening emotions of the night were chased away by her presence, her beautiful smile and the thought that she'd left the house so quickly to come to him.
It was always worse when he was alone.
When he was away from her.
Link let out a tense breath as his body relaxed, rushing to her and enveloping her in a tight hug. "I'm sorry--"
"Shut up," She cut him off quickly, and he couldn't help but laugh. Just having her close made everything okay. "I know. You don't need to apologize." She gave his torso a tight squeeze, resting her chin on his shoulder. "Want to show me what you're working on?"
Link stepped back, turning toward the rock and gesturing toward the inscription on its surface. "I'm not done yet. At this rate I'm only getting one word done every couple days."
Zelda leaned down to read it, crossing her arms against the morning chill. "Please don't forget..." With a sigh, she stood up, facing the rising sun. The thought of Skyloft being forgotten hurt her too, but she was much better at accepting things than he was. "They really are going to forget one day." In silence, they watched the sun rise; Link put his cloak over her shoulders and pulled her close to his side.
"One day," She suddenly specified, and Link briefly struggled to make the connection. She looked at him, smiling. "One day they will forget. But we won't be here. It won't be us. Do me a favor: try to live here, and now. Forget about the rest. It either hasn't happened yet, or is over and done. All that matters is right now." She took his hand in hers and held it tightly.
Link planted a lingering kiss on top of her head, closing his eyes and realizing that she always smells of Skyloft's meadows in spring rain. At least, she does to him. "...I'm trying."
"I know. Sometimes that's all you can do."
They sat and watched the sun rise until it was well above the Cloud Barrier, but they didn't return to the Surface. They didn't return that day, or the next, and when they did eventually return, they made weekly trips to the Sky from then on, forcing time into their busy schedules to enjoy flights around the floating islands. Link soon forgot all about the stone he was carving, and he never did finish it.

~Millenia Later~
Link sighed as he forced down the final bite of a half-hearted stew of mushrooms and venison. It was tasteless. The fire crackled softly, but it did not relax him. He barely felt the warmth of it at all. He was numb, numb and tired. So very tired. His whole body hurt and his heart ached. The Master Sword on his back was heavy, and his tunic and leathers felt restrictive. He was overwhelmed and exhausted.
He'd tried. He'd solved all of the regions' problems in Hyrule and obtained their avatars. He'd explored the depths and found Mineru's robot. The most tasking of all was finding the Dragon's Tears, the memories of his beloved Zelda who had been thrown back in time 10,000 years and now had permanently lost herself to her dragon form. She was gone. If Mineru could think of no way to save her even with her vast and ancient knowledge, then how could he? He'd lost his first love to Calamity Ganon, and now his second was forever lost because of him too. And when he'd tried to end him, he wasn't strong enough.
Link barely escaped that chasm beneath Hyrule alive-- he visited a fairy fountain and started on a journey to find all of the shrines he could, getting as strong as he could possibly be.
And he still couldn't do it.
In frustration, Link hurled the bowl across the campsite with a yell. Who was going to hear him? He was all alone, save for his horse. Epona snorted in alarm at his outburst, raising her head and huffing in his direction. "What?" He snapped, though he knew full well the horse couldn't understand him. Across Sky, Depths, and Hyrule, he kept getting stuck in shrines that should be easy.
He initially tried to calm himself, but decided not to. There wasn't anyone around he needed to keep his stoic act up for. He instead drew his blade and stormed into the nearby patch of woods, destroying any keese or chuchu that dropped from the trees in his path. When he'd expended his anger and all that was left was grief, he stumbled out of the other side and fell to his knees by a pile of ruins that had fallen from the Sky.
The tears came unbidden as he collapsed on a mossy stone, and he let himself sob as loud and as hard as he wanted to. He missed his friends, he missed Mipha, he missed Hyrule as it was before the Calamity. He missed his family. What had ever happened to his sister? He still had never found any descendants of hers. Most of all he missed Zelda, he missed her with all of his soul and then some and it was painful. Maybe it was she was so close, and yet so far.
Why does he keep fighting? With Zelda gone and with Ganon's incarnations always returning, what's the point anymore? He wanted to disappear. So badly, he wanted to leave and never come back, vanishing into the wilderness.
As he calmed, he tore at the moss absentmindedly, ripping away until it was gone and his fingers were stained green. Sniffling as he leaned back, he wiped his face with the back of his hand and noticed something... odd.
The rock's surface had an odd etching in its surface, but it didn't look like Zonai script. Zelda would want to see it. Curious, he used the Purah Pad as a light to better see it in the half-dark of the night. His eyes widened. It was Hylian. A very old version of it, he had seen it in Zelda's books. She'd gone on an excited tirade a year or so ago about it when she'd found an ancient tablet describing the founding of Hyrule, though she could barely read it. Shifting closer, he struggled to remember how to translate it. He'd learned it so that he could write her letters for her to practice, though it was so long ago and so much had happened that his mind was scrambled.
"Please... Don't... Forget..." The stone was so worn that he couldn't make out anything else. Link hummed thoughtfully, taking a picture of it-- he winced when he realized that he'd automatically thought of showing Zelda, who wasn't here. He stood, eyes on the inscription in the rock for a moment longer. He felt like it was important, but he couldn't place why.
Unexpectedly, his blade lit up with a soft noise, a magical sound it rarely produces. Zelda always said it was the spirit of the blade. Confused, he reached back to grab it, expecting a dangerous enemy to approach from the treeline when something caught his eye.
A Silent Princess.
Link's heart twisted at the sight of Zelda's favorite flower. Instinctively, he reached down and made to pluck it, but stopped. She would smack him so hard if she were here to do so. An endangered flower, remember? I need to leave it be.
The distant call of a dragon brought his attention upward, and his heart skipped when he saw a familiar outline on the horizon, backlit by the painfully beautiful dawn. "Zelda," He breathed; she rarely flew this low.
Please don't forget. The words on the stone, the sight of her, the flower, the sword whispering-- his heart raced. A few stray tears rolled down his cheeks. "I'll keep trying," He managed, "I made you a promise. I'll keep trying."
On the horizon, the Light Dragon shrieked low. He knew there was no way she could possibly hear him, but it felt like an answer. It's all you can do, she would say. He could almost hear her voice.
Filled with new energy, Link made his way back to his campsite. He packed up quickly, putting out the fire and making sure to retrieve his only bowl-- although he couldn't find his spoon. He would have to make a new one. As he stuffed his supplies in his saddlebag, something sharp poked his finger; he yanked the item out of the bag in a panic, expecting an insect or lizard, but was surprised at the sight of a long, red feather between his fingers. He made to throw it away, unsure of how it got in his bag, but stopped; maybe if he saw it again, it would remind him of the rock. Please don't forget.
Epona turned to look at him, nickering quietly. Link stuffed the feather in his bag and wrapped his arms around her head, hugging her tightly. "Even if all my friends are gone, at least I have you, Epona."
As though in answer, she whinnied loudly and he laughed, giving her the apple in his pocket that he knew she wanted. He clambered up into the saddle when she was done and the set off at a gallop for the distant glow of a shrine on a nearby cliff, eager to fight another day.
Maybe, when this was all over, he might find a way to save Zelda after all.
Okay guys. Look. It's been a very long time since I've written any fanfiction. And I don't think I've ever written anything for Zelda. I know this is different from my usual content, and I don't know if I'll do something like this again but I might. Let me know what you guys think!
Reblogs are greatly appreciated! If you'd like to be added to the tag list, you can reblog, comment, or leave a message in my inbox!
#legend of zelda#link#zelda#legend of zelda tears of the kingdom#legend of zelda breath of the wild#loz botw#dragons#legend of zelda skyward sword#legend of zelda fanfiction#loz fanfiction#loz fanfic#link fanfic#link fanfiction#zelda fanfiction#zelda fanfic#groose#pipit#gorons#kikwi#mogma#parella#zora#mipha#champions#botw champions
9 notes
·
View notes
Text
Blog Update
TLDR: I'M BACK (Soon. I have character analysis to do and I will be deleting all fanfic I've written and all prompts in my inbox to start fresh.)
Okay so the reason I haven't updated this blog in so long is because I've been stuck in character analysis hell. I made forms in my notes app so I can analyze the characters. Here is what that looked like, if you're curious.
Name(s):
Title:
Age:
Birthday/Character Day:
Nationality:
Ethnicity:
Likes
- ---
Dislikes
- ---
Food Preferences:
Trailer Notes:
Gameplay Notes:
Official Backstory Notes:
Deduction Notes:
Letter 1 Notes:
Letter 2 Notes:
Letter 3 Notes:
Letter 4 Notes:
Letter 5 Notes:
Playable Story Notes:
Full Story
- ---
Design Notes Information:
Cosmetic Notes
- General:
- SS Tier:
- Debut Essence:
- Nymph Awards:
- Deduction Star:
- Truth and Inference:
- COA:
- ONCE:
- Notable Crossovers:
- Ivory Tower:
- Worn Clothes:
Overall Taste in Clothing:
Official Song Notes
- Song Title (Event):
Official Art Notes:
Notable Relationships
- ---
Identity Switch Description:
Personality
- External Expression:
- Body Language:
- Speech Patterns:
- Quote: ""
- Internal Thoughts:
- Ambitions:
- Morals:
Story Themes:
My Headcanons
- ---
Fanon Interpretation:
Popular Theories
- --- (My Thoughts)
Popular Ships
- --- (My Thoughts)
Most Compatible Crackship (Taken Seriously):
Writing Notes
- ---
For the 28 characters I intended to write for, that was a lot. The worst part is that it required me to read every letter and record all notable information just so that I can compile it all into a chronological story description, which is repetitive and ultimately unnecessary because I'd end up never reading those letter descriptions again. It was just work for the sake of work. And when new letters came out, I'd have to reevaluate everything. With so many characters to analyze and multiple characters to update, it was a lot. Eventually, it became more trouble than it was worth and I lost interest in writing.
And the solution I've come up with is to completely revamp the form. I'm adding new prompts, removing the unnecessary stuff, and reorganizing the list in a more productive order. I will also be re-evaluating the list of characters I write for. In addition, I will be saving a few prompts I like and rewriting them. I want to start fairly fresh, with new prompts and new systems in place. I went into this with a lot of randomness that I no longer consider to be optimal. I didn't even use the forms initially. I made a lot of odd writing choices, and I'd like to redo some of it.
In the coming days, I will:
♡ Finish editing the form (Almost finished).
♡ Re-evaluate who I write for (I intend to create a "starter pack" containing popular characters who I'll immediately analyze, with additional characters to be analyzed when they're asked for. The starter pack will include: Luchino, Norton, Ithaqua, Andrew, and Aesop.)
♡ Create guides to writing (Including a small collection of prompts to remind me of what to write.)
♡ Have a look through previous work and see what I'd like to salvage, then delete everything. I will also be updating my pinned post.
♡ Begin analyzing characters (I think it is best to start with Luchino.)
♡ Resume writing.
I'm sure you have thoughts on this update. Against my better judgment, I will keep my inbox open during this process. All hateful comments will be deleted and I ask you to remain polite, but I'm open to advice.
5 notes
·
View notes
Text
Star Wars: Saasa Raassiks
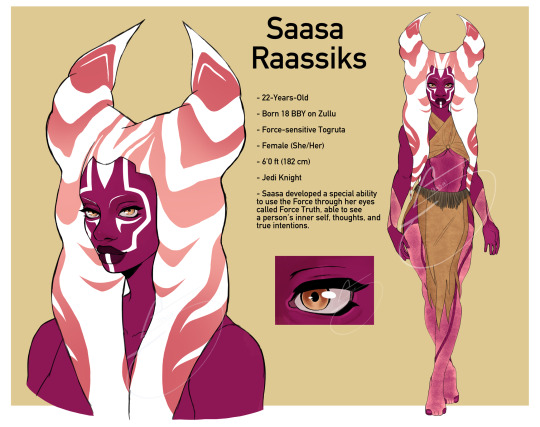
Now we get to the badass mother of Pa’loa, Saasa :) Pronounced Saa-YA-sa Raa-Ss-eks.
Saasa Raasskis is a 22-year-old Togruta female with Force sensitivity. She lives on the planet Zullu, which is uninhabited and serves as a living and breathing ecosystem for the Force. Her mother, Athsok Raasskis, was a former Jedi Master who fled Coruscant while pregnant during Order 66. Saasa was born and hidden on Zullu, where she was trained by her mother in the ways of the Force from an early age, however, Athsok renounced the conventional Jedi principles on account of their restrictive code, which, in her view, led to the Jedi Order's downfall. Due to the planet's unique conditions, Saasa has developed an exceptional connection and harmony with the Force, essential for her survival in the harsh environment. Athasok and Saasa lived in peace as Zullu wasn't recognized on many Star Systems to begin with, therefore the Galatic Empire had no knowledge of their existence. When Saasa was a child, she often felt lonely because she didn't have many opportunities to socialize with other people. Instead, she would spend long hours in the vast wilderness, where she made friends with the animals and even tried to use the Force to connect with others. Growing up in the jungle made Saasa a natural athlete, and she can effortlessly climb the dense terrain as if she were an animal herself.
In the year 4 ABY, just before the events of Return of the Jedi, Luke's ship crashes on Zullu after the Force summons him, causing his ship to be pulled towards the planet’s center. He survived for several days in the wilderness before Saasa appeared. Saasa was curious about the young human man and had been following him. However, she pretended to be hostile to protect herself and her home. Saasa developed a unique ability called "Force Truth", where she could use the Force in her eyes to look into people's inner selves, thoughts, and true intentions. After sensing that Luke was one with the Force and meant no harm, she apologized for her initial aggression towards him. Saasa then led Luke to her Mother, Athsok, who recognized him after hearing his surname. Athsok told him that she knew his father and Obi-wan, as they had all served together as generals of the Republic during the Clone Wars and all of the stories she had. Luke's desire to finish his Jedi training, as well as his natural curiosity about Zullu, led the mother-daughter duo to offer him an extended stay. They would teach him everything they knew, and he managed to remain on Zullu for a few months, learning how to survive on the planet by connecting to the Force.
Athsok, a highly skilled Jedi Master, was personally trained by the legendary Yoda himself. Her extensive knowledge and unparalleled experience in the Force proved to be of great assistance to Luke during his Jedi training. Through their rigorous training and survival in the unforgiving jungle, Saasa and Luke formed a strong connection through the Force, eventually leading to them falling deeply in love. However, their love was cut short as Luke was compelled to leave and rescue Han Solo on Tatooine. Despite this separation, Saasa made a bold decision to leave behind her mother and Zullu, and join Luke in his fight against the tyrannical Galactic Empire. Having spent her entire life in hiding, Saasa finally felt empowered to aid the Resistance in their struggle for freedom. Saasa showed unwavering trust in Luke's leadership during the events of Return of The Jedi and played a pivotal role in the destruction of the second Death Star's shield generator, effectively aiding Leia, Han, and Chewy to emerge victorious.
Luke and Saasa's relationship is a beautiful example of trust and mutual respect. Luke held Saasa in high regard for her plentiful knowledge of the Force and saw her as a mentor. Saasa, on the other hand, admired Luke for his compassionate nature and unwavering commitment to freedom. Together, they joined the Resistance and played a crucial role in defeating the Galactic Empire. When the war was over, Saasa decided to stay with Luke and his friends to work towards restoring peace throughout the galaxy. Over time, their bond strengthened, and they fell in love with each other. Eventually, they got married, and Saasa continued to support Luke as he rebuilt the Jedi Order with new, less restrictive codes. As a master, Luke established the order on Yavin 4 but later moved it to Zullu under Saasa's influence. They believed that living in harmony with the Force was the true way of the Jedi. Their love bore fruit in the form of a daughter named Paloa Skywalker, who was a human-Togruta hybrid. Luke and Saasa took great care in raising Paloa and instilled in her the values of the new Jedi Order. Together, they continued to work towards a better future for the galaxy with victories and failures, yet their legacy lived on long after they were gone.
#star wars#star wars oc#star wars legends#star wars luke skywalker#star wars anakin#luke skywalker#leia skywalker#leia organa#han solo#jaina solo#jacen solo#anakin solo#anakin skywalker#padme amidala#the skywalker saga#the phantom menace#attack of the clones#revenge of the sith#a new hope#the empire strikes back#return of the jedi#ahsoka tano#togruta#star wars original character#star wars togruta#darth vader#darth maul#obi wan kenobi#lando calrissian#star wars expanded universe
37 notes
·
View notes
Text
Super Saiyan Sillyness
There's a small plot point in DBS that is really important as to the direction the series is going, but if I acknowledge it; it would be extreme spoiler content. So instead; I'm going to talk about how Super Saiyan works.
In the DragonBall series Ki is a metaphysical concept that can be used to increase your own endurance and kinetic power, without increasing your mass.
Originally, this was a small thing used by characters to shoot out magical bursts like a firearm, without a weapon. Allowing a Martial Artists to develop ranged attacks without weaponry.
As we get to DBZ however; this Ki energy becomes a way to increase your physical strength and endurance. Initially by increasing your muscle mass, and later without the forced muscle expansion that causes body degradation and extreme exhaustion.
This culminates in the Battle of Goku vs Frieza, where along with his innate spaceman genetics; Goku figures out how to use this Ki, along with his anger to transform into a super Saiyan.
What this is, is a focused version of abilities before this, developed by Roshi and King Kai. King Kai's variant being the most recognizable; Kaio Ken.
Kaio Ken, however; like the bulking Ki causes extreme wear and tear on the body. And so the Super Saiyans rarely use it after learning how to become super Saiyan.
Now, SS isn't the only type of super transformation available to denizens of Akira Toriyama's world. Frieza species seems to be able to "Go Gold" as well. Which is a full body transformation.
Similar to Super Saiyan 4 in the DBGT series, which explored the vastness of space after turning Goku into a child.
Saiyans also have a kind of werewolf transformation during the full moon, where they can't control their emotions.
This however is shown to be destructive, and akin to the muscle expansion techniques as it increases Mass equivalent to the energy gained.
The Namekians have a similar transformation showcases by Lord Slug and Orange Piccolo, which has all the same drawbacks.
What this means; is because Saiyans and Namekians and Frezians share these similar transformations and Ki generation; that these techniques should be available to every race and species.
It's just that some cultures are more ingrained with wanting to learn how to fight gooder. Or are Frieza and just Tyrants.
Vegeta and Frieza show a disdain for species that they previously believed were "inferior races". Frieza towards all Saiyans, and Vegeta to his Half-blood nephew: Gohan. Who display a completely different form of Saiyan transformation that isn't SSJ2 but is similar in power level. Dubbed Mystic Saiyan due to its creation by the influence from Supreme Kai's Magic.
But here's where it's interesting to me. As we get to Super Saiyan God mode, which is what the *real* SS legend is based on, and the Saiyan race had become extremely weak in comparison to their former abilities before the Friezers turned them into a caste of warrior conquerer slaves. Meaning they had forgotten nearly all of their *real* combat techniques that they thought made them a "superior race."
But this Super Saiyan God mode, which then can be focused into what's known as Super Saiyan Blue; demonstrates the use of Ki and it's reflection on tbe visible light spectrum.
Ki can be used raw to empower a person, but because it's non focused it will cause the body to undergo a temporary extreme physical transformation.
This is alleviated somewhat with the Kaio-Ken technique which focuses the ki to a sharper point, and allows for an exponential increase in comparison to the regular Ki power up, but has the *same* draw backs at higher levels.
Then we get to a kind of Middle point. Frieza has several forms before Gold, but they seem to be more able to limit their physical transformation to use the power gain more effectively.
In fact; Friezas stay in their supposed final form after entering permanently, and then have more forms to go, and Unlike Uzaro Form and Super Namekian form, retain a standard small humanoid size.
And here's where it gets interesting; these different forms and techniques can be combined or used interchangeably to achieve the same or similar results .
In DB:GT; Super Saiyan 4 is achieved by entering Uzaro Form, Mastering it, Turning Super while in that form, and then supressing the Ki and physical transformation to bring the user back to typical humanoid size.
With their body showcasing red fur growth over their body.
This indicates that Super Uzaro, Namek, and Frieza all use a similar method in order to achieve levels that are past Super Saiyan 3 levels.
SS3 is a unique form, because while still being Super Saiyan, it amps up the physical form of the user. It still increases the physical mass. Not only appearing to lengthen the hair follicles (which is probably just run-off ki, as the user returns to normal after use)
But bulking up as with the previous forms drawbacks.
Which means that this Bulking is the habit that most life forms exhibit when they increase their key until they figure out how to shift better.
Basically, SS3 is the Roshi Technique combined with SS transformation. And SS2 focuses the energy of SS1 better, because it doesn't exhibit the bulking drawback.
This bulking drawback is visible when Vegeta and Trunks attain their own post Super Saiyan forms as well. Vegeta commenting; "You're still using that bulky form?" At one point indicating to Trunks that he is doing it wrong.
Their SS2 forms included the bulking drawback that Goku's didn't exhibit.
So when we get to SS:God form; this looks similar to Kaio Ken, with it's red glow. Indicated a compressed form of energy, that can then be compressed into Super Saiyan Blue.
Vegeta demonstrated this with his Super Saiyan Prince form. As his eyes sparkle along the colored light spectrum indicating the varying power levels not visible in the hair.
This is different but similar to the SS4 shown in GT. Instead of the Ki run off coming from the tops of their heads as in the gold super Saiyan forms, the red ki comes out of the hair follicles across their body and from their regrown Saiyan monkey tails.
This is a strange transformation as it looks like a form similar to Ultra Instinct combined with a red variant of super Saiyan.
More on this; Ultra Instinct looks like base form. Because there is no bulking, there is no visible Ki generation at the hair follicles. Just a black-light aura.
This is because the Ki is focused to a point where it is no longer emitting from the visible light spectrum.
The drawbacks with UI seem similar to Uzaro and Kaio Ken form however. As UI takes an extreme toll on the body, and nearly loses concious control. Any less control, and it's conceivable Goku could become a mindless destructive force like Uzaro or Brolly.
Brolly is a Super Saiyan who can't control his super Saiyan powers due to extreme neglect and trauma induced by the former Saiyan culture and lifestyle. Which indicates a connection between Super Saiyan Brolly, UI, and Uzaro. SS Brolly forms (also shared by Kefla from Uni6) also showcases a greenish aura.
Demonstrating that there are different ways that different people can utilize the SS transformation and these other techniques.
What this means is that Uni7 UI Goku has potentially become stronger than DB:GT(unnumbered uni) Goku. Because he doesn't have Color inconsistencies. SS4 Goku and Vegeta in comparison, while having black hair, emit the Red Ki from their body hair, and red from their eyes, similar to Vegeta's Super Princess. SSJ4 also includes slight bulking.
However, UI has that extreme Drawback where once you've used up your energy, that's it until you take a long rest.
UI also seems different from Super Forms as you can't harness your emotional state, as one is often shown doing when they initially enter that state.
And Uni6 Saiyans, with the exceot of Vegeta's protege, entering it at will without emotion.
Hinting that the emotional burst is good to learn how to control larger amounts of Ki, but not good at focusing it down to the single point required of UI.
The SS4 Saiyan's also have a "Limit Breaker" similar to that of entering SS:God Mode. which enables them to use their transformation at will, unlike before which required becoming Uzaro, loosing control, regaining control, become super Uzaro, and then sustaining that. And maintaining it longer than 5 minutes.
Which suggests the forms are not unique to the method of transformation.
With Videl standing in for an extra Saiyan (Despite being Preggers) this also suggests that you simply need multiple people whose combined energy exceeds a certain amount, and isn't generically limited to Saiyan's.
This correlates with the other [Super Transformations] shown in the series as a whole.
What they tend to forget, is that despite being Human, Videl is one of the strongest Humans on Earth. Rivaling only Krillin, who isn't as strong as Goku simply because he doesn't have a single mind focused on becoming stronger. Also, unlike Goku, who inherited land and money from King Yama, actually needs to work for a living.
Goku isn't the strongest because he's a Saiyan either. Even Vegeta believed for a while that Goku was a low-tier saiyan incapable of meeting, much less exceeding the power level of a prince like himself.
He's the strongest because he's Goku.
This brings me to the end of this with one final observation; Goku and Trunks in Uni7. Who become Super Saiyan at will naturally. Without training, without really knowing what it is.
They're not just expanded power level from epigenetics, they have expanded powers because of the same technique that gives Goku and Vegeta SS:God powers.
Because it's the same technique showcased by Korin, Kami, Guru, and the Kai's, in "unlocking a person's potential".
Just a weaker form since a single person would only be able emit so much energy. Achieving SS:God and SS4:LB and the [Ki Expansion] technique most therefore be the same, becoming stronger the more Ki you pump into the recipient.
Ergo; Trunks and Goten have high power levels because of... Well... All that energy and training happening during the Buu saga...
26 notes
·
View notes
Text
VANGUARD SCHEME WITH COVER 1 BLITZING DBU//TIME OF POSSESSION INDICATORS BLITZING STRONG SAFETY
SUPPLIER
Investors and policymakers always want tools to predict future trends and to make informed decisions. Economic indicators stand out among these tools as crucial signposts. They offer insights into the health and direction of an economy.
Leading, lagging, and coincident indicators form a trifecta of economic measures. Each plays a role in forecasting, confirming, or telling us about the market or the broader economy. They fall into one of three categories:
Leading indicators point toward future events.
Lagging indicators confirm economic or market shifts that are already in motion.
Coincident indicators occur in real time and clarify the state of the economy.
The information provided by these indicators is very influential. Indicators help shape fiscal and monetary policy, business investments and strategies, and the value of share prices.
What Is the Purchasing Managers Index (PMI)?
A monthly Purchasing Managers Index (PMI) for the manufacturing sector is developed by the Institute for Supply Management (ISM), a nonprofit supply management organization. ISM also tallies a monthly PMI for the service sector and hospitals.1
It is a diffusion index that summarizes whether market conditions are expanding, staying the same, or contracting, as viewed by purchasing managers.
Who Uses the PMI?
Corporate Managers: May use the monthly PMI results to make key decisions about future business. For example, an automobile manufacturer makes production decisions based on new orders that drive purchasing decisions about parts and raw materials. Existing inventory balances also drive the amount of production the manufacturer needs to complete to fill new orders and to keep some inventory on hand at the end of the month.
Suppliers: A manufacturer's parts supplier follows the PMI to estimate future demand. The supplier must determine how much inventory its customers have on hand, which affects the production that its clients generate.
Investors: PMI is a leading indicator of economic conditions. The direction of the trend in the PMI may signal changes in the estimates of economic activity and output, such as the GDP, industrial production, and employment.
PLAYERS ON THE FIELD
3 DE
4 LB
1 SS AS A DEUPTY LB
1 FS
2 CB
MARKET INDICATORS
Leading indicators point toward future events.
Lagging indicators confirm economic or market shifts that are already in motion.
Coincidnent indicators occur in real time and clarify the state of the economy.
A lagging indicator is an economic statistical indicator that changes after macroeconomic conditions have already changed. Typical examples of lagging indicators are unemployment figures, profits or interest rates. Within short-term statistics the number of persons employed is a typical lagging indicator.
In the context of the National Football League (NFL), leading indicators could include things like draft position, free agency signings, and the hiring of new coaches, as these often predict future team performance. Lagging indicators would be things like Super Bowl wins or playoff appearances, which confirm past performance. Coincident indicators might be things like weekly game attendance or television ratings, which reflect current fan engagement.
Leading Indicators:
Draft Position:A high draft pick generally indicates a team's recent struggles and can be a predictor of future talent acquisition and potential for improvement.
Free Agency Signings:Signing key players in free agency can signal a team's intent to compete for a championship in the near future.
Coaching Changes:Hiring a new coach, especially one with a winning record, can be a leading indicator of a shift in team strategy and potential for future success.
Lagging Indicators:
Super Bowl Wins:A Super Bowl win is a clear confirmation of a team's success in a given season and over a longer period.
Playoff Appearances:Making the playoffs indicates a strong regular season performance, confirming the team's competitiveness.
Final Win/Loss Record:A team's final record is a lagging indicator of their overall performance throughout the season.
Coincident Indicators:
Weekly Game Attendance:The number of fans attending games each week reflects the current interest and support for the team.
Television Ratings:High TV ratings indicate the current popularity of a game or team, reflecting their current engagement with fans.
Social Media Engagement:The level of social media activity surrounding a team, including mentions, shares, and likes, can be a real-time indicator of their current popularity and fan interest.
Lagging indicators for a strong NFL strong safety in football are historical performance metrics that reflect past success, such as tackling efficiency, run stop percentage, and coverage stats like yards allowed per coverage snap and passer rating allowed. These metrics offer insights into how effectively the safety has performed in run defense, pass coverage, and overall tackling, providing a backward-looking view of their contributions.
Elaboration:
Lagging indicators in the context of an NFL strong safety are essentially performance statistics that are recorded and analyzed after the fact. They don't predict future performance but rather describe past performance. Here's a breakdown of key lagging indicators:
1. Tackling Efficiency:
Definition:This measures how often the safety successfully brings down the ball carrier after making contact. A high tackling efficiency indicates the safety is reliable in bringing ball carriers to the ground.
Relevance to Strong Safety:Strong safeties are often involved in run support, and their ability to make tackles is crucial for stopping the run.
2. Run Stop Percentage:
Definition:This metric indicates how often the safety prevents the opposing team from gaining positive yardage on running plays. PFF metrics calculate this by factoring in tackles for loss and tackles that result in no gain or a minimal gain for the offense.
Relevance to Strong Safety:A strong safety who consistently stops the run helps create negative plays for the offense and puts the defense in advantageous down and distance situations.
3. Coverage Stats (Yards Allowed per Coverage Snap, Passer Rating Allowed):
Yards Allowed per Coverage Snap:This metric measures how many yards a safety allows on average when they are in pass coverage. A lower number indicates better coverage ability.
Passer Rating Allowed:This metric measures how effectively the safety is in limiting an opposing quarterback's passing success against them. It considers completion percentage, yards per attempt, touchdowns, and interceptions.
Relevance to Strong Safety:While strong safeties are known for run support, they also play a vital role in pass coverage, especially against tight ends and running backs coming out of the backfield. These metrics help assess their effectiveness in covering these types of receivers.
4. Interception Rate/Forced Fumbles:
Interception Rate:This measures how often the safety intercepts passes. A higher interception rate indicates a strong ability to recognize routes and make plays on the ball.
Forced Fumbles:This indicates the safety's ability to strip the ball from ball carriers, creating turnovers.
Relevance to Strong Safety:These statistics show the safety's ball-hawking ability and playmaking impact on the game.
5. Pre-Snap Alignment:
Definition:Tracking where a strong safety lines up pre-snap (in the box, at free safety, etc.) can provide insights into their role and responsibilities within a defensive scheme.
Relevance to Strong Safety:By analyzing pre-snap alignments, coaches can understand how the safety contributes to both the run and pass defense.
In essence, these lagging indicators provide a snapshot of a strong safety's performance over time. By analyzing these stats, coaches and scouts can evaluate the player's past effectiveness in run stopping, pass coverage, and overall impact on the game, helping to assess their suitability for the strong safety position and their potential for future success.
The 46 defense in football, made famous by the 1985 Chicago Bears, is a scheme that utilizes a strong safety as an extra player near the line of scrimmage, creating an eight-man front to overwhelm the offense, particularly in run defense. The strong safety, known for his athleticism and tackling ability, lines up in the box alongside linebackers, essentially becoming an extra lineman. This alignment puts pressure on the quarterback and running backs, but it can also leave the defense vulnerable to quick passes.
Here's a breakdown:
Strong Safety's Role:The strong safety's position is crucial. He's not just a typical safety; he needs to be able to cover ground, rush the passer, and deliver strong tackles.
Extra Man in the Box:The 46 defense places the strong safety on the line of scrimmage or very close to it, creating an eight-man front for the run game.
Pressure on the Quarterback:The extra player in the box can force the quarterback to make quick decisions and potentially throw off his timing.
Vulnerability to Passing:While effective against the run, the 46 can be vulnerable to quick passes, especially crossing routes, as the extra defenders in the box can leave space for receivers.
Adaptability:The 46 defense is not a rigid scheme. It requires adjustments and disguises to keep the offense guessing.
Evolution of the 46:Modern teams often run variations of the 46, sometimes incorporating it into a 3-4 base defense, rather than the original 4-3 alignment according to Taylor Blitz Times.
Personnel Dependent:The 46 defense was highly successful for the 1985 Bears due to their exceptional talent, particularly in the front seven and in the secondary according to Bleacher Report.
In football, "clubbing" refers to a type of tackle where a player uses their arm or shoulder to make contact with an opponent, often in a forceful manner. Key Performance Indicators (KPIs) related to tackling in football include metrics like tackle success rate, number of tackles won, and tackles per game. These KPIs help assess a player's defensive effectiveness and contribution to the team's overall performance.
Elaboration:
Tackling in Football:Tackling is a crucial defensive action in football, aiming to dispossess the opponent of the ball.
"Clubbing" Tackle:This term describes a specific type of tackle where a player uses their arm or shoulder to make forceful contact with an opponent, sometimes with the intention of destabilizing or dispossessing them.
KPIs for Tackling:
Tackle Success Rate: This measures the percentage of tackles a player successfully completes, resulting in regaining possession for their team or preventing the opponent from advancing.
Number of Tackles Won: This metric simply counts the total number of successful tackles a player makes in a game or over a period of time.
Tackles per Game: This KPI indicates how frequently a player attempts tackles, providing insight into their defensive activity and willingness to engage in challenges.
Tackles in Defensive Third/Final Third: Analyzing tackles in specific areas of the pitch can highlight a player's effectiveness in different defensive zones.
Fouls Committed While Tackling: This KPI measures the number of fouls a player commits during tackling attempts, indicating potential disciplinary issues or overly aggressive play.
Importance of KPIs:These KPIs are used to evaluate player performance, identify areas for improvement, and assess the effectiveness of defensive strategies. They provide valuable insights for coaches and analysts to make informed decisions about player selection, training, and game tactics.
In football, "clubbing" refers to a tackling technique where the defender uses their arms to wrap and clamp the ball carrier, restricting their movement. A key performance indicator (KPI) for this technique is Arm Clamp (Strength to Stick), which emphasizes the defender's ability to maintain a strong, unyielding grip on the ball carrier after initial contact.
Here's a more detailed explanation:
What is Arm Clamp?
Concept:The Arm Clamp KPI focuses on the defender's ability to secure the ball carrier with a tight, vice-like grip, preventing them from escaping.
Importance:A strong arm clamp is crucial for bringing the ball carrier to the ground efficiently and preventing them from gaining extra yards.
Types:
Arms Clamp: Both arms work individually at differing heights to clamp around the ball carrier.
Lock Clamp: Both arms clamp and connect to each other around the ball carrier.
Key Performance Indicators (KPIs) for Arm Clamp:
Strength:The ability to maintain a strong grip and resist the ball carrier's attempts to break free.
Speed of Clamp:The speed at which the defender can secure the clamp after initial contact.
Dominance:The ability to control the ball carrier through the clamp.
Penalty Avoidance:Proper arm clamp technique helps prevent penalties associated with "chicken wing" or shoulder-first tackles.
Completion:Successfully bringing the ball carrier to the ground while maintaining the clamp.
Drills to Develop Arm Clamp:
Jersey Grab Drill:Players grab onto a cloth and squeeze, simulating the clamp and the "exhale" of the tackle.
Bag Drill:Using weighted bags, players work on clamping and controlling the bag after shoulder contact.
Progression:Drills can progress from kneeling positions to running steps, incorporating other KPIs like hip and core activation.
Overall, the Arm Clamp KPI is a crucial aspect of effective tackling, emphasizing the strength, speed, and control needed to dominate the ball carrier after initial contact, contributing to both defensive success and penalty avoidance.
Hawk tackling with arm clamps, also known as shoulder leverage tackling, involves using the shoulder to initiate the tackle on the near thigh of the ball carrier, followed by wrapping and squeezing with the arms to secure the tackle. It's a key component of the "Hawk Tackle" system, emphasizing controlled, powerful tackles with a 360-degree roll to bring the ball carrier down.
Drills for Hawk Tackling with Arm Clamps:
Hawk Roll Tackle Drill:This drill focuses on tracking the near hip, striking the thigh, and executing a 360-degree roll to bring the runner down while maintaining a secure clamp.
Diamond Drill with Shield:This drill involves using a shield to simulate the ball carrier and practicing the hawk tackle technique, emphasizing the shoulder strike and wrap.
Angle Tackle Drill:Focuses on the tackler's positioning to dictate the ball carrier's angle of run, using a side-on tackle with the near foot up, eyes through the thighs, and a wrap and squeeze.
Live Tackling Drills with Proper Technique:These drills should emphasize the importance of keeping feet underneath, sinking hips, keeping the chest and chin up, thrusting hips forward, ripping arms, grabbing cloth, and driving forward.
Tackling Circuit:A circuit of drills incorporating various tackling techniques, including the Hawk, Hawk Roll, Ankle Slap, and other drills to build muscle memory and improve tackling skills.
Tracking Drills:Focus on tracking the near hip of the ball carrier, using visual cues and footwork to ensure proper angle and leverage for the tackle.
Wrap and Squeeze Drills:Practicing the wrap and squeeze technique to secure the ball carrier and prevent them from breaking free.
"Fire in the Hole" Drill:This drill focuses on rapid engagement and secure tackling, emphasizing the wrap and drive.
Key Coaching Points for Hawk Tackling:
Eyes through the Thighs:The tackler's eyes should be focused on the ball carrier's near thigh, not across the body.
Shoulder Contact:The tackler should make contact with the ball carrier's near jersey number with their shoulder.
Wrap and Squeeze:After the shoulder contact, the tackler should wrap their arms around the ball carrier and squeeze tightly to maintain control.
Drive for Five:After securing the tackle, the tackler should drive their legs for a few steps to ensure the ball carrier is brought to the ground.
Maintain Leverage:The tackler should maintain leverage on the ball carrier, preventing them from breaking free.
Head Up:The tackler should keep their head up throughout the tackle to maintain vision and avoid injury.
Footwork:The tackler should use short, choppy steps to maintain balance and generate power.
Angle:The tackler should aim to get their body in a position to dictate the ball carrier's angle of run, enabling a side-on tackle.
Safety:Emphasize the importance of not leading with the head and avoiding leading with the hands to minimize the risk of injury.
Lateral agility drills for a strong safety should focus on quick, efficient movements side-to-side, improving reaction time and change of direction. Key drills include side shuffles, carioca, cone drills, and lateral bounds, all designed to enhance the ability to move quickly and effectively in response to offensive actions.
Here's a breakdown of effective drills:
Basic Lateral Movement:
Side Shuffles:Quick, controlled steps to the side with feet moving in a coordinated fashion, emphasizing a low center of gravity and maintaining a good athletic stance.
Carioca (or Carioca Sideways Running):A dynamic drill that improves lateral movement, footwork, and coordination by crossing one leg over the other as you move sideways.
Lateral Lunges:Step to the side, bending the knee of the stepping leg while keeping the other leg straight, focusing on controlled movement and balance.
More Advanced/Specific Drills:
Cone Drills:Set up cones in a pattern (e.g., a "T" or "L" shape) and shuffle between them, emphasizing quick direction changes and maintaining speed.
Lateral Bounds:Explosive jumps to the side, landing softly and immediately exploding to the other side, focusing on power and stability.
Agility Ladder Drills:Footwork drills using an agility ladder to improve foot speed, coordination, and quickness in various patterns.
Lateral Low Hurdle Run:Running laterally over low hurdles, emphasizing quick steps and maintaining a low center of gravity.
Shuttle Runs:Short sprints back and forth between cones or lines, improving acceleration and deceleration.
Mirror Drill:One player shuffles laterally, mirroring the movements of another player who is trying to evade them, improving reaction time and agility.
Sled Drags:Using a weighted sled to improve strength and power in lateral movements.
Defensive Push Step:Focuses on quick, explosive lateral movement and maintaining a good defensive stance.
Important Considerations:
Proper Form:Maintain a low center of gravity, quick feet, and controlled movements throughout all drills.
Focus on Explosiveness:Emphasize explosive movements and quick changes of direction in all drills.
Gradual Progression:Start with basic drills and gradually increase the complexity and intensity as you improve.
Game-Specific Situations:Incorporate drills that mimic the movements and situations a strong safety would face on the field.
Strength and Conditioning:Combine these agility drills with strength training exercises to enhance overall performance.
Lateral agility drills can be a great alternative cardio workout for strong safeties, improving footwork, speed, and overall athleticism while also providing a good cardiovascular challenge. Examples include side shuffles, carioca, lateral ladder drills, and cone drills, all of which enhance lateral movement and explosiveness.
Lateral Agility Drills for Strong Safety:
Side Shuffle:A fundamental drill where you move laterally, stepping to the side with one foot and bringing the other foot to meet it, maintaining a low center of gravity. This drill strengthens the inner and outer hips and thighs while improving lateral movement.
Carioca:This drill involves crossing one leg over and behind the other while moving laterally. It enhances hip mobility, coordination, and lateral speed.
Lateral Ladder Drills:Using an agility ladder, step into each box with both feet, focusing on quick and controlled movements. These drills improve footwork, coordination, and speed, while also challenging cardiovascular fitness.
Cone Drills:Setting up cones in a pattern, you can work on quick changes of direction, acceleration, and deceleration, mimicking movements needed on the field. These drills improve lateral speed, agility, and reaction time.
Shuttle Runs:Involving sprints and quick changes of direction, shuttle runs provide a high-intensity cardio workout that also improves agility and acceleration.
Lateral High Knees:A dynamic drill that improves coordination and cardiovascular fitness by bringing knees up laterally while shuffling.
Benefits for Strong Safeties:
Improved Footwork:Agility drills enhance the ability to move quickly and efficiently in any direction, crucial for covering receivers and reacting to plays.
Enhanced Speed and Agility:These drills build explosive power and quickness, allowing strong safeties to cover ground faster and change direction more effectively.
Reduced Risk of Injury:Strengthening the muscles and improving joint stability through lateral agility drills can help prevent injuries, especially non-contact injuries like ACL tears.
Cardiovascular Conditioning:While not traditional cardio, high-intensity agility drills can provide a great cardiovascular workout, improving overall fitness and endurance.
Cognitive Benefits:Agility training can improve reaction time, quickness of thought, and the ability to anticipate movements, all valuable assets for a strong safety.
By incorporating these drills into a training routine, strong safeties can enhance their athleticism, improve their performance on the field, and reduce their risk of injury.
Strong safety drills in football focus on developing the skills and techniques necessary for success at that position. These drills cover run fits, pass coverage, tackling, and footwork, often incorporating game-like scenarios to improve player performance.
Here's a breakdown of common strong safety drills:
Run Support Drills:
Run Fit and Tackle Drills:These drills emphasize reading the play, breaking down, and exploding through the tackle, often involving open-field tackling and making contact with a heavy bag to simulate bigger opponents.
Angle and Leverage Drills:Focus on maintaining proper angles and leverage while tackling, including the importance of square shoulders and a near-foot-first landing to generate power.
Read Blocks and Fit Drills:These drills train safeties to read blocks and fit into the correct gap based on offensive formations, ensuring they are in the right position to make a play.
Pass Coverage Drills:
Pedal and Break Drills:These drills focus on maintaining a proper backpedal, transitioning to a shuffle, and breaking towards the ball or a specific area, often incorporating route recognition and ball tracking.
Weaving and Breaking Drills:Players work on weaving through cones while maintaining a square stance and then breaking at different angles, simulating coverage responsibilities.
Deep Zone Coverage Drills:Safeties practice dropping into deep zones, reading the quarterback, and breaking on the ball, often simulating different coverage schemes like Cover 2.
Route Recognition Drills:These drills focus on identifying different routes (slants, outs, digs, etc.) and reacting accordingly, improving the safety's ability to anticipate and defend passes.
Funnel and Cushion Drills:These drills focus on funneling receivers towards the safety and then dropping into coverage, often used in specific coverage schemes like Cover 2.
Tackling Drills:
Open Field Tackle Drills:Safeties practice tackling in space, emphasizing proper technique to bring down ball carriers in the open field.
Near Foot, Near Shoulder Tackling:This technique emphasizes landing the near foot and using the near shoulder to drive through the tackle, improving power and leverage.
Tackle Circuit:This involves multiple tackling scenarios, including tackling around cones, tackling a moving target, and tackling a heavy bag, to build confidence and technique.
General Drills:
Four-Way Shuffle:Players practice shuffling in all directions (forward, backward, and laterally) to improve agility and footwork.
High Point Ball Drills:These drills focus on tracking the ball in the air and making a play on it, simulating high passes and jump balls.
Pass Drop Drills:Safeties practice dropping back into coverage from a set position, emphasizing proper footwork and body positioning.
Two-on-One Contact Drill:This drill involves a safety and a linebacker against a running back, simulating a blocking and tackling scenario.
Key Principles Emphasized in Drills:
Proper Footwork:Footwork is critical for safeties to move efficiently in all directions. Drills focus on maintaining a low center of gravity and using proper footwork techniques.
Square Shoulders:Maintaining square shoulders is essential for maintaining balance, changing direction, and delivering effective tackles.
Reading the Quarterback:Safeties must learn to read the quarterback's eyes and body language to anticipate throws and react accordingly.
Confidence in Tackling:Safeties need to be confident tacklers in the open field, and drills help build that confidence through repetition and proper technique.
Game-Like Situations:Drills should simulate game situations to help safeties prepare for the speed and intensity of actual gameplay.
A strong safety (SS) blitz package involves the strong safety, typically positioned near the line of scrimmage on the strong side of the formation, aggressively rushing the passer, often alongside other blitzers like linebackers or defensive ends. This tactic can create confusion for the offensive line and potentially disrupt passing plays.
Here's a more detailed explanation:
Core Concepts:
Strong Safety's Role:The strong safety is a versatile player who can play closer to the line of scrimmage than a free safety and has the athleticism to cover tight ends or running backs.
Blitz Package:A blitz package is a pre-planned defensive strategy where multiple players, including the strong safety, rush the passer simultaneously.
Disguise:Many blitz packages involve disguising the blitz, with players initially showing a different coverage or alignment before aggressively attacking the line of scrimmage.
Example in a 4-3 Defense:
Pre-snap:The strong safety might initially align as a deep safety, giving the appearance of a two-high safety coverage (like Cover 2 or Cover 4).
Post-snap:As the quarterback begins his cadence, the strong safety quickly rolls down and attacks a specific gap, often the edge near the line of scrimmage.
Linebackers:Linebackers might slant or blitz to further disrupt the offensive line and create opportunities for the strong safety.
Other Defenders:Defensive ends and tackles might slant or loop to occupy offensive linemen and free up the blitzing players.
Example in a 3-3-5 Defense:
Similar to the 4-3, the strong safety can disguise the blitz by initially showing a two-high safety look and then aggressively attacking the line of scrimmage.
The defensive line might slant or stunt to create gaps for the strong safety and other blitzing linebackers.
The free safety might rotate to cover the deep middle or play a zone coverage to compensate for the strong safety's blitz.
Key Benefits:
Pressure:The primary goal is to generate pressure on the quarterback, forcing hurried throws or even sacks.
Confusion:The blitz can confuse the offensive line, making it difficult to pick up all the rushers and protect the quarterback.
Versatility:A strong safety blitz can be incorporated into various defensive schemes and formations, adding an element of surprise to the defense.
Important Considerations:
Timing:The timing of the blitz is crucial. If the strong safety blitzes too early, the offensive line might pick it up, and if it's too late, the quarterback might have already released the ball.
Coverage:It's essential to have adequate coverage behind the blitz to prevent big plays if the quarterback gets the ball off quickly.
Opponent Weakness:Coaches will analyze the opponent's offensive line and blocking schemes to determine the best blitz angles and gaps to attack.
In NFL, third-down defense, three-and-outs, turnover rate, and time of possession are interconnected key performance indicators (KPIs) that significantly impact a team's success. A strong third-down defense leads to more three-and-outs, which can force the opposing team to punt, leading to better field position and potentially more scoring opportunities. Turnovers disrupt the opponent's momentum and can lead to more offensive possessions for the defending team, while increased time of possession allows a team to control the game and wear down the opponent's defense.
Here's a breakdown of how these KPIs connect:
1. Third Down Defense and Three-and-Outs:
Third Down Defense:This measures a team's ability to prevent the opposing offense from converting on third down attempts, forcing them to punt.
Three-and-Outs:When an offense fails to gain a first down within three plays (a three-and-out), they must punt the ball to the opposing team.
Connection:A strong third-down defense directly leads to more three-and-out situations for the opposing team.
2. Three-and-Outs and Time of Possession:
Three-and-Outs:A high number of three-and-outs for the opposing team means they are off the field more often, and the defensive team is on the field longer.
Time of Possession:The longer a team holds the ball on offense, the less time the opposing offense has to score, and it also allows the defense to rest and regroup.
Connection:By forcing three-and-outs, a team can significantly improve its time of possession advantage.
3. Turnover Rate and Time of Possession:
Turnover Rate:This measures how often a team gains or loses possession of the ball due to fumbles or interceptions.
Connection:Turnovers can lead to a significant shift in possession time. If a team gains possession due to a turnover, they have a chance to score without the other team having a chance to respond.
Connection:A team with a higher turnover margin (more turnovers forced than given up) generally has a higher time of possession, as they are getting more offensive opportunities.
4. Turnover Rate and Three-and-Outs:
Connection: Turnovers can also create three-and-out situations for the opposing team.
Connection: If a defense intercepts the ball, it often puts the opposing offense in a difficult situation, potentially leading to a quick three-and-out on their next possession.
In essence: A strong defense that excels on third down will force more three-and-outs, leading to more time of possession and better field position for the offense. Turnovers can further disrupt the opposing team and shift the time of possession in favor of the defensive team.
INDIGENOUS MINERALS AND METALLURGY
Assault Rifles
4x4
RACING STRIPES SKILLS ZONE FOOTBALL FIELD
Ball Machine
25 Yards Parachute Routes
Weighted Sled Sprints
Agility Ladder
Sledgehammer and Tire
RECESSION RESISTANT PAYCHECKS
Rural economics is the study of rural economies. Rural economies include both agricultural and non-agricultural industries, so rural economics has broader concerns than agricultural economics which focus more on food systems.[1] Rural development[2] and finance[3] attempt to solve larger challenges within rural economics. These economic issues are often connected to the migration from rural areas due to lack of economic activities[4] and rural poverty. Some interventions have been very successful in some parts of the world, with rural electrification and rural tourism providing anchors for transforming economies in some rural areas. These challenges often create rural-urban income disparities.[5]
Rural spaces add new challenges for economic analysis that require an understanding of economic geography: for example understanding of size and spatial distribution of production and household units and interregional trade,[6] land use,[7] and how low population density effects government policies as to development, investment, regulation, and transportation.[8]
Economic geography is the subfield of human geography that studies economic activity and factors affecting it. It can also be considered a subfield or method in economics.[1]
Economic geography takes a variety of approaches to many different topics, including the location of industries, economies of agglomeration (also known as "linkages"), transportation, international trade, development, real estate, gentrification, ethnic economies, gendered economies, core-periphery theory, the economics of urban form, the relationship between the environment and the economy (tying into a long history of geographers studying culture-environment interaction), and globalization.
Agricultural economics is an applied field of economics concerned with the application of economic theory in optimizing the production and distribution of food and fiber products. Agricultural economics began as a branch of economics that specifically dealt with land usage. It focused on maximizing the crop yield while maintaining a good soil ecosystem. Throughout the 20th century the discipline expanded and the current scope of the discipline is much broader. Agricultural economics today includes a variety of applied areas, having considerable overlap with conventional economics.[1][2][3][4] Agricultural economists have made substantial contributions to research in economics, econometrics, development economics, and environmental economics. Agricultural economics influences food policy, agricultural policy, and environmental policy.
Soil science is the study of soil as a natural resource on the surface of the Earth including soil formation, classification and mapping; physical, chemical, biological, and fertility properties of soils; and these properties in relation to the use and management of soils.[1]
Silt is granular material of a size between sand and clay and composed mostly of broken grains of quartz.[1] Silt may occur as a soil (often mixed with sand or clay) or as sediment mixed in suspension with water. Silt usually has a floury feel when dry, and lacks plasticity when wet. Silt can also be felt by the tongue as granular when placed on the front teeth (even when mixed with clay particles).
Covalent Bonds Fertilizer.
The Soil Science Society of America (SSSA), is the largest soil-specific society in the United States.[2] It was formed in 1936 from the merger of the Soils Section of the American Society of Agronomy and the American Soil Survey Association. The Soils Section of ASA became the official Americas section of the International Union of Soil Sciences in 1934, a notable role which SSSA continues to fulfill.[3]
The American Society of Agronomy (ASA) is a scientific and professional society of agronomists and scientists of related disciplines, principally in the United States but with many non-U.S. members as well.[1]
An agriculturist, agriculturalist, agrologist, or agronomist (abbreviated as agr.) is a professional in the science, practice, and management of agriculture and agribusiness.[1] It is a regulated profession in Canada, India, the Philippines, the United States, and the European Union. Other names used to designate the profession include agricultural scientist, agricultural manager, agricultural planner, agriculture researcher, or agriculture policy maker.
FANTASY SPORTS CLUSTER
A strong Key Performance Indicator (KPI) for a strong safety forcing fumbles is the Fumble Forced Ratio. This KPI measures how often a player forces a fumble relative to their opportunities to do so, such as tackles or hits. A higher ratio indicates a player is effectively creating turnovers, which is a key defensive contribution.
Here's why this is a strong KPI and how it can be used:
Fumble Forced Ratio:
Definition: Fumbles Forced / (Tackles + Hits + Other Opportunities)
Explanation: This ratio provides a clear picture of how often a player's actions lead to a fumble. It's not just about how many fumbles they force, but also how often they're in a position to do so.
Example: If a safety has 50 tackles and 20 hits, and forces 3 fumbles, their fumble forced ratio would be 3 / (50+20) = 0.043 or 4.3%.
Why this is a strong KPI:
Specificity:It directly measures the desired outcome (forcing fumbles) in relation to the actions that lead to those outcomes.
Contextual:It takes into account the player's activity level. A player with a lot of tackles and hits but no forced fumbles will have a low ratio, indicating they may need to improve their technique or focus on creating turnovers.
Measurable:The data needed (tackles, hits, forced fumbles) is readily available in most game statistics.
Actionable:A low ratio can highlight areas for improvement, such as focusing on stripping techniques or being more aggressive in hitting the ball carrier.
Benchmarking:This ratio can be compared to other safeties in the league to assess performance and identify areas for improvement.
Other relevant KPIs (that can complement the Fumble Forced Ratio):
Fumble Recovery Rate:Measures how often a player recovers a fumble they forced. A high fumble forced ratio and a high recovery rate indicates a player is a significant turnover creator.
Tackles for Loss (TFL):While not directly related to fumbles, TFLs indicate a player's ability to disrupt the opposing team's offense, which can lead to more opportunities to force fumbles.
Pass Breakups/Interceptions:While not directly related to fumbles, these are also key defensive plays that can lead to turnovers and should be tracked.
By using the Fumble Forced Ratio as a core KPI, coaches can effectively assess a safety's performance in forcing fumbles and identify areas for improvement. It's a proactive measure that highlights not just the outcome but also the process leading to that outcome.
In a +/- system of football, a strong safety's key performance indicators (KPIs) should focus on both defensive impact and ball-hawking ability. Relevant metrics include tackles, forced fumbles, interceptions, passes defended, and coverage assignments, as well as how they contribute to the team's overall defensive rating within the +/- system.
Defensive Impact:
Tackles:While not all tackles are created equal, the total number of tackles a strong safety makes is a basic indicator of their involvement in stopping the run and pass.
Tackles for Loss:A strong safety should be able to make tackles behind the line of scrimmage, disrupting the opponent's play and creating negative yardage situations.
Forced Fumbles:A strong safety's ability to strip the ball from ball carriers is a valuable skill that can lead to turnovers.
Sacks (if applicable):While primarily a defensive end or linebacker responsibility, strong safeties can occasionally blitz and get sacks, which are high-impact plays.
Passes Defended:A strong safety should be able to disrupt passes, whether by batting them down or intercepting them. This is a crucial skill for a strong safety in pass coverage.
Ball-Hawking Ability:
Interceptions:Interceptions are a game-changing play. A strong safety should be able to read the quarterback, anticipate throws, and make plays on the ball.
Interception Return Yards:The distance a strong safety can gain after an interception is another valuable KPI, as it can set up the offense with good field position.
Forced and Recovered Fumbles:As mentioned earlier, forcing fumbles and then recovering them adds to a strong safety's value.
+/- System Specific:
Contribution to +/- Rating:The strong safety's performance directly impacts the team's +/- rating. A strong safety who consistently makes plays that lead to positive outcomes for their team will have a higher +/- rating.
Coverage Assignments:In a +/- system, it's important to track how well the strong safety executes their coverage assignments. This includes things like limiting big plays in their area of responsibility and contributing to the overall defensive scheme.
Run Support:A strong safety must also be effective in run support, as they are often the last line of defense against the run. How well they fill gaps, make tackles, and prevent big gains contributes to the team's defensive rating.
Other Considerations:
Alignment and Assignments:How well the strong safety understands their role within the defensive scheme and executes their assignments.
Communication:Effective communication with other defensive players is crucial, especially in complex defensive schemes.
Instincts:A strong safety with good instincts can anticipate plays, make quick decisions, and react effectively to what the offense is doing.
Discipline:A strong safety must be disciplined in their assignments and not take unnecessary risks that could lead to big plays for the opposing team.
HAÏTIEN SPORTS MEDICINE MYOGLOBIN SUPPLEMENTS THEORY (SYNTHESIZED HORSE GENETIC, FEED, AND RED MEAT)
Insulin Sensitivity with Anabolic Metabolism and IV Therapy.
Red Meat consists of B Vitamins, Minerals, Creatine, and Myoglobin. Use for only Pre Workout, Post Workout, Pre Sleep.
Daily B Vitamins and Iron Spectrum, Pre-Workout and Pre-Sleep Myoglobin L-Arginine, Pre-Workout Myoglobin Beta-Alanine, Post-Worout BCAA Myoglobin, Pre-Sleep Myoglobin L-Leucine Creatine and Myoglobin ZMA GABA
Red Meat Amino Acids with Anion RNA
Tryptopha, Threonine, Isoleucine, Leucine, Lysine, Methionine, Cystine, Phenylalanine, Tyrosine, Valine, Arginine, Histidine, Alanine, Aspartic acid, Glutamic acid, Glycine, Proline, Serine,Hydride, Oxide, Fluoride, Sulfide, Chloride, Nitride, Bromide, Iodide, Oxoanions, Arsenate, Phosphate, Arsenite, Hydrogen Phosphate, Dihydrogen Phosphate, Sulfate, Nitrate, Hydrogen Sulfate, Nitrite, Thiosulfate, Sulfite, Perchlorate, Iodate, Chlorate, Bromate, Chlorite, Hypochlorite, Hypobromite, Carbonate, Chromate, Hydrogen Carbonate or Bicarbonate, Dichromate, Anions from Organic Acids, Acetate, Formate, Other Anions, Cyanide, Amide, Cyanate, Peroxide, Thiocyanate, Oxalate, Hydroxide, Permanganate
SINE MSTN GENE with Myosin Heavy Chain Type IIx.
FORMATIONS
46 Defense
POSITION
Strong Safety
Deputy Linebacker
SPRINTING MOTION
Z Motion; Figure 4; Dorsiflexion Calf to Hamstring
Posterior Pelvic Tilt Horizontal Plane and Vertical Force
In and Out Sprinting to Force Back Heels
HAÏTIEN RECRUITING 5 STAR (DEEP BALL THREAT AND PROTECTION)
Force PA Contrast Training
FORCE-VELOCITY CURVE BIOPHYSICS W/ PYTHAGOREAN THEOREM (A+B=C) WORKOUT
FORCE PRODUCTION
COMPOUND MOVES
Hamstrings
Lats
Triceps
ISOLATED MOVES
Single Leg Vastus Lateralis
Stability Abs
STATIC
Plank
Wallsit
FORCE ABSORPTION
Resistance Sprint Training
Jumping Training
Cardio
Jump rope
Mountain Climbers
FINAL PRODUCT
Power on Force-Velocity Curve
METHOD
Cluster Sets for Type II Motor Units
46 DEFENSE FORMATION
SQUAD
WIDE OUTS
SLOTBACKS
DEFENSIVE BACKS
The 46 defense, popularized by the 1985 Chicago Bears, utilizes various blitz packages designed to overwhelm the opposing offense with aggressive pressure, particularly targeting the quarterback. These packages involve complex formations and player movements to disguise blitzes and create confusion, often featuring a six-man rush with linebackers and safeties joining the defensive line.
Here's a breakdown of some common 46 blitz packages:
Key Principles of 46 Blitzes:
Aggressive Pressure:The 46 defense is known for its aggressive, blitz-heavy approach, aiming to disrupt the offense's timing and rhythm.
Disguise and Deception:Blitzes are often disguised to make it difficult for the offensive line to identify the rushers and pick them up effectively.
Man-to-Man Coverage:The secondary often employs man-to-man coverage to allow for more freedom in the blitz packages.
Exploiting Offensive Weaknesses:The defense aims to exploit mismatches and weaknesses in the offensive line's blocking schemes.
Common Blitz Packages:
Single Blitz:A single linebacker or safety attacks a specific gap, often disguised to look like a standard rush or coverage.
Hamburger Blitz:A combination of linebackers and/or safeties blitzing from different gaps to create confusion and overwhelm the offensive line.
50 Blitz:A blitz involving five players rushing the passer, often utilizing a defensive end and a linebacker from the same side.
Strong Safety 6Z:A blitz where the strong safety joins the defensive line, creating a six-man rush, often on the strong side of the offensive formation.
Giant Blitz:A blitz involving multiple players, including the defensive line and linebackers, aiming to overwhelm the offensive line.
LB Dogs Blitz:A zero-man blitz (all players blitzing) that rushes six players, creating chaos and forcing the offense to block all rushers, according to a YouTube video.
Tracy Call:A blitz where the strong safety drops inside of the #2 receiver (slot receiver), and the linebacker acts as a spy on the running back, according to real46defense.
Zone Blitzes/Fire Zones:These involve a combination of blitzing and zone coverage, where players drop into zone coverage after initially appearing to blitz.
"Spy" Blitz:A blitz where a linebacker or safety acts as a spy, reading the quarterback's movements and potentially blitzing if the quarterback tries to run.
Modern Adaptations:
Modern 46:Modern adaptations of the 46 defense often incorporate elements of 3-high safety looks and zone blitzes to further confuse offenses.
Adjustments and Audibles:The 46 defense allows for coaching adjustments and audibles at the line of scrimmage to react to the offensive formation and play call.
The 46 defense, with its emphasis on aggressive blitzes and disguise, remains a potent scheme in football, forcing offenses to account for a variety of pressure packages and adjustments.
When using strong safety blitz packages, effective Key Performance Indicators (KPIs) should focus on both the success of the blitz and the potential risks involved. KPIs should measure the pressure created on the quarterback (success) and the potential for giving up big plays or being out of position (risk). Leading indicators, like the number of times the strong safety is in position to blitz or the number of times the blitz is called, can help predict future performance. Lagging indicators, like sacks, quarterback pressures, or missed tackles, can show the results of the blitz package.
Here's a more detailed breakdown:
Leading Indicators (Focus on Process and Preparation):
Blitz Participation Rate:Percentage of plays where the strong safety is involved in a blitz package. This indicates the frequency of utilizing this tactic.
Blitz Recognition Rate:Percentage of times the strong safety correctly identifies and reacts to offensive formations that allow for a successful blitz. This shows the player's understanding of the game plan and ability to exploit opportunities.
Blitz Success Rate (Pre-Snap):Number of times the strong safety correctly identifies the offensive formation and alignment, allowing the blitz to be effective.
Blitz Timing:Accuracy and consistency of the strong safety's timing when executing the blitz (e.g., timing with the defensive line or other blitzers).
Coverage Assignments:If the strong safety is used as a blitzer, it is important to track the success of their coverage assignments on plays where they do not blitz. This ensures the player is not sacrificing coverage responsibility for blitzing.
Lagging Indicators (Focus on Results):
Sacks:Number of times the strong safety successfully sacks the quarterback as a result of the blitz.
Quarterback Pressures:Number of times the strong safety pressures the quarterback, forcing a bad throw or incompletion.
Tackles for Loss:Number of times the strong safety tackles the ball carrier behind the line of scrimmage after blitzing.
Missed Tackles:Number of times the strong safety misses a tackle on a play where they blitzed.
Big Plays Allowed:Number of times the offense gains significant yardage on a play where the strong safety blitzed (e.g., a long pass or run).
Penalty Yards:Number of penalty yards incurred by the strong safety on plays where they blitzed (e.g., holding, illegal contact).
Completion Percentage Against:Completion percentage allowed by the defense when the strong safety blitzed. This helps assess the effectiveness of the blitz package in forcing incompletions or bad throws.
SCHEME 46 DEFENSE
SQUAD
SS — DEPUTY LINEBACKER
FS — BALL HAWK
CB — BUMP AND RUN
OLB — Zone/Blitz Partners
Zone Blitzing Combinational Role Pairings Zone Schemes and Blitz Scheme
The 46 defense is an American football defensive formation with six players along the line of scrimmage.[1] Regarded as an eight men in the box defense, it features two players at linebacker depth playing linebacker technique, and three defensive backs. The 46 defense was originally developed and popularized with the Chicago Bears by their defensive coordinator Buddy Ryan, who later became head coach of the Philadelphia Eagles and Arizona Cardinals.
Unlike most defensive formations that take their names from the number of defensive linemen and linebackers on the field (i.e. the 4–3 defense has 4 linemen and 3 linebackers), the name "46" originally came from the jersey number of Doug Plank, who was a starting strong safety for the Bears when Ryan developed the defense, a role typically played in the formation as a surrogate linebacker.[2][3]
Safeties: The strong safety lines up four to four and a half yards off the line of scrimmage and stands directly in front of the weak side tackle. The free safety lines up about ten to twelve yards away from the line of scrimmage and will stand directly in front of the weak side guard.
Cornerbacks: The corners will line up on the line of scrimmage in bump and run coverage, or at times will line up seven to eight yards off of the line in front of their receivers in man-free coverage.
Key performance indicators (KPIs) for a strong safety in football focus on their ability to disrupt the passing game, make tackles, and contribute to run defense. These include metrics like tackles, forced fumbles, interceptions, passes defended, and tackles for loss, as well as their contribution to the overall defensive efficiency, such as opponent passer rating and completion percentage against.
Here's a breakdown of relevant KPIs:
Defensive Impact:
Tackles:Total tackles (solo and assisted) to assess their ability to bring down ball carriers.
Tackles for Loss (TFL):Tackles made behind the line of scrimmage, indicating disruptive play against the run.
Forced Fumbles:The ability to strip the ball from the ball carrier, creating a turnover opportunity.
Interceptions:The number of passes caught by the strong safety, a key indicator of their coverage skills and playmaking ability.
Passes Defended (PD):The number of times the strong safety disrupts a pass attempt, even if it's not intercepted.
QB Pressures/Sacks (if applicable):While often a defensive lineman's domain, strong safeties can sometimes blitz and contribute to pressure on the quarterback.
Completion Percentage Allowed:The percentage of passes completed when targeted, indicating their coverage effectiveness.
Opponent Passer Rating Allowed:A more comprehensive metric that assesses the overall impact on the opposing quarterback's performance.
Run Defense Contribution:
Missed Tackles:The number of missed tackles, a negative indicator of tackling effectiveness.
Tackles in the Box:Tackles made near the line of scrimmage, showing their involvement in defending the run.
Defensive Stops:Plays that prevent the offense from gaining a first down or a significant gain.
Run Defense Efficiency:A broader measure of how well the defense performs against the run when the strong safety is involved.
Other Important Factors:
Defensive Alignment: The strong safety's ability to line up in the correct position and execute their assigned role.
Communication: Effective communication with other defensive players to ensure proper coverage and alignment.
Instincts and Awareness: The ability to read plays and react quickly to develop a play.
Coverage Assignments: How well the strong safety covers their assigned area of the field.
Alignment and Assignment: How well the strong safety executes their assigned responsibilities.
Run Support: How effectively the strong safety contributes to stopping the run.
By tracking these KPIs, coaches can evaluate a strong safety's performance, identify areas for improvement, and make informed decisions about their role on the defense.
Key performance indicators (KPIs) for a strong safety blitz in football include sack percentage, tackles for loss, quarterback pressures, forced fumbles, and blitz success rate. These metrics help evaluate the effectiveness of the blitz in generating negative plays for the opposing offense and disrupting their rhythm.
Elaboration:
Sack Percentage:Measures how often the blitzing safety brings down the quarterback for a loss of yardage.
Tackles for Loss:Indicates how often the safety's blitz results in a tackle that gains no yards or results in a loss of yardage for the opposing team.
Quarterback Pressures:Tracks the number of times the safety pressures the quarterback, forcing hurried throws or inaccurate passes.
Forced Fumbles:A successful blitz can lead to a fumble, which is a crucial turnover that can change the game.
Blitz Success Rate:This is a broader measure that considers the overall impact of the blitz, taking into account sacks, pressures, tackles for loss, and forced fumbles. It helps assess how often the blitz is effective in disrupting the opposing team's passing game.
These KPIs provide a comprehensive view of a strong safety's ability to execute a blitz effectively, contributing to defensive success.
HOMESTEAD MANAGEMENT
PYTHAGOREAN THEOREM: Industrial Agriculture + Mechanism Agricultural = Agrarian Society; Developing Country + Emerging Market ÷ Export Economy = Port Inputs
LOCATION: Belt Valley's (Horizontal Plane for Hectares)
TEAM: Farmer's, Equipment Manager, AgTech, Investment Trust, Distribution Centers, Realtors
PRODUCTS: Pigs, Chicken, Buffalo, Belgian Blue Cattle, Goat, Potatoes, Berry Fields, Citrus Trees, Coffee, Cereal and Grains, Wheat, Corn, Spinach, Root Vegetables for Salts and Seasoning, Cotton Riverbank Farming, Wool Shaving, Tobacco
CLOTHING: Cotton and Wool
FOOD GROUPS: Meat, Carbs or Roots, Dairy, and Greens
INPUT OR EXPORTS: Wholefoods Farm
COURSE: Intro 101, Agronomics with Industrial Engineering, Barter Economics with Behavioral Finance, Investment Farms and Mechanism Agriculture
AGINDEX ROUGH MODEL
ENTREPÔT 500 COMPANIES FX/OIL USD/XAU
ENTREPÔT 250 AGTECH FX/OIL USD/XAU
ENTREPÔT 150 GAS STATIONS USD/PETRO DOLLAR
ENTREPÔT 100 AGCOSMETICS, COSMETIC CHEMISTRY, WITH LIPSTICK EFFECT; IVF/USD
ENTREPÔT 50 EQUIPMENT/METALLURGY/REITS USD/IVF
Recession Resistance; Credit Spread Options Hedging with Commodities and FX CFDS, USD/XAU; USD/IVF; USD/PETROFRANC CFDS, Intercommodity Spread Trading; Volume Spread Analysis; with Eqivolume Charts; REITS, AgTech Blue Chips, Fast Food and Soft Drink Blue Chips
Commodity Laundering: Crude Oil, Refinery, and ExxonMobil; Rough Diamond, Laser Lab Cutters, with Cartier
AGRARIAN SPECTRUM
Fossil Fuels/Cash Crops — Artisanal Plantation/Artisanal Mining
Examples
Coal/Potatoes — Fragrance/Cobalt and Gold
GOLD MAFIA
USD/XAU Fixed Exchange Rate with NIRPS and Helicopter Money; CFD Compounding. Liquid Gold, Refinery, and Bullion Bank; Intercommodity Spread Trading; Volume Spread Analysis; with Eqivolume Charts; Mine REITS
ENDORSEMENT SCHEME
Unicorn ($1,000,000,000 NO IPO) with Shares Appreciation Rights, Sales %, Deferred Contracts
COMMERCIALS
NFL & MLB
NFL has Spike Viewership and MLB has Summer Viewership.
TYREEK HILL CLUSTER SETS* FITNESS
IV therapy is a way of administering blood, medication, water, nutrients, and other fluids directly into the bloodstream via the veins. It allows medical professionals to administer fluids to a patient quickly and efficiently. Although it is common, IV therapy is an invasive procedure that carries some risks.
Force Production
Definition: Force production is the ability to generate power quickly and efficiently. This is essential for the initial burst in a sprint and maintaining top-end speed.
Importance for Speed: When you sprint, each step relies on generating a powerful push-off from the ground. Stronger muscles, particularly in the legs and core, allow you to generate and absorb more force with each stride, not dissipate it. This ]propels you forward with greater acceleration and velocity.
Strength Exercises for Force Production: Movements like squats, deadlifts, and power cleans enhance the strength of the glutes, hamstrings, and quads—key muscles for sprinting. Olympic lifts, like the power clean and snatch, are specifically explosive exercises that build the fast-twitch muscle fibers needed for quick, high-power movements.
Force Absorption
Definition: Force absorption is the ability to control and handle the impact forces created when landing or changing direction. This skill is just as essential as force production for sprinting, as it enables the body to “catch” the impact and convert it into the next powerful movement.
Importance for Speed and Agility: In each stride, the body absorbs impact forces equivalent to several times its weight. Training for force absorption prevents these forces from dissipating or causing instability, ensuring you maintain control and balance, which is crucial for staying efficient and fast. Effective force absorption is also vital in sports with rapid direction changes, as it allows you to quickly stop and accelerate without losing speed or risking injury.
Strength Exercises for Force Absorption: Plyometric exercises like depth jumps and bounding teach your body to absorb impact and rapidly transition into the next movement. These drills train the muscles and tendons to store energy and release it quickly, increasing your ability to “rebound” into the next stride with power.
Why This Matters for Explosiveness
Efficient Energy Use: Strong muscles are more efficient at both producing and absorbing force, meaning they can store and release energy quickly without excess energy loss. This efficiency translates to faster, more explosive movements on the field.
Injury Prevention: Improved force absorption reduces stress on the joints, tendons, and ligaments, lowering injury risk. Healthy, resilient muscles and joints are able to perform explosive movements repeatedly without wearing down.
In Tyreek Hill’s training, strength exercises that improve both force production and absorption are essential for maintaining his elite speed and explosive ability. By building strength in these areas, you’ll improve sprint speed, agility, and overall athleticism.
Here’s a Tyreek Hill-inspired strength and sprint speed training plan that focuses on explosive power, speed, and agility. This plan will include strength exercises for leg power and sprints for speed development, structured similarly to Hill’s training style.
Strength Training (3x per week)
Warm-Up (10 minutes)
Dynamic stretching: Leg swings, high knees, butt kicks
Activation drills: Glute bridges, calf raises, nordic hamstring curls, and bodyweight squats
Power and Strength Exercises
Power Clean: 4 sets of 5 reps
Focuses on explosive power and engages your entire posterior chain.
Squats (Back or Front Squat): 4 sets of 6 reps
Builds lower body strength, particularly in the quads, glutes, and hamstrings.
Deadlift (Traditional or Trap Bar): 4 sets of 5 reps
Develops total body power and strength, especially in the hamstrings and lower back.
Bulgarian Split Squats: 3 sets – 10 reps each leg
Improves single-leg strength and balance for greater stability in sprints.
Lunges 3 Sets - Cluster Sets Improves single-leg strength and balance for greater stability in sprints.
Box Jumps: 4 sets of 6 reps
Trains explosive power in the legs, mimicking the force needed in each sprint stride.
Core Strengthening (Warm-up)
Russian Twists: 3 sets of 20 reps
Plank Variations (front and side): 3 x 60 seconds each
Helps stabilize your body during sprints for better control and power transfer.
Cooldown (5-10 minutes)
Static stretching: Hamstrings, quads, hip flexors, and calves
Sprint Speed Training (2x per week)
Warm-Up (10-15 minutes)
Dynamic movements: High knees, butt kicks, skips, walking lunges
Speed drills: Arm swings and wall drills for sprint mechanics
Sprint Work
10-Yard Accelerations: 4 sets (focus on explosiveness at the start)
20-Yard Sprints: 4 sets (maintain top speed and acceleration)
40-Yard Sprints: 3 sets (work on maintaining speed at the top end)
60-Yard Sprints: 2 sets (maintain form and speed endurance)
Rest for 1-2 minutes between sets to ensure full recovery at maximum speed.
Resisted Sprints
Sled Pushes or Parachute Runs: 4 sets of 20 yards
Builds power and strengthens muscles used in the sprint.
Plyometric Finisher
Bounding: 3 sets of 20 meters
Depth Jumps: 3 sets of 8 reps
Enhances explosive power and prepares you for sprints by improving elasticity in leg muscles.
Agility and Lateral Movement (Optional)
Ladder drills (2-3 different patterns): 4 sets each
3-cone drill: 3 sets
Enhances quickness and change of direction.
Cooldown (5-10 minutes)
Isometric-Mobility and foam rolling to promote recovery
Type II: Type II motor units develop a high peak force in a relatively short period of time (10 to 50 ms). Type II motor units are called fast-twitch motor units because of this quicker response time. Another common name is the phasic motor unit, because Type II motor units are recruited after Type I motor units to provide short bursts, or phases, of higher muscle tension as required.
Type II motor units have two subcategories. Both reach high peak force in a relatively short period of time, but they differ in resistance to fatigue:
Type IIb: Type IIb motor units are very prone to fatigue, but they produce the most force when stimulated. These are the last motor units recruited when a muscle gets activated, and they’re the first to stop being recruited when the force from a muscle is no longer needed. Type IIb are sometimes called Type IIx in human muscle.
Type IIa: Type IIa motor units are the intermediate motor units. Their peak force and their resistance to fatigue fall between the classifications of Type I and Type IIb. These motor units are also recruited after Type I but before Type IIb, and they stop being activated after Type IIb but before Type I.
The primary KPIs that scouts look for in defensive backs are short-area quickness, acceleration, and top-end speed.
BACKPEDAL AND REACT
Execution
The backpedal and react drill (figure 4.1) is essentially a position-specific 40-yard dash constructed for defensive backs. A lane is created with two cones at the starting line, two cones 10 yards downfield, and two more cones placed another 20 yards further, making a lane totaling 30 yards.
The backpedal and react drill (figure 4.1) is essentially a position-specific 40-yard dash constructed for defensive backs. A lane is created with two cones at the starting line, two cones 10 yards downfield, and two more cones placed another 20 yards further, making a lane totaling 30 yards.
Coaching Points
Evaluators look for smooth execution in this drill. However, many players do not understand that it is a timed assessment. They often move much more slowly than they should. Evaluators want to see how well a defensive back covers space; a player's time covering this drill's 30 yards should roughly mirror his 40-yard dash time. Coaches often tell players to be smooth in this drill, which is certainly a helpful cue, but defensive backs need to show flat-out speed in their backpedal. If an athlete does not perform this drill at maximum speed, it will reflect poorly on his abilities.
W DRILL
Execution
The W drill (figure 4.2) assesses change-of-direction capability in tight spaces. Three cones are placed along the line of scrimmage, with the outer two cones just outside the hash marks and the middle cone directly in between. The athlete begins in his defensive back position at one of the outside cones, facing the coach.
At the coach's cue, the player backpedals straight back. As the player reaches roughly 5 yards in his backpedal, the coach gives another signal to break forward diagonally to the next cone. Once the player is close to the next cone, the coach cues him to backpedal straight back again. He repeats this 5-yard backpedal and diagonal break one more time, and as he closes on the third cone he intercepts and returns a ball thrown at him.
Coaching Points
The W drill's demands are somewhat like the close and speed turn drill, described next, albeit in a smaller space. The W drill can be especially helpful to assess a player's short-area quickness so teams can see how quickly his feet move when he is in too tight of a space to reach full acceleration. Potential slot cornerbacks are identified as players who can change direction and navigate in tight spaces, so evaluators watch athletes closely during the W drill.
CLOSE AND SPEED TURN
Execution
Defensive backs must exhibit excellent change of direction ability to succeed at football's higher levels. The close and speed turn drill (figure 4.3) puts an athlete's general movement skills on display. For this drill, the defensive back lines up on the hash mark, directly across from the coach as if in man coverage. The throwing quarterback is located on the opposite hash, also at the line of scrimmage.
All aspects of the drill occur at the coach's signal. Starting at the line of scrimmage, the athlete backpedals when the coach signals the snap. At the coach's next signal, the player plants and drives back toward the line of scrimmage as if closing on the ball. A third cue from the coach tells the player to make a speed turn away from the coach, at an angle toward the sideline. After his speed turn, he must locate the quarterback's ball in the air and make an interception, then change direction again to return the interception.
Coaching Points
This drill is an excellent assessment of acceleration, deceleration, and change of direction in multiple planes of movement. The athlete must be able to backpedal, decelerate, reaccelerate forward, decelerate once more, and make an efficient bridging movement to reaccelerate at an angle.
Cover 1 blitzing in football involves sending extra defenders (blitzing) while still maintaining a single safety in the middle of the field with man coverage underneath. This strategy aims to create pressure on the quarterback while maintaining a deep safety for coverage, but it can be vulnerable to quick passes and crossing routes if the blitz isn't effective.
Here's a more detailed breakdown:
Cover 1:
Basic Concept: Cover 1 is a man coverage scheme where one safety (the free safety) is responsible for the deep middle of the field, while all other defenders cover a specific receiver.
Man Coverage: Each defender is assigned to cover a particular receiver, mirroring their movements.
Single Deep Safety: The free safety acts as the last line of defense against deep passes.
Blitzing:
Extra Pressure:
A blitz in Cover 1 involves sending more than four pass rushers (defensive linemen and linebackers) after the quarterback.
Risk vs. Reward:
Blitzing in Cover 1 can be risky because it leaves fewer defenders to cover underneath routes and can expose the single deep safety to deep threats.
Defensive Coordinator's Choice:
The decision to blitz in Cover 1 depends on the defensive coordinator's assessment of the offensive scheme and the specific situation in the game.
Cover 1 Blitzing in Action:
Example:
A defensive end might be sent on a blitz, while a linebacker drops into coverage to replace the defensive end's pass rush responsibilities.
Disguising the Blitz:
Defenses can disguise their blitzes by showing one alignment before the snap and then switching to a different blitz package post-snap.
Vulnerabilities:
If the blitz is not effective, the offense can exploit the man coverage underneath with quick passes or crossing routes.
In American football, the term "hammer and anvil" refers to a specific offensive strategy or a player's role within a defensive scheme. In the context of offense, "hammer and anvil" describes a play where one unit (the "anvil") engages the defense, and a second, more powerful unit (the "hammer") then attacks, often with a run. In a defensive context, a strong safety is often described as a "hammer" due to their role in stopping the run and delivering powerful hits.
In military terminology, a vanguard refers to the leading element or troops of an advancing military formation. It's the part of an army that goes ahead of the main body, often tasked with scouting, securing ground, and engaging the enemy initially. Essentially, the vanguard acts as the advance guard, paving the way for the rest of the force.
Here's a more detailed explanation:
Scouting and Security:The vanguard's primary role is to scout ahead, seeking out the enemy and gathering intelligence about their location, strength, and disposition. They also secure key terrain features and potential obstacles, ensuring the main force can advance safely.
Initial Engagement:In combat, the vanguard is often the first to engage the enemy, making the initial contact and setting the stage for the main battle. They might engage in skirmishes or set up ambushes to disrupt enemy movements.
Vanguard as the Advance Guard:The vanguard is synonymous with the advance guard, highlighting its role as the leading edge of an advancing military formation.
Beyond Military:The term "vanguard" can also be used in a broader sense to describe the leading position or the group of people at the forefront of any movement, be it a social movement, an artistic endeavor, or a scientific field.
In essence, the vanguard is the spearhead of a military force, responsible for reconnaissance, security, and initiating contact with the enemy.
Offensive "Hammer and Anvil" Tactic:
The Anvil:A unit, often the offensive line, that engages the defense, holding them in place.
The Hammer:A more powerful unit, such as a running back or a fullback, that attacks through the gap created by the anvil.
Defensive "Hammer and Anvil" Tactic:
The Anvil:A slower, more powerful player or unit that can withstand a hit and can be used to slow down the offense, like the defensive line.
The Hammer:The strong safety, who is responsible for delivering hard hits and stopping the run, often coming up from the secondary.
Strong Safety as a "Hammer":
Strong safeties are often bigger and stronger than free safeties, designed to play closer to the line of scrimmage and provide run support.
Their role often involves delivering forceful tackles, hence the "hammer" analogy.
They may also cover running backs and tight ends who come out of the backfield.
Examples of strong safeties in the NFL include Kyle Hamilton, Harrison Smith, and Budda Baker.
The "hammer and anvil" defense is a schematic approach in football that utilizes a strong safety as the "hammer" and a free safety as the "anvil," with cornerbacks and linebackers playing supporting roles. The strong safety, like a hammer, aims to deliver big hits and disrupt the run, while the free safety, acting as the anvil, provides deep coverage and support. Cornerbacks primarily focus on pass coverage and forcing interceptions, while linebackers are often involved in both run stopping and blitzing, sometimes forcing fumbles.
Here's a breakdown:
Strong Safety (Hammer):This player is typically bigger and stronger, often tasked with covering tight ends, blitzing, and playing near the line of scrimmage to stop the run and deliver big hits.
Free Safety (Anvil):This player needs to be fast and have good range, playing deep in the secondary to cover passes and intercept throws. They are the last line of defense and act as a center fielder, helping to prevent big plays.
Cornerbacks:These players are primarily responsible for covering wide receivers and trying to intercept passes. Their ability to force turnovers is crucial for the defense.
Linebackers:Linebackers are versatile and can be involved in both run stopping and pass coverage. They can also blitz the quarterback, potentially forcing fumbles. According to Glazier Clinics, they can be effective at forcing fumbles by using gang tackling.
This defensive scheme combines zone coverage with a blitz strategy, utilizing cornerbacks in zone coverage, a free safety playing a zone, and linebackers/strong safety blitzing. This creates a complex defensive look that can confuse quarterbacks and offensive lines. Here's a breakdown:
Key Components:
Cornerbacks in Zone:Cornerbacks are responsible for specific zones of the field, rather than man-marking a specific receiver. This allows them to cover a defined area and potentially intercept passes thrown into their zone.
Free Safety in Deep Zone:The free safety typically covers the deep middle of the field, acting as the last line of defense against long passes.
Linebackers and Strong Safety Blitz:Linebackers and the strong safety are designated as blitzers, aiming to pressure the quarterback by attacking gaps in the offensive line. They may also drop into short zones after the snap if the offensive scheme dictates.
Zone Blitz Variations:The specific zone coverage (like Cover 2, Cover 3, or Cover 4) can be adjusted based on the defensive scheme and the offensive formation.
How it works:
1. Pre-Snap Deception:The defense disguises their intentions, potentially showing a blitz look to confuse the offensive line about who is blitzing and who is dropping into coverage.
2. Blitz Execution:Linebackers and the strong safety will execute their blitz, aiming to exploit gaps in the offensive line's protection.
3. Coverage Adjustment:While the blitzers are attacking, the cornerbacks and free safety will maintain their zone responsibilities, covering their designated areas of the field.
4. Potential for Interceptions:By confusing the quarterback with the blitz and the zone coverage, the defense can create opportunities for interceptions, especially if the quarterback hesitates or makes a poor throw.
5. Versatility:This scheme can be adjusted to various offensive formations and down-and-distance situations, making it a flexible and effective defensive strategy.
Advantages:
Confusion for the Offense:The blitz and zone coverage combination can confuse offensive linemen, making it difficult to identify who is blitzing and who is dropping into coverage.
Pressure on the Quarterback:The blitz aims to get pressure on the quarterback, forcing him to make quick decisions and potentially leading to errant throws.
Versatility in Coverage:The zone coverage allows defenders to react to the play as it develops, rather than being locked into man coverage.
Disadvantages:
Vulnerable to Quick Passes:If the quarterback can get the ball out quickly, the blitzing defenders may not have time to get to the quarterback, and the offense can exploit the vacated areas of the field with quick passes.
Requires Disciplined Defenders:The success of this scheme relies on defenders understanding their zone responsibilities and executing their assignments with precision.
In football, a forced fumble is a turnover stat, meaning it's a situation where a defensive player's action causes the ball carrier to lose possession, resulting in a change of possession. This can be a strategic element for defensive teams, aiming to create scoring opportunities or gain field position advantage.
Here's a more detailed explanation:
Forced Fumble:
Definition:A forced fumble occurs when a defensive player dislodges the ball from an offensive player's grasp, causing the ball to become loose.
How it happens:Defensive players can force fumbles by striking the ball with their hand or helmet, or by tackling the ball carrier in a way that dislodges the ball.
Turnover:When a fumble is recovered by the opposing team, it's considered a turnover.
Strategic Importance:
Create Scoring Opportunities:A turnover caused by a forced fumble can lead to an immediate scoring opportunity for the defensive team, giving them a chance to put points on the board.
Gain Field Position:Even if a forced fumble doesn't immediately lead to a score, it can give the offense a better starting field position if the fumble is recovered by the defensive team.
Momentum Shift:Turnovers, including forced fumbles, can drastically shift the momentum of a game in favor of the team causing the turnover.
Strategic Planning:
Focus on Stripping:Defensive players can be trained to specifically target the ball when tackling, attempting to "strip" it away from the ball carrier.
Attacking Vulnerable Points:Players can focus on areas like the ball carrier's arms or the area where the ball is held, to increase the chances of a forced fumble.
Defensive Schemes:Defensive schemes can be designed to put pressure on the ball carrier and create opportunities for forced fumbles.
A forced fumble in football occurs when a defensive player causes the ball carrier to lose possession, and a "club tackle" is a specific technique used to achieve this, often involving striking the ball with the forearm or elbow to dislodge it during a tackle.
Elaboration:
Forced Fumble:In football, a fumble happens when a player in possession of the ball loses control of it, dropping it or having it knocked away. A forced fumble is specifically when a defender's actions cause this loss of possession.
Club Tackle:A club tackle is a technique where a defender uses their forearm or elbow to strike the ball while tackling an opponent. The goal is to hit the ball at the right moment and angle to make it come loose.
Strategic Plan:A strategic plan for forcing fumbles involves practicing specific techniques like the club tackle, as well as emphasizing gang tackling to hit the ball carrier from multiple angles, and other methods to dislodge the ball.
Ball Security:Defensive players train to dislodge the ball, while offensive players work on ball security, carrying the ball in a way that makes it difficult to be stripped.
Importance:Forcing fumbles is a key aspect of defensive strategy, as it can lead to turnovers and change the momentum of a game.
A strong safety's strategic plan for forcing fumbles and deflecting passes involves a combination of aggressive pursuit, precise timing, and effective tackling techniques. They should focus on attacking the ball when making tackles, aiming to jar it loose, and anticipating routes to disrupt passing plays and bat down passes. Additionally, strong safeties should be adept at recognizing offensive formations and play calls to anticipate where the ball is going and position themselves to make a play.
Forced Fumbles:
Aggressive Pursuit:A strong safety should prioritize closing on the ball carrier with speed and intensity, aiming to make a decisive hit.
Targeting the Ball:When making contact, the strong safety should focus on striking the ball, either with an open hand or a punch, to dislodge it.
Proper Technique:Using a wrap-and-roll technique can help generate more force and increase the chances of a fumble.
Practice Drills:Incorporate drills that emphasize striking the ball in practice to develop the muscle memory for forcing fumbles.
Pass Deflections:
Route Recognition:Strong safeties need to study offensive formations and tendencies to anticipate where the quarterback will throw the ball.
Breaking on the Ball:Once the ball is released, the strong safety should break towards the intended receiver, anticipating the ball's trajectory.
Ball Disruption:When challenging the receiver, the strong safety should aim to get their hand on the ball to deflect it away from the receiver, forcing an incomplete pass.
Coverage Techniques:Using a combination of man and zone coverage techniques will allow the strong safety to be versatile in their approach to defending passes.
Strategic Considerations:
Defensive Formations:Strong safeties need to understand how their role changes based on the defensive scheme (e.g., 4-3, 3-4, or various zone coverages).
Opponent Tendencies:Studying film to identify the opponent's passing patterns and tendencies will allow the strong safety to anticipate plays and make more impactful plays.
Situational Awareness:Understanding the game situation (e.g., down and distance, score, time remaining) will help the strong safety make the best decisions on when to be aggressive and when to play it safe.
Team Communication:Effective communication with other defensive players is crucial for coordinating efforts and maximizing the chances of creating turnovers.
A "ball hawk" stat, often referred to as the Ballhawk Index from The Power Sweep, quantifies a defensive player's impact on the ball. It's calculated by adding interceptions, passes defensed, sacks, and forced fumbles. This metric helps identify players who are consistently making plays on the ball and contributing to defensive success.
Here's a breakdown of the components:
Interceptions: When a defensive player catches a pass intended for the opposing team.
Passes Defensed: When a defensive player breaks up a pass attempt, preventing the receiver from catching it.
Sacks: When a defensive player tackles the quarterback behind the line of scrimmage.
Forced Fumbles: When a defensive player knocks the ball loose from the ball carrier.
In the context of a safety, these stats indicate their ability to:
Intercept passes: Highlighting their coverage skills and ability to read quarterbacks.
Break up passes: Demonstrating their playmaking ability in coverage and defending against throws.
Force fumbles: Showcasing their tackling ability and impact on the ground game.
Contribute to sacks: While safeties don't typically get as many sacks as defensive linemen, their ability to blitz and disrupt the quarterback is still valuable.
Overall, a high ball hawk score for a safety indicates they are a playmaker who is frequently involved in creating turnovers and disrupting the opposing offense. Safeties like Kevin Byard are known for their ball-hawking skills.
A "ball hawk" in football is a player who consistently creates turnovers and disrupts passing plays. This is often measured by a "ball hawk" index, which combines interceptions, passes defensed, sacks, and forced fumbles. A blitz is a defensive strategy where more players than usual rush the passer in an attempt to pressure or sack the quarterback.
Here's a breakdown of the terms:
Ball Hawk:A player who excels at intercepting passes, deflecting passes, getting sacks, and forcing fumbles. The "ball hawk index" is a way to quantify this type of player.
Sacks:When a defensive player tackles the quarterback behind the line of scrimmage.
Forced Fumbles:When a defensive player knocks the ball loose from the ball carrier.
Passes Defended:When a defensive player interferes with a pass attempt, preventing the receiver from catching it.
Blitz:A defensive tactic where multiple players rush the quarterback, aiming to disrupt the play.
Blitz Success Rate:While not a standard statistic, it can refer to how often a blitz results in a sack, forced fumble, or other positive defensive outcome.
PRO FOOTBALL FOCUS
PFF (Pro Football Focus) uses several Key Performance Indicators (KPIs) to evaluate strong safeties in college football, including coverage grades, run defense grades, and overall defensive grades. Other important metrics include tackles for loss, pass breakups, and interceptions. PFF also tracks where safeties line up pre-snap (box, free safety, slot corner, etc.) to assess their impact and versatility.
PFF's KPI Breakdown for Strong Safeties:
Coverage Grade:This metric assesses a safety's effectiveness in pass coverage, including yards allowed per coverage snap and passer rating allowed.
Run Defense Grade:This evaluates how well a safety performs against the run, including tackles for loss and run stop percentage.
Overall Defensive Grade:This combines a player's performance in both coverage and run defense, providing a comprehensive measure of their overall defensive impact.
Tackling Efficiency:This metric assesses how often a safety successfully tackles a ball carrier, especially against the run.
Pass Rush Productivity:Although not a primary focus for safeties, PFF also tracks pass rush productivity for safeties who blitz or have pass rush responsibilities.
Snaps by Position:PFF tracks where safeties line up pre-snap (e.g., in the box, at free safety, or in the slot) to assess their versatility and effectiveness in different roles, according to PFF.
Depth of Target:PFF also tracks depth of target for safeties, indicating how well they perform against short, intermediate, and deep passes.
Other Key Stats:Tackles for loss, pass breakups, and interceptions are also crucial for evaluating a safety's performance.
For a strong safety in the NFL, Pro Football Focus (PFF) uses a variety of key performance indicators (KPIs) to evaluate their performance. These include coverage grades, tackling efficiency, run defense, and pass rush ability. PFF also analyzes how well they cover tight ends and slot receivers, and their overall impact on the game.
Here's a more detailed breakdown:
Coverage:
Coverage Grade:This is a core metric, evaluating how effectively the safety defends passes. It considers factors like completions allowed, yards allowed, touchdowns allowed, and interceptions.
Coverage Snap Rate:The percentage of passing plays where the safety is actively involved in coverage.
Passer Rating Allowed:A crucial statistic that measures the effectiveness of the safety's coverage by calculating the passer rating a quarterback achieves when targeting the player they are covering, according to PFF.
Interception Rate:The frequency with which the safety intercepts passes, indicating their ball-hawking ability.
Targeted Receptions Allowed:The number of times the safety is targeted and allows a reception, indicating their effectiveness in defending the pass.
Run Defense:
Run Defense Grade:PFF evaluates how well the safety defends the run, assessing their ability to make tackles, fill run gaps, and prevent big plays.
Missed Tackle Rate:The percentage of tackles the safety fails to make, a key indicator of their tackling consistency.
Tackling Efficiency:How many tackles the safety makes per attempt, reflecting their effectiveness in bringing down ball carriers.
Other Important Factors:
Pass Rush Grade:While not a primary role, some strong safeties contribute to pass rushes. This metric assesses their ability to pressure the quarterback.
Discipline:PFF also considers factors like penalties and alignment, which reflect a player's understanding of their role and ability to stay out of trouble.
Overall Grade:PFF combines all these factors into a single overall grade for each player, providing a holistic view of their performance.
In essence, PFF's KPIs for strong safeties go beyond traditional statistics, providing a detailed and nuanced view of their impact on the game.
PFF uses a variety of key performance indicators (KPIs) to evaluate strong safeties, focusing on their ability to impact both run defense and pass coverage. Key metrics include coverage grades, run defense grades, tackling efficiency, and performance in various coverage schemes, along with advanced metrics like those related to forced incompletions and plays made over expected.
Here's a more detailed breakdown:
Coverage Performance:
Coverage Grade:PFF assigns a grade to players on every play based on their performance in coverage, taking into account factors like positioning, reaction time, and ability to defend the pass.
Advanced Coverage Grade:This metric provides insights into a player's ability to maintain coverage even when not directly targeted.
Target Rate and Efficiency:PFF tracks how often a safety is targeted, and how effectively they defend those targets in terms of completions, yards allowed, and passer rating allowed.
Interception Rate and Pass Breakups:These traditional stats are also tracked and factored into the overall coverage grade.
Run Defense and Tackling:
Run Defense Grade:PFF assesses a player's effectiveness in run defense, considering their ability to shed blocks, make tackles, and prevent big runs.
Tackling Efficiency:Metrics like tackling success rate and missed tackle percentage are used to evaluate a safety's ability to make reliable tackles.
Versatility and Impact:
Versatility:PFF emphasizes the importance of safeties being able to play in multiple roles, including deep zones, near the line of scrimmage, and even in the slot.
Impact Plays:Metrics like "Defensive Impact Plays Over Expected" help quantify a safety's ability to make game-changing plays.
Specific Examples:
Xavier Watts (Notre Dame):A highly-rated safety in the 2025 draft class, Watts has shown strong coverage and run defense, including a high interception rate.
Kyle Hamilton (Baltimore Ravens):Known for his versatility, Hamilton earned high grades in coverage, run defense, and even pass rushing.
Javon Holland (Miami Dolphins):Holland's production and coverage grade place him among the league's best safeties.
In essence, PFF uses a combination of raw data, advanced metrics, and subjective grades to evaluate strong safeties, providing a comprehensive view of their strengths and weaknesses.
PFF (Pro Football Focus) KPIs for a strong safety would focus on measurable aspects of performance like tackling effectiveness, coverage ability, and play recognition. Specific drills to improve these skills would include tackling drills (angle tackling, open field tackling), coverage drills (pedal and break, break step/T-step and ball reaction), and drills that improve reaction time and open field movement (W-drill, open and run).
Here's a breakdown of relevant PFF KPIs and drills:
PFF KPIs for Strong Safety:
Tackling Efficiency:PFF tracks missed tackles, tackle success rate, and tackling efficiency in various situations (e.g., open field, vs. the run, vs. the pass).
Coverage Effectiveness:PFF analyzes completion percentage allowed, yards allowed per target, and passer rating allowed when the safety is in coverage. They also track coverage grades, which reflect overall coverage performance.
Play Recognition and Reaction Time:PFF assesses how quickly a safety identifies offensive plays and reacts, including their ability to anticipate routes and make plays on the ball. This can be reflected in metrics like interception rate and forced incompletion rate.
Run Support:PFF grades a safety's effectiveness in defending the run, including their ability to fill gaps, shed blocks, and make tackles near the line of scrimmage.
Drills to Improve Strong Safety Skills:
Tackling Drills:
Angle Tackling: Focuses on proper angles of approach to the ball carrier and breaking down to make the tackle.
Open Field Tackling: Drills to practice tackling in space, away from the line of scrimmage.
Coverage Drills:
Pedal and Break: Practices the backpedal technique and breaking on the ball when a receiver makes a cut.
Break Step/T-Step & Ball Reaction: Focuses on quick transitions from backpedal to forward movement and reacting to the ball in the air.
W-Drill: Improves agility, change of direction, and speed in a back-and-forth pattern.
Open and Run: Simulates a receiver breaking out of a route and the safety reacting to the break and running with the receiver.
Reaction and Speed Drills:
Cone Drills: Various drills using cones to improve agility, speed, and change of direction.
Ladder Drills: Improve footwork and speed, which are crucial for both coverage and run support.
Film Study:Analyzing game film to understand offensive tendencies and improve play recognition and anticipation.
JACQUES SAMASSI HAS COMMITTED TO NOTRE DAME
5 notes
·
View notes
Text
How Is an Online Payslip Generator Right ToolFor Company?
You know one thing, using Online Payslip Generator actually helps to automate many tasks that are associated with payroll management. By using this tool, you can calculate salaries and note the taxes and deductions.

#Online Payslip Generator#Salary Slip Generator#Free Payslip Generator Online#Salaried Pay Stub#Payroll Generator#Real Paycheck Stubs#Paycheck Now#How to Make Check Stubs#Check Stub Maker#Check Stubs#Make Check Stubs#Direct Deposit Check Stub#online paystub maker#online check stub maker#online check stub generator#pay generator#pay check generator#generate w2 form#w2 generator online#free online w2 generator#w2 form maker#W7 Form Creator#Generate W7 Online#Online 1099-C Form Generator#Free 8809 Generator#Generate SS 4 Form#8995 Generator Online#Generate 941B Form#Online 1099-DIV Form Generator#Online 1099-OID Form
0 notes
Text


Having been on the topic of cars for the longest time, today, we're gonna talk about something that Americans are obsessed with besides guns and cars.. Trucks but not just any ol' trucks, we're diving some VERY fast trucks of the 90s-10s.
Pics from left to right, top to bottom in zig-zag form: Shelby Dakota -> GMC Syclone & Typhoon -> '93 Chevy 454 SS -> '94 Ford F-150 Lightning -> '04 Lightning -> 2011 Ford F-150 Raptor -> 2017 F-150 Lightning
Dodge for the longest time was making trucks and was eating the shares of both Chevy/GM in general and Ford in the US market alone with Chrysler's purchase of Ram and pushing that department to Dodge. During the 80s, Carroll Shelby had jumped from working with Ford to helping his best friend, Lee Ioccocca at Chrysler Corp in modifying their fleet of cars with special models. However, Dodge and Plymouth at that moment were stuffing more and more FWD vehicles for Shelby to work with that he was getting slightly sick of it. So when he heard that Dodge was pushing out a new light utility truck (small in US size, normal everywhere else), the Dakota and Shelby quickly jumped the gun on it. He would take the Dakota Sport that was launched in 1988, tear the V6 in it out and slap a 318ci 5.2L V8 producing 175hp into the Dakota Sport and launch it in 1989 as the "Shelby Dakota". Not only did it come with a more powerful engine than the V6 Sports pack, it also has striking livery, more aggressive bodykits and also firmer suspension. It was only sold for one year but Dodge had unknowingly kicked the hornet's nest and got everyone in Detroit stirring for a fight in the now sizzling market.
GM on the other side of Detroit saw how well Dodge was doing and thought: "we can give them a run with our bigger finance" thus they took the 1990 Chevrolet Silverado Sport, slapped a bigger engine in it like the Dakota which for the Silverado was the 454ci 7.4L V8 making 230hp, before seeing a power boost to 250hp for the 1991 model. Not only that, Chevy would also install tauter suspension and brakes for the truck. GM and Chevy would also sell the truck under a new special model as the "454 SS".
On the other hand of the GM brand, GMC was rattling its cage also and GM would allow them to do what they want for their new Sonoma line and GMC would go all ham on their concept. Back in 1986 and 1987, Buick, another wing of GM, was working with a turbo V6 that would compensate their specialty of not using a V8 as the only power unit for their cars where Buick would take a Regal Grand National, modify it to bits, dump the turbo V6 in it, turn it into the GNX and shocked everyone in the industry, even international motor journalists. GMC saw that as their fighting chance too thus they developed their truck based on that ideology but, with a twist. They would develop their own V6 with a 4.3L unit and slapping the same turbo used on the Mitsubishi 4G63T unit which would push the engine unit to make 280hp. What was different from the other sports truck was that instead of sticking to the RWD concept, it had an AWD system in the truck also. This was a very great call as it shot the truck into a godlike status as it became as fast or even faster than even a supercar of its time at at least 2x its weight. GMC would name this new truck the Syclone and to match it, they would also slap a closed canopy to the rear and turn it into an SUV as the Typhoon. Upon testing, the trucks were significantly shocking as it could do a 0-62/0-100kmh time of 5.2sec which was unheard of not only in trucks but almost 90% of the car in the market couldn't even reach that time. It could even do 14sec on the 1/4 mile making it faster than the C4 Corvette, Ferrari 348t, the Z32 300ZX and even the 964 Porsche 911 Turbo which was very shocking to the public and the press. Despite not making many units, the limited Typhoon and Syclone still became a legendary vehicle of its time.
Ford, after watching GM doing magic to their truck range, decided to jump into the fray and knowing that their F-series trucks were already outselling the other competitors, they got to work immediately. Ford asked their "Special Vehicles Team"/SVT in 1991 to do the job and SVT took a base F-150, shoehorned the 351ci 5.8L "Windsor" V8 with higher flowing headers into the engine bay making 240hp and the chassis work was finely developed by, oddly enough, Sir Jackie Stewart. Despite being weaker in horsepower than the GMC Syclone, it was comparable to the Chevy 454 SS and it drove better and the critics and journalists who reviewed it liked it and thus, it became a symbol for Ford on what they could do and the "Lightning" brand became the pinnacle of the F-150.
Ford would update the Lightning to the new 10th gen F-150 chassis in 1999 and this time, Ford did alot of things to make it as sporty as they can. The 1st gen F-150 used the F-250 chassis with the normal F-150 shell. This gave the 1st Lightning the ability to haul heavy loads and be fast still. However, for the 2nd gen Lightning, Ford used the F-150 fully as its base and to make it even sportier, they initially lowered its loading ability to just 800 pounds/360kg initially. Despite not being a top hauler, it was a great sports truck as Ford would slot the 5.4L "Triton" V8 with a supercharger to the Lightning which makes 360hp. Ford would also lower it as much as they can which did improve cornering ability. Ford would improve the formula again in 2002 by increasing the horsepower to 380hp and also finally realign the carry load weight of the Lighting to 1,350 pounds/610kg. Ford would eventually stop making the Lightning in 2004 and in that period of time, it was yet again the pinnacle of Ford's engineering and the F-150's ability to not only be a general purpose carry vehicle but also a great sports truck.
Dodge, after watching both GM and Ford going to strides with their "sports truck" initiative also wanted to join in way back in 1996. Dodge had just finished the S2 Viper that year and thus, Dodge had the idea to stuff the 8L V10 into the Dodge Ram 1500 chassis and compete with the Ford Lightning but somehow, Dodge didn't commit to it after building a prototype and cancelling it soon after. It didn't take them till 2002 to revive the concept again. Using the same concept that they drafted way back in 1996, they would use the Ram 1500 as base but this time, they would slap the newer 8.3L V10 engine making 500hp. Despite its weight of a whooping 2t, it could shift itself with a 0-62mph/0-100kmh in 4.9sec and reach a top speed of 147mph/237kmh making it one of the fastest truck in the market. Not only that, Dodge also changed the game that when the car launched in 2004, Dodge would sell the car in singlecab and quadcab form, a concept that wasn't seen with the other sports trucks. Dodge would sell the Ram SRT-10 till 2006 and the reception was great.
The sports truck market would fall silent during the latter half of the 2000s like the muscle car market and as times were changing, people thought sports trucks will never be a thing again. Not Ford tho as in 2010, they burst into the market again this time not with a sports truck but a "sports" truck. By 2008, Ford wanted to rebuild the glory of the sports truck but looking at how the situation has changed and how off-roading was the new norm, Ford decided to switch gear and instead build their next sports truck into an off-roading sports truck. Ford would take the 11th gen chassis, stuff the truck with a 5.4L V8 which would initially make approx 350hp but would also give customers the option to accept the 6.2L "Boss" V8 which makes 410hp. The "Boss" engine would also be the only option by 2012 once the 5.4L got dropped from that F-150 line. For the entirety of that Raptor line, all of them were fitted with Fox long stroke suspension and also were fitted with 4x4 as standard. Unlike the 2002-2004 Lightning, Ford would learn from that lesson and not reduce the loading capacity of the Raptor and this time, the 1st gen Raptor would accept rear loads to 1.8k pounds/810kg and could even pull loads over 3t. Ford would also launch the Raptor in both Super crewcab form and also single cab form. The Raptor would become a sensation as its not only fast on the streets, its also rather helpful and great on the dirt.
With that comforting success, Ford would upgrade the Raptor again in 2017. With the styling changes, mechanical changes would definitely have to be made also and thus, Ford once again changed the recipe for the engine and they'll drop the V8 for a more efficient but yet powerful 3.5L D35 "Ecoboost" V6 used in the Ford GT which would be severely detuned to "just" 450hp in the 2nd gen Raptor. Not only that, Ford would also build the Raptor mostly out of aluminium which would cut the weight by at least 500 pounds/226kg. Even the gearbox would be changed where the old Raptor uses a 6spd autobox, the new Raptor would use the 10spd autobox. Ford would once again upgrade the Raptor in 2021 without much changes for the "base" Raptor but to pander to more customers who want an even faster truck, Ford would this time stuff a V8 into the Raptor again and this time would launch a new model under the Raptor lineup as the Raptor R. They would put the 5.2L "Carnivore" supercharged V8 into the truck which makes 700hp.
People would definitely think as pickups as a work vehicle, not these Americans.
6 notes
·
View notes
Text
Been thinking about how I'd rank each of the new pokemon introduced in each generation and I'm curious what the consensus is, so I'm running two polls.
Including Megas, Regional Variants, GMaxes, etc in the generation those new forms were introduced in, not the original Pokemon:
274 notes
·
View notes
Note
What were Moldaver and her group's position with the New California Republic? Sure, they fly NCR flags over their base at the Observatory, and the refugees in Vault 4 who worship her also carried NCR memorabilia with them (like the flag Lucy finds in the classroom), but at the same time, there's always the possibility they weren't really acting on the part of the NCR. There's a pretty clear contrast between the NCR soldiers we've seen in Season 2 set leaks vs. what Moldaver's group had. While her method of extracting Hank MacLean from Vault 33 doesn't seem like something that the NCR would do.
My guess is that maybe they were meant to be a ragtag militia of sorts born from the survivors of Shady Sands. One that Moldaver had to form because brass like General Oliver and Col. Moore wouldn't authorize a retribution campaign against Vault 33.
I think it goes a bit deeper than just ragtag militia.
First: In episode 5 credits, it's shown a book "The New California Republic by Kate Williams", published in 2189!!!! (I hadn't noticed the year before, just now!) We KNOW that Moldaver before used the name Williams, however we don't know her first name, nor how she reached the present. I could see Moldaver having her own cryopod and sleeping and waking up for periods, maybe trying to find and develop the Cold Fusion, and then going frozen again. If she was like this mythical figure that appeared and disappeared, and maybe solved things, it would help explain WHY the survivors in Vault 4 call her Flame Mother and claim for ther to avenge Shady Sands, she ended up becaming this mythical figure that appears when SS is in trouble. Still, now she uses the name Lee Moldaver and is known by lots of people as "crazy woman from the mountains/hills" (something the Vault 4 survivors don't seem to know or would've gone there, so her setting up there is almost 100% after the bombing), but we don't know since when she uses this name.
Second: We know she wasn't in Shady Sands when it blew up, and we know there was a time between Hank taking the kids and blowing the city, and STILL something in how she explains the happening in episode 8 feels as if a lot of guesswork? I'm wondering now if she wasn't away for something like years, possibly leaving while the kids were still around and returning after hearing about the bombing, and assumed that Hank taking the kids and bombing the city was done in a single go, instead of the kids being taken in 2277 and the city bombed some year after 2281. I could see this being the case if she was trying to discover about the cold fusion - maybe heard the Enclave had got its hands on it and was trying to discover it? Maybe discovered a Vault where it was supposed to be but when arrived there it had already been ransacked by the Enclave? Maybe, with Rose's presence and Moldaver hearing about Hank Maclean, she noticed she had a CHANCE, if she knew she needed a Vault Tec employee: she knew for a fact now that probably there would be a whole Vault full of those for her to unlock the cold fusion if she got her hands on it, with a Vault-Dweller to open the door, and this may be what prompted her to leave.
This would explain how she and Wilzig first met, and why he did what he did and knew to get the tech to her - heck, Wilzig may be someone that infiltrated the Enclave on Moldaver's orders to find the tech, it would ALSO EXPLAIN HOW HE KNEW ABOUT VAULT 33 AND LUCY'S LAST NAME, Moldaver would've heard from Rose and told him. I mean, we really haven't met an Enclave born-person that wasn't rabid about the organization, afair.
If that's the case, that Moldaver spent years away and returned after Shady Sands, it would also explain why her men are so different from the leaked pictures and how different they behave and how they clearly had no qualms about recruiting Raiders to distract and attack the Vault-Dwellers while she got what she wanted. Also, the Observatory specifically has a "NCR Headquarters" plaque, but it could very well be abandoned by the time she arrived. In this case, well, I can see that she and the others left under the orders of finding the Cold-Fusion and never even got in contact with the rest of the NCR upon return after the bombing, just got to work setting up the Observatory to receive the Cold Fusion, knowing that Vault 31 would have a VT employee.
All this is really something I thought about now, so it all may be a bit disorganized, and it's really making me think more about the time between taking the kids away and bombing Shady Sands.
There has been this floating theory in my mind that Hank managed to drag Rose back with the kids to the Vault, but kept her locked away and for all effects "dead" for years, probably trying to break her and make her a compliant Vault-Dweller again, but eventually she managed to escape alone... And Hank bombed Shady Sands, both as punishment to her and to make sure she would have no help or way to get the kids and, hopefully, killing her. This would explain: the time between getting kids and bombing the city and, if Moldaver away for years, why she thought the two things happened together and Rose never got into contact with her about what happened or never attempted to take her kids back - I refuse to admit that Rose just remained something like 5 years in the surface, possibly with Moldaver, and didn't try to take Norm and Lucy back or outright invading the Vaults, since we KNOW her Pip-Boy still was able to open the Blast Doors.
I don't know, Hank does strike me as the type to keep a wife in the attic/basement.
2 notes
·
View notes
Note
heya, I’m a big fan of your prince of death story! I’ve made a few comments under the guest name “Myself” (probably more memorable as the guy who never shuts the fuck up about wholesome Vyke and Lansseax content, sorry about that), But then I remembered I had a Tumblr I had only used once before! If it’s okay, I have a few questions about Vyke and Lansseax’s relationship, and their history:
You’ve already explained to me in a comment reply how they met, but how did they become a couple, and who initiated it? (I’d personally imagine Lansseax, Vyke doesn’t seem like he’d be the forward type. I also imagine Lansseax made a big show of it to embarrass Vyke)
2. when all hell isn’t breaking loose, how do they normally spend time together? Or is Vyke the “brooding silent type who is begrudgingly hugged by his much taller girlfriend in public”
3. does Lansseax ever force Vyke to go flying with her? I’d imagine that would be terrifying weather or not he’s afraid of heights (although *I* am afraid of heights, so that may be a bit of a projection)
4. (Based on a funny mental image I had at one point) Being a dragon, was Lansseax ever confused about alcohol, so Vyke, humoring her, decided to take her to a bar, but then he had to deal with an absolutely trashed dragon for the next few hours?
5. despite Vyke having the personality of a homeless cat, his wife and best friend are social butterflies. Do either of them ever drag Vyke to social outings and he ends up being the guy just awkwardly standing there doing nothing?
6. Not really about Vyke and Lansseax per se, but it is by extension I guess: what’s Vykes dynamic with Fortisax? I imagine they would at they very least be friends, because in his boss fight Vyke uses Fortisax’s Lightning spear but not Lanssex’s glaive
7. how does the rest of the dragon cult view their relationship? Do people just think “lucky bastard” about Vyke, do some people think that while others think Vyke is just trying to gain favor in the cult?
8. how would Lansseax react to someone hitting on Vyke? Would she be upset or just find it funny?
9. has Vyke ever asked “would you still love me if I was a Wyrm”, )referring to the magma worm) as a joke? I definitely would, bad puns are the best type of humor
Absolutely love Prince of Death, it’s right up there with Incidence (a Deltarune story by Jungle Dragon) with being my favorite. Thank you for your time and sorry to bother you with more questions about Vyke and Lansseax XD
Hi, thanks for the ask!
Lansseax: Vyke, what was it your people call that thing you do? With the rings? Vyke: ... What? Lansseax: You know, the mammal pair-bonding ritual. Vyke: You mean marriage? Lansseax: Yes, that. Lansseax: Do you want to get married? Vyke's brain: sdfghjkjbvvvjd;ss Vyke: Sure.
In all seriousness, Vyke is a very blunt and practical guy, and Lansseax is pretty direct in going after what she wants. Once they started making a point to spend time together and realized that they wanted to continue doing so, neither of them saw any reason not to make things official.
Vyke generally doesn't get involved with Lansseax's social life. But she's constantly trying out new hobbies, and he likes hanging around and asking the occasional question while she's working on her current project. They've settled into a comfortable compromise where Lansseax doesn't try to make Vyke pretend to be social, and he finds other ways to spend quality time with her.
In this continuity, Lansseax cannot change forms at will. When she turned human, that was permanent. If she somehow turned back into a dragon, that would be permanent. Her Crucible wings allow for something closer to old-school Superman's "leap tall buildings in a single bound" than to true flight. I suppose Vyke could theoretically hold onto her while she goes springing across the rooftops, but the danger of getting dropped would be very real, and Vyke's dignity wouldn't allow for it anyway.
Lansseax actually has a pretty high tolerance for alcohol, being nearly seven feet tall. She was the one carrying Vyke home after their first time at a bar together -- he quickly learned not to try to keep up with her drinking.
Vyke is obligated to go to the occasional Cult celebration, but he never stays too long. Godwyn and Lansseax have both learned that he'll just stand in a corner if he's forced into social events -- if one wants quality time with Vyke, it's best done one-on-one.
Out of all their sister's knights, Fortissax tolerated Vyke the most. Unlike Lansseax, Forti was there for Godwyn, and didn't care for humans as a rule. But Vyke is a very dragonish human, and he's not flakey and talkative like most humans, and he didn't try to force a friendship with Fortissax (the worst possible thing one could do). They eventually warmed up to him a bit, to the point where they could sit quietly and brood together, or have the odd sparring match.
Vyke and Lansseax are an institution. Their relationship predates the Dragon Cult, and Vyke was technically the first member. The other knights see Lansseax more as a mother figure (or more rarely, an object of courtly love), and Vyke as something between a godfather and an older brother.
You know, I never considered Vyke having other suitors. But following the second war against the dragons, he would have been considered quite the catch -- the slayer of Gransax, and a close friend of Crown Prince Godwyn. He probably had a small horde of suitors chasing after him for a bit. Lansseax would have bristled at first. But Vyke is like a solitary bird of prey that mates for life and would probably just curl up and die if something ever happened to his One Person. Half the time he wouldn't even notice if someone else was flirting with him, and when he finally picked up on it he'd just be mildly bemused. Nowadays Lansseax would just find it funny.
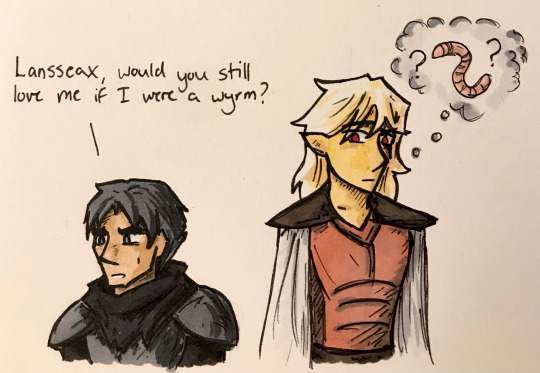
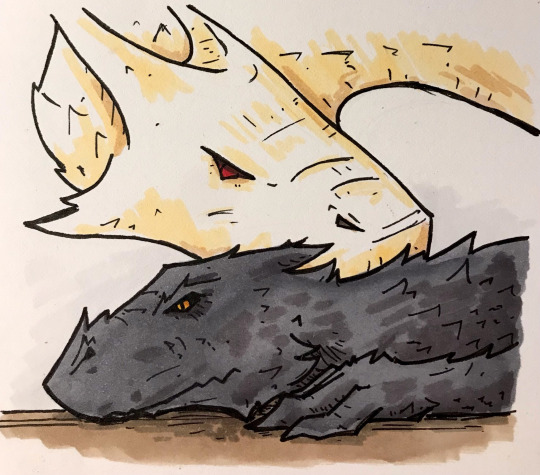
14 notes
·
View notes
Text
After prompting chatGPT with the question, “Can you describe the legal process - in the form of a linear temporal story - of how Hitler changed a democracy into a dictatorship?”, the following timeline was generated:
Certainly. Here’s a chronological account of how Adolf Hitler transformed the Weimar Republic, a democracy, into a Nazi dictatorship:
1. Weimar Republic’s Fragility (1919-1933)
Germany’s post-World War I democracy was unstable due to economic hardships, widespread resentment over the Treaty of Versailles, and political polarization. The Great Depression of 1929 further destabilized the country, leading to increased support for extremist parties like the Nazis.
2. Hitler’s Appointment as Chancellor (January 30, 1933)
Despite the Nazi Party not winning a majority in the 1932 elections, political elites believed they could control Hitler and use his popularity to stabilize the government. President Paul von Hindenburg appointed Hitler as Chancellor.
3. The Reichstag Fire (February 27, 1933)
A fire destroyed the Reichstag (German parliament building). Hitler and the Nazis blamed Communists, using the event to stoke fear of a supposed Communist uprising.
4. Reichstag Fire Decree (February 28, 1933)
The day after the fire, President Hindenburg, under Hitler’s pressure, signed the Reichstag Fire Decree. This suspended civil liberties, including freedom of speech, press, and assembly, and allowed arbitrary arrests. It gave the Nazis a tool to suppress political opponents.
5. The March 1933 Elections
With civil liberties curtailed and political opponents suppressed, the Nazis increased their seats in parliament, though they still didn’t achieve an outright majority.
6. The Enabling Act (March 23, 1933)
Hitler introduced the Enabling Act, which allowed him to pass laws without parliamentary approval or presidential consent. Using intimidation and political manipulation, the Nazis secured the necessary two-thirds majority in the Reichstag. This effectively gave Hitler dictatorial powers.
7. Elimination of Political Opposition (1933-1934)
The Nazi regime quickly outlawed opposition parties, trade unions, and free press. By mid-1933, Germany was a one-party state. Political dissenters were arrested or sent to concentration camps.
8. The Night of the Long Knives (June 30, 1934)
To consolidate power and gain the army’s support, Hitler ordered the purge of the SA (Stormtroopers) leadership and other potential rivals. Hundreds were executed, eliminating internal threats.
9. Hindenburg’s Death and Hitler Becomes Führer (August 2, 1934)
When President Hindenburg died, Hitler combined the roles of Chancellor and President, declaring himself Führer (Leader) of Germany. The military swore allegiance directly to him.
10. Totalitarian Control (1934 onward)
The Nazis established totalitarian control through propaganda, censorship, and terror. Institutions like the Gestapo (secret police) and SS enforced Hitler’s rule. Education, media, and culture were co-opted to promote Nazi ideology, ensuring complete dominance over German society.
Summary
Through a combination of legal manipulation, fear tactics, and outright violence, Hitler dismantled the democratic institutions of the Weimar Republic and established a totalitarian Nazi dictatorship within JUST OVER A YEAR (emphasis added) of becoming Chancellor.
2 notes
·
View notes