#How to backup apple mail
Explore tagged Tumblr posts
Visit Tumblr Blog
Explore Tumblr blogs with no restrictions, modern design and the best experience.
Last Seen Tumblr Blogs


Fun Fact
The KCSC sent more than 20K requests to delete posts related to prostitution and porn to Tumblr from January to June 2017.
Text
Streamlining Email Management: A Comprehensive Guide
Email communication remains a cornerstone of business and personal interactions in the digital age. Whether you’re a professional managing multiple accounts or an individual seeking efficient email organization, having the right tools and methods at your disposal is crucial. This guide aims to provide solutions to common email management challenges, covering a wide range of topics from migrating…

View On WordPress
#Apple Mail to Outlook#apple mail to pst#Backup Office 365 Mailbox to PST#EDB to MS Outlook#EDB to PST#Email#Email Marketing#eml to outlook#eml to pst#Export edb files to Outlook PST#Export OLM Files to PST#how to convert from msg to pst#import pst to outlook#mbox converter#mbox exporter#mbox to outlook#mbox to pst#OutLook#outlook pst repair
0 notes
Text
How VHS to Digital Conversion Works: A Step-by-Step Guide for Alexander Heights Residents
In today’s digital world, many people in Alexander Heights still have old VHS tapes filled with treasured memories. However, VHS tapes are susceptible to deterioration, and VCRs are becoming obsolete. Converting VHS tapes to a digital format is the best way to preserve these precious moments for future generations. Here’s a step-by-step guide on how VHS to digital conversion works and why it’s beneficial.
Step 1: Assess Your VHS Tapes
Before starting the conversion process, gather all your VHS tapes and check their condition. Look for:
Signs of mold, dust, or physical damage.
Faded labels or missing information about the tape’s content.
Signs of tape degradation, such as warping or sticky residue.
If the tapes are in poor condition, professional restoration may be necessary before conversion.
Step 2: Choose a VHS to Digital Conversion Method
There are two primary ways to convert VHS to digital:
DIY Conversion Using VHS-Digital Equipment
Requires a working VCR, a capture device (USB video converter), a computer, and software.
The VHS tape plays on the VCR while the capture device records the video onto your computer.
Requires manual editing and file formatting.
Professional VHS to Digital Services
Professionals use high-quality equipment to ensure better video and audio quality.
They offer additional services such as video enhancement, noise reduction, and cloud storage options.
Ideal for those who lack the technical expertise or equipment.
Step 3: Preparing the Equipment
For DIY conversions, ensure you have:
A VCR in good working condition.
A USB video capture device that connects the VCR to your computer.
Conversion software (e.g., OBS Studio, Roxio, or Elgato Video Capture) to record the video.
Adequate storage space on your computer for digital files.
For professional services, you simply need to drop off or mail your tapes to the service provider.
Step 4: Connecting and Capturing the Video
For DIY conversions:
Connect the VCR to the Computer – Plug the RCA cables (red, white, yellow) from the VCR into the capture device, then connect the device to your computer via USB.
Launch the Capture Software – Open the software and set the video resolution and format (MP4, AVI, MOV, etc.).
Play the VHS Tape – Start playing the tape while the software records the footage in real-time.
Monitor the Process – Ensure the audio and video sync correctly and make adjustments if needed.
Step 5: Editing and Enhancing the Video
Once the video is recorded:
Trim Unwanted Sections – Cut out blank spaces or static noise.
Enhance Quality – Use software tools to adjust brightness, contrast, and color correction.
Remove Background Noise – Some software allows for noise reduction to improve sound quality.
Add Titles or Chapters – Organize videos into sections for easy navigation.
Professional services often provide these enhancements automatically for optimal quality.
Step 6: Choosing a Storage Format
After editing, save your digital files in a preferred format:
MP4 – Best for universal compatibility.
AVI – High quality but larger file size.
MOV – Ideal for Apple devices.
Consider multiple storage options:
USB Flash Drive – Portable and easy to share.
External Hard Drive – Suitable for storing large video collections.
Cloud Storage – Offers remote access and backup security.
DVDs – Traditional but may not be as future-proof as cloud storage.
Step 7: Organizing and Backing Up Files
Create folders labeled by event or year.
Store files in multiple locations for extra security.
Consider cloud services like Google Drive, Dropbox, or OneDrive for remote access.
Why Convert VHS to Digital?
Prevents Tape Degradation – Digital files do not degrade over time.
Saves Space – Eliminates the need for bulky VHS tapes.
Easier Sharing – Share videos with friends and family via email or social media.
Enhances Accessibility – Watch videos on modern devices like smartphones and smart TVs.
Final Thoughts
Converting VHS to digital is a crucial step in preserving your most treasured memories. Whether you choose DIY conversion or professional services in Alexander Heights, ensuring your tapes are digitized will keep your family’s history alive for generations. Don’t wait until your tapes deteriorate—future-proof your memories today!

youtube
#Vhs To Digital Perth#Vhsc To Digital Perth#Convert Vhsc To Digital Perth#Convert Vhs To Digital Perth#Transfer Vhs To Digital Perth#Vhs To Dvd Perth#Vhsc To Dvd Perth#Transfer Cassette To Digital Perth#Convert Audio Cassette To Digital Perth#Convert Audio Tapes To Digital Perth#Youtube
3 notes
·
View notes
Text
iCloud vs Google Drive: Which One Should You Use?
In today’s digital world, cloud storage is a must for keeping your files safe, synced, and accessible anywhere. Two of the biggest options are iCloud and Google Drive. Let’s see how they compare and which is better for you.
1. What They Are
iCloud
Apple’s cloud service for iPhone, iPad, and Mac users.
Great for backing up photos, contacts, notes, and device data.
Google Drive
Google’s cloud storage platform.
Works on any device – Android, iOS, Windows, Mac.
Best for storing files, sharing documents, and collaboration.
2. Storage and Pricing (India)
Google Drive gives more free storage and cheaper high-tier plans. iCloud doesn’t offer a 100GB plan.
3. Ease of Use
iCloud:
Perfect for Apple users.
Integrates smoothly with apps like Photos, Notes, and Mail.
Limited features on Windows and almost no use on Android.
Google Drive:
Works on all devices and operating systems.
Easy to upload, access, and manage files anywhere.
Integrated with Google Docs, Sheets, and Slides.
4. Collaboration
Google Drive is better for teamwork. You can edit, comment, and share files with anyone easily.
iCloud has limited collaboration only in Apple apps like Notes, Pages, and Numbers.
5. File Sharing
iCloud is smooth for sharing with other Apple users but limited for others.
Google Drive has flexible sharing options – public links, view-only, comment, or edit access.
6. Security and Privacy
FeatureiCloudGoogle DriveEncryptionEnd-to-end for some data; encrypted in transit and at restEncrypted in transit and at restPrivacyStrong Apple privacy policiesGoogle uses metadata for ad targetingTwo-Factor AuthYesYes
Note: Both are secure, but Apple focuses more on user privacy as a brand.
7. Special Features
iCloud
Apple One bundles (Music, TV+, Arcade, iCloud+).
Private Relay (VPN-like browsing).
Hide My Email for privacy.
Automatic device backups.
Google Drive
Works with Google Workspace (Docs, Sheets, Gmail).
Built-in OCR (reads text in images).
Powerful search features.
Easy team sharing and management.
8. Which Should You Choose?
Pick iCloud if:
You use only Apple devices.
You want automatic device backups.
You value Apple’s privacy-first approach.
Pick Google Drive if:
You use multiple devices (Android, Windows, Mac, iPhone).
You need to share and edit files with others often.
You want more free storage and flexible plans.
Final Thoughts
Both iCloud and Google Drive are excellent. For Apple-only users, iCloud is simple and seamless. For everyone else, Google Drive offers better flexibility, sharing, and collaboration.
FAQs
1. Can I use iCloud on Windows? Answer: Yes, through the iCloud Windows app.
2. Does Google Drive work on iPhone? Answer: Yes, via the Google Drive app.
3. Which is better for photos? Answer: iCloud for Apple Photos; Google Photos for better search and cross-device access.
4. Is my data safe? Answer: Yes, Both encrypt your data and offer two-factor authentication.
5. Can I change plans anytime? Answer: Yes, you can upgrade or downgrade anytime on both platforms.
Make the best use of cloud storage. Use iCloud for your Apple backups and Google Drive for sharing files and working with others easily.
Read More: iCloud vs Google Drive
0 notes
Text
With so much happening while we are on the move, being able to have access to our photos, documents, and email through a cloud service can be a blessing. And Apple devices’ users get for free 5GB of storage linked to their Apple ID with their Macs, iPhone, iPads or iPods. This tool called iCloud make possible not only to have an updated backup but also to keep all devices in sync. But how to make the best of it? To help you out on it, you will find below 15 tips and tricks to get more out of your iCloud service Make sure it will work One of the biggest mistakes of those using iCloud is to think that it will set itself up on all your devices as soon as you turn them on. Unfortunately, this isn’t how it works. You will need to active the service on your Mac or mobile devices, and ensure that the items you want are synced, just for starters. Turn it into a more friendly virtual folder To make iCloud looks like a more friendly virtual folder, follow these steps: go to iCloud System Preferences and turn on Documents & Data. Then, open the Finder and tap Command + Shift + G. Type ~/Library in the dialogue box. Scroll down the Mobile Documents, where you will be able to drop down your own files and folders from now on. Make sure your Reading List works To make sure that your Reading Lists feature is functioning properly, ensure that Safari is checked in your iCloud settings on your Mac, or that Bookmarks is checked in your iPhone or iPad. It will make them all sync correctly. Free up storage space If your 5G storage space is running low, go to Settings >> iCloud >> Storage >> Manage Storage. There you will be able to see what is taking your space and decide what you might want to delete. And this is just one way to free up storage space in your iCloud. Manual backup If you haven’t been away from a power source or of a Wi-Fi connection for a while, you might want to backup your files manually. In this scenario, tap Back Up Now (located below your toggle switch) and your backup will be started as soon as you are connected to a Wi-Fi connection. Understand what is on your backup Not everything that you have in your devices will be backed up, as you can imagine. Here is what will and won't really be saved for you (if you set it correctly): Yes: The most recent 1,000 photos from your Photo Stream, but only for 30 days; No: the music you sync; No: purchased music, movies, TV shows, apps, and books (only a link to them in iTunes Store, App Store, and iBookstore, respectively, is saved) Be also aware that iCloud storage space is used for iCloud Backup, iCloud Drive, iCloud Photo Library beta, iCloud Mail, and data from apps. Remember that there is a limit to the file size It isn’t only on the storage space limit that you need to keep one eye. There is also a limit to the size of the files themselves, which can't be more than 15 GB each. They can be of any kind, though. Use the extra limit to send large files If you are using the Yosemite's version of Mail and need to send an attachment of more than 40 MB that shouldn’t be shrunk (as in a photo that would lose its quality if you do so), now you can do it with iCloud and Mail Drop features. As iCloud can handle files up to 5GB, your attachment will be “temporarily” stored there while you send it. You will get a warning message the first time you do it, but just ignore it, click on Send and you check the Mail Drop button on the display option you will get. Enable two-step verification to increase security Of course, it sounds very concerning that all your precious data is out there in the cloud available to anybody hack it. But it shouldn’t worry you much. Apple has a very secure system, and some of the best security apps for iPhone and iPad in the market, rest assured. Still, the company suggests that you enable a two-step verification process, so you can decrease the chances of having your Apple ID hacked. After following a few steps, every time you try to log in your Apple ID, you will receive a four-digit code on your trusted device for verification.
Managing iCloud Family Sharing Now is possible to link more than one iCloud account to a single payment method and make the app, music or book purchased available to download for the entire family. All you need to do is go to Settings >> iCloud menu, and look for a family section. There, you will be able to manage your family members, so they will all be associated with the main device and payment method. Generating strong passwords with iCloud Keychain If you are running out of ideas for strong passwords and have been unable to do effective research online, you can use iCloud Keychain to get some suggestions. When you are asked to add a password to a website (assuming here that you are navigating on the site with your Safari app), tap on the password field and you will see the option “Suggest a Password” above your keyboard. A pop-up menu will show up with a randomly-generated password for you. How to disable Find My Phone (and Activation Lock) If you need to restore your Apple device, you will need to disable Find My Phone first – it will disable Activation Lock as well. And you still can do it even if you don’t have your iPhone, iPad or iPod on you through iCloud. Just open any web browser and go to icloud.com. Then enter your Apple ID and click on Find My Phone. Now, enter your Apple password again, and click on All devices >> Offline device you want to remove >> Remove from account. Final Thoughts iCloud is a powerful tool offered by Apple for free to their clients. If you learn how to make the best of it, you will have plenty of resources in your hands. And if you feel that 5GB is just not enough, just pay extra space and enjoy the freedom of having access to all your files and data anywhere you go and of syncing all your devices together. Diana Beyer is experienced and self-driven media expert who is passionate about writing. Her purpose is to share values amid those interested. She is always seeking to discover new ways for personal and professional growth. Connect with Diana though Twitter or visit her blog.
0 notes
Text
Edit PDF on iPad with Pencil: A Professional’s Guide to Digital Productivity
In today’s mobile-first world, professionals are increasingly turning to tablets for handling documents on the go. Among all tablet ecosystems, the iPad—especially when paired with the Apple Pencil—has become the preferred choice for editing PDFs with precision and ease. If you’re wondering how to edit PDF on iPad with Pencil, this guide will walk you through everything you need to know, from tools and apps to workflows and productivity hacks.
Whether you’re signing contracts, annotating legal documents, grading student assignments, or collaborating on project blueprints, learning how to effectively edit PDF on iPad with Pencil can significantly enhance your efficiency and digital workflow.
Why Use iPad and Apple Pencil to Edit PDFs?
Professionals across industries—legal, education, architecture, healthcare, and creative fields—need to interact with PDFs daily. But what makes the iPad and Apple Pencil such a powerful combo?
Benefits include:
Precision Annotation: Apple Pencil allows fine, natural handwriting and drawing, ideal for detailed markups.
Paperless Workflow: Editing PDFs digitally reduces printing costs and improves file management.
On-the-Go Efficiency: Access, edit, and sign documents from anywhere, no scanner or printer needed.
App Integration: Syncs with cloud services like iCloud, Dropbox, OneDrive, and Google Drive.
Best Apps to Edit PDF on iPad with Pencil
While iPadOS includes basic tools to markup PDFs, the real power comes from professional-grade apps. Here’s a breakdown of the top options for anyone serious about document editing.
1. Apple’s Markup Tool (Built-in)
How it works: Open any PDF in the Files app or Mail, tap the Markup icon (pen tip), and use the Apple Pencil to sign, write, highlight, or draw.
Pros: Free, built-in, quick access.
Cons: Limited editing capabilities; better suited for simple annotations.
2. GoodNotes
Features: Import PDFs, annotate with Apple Pencil, organize notebooks, and search handwritten notes.
Best for: Professionals who like a notebook-style interface and need structured document organization.
3. Notability
Features: PDF annotation, voice notes, multi-note support, and automatic cloud backup.
Best for: Teachers, students, and professionals needing multimedia note integration.
4. PDF Expert by Readdle
Features: Advanced annotation tools, text editing, form filling, password protection, file merging.
Best for: Legal professionals, administrators, and power users who deal with large volumes of documents.
5. Adobe Acrobat Reader
Features: Full PDF support, syncing with Adobe Document Cloud, editing, signing, and commenting.
Best for: Users already embedded in Adobe’s ecosystem.
How to Edit PDF on iPad with Pencil – Step-by-Step
Now, let’s walk through how you can edit PDF on iPad with Pencil using Apple’s native tools and third-party apps. The process is straightforward but varies slightly based on your choice of app.
Using Apple’s Markup Tool:
Open the Files app and locate your PDF.
Tap to open it.
Tap the Markup icon (pen tip in a circle).
Use your Apple Pencil to write, highlight, or draw.
Tap Done to save changes automatically.
Using PDF Expert:
Open the PDF in PDF Expert.
Tap the Annotate tab.
Use the Apple Pencil to highlight, underline, comment, or draw.
To edit text, tap the Edit tool, then select the text field.
Save or export to cloud storage when finished.
Using Notability or GoodNotes:
Import the PDF into the app from Files or a cloud service.
Select the Pen, Highlighter, or Eraser tools.
Annotate freely with your Pencil.
Use the Lasso Tool to move or resize handwritten notes.
Export as a new PDF with annotations included.
Advanced PDF Editing Tasks on iPad
With the right app, you can do much more than just annotate. Here are some advanced capabilities:
✅ Fill Out Forms
Use fillable PDFs to input data directly using the Pencil or keyboard.
Apps like PDF Expert and Adobe Acrobat recognize text fields.
✅ Sign Documents
Create a signature using your Apple Pencil.
Save your signature for quick reuse in future documents.
✅ Merge & Split PDFs
Combine multiple documents into one PDF file.
Extract individual pages as needed for sharing or archiving.
✅ OCR and Search Handwriting
Apps like Notability and GoodNotes convert handwriting to text (OCR).
Useful for creating searchable notes from meeting or class annotations.
Best Practices for Professionals
To make the most of editing PDFs on iPad with Apple Pencil, keep these tips in mind:
1. Use iCloud or Dropbox Syncing
Ensure all your documents are automatically backed up and available across devices.
2. Invest in a Screen Protector (like Paperlike)
This improves writing feel and reduces glare when using the Pencil extensively.
3. Organize with Folders and Tags
Use file naming conventions and folders to keep documents categorized and easy to retrieve.
4. Use Keyboard Shortcuts (iPad Magic Keyboard)
For advanced users, combining the Apple Pencil with a keyboard increases productivity—especially in apps like PDF Expert or Notability.
Use Cases by Profession
📄 Lawyers
Sign contracts.
Highlight key clauses.
Organize client documentation.
🎓 Educators
Grade papers.
Annotate student submissions.
Share feedback instantly.
💼 Business Executives
Approve proposals on the go.
Annotate financial reports during meetings.
Sign NDAs or HR documents.
👩⚕️ Medical Professionals
Fill and annotate patient intake forms.
Share test result summaries.
Record handwritten notes digitally.
Security Considerations
Professionals must prioritize data privacy when editing sensitive PDFs. Here’s how:
Use apps with encryption and password protection (like PDF Expert).
Avoid using public Wi-Fi without a VPN when sharing files.
Turn on Face ID or Touch ID to secure document access.
Future of PDF Editing on iPad with Pencil
Apple continues to evolve iPadOS, and each update brings more powerful features to support professional workflows. Features like Stage Manager, Split View, and Universal Clipboard make it easier than ever to handle multiple documents, copy content between devices, and transition between mobile and desktop environments seamlessly.
Additionally, improvements to the Apple Pencil (like hover detection on iPad Pro M2 models) suggest a future where precision editing and document interaction will be even more intuitive.
Conclusion
Learning to edit PDF on iPad with Pencil is not just a productivity boost—it's a competitive advantage. For professionals across industries, mastering this workflow means faster document turnaround, reduced reliance on printing, and seamless collaboration from anywhere.
Whether you're annotating blueprints, grading reports, or signing NDAs in a client meeting, your iPad and Apple Pencil are all you need to get the job done with precision and style.
Invest in the right apps, follow best practices, and enjoy a truly paperless, high-performance workflow that keeps pace with your professional demands.
0 notes
Text
Portable Outlook Mac Backups with Mail Backup X: Built to Move
Data that lives in one machine, tied to one setup, often becomes fragile. You may not notice this until something shifts, such as acquiring a new device, changing your workspace, traveling, or needing a repair. Outlook for Mac does its job well inside its own environment, but its data doesn’t travel easily. Mail Backup X shifts the balance by creating portable Outlook Mac backups independent of the client or the system.

You can take your archives with you, store them on multiple platforms, and open them independently of Outlook. This creates a working model where your information remains accessible wherever you are.
Setting Up an Outlook Mac Backup That Moves with You
So, first, let’s see how exactly you can do that with the help of “Mail Backup X.”
Begin by opening Mail Backup X and clicking on “My Backup Profiles.” Select “Add New Backup” to begin.
Choose Outlook Mac and then the tool will locate and link to the local database without needing a manual path.
Pick the folders you want to back up.
Give the backup profile a name that reflects its purpose or contents.
Select a storage location. This might be your Mac’s internal drive, an external USB drive, or a connected cloud account. All options create the same .mbs format.
Since portability is the goal, use cloud or external drives as your primary or mirror location. You can add one or more mirrors by clicking the “Add Mirror” button and selecting additional destinations.
Set the schedule. Automatic backups can detect new emails and act as needed. Recurring backups can run at fixed times, every hour, daily, weekly, based on your preference.
If you plug in a USB drive and register it, the tool can automatically copy your Outlook Mac backups to that drive each time it connects.
Click save. The first backup starts immediately. You can continue using Outlook Mac while it runs in the background.
Accessing Your Portable Outlook Mac backups
Once the backup of your Outlook Mac data exists, you can move it anywhere. If you open the software on another Mac or a Windows PC with Mail Backup X installed, you can import the archive using the “Open Archive” button. This creates a new profile in the viewer, where your emails appear exactly as they were backed up, folders intact, attachments preserved, timestamps in place.
You can search through the archive as though it were still part of your live email. The search bar handles both basic queries and complex expressions. This makes it easy to locate a specific piece of information, even inside a large, multi-year archive.
Exporting to Other Formats Without Losing Portability
Let’s say you’re no longer using Outlook or need to switch to a different client. The export feature allows you to convert your Outlook Mac backed up data into formats compatible with the most popular email platforms. You can export an entire folder to PST for Microsoft Outlook or choose EML files for clients like Thunderbird or Apple Mail.
If you want to create a fixed record for documentation, legal, or archival purposes, exporting to PDF offers a practical option.
Each export happens within the viewer itself. Select the folders or messages you want, choose the format, and designate an output location. The software handles the conversion, keeps the structure intact, and reports progress in real time.
How Portable Are Mail Backup X Archives?
Q: What format does the tool use for Outlook Mac backups?
On macOS, each backup profile creates a compressed archive saved as an .mbs package. This archive contains your backed-up Outlook Mac data and can include all folder structures, metadata, and attachments. Unlike standard exports from Outlook, this format is recognized by the tool on any supported machine. That means you can copy it to another system, open it using the app there, and continue working with it just as before.
Q: How can you access the contents of an archive on a new computer?
You launch Mail Backup X on the new system, click “Open Archive,” and select the .mbs file. The app then reindexes the archive, rebuilding the folder view and search-index, so everything appears as it did on the original machine. There is no need to restore anything to Outlook or import it into another mail client. The archive opens as a viewable and searchable profile within the app. Note, seeing the contents of backed up package can also be done through the free version of the tool.
Q: What makes this system more flexible than native Outlook export options?
Outlook’s own export tools produce files like .olm, which are not readable outside the client itself. Mail Backup X archives are readable without Outlook, searchable through the built-in viewer, and transferable between Mac and Windows. If you use different devices at home and at work, or if your machine changes, you won’t lose access to your mail.
Q: Can the tool export Outlook Mac backed up data to standard formats for use elsewhere?
Yes. You can export individual messages or entire folders or the entire profiles into formats like PST, EML, MBOX, and PDF. This means you can migrate your email data into a different client or share selected parts without sending the whole backup. The export function doesn’t require you to unzip or decode the archive manually. Everything happens from within the interface, with folder selection, target format, and destination handled in a few steps.
The Value of Data That Travels Well
There’s freedom in knowing your data is not locked to one interface, one operating system, or one machine. For people who work across platforms, this means fewer technical blocks and smoother handoffs. If you’re handing over a project to someone else, switching devices, or simply archiving years of communication, you want that archive to open and function wherever needed.
Mail Backup X does not build walled gardens. It gives you a way to create Outlook Mac backups that are light to carry and easy to read. From compressed .mbs files to cloud mirrors, from USB snapshots to export tools, everything is shaped with mobility in mind.
A free trial version is available for you to explore these features and see how portable your Outlook Mac email backups can become. The process starts simply but opens into a much larger system of access and control. Once you see your archive appear, complete, structured, and untied from your machine, you begin to understand what portability really looks like.
You don’t start over each time the device changes, or the setup evolves. With Mail Backup X, the Outlook Mac backup remains intact, readable, and ready, wherever your work moves next. What stays with you, in the end, is access without interruption.
0 notes
Text
A Complete Guide to BT Login Email: How to Access and Troubleshoot Your Account
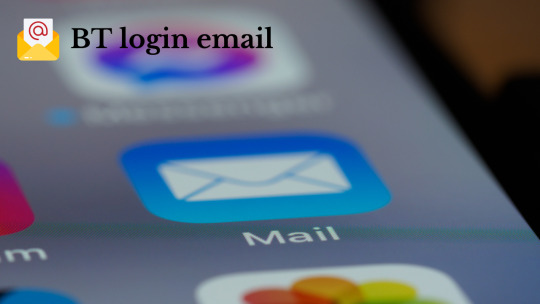
BT login email, a reliable email service provided by British Telecommunications, offers its users seamless access to manage their communications. Whether you use BT login email as your primary email provider or simply rely on it for specific services, understanding how to log in securely and manage your account is crucial. This comprehensive guide will take you through the process of logging in to BT login email, troubleshooting common login issues, and ensuring your account remains safe and secure.
Why BT Login Email is Essential
BT login email offers a wide array of features for both personal and business use, including organizing your emails, cloud storage, contacts, and calendar management. It’s integral to staying connected, whether you’re handling important business communications or managing your personal messages. Understanding how to log in to your BT Email account is key to ensuring that you can access these features at all times. Moreover, BT Email is equipped with security features to help protect your sensitive data.
How to Log In to BT Email
Step-by-Step Process to Access Your BT Login Email
Visit the BT Email Login Page: To begin, open your preferred web browser and type in https://mail.btinternet.com or simply visit BT’s official website at www.bt.com and click the Sign In button.
Enter Your BT Email Address: On the login page, input your full BT Email address, including the domain (e.g., [email protected]), and click Continue.
Input Your Password: Next, type in your password associated with your BT Email account. If you’ve forgotten your password, simply click Forgot Password? and follow the prompts to reset it.
Click on ‘Sign In’: After entering your password, click Sign In to access your inbox and other features associated with your BT Email account.
Troubleshooting Common BT Login Email Issues
Incorrect Password or Username
Solution: Double-check your username and password for typos. If you can’t remember your password, use the Forgot Password? link to reset it.
Account Locked After Multiple Failed Login Attempts
Solution: After several failed login attempts, BT may lock your account for security reasons. Wait for 15-30 minutes and try again. If you still can’t log in, contact BT support for assistance.
Two-Factor Authentication (2FA) Problems
Solution: If you’re using 2FA and can’t receive your verification code, ensure your phone number is up-to-date. Alternatively, use backup codes if available or contact BT support for help.
Browser Cache Issues
Solution: Clear your browser’s cache and cookies or try logging in using a different browser or device to avoid issues with loading the login page.
Account Suspended or Disabled
Solution: If your account is suspended, you’ll need to check for any notifications from BT about the suspension. If the issue persists, contact BT customer support to resolve it.
Improving Security for Your BT Login Email
To protect your BT Email account and sensitive data, it’s important to enhance the security of your login process:
Use a Strong Password: Avoid using easily guessable passwords. Combine uppercase, lowercase, numbers, and special characters for a secure password.
Enable Two-Factor Authentication (2FA): Turn on two-factor authentication for an added layer of security. This requires an additional verification step, such as a code sent to your phone or authentication app.
Stay Vigilant Against Phishing: Be cautious of phishing scams that attempt to steal your login credentials. Never click on suspicious links or share your password with anyone.
Setting Up BT Email on Other Devices
You can also set up your BT Email on third-party email clients such as Outlook, Apple Mail, or mobile email apps. Here’s how:
Open your email client and go to the account settings.
Enter your BT Email credentials (your BT Email address and password).
Enter the IMAP and SMTP server settings: IMAP server: imap.mail.btinternet.com SMTP server: smtp.mail.btinternet.com IMAP Port: 993 (SSL encryption) SMTP Port: 465 (SSL encryption)
Save the settings and verify that your email client successfully syncs with your BT Email account.
FAQs
Q1: What should I do if I forgot my BT Email password? Click on the Forgot Password? link on the login page and follow the prompts to reset it via your registered recovery email or phone number.
Q2: Can I access BT Email on my mobile device? Yes, you can access BT Email on your smartphone by using the BT Mail app or setting it up in your mobile email client with the correct IMAP/SMTP settings.
Q3: How do I recover my BT Email account? If you’re having trouble logging in, use the Forgot Password? link or contact BT customer support for assistance with account recovery.
Q4: How do I improve the security of my BT Email account? Enable two-factor authentication (2FA), use a strong password, and remain cautious of phishing attempts to enhance the security of your BT Email account.
Conclusion
Logging in to your BT Email account is a straightforward process, but being aware of potential issues and how to resolve them is important for smooth access. By following the step-by-step instructions above and implementing best security practices, you can ensure that your BT Email account is both accessible and secure. Additionally, setting up your BT Email on third-party email clients can help streamline your communication across various platforms. If you face any login difficulties, don't hesitate to contact BT support for further assistance.
0 notes
Text
youtube
How to Convert MBOX to EML File Format?
The need to convert MBOX files to EML arises for several reasons, primarily to facilitate accessibility, compatibility, and ease of sharing. MBOX and EML are two distinct file formats used in different email clients. While MBOX files consolidate multiple emails into a single file, EML files store each email as a standalone file, compatible with a broader range of email applications. In this article, we’ll dive into an in-depth, step-by-step guide on converting MBOX to EML to improve email portability and ease of use.
Understanding MBOX and EML File Formats
What is MBOX?
MBOX (Mailbox) is a file format used by various email applications to store messages collectively within a single file. Commonly supported by Mozilla Thunderbird, Apple Mail, Entourage, and others, MBOX is an open-source format that saves all emails in a single text file.
What is EML?
EML (Email Message) is a more versatile format and widely used due to its compatibility across a larger variety of email clients, including Microsoft Outlook, Outlook Express, Windows Live Mail, and others. Each email is saved as a separate file with the .eml extension, preserving metadata such as sender, recipient, subject, and attachments.
Reasons to Convert MBOX to EML
1. Enhanced Compatibility EML files are compatible with multiple platforms, making them accessible across most email clients.
2. Better Organization Each email is saved as an individual file in EML format, making email management more organized.
3. Easier Backup and Restoration With each email stored individually, EML files allow for more streamlined backups and recovery in case of data loss.
4. Improved Portability You can transfer EML files to different devices easily, allowing users to read emails offline.
Methods to Convert MBOX to EML
There are several ways to convert MBOX to EML, including manual techniques and the use of automated tools. Here’s a look at the most effective methods available.
1. Manual Method Using Mozilla Thunderbird
Mozilla Thunderbird, an open-source email client, offers a simple way to convert MBOX files to EML format.
Steps to Convert MBOX to EML in Thunderbird:
Install Thunderbird: If you haven’t already, download and install Mozilla Thunderbird on your device.
Import MBOX File:
Go to Tools > Add-ons > Extensions.
In Top right you can see “ImportExportTools NG” and install it.
After installation, restart Thunderbird.
Use ImportExportTools NG to Import MBOX File:
In Thunderbird, click on Local Folders > Right-click > ImportExportTools NG > Import MBOX file.
Choose your MBOX file to import that file in thunderbird.
Export Emails to EML Format:
After MBOX import, select the emails or folders you want to export.
Right-click on the selected emails and choose ImportExportTools NG > Export all messages in folder > EML format.
Choose a path where you want to save the EML files.
This method is free and effective but may require more effort if you have multiple MBOX files to convert.
2. Using Dedicated MBOX to EML Conversion Software
For large volumes of emails or multiple MBOX files, you use our MBOX to EML converter tools are highly recommended like Webbyacad MBOX converter software.
Advantages of Using Webbyacad MBOX Converter Software:
Batch Conversion: Convert multiple MBOX files to EML in one click.
Retention of Metadata: Keeps email details intact, such as date, sender, recipient, and attachments.
Using Webbyacad MBOX Converter Software:
Download and Install: Download the Webbyacad MBOX Converter Software and install the software on your system.
Add MBOX Files: Select the Add File option to import MBOX files.
Select EML: Choose the EML option from the dropdown as the export format.
Choose Output Location: Specify where the converted EML files should be saved.
Start Conversion: Click Export to initiate the conversion.
Our software also comes with a free trial version, this allows users to test functionality before committing to purchase.
3. Online MBOX to EML Converters
For users who prefer not to install software, several online conversion tools can help convert MBOX to EML. These tools are typically free for small conversions, but they may have file size limits or lack privacy assurances. Always check privacy policies and limitations before uploading sensitive data.
How to Use an Online Converter:
Go to the Website: Visit the chosen online conversion tool’s website.
Upload MBOX File: Select and upload the MBOX file.
Select EML Format: Choose EML as the output format.
Download Converted Files: Once the conversion is complete, download the EML files to your device.
Note: Be cautious while using online converters, especially if the data is sensitive, as these tools may not guarantee data confidentiality.
Best Practices and Tips for Converting MBOX to EML
Backup Original Files: Always keep a backup of the original MBOX file in case any errors occur during conversion.
Use Reliable Software: When using third-party software, opt for reliable and reputable solutions to avoid data corruption or loss.
Check Compatibility: Ensure that your email client is compatible with EML files before converting.
Test on a Small File First: If you have a large volume of emails, start with a small file to test the conversion accuracy and software functionality.
Common Issues and Troubleshooting Tips
1. File Size Limitations: Some converters have file size limitations. Consider breaking down large MBOX files or using premium tools.
2. Loss of Attachments: Some conversion methods may not retain attachments. Ensure the software you choose explicitly supports attachment preservation.
3. Formatting Issues: After conversion, some emails may display formatting inconsistencies. Preview a few EML files in your email client before transferring the entire batch.
By following this comprehensive guide, you can successfully convert your MBOX files to EML and enjoy the enhanced flexibility, compatibility, and organization offered by the EML format. Choose the method that best suits your needs, considering factors like email volume, operating system, and any security concerns.
#mbox#migrate#mboxconverter#mboxtoeml#exportermboxtoeml#importmboxtoeml#transformmboxtoeml#outlook#tools#email migration#export mbox to eml#tranform mbox to eml#mbox to eml#Youtube
0 notes
Text
Key West iPhone Repair: your Guide to Quick and Reliable Fixes
Living in the paradise that is Key West, you might not expect to face technology issues. But when your iPhone takes a dive into the pool, gets dropped during a sunset cruise, or simply starts acting up, finding a dependable repair service can be crucial. In this blog, we'll explore why Key West iPhone repair services are essential, what you should look for in a repair provider, and how to make sure your device gets the best care possible.
Why Key West iPhone Repair Services Are Essential
Key West is known for its laid-back lifestyle and beautiful scenery, but even in paradise, tech problems can arise. When your iPhone is your main way to capture stunning sunsets, navigate the island, or stay in touch with loved ones, having it in working order is crucial. Here are a few reasons why a Key West iPhone repair service is indispensable:
Immediate Solutions: Unlike sending your phone away for repairs, local services can often fix issues on the spot or within a day. This means you can get back to enjoying your time in Key West without a prolonged tech downtime.
Expert Technicians: Key West has skilled technicians who understand the unique needs of island life. They are familiar with common issues that can arise in a coastal environment, such as screen damage from sand or water exposure.
Convenience: The last thing you want to do on vacation or during your busy day is to deal with the hassle of mailing your iPhone off to be repaired. Local services save you time and stress by offering quick, face-to-face assistance.
What to look for in a Key West iPhone Repair Service
When searching for the best iPhone repair service in Key West, consider these important factors:
Reputation and Reviews: Check online reviews and ask locals for recommendations. A reputable repair service will have positive feedback and a history of satisfied customers.
Experience and Certification: Ensure that the technicians are certified and have experience with iPhone repairs. This ensures that they are up-to-date with the latest technology and repair techniques.
Quality of Parts: Ask about the quality of replacement parts used. Genuine Apple parts or high-quality third-party components can make a big difference in the longevity of your repair.
Warranty: A good repair service should offer a warranty on their work. This provides peace of mind knowing that if something goes wrong after the repair, you can get it fixed without additional cost.
Turnaround Time: In a place as vibrant and activity-packed as Key West, you don’t want to be without your phone for too long. Select a repair company with a reputation for providing fast service.

Tips for iPhone Maintenance in Key West
Preventing issues is always better than dealing with repairs. Here are a few maintenance tips to keep your iPhone in top shape while living or vacationing in Key West:
Use a Protective Case: With the island's sandy beaches and outdoor activities, a durable case can help shield your iPhone from damage.
Avoid Excessive Moisture: Although iPhones are water-resistant, it’s still best to keep them away from excessive moisture and sand.
Regular Backups: Ensure you regularly back up your iPhone to avoid losing important data if a repair becomes necessary.
Having a reliable Key West iPhone repair service at your disposal ensures that your device stays in top shape, allowing you to fully enjoy everything this beautiful island has to offer. By choosing a reputable Key West IPhone repair service and taking steps to maintain your iPhone, you can ensure that your device remains a reliable companion for all your Key West adventures.
0 notes
Text
Apple iOS 18 Features On iPhone And How To Get iOS 18

Apple iOS 18
With deeper customization options for the Home Screen and Control Center, the largest-ever redesign for Photos that makes it even easier to find and relive special moments, and significant improvements for Messages and Mail, iOS 18 is now available to iPhone users worldwide. Apple Intelligence, a personal intelligence system that blends the power of generative models with individual context to produce information that is extraordinarily relevant and valuable while safeguarding users’ security and privacy, will be available starting next month with iOS 18.1 Greater Personalization. Than Before With iOS 18, users may arrange app icons and widgets to make the perfect arrangement on each page or to frame the background, giving them exciting new options for personalizing their Home Screen.
Additionally, users may adjust the bright, dark, or colorful tint of the program icons and widgets, as well as enlarge them for a more streamlined appearance. Control Center has been updated with even more versatility in mind. You may arrange powerful control groups that are constantly at your fingertips, such as media playback, favorites, Home controls, connection, and the new controls gallery with choices from third-party applications. Additionally, users may modify or delete the Lock Screen‘s features completely, and they can now access their preferred controls via the Action button.
- Advertisement -Image credit to Apple
How To Get iOS 18
Download iOS 18! Steps to upgrade compatible iPhone:
Check Your Compatibility: The iPhone must support iOS 18. The update supports iPhone XS and later.
Back Up Your Data: Before updating, backup your iPhone with iCloud or iTunes.
Connect your iPhone to a stable Wi-Fi network.
Make sure your iPhone is at least 50% charged to avoid update interruptions.
Open Settings: Access iPhone Settings.
Choose General. Tap “General.”
Select Software Update. Click “Software Update.”
If iOS 18 is available, select “Download and Install.” You may need your passcode.
iOS 18 Features
The Largest Image Remodel
The largest upgrade to Photos ever makes it simpler to locate and revisit memorable experiences. The elegant, uncomplicated design presents the library in a cohesive, but comfortable light. With the help of new categories like Recent Days, People & Pets, and Trips, users can appreciate their memories more and spend less time searching thanks to on-device intelligence. Users may customize their experience by pinning their favorite collections to make them quickly available and customizing the layout to reflect what matters most to them.
Effective Methods to Keep in Touch via Phone and Messages
Significant improvements to the ways people communicate and express themselves are provided via Messages. In addition to all-new text effects that bring words, phrases, and sentences to life, emoji and sticker Tap backs that allow users limitless ways to reply in a conversation, and the ability to write an iMessage to send later, users can better communicate tone with formatting choices like bold, italic, underline, and strikethrough.
Messages via satellite allows users to send and receive messages, emojis, and Tap backs via iMessage and SMS directly from the Messages app in situations where cellular and Wi-Fi connectivity are unavailable. When messaging non-Apple contacts, the Messages app now supports RCS for richer media and more reliable group interactions than SMS and MMS.
- Advertisement -
With the ability to record and transcribe live conversations, the Phone app helps users remain organized by making it simpler to remember crucial information later. Before a call is recorded, participants are alerted, and transcripts are readily stored to the Notes app, which makes it easy for users to explore and go over the topics covered.
Sense-Based Sorting in Email
Mail’s categorization feature, which will be available later this year, arranges messages to assist users in managing their inbox. Users may concentrate on messages that are urgent or include information that has to be seen quickly by using the Primary category. In a new digest view that compiles all pertinent emails from a company, Transactions, Updates, and Promotions are sorted by sender so users can rapidly scan for what’s important right now.Image credit to Apple
Safari: The Distraction-Free Web Browser
With iOS 18, Safari, the fastest browser in the world, now has even more features for online surfing.4 Highlights are clever pop-ups that appear when a site loads that include important information such as an address, a synopsis, or further details about a movie, TV program, or music. With a simplified layout, a synopsis, and a table of contents for lengthy pieces, the new Reader offers additional ways to consume articles. Users may use Distraction Control to conceal website elements like sign-in banners and content overlays that they feel interfere with their surfing.
The Brand-New Passwords App
A new software called Passwords, which is based on Keychain, makes it even simpler for users to see and retrieve all of their credentials, including passwords, passcodes, and verification codes, in one location. Passwords App is supported by extraordinarily safe end-to-end encryption, syncs effortlessly across devices, and notifies users when a password is likely to be cracked, has been used more than once, or has been discovered in a known data dump.
Features for Privacy That Empower Users
With iOS 18, users can choose who may see their applications, share their contacts, and connect their iPhone to accessories. Apps that are hidden or locked provide users the assurance that private information like content and notifications won’t accidentally be seen by unauthorized parties. In addition to hiding an app by relocating it to a protected, hidden applications folder, users may also lock an app for further privacy.
Content such as emails or messages inside an application that is locked or hidden is concealed from search results, system alerts, and other locations. Furthermore, iOS 18 allows users to exchange individual contacts with apps, and developers may provide a more private and frictionless experience for consumers when connecting third-party accessories to iPhones.
Coming Next Month: The Initial Set of Apple Intelligence Features
iOS 18 has a deep integration of Apple Intelligence, which uses the power of Apple silicon to safeguard users’ privacy and security while simplifying and accelerating daily chores. It can also comprehend and produce words and pictures, execute actions across applications, and draw upon personal context. Next month, the first batch of Apple Intelligence features will go live, offering fun, simple-to-use, intuitive, and purposefully designed experiences to support customers in doing the things that are most important to them.
By rewriting, editing, and summarizing material in almost every place they write including Mail, Notes, Pages, and outside appsusers may improve the quality of their writing using Writing Tools. With only a description, users can now make the movies they wish to view in Photos using the Memories feature. Furthermore, precise picture searches may be conducted using natural language, and video searches become even more effective when precise periods inside films can be located.
With the help of the new Clean Up tool, distracting background elements in photos may be found and eliminated without unintentionally changing the topic. Additionally, users may record, transcribe, and summarize audio in the Notes and Phone applications. Participants are alerted immediately when a recording is started during a conversation in the Phone app, and once the call concludes, Apple Intelligence creates a summary to aid in remembering important details.
The Siri grows more intuitive, adaptable, and well ingrained in the system. When activated on an iPhone, its sophisticated glowing light design encircles the screen’s edge. On an iPhone, users may utilize Siri to speed up daily duties at any moment by typing to her. They can also seamlessly transition between text and speech.
Siri’s enhanced language comprehension skills enable it to follow users even when they mispronounce words and to retain context across requests. Furthermore, thanks to its vast product expertise, Siri is now able to respond to millions of inquiries about the settings and functions of Apple products.
Apple Intelligence is a remarkable advancement in artificial intelligence privacy, with many of its models operating exclusively on the device and the release of Private Cloud Compute, which expands the security and privacy of Apple devices into the cloud to unlock even more intelligence.
Read more on govindhtech.com
#AppleiOS18Features#iPhone#GetiOS18#AppleIntelligence#iOS18#Appledevices#Messagesapp#iMessage#iOS181#LockScreen#InitialSet#PasswordsApp#artificialintelligence#NewPasswordsApp#Email#news#FreeWebBrowser#technology#technews#govindhtech
0 notes
Text
Mac Gmail backup facility with no extra efforts on the clients’ part
To carry Gmail backup is quite important if you wish to keep your data secure. It is the methodology that you choose for the same that would determine how the experience goes for you. Before you decide on which facilities you want in the Gmail backup software you should first have thorough information about the mail account, get it here- . Avoid using a freeware as it can cause harm to your precious data and thus cause irrevocable damage.

How to Gmail backup that is regularly effective on a long term?
The Gmail backup tool that can provide the same facility to other mail clients as well- Mail Backup X is the best every software you will come across for mail backup as well as archiving. It has got several superb inbuilt qualities that keep the mail backup process quite smooth and free of hassles. Everyone can try out the software for free for Gmail email backup as a free demo version of it available here.
Gmail backup facility relevant for other mail clients as well
This software functions quite well as a Gmail backup software as well as for other major mail clients. It can be used to backup and archive data from Gmail as well as Hotmail, yahoo mail, apple mail, outcook, postbox and thunderbird. It can also be used to change the format of the data files of these mail clients as it is compatible with them all. It can be thus used to change the format of the data files to and from .eml, .rge, .pst, .olm and .mbox. This makes it quite easy to share data to various platforms.
Auto-USB backup and inbuilt ftp client
The data files stored in usb cables can be automatically updated by this software as it smartly remembers the data folder name and its location in the database. To enhance the safety of the data after the backup they are saved in the pdf form. That procedure also makes them altogether safer and more shareable. Also, they are stored in the proper sequential order so that it does not get tough to find them.
It is possible to carry both primary backup and mirror backup with this software as it comes with an inbuilt ftp client. Keeping that tool active makes it easier to have a copy of all the data ready as it keeps arriving in the system.
Intrinsic ability to save storage space and to find data files instantly
While backing up your data this software also makes sure that you never run out of storage space. It religiously backs up your data, but also makes sure that the files are compressed before being stored. Also, it gets easier for the users to find out data files as there is an ultra-fast data search facility available with it which is also relevant for complex files.
You can get either the free demo version from the link below, and later upgrade to the full version or get the full version directly from the link below www.mailbackupx.com/make-backup-of-gmail-emails/.
youtube
#gmail backup#backup gmail#gmail backup tool#backup gmail mail#gmail backup software#gmail mail backup#gmail email#Youtube
1 note
·
View note
Text
Lost my job when I got a 1000 PC order for a UNIX farm canceled when I brought in Apple to demonstrate what RedHat would do on a G3. It was a constant battle between PC people and Apple. I took care of 850 Macs (hardware/software, mail, app, backup servers and all DT peripherals) while we had 5 men taking care of 250 PC either software or hardware. PC people kept pointing out how expensive it was to buy a Mac.


667 notes
·
View notes
Text
Know the details of Thunderbird backup email here
In order to keep one’s data safe and updated it is vital that one carries Thunderbird backup email on a regular basis. The process however can be complicated and even induce data safety concerns. With the availability of several third-party software, people have given over the idea of manual backup and archiving. However, even with the availability of such software, it is important that one checks them for their reliability and compatibility with data. The first thing you can do in that direction is to educate yourself about Thunderbird, check here- https://en.wikipedia.org/wiki/Mozilla_Thunderbird.
Thunderbird email backup service in alignment with your requirements

You can backup mail Thunderbird with Mail Backup X and carry a lot of associated tasks with it at no extra cost. It is priced quite reasonably considering how wide-ranging the facilities it provides are. It is also quite safe for all types of data, is compatible with all sorts of mail file formats to. To ensure that the user feels safe using this Thunderbird email backup tool it has been designed to work in the offline mode.
How to restore Thunderbird mail backup without moving your fingers
One does not have to be adept at the task of Thunderbird email backup in order to carry it regularly. Using this software on a regular basis will provide the desired results. Also important is the capacity of this software to backup and archive data not only from Thunderbird but from Gmail, Hotmail, apple mail, yahoo mail, outlook, and postbox.
Closely associated with the ability of this software to backup and archive data from various sources is the integrated mail viewer. In order to work with data from several sources one would not have to skip continuously from one platform to another, the mail viewer makes sure of that. It works by bringing data from various sources at one place.
Convert mail file formats and use ftp client for additional safety
As this software supports several mail file formats it is also capable of providing the facility of changing mail file formats. It can be used to change the format of the data files to and from .olm, .eml, .pst, .mbox, and .rge.
The ftp client on the other hand makes sure that one can carry backup of data on a regular basis without themselves intervening. The ftp client continuously backs up data and provides the facilities of primary backup and mirror backup as well.
Faster search results and more storage space
With this software you will have the freedom to backup as many files as you want since it meanwhile also saves storage space. It manages to do that by compressing the files methodically.
One does not have to waste time looking for even a bit of data. The ultra-fast data search module can find out any variety of data within nanoseconds.
You can try these features out immediately by purchasing the software. A free demo version of it is also available www.mailbackupx.com/thunderbird-backup-email/.
1 note
·
View note
Text
Mac email backup is very easy now
It has been a topic of discussion for long on how to mac email backup with an easy to use procedure.
Often it has been seen that Mac users complain about incomplete procedure on mac email backup. The foundation of an appropriate data backup always lies on a well instructed procedure. Therefore, it is very important to use a right, more precisely a professional tool for data backup.
While you may come across endless names for data backup tool, we offer the best in class product Mail Backup X. A well-engineered email backup tool for archiving emails from apple mailbox.
Also, the below links on Mac Operating System and Apple mail will make you understand about the subject in detail.
MacOS and Apple mail gives an idea on selection of the right tool considering different aspects of the mail communication tool.
The best way to mac email backup with clear instructions
Downloadthe mac email backup softwareand install on your Macformac email backup. Please follow the link for installation instructions.
Once the installation is completed, launch the tool from the Applications/ Quick Launch Menu.
You can start the fully functional trial run for 15 days or activate it if you have already purchased a license version of the tool.
You may choose to setup a new backup profile from the dashboard by choosing option “setup a new backup” oryou may click my backup profiles on the left side bar in the dashboard and click “set up a new backup profile”.
The next screen shows options to setup back for a list of mail clients. Choose Apple Mail and proceed to next step.
Once you click and choose Apple Mail to setup a backup you are presented with folder structure from Apple Mail accounts. Please select or deselect the folders out of all the mail accounts configured in Apple Mail.
The next step shows Advanced options like setting
* frequency of Mail backup (select automatic as its recommended or you may choose Manual or recurring at particular intervals).
* secure your backup archive by encrypting the data. So, it can only be viewed on this computer.
* you May also activate the USB Auto Snapshot option by assigning a USB drive. So, whenever you connect the USB drive, it automatically makes a snapshot copy of your local mail backup to the USB Drive in the background automatically.
8. You can set the location of backup to local disk drive or Cloud service by authenticating and adding Cloud Space (at Present Google Drive, DropBox and Microsoft One Drive are supported). Click save.
9. Apple Mail Backup Profile is set up and now your emails should have started to back up as per the options and settings you selected during the previous steps.
Demo is the preliminary answer on how to mac email backup on mac
In order to understand the basics of mac email backup, we recommend you to use the demo version of the tool initially.
The demo tool has various advantages before you proceed with the licensed product.
It is completely free and guides in the most systematic way on how to mac email backup. For more information, do visit the official website for a detailed tool on the software www.mailbackupx.com/how-to-backup-apple-mac-mail-mails-on-mac/.
1 note
·
View note
Text
Best solution to restore Apple email
Don’t look any further for a solution to restore Apple email
Maybe you have never felt the need to restore data. But you keep hearing the experts telling you to archive email data and keep ready for restore if need be. You cannot ignore this advice as it is extremely valid and important. Archiving emails and backing up data regularly is what any wise person will do because we know how data is so prone to damage or hacking or other kind of losses. This is especially true when original messages don’t get stored in device like the case with IMAP based services. You will need to restore Apple email in a case you lose data due to any reason like hardware failure or some other. You will be able to restore only if you have backed it up or archived email folders. Else, you will not be able to do anything. You need a good backup and recovery option for this. Although we will be focusing on a method which covers all IMAP based email services like Gmail, Thunderbird, Yahoo, etc., you can read a little about Apple email to get a fair idea why we must backup emails. Here is the link- https://en.wikipedia.org/wiki/Apple_Mail
Best way to restore Apple email is with a certified software

There are a few methods available to backup as well as restore Apple mails and other on Mac. Yet, you see experts recommending only certified tools. Why is it so? Why don’t they recommend a manual method or maybe restore Apple email app which works online? There must be some factor behind it. While manual methods are never recommended for any similar task which is to be done regularly, they also pose a great challenge to novices. And when we talk of online apps, they are fraught with dangers like data loss, data stealth, corruption, etc. Along with these risks, there is almost zero support available for any doubts or mishaps. This means we shouldn’t be using these apps. We should only use a reliable certified archiving and restoring tool like Mail backup X by InventPure. This is the best one out there for end users.
Now restore Apple email account and other multiple accounts in a short, precise, and easy way
This tool makes it really easy, quick, as well as accurate to backup and restore IMAP emails on Mac. There is something else also which we need to look at. If I am in a need of a software, and I have heard good things about it, even then it would be normal for my mind to have some doubts. All users face these doubts and thus this issue must be settled. This issue is settled by bringing to users a free albeit a limited use demo of this backup tool so that their doubts are settled. They can use most of the important functions that the full restore Apple email tool comes with and once satisfied, they can purchase full version for daily data preservation in the manner they prefer https://www.mailbackupx.com/restore-apple-email/.
1 note
·
View note
Text
how to cancel hotspot vpn subscription on iphone
🔒🌍✨ Ganhe 3 Meses de VPN GRÁTIS - Acesso à Internet Seguro e Privado em Todo o Mundo! Clique Aqui ✨🌍🔒
how to cancel hotspot vpn subscription on iphone
Cancelar assinatura Hotspot VPN
Cancelar uma assinatura do Hotspot VPN não precisa ser uma tarefa complicada. Se você não está mais precisando dos serviços de uma VPN ou quer experimentar outras opções, é importante saber como cancelar sua assinatura de forma eficiente. Aqui estão algumas etapas simples que você pode seguir para cancelar sua assinatura do Hotspot VPN.
Primeiro, você precisa acessar a sua conta no Hotspot VPN. Isso geralmente pode ser feito através do site oficial ou do aplicativo móvel, dependendo de como você se cadastrou inicialmente. Após fazer login, procure a seção de configurações ou de gerenciamento de conta.
Dentro da seção de configurações da sua conta, você deve encontrar a opção de assinatura ou pagamentos. Clique nessa opção para ver os detalhes da sua assinatura atual e as opções de cancelamento disponíveis. Geralmente, haverá um botão ou link que permite cancelar a assinatura.
Ao clicar para cancelar a assinatura, é possível que você seja redirecionado para uma página de confirmação ou que receba um e-mail de confirmação do cancelamento. Certifique-se de seguir as instruções adicionais, se houver, para garantir que o processo seja concluído com sucesso.
Lembre-se de que após cancelar a assinatura do Hotspot VPN, você pode perder o acesso aos recursos premium oferecidos pela VPN. Certifique-se de ter feito backup de quaisquer dados importantes relacionados à sua conta antes de prosseguir com o cancelamento.
Encerrar subscrição Hotspot VPN no iPhone
Para encerrar a subscrição do Hotspot VPN no iPhone, é importante seguir alguns passos simples. O Hotspot VPN é um serviço utilizado por muitos usuários para proteger sua privacidade e segurança online, mas se você deseja cancelar a sua assinatura, acompanhe as instruções abaixo:
Acesse o aplicativo "Ajustes" em seu iPhone.
Role a tela para baixo e toque em "iTunes e App Store".
Toque no seu ID Apple no topo da tela.
Selecione a opção "Ver ID Apple" e faça login, se necessário.
Toque em "Assinaturas".
Aqui você verá uma lista de todas as assinaturas ativas em seu ID Apple. Procure por "Hotspot VPN" e toque sobre ela.
Toque em "Cancelar Assinatura" e confirme a ação.
Pronto! Sua subscrição do Hotspot VPN no iPhone será encerrada e você não será mais cobrado a partir do próximo ciclo de faturamento. Lembre-se de que mesmo após cancelar a assinatura, você ainda pode utilizar o serviço até o final do período já pago.
Caso não encontre a opção de cancelamento de assinatura, verifique se você está logado com o ID Apple correto que possui a subscrição ativa do Hotspot VPN. Seguindo esses passos simples, você poderá encerrar facilmente sua subscrição do Hotspot VPN no seu iPhone.
Processo de cancelamento do Hotspot VPN no iPhone
Quando você decidir cancelar o serviço de Hotspot VPN no seu iPhone, é importante seguir alguns passos simples. Primeiramente, abra o aplicativo Ajustes no seu dispositivo e toque na opção "iTunes e App Store". Em seguida, selecione o seu ID Apple e, se necessário, faça login com a sua senha.
Após acessar a sua conta, toque em "Assinaturas" e você verá uma lista de todas as assinaturas ativas vinculadas ao seu ID Apple. Localize a assinatura do Hotspot VPN e selecione-a. A partir daí, você terá a opção de cancelar a assinatura.
Ao cancelar a assinatura do Hotspot VPN, você ainda poderá utilizar o serviço até o final do período de cobrança atual. Após esse período, a assinatura será encerrada e você não receberá mais cobranças em relação ao serviço.
Lembre-se de que é importante cancelar a assinatura com anteced��ncia, para evitar cobranças adicionais. Além disso, fique atento às políticas de cancelamento do Hotspot VPN, pois algumas empresas podem exigir a desinstalação do aplicativo para concluir o processo de cancelamento.
Seguindo essas orientações simples, você poderá cancelar o serviço de Hotspot VPN no seu iPhone de forma rápida e fácil, sempre garantindo a sua privacidade e segurança online.
Como cancelar a assinatura do Hotspot VPN no iPhone
Se você é usuário de um serviço de VPN chamado Hotspot VPN e deseja cancelar a assinatura no seu iPhone, siga estas etapas simples para concluir o processo:
Na tela inicial do seu iPhone, abra o aplicativo "Ajustes".
Role para baixo e toque em "iTunes e App Store".
Toque no seu ID da Apple no topo da tela.
Em seguida, selecione a opção "Ver ID da Apple".
Você pode ser solicitado a fazer login com sua senha ou usar o Touch ID ou Face ID.
Deslize a tela para baixo e toque em "Assinaturas".
Aqui você verá uma lista de todas as assinaturas ativas vinculadas à sua conta.
Encontre a assinatura do Hotspot VPN e toque nela.
Selecione a opção "Cancelar Assinatura" e siga as instruções na tela para confirmar o cancelamento.
É importante notar que cancelar a assinatura do Hotspot VPN no iPhone impedirá que você seja cobrado automaticamente na próxima renovação. Você ainda poderá usar o serviço até o final do período de faturamento atual. Certifique-se de concluir o cancelamento com antecedência para evitar cobranças adicionais.
Esperamos que este guia rápido tenha sido útil para você cancelar a assinatura do Hotspot VPN no seu iPhone. Lembre-se de que você sempre pode optar por assinar novamente no futuro, se desejar.
Tutorial para desistir do Hotspot VPN no iPhone
Para muitas pessoas, utilizar uma VPN no iPhone é uma prática comum para garantir a segurança e privacidade dos dados online. No entanto, há momentos em que pode ser necessário desabilitar o uso do Hotspot VPN. Se você está enfrentando dificuldades para desistir do Hotspot VPN no seu iPhone, não se preocupe, pois este tutorial irá te ajudar a resolver esse problema de forma rápida e fácil.
O primeiro passo é acessar as configurações do seu iPhone e selecionar a opção "VPN". Uma vez dentro das configurações de VPN, você poderá visualizar todas as redes disponíveis e ativas em seu dispositivo. Para desistir do Hotspot VPN, basta selecionar a rede desejada e deslizar o botão para a posição desativada.
Caso ainda esteja enfrentando problemas para desabilitar o Hotspot VPN, uma opção adicional é reiniciar o seu iPhone. Às vezes, simplesmente reiniciar o dispositivo pode resolver questões técnicas e permitir que você desative a VPN sem maiores complicações.
Por fim, se ainda assim você não conseguir desistir do Hotspot VPN no seu iPhone, recomendamos que entre em contato com o suporte técnico da Apple para obter ajuda especializada e resolver a questão de forma eficaz.
Seguindo este tutorial simples, você conseguirá desativar o Hotspot VPN no seu iPhone sem maiores dificuldades, garantindo assim o uso adequado e seguro do seu dispositivo móvel. Lembrando sempre a importância de manter a segurança de seus dados online.
0 notes