#KubernetesStorage
Explore tagged Tumblr posts
Visit Tumblr Blog
Explore Tumblr blogs with no restrictions, modern design and the best experience.
Last Seen Tumblr Blogs


Fun Fact
The Tumblr app for Google Glass was released on May 16, 2013.
Text
Architecture Overview and Deployment of OpenShift Data Foundation Using Internal Mode
As businesses increasingly move their applications to containers and hybrid cloud platforms, the need for reliable, scalable, and integrated storage becomes more critical than ever. Red Hat OpenShift Data Foundation (ODF) is designed to meet this need by delivering enterprise-grade storage for workloads running in the OpenShift Container Platform.
In this article, we’ll explore the architecture of ODF and how it can be deployed using Internal Mode, the most self-sufficient and easy-to-manage deployment option.
🌐 What Is OpenShift Data Foundation?
OpenShift Data Foundation is a software-defined storage solution that is fully integrated into OpenShift. It allows you to provide storage services for containers running on your cluster — including block storage (like virtual hard drives), file storage (like shared folders), and object storage (like cloud-based buckets used for backups, media, and large datasets).
ODF ensures your applications have persistent and reliable access to data even if they restart or move between nodes.
Understanding the Architecture (Internal Mode)
There are multiple ways to deploy ODF, but Internal Mode is one of the most straightforward and popular for small to medium-sized environments.
Here’s what Internal Mode looks like at a high level:
Self-contained: Everything runs within the OpenShift cluster, with no need for an external storage system.
Uses local disks: It uses spare or dedicated disks already attached to the nodes in your cluster.
Automated management: The system automatically handles setup, storage distribution, replication, and health monitoring.
Key Components:
Storage Cluster: The core of the system that manages how data is stored and accessed.
Ceph Storage Engine: A reliable and scalable open-source storage backend used by ODF.
Object Gateway: Provides cloud-like storage for applications needing S3-compatible services.
Monitoring Tools: Dashboards and health checks help administrators manage storage effortlessly.
🚀 Deploying OpenShift Data Foundation (No Commands Needed!)
Deployment is mostly handled through the OpenShift Web Console with a guided setup wizard. Here’s a simplified view of the steps:
Install the ODF Operator
Go to the OperatorHub within OpenShift and search for OpenShift Data Foundation.
Click Install and choose your settings.
Choose Internal Mode
When prompted, select "Internal" to use disks inside the cluster.
The platform will detect available storage and walk you through setup.
Assign Nodes for Storage
Pick which OpenShift nodes will handle the storage.
The system will ensure data is distributed and protected across them.
Verify Health and Usage
After installation, built-in dashboards let you check storage health, usage, and performance at any time.
Once deployed, OpenShift will automatically use this storage for your stateful applications, databases, and other services that need persistent data.
🎯 Why Choose Internal Mode?
Quick setup: Minimal external requirements — perfect for edge or on-prem deployments.
Cost-effective: Uses existing hardware, reducing the need for third-party storage.
Tightly integrated: Built to work seamlessly with OpenShift, including security, access, and automation.
Scalable: Can grow with your needs, adding more storage or transitioning to hybrid options later.
📌 Common Use Cases
Databases and stateful applications in OpenShift
Development and test environments
AI/ML workloads needing fast local storage
Backup and disaster recovery targets
Final Thoughts
OpenShift Data Foundation in Internal Mode gives teams a simple, powerful way to deliver production-grade storage without relying on external systems. Its seamless integration with OpenShift, combined with intelligent automation and a user-friendly interface, makes it ideal for modern DevOps and platform teams.
Whether you’re running applications on-premises, in a private cloud, or at the edge — Internal Mode offers a reliable and efficient storage foundation to support your workloads.
Want to learn more about managing storage in OpenShift? Stay tuned for our next article on scaling and monitoring your ODF cluster!
For more info, Kindly follow: Hawkstack Technologies
0 notes
Text
GlusterFS vs Ceph: Two Different Storage Solutions with Pros and Cons
GlusterFS vs Ceph: Two Different Storage Solutions with Pros and Cons @vexpert #vmwarecommunities #ceph #glusterfs #glusterfsvsceph #cephfs #containerstorage #kubernetesstorage #virtualization #homelab #homeserver #docker #kubernetes #hci
I have been trying out various storage solutions in my home lab environment over the past couple of months or so. Two that I have been extensively testing are GlusterFS vs Ceph, and specifically GlusterFS vs CephFS to be exact, which is Ceph’s file system running on top of Ceph underlying storage. I wanted to give you a list of pros and cons of GlusterFS vs Ceph that I have seen in working with…
0 notes
Text
🔄 Backing Up and Restoring Kubernetes Block and File Volumes – No-Code Guide
Kubernetes has become a foundational platform for deploying containerized applications. But as more stateful workloads enter the cluster — like databases and shared storage systems — ensuring data protection becomes critical.
This no-code guide explores how to back up and restore Kubernetes block and file volumes, the differences between storage types, and best practices for business continuity and disaster recovery.
📌 What Is Kubernetes Volume Backup & Restore?
In Kubernetes, Persistent Volumes (PVs) store data used by pods. These volumes come in two main types:
Block Storage: Raw devices formatted by applications (e.g., for databases).
File Storage: File systems shared between pods (e.g., for media files or documents).
Backup and restore in this context means protecting this stored data from loss, corruption, or accidental deletion — and recovering it when needed.
Block vs 📂 File Storage: What's the Difference?
FeatureBlock StorageFile StorageUse CaseDatabases, apps needing low latencyMedia, documents, logsAccessSingle node accessMulti-node/shared accessExampleAmazon EBS, OpenStack CinderNFS, CephFS, GlusterFS
Understanding your storage type helps decide the right backup tool and strategy.
🔒 Why Backing Up Volumes Is Essential
🛡️ Protects critical business data
💥 Recovers from accidental deletion or failure
📦 Enables migration between clusters or cloud providers
🧪 Supports safe testing using restored copies
🔧 Common Backup Methods (No Code Involved)
1. Snapshots (for Block Volumes)
Most cloud providers and storage backends support volume snapshots, which are point-in-time backups of storage volumes. These can be triggered through the Kubernetes interface using storage plugins called CSI drivers.
Benefits:
Fast and efficient
Cloud-native and infrastructure-integrated
Easy to automate with backup tools
2. File Backups (for File Volumes)
For file-based volumes like NFS or CephFS, the best approach is to regularly copy file contents to a secure external storage location — such as object storage or an offsite file server.
Benefits:
Simple to implement
Granular control over which files to back up
Works well with shared volumes
3. Backup Tools (All-in-One Solutions)
Several tools offer full platform support to handle Kubernetes volume backup and restore — with user-friendly interfaces and no need to touch code:
Velero: Popular open-source tool that supports scheduled backups, volume snapshots, and cloud storage.
Kasten K10: Enterprise-grade solution with dashboards, policy management, and compliance features.
TrilioVault, Portworx PX-Backup, and Rancher Backup: Also offer graphical UIs and seamless Kubernetes integration.
✅ Backup Best Practices for Kubernetes Volumes
🔁 Automate backups on a regular schedule (daily/hourly)
🔐 Encrypt data at rest and in transit
🌍 Store backups in a different location/region from the primary cluster
📌 Use labels to categorize backups by application or environment
🧪 Periodically test restore processes to validate recoverability
♻️ How Restoration Works (No Coding Required)
Restoring volumes in Kubernetes depends on the type of backup:
For snapshots, simply point new volumes to an existing snapshot when creating them again.
For file backups, use backup tools to restore contents back into the volume or re-attach to new pods.
For full-platform backup tools, use the interface to select a backup and restore it — including associated volumes, pods, and configurations.
Many solutions provide dashboards, logs, and monitoring to confirm that restoration was successful.
🚀 Summary: Protect What Matters
As Kubernetes powers more business-critical applications, backing up your block and file volumes is no longer optional — it’s essential. Whether using built-in snapshots, file-based backups, or enterprise tools, ensure you have a backup and recovery plan that’s tested, automated, and production-ready.
Your Kubernetes environment can be resilient and disaster-proof — with zero code required.
For more info, Kindly follow: Hawkstack Technologies
#Kubernetes#K8s#DevOps#CloudNative#PersistentStorage#StatefulApps#KubernetesStorage#VolumeBackup#DisasterRecovery#DataProtection#PlatformEngineering#SRE#CloudSecurity#OpenSourceTools#NoCodeOps
0 notes
Text
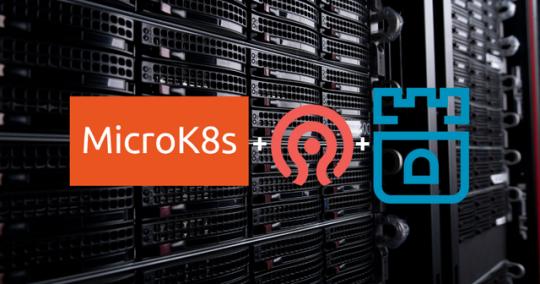
Kubernetes Persistent Volume Setup with Microk8s Rook and Ceph
Kubernetes Persistent Volume Setup with Microk8s Rook and Ceph @vexpert #vmwarecommunities #homelab #Kubernetespersistentvolumes #persistentvolumeclaims #storageclassesinKubernetes #accessmodes #kubernetes #kubernetesstorage #ceph #rook #blockstorage
Kubernetes persistent volume management is a cornerstone of modern container orchestration. Utilizing persistent storage can lead to more resilient and scalable applications. This guide delves into an experiment using Microk8s, Ceph, and Rook to create a robust storage solution for your Kubernetes cluster. Table of contentsWhat is a Kubernetes Persistent Volume?Understanding Persistent…
View On WordPress
0 notes