#MilwaukeeTools
Explore tagged Tumblr posts
Visit Tumblr Blog
Explore Tumblr blogs with no restrictions, modern design and the best experience.
Last Seen Tumblr Blogs


Fun Fact
Tumblr’s website traffic is steadily declining.
Text
may khoan milwaukee m12 fddxkit voi 4 dau khoan linh hoat
Máy khoan đa năng Milwaukee M12 FDDXKIT là giải pháp 4 trong 1 với thiết kế nhỏ gọn và động cơ không chổi than POWERSTATE™ mạnh mẽ, cho mô men xoắn 34 Nm. Hệ thống đầu kẹp tháo rời kèm 4 đầu khoan cho phép người dùng linh hoạt sử dụng trong nhiều ứng dụng. REDLINK PLUS™ bảo vệ công cụ và pin khỏi tình trạng quá tải, trong khi pin REDLITHIUM™-ION đảm bảo độ bền lâu dài. Sản phẩm này tương thích với toàn bộ pin MILWAUKEE™ M12™ để tăng sự tiện dụng.
Xem chi tiết: https://hoanglongvu.com/san-pham/may-khoan-da-nang-4-dau-m12fddxkit/
Hotline: 0932 632 563
2 notes
·
View notes
Text
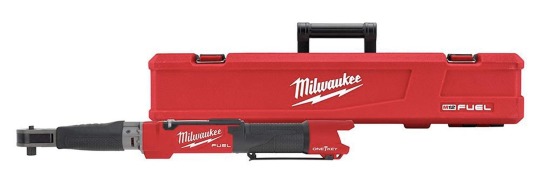
With discounts it’s only just over $500
Built with precision engineering, the Milwaukee Torque Wrench M12 ensures consistent torque accuracy, making it an essential tool for professionals and DIY enthusiasts alike. Its compact design and user-friendly interface make every task a breeze, setting a new standard for efficiency in your toolbox.
The Milwaukee Torque Wrench M12 stands out as a reliable companion for your mechanical endeavors. Crafted with meticulous attention to detail, this torque wrench offers a broad torque range, allowing you to tackle diverse projects with ease. Whether you're working on automotive repairs or assembling intricate machinery, the M12's precision ensures optimal
3 notes
·
View notes
Text
#MilwaukeeBradNailer#MilwaukeeTools#BradNailer#PowerTools#MilwaukeePowerTools#CordlessTools#DIYTools#CarpentryTools#WoodworkingTools#CarpentryLife#WoodworkingCommunity#FinishNailer#TrimNailer#WoodshopLife#DIYWoodworking#NailerTools#MilwaukeeCarpentry#CordlessBradNailer#18GaugeNailer#MilwaukeeM18#MilwaukeeFuel#PrecisionTools#FasteningTools#ProTools#DIYPowerTools#ContractorLife#BuilderTools#DIYer#HomeImprovement#ToolAddict
0 notes
Text
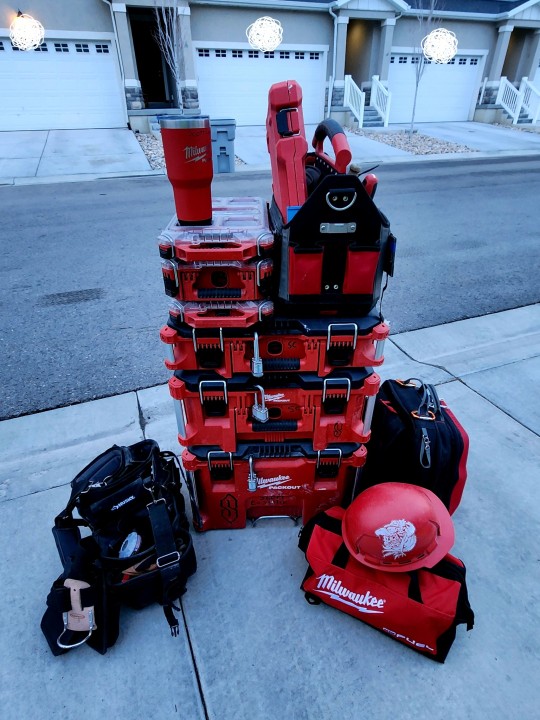
Steps to Customize Your Milwaukee Packout Setup

Introduction
Customizing your Milwaukee Packout setup can transform your work efficiency, organization, and overall productivity. Whether you’re a professional tradesperson or a DIY enthusiast, a tailored Packout system ensures your tools are always within reach and well-organized. This guide will walk you through each step to create a setup that perfectly fits your needs.
What is Milwaukee Packout?
Milwaukee Packout is a modular storage system designed to provide customizable and portable tool organization solutions. With various components like tool boxes, organizers, and totes, the Packout system offers endless possibilities for creating a storage setup that suits your specific requirements.
Benefits of Customizing Your Milwaukee Packout
Customizing your Milwaukee Packout setup brings numerous benefits:
Efficiency: Quick access to tools saves time.
Organization: Keeps tools systematically arranged.
Portability: Easy to transport between job sites.
Protection: Provides secure storage to prevent tool damage.
Professionalism: A well-organized setup enhances your professional image.
Understanding the Components of Milwaukee Packout
Overview of the Components
Milwaukee Packout includes various components that can be mixed and matched to create a tailored storage solution.
Tool Boxes
Packout tool boxes come in different sizes, each designed to hold a variety of tools and accessories securely.
Organizers
Organizers feature compartments for small parts and tools, helping to keep everything in its place.
Totes and Bags
Packout totes and bags provide flexible storage options for larger tools and equipment, offering easy access and portability.
Steps to Plan Your Custom Milwaukee Packout Setup
Assessing Your Needs
Start by evaluating the types of tools you have and how often you use them. This assessment will help you determine the necessary components for your setup.
Planning Your Layout
Design a layout that maximizes space and accessibility. Consider the order in which you use your tools and arrange them accordingly.
Selecting the Right Components
Choose the Packout components that best fit your needs. Think about the size, type, and number of tools you need to store.
Tools and Accessories for Customizing Your Packout
Essential Tools
Basic tools like screwdrivers, pliers, and wrenches are necessary for assembling and customizing your Packout system.
Custom Inserts and Foam
Custom foam inserts can be cut to fit specific tools, providing extra protection and organization.
Labels and Stickers
Using labels and stickers helps to quickly identify tools and parts, enhancing overall organization.
Creating a Modular Setup
Benefits of Modularity
A modular setup allows you to easily adjust and expand your storage as your tool collection grows.
Examples of Modular Configurations
Consider configurations like stacked tool boxes for compact storage or side-by-side arrangements for easy access.
Organizing Your Tools Efficiently
Tool Categorization
Group similar tools together to streamline your workflow and make finding tools easier.
Accessibility and Convenience
Place frequently used tools in easily accessible locations to save time during tasks.
Maintaining Your Milwaukee Packout Setup
Regular Cleaning
Keep your Packout components clean to ensure they function properly and look professional.
Inspecting for Damage
Regularly check for any damage or wear and tear, and replace or repair components as needed.
Updating Your Setup
As your tool collection evolves, update your setup to accommodate new tools and improve organization.
Advanced Customization Tips
Adding Tech Features
Incorporate tech features like LED lighting or battery charging stations to enhance your setup.
Custom Paint and Finishes
Personalize your Packout with custom paint or finishes to make it uniquely yours.
Common Mistakes to Avoid
Overloading Components
Avoid overloading your Packout components, which can cause damage and reduce mobility.
Ignoring Weight Distribution
Ensure even weight distribution to maintain balance and prevent tipping.
Cost-Effective Customization Strategies
DIY Custom Inserts
Create your own custom inserts using foam or other materials for a budget-friendly solution.
Using Recycled Materials
Incorporate recycled materials to save money and reduce environmental impact.
Case Studies: Successful Milwaukee Packout Customizations
Electrician’s Setup
Explore how electricians customize their Packout setups to keep their tools organized and accessible.
Carpenter’s Setup
Learn from carpenters who have tailored their Packout systems for maximum efficiency and convenience.
Frequently Asked Questions About Milwaukee Packout
Q. How do I start customizing my Milwaukee Packout setup?
A. Begin by assessing your tools and planning a layout that fits your workflow. Select the appropriate Packout components and start organizing.
Q. What are the essential components of a Milwaukee Packout system?
A. Essential components include tool boxes, organizers, totes, and bags. Custom inserts and labels can further enhance organization.
Q. Can I expand my Packout setup over time?
A. Yes, the modular design of the Milwaukee Packout system allows you to add or rearrange components as your needs change.
Q. How can I ensure my tools are protected in the Packout system?
A. Use custom foam inserts and regularly inspect your Packout for damage to ensure your tools are secure and protected.
Q. What are some advanced customization options for my Packout setup?
A. Consider adding tech features like LED lighting or custom paint finishes to personalize your setup further.
Q. Is it possible to create a cost-effective Packout setup?
A. Yes, using DIY inserts and recycled materials can help reduce costs while still providing a customized storage solution.
Conclusion
Customizing your Milwaukee Packout setup can significantly improve your tool organization, efficiency, and overall work experience. By following the steps outlined in this guide, you can create a tailored setup that meets your specific needs and enhances your productivity. Keep your Packout system updated and maintained to ensure it continues to serve you well for years to come.
#MilwaukeePackout#ToolStorage#MilwaukeeTools#PackoutSystem#ToolOrganization#ModularStorage#WorkshopSetup#ToolBox#JobsiteReady#ToolLovers#OrganizedTools#StorageSolutions#ToolEnthusiast#EfficientWorkspaces#ToolManagement
0 notes
Text
Why Choose Milwaukee Tools?
Explore the top reasons to choose Milwaukee tools for your next project. From cutting-edge technology to rugged reliability, see why professionals and DIY enthusiasts trust Milwaukee. Read more on https://medium.com/@servicesbusiness482/why-choose-milwaukee-tools-c57eda6aea75.

1 note
·
View note
Text
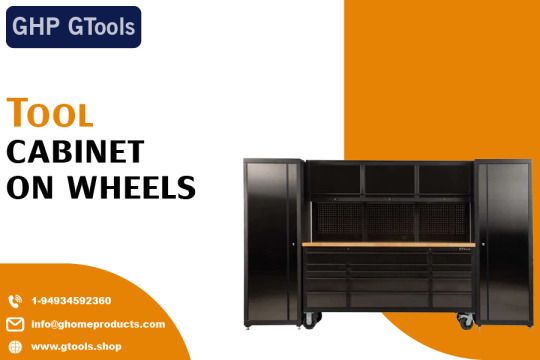
Get your tools in order with a tool cabinet on wheels! Our mobile storage solution offers convenience and flexibility. Shop now for a clutter-free workspace.
#toolstorage#tools#toolsofthetrade#toolbox#powertools#mechanic#handtools#toolset#toolporn#toolshop#tool#snapon#milwaukeetools#construction#toolsday#diy#woodworking#electrician#toolorganization#toolorganizer#milwaukee#milwaukeepackout#mechaniclife#toolslovers#workshop
1 note
·
View note
Text
#MilwaukeeAirPower#CompressorChampion#PowerUpMilwaukee#AirFlowMKE#MilwaukeeTools#CompressorCraft#AirForceMilwaukee#ToolTechMKE#MilwaukeeMachines#CompressorKingdom#AirWorksMKE#MilwaukeeBuilders#CompressorPro#MilwaukeeInnovation#AirMKE#usa#canada
0 notes
Text
#gezi rehberi#gezibilgi#milwaukee bucks#milwaukee brewers#milwaukee road#milwaukee admirals#milwaukeetools#wisconsin#washington dc#virginia#seattle
0 notes
Text
I like tools
I love tools!
1 note
·
View note
Text
Explore the Selection of Milwaukee Hand Tools, Power Tools, and Accessories on Wolseley Express!

Upgrade your tool collection with Milwaukee hand tools, power tools, and accessories available online on Wolseley Express. From hand tools to safety solutions, shop a variety of plumbing solutions and get your job done efficiently and effortlessly. Find the right Milwaukee tools for your projects by shopping on Wolseley Express today: https://www.wolseleyexpress.com/en/milwaukee
#MilwaukeeTools#MilwaukeeHandTools#MilwaukeePowerTools#MilwaukeeToolAccessories#MilwaukeePressTools#MilwaukeeDrillSets#MilwaukeeToolsOnSale#WolseleyExpress
0 notes
Video
youtube
Milwaukee M12 Nibbler: Clean Cuts, NO Problem! #milwaukeetool
Clean, consistent cuts in 16-gauge mild steel? EASY. 🔥The Milwaukee M12 FUEL Nibbler is a game-changer for sheet metal work. Lightweight, powerful, and part of the versatile M12 system. A must-have for any serious tool collection! 🛠️
0 notes
Text
With discounts it’s only just over $500
Built with precision engineering, the Milwaukee Torque Wrench M12 ensures consistent torque accuracy, making it an essential tool for professionals and DIY enthusiasts alike. Its compact design and user-friendly interface make every task a breeze, setting a new standard for efficiency in your toolbox.
The Milwaukee Torque Wrench M12 stands out as a reliable companion for your mechanical endeavors. Crafted with meticulous attention to detail, this torque wrench offers a broad torque range, allowing you to tackle diverse projects with ease. Whether you're working on automotive repairs or assembling intricate machinery, the M12's precision ensures optimal performance, leaving no room for errors.
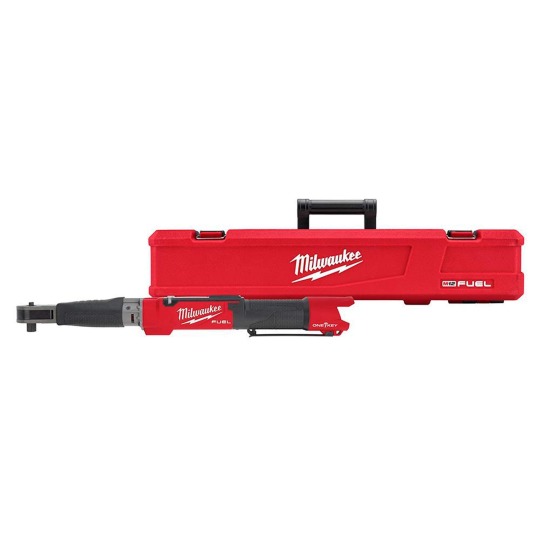
Designed for convenience, the M12 features an intuitive digital display, providing real-time torque readings for enhanced accuracy. Its ergonomic handle offers a comfortable grip, reducing fatigue during prolonged use. With Milwaukee's commitment to quality, Milwaukee Torque Wrench M12 is not just a tool – it's a testament to excellence in craftsmanship and a valuable addition to your toolkit, elevating your work to new heights of precision and efficiency.
3 notes
·
View notes
Text
#MilwaukeeTrackSaw#TrackSawKit#MilwaukeeTools#MilwaukeePowerTools#MilwaukeeSaw#TrackSawLife#ProWoodworking#SawingPrecision#CuttingEdgeTools#CarpentryTools#PrecisionCutting#TrackSawPrecision#SmoothCutsEveryTime#PowerfulSawing#NextLevelWoodworking#WoodworkingGear#CutLikeAPro#FineFinishCuts#SawingMadeEasy#BestTrackSaw#BuyMilwaukeeTools#MilwaukeeToolsForSale#TrackSawForSale#BestTrackSawKit#MilwaukeeToolDeals#PowerToolsShop#MilwaukeeFans#TopCarpentryTools#ShopMilwaukeeTools#WoodworkingEssentials
0 notes
Text
Troubleshooting a Milwaukee Transfer Pump

Introduction
Milwaukee transfer pumps are reliable tools used in various applications, from dewatering to transferring water and other fluids. However, like any mechanical device, they can encounter issues that may hinder their performance. Understanding how to troubleshoot these problems can save time, reduce downtime, and extend the life of your pump. This guide will provide a detailed troubleshooting approach, covering common issues, diagnostics, and solutions.
Understanding the Milwaukee Transfer Pump
Milwaukee transfer pumps are designed to move water and other fluids efficiently. They are commonly used in construction, plumbing, and emergency dewatering scenarios. These pumps feature durable construction and battery-powered operation, making them portable and convenient.
Common Issues with Milwaukee Transfer Pumps
No Power
One of the most common issues is the pump not turning on. This can be due to battery problems, faulty switches, or electrical connections.
Low Suction
Low suction can hinder the pump's performance, often caused by clogged filters, air leaks, or impeller issues.
Overheating
Overheating can damage the pump and is usually due to overuse, blocked cooling mechanisms, or operating in high-temperature environments.
Leaks
Leaks can occur in hoses, seals, or the pump housing, leading to reduced efficiency and potential damage to the surrounding area.
Initial Diagnostics
Visual Inspection
Begin by visually inspecting the pump for obvious signs of damage or wear. Look for loose connections, worn seals, or any visible cracks.
Basic Checks
Perform basic checks such as ensuring the battery is fully charged, the pump is properly assembled, and all connections are secure.
Tool Requirements
Have the necessary tools ready, including screwdrivers, wrenches, and a multimeter for electrical testing.
No Power Troubleshooting
Battery Issues
Check if the battery is properly charged and seated. Swap with a known good battery to rule out battery failure.
Electrical Connections
Inspect all electrical connections for corrosion or loose wires. Tighten or clean as necessary.
Switch Problems
Test the power switch for continuity using a multimeter. Replace the switch if it is faulty.
Low Suction Troubleshooting
Clogged Filters
Remove and clean the inlet and outlet filters. Replace them if they are damaged.
Air Leaks
Check all hose connections for tightness. Apply sealant or replace hoses if air leaks are detected.
Impeller Problems
Inspect the impeller for damage or obstructions. Clean or replace the impeller as needed.
Overheating Troubleshooting
Cooling Mechanisms
Ensure that the cooling vents are not blocked. Clean any debris from the vents.
Usage Limits
Do not operate the pump continuously for longer than recommended. Allow the pump to cool down if it overheats.
Environmental Factors
Avoid using the pump in extremely hot conditions. Provide shade or ventilation if necessary.
Leak Troubleshooting
Seal Inspections
Inspect all seals for wear or damage. Replace any faulty seals to prevent leaks.
Hose Connections
Ensure that all hose connections are tight and secure. Use hose clamps if necessary.
Housing Cracks
Check the pump housing for cracks or damage. Repair or replace the housing if needed.
Motor Issues
Motor Noise
Unusual noises from the motor can indicate wear or damage. Inspect the motor and lubricate or replace parts as needed.
Stalling
If the motor stalls, check for blockages in the impeller or hoses. Ensure the power supply is consistent.
Motor Replacement
If the motor is beyond repair, refer to the manufacturer’s guidelines for replacing the motor.
Electrical Problems
Wiring Checks
Inspect all wiring for wear, damage, or corrosion. Replace any faulty wiring.
Fuse Replacement
Check and replace any blown fuses. Ensure the correct fuse rating is used.
Circuit Testing
Use a multimeter to test the electrical circuit for continuity and proper voltage.
Impeller Maintenance
Cleaning
Regularly clean the impeller to remove debris and prevent clogs.
Replacement
Replace the impeller if it shows signs of wear or damage.
Performance Testing
Test the pump's performance after cleaning or replacing the impeller to ensure proper operation.
Battery Maintenance and Replacement
Battery Life
Monitor the battery life and replace it when it no longer holds a charge.
Charging Practices
Follow the manufacturer's guidelines for charging to extend battery life.
Replacement Guidelines
Use only recommended batteries to ensure compatibility and performance.
Filter Cleaning and Replacement
Types of Filters
Familiarize yourself with the types of filters used in your pump model.
Cleaning Process
Clean filters regularly to maintain optimal performance.
Replacement Steps
Replace filters according to the manufacturer's instructions.
Pump Assembly and Disassembly
Step-by-Step Guide
Follow a detailed guide to disassemble and reassemble the pump safely.
Tool Requirements
Ensure you have all necessary tools before beginning.
Safety Tips
Always disconnect the power source before performing maintenance.
Usage Best Practices
Correct Operation
Operate the pump within its specified parameters to avoid damage.
Preventive Measures
Implement preventive measures such as regular maintenance and proper storage.
Storage Tips
Store the pump in a cool, dry place when not in use to prevent damage.
Regular Maintenance Routines
Scheduled Checks
Perform regular checks to identify and address issues early.
Parts Replacement
Replace worn parts to prevent breakdowns.
Lubrication
Lubricate moving parts to reduce friction and wear.
Signs of Wear and Tear
Identifying Issues Early
Look for signs of wear such as reduced performance or unusual noises.
Impact on Performance
Address wear and tear promptly to maintain pump efficiency.
When to Call a Professional
Major Repairs
For complex issues, seek professional repair services.
Warranty Issues
Contact the manufacturer if the pump is under warranty.
Expert Services
Utilize expert services for thorough inspections and repairs.
Frequently Asked Questions About Milwaukee Transfer Pump
Q. Why is my Milwaukee transfer pump not turning on?
A. Check the battery, power switch, and electrical connections.
Q. How can I improve the suction of my transfer pump?
A. Clean the filters, check for air leaks, and inspect the impeller.
Q. What should I do if my pump overheats?
A. Allow the pump to cool, clean the cooling vents, and avoid using it in high temperatures.
Q. How do I fix a leak in my transfer pump?
A. Inspect and replace seals, tighten hose connections, and check for housing cracks.
Q. What causes unusual noises in the pump motor?
A. Noises can indicate motor wear or damage. Lubricate or replace motor parts as needed.
Q. When should I replace the battery of my pump?
A. Replace the battery when it no longer holds a charge or fails to power the pump adequately.
Conclusion
Maintaining and troubleshooting a Milwaukee transfer pump involves regular inspections, timely repairs, and understanding the common issues that can arise. By following the guidelines outlined in this article, you can ensure your pump operates efficiently and reliably, minimizing downtime and extending its lifespan.
#MilwaukeeTransferPump#PumpTroubleshooting#MilwaukeeTools#TransferPump#ToolRepair#MilwaukeePower#WorkshopTools#PumpMaintenance#DIYRepair#PumpEfficiency#MilwaukeeEquipment#PowerTools#ToolTech#PumpPerformance#ReliableTools
0 notes
Text
Find the perfect storage solution with our durable tool boxes. Keep your tools organized and easily accessible with our wide selection.
#toolstorage#tools#toolsofthetrade#toolbox#powertools#mechanic#handtools#toolset#toolporn#toolshop#snapon#milwaukeetools#construction#toolsday#diy#woodworking#electrician#toolorganization#toolorganizer#milwaukee#milwaukeepackout#mechaniclife#toolslovers#workshop
1 note
·
View note