#Rode NTG4+
Explore tagged Tumblr posts
Visit Tumblr Blog
Explore Tumblr blogs with no restrictions, modern design and the best experience.
Last Seen Tumblr Blogs


Fun Fact
Tumblr has 16.74 million mobile monthly users in the US.
Text
youtube
How does it sound?
Rode NTG4+
1 note
·
View note
Text
Indie Filmmaking: Must-Have Gear for Stunning Visuals
Essential Equipment Every Indie Filmmaker Should Have
For those venturing into indie filmmaking, having the right equipment can be a game-changer. Whether you're shooting breathtaking visuals, creating the perfect ambiance with lighting, or securing clear audio, each piece of gear is vital. Here's a detailed guide on the essential tools every indie filmmaker should consider.
Capturing the Vision
Selecting the right camera is crucial for any indie filmmaker. There are numerous affordable options on the market that don't sacrifice quality.
Blackmagic Pocket Cinema Camera 6K Pro is a top recommendation. This camera delivers stunning 6K resolution, a Super 35 HDR sensor, and an integrated motorized ND filter system. It's reasonably priced for the extensive features offered.
Sony A7S III stands out as another fantastic option. Renowned for its excellent low-light performance, this mirrorless camera offers 4K 120p slow-motion capability and 10-bit 4:2:2 recording, making it a popular choice among indie filmmakers.
Canon EOS R is also noteworthy. This full-frame mirrorless camera provides 4K video recording, a flip-out touchscreen, and a robust autofocus system, ensuring precision in capturing every moment.
Setting the Mood
Lighting plays a crucial role in filmmaking. Proper lighting can evoke emotions and set the scene's tone. Here are some affordable lighting options to help indie filmmakers achieve their desired look.
Neewer 2 Packs Dimmable Bi-color 480 LED Video Light is ideal for those on a budget. This kit provides adjustable color temperature and brightness, allowing for flexible lighting setups.
MOUNTDOG Softbox Lighting Kit is another excellent choice. The kit includes two softboxes, two light stands, and two bulbs, making it perfect for creating soft, even light, which is essential for interviews and close-up shots.
Capturing Clear Audio
Good audio quality is crucial and shouldn't be overlooked. Here are several affordable audio equipment options.
Rode NTG4+ Shotgun Microphone is renowned for its high-quality sound recording. It's perfect for on-camera use, ensuring dialogue and ambient sounds are captured clearly.
Tascam DR-10L is a compact digital recorder ideal for interviews or dialogue. It can be easily attached to a camera or clothing, making it a versatile tool for indie filmmakers.
Bringing It All Together
Post-production can greatly influence the final product. Choosing the appropriate editing software is essential to streamline the process.
Adobe Premiere Pro is an industry-standard editing software offering a wide array of features. It's compatible with other Adobe products, making it an efficient tool for filmmakers.
Final Cut Pro is a professional video editing software available exclusively for Mac users. It combines advanced features with a user-friendly interface, making it a powerful tool for post-production.
DaVinci Resolve is a standout free alternative, offering professional-level color correction and audio post-production tools. It's an excellent choice for those on a budget yet seeking high-quality results.
We reached out to seasoned indie filmmakers to gather their insights on critical gear and why it's essential on set.
"I always bring a small LED panel with me on set. It's incredibly versatile and can make a huge difference in lighting interviews." - Sarah, indie filmmaker
"My go-to camera is the Sony A7S III. Its low-light performance is unmatched, and it's compact enough to use in various shooting scenarios." - John, indie filmmaker
"For audio, I swear by the Rode NTG4+. It's affordable, reliable, and delivers great sound quality." - Emily, indie filmmaker
In conclusion, having the right gear is crucial for indie filmmakers to bring their vision to life. Investing in quality cameras, lighting, audio equipment, and editing tools can have a significant impact on the final product. As technology continues to advance, more affordable options become available, enabling filmmakers to create professional-quality content even on a budget.
#IndieFilmmaking #FilmmakingGear #Cinematography #EditingTools #FilmmakingTips
Discover the best gear to kickstart your filmmaking journey and elevate your projects!
0 notes
Text
Mastering Film Audio: Essential Equipment and Techniques
Quality audio isn't just about capturing sound; it's about creating an immersive experience for viewers. This detailed guide dives into essential audio equipment you need to ensure your film sounds as good as it looks. From the best microphones to advanced noise-cancelling solutions and sound editing software, get ready to elevate your film production to professional standards.
Choosing Your Microphone
The microphone is your first touchpoint for quality audio. High-end options like the Rode NTG4+ offer superior sound quality with on-board battery power, making it a top choice for both studio and field recording. For capturing dialogue in varied environments, industry professionals often recommend the Sennheiser MKH 416 due to its reliability and exceptional audio clarity. If budget constraints are part of your reality, consider the Audio-Technica ATR3350ISOMIC. This lavalier mic provides good quality sound for interviews and is discreet enough for documentary-style filming. Sound engineers appreciate the flexibility these mics ensure, allowing them to capture pristine sound in any scenario.
Microphone Setup Tips
Setting up your microphone correctly can significantly impact the quality of the audio captured. Firstly, ensure the microphone is positioned correctly to capture the primary sound source effectively. Use a windshield or pop filter to reduce unwanted noise. Always perform a sound check before filming to adjust levels and avoid clipping.
Integrating Audio Mixers and Noise Cancellation
Audio mixers play a pivotal role in balancing and enhancing the sound. The Yamaha AG03 offers portability and is quite user-friendly for beginners and smaller setups. For more complex productions, the Sound Devices MixPre-3 is celebrated for its multifunctionality, providing robust features that cater to the sophisticated needs of professional sound engineers. When setting up your mixer, always test different settings to find the optimal sound quality for your specific filming environment.
Noise Cancelling Solutions
To combat unwanted background noise, consider the Rode Wireless GO, known for its effective built-in noise reduction capabilities. Another great option is the Zoom H6, which not only provides noise-cancelling features but also versatility in recording options. These tools are essential for maintaining audio clarity in challenging environments.
Practical Advice for Setup
When integrating these devices, start by connecting your microphone to the audio input of the mixer. Adjust the levels to find a balance where the main sound is clear, and background noise is minimized. For noise cancelling devices, place them strategically to block unwanted sound sources. Regularly monitor the audio feed through headphones to ensure consistency.
Enhancing Audio in Post-Production
Fine-tuning in post-production is invaluable. Utilizing software like Adobe Audition or Pro Tools can greatly enhance and refine your captured audio. These programs offer advanced tools for editing, mixing, and mastering audio tracks. Integrating your audio hardware with this software allows for a seamless workflow, giving you control over every nuance of the sound landscape.
Software Integration Tips
To maximize efficiency, use the same audio file formats throughout the post-production process. Sync your hardware settings with the software to avoid compatibility issues. Utilize presets and templates within the software to maintain a consistent sound quality across different projects.
Remember, the quality of sound can deeply impact the viewer's experience. According to seasoned sound engineer Alex Jennings, "The right microphone can elevate a good film to a great one with the sheer power of clarity and audio depth." Combining this equipment with your creative vision enables you to produce captivating, professional-grade audio that complements your visual story.
To conclude, investing in the right audio equipment, understanding how to use them effectively, and harnessing powerful post-production software will put you leagues ahead in the competitive world of film production. Sound not only matters; it's essential to storytelling. As you build your audio arsenal, keep these tips and suggestions in mind to create an auditory experience that resonates with your audience.
/post/mastering-film-audio-essential-equipment-and-techniques
0 notes
Photo
#rode #ntg4 #microphone #condenser #camera #mic NTG4 Plus is the latest short shotgun from Rode, which features digital controls, rechargeable lithium battery and improved sound quality. It is positioned in between the classic but inexpensive NTG2 and professional NTG3. However, in terms of price, it still fits into the entry category, so consider it a very good investment! The usage is a total breeze, and believe it or not, it won’t leave you indifferent. Whether you are a professional or just a beginner, NTG4+ has all you need to accomplish most of your videography tasks …with a solid A! Noise levels Rode NTG4+ does bring a better quality compared to previous models, and this involves a number of factors. First of all, it has improved noise characteristics. Shotguns are somewhat noisy by nature and this noise is usually perceived as a background hiss. Often, it remains inaudible but sometimes it can ruin your work, especially when there is a need for post-processing. Noise reduction however has a dramatic impact on price, and it is one of the reasons why professional shotguns are so expensive. Now, this mic does a good job of filling that gap between entry and professional shotguns. The self-noise of NTG4 is rated at 16 dB-A, which is about the same as MKE600, but with a higher sensitivity of 25mV/Pa vs 21mV/Pa, it gives us a slightly better noise floor, though both are essentially very similar. However, comparing to NTG2 with 18 dB-A equivalent noise and sensitivity of 15mV/Pa we do get quite a noticeable improvement. Using the following formula 20·log10(V1/V2), we can convert the sensitivity into effective dBs. So we’ll end up with 4.4 dB more signal and 2 dB less self-noise over NTG2. Overall, I would say it’s very decent and just the way a semi-pro mic should be. Frequency response Frequency response is another very important factor that determines how natural will a certain mic sound (but of course it’s not the sole factor). Plotted on a diagram, it shows a deviation measured in dB throughout the mic’s nominal frequency range. As a rule, we want to see a smooth line because any abrupt deviation could signify an anomaly. (at Bhargavas Music Lajpat Nagar) https://www.instagram.com/p/B81LkA2hye8/?igshid=1fucn5tbb87pe
0 notes
Photo

My New Gear RODE NTG4+ 1 LED + Ts lens #rode #ntg #ntg4 #microphone @dslr #productphoto #productphotography #wood #woodtable https://www.instagram.com/p/B7IOxWSn_Uy/?igshid=j2h318i4le6i
0 notes
Note
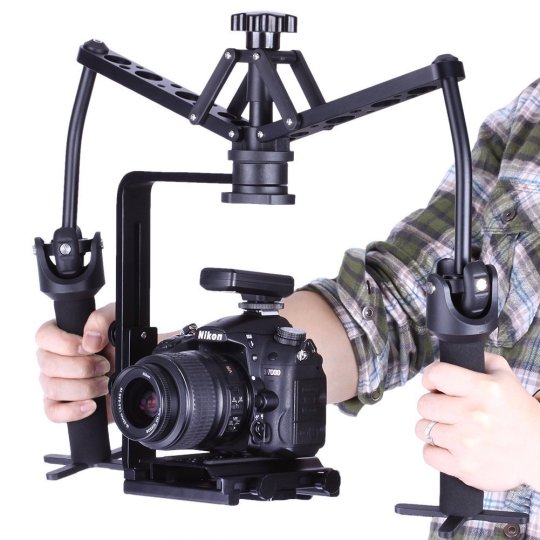
Hi! I'm a high schooler with a passion for film who hasn't actually filmed anything yet. I'm planning to get started by just filming stuff and gaining experience over time. I want to buy gear (camera, lights, etc) so I can get started but it's an expensive investment and I'm unsure what I should get. Do you have any ways to figure out which gear is good for me?
Hello @jeffreydahmerofficial
There are lots of options when it comes to gear and it can be a bit of an investment. So I have put together a starter kit with some gear breakdowns, recommendations, and prices. The prices listed are if you are purchasing brand new equipment. You can most likely find used equipment or older models that work just as well for a lower price. In addition, some miscellaneous gear you can make yourself (dollies, steadicams, light bars…), if you are willing and able to put in the time and effort.
Film Gear Starter Kit
Cameras
DSLR - digital cameras are great starter cameras because they are cheaper, small, maneuverable, and produce good quality videos. You can even buy older models to reduce the price and still get good quality (You can also buy used.) Canon and Nikon are good cameras as are some Sonys, but I am partial to Canons. When purchasing, pay special attention to if you are purchasing the camera with or without a lens and what type of lens (I recommend a zoom to start out.)
Some good DSLRs:
Nikon D3300 ($350-500) - great quality image for a relatively low price. A lens is included, so you don’t have to worry about finding one separately.
Canon EOS Rebel T5 ($350-450) - any of the rebel cameras are good, but being newer (but not the newest model) the T5 is a great choice. It has decent low-light capabilities and comes with a zoom lens.
Nikon D5300 ($400-500) - with a better sensor, and a bit more customization opions, this Nikon is a step up from the D3300 with very little change in price.
Canon EOS 6D ($1,200-1,600) - a good substitute for the more expensive 5D Mark III. For the price jump, you get much higher image processing quality and great low-light capabilities.
Canon EOS 80D ($750-1,000) - much like the 6D, it has great low-light capabilities and great image quality, plus a maneuverable viewscreen
Camcorder - In terms of video quality, DSLRs can offer the same image quality as a camcorder at a much lower price. However, camcorders have a lot to offer as well. They have much longer recording time andare built for video, so it is much easier to hold one for long periods of time, despite DSLRs being lighter. They also have built in XLR inputs and neutral density filters, which means camcorder will automatically properly expose your footage without changing the frame rate. (Bonus: They look professional, which is helpful when working freelance.)
Some good camcorders:
Canon XA30 ($1,300-2,000) - a professional/semi-professional camcorder that is easy to use, has good low-light capabilities, a touch screen, and is relatively inexpensive for a camcorder.
Sony HXR NX100 ($1,500-2,000) - an entry-level professional camcorder that has HD quality video, good low-light capabilities, 2 XLR inputs, and 3 focus rings. It’s comparable to the more expensive Canon XF200.
Canon VIXIA GX10 ($2,500-3,000) - a “consumer” camera with professional video quality, this camcorder shoots in 4K. While it lacks some pro features, such as the XLR port, it is very portable and has optical zoom, a touch screen, (You can also get a nice kit that includes a mic, cables, backpack case, LED lights, memory card, and more for under $2,700.)
Canon XF300 ($3,000-4,000) - a professional camcorder great for run-and-gun as well as on a shoulder mount. It has a slightly larger, rotating viewscreen, 2 XLR ports, full manual and full auto modes, built in ND filters, and more.
Misc. Camera Gear
Tripod ($20-200) - a staple for any filmmaker. You can get cheap, lightweight ones for about $20. I recommend investing in something sturdier, so you don’t risk having your camera fall over because of a flimsy tripod.
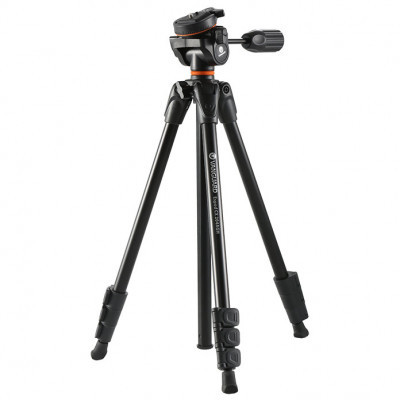
This a vanguard tripod that is good for DSLRs. It’s lightweight and small, which is great for traveling, but it also can’t support heavier cameras, so when purchasing, look at the load to see if it can support the weight of your camera. You can find Vanguard tripods and similar brands for under $50, but some run a little higher.
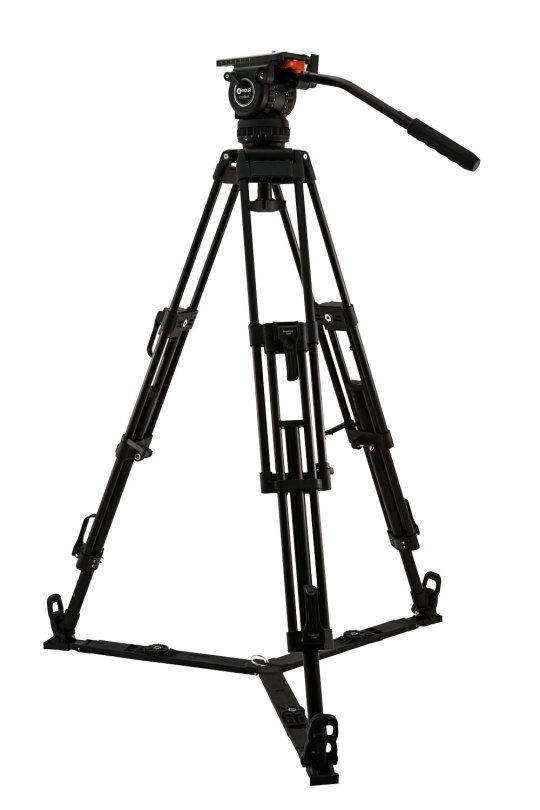
This is an example of a heavy duty tripod with a fluid head for easy maneuvering. These tripods are extremely sturdy and can easily support the weight of camcorders and higher-end cameras. You can get a good one of these for around $150-$200.
Cases/Bags ($30-60) - get cases for everything: cameras, microphones, lighting, tripods, etc. You invested a lot into your gear. It is worth it to spend a little more to protect it and keep everything in good condition.
SD cards ($25-50) - I recommend 32GB or higher and make sure they are higher class cards. Otherwise, some cards may stop recording automatically with DSLRs because they can’t keep up with the writing speed.
Steadicam ($30-150) - professional steadicams are much more expensive, but you can find cheap and effective ones for DSLRs relatively easily. They give a cleaner handheld look that improves the look of your film immensely. They even have steadicams for smartphones!
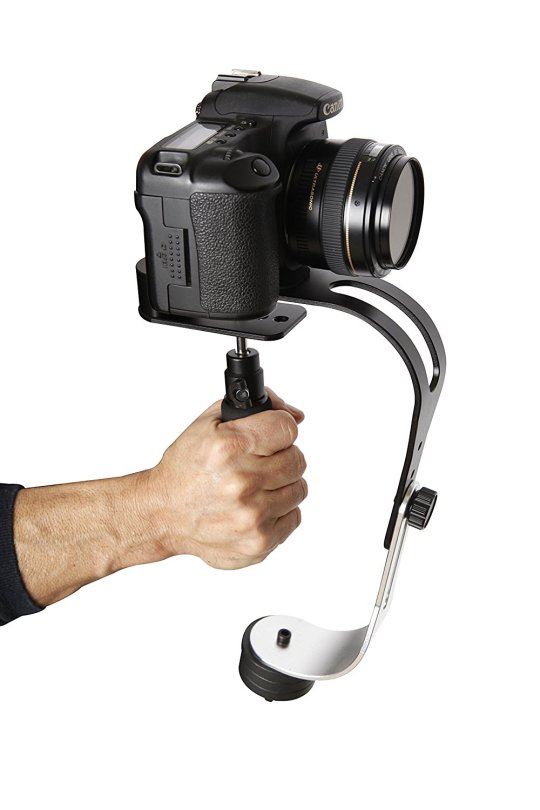
Pictured Above: Roxant Pro Steadicam
Pictured Above: Ceari VILTROX WD-Z Steadicam
Microphones
Shotgun mic - a staple of you want good (or even decent) sound for your film. Unfortunately, a good mic is easily as expensive as a DSLR and requires more gear. With a shotgun mic, you need to also purchase an XLR cable, shockmount, and windscreen. Often it’s cheaper to purchase a kit rather than buy these separately.
Some recommended shotgun mics:
Rode VideoMic ($100-200) - A lower-end shotgun mic meant to be mounted directly onto a DSLR. It has decent quality sound, doesn’t need an XLR cable, has a built in shockmount, and is relatively cheap.
Audio-Technica AT875R ($150-200) - a cheaper semi-pro microphone that requires an XLR cable and phantom power. It’s smaller and has a wider pickup range, making it a good on-camera solution. It can also be mounted on a boom pole or stand. It is better for studio and indoor recording. Although it’s much cheaper, it holds its own against the Sennheiser MKE 600.
Sennheiser MKE 600 ($300-400) - powered by battery or phantom power, this is a good, well-rounded mic.
Rode NTG3 or NTG4 ($350-550) - the NTG series is very popular in the filmmaking world. While NTG3 is arguably better, the NTG4 is cheaper and still produces very good quality sound.
Lav mics - great for wide shots, interviews, outdoor audio and as second audio source. You can hide these guys relatively easily when booming is not an option. The great thing about lavalier microphones is they are relatively inexpensive and you can get good sound with a really cheap lav.
Some recommended lav mics:
Neewer 3.5mm ($5-10) - a super cheap lav that’s great for buying in bulk. It’s a bit harder to hide, but works great for interview videos.
Sony ECMCS3 ($15-30) - this is a sensitive, durable, and inexpensive lav that picks up sound from both sides.
Rode Smartlav+ ($50-70) - this practical, high quality lav hooks up directly to your smartphone, external recorder, or camera.
Sennheiser EW 100 ENG G3 ($700-800) - if you are willing to spend more, these are some of the best wireless lavaliers. They have great quality and can be easily hidden.
External Sound Recorders - crucial if you plan on moving your microphone far away from the camera. Booming is usually done using external sound, meaning the mic is hooked up to an external recorder rather than the actual camera. The sound is synced in post. (That’s why we have a clapper!)
Some recommended Sound Recorders:
Zoom H1 ($50-100) - One of the first Zoom recorders, this is one of the cheapest and most basic options. It’s compatible with micro SD cards, battery operated and has a built-in omni-directional mic.
Zoom H4N Pro ($150-200) - one of the most popular and highest rated external recorders, it’s well worth the investment. It has 4-channel recording, a larger screen, easy navigation, 4 hour battery life, and a built-in omni-directional mic. (I personally recommend this one.)
Tascam DR-40 ($150-200) - with a 15 hour battery life, this 4-channel recorder is a good rival to the Zoom H4N, but it’s extra features make it slightly more expensive.
Misc. Sound Gear
Boom pole ($100-300)- sound quality improves immensely when you are able to put the mic closer to the subject rather than mounting in on the camera. You can get a pole with the cord built in or without, which is slightly cheaper. (Full disclosure: I’ve used a monopod as a mini boom pole before. Not great, but it got the job done. This guy even turned a light stand into a boom pole.)
Headphones ($100-200) - specialized or noise-cancelling headphones so you can clearly hear the audio you are capturing on set and while editing. Earbuds work, but they are far from ideal.
Deadcat ($20-30) - minimizes wind noise, very helpful for outdoor shoots. Available for both shotgun mics and lavs. You can easily get this used for under $15, but new ones are more expensive.
Lighting
Lighting is necessary on bigger shoots, but for freelance and beginners, you rarely have your own lighting outside of a studio. Lights are expensive and most of the time, you won’t be able to use them without a crew (especially outdoors). When you do use them, you will most likely be much more experienced and either working for a company with lighting equipment, or running your own company.
I recommend purchasing a cheap photography lighting set to have some lights, but wait to invest in higher end lighting. A cheap lighting + green screen kit can cost around $100-200(I personally have 2 cheap umbrella lights and while I like them, I rarely use them.) That being said, below are some common types of lights and their general price ranges. Professional brands include: Arri, Lowel, KinoFlo, Limelite, and Ikan.
Softbox/Umbrella Lights ($200-550) - used mostly in studios and photography, they give off, you guessed it, soft light and have florescent bulbs. These are great when you need a quick light source, they are lightweight, and don’t easily overheat.
Can Lights ($500-1,000) - these are the classic lights you see on film sets. They can get very hot, but they are small, lightweight, bright, easy to assemble, and you can use diffusers, filters, and gels to customize the light.
LEDs ($1,000-2,000) - LED lights are the most expensive but also the most useful. They allow you to easily dim the light and change the temperature and they don’t overheat or use as much power.
Misc. Lighting Gear
Gloves ($30-40) - lights get hot and when you need to maneuver them up close, it’s safe to have heat-resistant gloves. Set-specific gloves are more expensive, but you can find cheaper options elsewhere that work just as well.
Bounce board ($5-10) - these can replace a fill light and help add a little more light to your scene without purchasing an expensive and bulky light. You can get collapsible reflector disc with white, silver, and/or gold for the price listed. Poster-board is another cheap alternative.
Gels, diffusers, and dimmers ($20-30) - If you don’t have an LED light, you can modify the color of a light source with gels. They work on any light source from industrial lights to household lamps and are very handy and inexpensive. (The price listed is for a kit of all of these products, but you can buy sheets of any of these for just a few dollars.)
Gaffers Tape ($5-10) - heat resistant and doesn’t leave residue. Gaff tape is used for just about everything on set from lighting, to setting marks, to taping down cords, to labeling.
I hope this helped and didn’t overwhelm you too much! Just a reminder: these are just some options based on what I see used in the industry. There is plenty of gear out there and plenty of cheaper solutions and substitutes for some gear. As always, it’s the filmmaker, not the gear that makes a good movie (but getting good gear is always nice!)
Best,
Jules
#ask box#my filmmaking tips#film gear#film equipment#cameras#microphones#lighting#lights#production#camera department#sound department#g&e
678 notes
·
View notes
Text
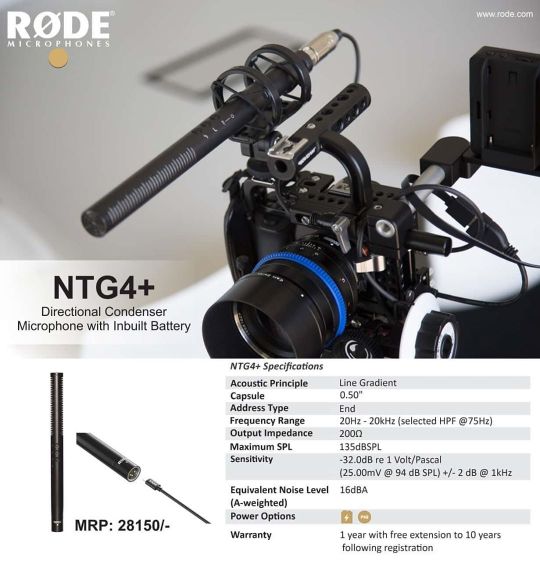
Rode NTG4+ Supercardioid Condenser Shotgun Microphone with Inbuilt Battery
Rode NTG4+ Supercardioid Condenser Shotgun Microphone with Inbuilt Battery
Building on the popularity and acceptance of the RODE NTG2, the NTG4+ features an all-new condenser capsule with low noise, high sensitivity and the convenience of on-board equalization/level control via digital switching. The NTG4+ is the very first microphone to feature an in-built battery that provides 150+ hours of operation with the convenience of USB charging. Control the in-built high-pass…

View On WordPress
0 notes
Video
vimeo
5 Handy and Creative Ways to Mount Microphones from Caleb Pike on Vimeo.
Today we look at 5 different ways to mount your microphones!
GEAR MENTIONED:
Cheap Clamps: homedepot.com/p/HDX-2-in-Spring-Clamp-80002/100027346
Cheap Monitor Arm: amzn.to/1OVINmg
Heavy Duty Monitor Arm: amzn.to/1FRLjY8
Zoom Handle: amzn.to/1FRLsux
Music Mic Stand: amzn.to/1j3UtpF
Boom Holder: amzn.to/1OVJlJ3
Nano Clamp: amzn.to/1PgzaxR
You may also need a 1/4" to 3/8" thread adapter since many microphones have a 3/8" thread instead of 1/4: amzn.to/1FRLQcs
Microphones Shown in Video:
RODE VideoMic Pro: amzn.to/1OVJFY6
RODE NTG4: amzn.to/1OVJOLb
0 notes
Photo

As I mentioned last week we have been recording the sounds of books at the Bodleian Libraries in Oxford for our Fusion Arts Oxford Sense-sational Books project. We have used two Zoom recorders (H8 and H6), a matched pair of Rode M5 Cardioid Condenser Microphones in an Ortf placement, a Rode NTG4+ shotgun mic, Sennheiser radio lavalier mic and our homemade contact mics to collect sound in the library. Here we are listening to the sounds of the Weston Library. @zoomunitedkingdom @rodemic @bodleianlibs @fusionartsox #sonicarts #reading #referencelibrary @sony @sennheiser #ortf #rodemic #sennheiser #soundrecording #sonymdr7506 #rodeshockmount #library #books #booksofinstagram #Oxford #sound #library #shh @oxford_uni @pale.blue.dot.collective @louise.beer (at Bodleian Library, Oxford) https://www.instagram.com/p/CbrhUnWMd2W/?utm_medium=tumblr
#sonicarts#reading#referencelibrary#ortf#rodemic#sennheiser#soundrecording#sonymdr7506#rodeshockmount#library#books#booksofinstagram#oxford#sound#shh
0 notes
Video
What’s in the Box? Rode NTG4+ Supercardioid Condenser Shotgun Microphone
1 note
·
View note
Text
Wedding Photography VOL 1 - Behind The Scenes by Yervant
The way I shoot weddings. Wedding location shoot and Album Vol.1 by Yervant - Wedding Photography Tutorial - Wedding Photography Inspiration Web - https://www.yervantphotography.com Instagram - https://www.instagram.com/yervantphotography Facebook - https://www.facebook.com/yervantphotography STUDIO EQUIPMENT Cameras: - Canon Eos R https://www.digidirect.com.au/cameras... Amazon Link: https://amzn.to/3dOc9mO Lens: - Canon RF 35mm F/1.8 Macro IS https://www.digidirect.com.au/lenses/... - Canon RF 24-105mm f/4L IS https://www.digidirect.com.au/lenses/... Lighting: - Profoto b10 https://profoto.com/au/products/light... - Profoto RFi Softbox Rectangular Microphone: - Rode Wireless GO https://www.digidirect.com.au/audio-a... - Rode NTG4 Shotgun https://www.digidirect.com.au/audio-a... - Zoom H4n Pro 4-Channel https://www.digidirect.com.au/audio-a... Video Recorders: - Atomos Ninja V https://www.digidirect.com.au/pro-vid... Computers: - Apple MacBook Pro - iMac Pro Editing software: - Final Cut Pro X #Weddingphotography #Photography #Wedding Follow me: Website - http://www.yervantphotography.com YouTube https://www.youtube.com/channel/UC0KAC6WNd1a6Xc01dojebwQ Facebook - https://www.facebook.com/yervantphotography Instagram - https://www.instagram.com/yervantphotography
0 notes
Photo

Rate my sound design capture setup. I used this to record some sound effects for the Dire Armory short film. Zoom H4n Rode ntg4 #Videography #videographyatl #videographylife #videographybandung #videographyservices #videographyjakarta #videographykualalumpur #videographycinematic #videographyt #videographyison #audiodesign #audioengineer #audioengineering #audioengineers #audioengineerlife #audioengineeringschool #audioengineeraes #audioengineeringandmusicproduction #AudioEngineeringSociety #audioengineerintraining #audioengineerslife #filmmaker #filmmakers #filmmakerslife #Filmmakerlife #FilmMakerBoost #filmmakermuslim #FilmmakerKit #setlife #videocreator (at Marietta, Georgia) https://www.instagram.com/p/B-90ma8JImB/?igshid=14wk945ettskw
#videography#videographyatl#videographylife#videographybandung#videographyservices#videographyjakarta#videographykualalumpur#videographycinematic#videographyt#videographyison#audiodesign#audioengineer#audioengineering#audioengineers#audioengineerlife#audioengineeringschool#audioengineeraes#audioengineeringandmusicproduction#audioengineeringsociety#audioengineerintraining#audioengineerslife#filmmaker#filmmakers#filmmakerslife#filmmakerlife#filmmakerboost#filmmakermuslim#filmmakerkit#setlife#videocreator
0 notes
Text
Week 3 - Sonic Branding
Sonic branding is the audio representation of a brand identity that is created through an audio feature like a sonic logo and a set of sonic guidelines (Krishnan, Kellaris, & Aurand, 2012). Sonic branding gives a product or project the ability to convey itself well through its sonic features.
In order to create a sonic brand for the podcast, I needed to establish the brand values. These values were identified and realised as a visual map (Image A) to inform the production process. An audio logo can be referred to as the acoustic identification of a brand so I had to envision the podcast doing well to establish what the brands values are (Bertil Hulten, 2018, pp. 257–258).
Image A - Visual map of brand values
Four key words were identified as brand values for Sonic Seasoning.
Discover - Each episode will take the listener through an exploration of a topic and introduce them to something new.
Immersion - The content will immerse the listener into the world of the topic.
Quality - The podcast audio will deliver a professional sound utilising industry standard microphones like the SM7B for studio voice overs and the Zoom H4N & Rode NTG4+ for recording on location.
Fun - The content will be fun and light hearted.
Time was spent listening to podcasts I enjoy, as a consumer and also potential competitors to analyse what they do well and to specifically listen to their theme music. ‘The daily’ is a news podcast by the New York Times (2019) that uses different aspects of a single composition for each episode so each introduction is different yet it sounds familiar. By having an entire track as your sonic brand, there are countless variations of the theme music at your disposal.
I decided to take this approach with my theme music and I composed a full track that will act as the central aspect of the sonic brand and everything will stem from it. I wanted to create a piece of theme music and then create the audio logo from it that would be no longer than 30 seconds.
I create many drafts and asked my peers for feedback on them before settling on the final idea. One of the other drafts for the audio logo is available for a listen through this private link - https://soundcloud.com/alexiking/sets/sonic-seasoning-audio-logo/s-1pz1Q
Bertil Hulten. (2018). Sensory marketing : theoretical and empirical grounds (pp. 257–258). London: Taylor & Francis Ltd.
Krishnan, V., Kellaris, J. J., & Aurand, T. W. (2012). Sonic logos: can sound influence willingness to pay? Journal of Product & Brand Management, 21(4), 275–284. https://doi.org/10.1108/10610421211246685
The New York Times. (2019). Podcasts. The New York Times. https://www.nytimes.com/column/the-daily
0 notes
Text
3 EASY Music Video Lighting Setups (USING COLOR)
Sponsorship ------------- Sponsored By - Squarespace Website - http://Squarespace.com/ycimaging Promo Code - "YCImaging" For 10% Off Your First Purchase -------------------------------------- Tyler Casey ------------- YouTube - https://www.youtube.com/user/TylerCasey023 Instagram - https://instagram.com/tylercaseyprod Cinepacks - https://cinepacks.store/discount/YC5 BTS By Joe Moore ------------- Youtube - https://www.youtube.com/user/JDaHispanic724 -------------------------------------- ALL Of My Filmmaking Gear - http://goo.gl/Lo6Zbm -------------------------------------- Support Me On Patreon (Exclusive BTS Content) - http://Patreon.com/YCImaging -------------------------------------- New LUTS, Transitions, Guides & Kits ------------- Digital Store - http://Sellfy.com/YCImaging NEW Distortion Transitions Pack - https://sellfy.com/p/r7So/ Branding Kit 3.0 - https://sellfy.com/p/IJnB/ Panama City LUT - https://sellfy.com/p/y8Ub/ -------------------------------------- Equipment Used To Make This Video - Via Amazon ------------- Canon EOS R (Camera) Via Amazon - https://geni.us/EOSRBody Canon 16-35mm f/2.8 III (Lens) Via Amazon - https://geni.us/vlog16 EOS R Variable ND Adapter (Via Amazon) - https://geni.us/EOSRND Rode NTG4+ (Mic) Via Amazon - https://geni.us/NTG4Plus Aputure 120D II (Lighting) - https://geni.us/120DII Aputure LighDome II (Softbox) - https://geni.us/LightDomeII Equipment Used To Make Setups - Via Amazon ------------- Aputure 120D II (Lighting) - https://geni.us/120DII Aputure LightDome II (Softbox) - https://geni.us/LightDomeII Aputure MC (Lighting) Via B&H - https://bhpho.to/2rlLWZt Godox SL150 (Lighting) Via Amazon - https://geni.us/Godox150 Aputure Frenel 2X (Modifier) Via Amazon - https://geni.us/Fresnel2 ---------------------- Rent Filmmaking Gear Online ------------- Website - hhttps://www.pntrs.com/t/TUJGRktHSkJGTU1HTkdCRkpOSkVN Promo Code: ycimaging15 for 15% off ---------------------- YCImaging http://Instagram.com/YCImaging http://Twitter.com/YCImaging -------------------- Music: Epidemic Sound Start Your FREE TRIAL HERE: http://share.epidemicsound.com/pbj3h AFFILIATE DISCLOSURE: Some of the links used in the description will direct you to Amazon, as an Amazon Associate I earn from qualifying purchases at no additional cost to you. behind the scenes music video tips cinematic lighting video production
0 notes
Photo

Corporate video assignment setup: Panasonic Lumix S1, Lumix S 24-105mm f4.0 and a Panasonic DMW-XLR1 XLR Microphone Adaptor connected to a Rode RODELink and Rode NTG4+ in a Rycote suspension mount grip, on a Uniqball UBH 45XC Ball Head with X-Cross Clamp and IQuick3Pod 40.4 tripod. @lumix @lumixuk #lumixspro #lumixs24105 #lumix #changingphotography #lumixs1 #NextLevelLumix @rodemic #rodemic @uniqball #uniqball #tripod @rycoteuk #rycote #videoshoot #videosetup #xlr https://www.instagram.com/p/B3mbxnIHyPe/?igshid=1cbxe5gml6muh
#lumixspro#lumixs24105#lumix#changingphotography#lumixs1#nextlevellumix#rodemic#uniqball#tripod#rycote#videoshoot#videosetup#xlr
0 notes
Text
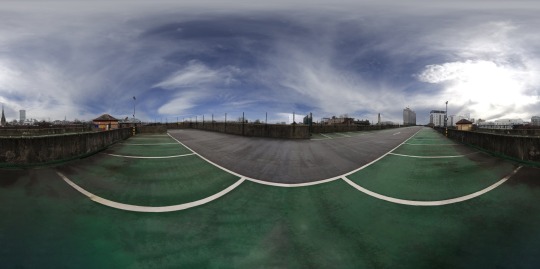
Filming
here's an entire equipment list of everything used on the shoot.
Camera:
Sony a7III
Lens:
Sony 16-35mm 2.8 Samyang 14mm 2.8 Samyang 24mm 1.4 Samyang 35mm 1.4 Samyang 85mm 1.4
Stabilisers:
Monfrotto Tripod Kessler Slider Zhiyun Crane 2
Audio:
Rode Ntg4+ Tascam DR-40
We also needed to take photos to create the HDRI for the car that we will be adding in 3d later.
In total I took 36 photos which were all stitched together in photoshop.

Had to then replace the sky to a new one as on the day the sky was less cloudy with more blue sky showing.

created a mask, and then replaced the sky.
0 notes