#TheOdinProject
Explore tagged Tumblr posts
Visit Tumblr Blog
Explore Tumblr blogs with no restrictions, modern design and the best experience.
Last Seen Tumblr Blogs


Fun Fact
Tumblr Inc. is funded by 13 investors.
Text
So I'm starting my coding path all over again --
-- specifically with The Odin Project which I've barely dipped my toes in and am already sold on. I will, no doubt, do a promo post once I'm more familiar with it. Anyway, they give you "assignments" at the end of a section; in the beginning these are reading assignments. And can I just say this "supplemental" reading assignment in the Foundations section feels like it really ought to have been mandatory. Words cannot express how deeply this resonated with me, and how reassuring I found it.
Things I Wish Someone Had Told Me When I Was Learning How to Code, by Cecily Carver
This resonated with my soul. With every bit of experience I'd had jumping from paid and free courses alike to learn coding. It's not a particularly long read and its conversational vibe is really easy to follow; if you're starting out coding, in the beginning steps, or even just kicking around the idea of coding, I highly suggest reading this.
Also this surprisingly upbuilding article,
Don't Believe Anyone Who Tells You Learning To Code Is Easy, found on TechCrunch
Really, it's actually an article I found very encouraging, though I suppose as in all cases of confirming a road will be rough, your mileage may vary.
4 notes
·
View notes
Text
Day 1 of 100.
Today, I started working through The Odin Project. So far, I'm only 39% of the way through the foundations course, but already, it's filling in so many gaps in my self-taught knowledge. I started coding aeons ago, playing around in DOS as a kid and pulling apart webpages & templates later. I'm fairly familiar with the likes of HTML and CSS at this point, but diving into the terminal was an experience!
I can't wait to press on. I'm hoping to do at least an hour a day from now on. You lot have got to hold me to that!
10 notes
·
View notes
Text
The ODIN Project!
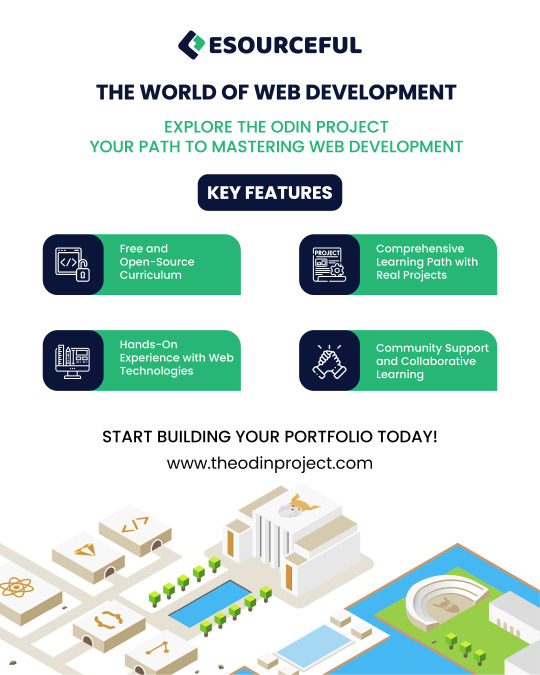
If you're starting your web development journey, this place is for you!
Dive into the world of web development with The Odin Project! This free and open-source platform offers a comprehensive curriculum that equips you with the skills to build amazing websites and applications.
📚 Gain hands-on experience with HTML, CSS, JavaScript, Ruby on Rails, and more, while working on real projects that will elevate your portfolio.
💻 Join the supportive community of learners and start crafting your future in tech today! 🏆
Visit the website here: https://www.theodinproject.com
#WebDevelopment#TheOdinProject#TechSkills#LearnToCode#free#freewebsite#freelearning#freedevelopment#opensource#learnforfree#esourceful#wordpress#coding#programminghumor#quote#responsivedesign#presentationdesign#appdesign
0 notes
Text
Starting TOP/Setting Goals.
Today, I’m *officially* starting to work in TOP. My goal is to dedicate at least an hour a day to studying the curriculum and working on projects because consistency is key! I’m currently working through the Foundations Curriculum, and I have my GitHub account all set up and linked to Discord. Fun Stuff. :^)
0 notes
Photo

Noob setup. I've been working on computers my whole life but not with them as intimately as I have been thanks to #theodinproject Its just an old tv for the side monitor but im hoping it'll help not having to click through so many pages on my laptop. . The laptop itself came from my dad's old work. They closed and didn't take their computers so he kept his. It was locked down due to an admin password something-or-other and he couldn't get it to unlock so he was gonna trash it but I asked for the shell. So I wiped the OS and added #ubuntu with a thumb drive I had made and boom. Free computer. Better processor then the desktop I have which.... . The Desktop is for my son's school and roblox. My goal with that lovely $300 paper weight is upgrading the RAM and GPU. Maybe another part depending on what it looks like once I take it apart. Eventually I think it'll come alone nicely. Currently for where I'm at I think it's perfect 🥰 💞 👌 #noob #newbeginnings #webdevelopment #selfteaching #learning #growthmindset #nevertooold https://www.instagram.com/p/ClTyPYWuUlq/?igshid=NGJjMDIxMWI=
#theodinproject#ubuntu#noob#newbeginnings#webdevelopment#selfteaching#learning#growthmindset#nevertooold
0 notes
Text
Finishes the landing page!
After procrastinating on the landing page for, what seems like, a week, I finally finished it. In reality, I finished most of it over the course of 8-10 hours or so, and I'm sure that someone more experienced with HTML and CSS could have finished it in less than an hour, but that's how it goes. I actually feel way more comfortable with html, css, and flexbox as a whole after finishing the exercise. I still don't really enjoy working with those technologies though, but at least I'm done with those for now. Now it's on to the juicy stuff...Javascript!
My prediction is that, with my foundation in C, it the JS section shouldn't be too much of an issue.
0 notes
Link
Over his career, Henry Marfori has gained a wide range of qualifications including Locker Room Managers Association certifications, Brinks Home Security technician certifications, and Small business certification.
0 notes
Text
Day 14: More properties, display values, and color theory!
So I did some super late night coding on freeCodeCamp and didn't record it since it was technically after I submitted Day 13, so lemme digitize that info!
<z-index> as a property: The "z-index" property influences the order in which elements appear. It's almost like a layering system. Giving a z-index property a higher value will have it appear over the other elements, otherwise it resorts to declaration order with the latest element showing up in front.
Float is another positioning tool like <position> but you can add a width modifier to it to determine how much horizontal space it needs.
The "margin" property can be set to "auto" to set elements center. Kind of like text-align: center. You can also use the "display" property to center images by giving it the value "block". (this changes the display value from inline to block which I'm diving into later)
I was slightly confused and needed a refresher on inline vs. block elements. The site w3schools.com has some awesome pages with valuable info to learn! Important to note is that all HTML elements have default display values. (which is the block or inline values)
Inline elements don't start on new lines.
Only take up as much room as necessary.
Block-level elements always start on a new line.
They always take up the full width available.
Lastly, they have a top and bottom margin whereas inlines do not!
Now we are diving into some color theory with RGB values, complementary colors, secondary colors, and tertiary colors. (among many other things)
Complementary colors are exactly what they sound like! They are opposite of each other on the color wheel, and when they are combined they cancel each other out but when placed side by side are vibrant with a strong contrast.
Primary colors are red, green, and blue. (hence RGB)
Secondary colors are created by mixing two primary colors.
The secondary colors are complement to the one primary color not used in it's combination. (cyan is complementary to red)
Tertiary colors are colors made from one primary color and a neighboring secondary color.
New color scheme idea! Split-complementary color scheme. Use one base color and then two colors adjacent to the complementary color of the base. (not the best way to word that) Used for strong visual contrast but much more subtle than two complementary colors.

Tomorrow I will be going into hues, tones, and gradients! Until tomorrow, see ya space cowboys.
-techmancer
0 notes
Text
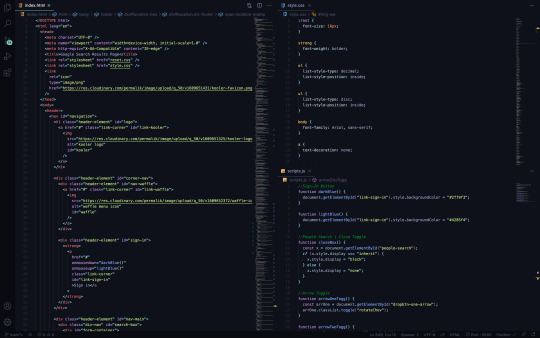
Recreating the Google Search Results Page
An Odin Project Challenge

From The Outset
I knew this would be a tedious process. It turns out, I was correct. While working on this challenge, I hammered out plenty of nesting and styling fundamentals. But, of more importance, throughout this build I got the opportunity to coast with the demands of HTML and CSS (meaning: I was simply reinforcing prior lessons learned.) This tempo of structuring and styling allowed me to think more freely about the behavior of certain elements — I was finally able to begin integrating JavaScript to create solutions. The subsequent paragraphs will administer some brief detail.
CSS: A Molehill and Mountain
When a Google Search Results page is produced (these days,) there are supplemental elements involved which aid any given search (by way of: ‘People also search for/ask’.) Each of these lists suggest multiple topics, websites and companies which may better address the initial query.
Typically, these references are housed by a border surrounding all sides. This border brings me to my first obstacle. And while solving this problem was quick and straightforward, I believe the answer I found will regularly come in handy down the road.
My issue presented as a parent element with a border which had gaps in the corners. And I intended there only to be a solid, continuous border.
When nesting siblings within a bordered-parent-element, the borders of the children need also be taken into account. Put simply: if there is styling for rounded border radius around all children — and those children have standard squared border radius — then the border corners of the outer children will create visual gaps (interrupting the integrity of the parent border.)
So this was an easy tweak. I altered the border radius of my outer children elements, such as to make both parent and child borders uniform. Then, my problem was resolved.
The second new CSS maneuver I utilized cured a great deal of stress. Attempting to clone the Google Search Results page means placing a waffle-menu icon paired with a sign-in button in the top right of the page.
I was under the assumption that by using a relatively-positioned parent and absolutely-positioned descendent, that my work would be done. I was very wrong.
See, by following this procedure, my coupling of elements in the top-right corner continued to stay fixed to the viewport edge. Problematic, for sure. The rest of the page moved together (when resizing the screen) while the waffle and sign-in kept glued to the side of the screen, leading to overlapping and clashing with all the other elements.
This was the most frustrating encounter during the whole project. I really didn’t understand what my mistake was (at first.) Admittedly, I kept shuffling the nesting of all navigation elements; thinking surely I just need to figure out the particular wrapper which will allow me to adjust positioning. It wasn’t the proper perspective. At all.
Eventually I realized how to frame my question and set off, thumbing through page after page of Google results. The answer was nauseatingly apparent when I stumbled into the concept of setting a minimal width for my containing div.
That was it! A minimal width would keep my elements from bleeding into my other elements at a lower viewport size, while allowing them to stretch with the screen as it grew. And so it was.
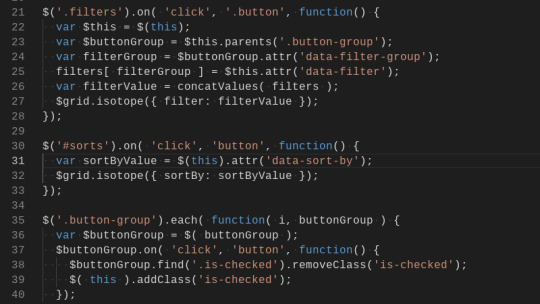
Toggling with JavaScript
One of the aforementioned sections (‘People also ask’) bears an X in the upper right corner, as a way for the user to collapse and remove the element from the flow of the page.
I first placed a button and span (housing the X) inside a div, wrapped by the parent element. This let me use CSS to position the X in its appropriate corner with the button stacked over top.
The button was then assigned an onmousedown event with a called function (closeBox); this would trigger my function when the mouse was actively pressed atop the button and perceivably on the underlying X.
In my JavaScript file, I defined the (closeBox) function and created an instance for my element id. By doing so, my html element in question could be manipulated by way of pressing down a mouse over the button.
Lastly, I used an if else statement to make the section display none when the button was pressed onmousedown.
In the remaining two sections of suggestions, each topic listed extends with a type of card which supplies more information. These topic headings are fit with their own chevrons, so as to invert and point up/down (respectively) determined by whether the card of info is actively being shown or not.
I knew the behavior needed to occur when each topic heading was clicked. So in my HTML file, I called a function (arrowOneTogg) with the onclick event attribute.
Using CSS, I created a class to transform and rotate my chevrons 180deg, ultimately making them point from down to up (and toggle back and forth with every click.)
Back in my JavaScript file, I defined the function. After which, I used const to create an instance for all of my individual spans (the spans which allowed me to add the initial chevrons).
I then wrote statements so as to refer to each variable and target classList, toggling the (rotateChev) class in order to rotate the specific chevrons onclick.
Conclusion
That’s that. I certainly didn’t want to spend much time on this HTML and CSS, but I did. However, as I press on, my chops get a bit more sharpened and the obvious pitfalls are more effectively avoided.
All things considered, I am pleased to have built my first solo JavaScript functions. The confidence is undeniable in comparison to having absolutely zero experience in this practice. Now, enough talking and onto the next project.
https://permalik.github.io/google-search-results-page
0 notes
Note
Hi! I really like a blog! Do you have an recommendation on useful websites that go more in depth on HTML5 and CSS3? Have a nice day!

Hallo!! I wholeheartedly believe FreeCodeCamp.org and TheOdinProject are two very great places to start coding!
But to go into more depth on reading about HTML5 and CSS3 I would choose:
HTML vs. CSS vs. Javascript: What’s the Difference?
Learn Web Development Basics – HTML, CSS, and JavaScript Explained for Beginners
Learn to code HTML5 and CSS3 - read through the various articles too!
♡~♡~♡
Thank you for asking and have a good day coding! 𓆏
7 notes
·
View notes
Text
Days 4, 5 & 6
Saturday, 21st October 2023
Well, this has been a rollercoaster of a week. I got tired of my Windows PC (10 years old) freezing when I opened more than three tabs at a time. So, shifted myself over onto a Linux machine cobbled together from bits of old office computer components I got free. Jumping from a 10-year-old HDD to a fresh SSD is giving me whiplash on bootup haha!
But it's so much easier for following along with TOP now. I've gone through the first sections a couple of times now, trying to cement it in my head before moving on. I still find myself checking my cheatsheet every time I need to create a new file or anything.
On an actual coding front, I've been reacquainting myself with isotope.js the last two days. It came as a horrible shock to discover that the site for it was down, but someone pointed me in the direction of the internet archive, where you can still read through the documentation.
Ever so slowly getting there with javascript. I'm looking forward to tackling the HTML & CSS sections of TOP and discovering what holes there are in my knowledge, though. Nothing like reading through things called 'fundamentals' to realise how scattergun my learning approach has been.
In the meantime, I'm going to be playing around with the styling of this filterable list today and singing the praises of flex to everyone that will listen. I'm also contemplating having a play with making my own tumblr theme for funsies. Does anyone have any advice for getting started?
#theodinproject#100daysofcode#100 days of productivity#jcink codes#coding adventures#javascript#css3#codeblr
14 notes
·
View notes
Text
A Guide to Learning How to Code
Based on websites people on Tumblr have recommended, which I have gone through and tried out.
Straight Up Teaching:
1. Khan Academy
Videos paired with challenges. Great for learning the basics and they cover a great deal. I first used Khan Academy for introductions to coding. However I recommend jumping straight into HTML and CSS, and skipping the animation introduction until you’re reading for Javascript.
2. Codecademy
My main tool for learning. You’ll go through the course following the steps they give, and then complete projects on your own. My only complaint is that I’m more of a visual and hands on learner, which is why I used Khan Academy more at first.
3. FreeCodeCamp
I use this less because I learned about it later. Pretty much a barebones Codecademy, but it’s good for refreshing yourself on concepts, or having those concepts explained in a different way. Also they offer certification if you complete their courses.
4.CodeCombat
Turns learning Javascript or Python into a game! It’s similar to an adventure quest mobile game.
Resources:
1. StackOverflow for questions
2. W3C proofreads your code.
3. W3Schools for checking rules, questions, etc. (My go to.)
What I have open when I’m building a website:
1. GoogleFonts has extra fonts you can copy into your HTML/CSS code.
2. FontPair pairs recommended fonts.
3. Palleton for colors
On My List But I Haven’t Tried Them:
1. CodeHS
2. TheOdinProject
3. FullStackOpen (Which I’m about to use to start learning React)
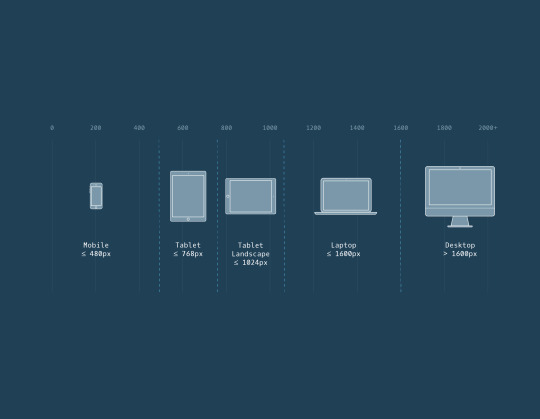
Helpful Images:

52 notes
·
View notes
Text
Day 1
First day into documenting my journey into UX Designing.
Day started off with some calmness of the morning and then P.volve.
It was an alright workout followed by a 10 minutes stretch.
First thing: Online UX class on General Assembly. Today it’s about Sketching and wireframing. Completed the lesson. & got alot of other links to resources about sketching and wireframing.
SKETCHING
Read through the resources and came across this website www.sketchingforux.com. It’s by this lady named Krisztina Szerovay. She provided so many UX resources in the form of sketch. And I also realised the importance to be able to sketch well as an UX Designer to bring my ideas across clearly. So I decided to sign up for her newsletter and participate in her #sketchingforux100 challenge. On top of that, she has a course on how to sketch as a UX designer on Udemy too. Previewed the course and found it really valuable. So, I signed up for the course too. Shall start it tomorrow!
& Yes, today is day 1 of the sketching challenge. 3 sketch: Feedback, error and form.
CODING
On top of my daily UX lessons. I realised it would be helpful for me to learn code to be a better UX designer too. So I’ve decided awhile back to learn code as well. However, I haven’t been that consistent in doing it. But I shall restart again!
Become coming to the conclusion of using this particular website: TheOdinProject.com, I’ve done some research on how to learn code. Found a bunch of websites and books. However, going through those, I find TheOdinProject more comfortable to use, so I shall stick to it. Did my daily practice on TheOdinProject.
Installed Ruby, Git, and some stuff, which I don’t really understand... But just followed instructions to set it up in my terminal. Was a pretty tedious process but it will be worth it!
1 note
·
View note
Text

Put in 3 hours of studying tonight.
Tomorrow learning how to use their terminal and putting commands in. #softwareengineering #webdevelopment #theodinproject #studyblr #studentlife #clockify #nonbinaryintech
0 notes
Text

☆ Main Blog ☆ Github ☆
I wanted to make a blog about my life as a student in tech, so here it is! I’m just starting out, and I’m excited for where this will take me.

About Me
Name: Domingo (Dom)
Pronouns: They/Them
Age: 24
Based: Seattle, WA, USA
Languages: EN / FR / 中文
Studying: Computer Science
Programming languages: JavaScript, Python
Bootcamps: FreeCodeCamp, TheOdinProject
Software: Obsidian, VS Code
My Tags
❊ #research ❊ #daily ❊ #reference ❊ #resource ❊
0 notes
Text
Recap #1
So far, I'm still following along with TOP's cirriculum. I'm currently on the section that goes over CSS in the Foundations course which is pretty much a recap for me. Not gonna lie, I understand that HTML and CSS is essential to become a WebDev, but I'm eager to get to the part that goes over JavaScript. The HTML and CSS sections are pretty boring, and actual programming is what I fine both challenging and interesting. As I mentioned before, a lot of what I learned in my intro CS classes carry over to the few introductory JS classes that I've dabbled in (but never completed so far). I set up a few goals for myself to accomplish by the end of next year:
1.) To be able to create a deploy a fully functioning webside: It doesn't have to be pretty, but it has to be functional. I suppose creating my own website should be my target for this goal.
2.) Complete most of the classes for my AS degree: While I don't thing a degree is essential to what I want to do, it is important given the amount of time and money I've invested in it to at least get SOME credential out of it. I will go on the DSU website sometime this week and reduce my scheduled 2 classes to 1.
3.) Complete TOP cirriculum: I have a hard time finishing things that I start, so it would help me gain confidence and prove that I can accomplish long-term goals that benefit me in the long run. Even though I plan on stopping at a certain point to work through the book: Head First JavaScript, I plan on finishing at least most of TOP.
4.) Complete a simple freelancing job: Even if it's just some basic HTML and CSS stuff from a freelancing site, I want to be able to do this so I can claim to be a "professional" developer.
5.) Transition into developing Android apps: This is REALLY what I want to do. From my understanding, I will eventually have to learn Java and/or Kotlin to be able to accomplish this goal, and I think I can do it with my foundation in C.
Everyone wants/has an iPhone nowadays though, so it will also buy me time to think about if I want to transition to the Apple infastructure and purchase a Macbook before I start to learn how to develop those type of apps. There will probably more opportunities for work if I go this route though.
1 note
·
View note