#ap wifi range extender setup
Explore tagged Tumblr posts
Visit Tumblr Blog
Explore Tumblr blogs with no restrictions, modern design and the best experience.
Last Seen Tumblr Blogs


Fun Fact
Tumblr was attacked by a cross-site scripting worm deployed by the Internet troll group GNAA on Dec 3, 2012.
Text

RangeXTD Setup in WiFi AP Mode
When the router and the Range XTD extender connects with the help of an Ethernet cable and the extender transforms the wired signals of the router into wireless ones to give internet access on multiple devices, the method is called the AP mode. The following steps will help you complete the RangeXTD set up in the AP mode.\
0 notes
Text
How to Accomplish the D-Link WiFi Repeater Setup?

What are the Multiple Ways to Perform D-Link WiFi Repeater Setup?
A D-Link WiFi Repeater Setup is an essential device when you want to extend your home networks' WIFI signal to areas with weak or no connectivity. Whether you're in a large house or have dead zones in certain parts of your home, a Wi-Fi extender can ensure smooth internet access across your space. While it’s easy to get started, performing the D-Link WiFi Repeater Setup involves a few steps, and there are multiple methods you can use. This guide will walk you through the web interface setup, the app setup, and using the WPS button for a hassle-free installation.
Pre-setup Requirements:
Before proceeding with any of the setup methods, ensure you have the following essentials:
Active Internet Connection: You must have an active internet connection from your router to extend the Wi-Fi network.
Correct Web/IP Address: Ensure you know the correct IP address or URL (dlinkap.local) for accessing the extender’s web interface.
Admin Credentials: You’ll need the default admin login credentials (usually mentioned in the product manual or on the device label).
D-Link WiFi App: Make sure you have the D-Link WiFi app downloaded and installed on your smartphone for the app setup method.
Computer/Smartphone: Depending on your preferred setup method, you’ll need either a computer or a smartphone.
Now, let’s look at the different ways to configure your D-Link WiFi Range Extender.
D-Link WiFi Repeater Setup Using the Web Interface:
This is one of the most common and straightforward methods of setting up your D-Link WiFi Range Extender. Follow these steps:
Power on the Extender: Connect your D-Link extender to a power outlet and ensure it’s powered on.
Connect to the Extender's Network: On your computer or smartphone, go to the WIFI settings and connect to the network broadcasted by the extender. It might be labeled something like “D-Link_Extender” or similar.
Open a Web Browser: Launch any web browser (Google Chrome, Firefox, Safari, etc.), and in the browser's address bar, type dlinkap.local and hit enter. This will take you to the login page of your D-Link WiFi Extender.
Login with Admin Credentials: Enter the admin username and password. The default credentials are usually “admin” for both fields (unless changed). You can find the details on the label of the extender or in the user manual.
Smart Setup Wizard: After logging in, you’ll be directed to the smart setup wizard. Follow the on-screen prompts to configure your extender.
Wi-Fi Setup: Navigate to the Wi-Fi Setup section. Here, you can modify your extenders' Network Name (SSID) and Password to match your primary router’s settings. It's recommended to use a unique SSID and a strong password.
Advanced Settings: Optionally, go to the Advanced Settings section, where you can configure Parental Controls, AP Mode, Bridge Mode, or Guest Networks based on your needs.
Save Settings: After making the necessary changes, click Save Settings to apply them. Your D-Link WiFi Extender is now configured.
Completion: Once the settings are saved, your extender should be ready to use, and your Wi-Fi coverage will be extended throughout your home.
D-Link WiFi Repeater Setup Using the App:
If you prefer using your smartphone, you can easily set up your D-Link extender using the official D-Link WiFi app. Here’s how:
Download the App: First, download the latest version of the D-Link WiFi app from the App Store (for iPhone) or Google Play Store (for Android).
Connect to the Extender’s Network: Connect your smartphone to the D-Link extender’s Wi-Fi network.
Launch the App: Open the D-Link WiFi app on your phone. If you don’t already have an account, you will need to create one. Once your account is ready, log in with your credentials.
Access the Home Dashboard: After logging in, you will be directed to the home dashboard of your extender. Here, you can manage all settings related to your Wi-Fi extender.
Wi-Fi Setup: Go to Settings > Extended Wi-Fi. You can change the SSID and password here, as well as other security settings.
Save Changes: After entering the new network name and password, click Save to apply the changes. You can also modify additional settings such as Guest Network and Internet Settings if needed.
Completion: After saving the settings, your extender will be configured, and your extended Wi-Fi network will be active.
D-Link WiFi Repeater Setup Using the WPS Button:

For those who prefer a quick and simple setup without involving any browser or app, the WPS method is the best option. Here’s how to perform the setup using the WPS button:
Power On the Extender: Plug the D-Link extender into a power outlet and make sure it’s powered on.
Place the Extender Near the Router: Position your extender close to the router for the initial setup.
Locate the WPS Button: Find the WPS (Wi-Fi Protected Setup) button on both your router and your D-Link extender.
Activate WPS: Press and hold the WPS button on your router for about 3 seconds. After that, press and hold the WPS button on your extender for about 3 seconds.
Wait for Connection: The LED lights on your extender will start blinking green, indicating that the devices are successfully communicating and pairing.
Release the Button: Once the connection is established, the LED light will become solid, indicating that the setup is complete.
Completion: Your D-Link WiFi Extender is now successfully connected to the router, and your extended Wi-Fi network is up and running.
Final Words The D-Link WiFi Repeater Setup can be performed in multiple ways, depending on what’s more convenient for you. Whether you prefer the traditional web interface, the app, or the simple WPS method, all these methods allow you to extend your Wi-Fi signal easily. Make sure you walk through the setup process step-by-step and choose the method that suits you best. By following the instructions carefully, you’ll have your Wi-Fi extended in no time, improving coverage throughout your home.
1 note
·
View note
Text
High-Performance Wi-fi Access Points
WiFi Access Point: Your Key to Better Connectivity A WiFi access point (AP) is a device that connects wireless devices to a wired network, acting as a bridge between your internet connection and devices like smartphones, laptops, and smart home gadgets.
Key Benefits: Extended Coverage: Expands your WiFi range, ensuring a strong signal throughout your home or office. Improved Performance: Creates a mesh network for faster speeds and reliable connections, even with multiple devices online. Easy Setup: User-friendly installation with mobile apps or web interfaces for quick configuration. Enhanced Security: Features like WPA3 encryption protect your network from unauthorized access. Guest Network Options: Allows visitors to connect without compromising your main network's security.
0 notes
Text
👉 TP-Link N300 WiFi Extender(RE105)
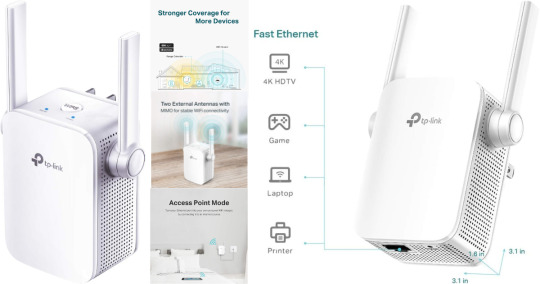
TP-Link N300 WiFi Extender(RE105), WiFi Extenders Signal Booster for Home, Single Band WiFi Range Extender, Internet Booster, Supports Access Point, Wall Plug Design, 2.4Ghz only
Brand 👉 TP-Link
Wireless Communication Standard 👉 802.11n, 802.11b, 802.11a, 802.11g
Data Transfer Rate 👉 300 Megabits Per Second
Frequency Band Class 👉 Single-Band
Connector Type 👉 RJ45
CLICK HERE TO GET INSTANT ACCESS NOW >>
About this item
Extend WiFi Coverage - Boost Internet WiFi coverage with 2 external antennas for more reliable Wi-Fi, compatible with any WiFi Router, Gateway, Access Point
More than a WiFi Repeater - RE105 also supports AP mode which creates a new Wi-Fi Access point for home
Fast Ethernet Port - Experience wired speed and reliability anywhere in your home by connecting your favorite device to the fast ethernet port
Better Range with External Antennas - Two external antennas with MIMO technology for improved range versus standard range extenders
Set Up in Minutes - Easily set up and manage your WiFi in a few quick and easy steps using the TP-Link Tether app (Android, iOS). Find the optimal location for the best WiFi connection with an intelligent signal indicator
All WiFi extenders are designed to increase or improve WiFi coverage, not to directly increase speed. In some cases improving signal reliability can affect overall throughput
If you experience any trouble during or after set up, please contact us. TP-Link offers a 2 year warranty and 24/7 technical Support
CLICK HERE TO GET INSTANT ACCESS NOW >>
The TP-Link N300 WiFi Extender, also known as the TP-Link TL-WA855RE, is a popular Wi-Fi range extender designed to enhance and extend the wireless network coverage in your home or office. Here are some key features and functions of this device:
1. Wi-Fi Range Extension: The TP-Link N300 WiFi Extender is designed to boost the existing Wi-Fi signal in areas with weak or no coverage, effectively expanding the wireless network's reach.
2. N300 Wireless Speed: This extender supports wireless speeds of up to 300Mbps on the 2.4GHz frequency band, which is suitable for general web browsing, email, and streaming.
3. External Antennas: The device is equipped with two external antennas that help improve Wi-Fi coverage and signal strength.
4. One-Button Setup: The extender offers a simple one-button setup process, making it easy for users to connect to their existing Wi-Fi network.
5. Ethernet Port: It comes with an Ethernet port, allowing you to connect wired devices like gaming consoles, smart TVs, or desktop computers directly to the extender for a more stable connection.
CLICK HERE TO GET INSTANT ACCESS NOW >>
6. LED Signal Indicator: The device features LED signal strength indicators, helping you find the optimal location for the extender to achieve the best coverage.
7. Access Point Mode: In addition to extending Wi-Fi range, the TP-Link N300 extender can be configured as an access point, creating a new wireless network from a wired connection.
8. WPA/WPA2 Encryption: The extender supports WPA/WPA2 security encryption to protect your network from unauthorized access.
9. Compatibility: It is compatible with most standard routers, access points, and Wi-Fi devices, making it a versatile solution for extending your network.
10. Tether App: TP-Link offers the "Tether" app, which allows you to manage and configure your extender from your smartphone.
The TP-Link N300 WiFi Extender is a cost-effective solution for improving Wi-Fi coverage and eliminating dead zones in your home or office. It can be especially useful in larger homes or spaces where the primary router's signal doesn't reach every area. When installing the extender, it's essential to place it in a location where it can still receive a strong Wi-Fi signal from your main router while providing better coverage to the areas you want to reach.
CLICK HERE TO GET INSTANT ACCESS NOW >>
#TPLinkN300WiFiExtender#TPLinkN300WiFiExtenderReview#TPLinkN300WiFiExtenderReviews#TPLinkN300WiFiExtenderBrand#TPLinkN300WiFiExtenderGoodorBad#TPLinkN300WiFiExtenderAmazon#TPLinkN300WiFiExtenderFeatures#TPLinkN300WiFiExtenderPrice#TPLinkN300WiFiExtenderInboxing#HowtobuyTPLinkN300WiFiExtender#HowtogetTPLinkN300WiFiExtender#TPLinkN300WiFiExtenderWalkthrough#TPLinkN300WiFiExtenderWorks#affiliatemarketing#marketing#amazon#amazondeals#onlinemarketing#amazonfinds#amazonprime
0 notes
Text
Re.Brostrend Extender Setup
The Brostrend Extender is a dual-band signal booster and network extender. Up to 20 devices may be connected, and the Wi-Fi network range is completely increased. By using a signal booster, you can easily increase the Wi-Fi range and expand the network coverage. The Wi-Fi range of this extender device covers the whole inside of your home. Additionally, the Brostrend AC1200 range extender supports both 2.4 GHz and 5 GHz networks. The extender has a speed of 300 mbps on the 2.4 GHz network and 867 Mbps on the 5 GHz network. The Wi-Fi network coverage is significantly enhanced by this network device. You need to set up the network in order to maintain & improve it. You may set up an extender quickly & easily at re.brostrend extender setup.
How do I set up the Re.brostrend WiFi extender?
Before the procedure restarts, the power LED will momentarily flash. Kindly wait.
Use your wi-fi device to connect to your extender after that. Standard Setup Network name for the Re.brostrend Extender. Before connecting to the extender, there was no need for a wifi password; now, you must now use either the 192.168.10.1 or AP.setup address.
For your initial login, you can select an administrator and a password.
When your existing router is closed, choose your WiFi network names and set the SSID and password.
By observing the colour of the extension's signal LED, you may determine how your extender and the present router are linked.
Note:- If you need any help regarding your wifi extender so contact our technician or visit the official website that is ap.setup.
Brostrend wifi extender setup via WPS button
You may also set up the range extender using the WPS button if it is not already set up with the default web address. Here are some instructions for setting up a Brostrend WPS-enabled wifi extender.
You must plug the Brostrend extender device into the wall power source in order to set it up with the WPS button.
As with a conventional router, you must first hit the WPS button on the device whose network you wish to extend in order to set up the extender using the WPS button.
Hold the WPS button for two to three seconds on the Brostrend extender.
The extender's status indicator light must now be checked; if it is red, the normal router must be kept away from this gadget.
You are attempting to position the normal router, an existing appliance, around the extender.
The connection is strong, the signal's LED light is solid blue, and it is ready for usage.
Dual-Band Wi-Fi Range Extender Setup
The fastest and most practical method to increase your Wi-Fi coverage is with the Bros Trend Dual-Band Wi-Fi Range Extender.
Please adhere to following instructions to set up the Wi-Fi Range Extender Bros Trend Wall Plug Band.
Connect it to the electric band via the extender.
For a faultless installation, we advise finishing the fundamental setup in the same room as your current router.
When the LED power switches from white to solid blue, please wait.
Bros Trend Extender may be configured in two different ways: by pressing the WPS button or by utilising the online user interface at re.brostrend.com.
Note: If your existing router does not support WPS Setup, make sure it has a WPS button before continuing.
#Re.Brostrend Extender Setup#Re.Brostrend wifi Extender Setup#Re.Brostrend Setup#ap.setup#ap setup#ap extender setup#ap wifi range extender setup
0 notes
Text
How To D-link extender setup using the D-link setup wizard? dlinkap.local
Plug the D-link wireless range extender into a power socket.
Make sure to place the extender within the wifi signal range of the home router or AP or connect it the router’s existing wired network.
Switch on the D-link range extender to receive power supply.
Allow the status LED to blink amber light indicating receiving of power.
Go to the wireless settings/utility section on your computer and select to open it.
Select the wireless network name (SSID) field of the D-link wifi extender’s network from displayed wifi networks list.
Enter the wireless network password for the selected SSID above.
The wireless network settings — SSD and password could be located from the included Wi-Fi Configuration Card of the D-link extender.
Launch a web browser on your computer connected to wifi network of the D-link wifi extender’s network.
Navigate to D-link extender login domain address http://dlinkap.local or dlinkrouter.local in from the address bar.
Either use default IP login http://192.168.0.50 for d-link extender login instead of dlinkrouter.local.
As the D-link extender login page gets directed, enter the D-link extender login information in the given fields.
Key in the dlink extender login default username as Admin.
Also, to key in the dlink extender default password, leave it blank.
#dlinkap.local#www.dlinkap.local#http://dlinkap.local#D-link extender setup#D-link setup wizard#dlink extender login#dlinkap.local setup wizard
1 note
·
View note
Link
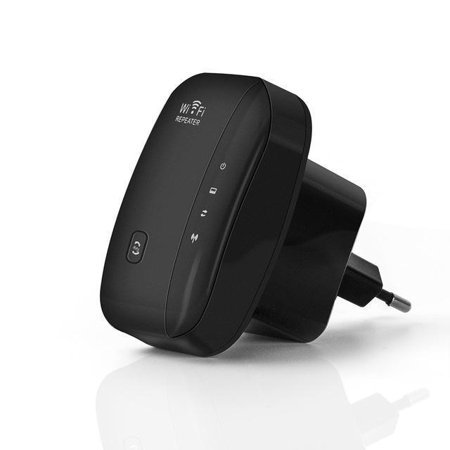
Easy to install and use. Designed with mobility and portability, little gadget with great value, ideal for home, company, and travel in use.
Product Features:
High Speed: Extending exist wireless network to hard to reach area with speed up to 300Mbps, creating high speed, long range and stable network.
Plug and Play: Easy to install and use. Designed with mobility and portability, little gadget with great value, ideal for home, company, and travel in use.
WPS Button:Can be simply setup on your phone/iPhone/tablet/laptop/PC within 5 minutes. Simply pressing WPS button to get safe encryption. Support WEP, WPA, WPA2, WPA/WPA2 encryption methods to prevent from unauthorized access and monitoring.
High Compatible: Ethernet port allows the Extender to function as a wireless adapter to connect wired devices, Compatible with 802.11n/g/b devices, work with any wireless network, router and Wi-Fi enabled devices including Smartphone, iPhone, iPad, Tablet, Laptop, Desktop, Smart TV, TV BOX, etc.
Working Mode: Repeater mode for stronger wireless performance and coverage and AP mode which creates a new WiFi access point.
1 note
·
View note
Link
Easy to install and use. Designed with mobility and portability, little gadget with great value, ideal for home, company, and travel in use.
Product Features:
High Speed: Extending exist wireless network to hard to reach area with speed up to 300Mbps, creating high speed, long range and stable network.
Plug and Play: Easy to install and use. Designed with mobility and portability, little gadget with great value, ideal for home, company, and travel in use.
WPS Button:Can be simply setup on your phone/iPhone/tablet/laptop/PC within 5 minutes. Simply pressing WPS button to get safe encryption. Support WEP, WPA, WPA2, WPA/WPA2 encryption methods to prevent from unauthorized access and monitoring.
High Compatible: Ethernet port allows the Extender to function as a wireless adapter to connect wired devices, Compatible with 802.11n/g/b devices, work with any wireless network, router and Wi-Fi enabled devices including Smartphone, iPhone, iPad, Tablet, Laptop, Desktop, Smart TV, TV BOX, etc.
Working Mode:Repeater mode for stronger wireless performance and coverage and AP mode which creates a new WiFi access point.
1 note
·
View note
Text

The very first mode of installation of a RangeXTD WiFi booster is the Repeater mode. In this mode, there is a wireless connection between the router and extender. The extender copies the signals from the route and reinforces the existing wireless signal to extend the coverage. You can set up the RangeXTD booster in the Repeater mode with the help of the WPS method.
0 notes
Photo
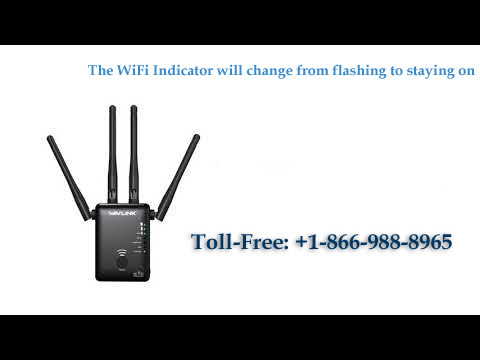
Wavlink WiFi range extenders are easy to set up, configure, and manage. You can install the device on your own by going through simple procedures. For any othery query contact Ap Setup support team +1-866-988-8965
1 note
·
View note
Photo
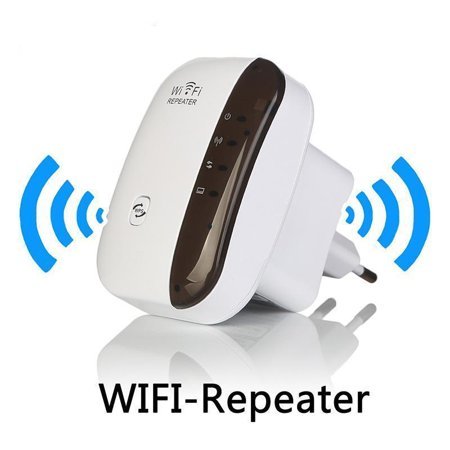

Mini WiFi Repeater - Pro Internet Signal Booster Product Features:
High Speed: Extending exist wireless network to hard to reach area with speed up to 300Mbps, creating high speed, long range and stable network.
Plug and Play: Easy to install and use. Designed with mobility and portability, little gadget with great value, ideal for home, company, and travel in use.
WPS Button:Can be simply setup on your phone/iPhone/tablet/laptop/PC within 5 minutes. Simply pressing WPS button to get safe encryption. Support WEP, WPA, WPA2, WPA/WPA2 encryption methods to prevent from unauthorized access and monitoring.
High Compatible: Ethernet port allows the Extender to function as a wireless adapter to connect wired devices, Compatible with 802.11n/g/b devices, work with any wireless network, router and Wi-Fi enabled devices including Smartphone, iPhone, iPad, Tablet, Laptop, Desktop, Smart TV, TV BOX, etc.
Working Mode:Repeater mode for stronger wireless performance and coverage and AP mode which creates a new WiFi access point.
1 note
·
View note
Text
Essential Steps for a Successful Wi-Fi Network Setup

A reliable and efficient Wi-Fi network is essential in today's connected world. Whether for your home or business, a well-designed and adequately configured Wi-Fi network ensures seamless connectivity and optimal performance.
This blog will discuss the essential steps for a successful Wi-Fi setup. Following these steps lets you enjoy a fast, secure, and uninterrupted wireless network experience. Let's dive in!
1. Assess Your Network Requirements
Before diving into the Wi-Fi network setup process, assess your network requirements. Consider the number of devices that will be connected, the size of the area to be covered, and the expected network usage. This evaluation will help determine the type and capacity of the Wi-Fi equipment needed for your specific needs.
2. Plan the Network Layout
Next, create a network layout plan. Identify the optimal Wi-Fi access points (APs) locations based on coverage and interference considerations. Consider physical barriers, such as walls and floors that may affect the Wi-Fi signal strength. Proper planning ensures even coverage throughout your space and minimizes dead zones.
3. Choose the Right Wi-Fi Equipment
Selecting the right Wi-Fi equipment is crucial for a successful network setup. Consider factors such as the wireless standard (e.g., 802.11ac or 802.11ax), the number of simultaneous connections supported, and the range of coverage. Consult with Wi-Fi installation servicesto ensure you choose equipment that meets your requirements.
4. Configure Security Settings
Security is paramount when setting up a Wi-Fi network. Enable WPA2 or WPA3 encryption and choose a solid and unique password for network access. This prevents unauthorized access and protects sensitive data transmitted over the web. Additionally, consider implementing guest network features to provide secure and separate connectivity for visitors.
5. Optimize Channel and Frequency Settings
Wi-Fi networks operate on different channels and frequencies. Choosing the least congested channels is essential to minimize interference from neighboring networks. Analyze the Wi-Fi spectrum using tools like Wi-Fi analyzers to identify your network's optimal channel and frequency settings. This step improves performance and reliability.
6. Configure Quality of Service (QoS)
To prioritize network traffic and ensure a consistent user experience, configure Quality of Service (QoS) settings on your Wi-Fi network setup. QoS settings allow you to prioritize specific applications or devices, such as video streaming or VoIP, over others, ensuring smooth performance for critical activities.
7. Perform Site Survey and Installation
Before installing the Wi-Fi equipment, conduct a site survey to assess the signal strength and coverage. This survey helps determine the ideal placement of access points for maximum coverage and minimizes potential signal interference. Consider engaging Wi-Fi installation services to ensure professional installation and optimal performance.
8. Test and Optimize the Network
After the Wi-Fi setup, thoroughly test the network to ensure it meets your expectations. Test the signal strength, network speed, and coverage throughout your space. Identify any weak areas or dead zones and make necessary adjustments, such as repositioning access points or adding range extenders. Continuously monitor and optimize the network to maintain optimal performance.
9. Regularly Update Firmware and Security Patches
To ensure the ongoing security and performance of your Wi-Fi network, regularly update the firmware of your Wi-Fi equipment. Manufacturers often release updates that address security vulnerabilities and enhance performance. Stay proactive in applying these updates to keep your network secure and up-to-date.
10. Provide Ongoing Network Maintenance
Maintaining a WiFi network setup requires periodic maintenance. Regularly check for signal strength, monitor network traffic, and promptly address connectivity issues. Clean and inspect access points to prevent dust accumulation or physical damage. By providing ongoing maintenance, you can ensure the longevity and efficiency of your Wi-Fi network.
Conclusion
Setting up a successful Wi-Fi network requires careful planning, configuration, and ongoing maintenance. Following this blog's essential steps, you can enjoy a fast, reliable, and secure Wi-Fi network experience.
Consider consulting with Elevate CCTV & Wi-Fi Solutions for your next Wi-Fi installation service. They will provide professional guidance and expertise in setting up your Wi-Fi network. So, if you need an excellent Wi-Fi network service, followed by good quality service & support, Elevate CCTV & Wi-Fi Solutions is your best option.
1 note
·
View note
Text
Netgear Access Point Setup : Find the Way

Are you unable to find How To Set Up a Netgear Wireless Router as an Access Point? Then don’t worry, you are at the right place. Here you will get to know how to do the same.Netgear WiFi extender is a wireless repeater, which is placed between the base router and the location where you want better wireless coverage.
It also expands the WiFi network, by connecting to your existing network and improving coverage. And it repeats the wireless signal from your router to expand its coverage. Netgear WiFi extender is also known as a WiFi booster. Performing Netgear Access Point Setup is not a challenging task, it is simpler than you think. If you are unable to do this on your own, then here are some simple steps to do the same. Simply go through the following guide for Netgear Access Point Setup.
Methods for How To Set Up a Netgear Wireless Router as an Access Point
If you ask yourself, what to do with unused wireless network devices, then you may need to learn How To Set Up a Netgear Wireless Router as an Access Point. Using an old router as an access point helps to extend the range of the network and eliminate those dead spots. If you don’t know How To Set Up a Netgear Wireless Router as an Access Point.
Then the following instructions will help you to do the same. Simply go through the below steps for the Netgear Access Point Setup.
Firstly, you need to cover the WAN or internet port of the secondary router with tape to prevent you from accidentally using it later.
After this, launch a web browser on the device, which is connected to the network of your router.
And then enter www.routerlogin.net on the address field of the web browser.
Now Netgear WiFi extender login page will appear, login with your default credentials i.e., username and password.
The default name of the WiFi extender is “Admin” and fill in the login information carefully because the username and password are case-sensitive.
After this basic home page or dashboard will appear on the screen.
From the homepage, click on “Advanced,” and then on “Advanced Setup.”
After this, choose “Wireless Access Point.” Some models might use slightly different menu labels, like Router / AP / Bridge Mode.
Then from the Nighthawk Pro Gaming routers, click on the “Settings” option.
And then click on “Setup,” and then choose “Wireless Access Point.”
Now select “Access Point” mode, and choose the IP Address settings on this access point.
Also, make sure that you get it from the existing router by default. Only enable fixed IP settings on this device setting if you have advanced network experience.
And if you want to do it manually, then assign a specific IP address to the router while it is in AP mode.
After doing this, click on “Apply” and lose the Internet connection between your router and your computer. Now our Netgear router is in AP mode.
Sum up
Certainly, the above instructions will help you with How To Set Up a Netgear Wireless Router as an Access Point. So, before seeking help from some, go through the above easy, and simple methods to do the same. And it is also required to follow the above steps as given.
Netgear Access Point Setup does not require too many steps, you just need to go through some simple and easy steps to do the same. From now on, you can use your Netgear as an access point.If the above steps are unable to help you with Netgear Access Point Setup. Then you may need expert assistance. Try to get in touch with Netgear experts. They will provide you with full assistance, and also help you with Netgear Access Point Setup.
0 notes
Link
0 notes